Greetings, DIYHub community, this is the first time I share with you and I want to show you a tutorial of an oil painting made in small format.
I've been experimenting with drawing and painting for seventeen years, it's something I really enjoy doing. I work with crayons, graphite, oil and watercolour. The process I'm going to present you I did it in oil, here I'll show you the step by step.
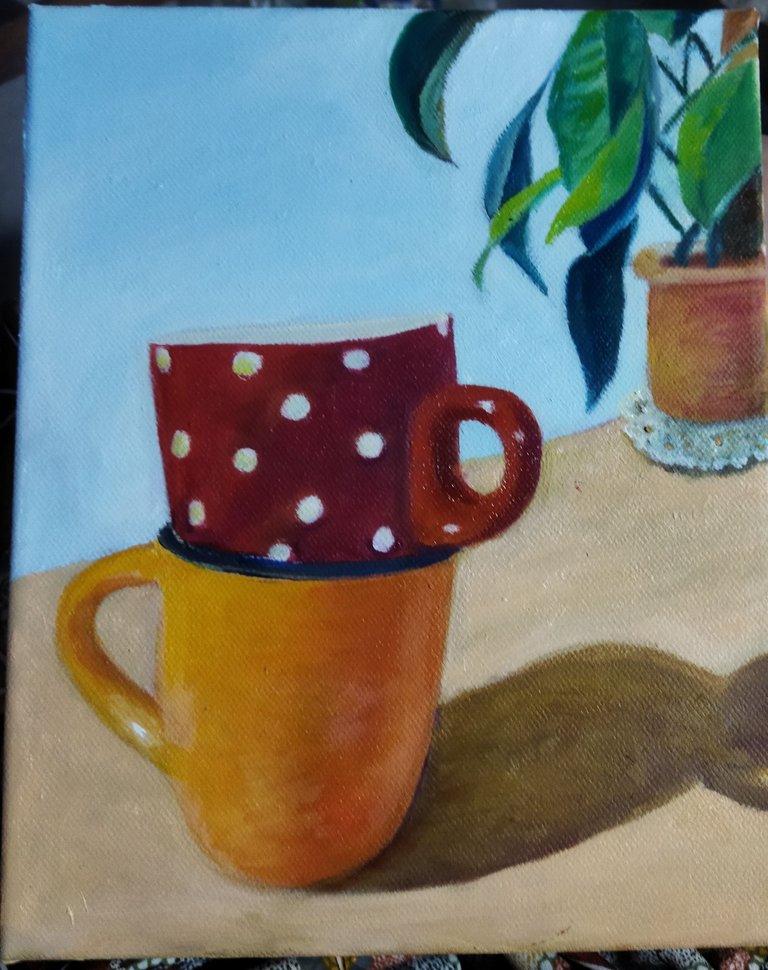
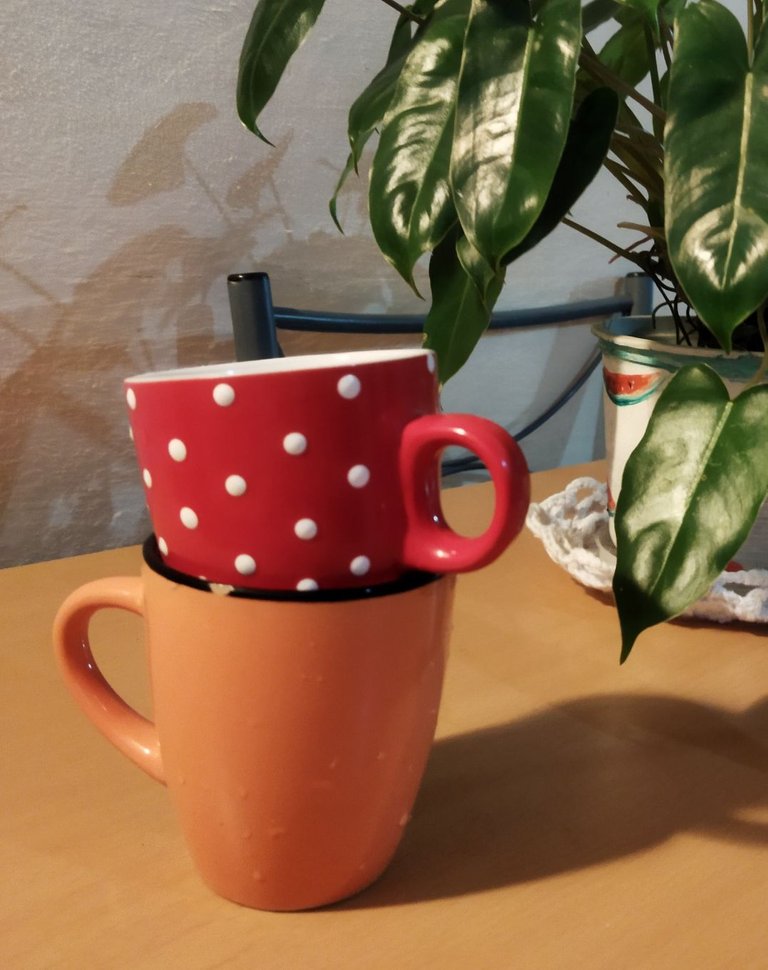
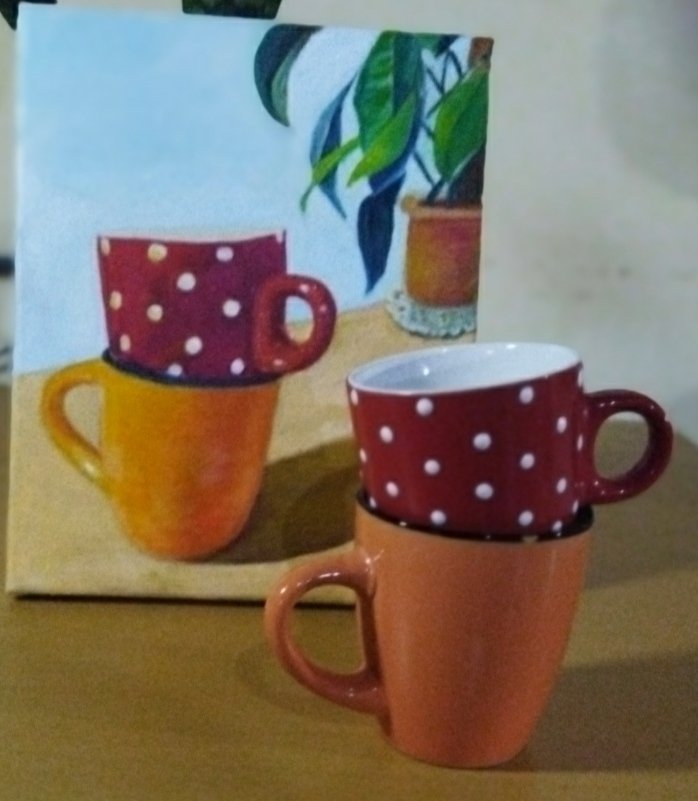
I believe in inspiration, in that need to do something that suddenly arises without us looking for it, that's how I decided to make a composition with some mugs that I was given as a present. I took many photographs, arranging them in different ways until I was satisfied with this one.
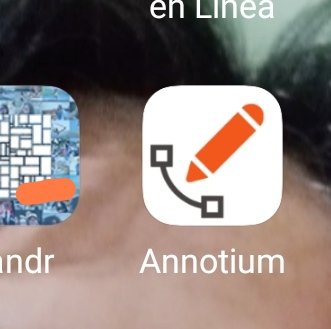
I have these photographs on my phone, I didn't print them but I started with the drawing on my mobile phone; the first thing was to look for a program that would allow me to draw diagonals to the photograph, I got the application "Annotium", which allowed me to do it.
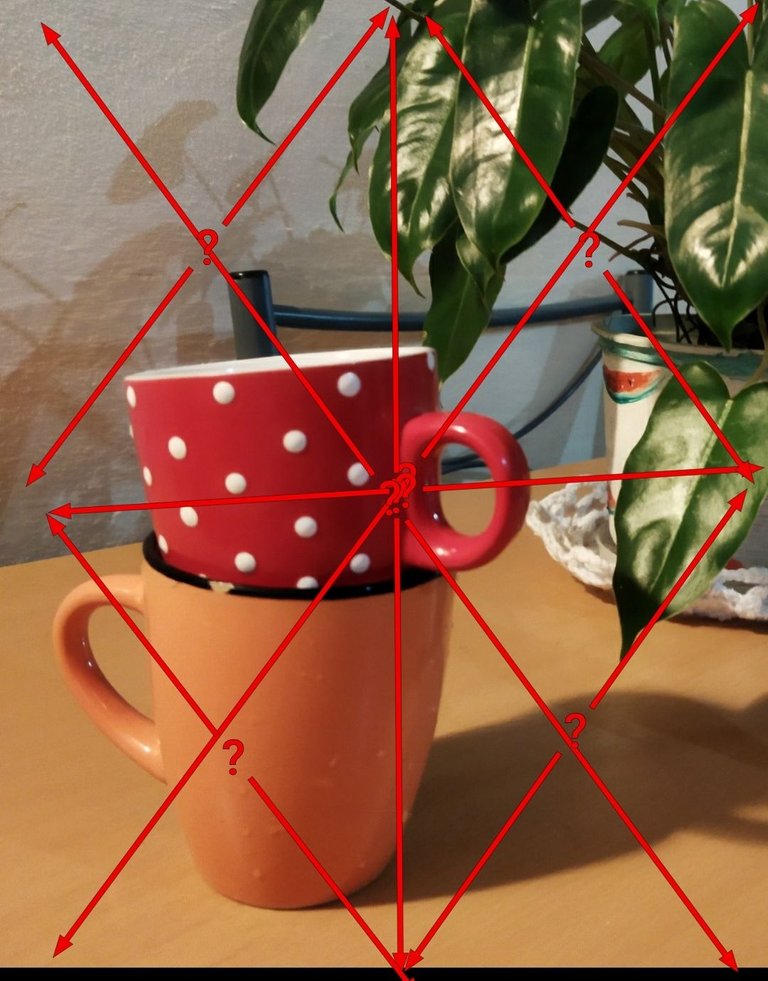
A painting comes out well if the drawing is well done, so take as much time as possible to reproduce the drawing on the canvas. I carefully guided myself by the lines I drew on the drawing, which I also measured with a ruler on the canvas.
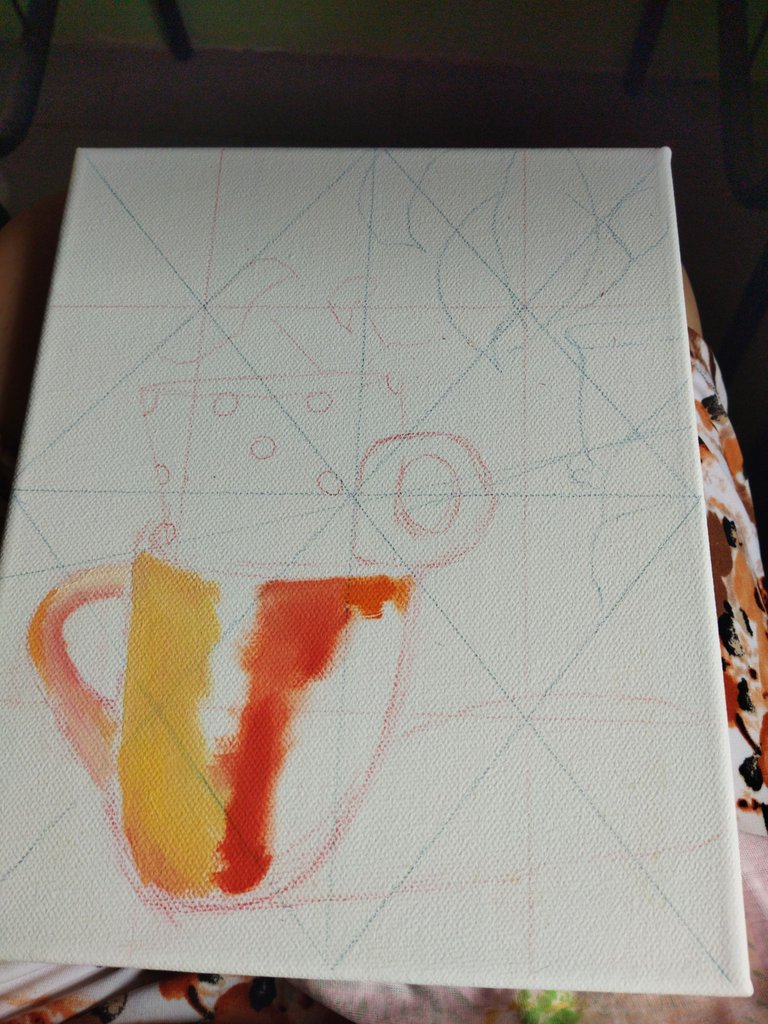
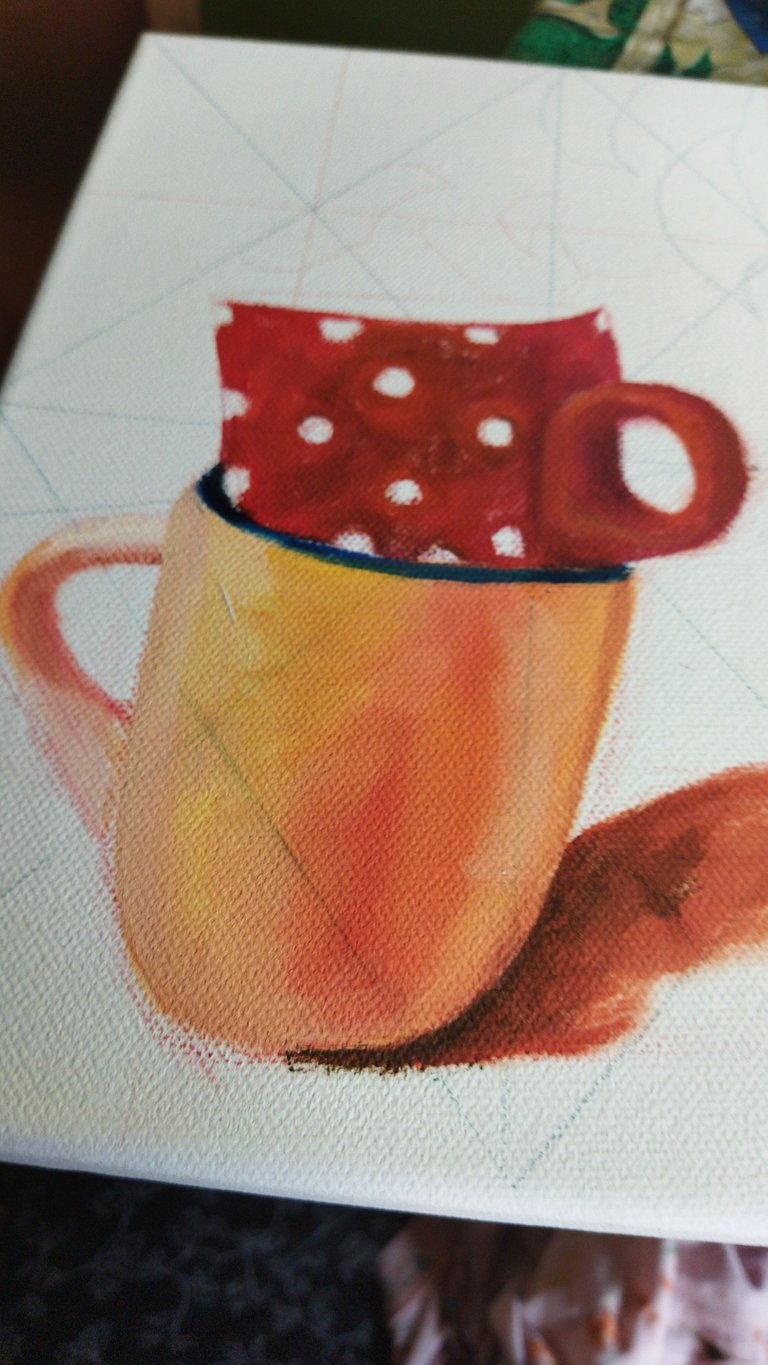
Oil is a very noble material that allows me to correct if something is not right, so I work quietly looking for colours that are close to the original. I worked with yellow, orange, ochre, and different types of reds, to first assemble the two cups. This first part is what we call "staining".
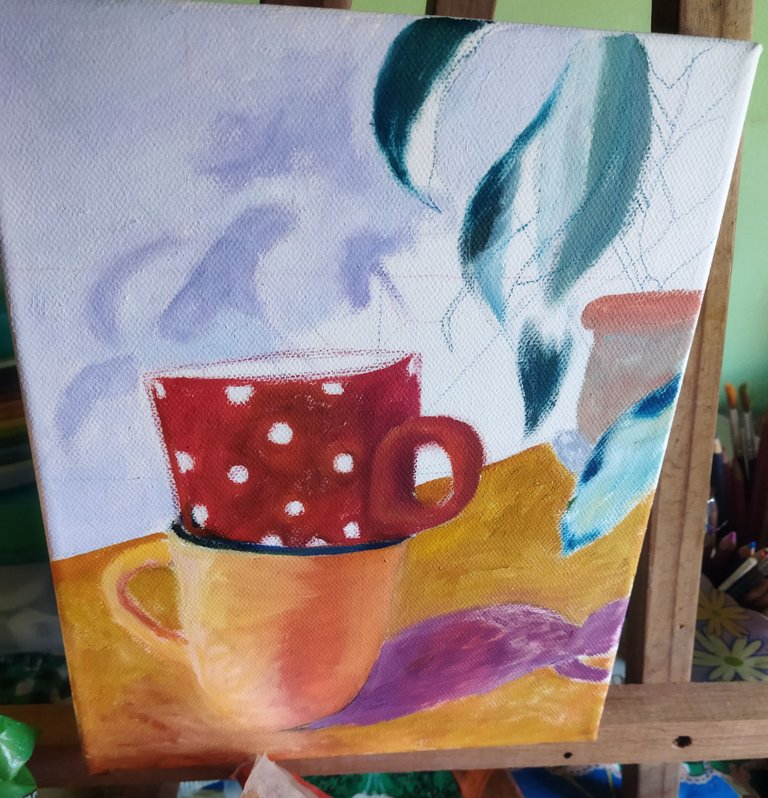
This project took me several days because I like to let one layer dry very well before proceeding to apply the other. The second time around I started working on the background vase, the leaves and the table. Once the whole painting was covered with paint I started with the details. I realised that a leaf that I had placed at the beginning stood out too much and I preferred to remove it to give prominence to the cups.
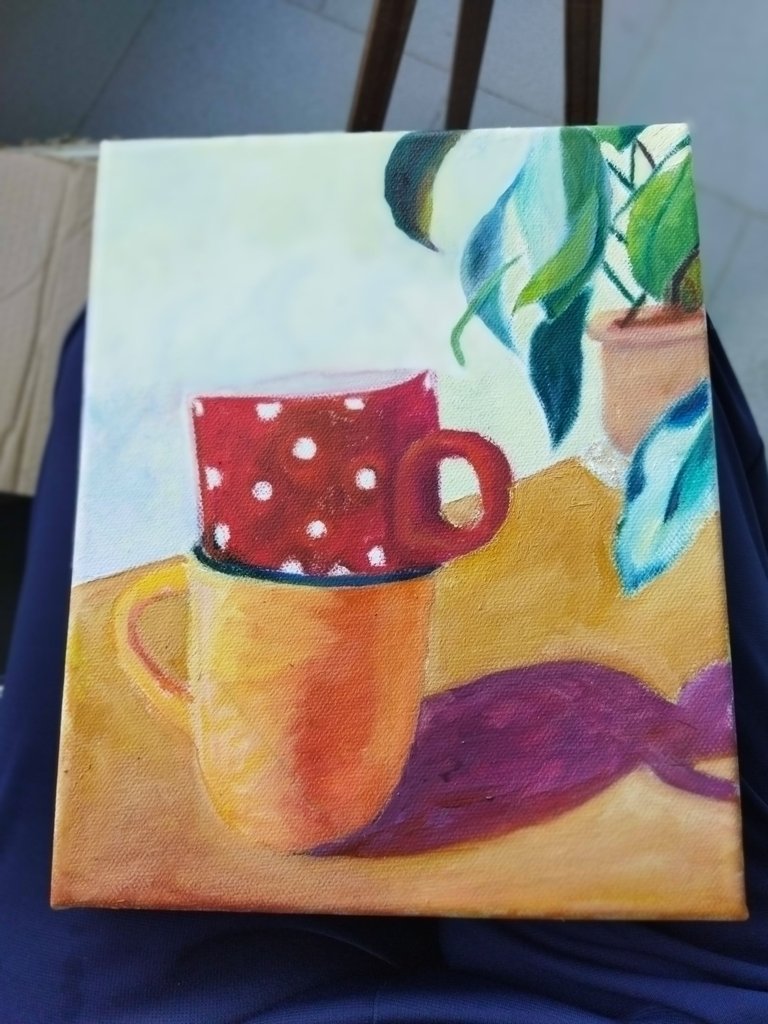
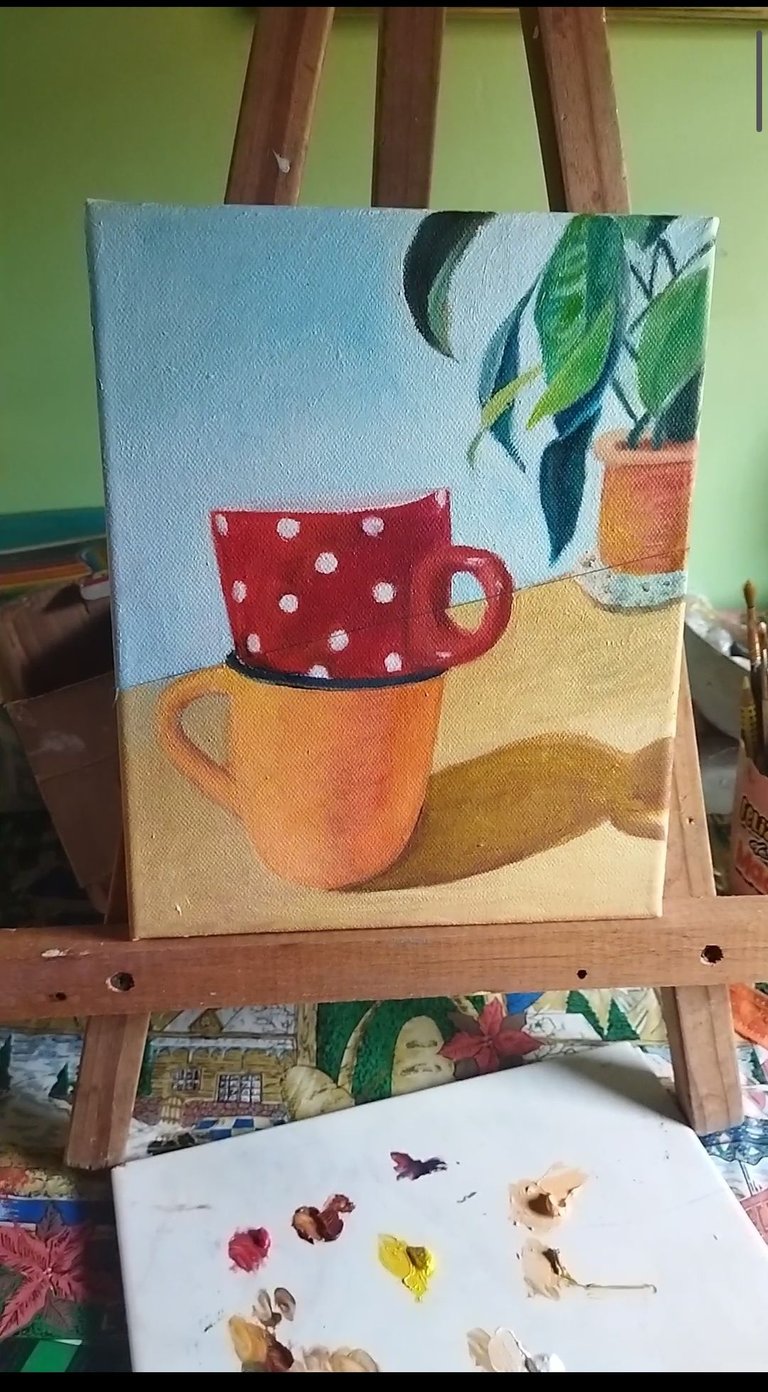
I always check the painting against the light to make sure that there are no areas that are less saturated with paint. One of the big conflicts is not knowing when to finish the painting.
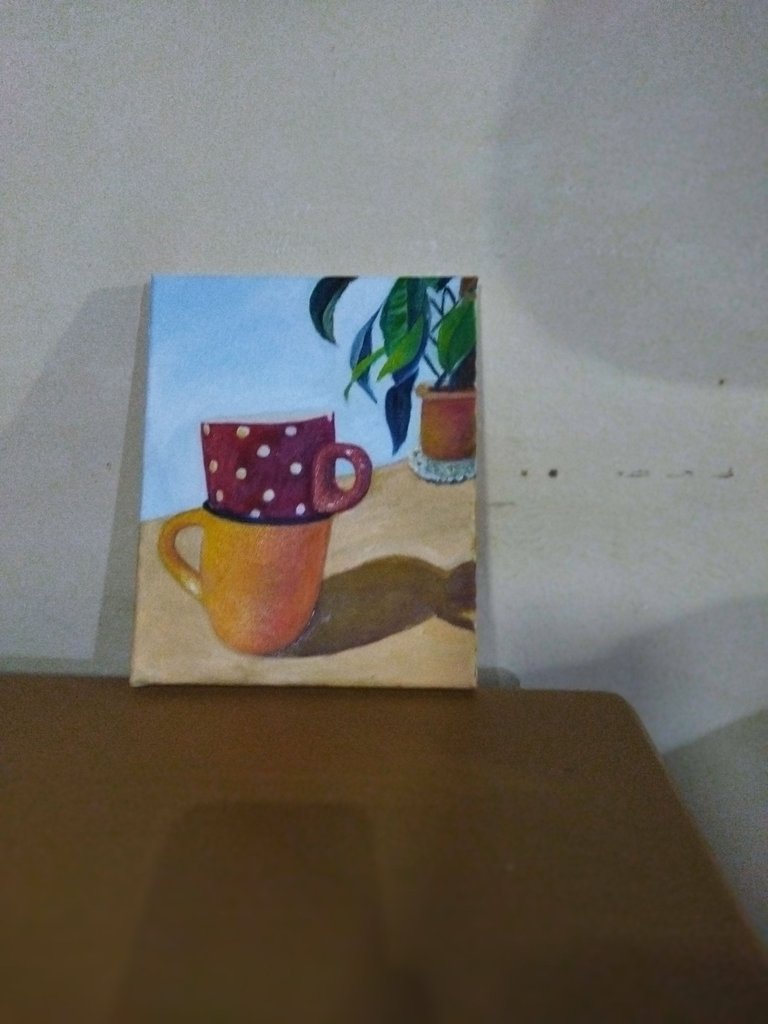
Finally I placed it next to the cups that gave rise to the idea and I really liked the result.
Thanks for your reading
I have used the translator DeepL
The content of this post is original, I took the pictures with my Redmi9t phone.

Saludos, comunidad DIYHub, esta es la primera vez que comparto con ustedes y quiero mostrar un tutorial de un trabajo en óleo hecho en pequeño formato.
Tengo diecisiete años experimentando con el dibujo y la pintura, es algo que disfruto mucho hacer. Trabajo con creyones, grafito, óleo y acuarela. El proceso que les voy a presentar lo hice en óleo, aquí mostraré el paso a paso.
Creo en la inspiración, en esa necesidad de hacer algo que surge de pronto sin que la busquemos, fue así como observando unas tazas que me regalaron me decidí a hacer una composición con ellas. Tomé muchas fotografías, acomodándolas de diferentes maneras hasta que me sentí satisfecha con esta.
Estas fotografías las tengo en el teléfono, no imprimí la misma sino que inicié con el dibujo en el celular; lo primero fue buscar un programa que me permitiera trazar diagonales a la fotografía, conseguí la aplicación «Annotium», que me permitió hacerlo.
Un cuadro sale bien si el dibujo queda bien hecho, así que tomarse todo el tiempo posible para reproducir el dibujo en el lienzo. Cuidadosamente fui guiándome por las líneas que tracé en el dibujo, las cuales medí también con una regla en el lienzo.
El óleo es un material muy noble que permite corregir si algo no sale bien, por ello trabajo tranquila buscando los colores que se acerquen al original. Trabajé con amarillo, naranja, ocre, y distintos tipos de rojos, para montar primeramente las dos tazas. Esta primera parte es lo que llamamos «manchado».
Este proyecto me tomó varios días porque me gusta dejar secar una capa muy bien antes de proceder a colocar la otra. En la segunda oportunidad comencé a trabajar el florero del fondo, las hojas y la mesa. Una vez que todo el cuadro estaba cubierto por la pintura empecé con los detalles. Me di cuenta que una hoja que había colocado al comienzo resaltaba mucho y preferí eliminarla para darle protagonismo a las tazas.
Siempre reviso el cuadro a contraluz para cerciorarme de que no queden zonas menos saturadas de pintura. Uno de los grandes conflictos es no saber cuándo dar por culminado el cuadro.
Finalmente lo coloqué al lado de las tazas que dieron origen a la idea y me gustó mucho el resultado.
El contenido de esta publicación es original, he tomado las fotografías con mi teléfono Redmi9t.
The rewards earned on this comment will go directly to the people( @samuell12 ) sharing the post on Twitter as long as they are registered with @poshtoken. Sign up at https://hiveposh.com.
Hola @charjaim, te quedó genial el cuadro, me gustó el efecto de sombra y la planta se ve muy real.
Muchas gracias, @samuell12 , aprecio tu comentario.
Te felicito amiga, tu dibujo quedó muy bonito. Casi idéntico a la imagen que capturó la cámara de tu teléfono. Me encanta 😊
Muchas gracias. Me alegra que le guste.
This drawing tutorial was great, especially in the case of some special drawings, it is very effective.
I am pleased to have complied with the tutorial
Thank you
Te quedo hermosa tu pintura, excelente idea lo de buscar una aplicación para hacer las líneas ya que asi podemos dibujar a la perfección, gracias por compartir, espero tengas una excelente semana 🤗
¡Gracias! Sí, con las líneas diagonales se facilita pasar el dibujo al lienzo.
Felices días para ti también.
¡Enhorabuena!
✅ Has hecho un buen trabajo, por lo cual tu publicación ha sido valorada y ha recibido el apoyo de parte de CHESS BROTHERS ♔ 💪
♟ Te invitamos a usar nuestra etiqueta #chessbrothers y a que aprendas más sobre nosotros.
♟♟ También puedes contactarnos en nuestro servidor de Discord y promocionar allí tus publicaciones.
♟♟♟ Considera unirte a nuestro trail de curación para que trabajemos en equipo y recibas recompensas automáticamente.
♞♟ Echa un vistazo a nuestra cuenta @chessbrotherspro para que te informes sobre el proceso de curación llevado a diario por nuestro equipo.
🥇 Si quieres obtener ganancias con tu delegacion de HP y apoyar a nuestro proyecto, te invitamos a unirte al plan Master Investor. Aquí puedes aprender cómo hacerlo.
Cordialmente
El equipo de CHESS BROTHERS
Muchas gracias.