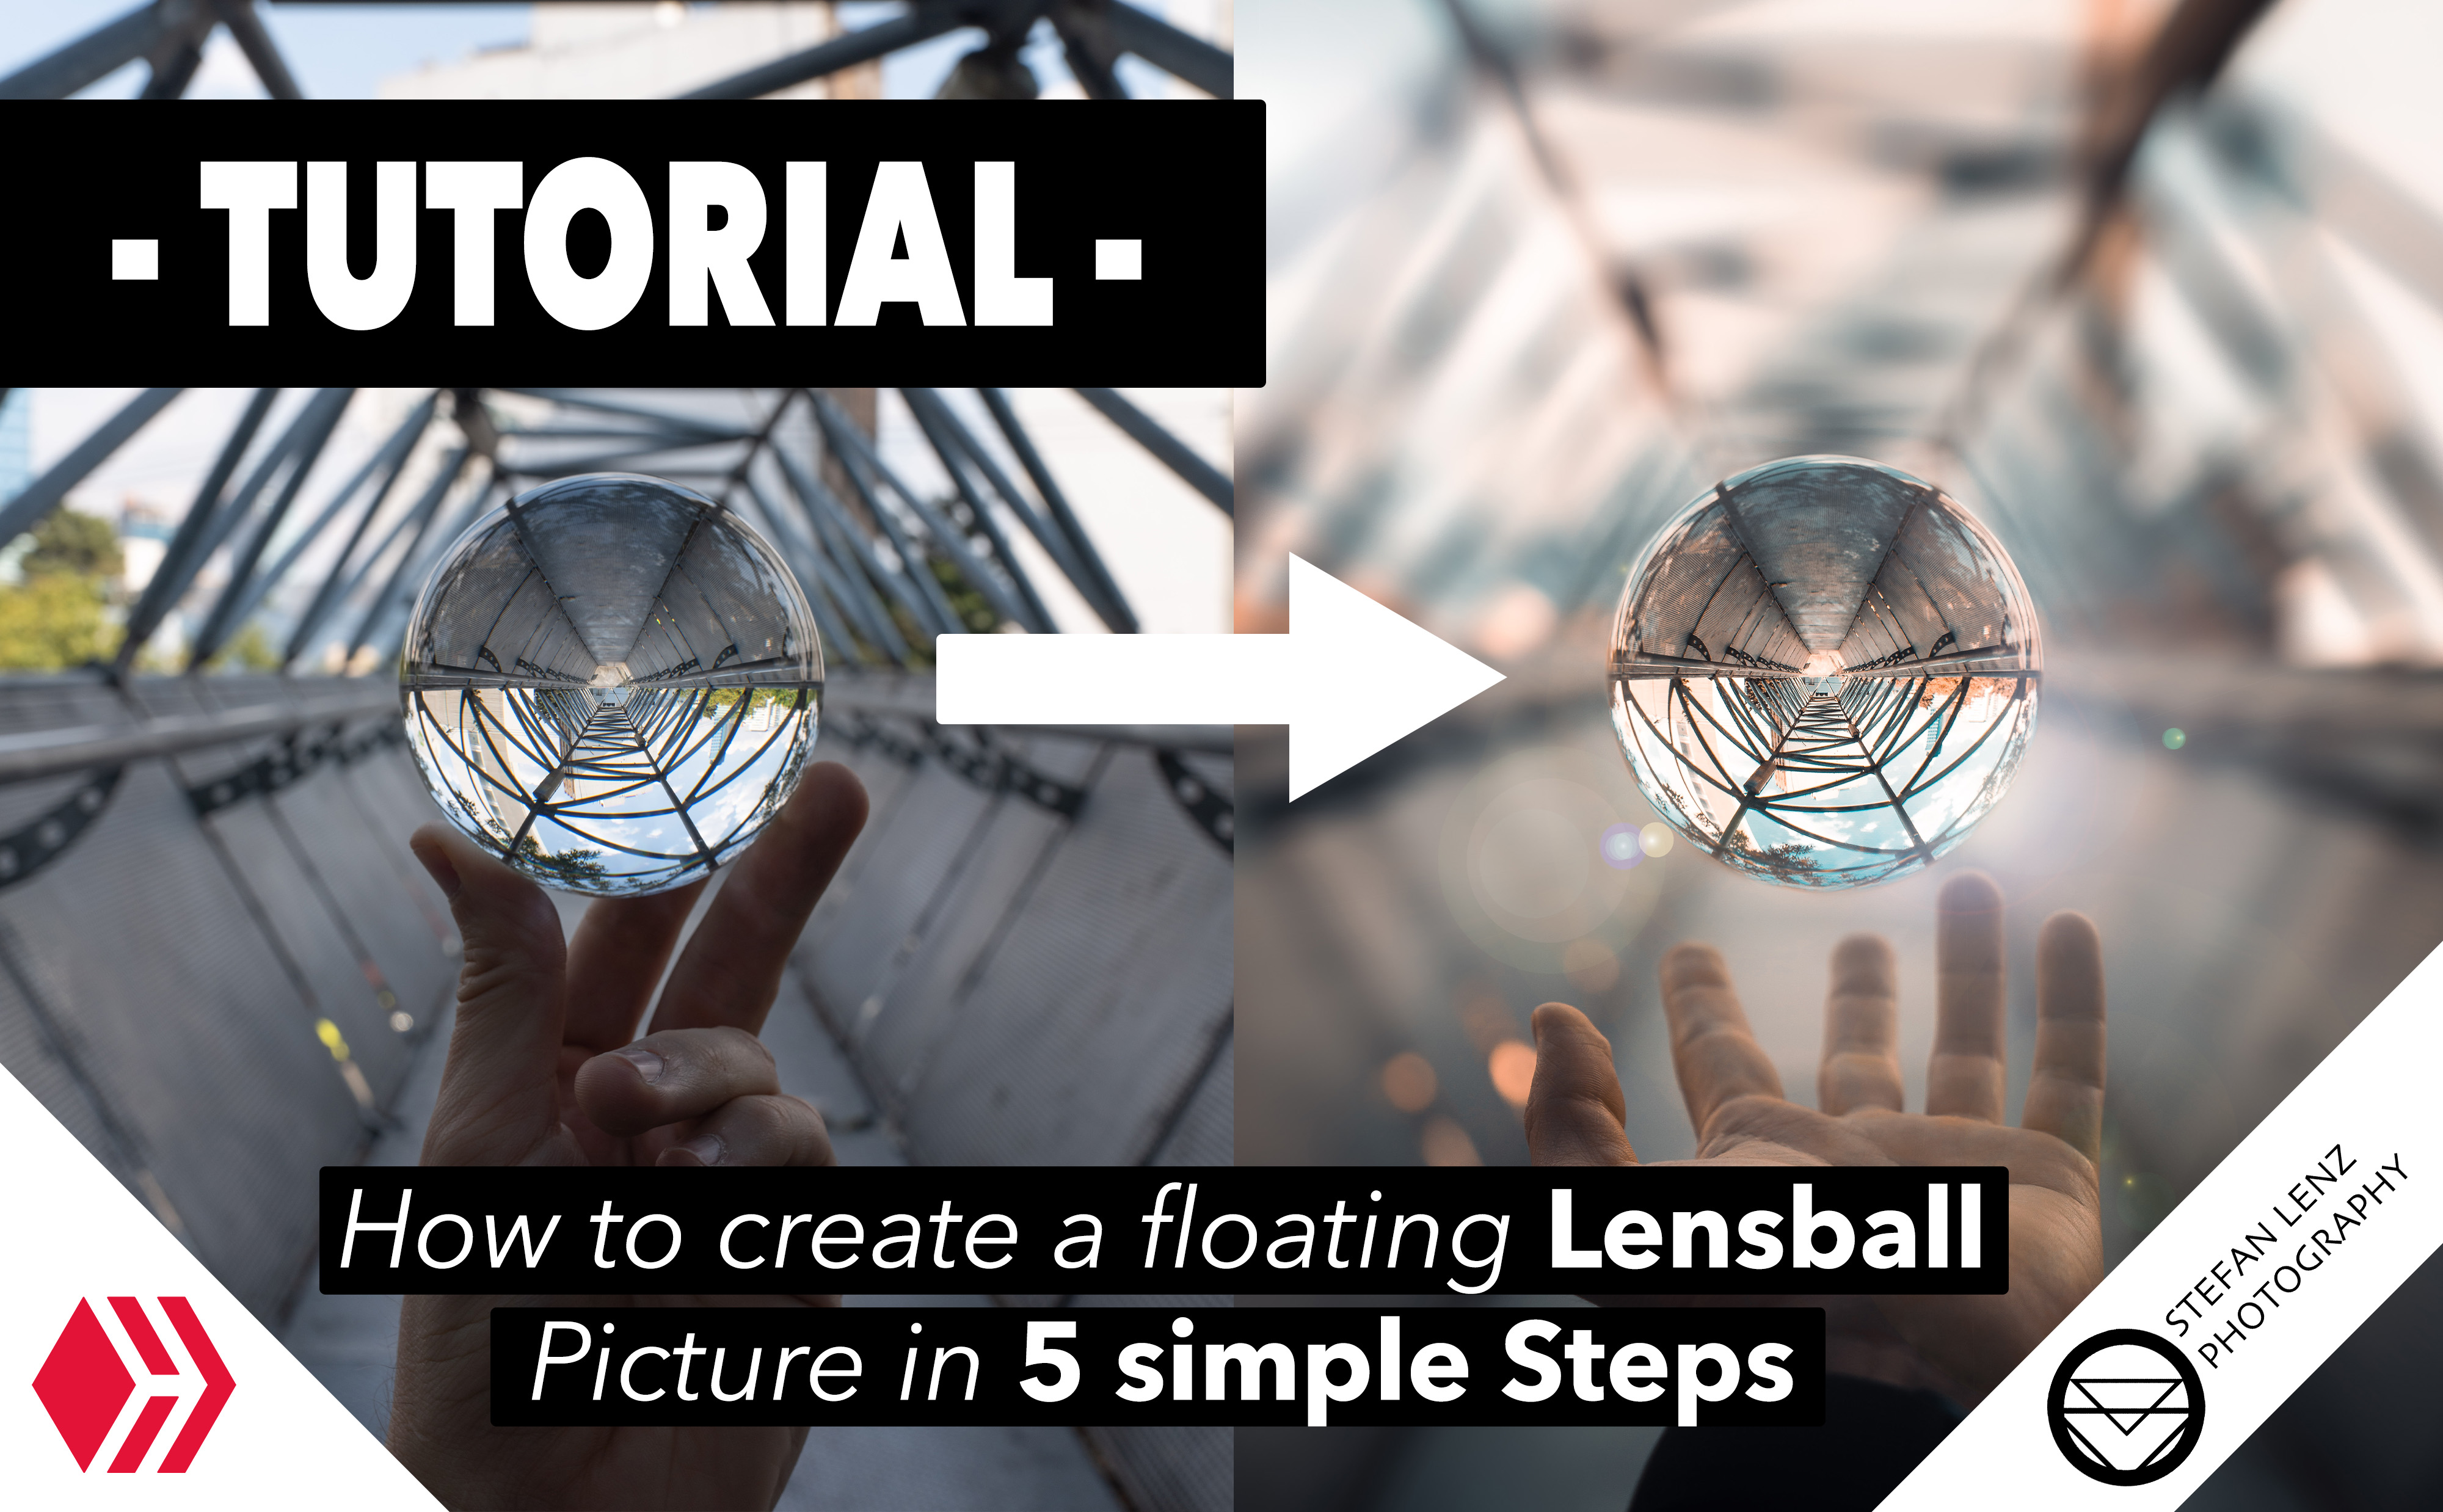
Hey guys! This post is once again about my specialty, Lensball Photography. I tried something new again and since I was quite happy with the result, I want to show you how to create a photo of a Lensball seemingly floating in the air relatively easily.
Hallo Leute! In diesem Beitrag geht es wieder einmal um mein Spezialgebiet, die Glaskugel-Fotografie. Ich habe mal wieder etwas neues ausprobiert und da ich mit dem Ergebnis recht zufrieden war, will ich euch zeigen, wie man relativ einfach ein Foto von einem scheinbar in der Luft schwebenden Lensball erstellt.
Step 1: Finding a suitable Lensball photo spot/Schritt 1: Einen geeigneten Lensball-Fotospot finden
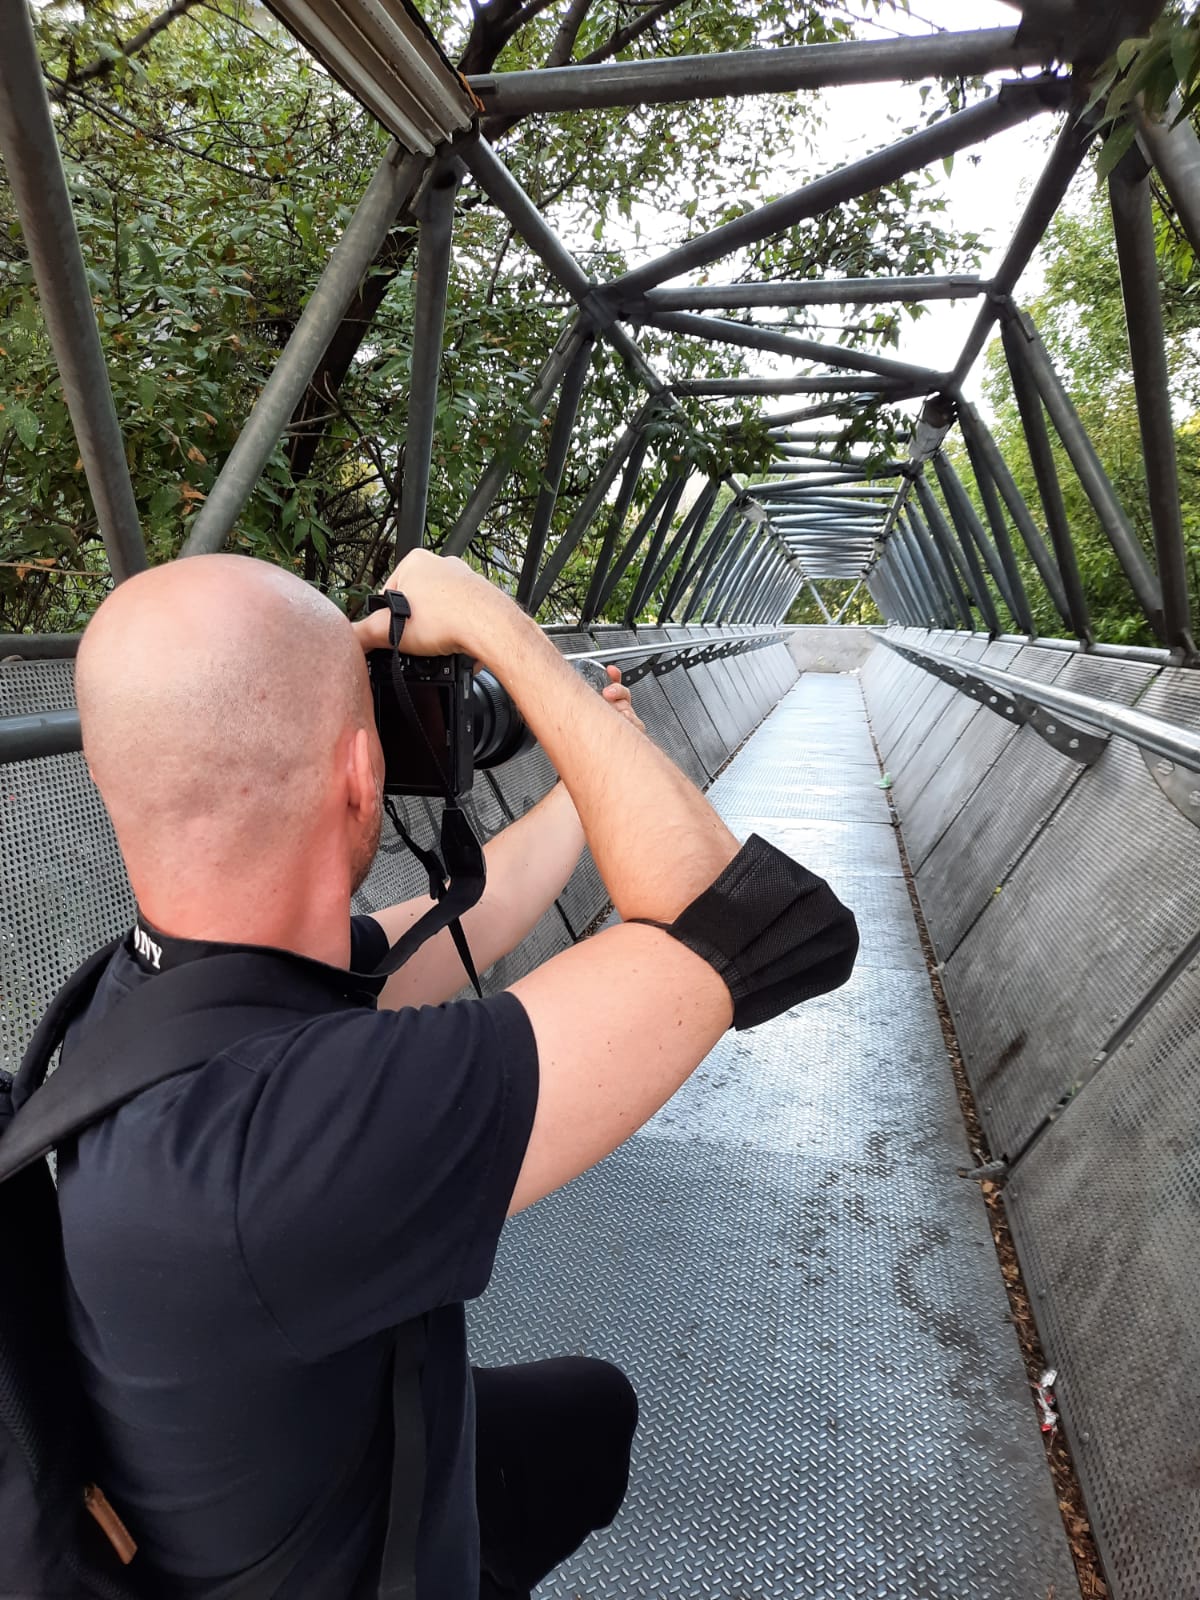
First of all, of course, you need a suitable location to create a fascinating glass ball photo. Personally, I prefer tunnel-shaped structures, such as footbridges, as they create many leading lines in the photos and provide a star-shaped image within the crystal ball. Apart from this recommendation, you can also choose other locations that you like.
Zuallererst benötigt ihr natürlich eine passende Location, um ein faszinierendes Glaskugel-Foto zu erstellen. Ich persönlich bevorzuge dafür meist tunnelförmige Strukturen, wie Fußgängerbrücken, da sie in den Fotos viele führende Linien erzeugen und für eine sternförmige Abbildung innerhalb der Glaskugel sorgen. Abgesehen von dieser Empfehlung, könnt ihr aber auch andere Orte, die euch gefallen, wählen.
Step 2: Shooting a technically clean glass ball photo/Schritt 2: Ein technisch sauberes Glaskugel-Foto schießen
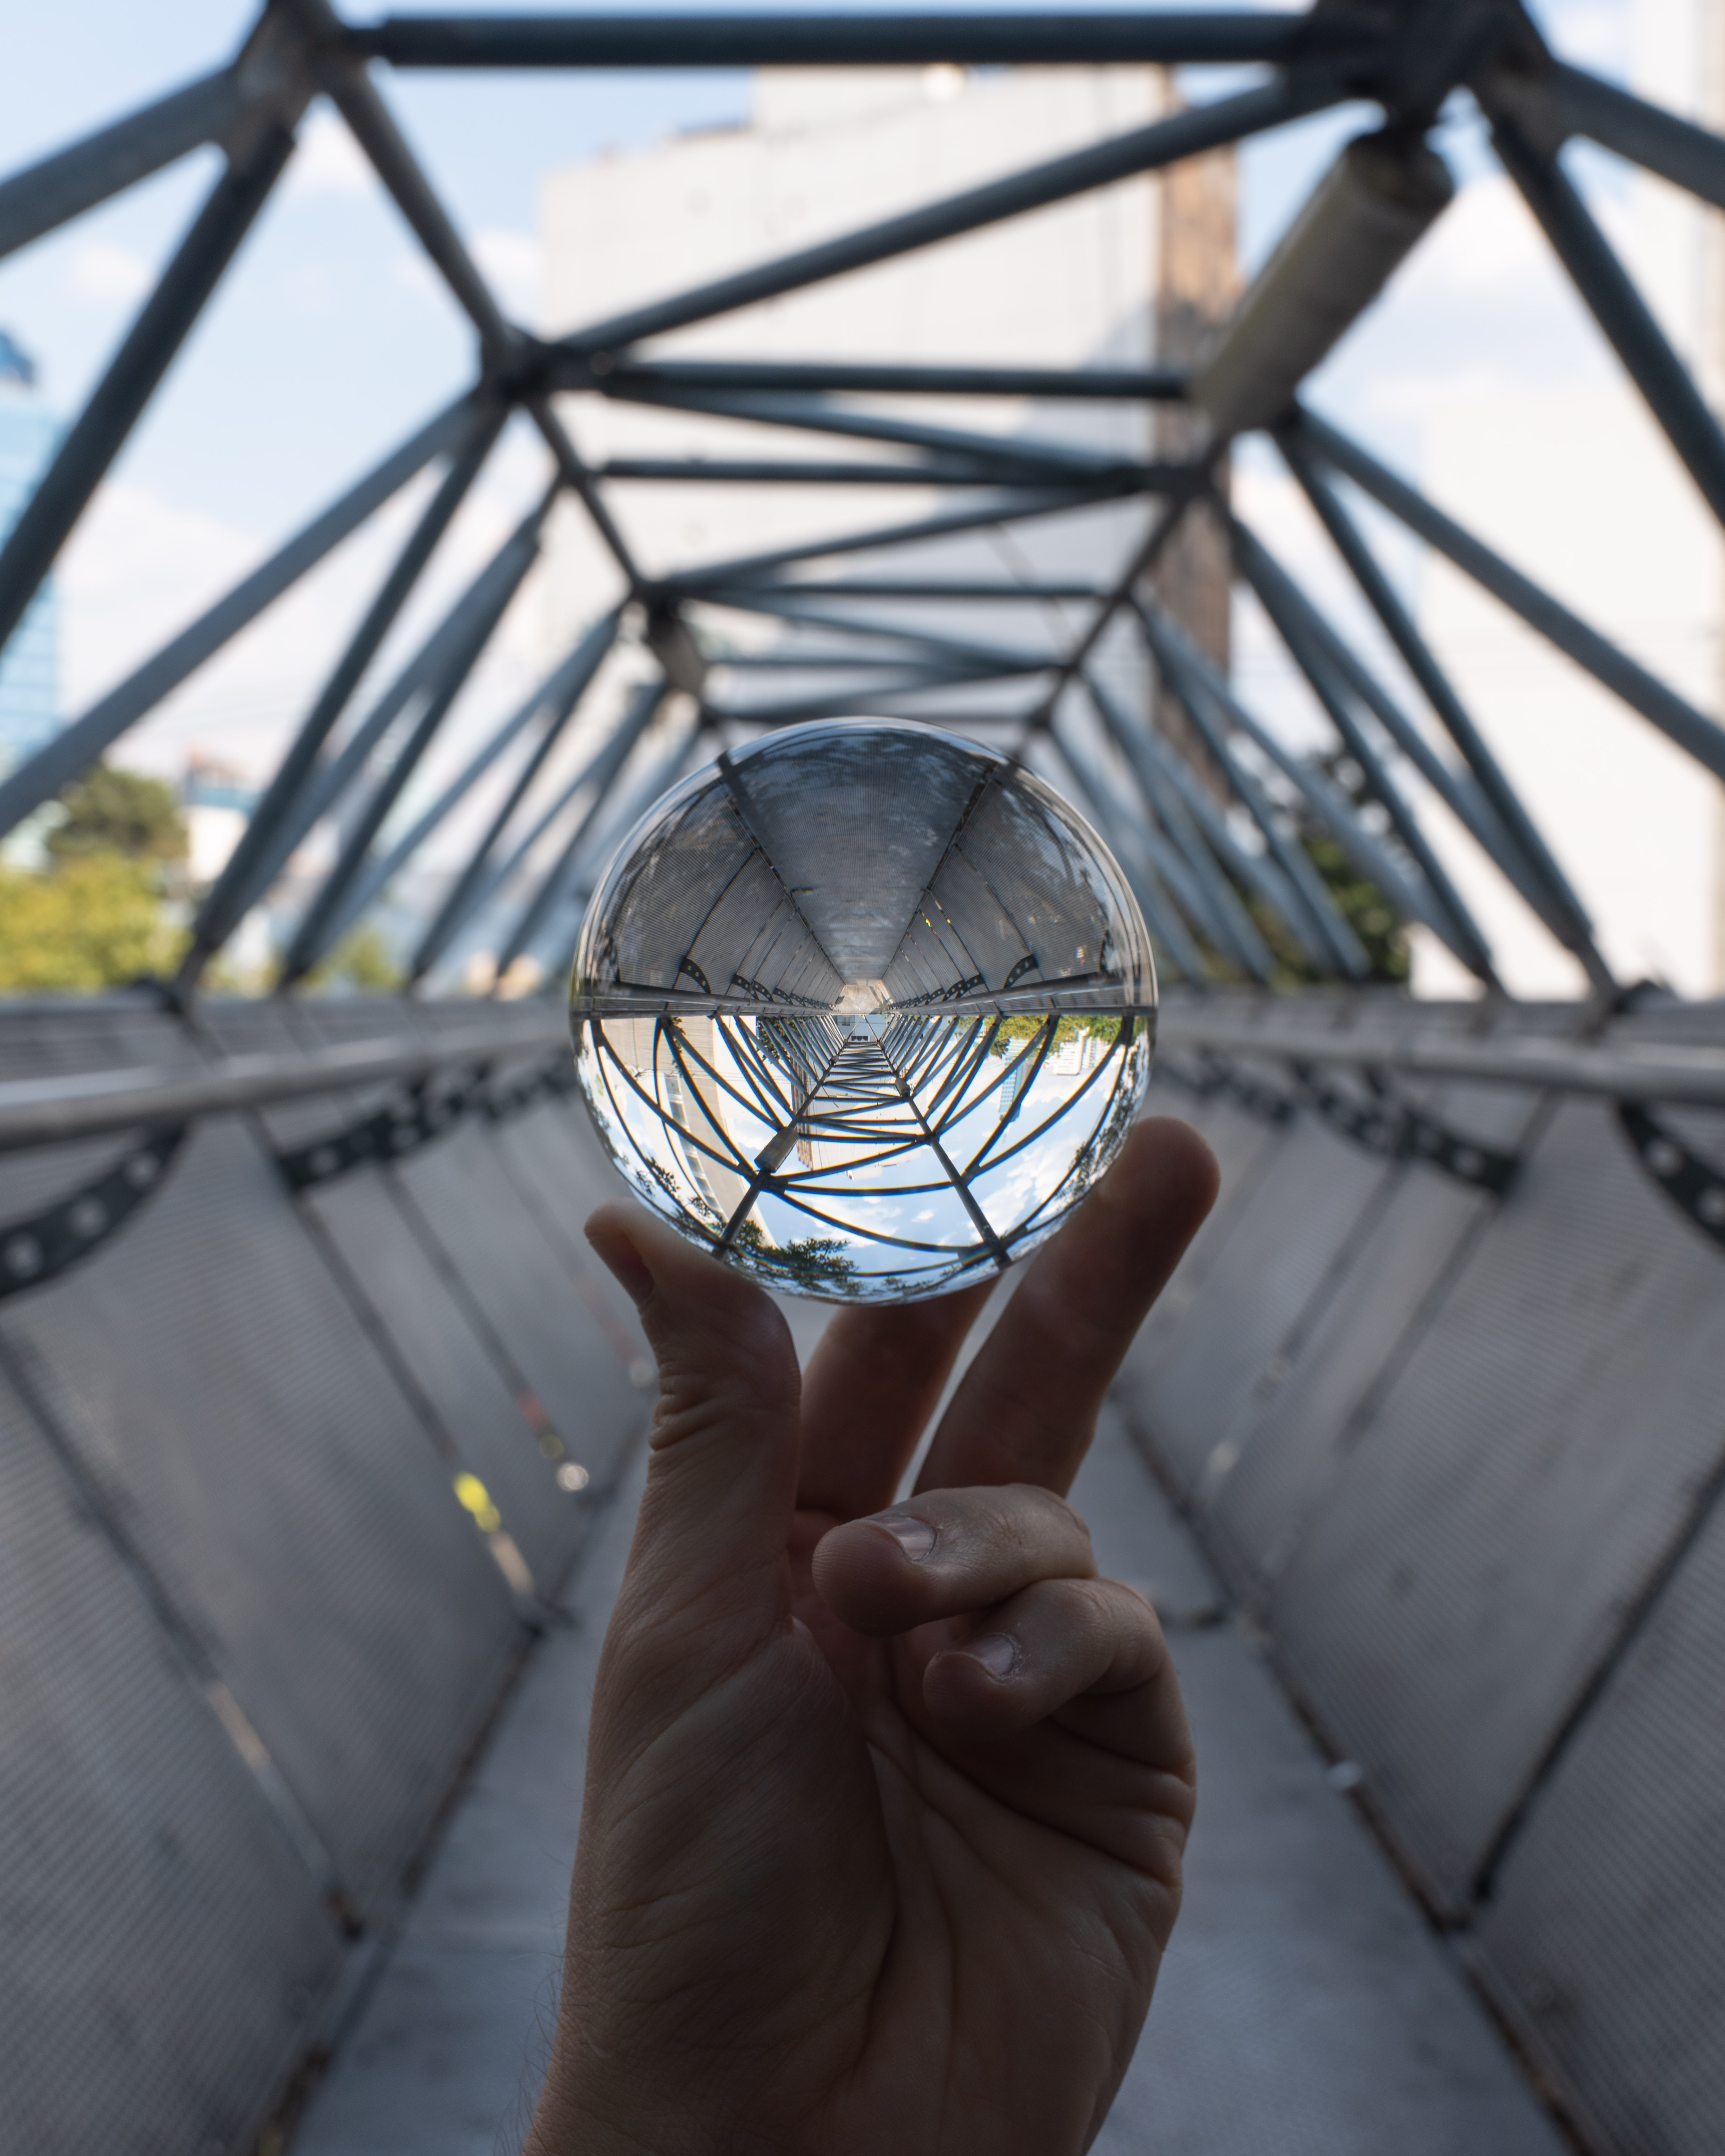
By technically clean I mean that the Lensball should be in focus and well exposed. To achieve this, it is best to use an aperture that is as closed as possible so that the edges of the ball do not blur. I used F11.0 for this shot. Hold the crystal ball exactly in the position in which you want it to float. Make sure that you do not cover it with your fingers at all. This can be a little difficult. You can try the three-finger method, as shown in my photo, or you can use a glass ball stand. Photographing the ball lying on the floor and then letting it float in the air, however, unfortunately does not provide a realistic result.
Mit technisch sauber meine ich, dass der Lensball scharf und gut belichtet abgebildet sein sollte. Dafür verwendet ihr am besten eine möglichst geschlossene Blende, damit die Ränder der Kugel nicht verschwimmen. Ich verwendete in diesem Beispiel F11.0. Haltet die Kugel genau in der Position, in der sie letztendlich schweben soll. Achtet unbedingt darauf, dass ihr sie so gut wie gar nicht mit euren Fingern bedeckt. Dies kann etwas schwierig sein. Ihr könnt es mit der Drei-Finger-Variante, wie auf meiner Aufnahme ersichtlich versuchen, oder ihr verwendet einen Glaskugel-Ständer. Die Kugel auf dem Boden liegend zu fotografieren, um sie dann in der Luft schweben zu lassen, sorgt hingegen leider für kein realistisch wirkendes Ergebnis.
Step 3: Shooting a photo of your hand/Schritt 3: Ein Foto mit einer Hand im Bild schießen
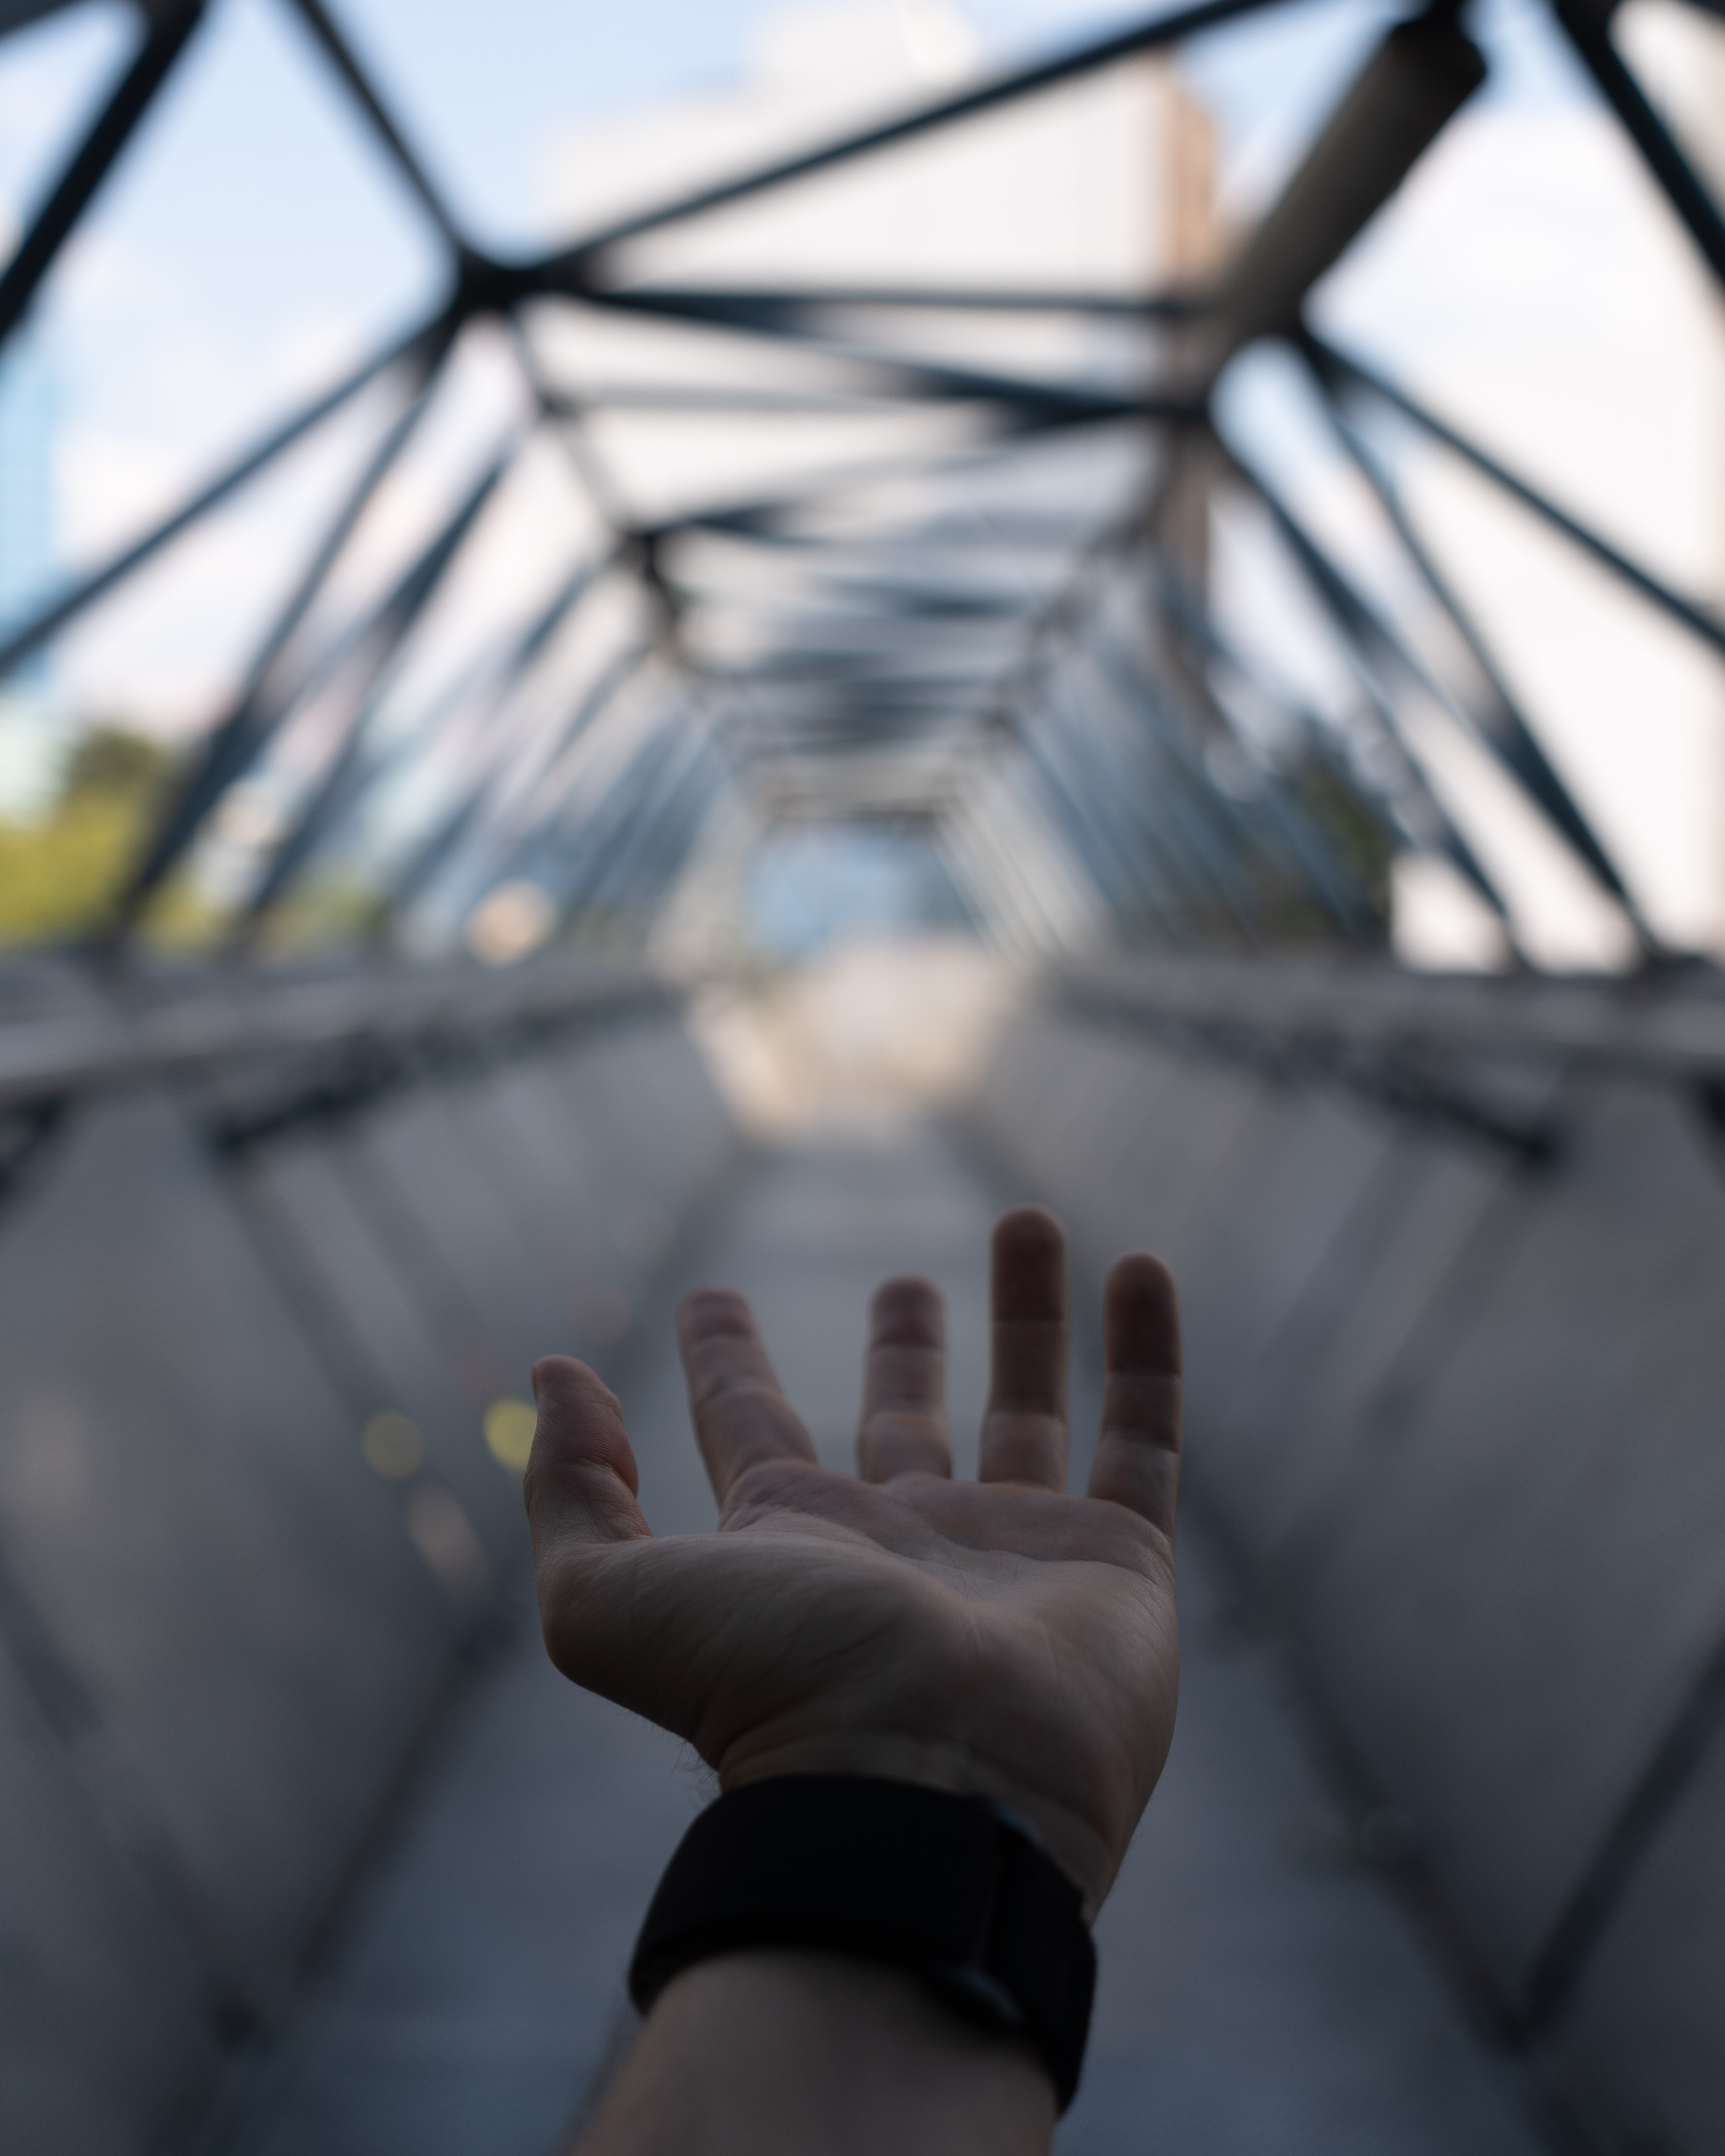
Once you have taken the Lensball photo, the next step is to take a photo of your hand. It is important that you place your hand in the lower third of the frame so that you can later insert the floating ball above it. Use an open aperture to achieve a nice background blur. I chose F2.8 for this shot.
Habt ihr das Lensball-Foto erledigt, besteht der nächste Schritt nun darin, ein Foto von eurer Hand zu schießen. Hierbei ist es wichtig, dass ihr die Hand im unteren Drittel der Bildausschnittes platziert, sodass ihr die schwebende Kugel später darüber einfügen könnt. Verwendet dafür eine offene Blende, um eine schöne Hintergrundunschärfe zu erreichen. Ich habe mich in dieser Aufnahme für F2.8 entschieden.
Step 4: Combining the two photos in post processing/Schritt 4: Die beiden Fotos in der Nachbearbeitung verbinden
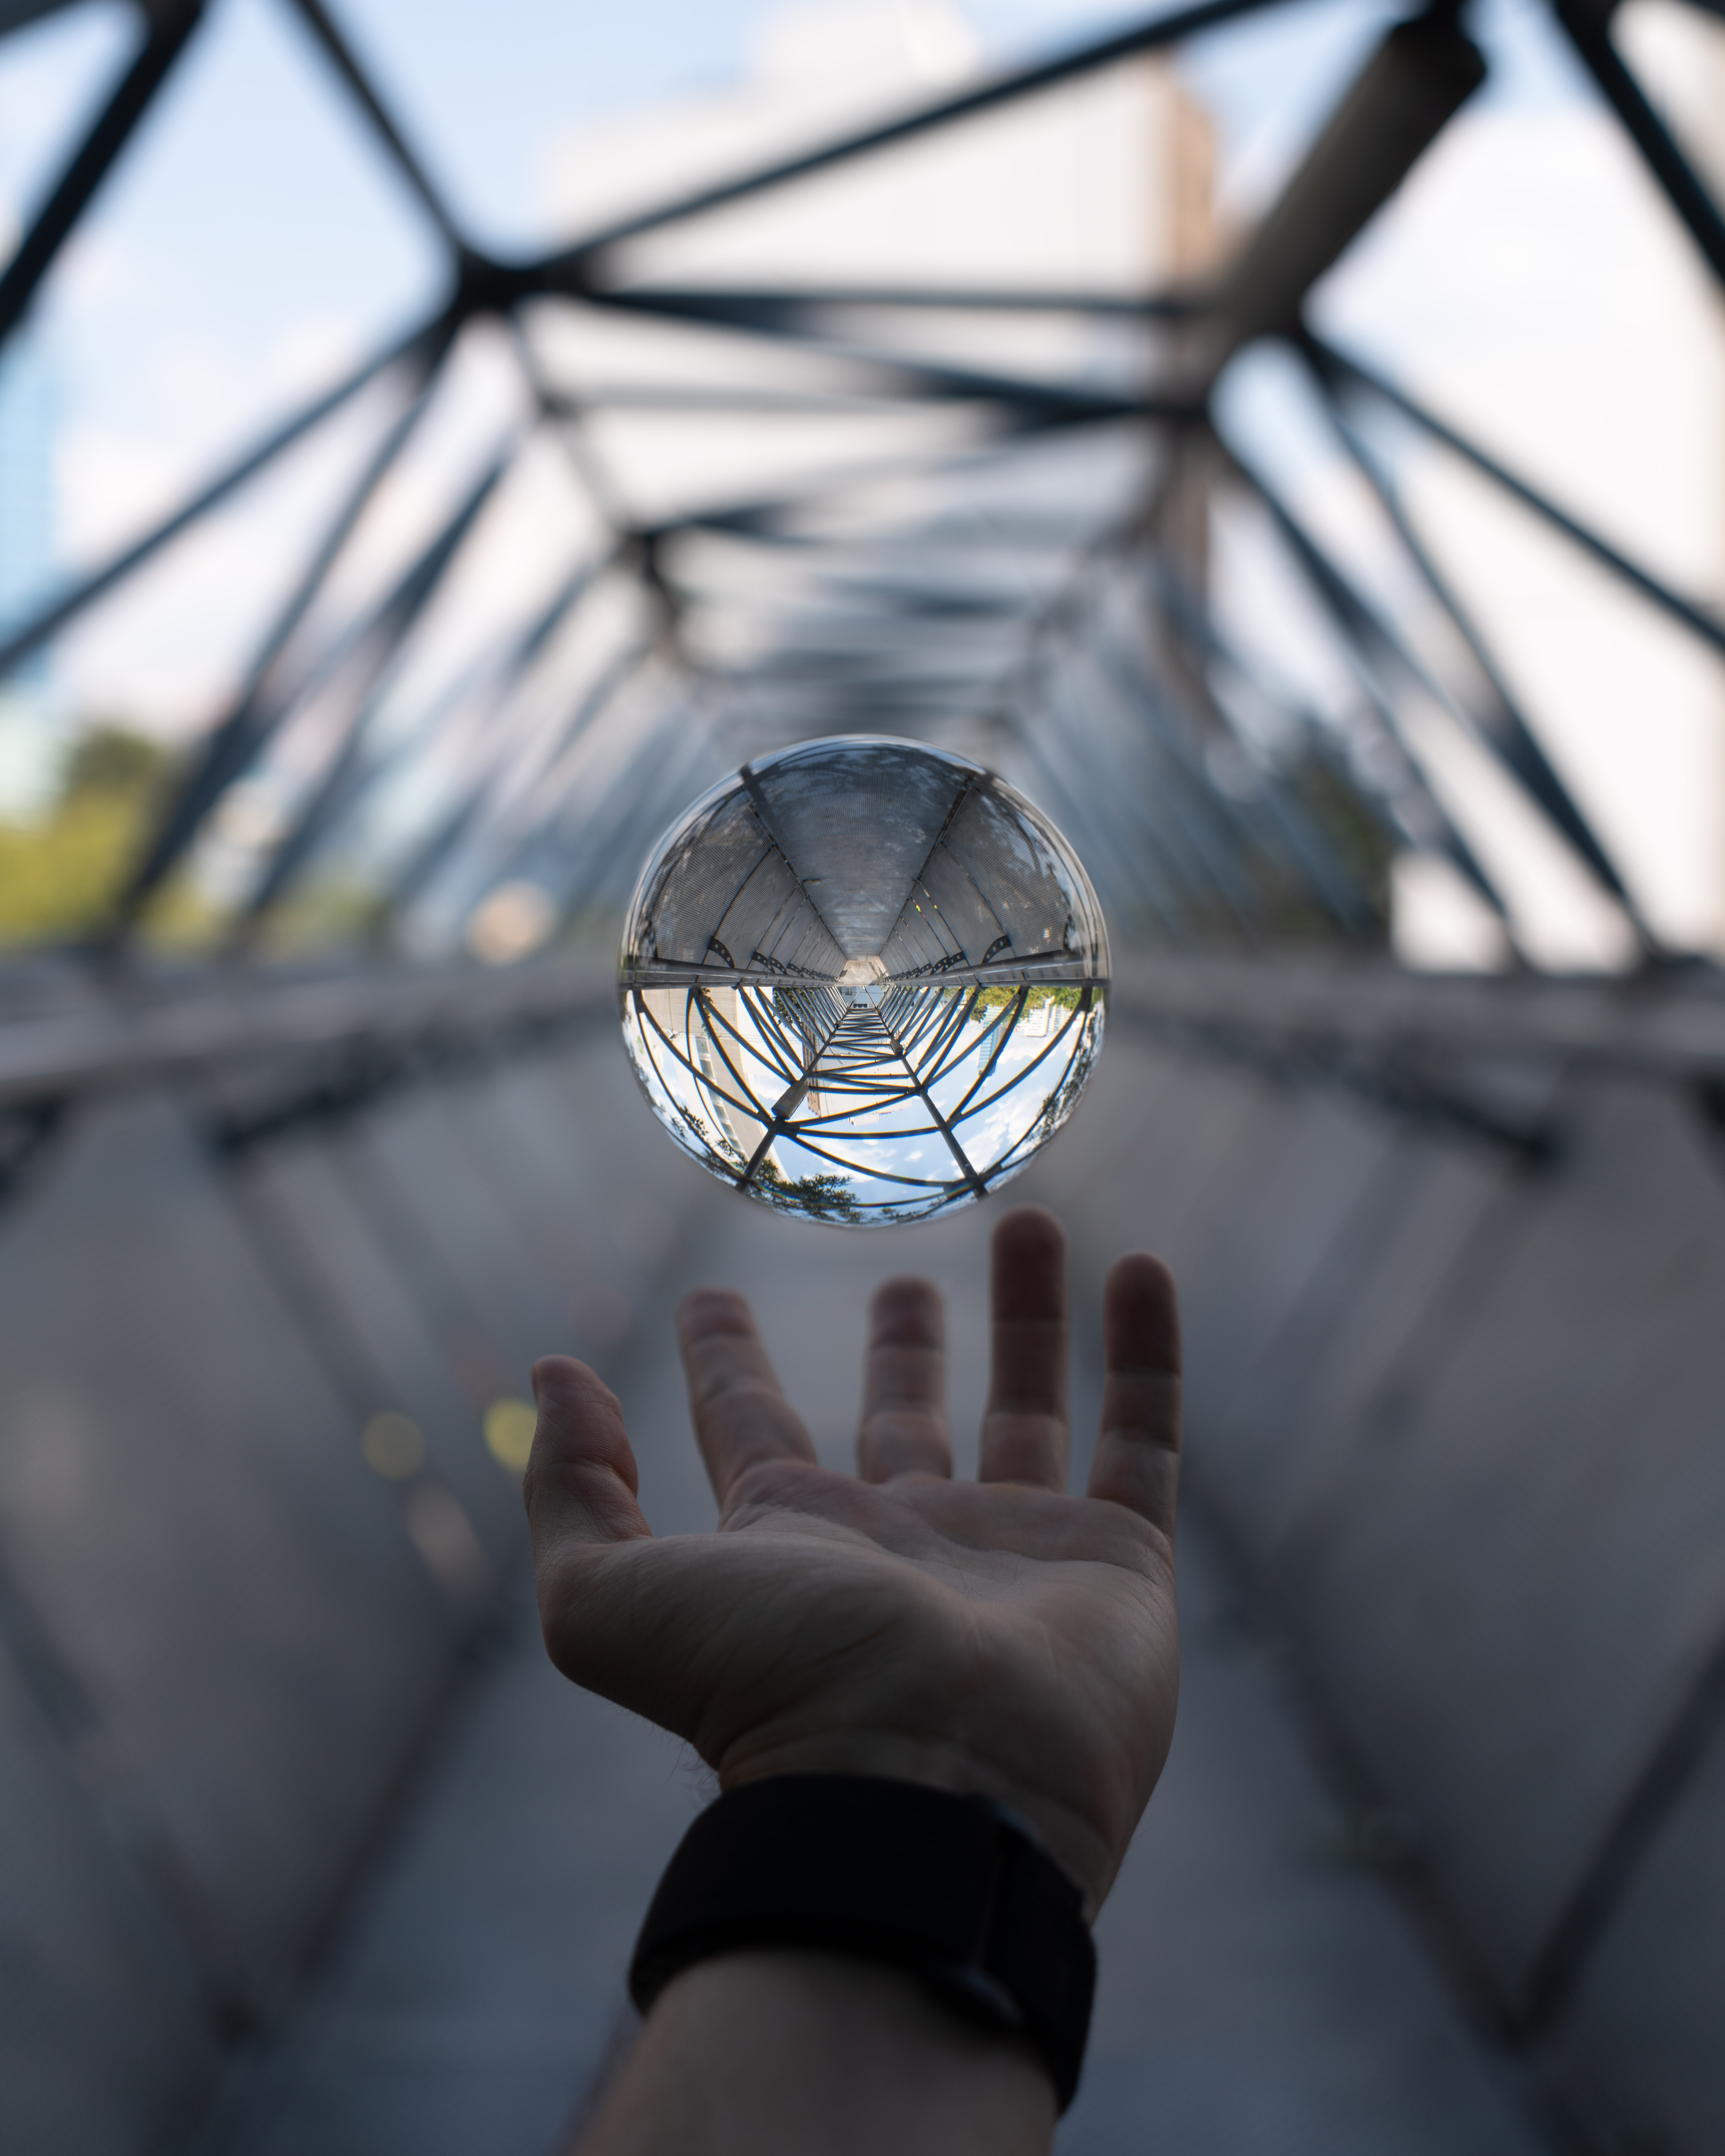
You have done your work on the spot. Now it's time for post-processing. Open the photo of your hand using your post-processing software. I personally used Adobe Photoshop for this example. Now place the photo with the Lensball on top of it as a second layer and place it in such a way that the ball hovers exactly in the desired position above your hand. Change the layer opacity to about 50% to get an impression of where the ball will be. When you have found the right position, set the opacity to 100% again and create a layer mask for the upper layer (the image with the Lensball). Now choose a brush with a soft edge and black color with the layer mask selected and delete all areas of the upper layer except for the glass ball. Make sure that you work precisely on the edges in order to achieve a realistic result.
Eure Arbeit vor Ort habt ihr erledigt. Nun geht es in die Nachbearbeitung. Öffnet die Aufnahme der Hand mit eurer Nachbearbeitungs-Software. Ich persönlich verwendete dafür Adobe Photoshop. Nun legt ihr das Foto mit dem Lensball als zweite Ebene darüber und platziert es so, dass die Kugel genau in der gewünschten Position über eurer Hand schwebt. Ändert dazu die Ebenendeckkraft auf ungefähr 50%, um einen Eindruck davon zu erhalten, wo sich die Kugel befinden wird. Habt ihr die passende Position gefunden, stellt ihr die Deckkraft wieder auf 100% und erstellt eine Ebenenmaske für die obere Ebene (das Bild mit dem Lensball). Nun wählt ihr einen Pinsel mit weicher Kante und schwarzer Farbe bei ausgewählter Ebenenmaske und löscht alle Bereiche der oberen Ebene, bis auf die Glaskugel. Achtet unbedingt darauf, dass ihr an den Rändern sauber arbeitet, um ein realistisch wirkendes Ergebnis zu erhalten.
Step 5: Editing the photo and adding effects/Schritt 5: Das Foto nachbearbeiten und Effekte hinzufügen
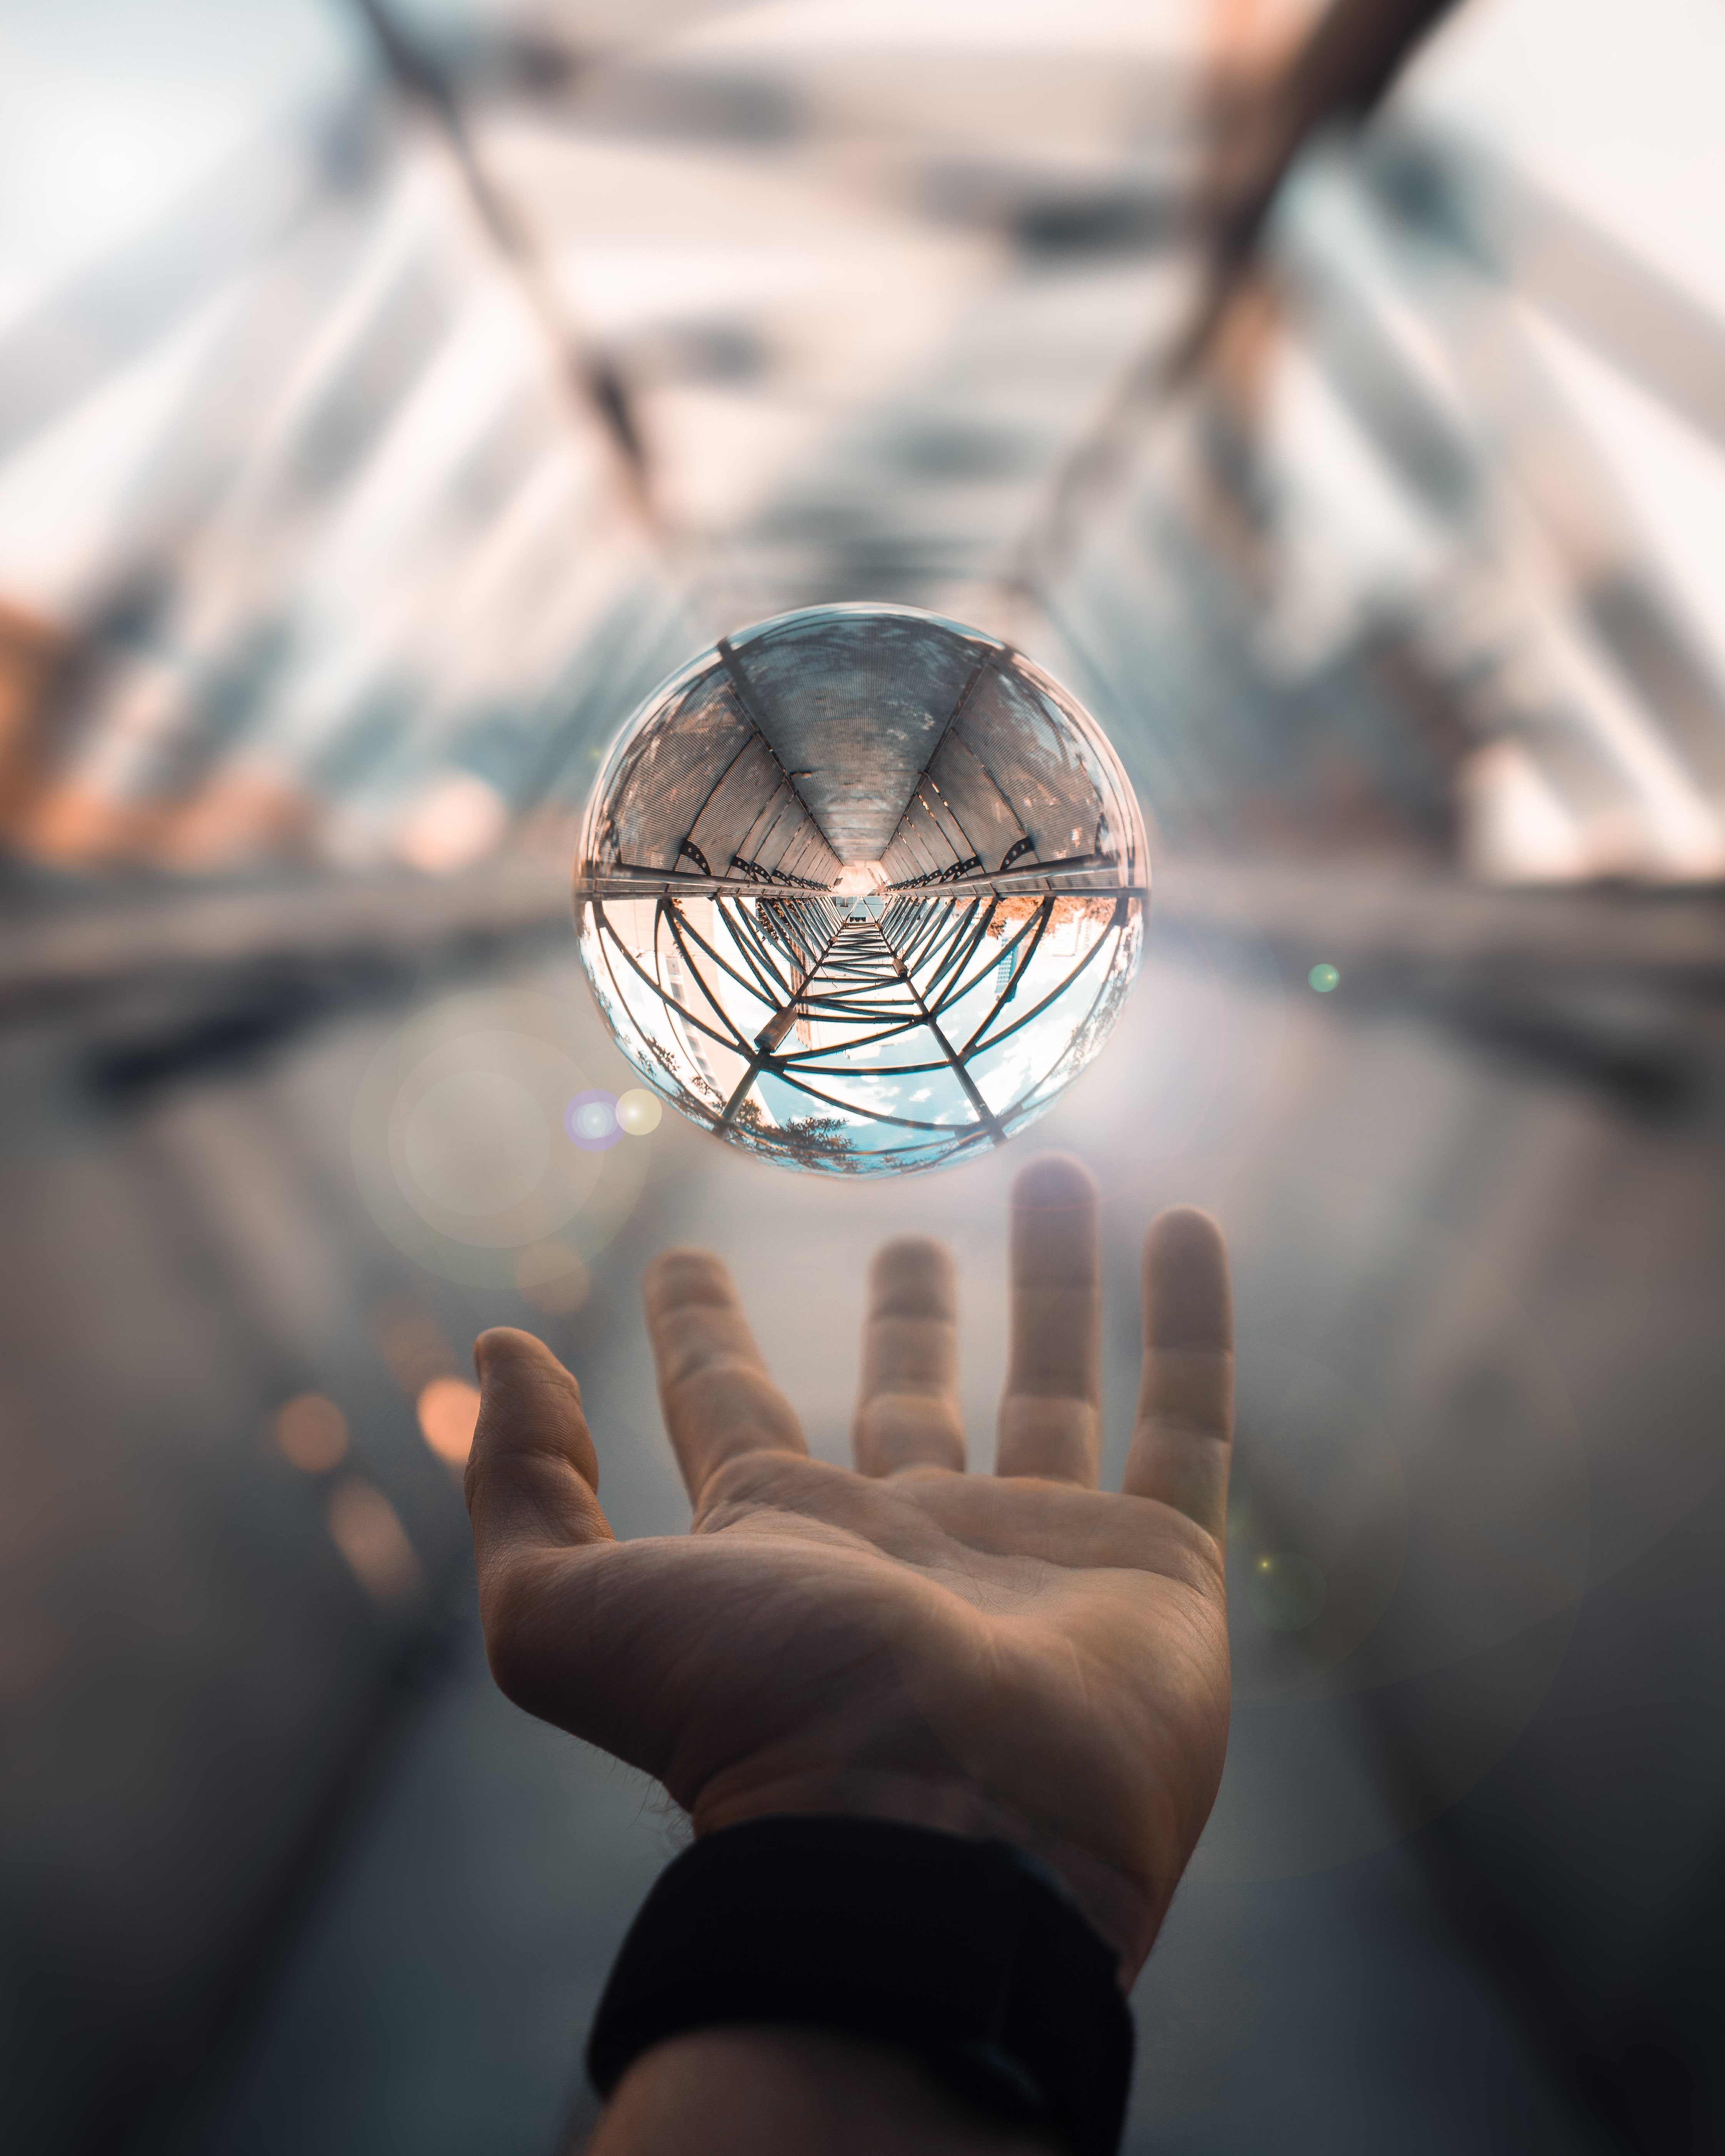
Finally, you can edit the finished result to your taste and add effects. In this example, I used the camera raw filter in Photoshop and added a few lens flare effects as well as a radial blur filter. Make sure you take enough time for this last step to make the image look magical and impressive. As you can see, it's not rocket science to create a floating Lensball. Have fun trying it out for yourselves!
Zum Schluss könnt ihr das fertige Ergebnis nun noch nach eurem Geschmack bearbeiten und Effekte hinzufügen. Ich verwendete in diesem Beispiel dafür den Camera Raw Filter in Photoshop und fügte ein paar Lensflare-Effekte sowie einen radialen Weichzeichnungsfilter ein. Nehmt euch für diesen letzten Schritt unbedingt genug Zeit, um das Bild magisch und beindruckend wirken zu lassen. Ihr seht, es ist absolut keine Raketenwissenschaft, einen schwebenden Lensball zu erzeugen. Viel Spaß beim selbst ausprobieren!
More about this topic?/Mehr zu diesem Thema?
You're looking for more photography inspirations? My two book hits "Crystal Ball Fascination" and "Long Exposure Photography quick and easy" are now available as a 2 in 1 book on Amazon! 🔮🌃 Under the following link you can read the complete description to see what awaits you exactly 😊:
Ihr sucht weitere Fotografie-Inspirationen? Meine beiden Buchhits "Glaskugel Faszination" und "Langzeitbelichtungen leicht gemacht" sind jetzt als 2-in-1 Buch bei Amazon erhältlich! 🔮🌃 Unter dem folgenden Link könnt ihr die komplette Beschreibung lesen, um zu sehen, was euch genau erwartet 😊:
*: affiliate link
See you soon!/Bis bald!
Stefan

Very cool, I'll try it out.
Thanks a lot! :-)
This is super cool. I had always wondered.
Thank you so much :-)
You're welcome.