I'm not a great photographer, and I'm still learning. But I thought it would be a good thing to share my knowledge with the steem community so that I can learn more and get better.
When you're using a camera and trying to take good photographs it is important to understand what affects the outcome of the photograph you are taking given the set-up that you are using. An essential factor of a great photo is getting the right exposure; underexpose your photograph and you'll get a very dark image, overexpose the photograph and you'll have missing details and what may appear to be a whitewash over your image.
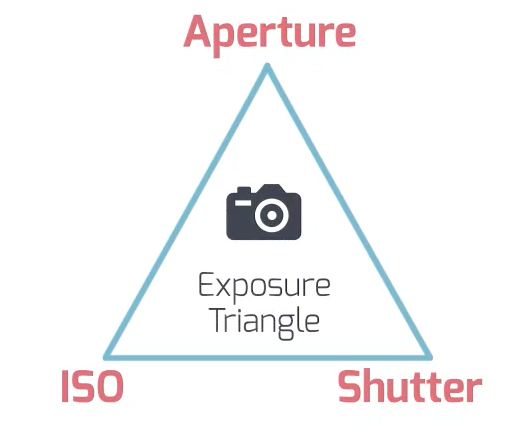
3 Factors that affect your exposure of your image are; Aperture, Shutter Speed & ISO. These 3 factors are called the Exposure Triangle, together they determine how balanced your photos' exposure is.
I'll break explaining the 3 factors into 2 separate parts, this is because understanding all of them at once and learning to adjust them to create the photograph you desire can be a rather complex & confusing task. To begin I'll explain aperture, then finish with a second part shutter speed and ISO. Let's begin -
Aperture is the degree to which your camera lens is open; for those with a little bio background it is like how your pupils dialate to increase it's size in order to let more light into your eye or constricts to decrease its size and reduce the amount of light that enters your eye.
How open/close your aperture is in photography terminology is referred to as your f-stop; here's a infochart for better reference:

Now remember, the bigger your aperture the smaller the f-stop value.
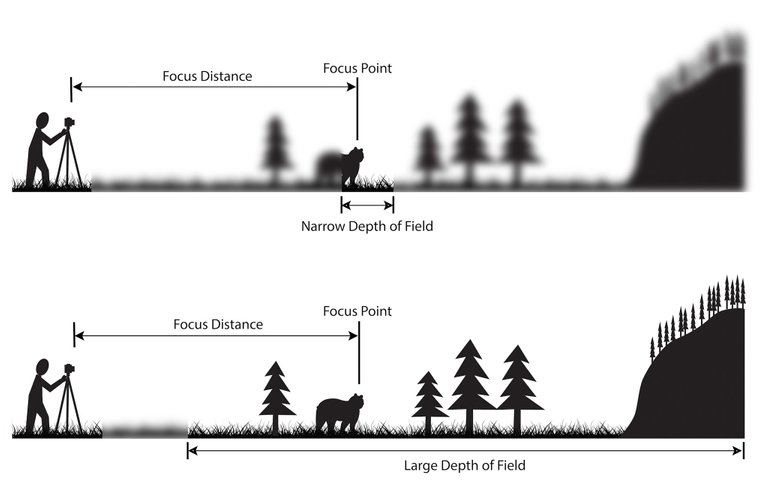
The bigger your aperture, the more light you let into your camera; but your depth of focus becomes shallow.
Depth of focus is another photography term, it describes the range at which your lens is able to focus. In more simpler terms the shortest and longest distance from your lens where the subjects in your image will be in focus. Imagine you're taking a photograph and you want to keep everything in focus, you need to have a small aperture. If you want to focus on a flower, animal or person and want everything before or after the subject to be blur, you need a big aperture. This is a great way to create portraits or take wildlife photos; it creates more emphasis on your subject of focus and creates a wonderful bokeh.
So, in dark light your aperture should be a little bigger and in bright/excess light your aperture can be a little smaller. However there are other ways to manipulate the exposure of your photograph; we'll get to that in the next guide.
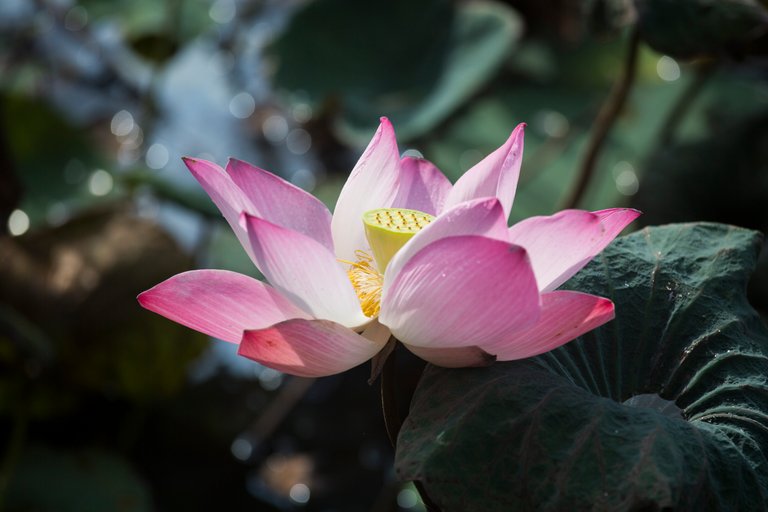
|Fun Fact| Bokeh is actually a japanese word that means blur, haze, however, in the right context can also be used as mental haze, craziness, senility. In photography terms it means the aesthetic blur/ circles of light that occur when using a large aperture due to the subjects that are out of focus in your photograph
An example of bokeh can be seen in the photo of the lotus flower above, you see the smooth blur of the background and the intrusive white circles caused by the reflection of light on the surface of the water? That's bokeh. I wouldn't call that great bokeh, but everyone's opinion differs
Do you manipulate your aperture for other reasons than those I've stated above? What other techniques do you use when you are out with your camera?
Feel free to comment any questions, feedback and or just comment to chat about photography or connect; I'd love to hear from you guys!
Hi @rotibakar I nearly always have my cameras set on aperture priority to manage what you have shown above. I shoot a lot of street so I tend to set up focus using hyperfocal distance (either marked on the lens or by using my telephone app.
Other things I have done are focus stacking, which is now coming into mobile phones, where multiple shots are blended to give front to back sharpness.
I also like to do bokeh panoramas, where I stitch together multiple overlapping shots at wide aperture to simulate a wide angle lens with narrow depth of field. Sometimes known as the Brenizer Method.
Hi @tomcarpenter, thanks for the upvote and commenting; it's great to hear from the masses
not really that many; I'm not that popularI usually have my camera set on manual, but swap between pre-programmed to enable myself to react to certain situations faster.Yes, I do some streetphotography when I'm in the city and I usually have my wideangle set at f14 ish~ with shutter speed at 1/800 or less, and leave my ISO variable depending on the lighting. I've not really gone far with photoediting to the extent of focus stacking; I've tried it a few times but I seem prefer to get my shot right the first time leaving me minimal clean-up work later.
This is my first time hearing of the benizer method, I'll have to look further into that; Thanks for the video link!
@originalworks
The @OriginalWorks bot has determined this post by @rotibakar to be original material and upvoted it!
To call @OriginalWorks, simply reply to any post with @originalworks or !originalworks in your message!
To enter this post into the daily RESTEEM contest, upvote this comment! The user with the most upvotes on their @OriginalWorks comment will win!
For more information, Click Here!
Special thanks to @reggaemuffin for being a supporter! Vote him as a witness to help make Steemit a better place!
@cryptohustlin has voted on behalf of @minnowpond. If you would like to recieve upvotes from minnowponds team on all your posts, simply FOLLOW @minnowpond.
To receive an upvote send 0.25 SBD to @minnowpond with your posts url as the memo To receive an reSteem send 0.75 SBD to @minnowpond with your posts url as the memo To receive an upvote and a reSteem send 1.00SBD to @minnowpond with your posts url as the memoAs a follower of @followforupvotes this post has been randomly selected and upvoted! Enjoy your upvote and have a great day!