Hello Everyone,
Today I'm super excited to share this project that I've been working tirelessly on for the past nine days.
The project was proposed to me by @davidke20, who generously offered 400 Hive to complete this job for him, paid up front on the trust that I would follow through, and deliver with 100% effort to produce a high quality item.
Work ethic is important to me, so I started the job immediately.
Let's discuss what this job entailed, and what exactly it is that I was employed to deliver.
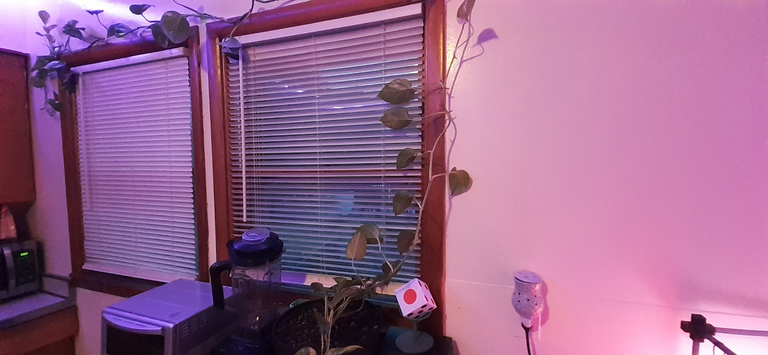
I was asked to produce a palm sized dice to be placed next to one of my windows.
I accepted his offer, because I was confident I could deliver what he wanted.

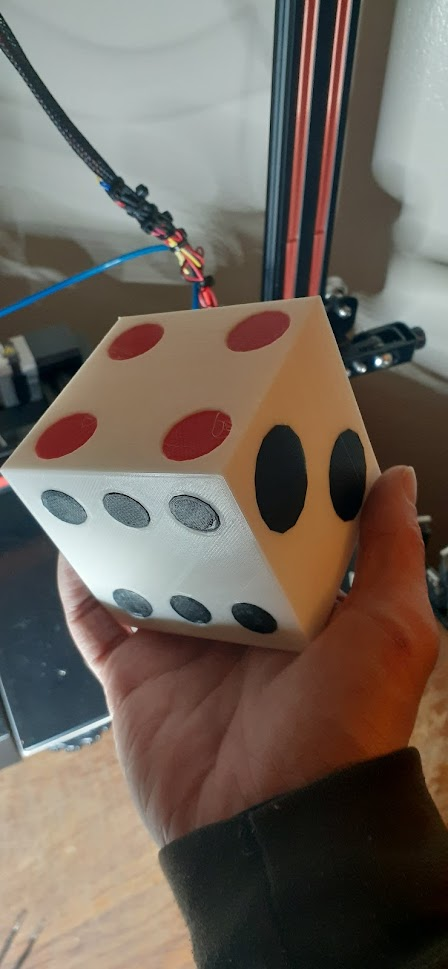
First I will show a photograph of the completed project, and then this post will extensively outline the process.
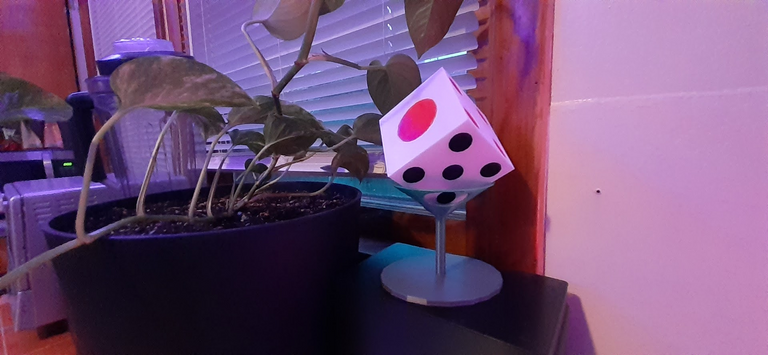
It was decreed by Emperor Hsuan-tsung, (britannica-dotcom information article on the emperor) the 7th of the Tang dynasty to have these red dots in place. In this link below you can read the story of how this came to be with some really cool photos of different dice.
https://averweij.web.cern.ch/averweij/china.htm
@davidke20 mentioned it would be cool to have some kind of wine glass style stand for it too but not a requirement. To me this made sense, because it wouldn't have made much sense to me to have this nice die just sitting on the table, it takes away from the appeal of having it placed near the window right?
I could have easily found someone else's design for a stand, but thought that I could design one myself, and this would make for a one of a kind creation.
The dice would not be so easy to design for a beginner in CAD like myself, and is also a rather standard thing, and so I went on a search to find the appropriate model. It took six hours of searching on thingiverse, but I found it.
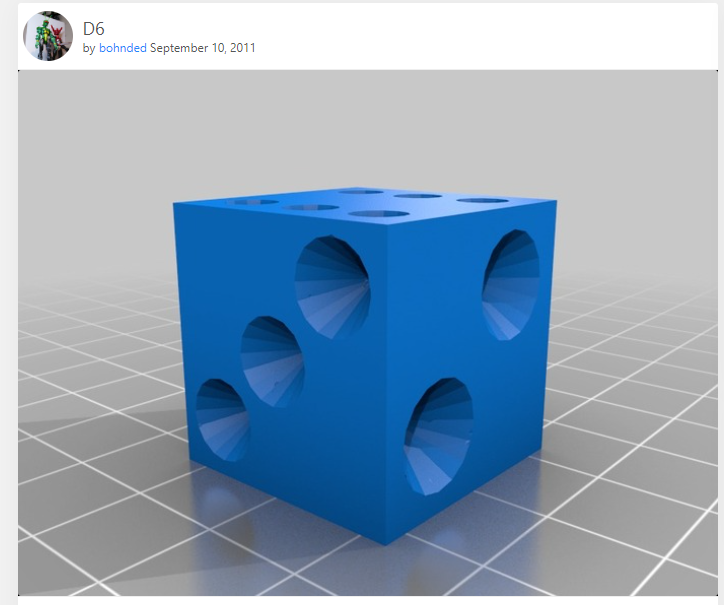
D6
by bohnded September 10, 2011
The dots were not included in the print, and the print is much smaller scaled than what I produced. It became clear that I would need to figure out a way to create black and red dots.
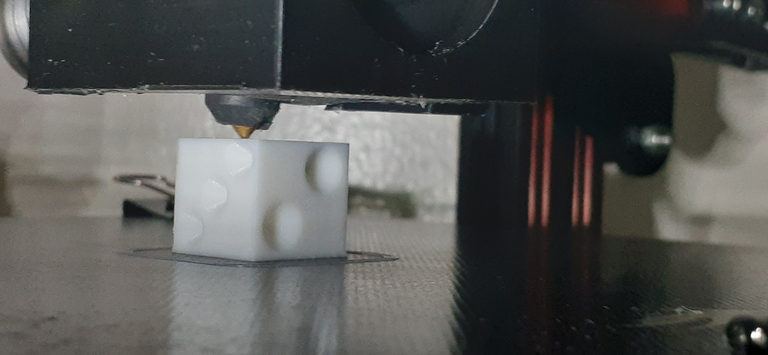
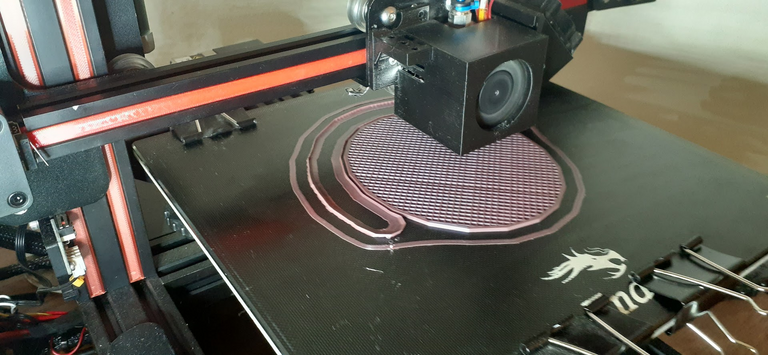
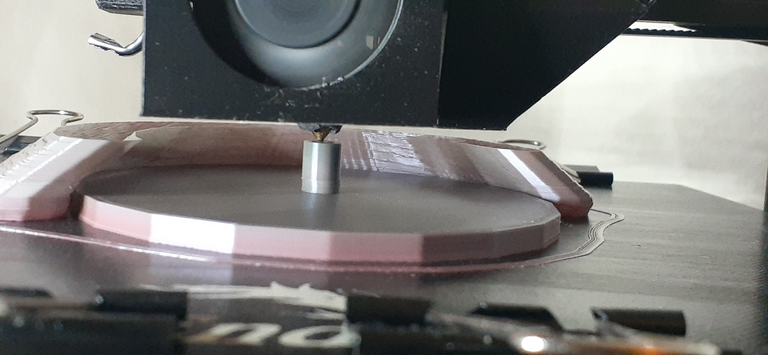
With plans to print in a fine resolution of 0.12 millimeters, I began small test prints.
Above is one the various test prints I produced.
I probably produced 20 test prints, most of which I stopped before completion because the intent was to test for different effects of altering the 3D printing slicer settings, which wouldn't require full prints. It's a meticulous process that most people in 3D printing can relate to. Things like infill, shell thickness, top/bottom layers and more..
The above print was one of the later prints where I was really getting it dialed nicely. We can see it has a rather smooth look to it, this was the intention.
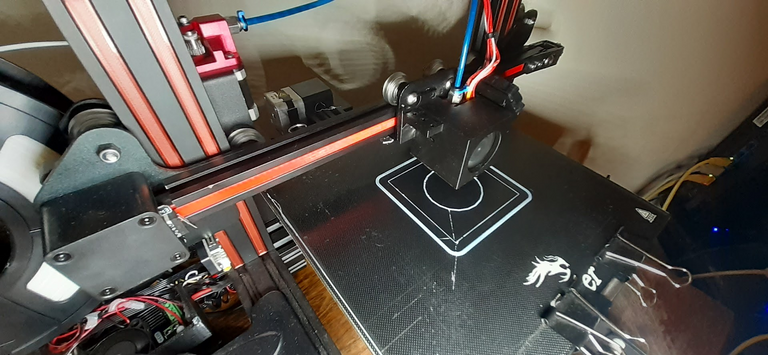
After about 5 days of vigorous testing, I felt confident that I could begin what would be a 30 hour print!


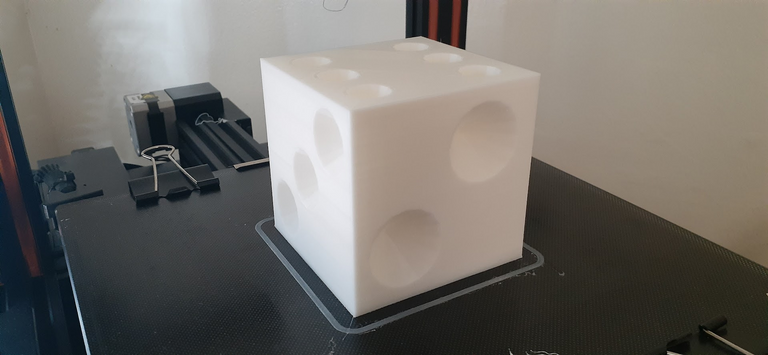
Above we see some different photographs of the build process. When all was said and done, it took a total of 29 hours to print. Slicer estimated 30, it was pretty close.
The end result was the nicest print I have ever produced on the Ender 3 V2.
There is not a single layer shift or blemish of any kind. It is quite perfect in my opinion.
I'm very thankful that this happened this way, because a 29 hour print is a lot of time.. And if it screwed up 20 hours in, I would have needed to troubleshoot the problem and start all over.
Now I had to figure out:
How do I fill the holes?
I was actually considering melting PLA with manual process and dumping it into the holes.
I'm not a physics major, but dumping molten PLA into PLA.... could have caused some serious problems!
I thought long and deeply on this..
Then realized, the holes are quite large...
So why not just design some simple cone shapes that I can just glue in? :D
This what the method I decided on.
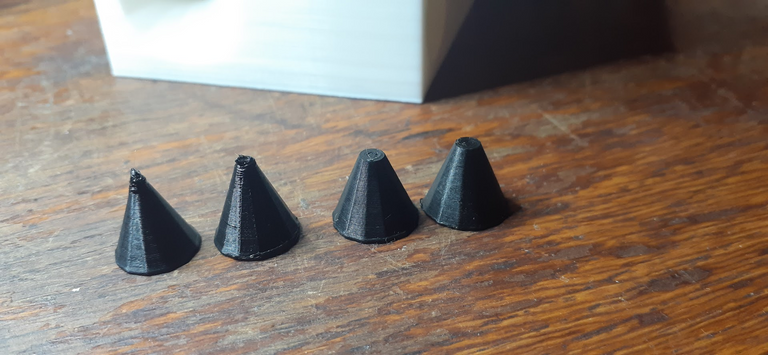
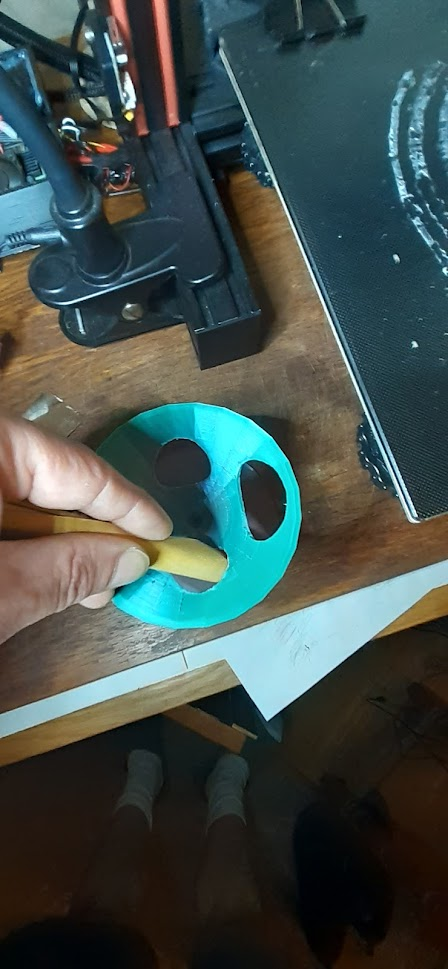
I decided to take off the tips in the design for two reasons:
It's difficult to make perfect tips with PLA, the nozzle will stay in the same area and not allow the previous layers to harden, causing this blobby look.
A little pocket between the base of the hole, and the cone would give some room for a little extra glue. (and reduce seeping out of the top.)
I started working on the holes by using a micrometer to measure. It wasn't a perfect process that involved a little guesswork here and there, and even a little sanding in some areas of the cone. The ultimate goal was to get the cones nice and flush with the surface of the die.
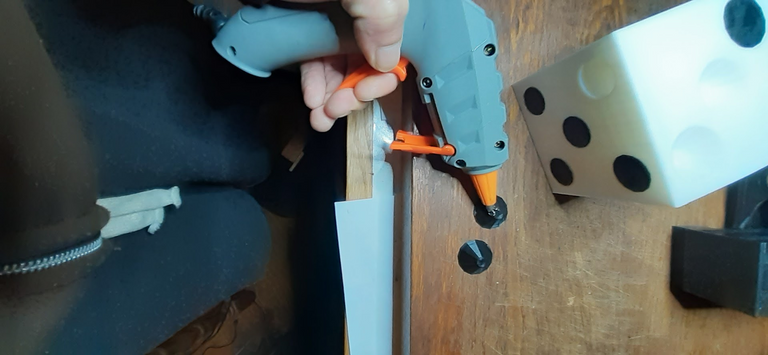
I worked on one side at a time, because each face of the dice has different size holes.
Once I had all the cones done, I would glue them in and move on to the next side.
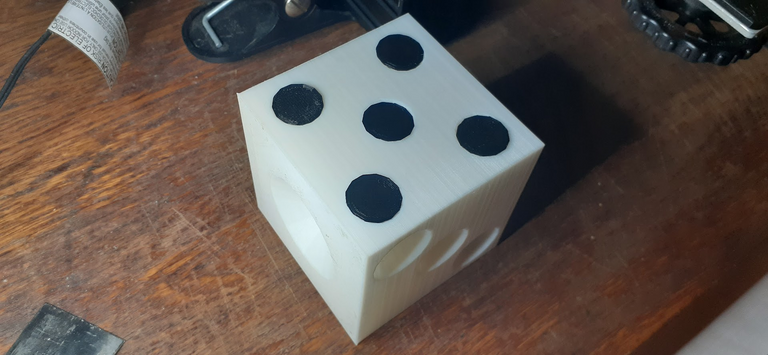
At this point it was starting to come together and I felt my excitement rising!
When I took this photo, the last red dot (the large one) was printing, and all of the others were glued in place. You can even see a wee bit of glue stringly in the photo on the red dot :D (no biggy that came off during the final clean up process.)
After the main die was done, I needed to begin designing a holder.
I was a little nervous about this...
Seemed like a big task for me, but also felt I could make it happen with Tinkercad.com (Entry level browser based CAD site)
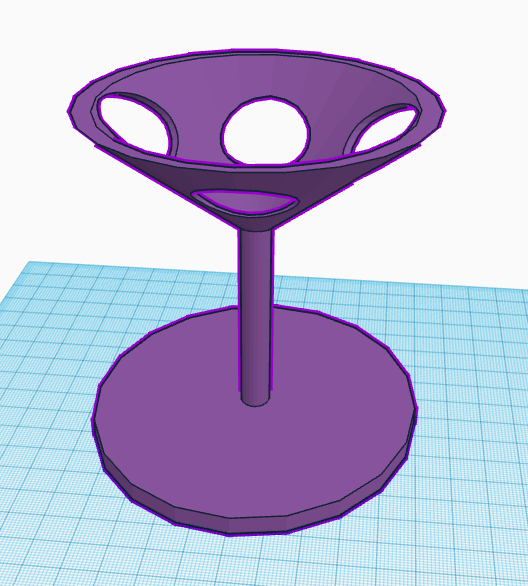
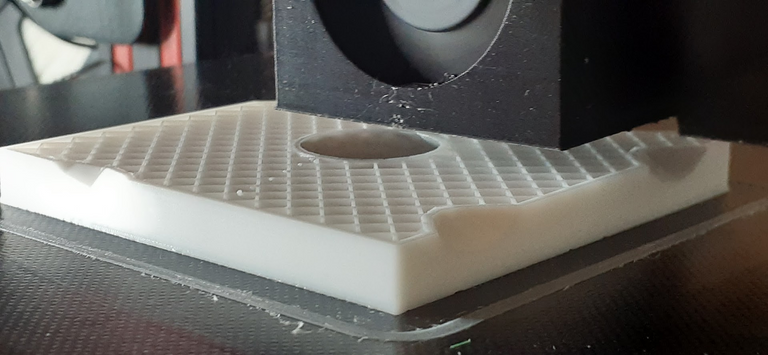
This is what I came up with.
The holes serve two purposes:
- Aesthetics ---> Allow more visibility on the dice.
- Material cost.
The material cost management wasn't the major consideration in this, since I was paid generously for the job, I just wanted to make it look as nice as I could, so the primary consideration was aesthetics.
I ran some tests with this as well but didn't get any photographs of it. Basically I just printed the top to make sure the die would fit just right, and see if any modifications needed to be done. The only thing I needed to modify was the thickness of the top, because it was a bit too thin. After the modification it turned out just right.
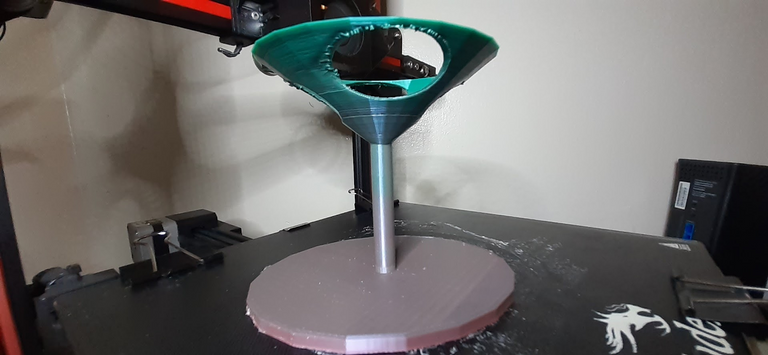
At this point (last night) I needed to go to bed, so I snapped some photos at this stage.
A minor layer deviation can be seen at the base. I was not very happy about this but decided to let it complete anyway because it's a relatively minor layer deviation that I knew would be not very visible with the final print. Someone walking past it is not likely to notice unless they are finely inspecting it.
I also figured "This will let me know if there are any other problem areas upon waking up."
This was one of those prints I was a little worried about "sleeping on." because of the complexity, but I just post up on the couch a few feet away, and hope that if any major problem occurs, that it will likely wake me up :D
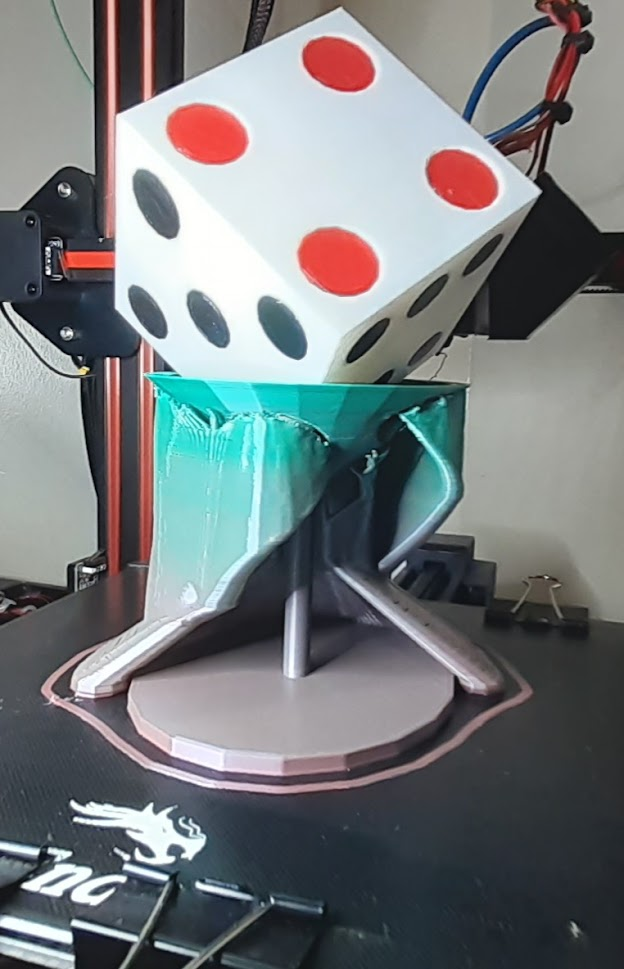
When I woke up, the print was done and pretty sharp looking!
I placed the die in there just to see what it would look like :D
The stuff around it is support material.
This is necessary for some prints, because we're working with a melted plastic like substance that will encounter overhang areas and will droop if not supported. I used this support structure called "tree" which I love because it incorporates a "natural" building process reminiscent of nature. It's like nature meets machine :D
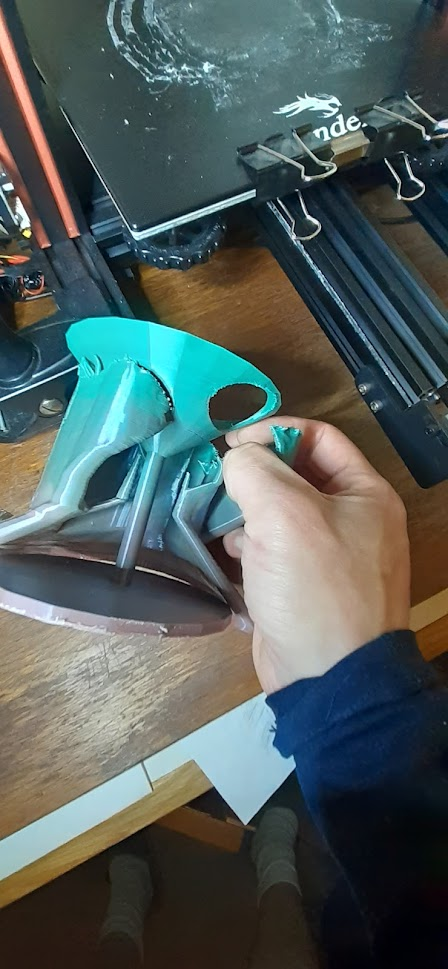
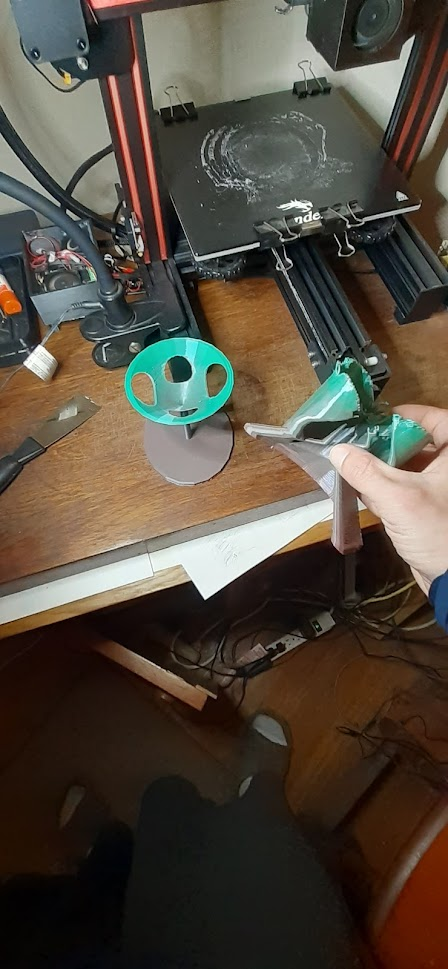
The supports came off super easy. It looks like a lot of filament but it's not, it is hollow and extruded more thinly to minimize waste.
There were a couple areas in this print that could have been better. Some minor layer deviations but overall it still looks very nice. The intense white light really brings out the minor deviations, but this will not be under intense light and is hardly noticeable.
It was printed at 0.2 mm layer height and took 8 hours, bringing the total print time of the completed product to 37 hours for the main prints. (Not including all the dice test prints.)
Also, we can see the left over support material, and in these cases sanding is appropriate.
So I rolled up a little piece of sandpaper and started cleaning it up.
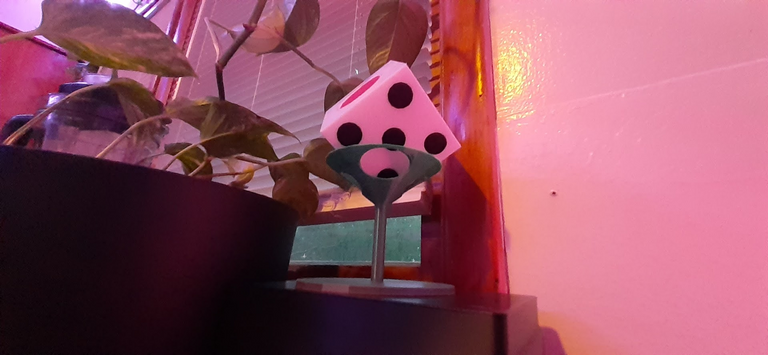
We can see here how those minor deviations are not even noticeable, and anyone who walks in my kitchen is going to notice that giant dice over the stand holding it, but I still feel the stand came out very nice, and love the color change filament.
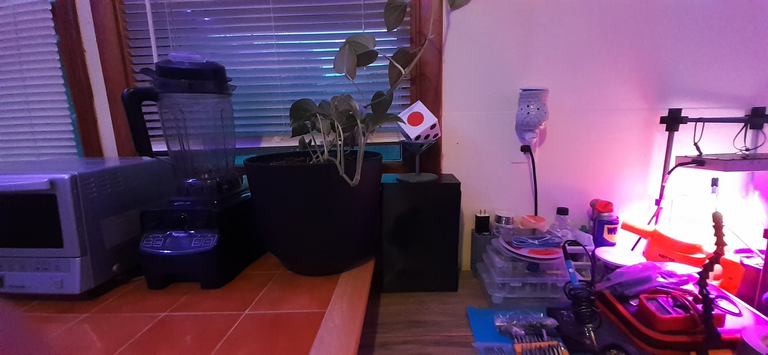
For now I have it propped up on some 3D stacking containers, I'm still brainstorming a more proper way to place it, but I still think it looks really good even sitting on top of those black containers.
I'll go ahead and wrap this post up now with a few more photos from different viewing angles.
What do you think @davidke20? Do you like the end result?
Thank you for being my first customer to employ me in creating something custom! You are now the owner of a truly one of a kind palm size dice which now sits next to my window, per your request! :)
What does the community think of this of this project and how it came to be?
I would love to hear everyone's thoughts on it!
Thank you for stopping by, have a great day! ~~@print3dpro
End result came out better than my expectation. Particularly like the idea of even the engrave were 3D printed, so it's like a full 99% 3D printed project. 1% is the hot glue, that bit doesn't count. But I guess there's no other way to do it.
The holder turned up better than what I would imagined. I thought of something like a barbeque stick, pierce a small hole at the apex of the dice and hang it there like BBQ chicken wing, but a wine glass lookalike is brilliant. Best of all, the color changing filament make it looks 1001% badass.
If there must have some less than perfect thing to comment, I don't really like the idea of TWO DOT, the dot size become bigger. But I can live with that, not a problem. Next, may be we should NFT it? Dice By The Window, 1 and only.
Thank you so much @davidke20!
It makes my day to know that you like the end result! This is a compliment of the highest order to know it came out better than your expectations! :)
I thought you would like the color change filament, that's the premo stuff and what I meant when I told you privately I had a little surprise in the mix. 😄
Actually it's possible to make dual color prints with one machine, but requires a special set up with multiple extruders. It's a bit more advanced than my current level and machinery, but maybe one day I will be able to create prints like that. For now we just have to adapt and overcome with a little glue here and there :)
Of course, I like constructive criticism bro, I always want to know what I can do better. In this case there weren't any variations of this dice style that I was able to find, but I can create more of these in the future too, and perhaps modify it or create my own variation even. I love this thing so much that I might even create some variations with color change filaments for a die and can work on making smaller dots by putting this in a CAD program for modification :D
YES!
Thanks again for doing this and trusting that I would deliver. I'm very happy to know you are satisfied with the results brother. 😀
Congratulations on your first paid 3D printing gig of your career!!!!
And what a phenomenal way to roll the dice as well as show off that dice that you created!
Thank you very much I really appreciate all of your hard work and all of the effort that you put into creating designing assembling and making a masterpiece.
Phenomenal job absolutely wow I am highly impressed. One of these days when I finally get into a place I am going to start doing 3D printing myself.
Maybe when I finally get to that point I can have amazing individuals like you give me some guidance on how to get there.
Thank you so much for this very nice compliment!
I guess it really was a bit like "rolling the dice" with taking on a pre-paid project like this for my first one. 😅
I hope you are able to get a 3D printer sooner rather than later, there is no question you have the motivation and intelligence to become good at it in no time. It takes some time and frustrations to become proficient with, but the great thing about it is once you get over these humps, it's easy to spit nice prints out consistently with little effort.
I would be more than happy to assist you with learning the trade!
Right now I'm printing some salt and pepper shakers :D and also 3D print stuff for my mini in home ganja farm :D
Thank you for the support and re-blog, having a look at your crazy little pooch right now :D
You should check out @cowboyblazerfan and ask him for some ganja growing tips. He is absolutely phenomenal.
And on top of it having the ability to custom 3D print whatever connectors that I would need? Then I could also just print my tubing with whatever flare or built-in connections already set up so I don't have to worry about leaks...
Yep I am just going to keep working very hard here and here in a little bit I'm going to start taking a little bit of crypto out to pay for hopefully getting amazing tools like a 3D printer.
Really excited and as well not only can you do a 3D printer but you can also do a CNC machine as well as a laser engraver with the same platform.
Which actually is an amazing benefit having the ability to go from subtractive manufacturing to additive manufacturing.
I can't wait to see the rise of more products!!!!
You have some great plans man!
Yeah I have seen his account before but I don't think we've engaged much. I'll be sure to have a look! There's a few people in the canna community that I talk with regularly and they have helped me out a lot with learning.
I'm planning on printing a whole bunch of stuff for cannabis gardening actually, in fact, if you check out this post on my main account @futuremind, you'll see this awesome dude @evileddy shared some resources for me.
It's super exciting, I feel like I need 10 printers so I can just have a mass of things printing :D waiting for my salt shakers to finish right now, and even with a lower resolution @ 0.2 mm's, it's like 8 hours of printing for 2 shakers. I might make a salt and pep shaker post today if I get to it. Also need to perform transplants and other things. Busy busy :D
Hopefully I'll be able to get some of these things out to buddies on the blockchain here. Things like trainer clips and more, I can put like 5-10 of them on the bed plate and print them all at once. :)
Have a nice day my friend.
Thanks for the shout out and thanks for posting great projects!
I am soon to get into 3D printing and this information is fantastic!
Following you and maybe we can smoke some herbs sometime!
Same and HECK YEAH!
Thank you as well for your encouragement and support! I can't wait to see you get into 3D printing, I just know you're going to excel at it :)
Let alone I could also print training knives for my new school.
We are also looking at manufacturing our own LED combatives saber hilts. Some small parts we will just buy. However the rest of it we can manufacture and especially with the laser engraving we can even engrave and etch more detail into the CNC designs.
Definitely really excited to get this going that's for sure.
No tips asked so far, but I’m always down to answer any questions about growing.
Yeah man this guy can print a hydro system!!!
And yeah good soil and proper climate is key.
This is a very interesting process @print3dpro , I'm wondering; with so many "Test Prints" can you melt or dissolve that material for reuse? I sure hope so.
In the first image, at a glance, I would have sworn the wine glass was clear, but it all looks pretty cool!
Kudos!
↑Upvoted↑ and ←Reblogged→
Thank you for the comment and support my friend!
The answer to your question is yes, actually it can be reused. However the process to re-manufacture it back into usable filament is not an easy one and requires some special machinery, because it has to maintain a perfect diameter throughout. So even a rudimentary process will not work very well. I saw some videos about it on Youtube a while back, because I was wondering the same thing. After seeing what it takes, I don't think I'll be re-manufacturing it any time soon.
There is almost no way to avoid this process, it's pretty standard for anyone who 3D prints because of the meticulous nature of 3D printing. There are many variables to consider which vary from print to print.
The positive aspect, is that PLA (Polylactic acid) is a biodegradable substance that is not harmful for the planet! So even throwing it in the garbage is not going to hurt mother nature, but it's not generally considered acceptable to do this because it takes a while to breakdown. Some recycling facilities will take the compound. It's a judgement call really.. With thin extrusions that are a single layer of 0.2 millimeter thickness (like a failed print in the beginning) I wouldn't get hung up on throwing it in the trash, because thin extrusions will break down much faster.
What I have been doing is just collecting all of my wasted filament in a big box, with hopes that one day I can figure out a way to reuse or recycle it properly. (or even ship it to a manufacturer who can if perhaps they want to send me a little filament in return and I'll take care of the shipping.. all kind of options to explore.)
Here's the Wikipedia on PLA if you're interested in reading more about this biodegradable compound:
https://en.wikipedia.org/wiki/Polylactic_acid
Thanks! It might be due to the high glossy shine of this stuff lol. They do make clear semi transparent filaments too that are a little tricky to work with but really cool nonetheless.
Thanks again for checking out my 3D printing content!
Great work! Would be cool if it had some LED's or push a button and it displays a 1d6 roll :P
I think that's beyond my current level. I'm only a beginner pro :D
I do have this Elegoo kit with an Arduino board and a bunch of LED's collecting dust right beside this though. I bet I have everything possible to produce that.
I want to get into some deeper techy things with this. Build some server towers, Pi cases, speaker enclosures lit up with LED's, all kinds of stuff. There just isn't enough hours in the day :D Perhaps somewhere in the future this will happen.
Thank you for the kind words and support my friend :)
You did a good job, it was so interesting reading the process involved.
Nice.
Thank you so much for the compliment! :)
Yay! 🤗
Your content has been boosted with Ecency Points, by @davidke20.
Use Ecency daily to boost your growth on platform!
Support Ecency
Vote for Proposal
Delegate HP and earn more
Thank you @ecency, and thank you @davidke20 for the support boost!
Congratulations @print3dpro! You have completed the following achievement on the Hive blockchain and have been rewarded with new badge(s) :
Your next target is to reach 4750 upvotes.
You can view your badges on your board and compare yourself to others in the Ranking
If you no longer want to receive notifications, reply to this comment with the word
STOPCheck out the last post from @hivebuzz:
Support the HiveBuzz project. Vote for our proposal!