I'd like to do a brief introduction before I dive right into this post. I say brief, but it's kinda late, and I've been drinking and smoking 😄 all day, so I may get carried away. Hopefully, if I wander too far from rocket stoves and clay, I'll remember to change the title. I don't like to waste anyone's time, so if you don't care about all the extra words, just skip to the paragraphs above the pictures, I'll keep all the meat and bones there.
You may have noticed that I've moved the rocket stove post from DIYHub to Build-It. I'm honestly not sure exactly which community it belongs in more, so it may bounce around a bit yet. For now I'm going to sort building posts into Build-It, and repairs and tips into DIYHub. I'll happily entertain any suggestions about what content would be better where.
If you're unfamiliar with rocket stoves, I would say that a rocket stove is just a wood burning stove with an insulated chimney. Put very simply, the insulated chimney gets hot enough to also burn the smoke, resulting in much more heat produced from the same amount of fuel. You can build small rocket stoves for cooking that will boil a canning pot full of water in just a few minutes with a handful of sticks, and you can build them with almost anything.
What I'm trying to heat my home with is a bit more complex than just a water boiler. It has a 'bell' over the chimney, to help further burn the compounds in the smoke and to contain the heat in an area where it can be directed indoors. The exhaust exits from the bottom of the bell, and is diverted along the foundation of my home, to draw as much heat from it as possible. Even after running the stove for days, I can hold my hand right over the end where the exhaust exits without getting burned. I haven't put a thermometer on it yet, but it's definitely cooler than my dryer exhaust. The stove only smokes for the first couple minutes, and that smoke is cold and will usually sink rather than rise. Once the chimney gets up to around 800°F, the exhaust is all steam.
By extracting so much heat from the burn process, the amount of wood used to keep a home warm is drastically reduced. Based on the amount of wood I burned in the trial stove last year, when I'm done with this install I should be able to heat my whole house, which is a basement and two full floors totaling about 3500 square feet, with about one full cord of wood a year. At the level I ran it last year, my whole house won't necessarily be comfortably warm, but I'm hoping to run it a bit hotter once I finally get things going this year.
Funny how I always focus once I get started on a project. Well, I already wrecked my $10 buzz, might as well get on with it!
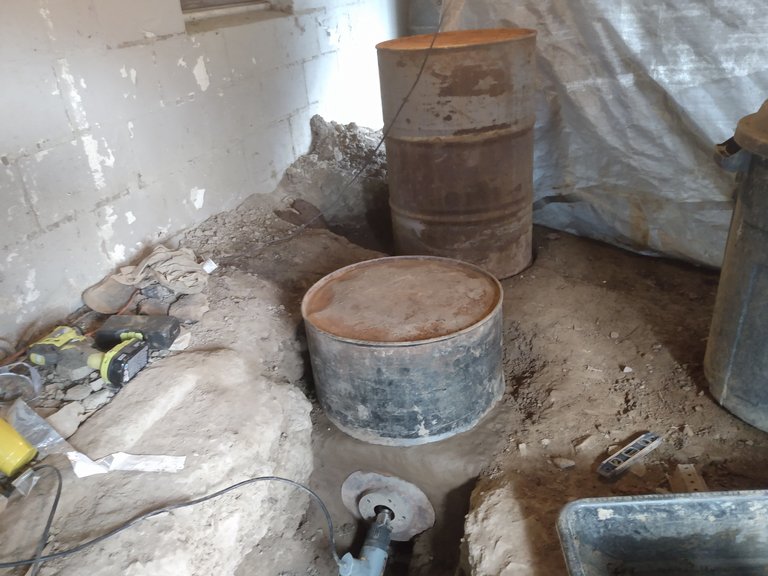
The picture below is what the stove part of the installation looks like, more or less completed. The large barrel in the back is the bell that covers the insulated chimney, and radiates most of the heat. When I'm done, this will be enclosed around that basement window, so all the heat will go into the house. The small barrel in the front is the 'stove' part that I fill with wood. The fire burns on the bottom, where you see the heat gun poking into the hole on the brake rotor. The heat rising through the insulated chimney (called a 'riser' on a rocket stove) creates a strong draw which pulls the fire in from the burn chamber.
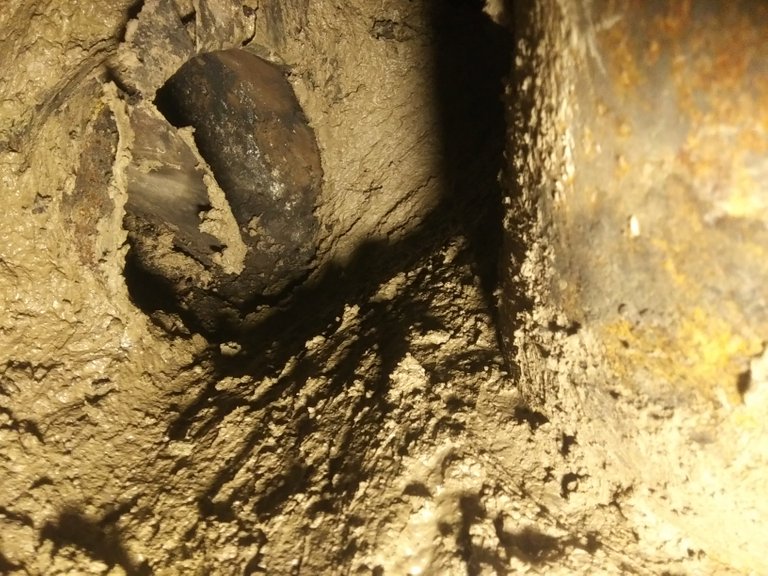
Long before we get to that (half) finished product seen above, we have a J shaped metal tube buried in the ground. If you're wondering how that got there, see part 2. I had to excavate quite a bit more than I did for the trial build, because this time I'm putting in a more substantial base, that will hopefully insulate a little better that just the dirt did. The partial barrel filled with dirt is the same one used as the top of the stove in the picture above. I say dirt, but as I mentioned in the previous posts, this dirt is basically all clay.
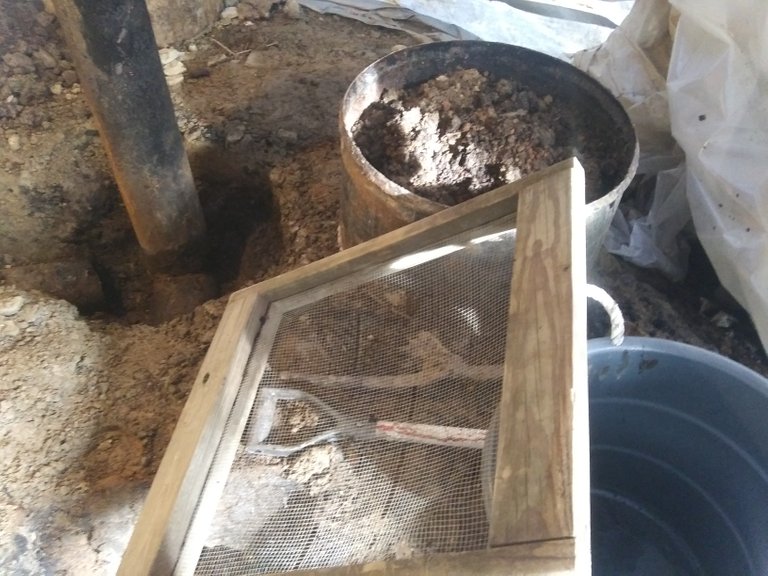
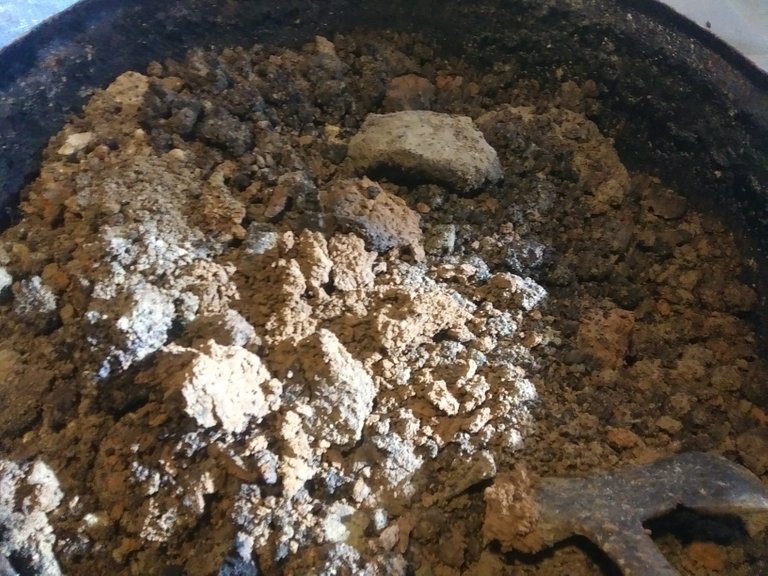
The trial run gave me a lot of material that had already been fired (called 'grog' when added to a clay mix), which is something that I've been lacking from my earlier builds. The color didn't show well in these pictures, but the fired stuff has that classic brick red/orange color people are used to seeing with fired terra cotta. It comes out in large brick like chunks, which I smash up with the back of the old hatchet you see in the lower right corner of the picture below. It then goes through the screen in the picture above, which is made with 1/4" hardware cloth and scrap lumber.
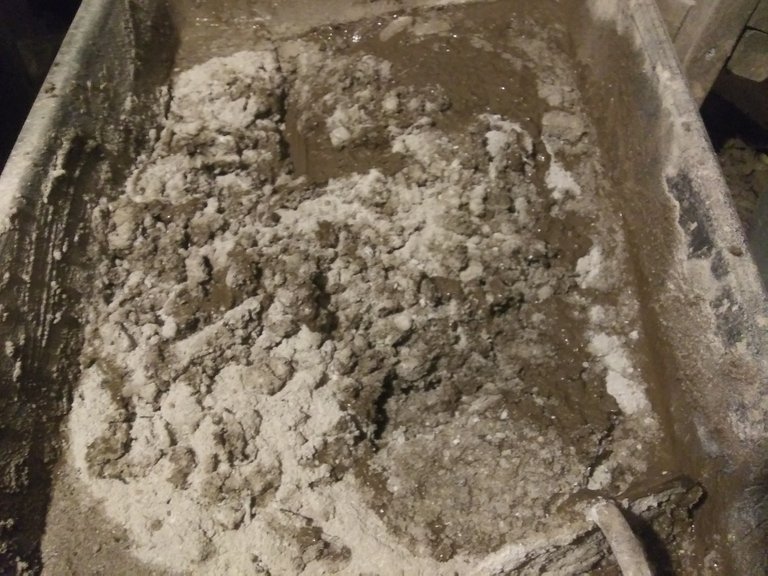
Once I have a tub just about full with screened clay, I add two handfuls of wood ashes and thoroughly mix the dry ingredients with the end of an old hoe. I then add a little water and mix it just as I would concrete or mortar, making sure to scrape the bottom of the tub and get everything mixed as uniformly as possible.
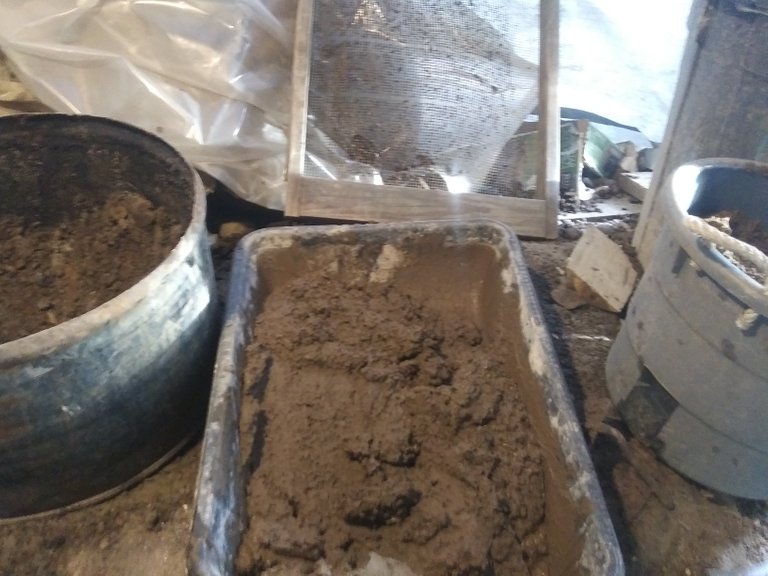
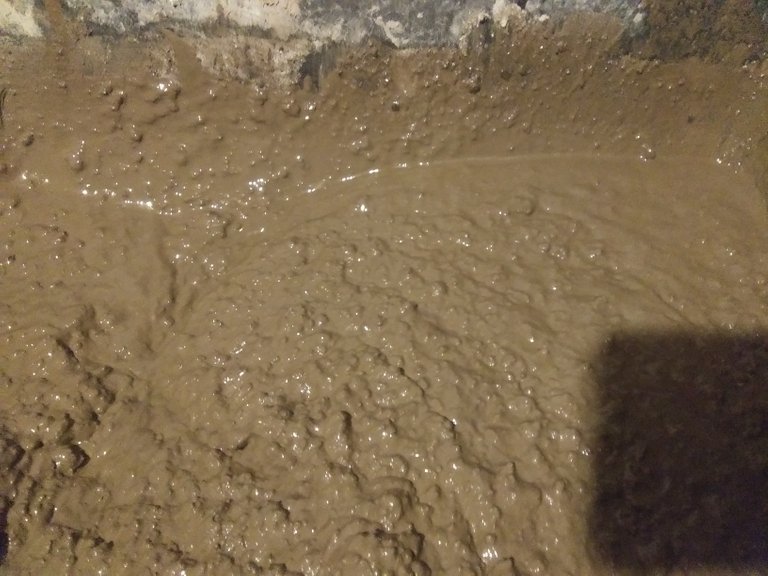
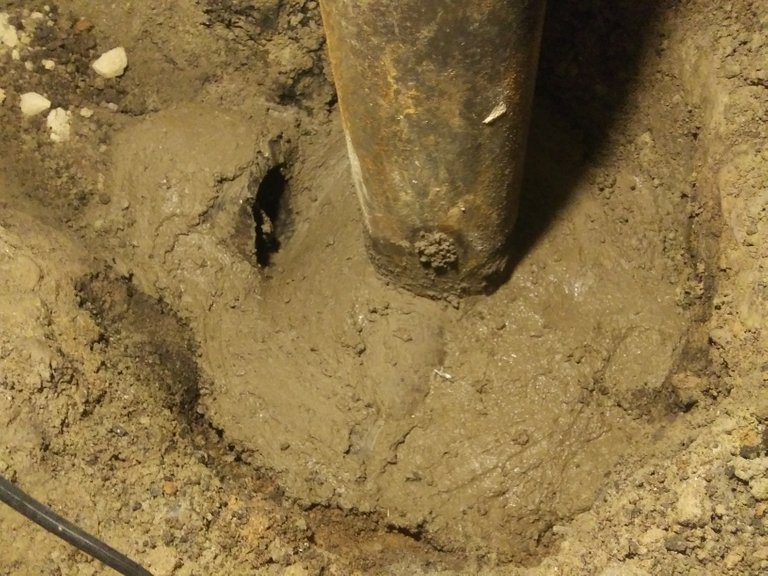
For the base, I'm experimenting with a very wet, more 'pourable' mix than I usually use. I want to find a mix that I can pour into cardboard forms which will withstand high temperatures and a reasonable amount of impact once it has set and been fired. I won't be using a form for this, so it also has to hold it's shape well enough to be worked by hand. The picure below seemed to represent my sweet spot, where just a bit of water would gather on the surface while mixing.
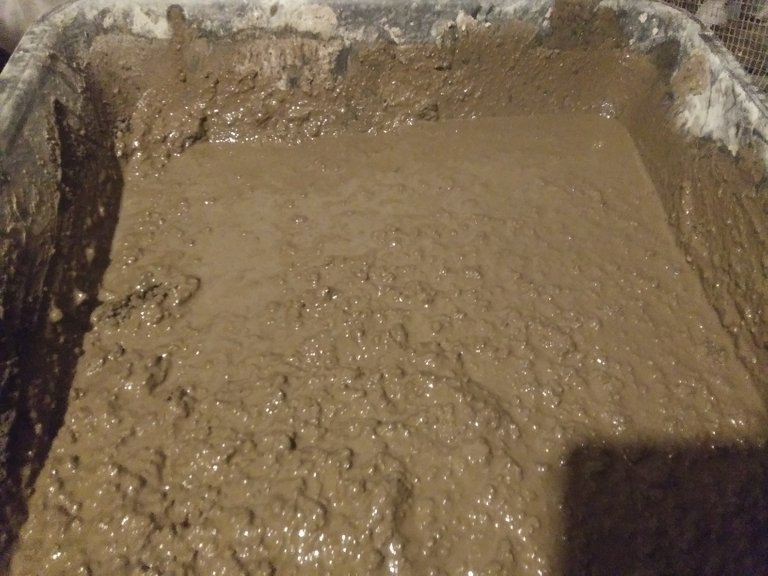
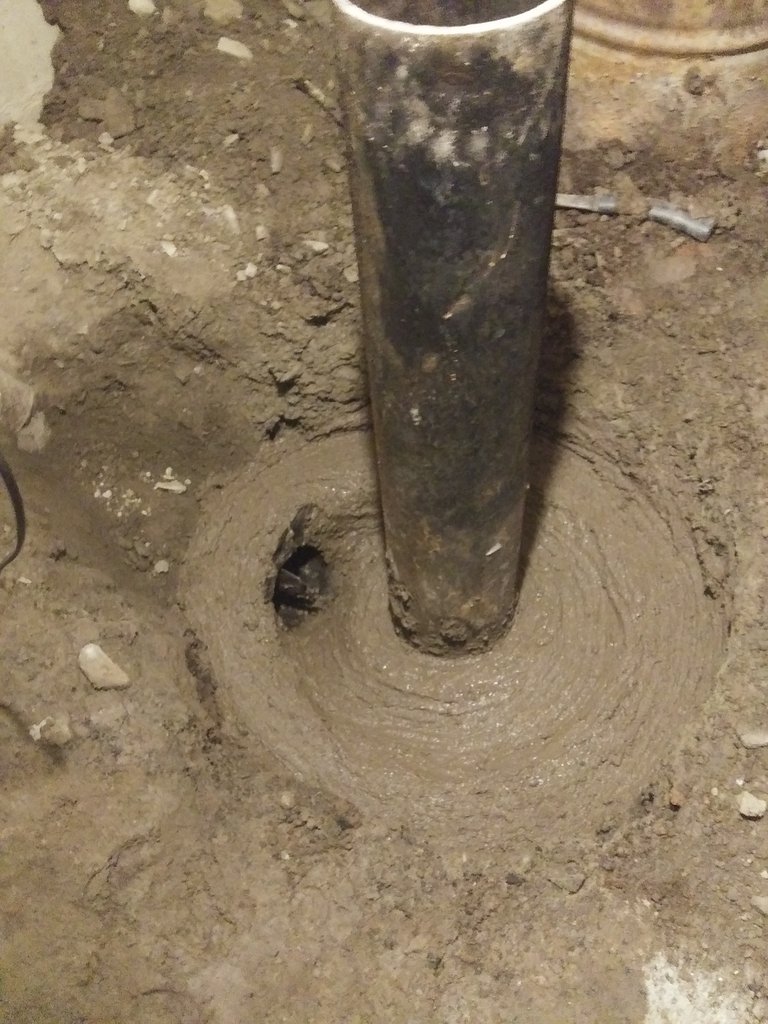
The picture below shows a mix with a little bit too much water. This mix may have worked with a mold, and I may try this in the future for making my own firebrick.
Once I have the mix just right, I add another couple handfuls of wood ashes. The wood ashes act like portland cement and help bond things together. It is also supposed to help make the clay mix a better insulator. When mixing in these last ashes, it actually begins to smell like cement. The wood ash doesn't make this mix waterproof, although it is my understanding that if you add enough ash it will. It does make things quite a bit more erosion resistant than the clay alone, and that will work good enough for my purposes here.
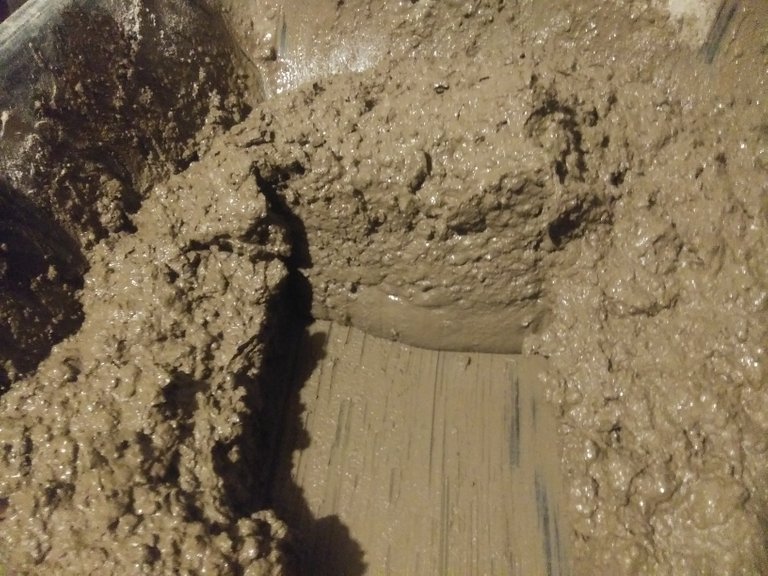
I'm ashamed to admit that I don't remember how to properly measure slump in a cement mix, so I can't tell you what slump this should be used at. I can tell you that it should be at least stiff enough to hold a vertical edge when pushed with the hoe.
One of the reasons I wanted to try a wetter mix for the base was because wetter mixes tend to stick better, and I wanted a good bond around both the burn chamber pipe and the exhaust vent. To get it good and stuck, I simply grabbed handfuls of the mud and threw it into place. If you ever vandalized anything with wads of wet paper towel as a teenager, the technique is basically the same. The exhaust is old 6" galvanized heating duct pipe taken from the old system in the house. I used this 'flue' section here for the extra support; the weight of the clay on top really flattened this part out on the trial build.
Once the mud is thrown into place, you work it just like concrete. I didn't really have the tools to fit this space, so I just worked it all by hand. When it's this wet, you want to touch it as little as possible to get it into the shape you want.
This mix was too wet to build up very high, so I tried to just get a good base at the bottom of the riser and make sure all the metal parts were covered. This will take a few days at least to set, so I'll wait a while before trying to smooth this out. If I try to work it too much now, it will just tend more and more to flatten. Working clay like this, the end product is not as dense as when you just 'hammer' it into shape, and I'm hoping this will insulate a little better than a normal clay body would.
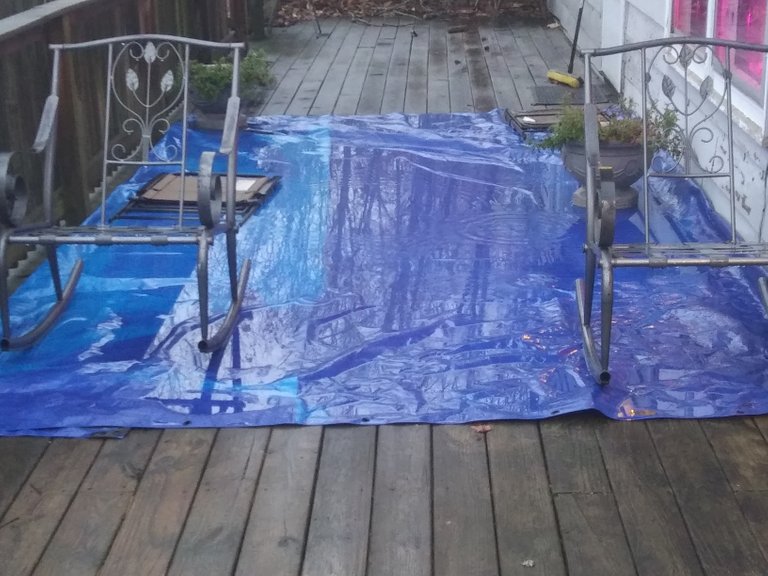
Of course, we had to get a bunch of rain before any of that work had a chance to set. Fortunately, I had a nice big tarp that I could spread out on the deck above. This whole deck will also get a much needed rebuild this year, and the rebuild will be a much better roof for what will be my new furnace room below.
That seems to be a good place to stop for now. Stay tuned for the next installment, which will have more details about building the stove and info about working with clay in a more classic sense. I hope you've enjoyed the read, and even more I hope you can't wait to build your own! If you have any questions, feel free to ask in the comments. Thanks for stopping by, hope to see you again soon!
I speak your language so don't trip about wandering off too far, I'm a seasoned and well practiced wanderer keeper upper wither.
My man @galenkp pointed out this article to me. This is the second rocket stove article I've come across recently.
My wife and I are currently parked in Tennessee until this lockdown thing lifts. I'm telling you this cuz there's snow on the ground and I shit you not, these people still have their air conditioners running—fact!
I've had the heater on since September and I'd rather feel the warmth of that stove.
I see you joined the platform at the beginning of the year, glad you made! Welcome to Hive @paradoxtma—don't be a stranger.
I think the other rocket stove article you came across was also mine, you left a comment on it. If it wasn't mine, I would love a link to it, I'm always looking to learn more before I build more!
Sorry about your lockdown, although there are definitely worse places to be stuck than Tennesee! I understand that need for heat, in the winter time 50°F is too cold for me.
I surely won't be a stranger around here, at least not until late April or so when my work season starts back up. I have about 30 folders full of pictures just waiting to be posted about, and many projects just waiting to get turned into folders full of pictures.
Don't be a stranger yourself... I think we share a similar sense of humor, and your comments are some of my favorite content on this platform!
Well then shit! We've crossed paths.
Yeah it's kinda a long story. Tennessee, here we are. I'm from Ca so anything under 70 is freezing. But yeah, we split in Dec 2017 and were in a 30 month road trip. Needless to say.... this happened.
One thing led to another, we were in England in February this year and they wouldn't renew my passport. US citizens weren't welcome anywhere worldwide. We had to make a choice.
So we said "well, Tennessee ain't a bad place to wait this out I guess." Landed in Florida August 1 and here we are. Got all gung Ho about purchasing property here and then called time out.
:time out!:
Conclusion—it's a lot more fun and a lot-lot-lot more affordable to travelive.
Now if they'd just open these F'ing gates
Ahhh, I used to have a more wandering lifestyle, until I bought this place. I like having some roots here (I always wanted a supervillain hideout) but I miss being harassed by police in different uniforms 🤣
Someday, when I have this place all sorted out, I hope to rent it out to some lucky soul and get into something like van life. Then I can inconspicuously set up a series of bunkers across the country 😇
If Tennessee gets too boring, give a shout. I know a few places in NY one could hole up for a while, if you can stand the weather and the politics!
We have a multitude of familiar language.
!ENGAGE 25
Thanks a lot for stopping back by here. Had you not, I wouldn't have realized I didn't show this content some love.
Hashtag dickmove
Happy New Year's Eve all eyes seeing this! It's almost over...
🤣
ENGAGEtokens.What an awesome post dude! I love it. This looks like so much fun to make. I hope to get to tinkering with things like this but damn this sounds like a really great and energy efficient way to heat a home. The cord of wood, does that last for temperatures that get into the low 20’s, teens and single digits? Would be great to have this in my back pocket if we buy a house in Vermont or Maine.
My experience with the trial build was during nights in the low to upper 20's, daytime temps in the mid 30's. Once it ran for a few days, most of the south wall of my basement was heated up to about 70, and at that point it stayed pretty cozy inside no matter how cold it got outside.
I'm hoping the new build will work even better (the old one had a significant blockage in the exhaust) and I'll post about it as I learn more.
Nice no worries man, love the content! You say you'll be around here until about April I think? Do you do a lot of traveling after that for work?
Sorry, somehow I previously missed this reply to the reply.
I'll be engaged online a lot until April when my work season usually begins. Because I only work 7-9 months of the year, I put in a LOT of hours when I am working, which drastically reduces the amount of online time I have available. I will still try to post about once a week then, but it wouldn't be unusual for me to 'disappear' for a month or so. I don't travel for work in the sense that there are hotel stays, but the job sites can be up to 3 hours driving away from our shop. You throw a 10 hour work day on top of that, and it doesn't leave time for much else.
So the heat is transferred into the house but what stops the smoke from entering, or is any additional smoke burned up in the process? Also, I'm in Australia so don't understand how cold your winters get but my guess is very cold. So, how much fuel is going to be required in a typical year of heating the house? A ton or more?
A cord of wood is 4 x 4 x 8 feet. Roughly half a cord to a level full standard pickup. Weight varies by species but our western soft wood (tamarack and cedar) weigh about 3500 lbs per cord.
I would trust these numbers much more than my guesses!
Ah ok, thanks Tom; We don't use the word cord here much, I've heard of it of course, but it's not commonly used.
Damn that answered my guess lol nice!
No smoke escapes around the larger 'heat exchange' barrel. A little does still escape from the lid of the 'stove' part, but that will be separate from the heat exchange system.
I'm not sure what my fuel needs will be by weight, but I'm expecting to be able to heat the house for a year on about one full cord of wood, which is about 4 standard pickup truck loads. My rough guess at the weight of that, for seasoned ash, is probably a little shy of two tons.
Ah ok, I'm not sure how much that would cost but it sounds like it could be a cost effective way of heating the house considering the cost of energy on the market these days.
My hope is that I'll be able to keep it filled with scraps from my lumber processing. I have wood to burn for YEARS!
That will help. Any way to recycle waste product is a good thing, and if you don't have to buy wood because of it then even better!
Congratulations, your post has been selected to be included in my weekly Sustainability Curation Digest for the Minnow Support Project.
Thanks for the support!
@galenkp sent me here too. I'm a big fan of the rocket stove concept, but I've never been around a set up near as big as yours. The two I've been around were essentially room heaters (cabin situations).
I love the noise, that gentle suck of air. Pretty pleasant and efficient use of fuel...
My first experimental builds were room heater sized, using 5 gal. and then 15 gal. metal containers and having just a 4" burn chamber and riser. I would say 4" is the minimum size you would want for room heating, smaller ones are still good for cooking outdoors.
I've seen some builds online that use an 8" burn chamber and riser, and at that level things start cooking on a more industrial scale. I'm roughing together an idea for a build this size that also heats water and makes steam for running a generator. That project feels like a pipe dream at this point, but just 3 years ago, the build I'm working on now felt the same way.
If you want more information and can't wait for me to post about it, head over to Permies.com. They have the best collection of free rocket stove info I've seen anywhere, as well as a treasure trove of other useful low-cost high-efficiency living solutions.
Hi @paradoxtma ! Thank you for posting through our Hive Community Page This article will be passed to other curation projects for more votes support. Keep up the good works!
Hi paradoxtma,
Visit curiehive.com or join the Curie Discord community to learn more.