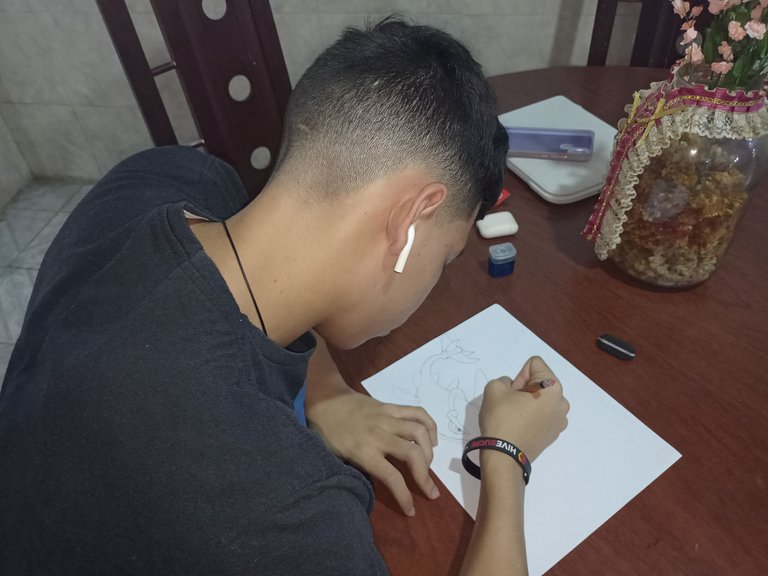
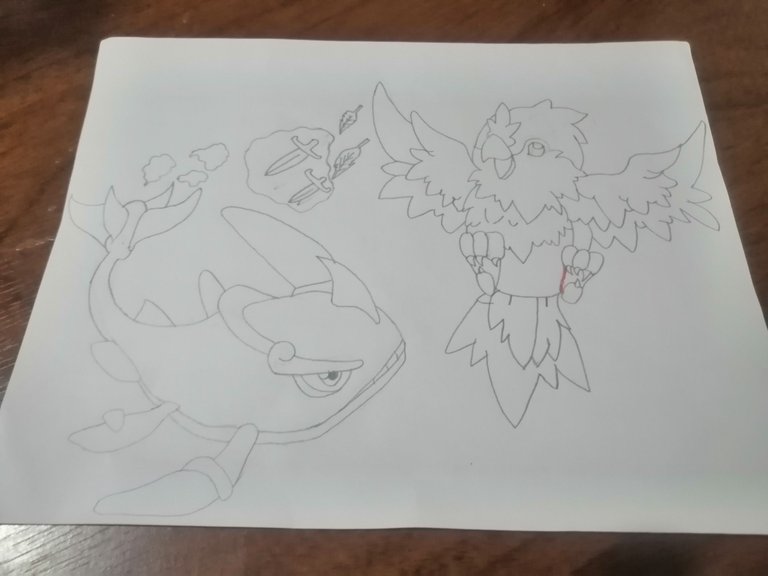
Hey, howdy my dear @holozing community. We are back here with a new battle between our magnificent creatures and this time, we can see a wonderful battle between water and air so you know that the beasts that we will draw will be nothing more and nothing less than waller and chirply, so my friends let's see how this drawing looks like.
Hey! Que tal mi querida comunidad de @holozing. Volvemos por aquí con una nueva batalla entre nuestras magníficas criaturas y en esta oportunidad, podremos observar una maravillosa batalla entre agua y aire por lo tanto sabrán que las bestias que dibujaremos serán nada más y nada menos que waller y chirply, así que mis amigos veamos como nos queda este dibujo.
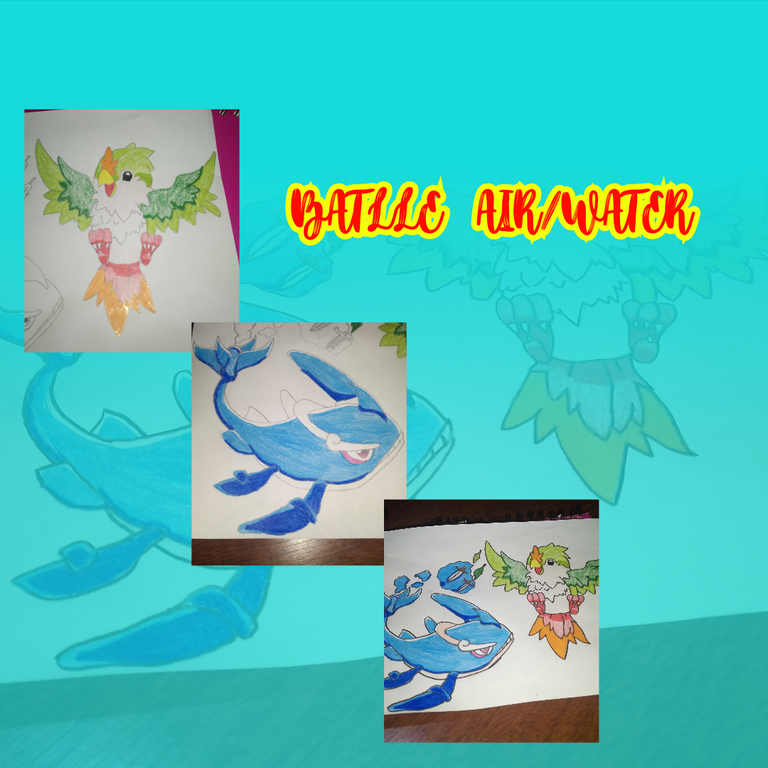
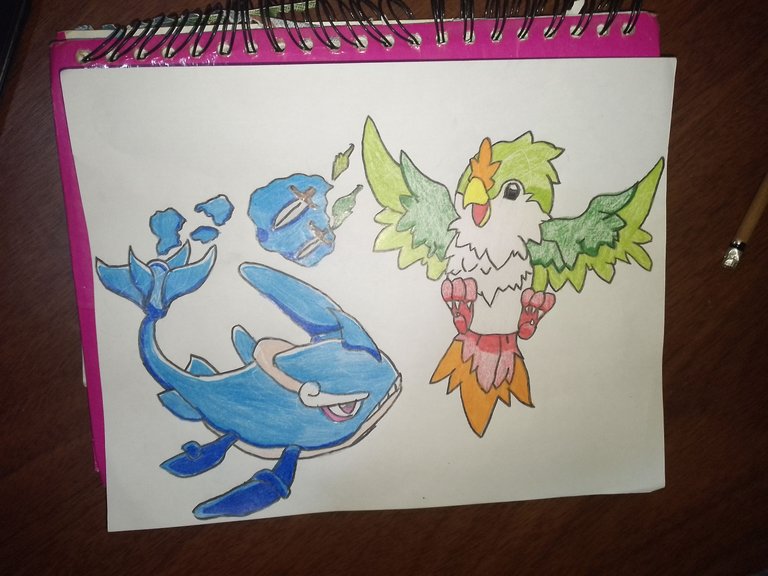
Well my friends since none of our holoz have been given any attack and defense power we will perform the same dynamics of the previous drawing therefore, one of the beasts will be using an attack power and the other one will be applying a defensive power. To be exact chirply will use an offensive power and our evolved whale which is a waller will use a defensive power.
In the case of chirply's power, this basically consists in that its feathers are mainly thrown and halfway to its adversary they turn into lethal daggers completely changing their shape. On the other hand, the power of waller consists of shooting several balls of water from its tail towards the daggers and imprisons them in a big ball of this liquid protecting itself from the enemy attack, however, since this power is extremely effective, it could not be used more than once, just like the power of chirply.
Bien mis amigos ya que a ninguno de nuestros holoz le han otorgado algún poder de ataque y defensa realizaremos la misma dinámica del dibujo anterior por lo tanto, una de las bestias estará usando un poder de ataque y la otra estará aplicando un poder defensivo. Para ser exactos chirply usará un poder ofensivo y nuestra ballena evolucionada la cual es waller usará un poder defensivo.
En el caso del poder de chirply, este básicamente consiste en que sus plumas son principalmente lanzadas y a medio camino a su adversario se convierten en unas letales dagas cambiando completamente su forma. Por otro lado el poder de waller consiste en disparar varias bolas de agua desde su cola hacia las dagas y las aprisiona en una gran bola de este líquido protegiéndose del ataque enemigo sin embargo, ya que este poder es sumamente efectivo no podría ser usado más de una vez al igual que el poder de chirply.
**WHAT CREATURES WILL WE DRAW? **
**¿QUE CRIATURAS DIBUJAREMOS? **


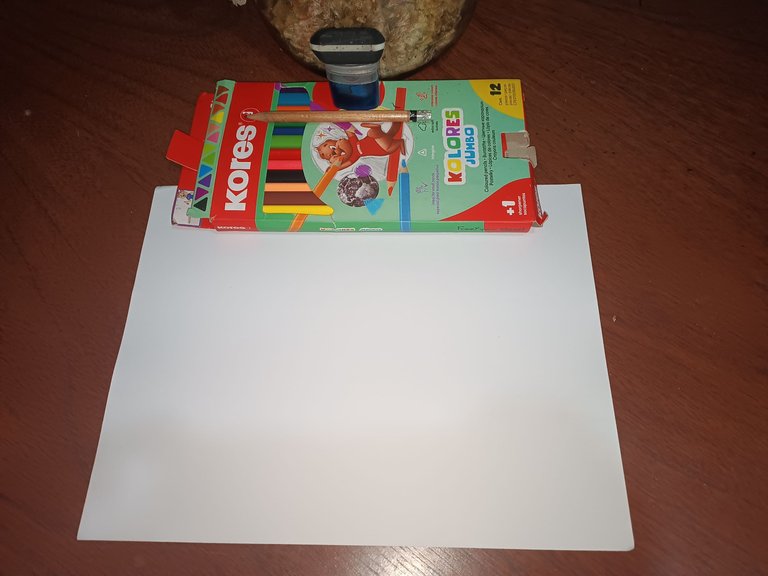
MATERIALS
The materials we need are very simple and easy to obtain, such materials are:
a pencil
A rubber
A pencil sharpener
** A colors**
one sheet
MATERIALES
Los materiales que necesitamos son muy simples y fáciles de obtener, tales materiales son:
un lapiz
una goma
un sacapuntas
colores
una hoja
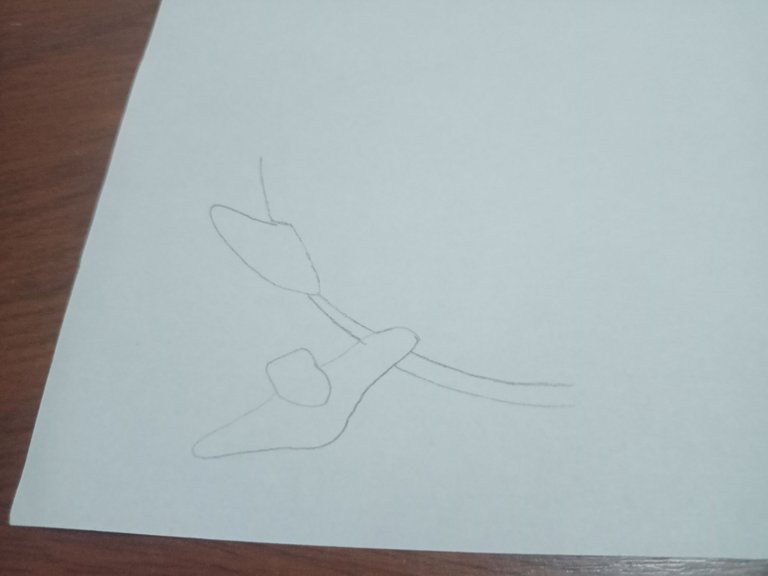
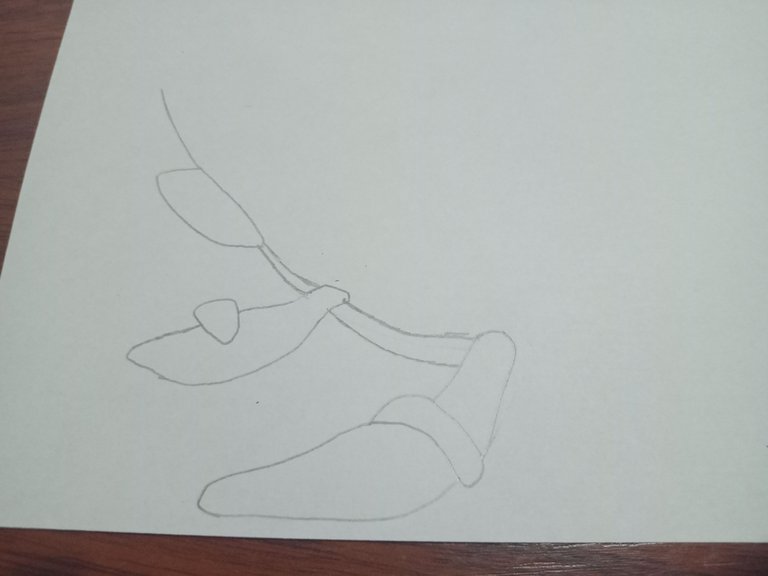
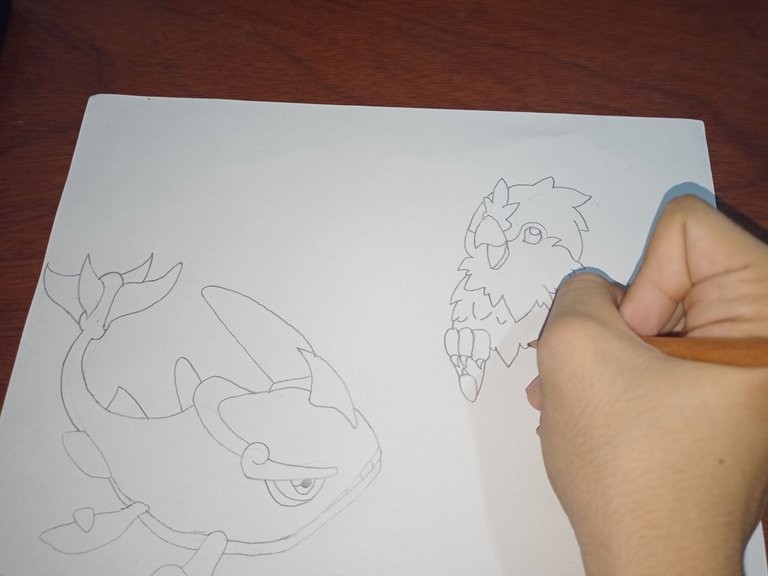
DRAWING OF WALLER
STEP 1
To start with our whale we will take into account the lower part as a start, making the curved part of its tail in the first instance and when we reach the first fin we will make it simply, then we will make a curved line at the bottom and one more in the same way just above the previous one to make the second fin and then a slightly longer line in the same way as the previous line to draw the largest waller fin.
DIBUJO DE WALLER
PASO 1
Para iniciar con nuestra ballena tomaremos en cuenta la parte inferior como inicio, realizando la parte curva de su cola en primera instancia y al llegar a la primera aleta la realizaremos sencillamente, luego realizaremos una línea curva en la parte inferior y una más de la misma manera justo encima de la anterior para así hacer la segunda aleta y seguidamente una línea un poco más larga de la misma manera que el trazo anterior para dibujar la aleta más grande de waller.
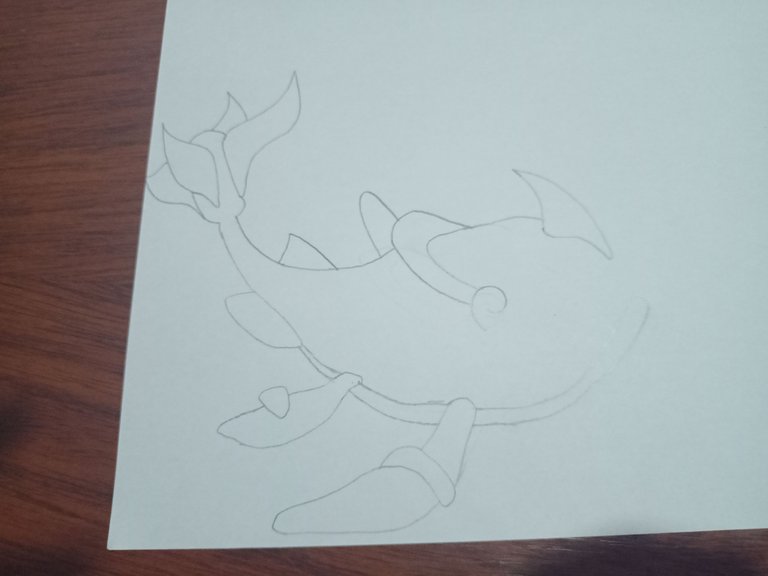
STEP 2
As a second step we will start completing the tail of our whale; for this, we must make a small curve and when we have it ready we will make all the fins following the pattern of our image and in the same way go drawing each fin belonging to the tail, when we complete it we will make the second part of this therefore, we will make a curved stroke that will start from a belly belonging to the tail. To give a little effect of upward look the second stroke of the tail will be in a curved way from bottom to top until reaching the point of making the first breastplate located at the top of the waller.
In this armor will start a small fin which we will easily draw without any problem and in the same way in the fin we will draw a fin even smaller and pointier than the previous one from the lower part of the armor we will follow a little round stroke which will represent the head of our beast. When we finish it we will draw a horn-like fin, finishing it we will make a curved stroke downwards which will continue until we reach the lower fin in this way we will finish the waller's body.
PASO 2
Como segundo paso iniciaremos completando la cola de nuestra ballena; para ello, debemos hacer una pequeña curva y al tenerla lista realizaremos todas las aletas siguiendo el patrón de nuestra imagen y de la misma manera ir dibujando cada aleta perteneciente a la cola, al completarla haremos la segunda parte de esta por lo tanto, realizaremos un trazo curvo que partirá de una barriguita perteneciente a la cola. Para darle un pequeño efecto de mirada hacia arriba el segundo trazo de la cola será de manera curva de abajo hacia arriba hasta llegar al punto de hacer la primera coraza ubicada en la parte superior de waller.
En esta coraza partirá una pequeña aleta la cual fácilmente dibujaremos sin problema alguno y de igual forma en la aleta dibujaremos una aleta aun más pequeño y puntiaguda que la anterior de la parte baja de la coraza seguiremos un trazo un poco redondo el cual representará la cabeza de nuestra bestia. Al terminarlo dibujaremos una aleta en especie de cuerno, terminando haremos un trazo curvo hacia abajo el cual seguirá hasta llegar a la aleta inferior de esta manera terminaremos el cuerpo de waller.
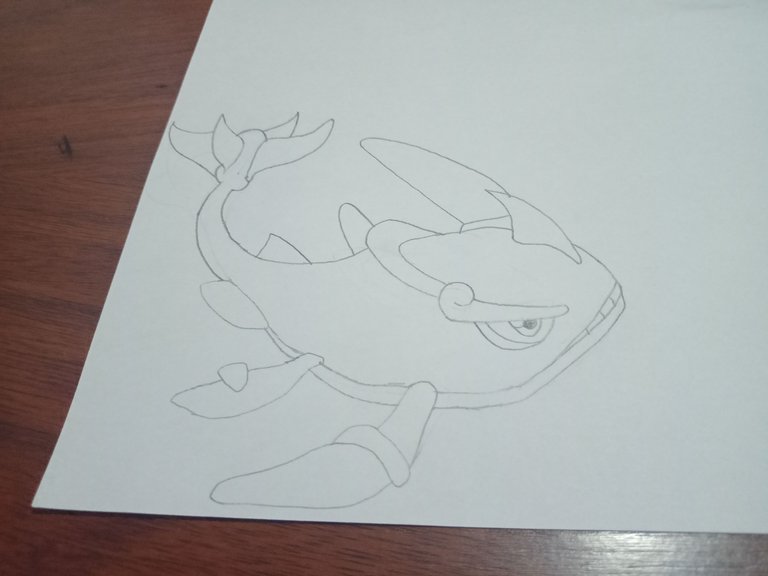
STEP 3
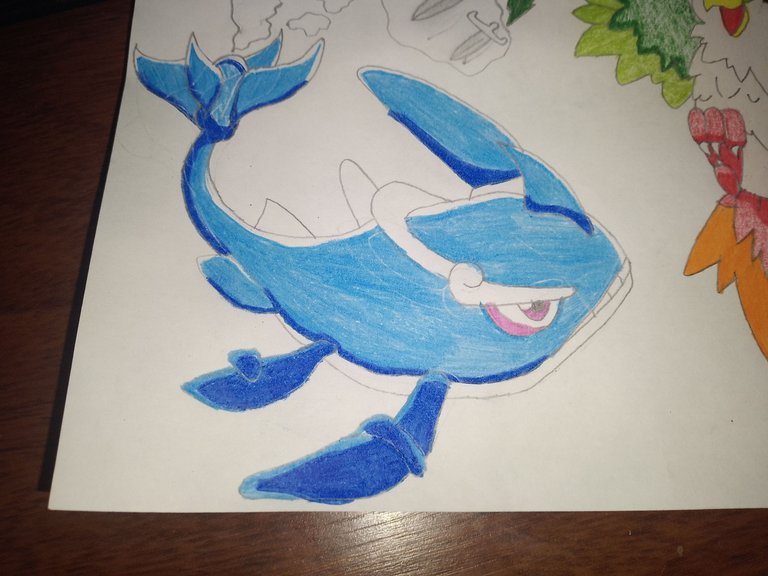
To finish with our waller drawing the only thing we will do will be very easy and simple, then as the whole body of our creature is already finished we will draw its mouth which will start from the tip of its snout, for this we will make a downward stroke a little short when we finish it we will make some straight lines in a vertical way representing its teeth.
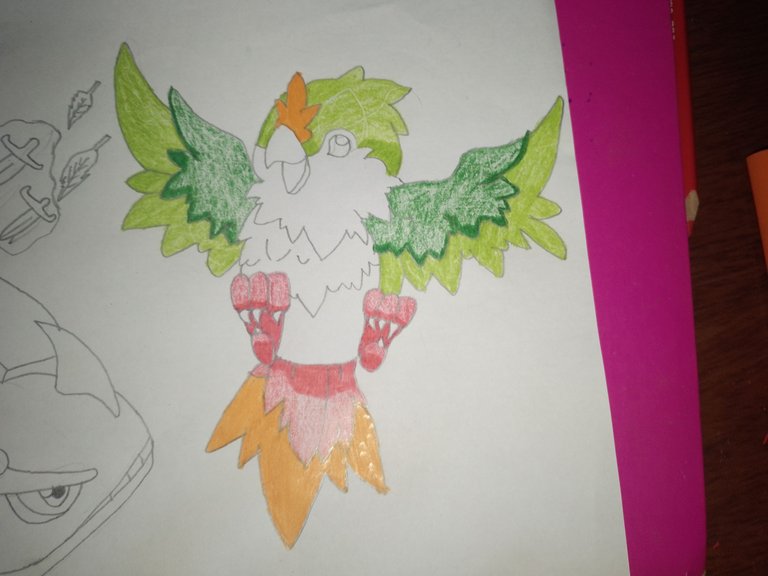
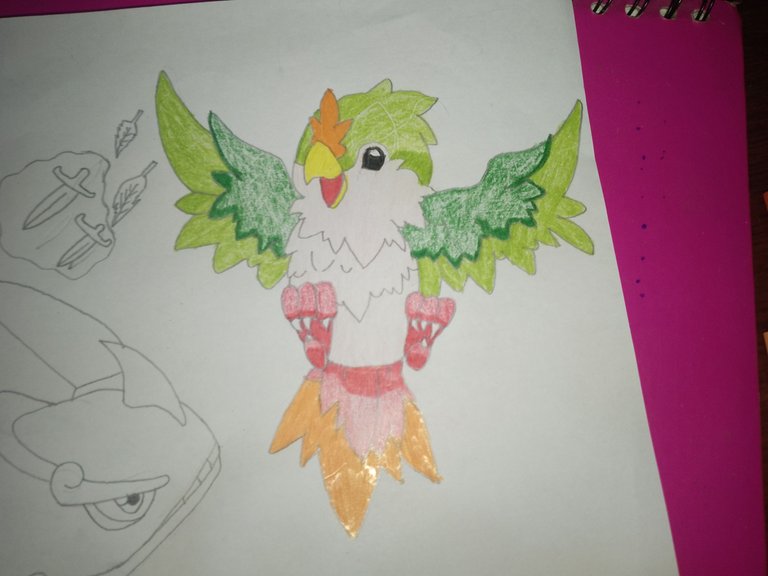
Finishing our friend we will draw his eyebrow which starts at the end of his armor what we will do will be simple, we will draw a spiral and then make a straight line drawing his eyebrow completely and as a last necessity we will make a medium circle to make his eye when we finish it we will finish our first beast, however, now we will have to draw his power, for this the only thing we will do will be some balls with several curvatures simulating floating water balls to finish our drawing.
PASO 3
Para acabar con nuestro dibujo de waller lo único que haremos será muy fácil y sencillo, entonces como ya se encuentra terminado el cuerpo entero de nuestra criatura dibujaremos su boca la cual partirá de la punta de su hocico, para ello haremos un trazo hacia abajo un poco corto al terminarlo haremos unas líneas rectas de manera vertical representando sus dientes.
Finalizando a nuestro amigo dibujaremos su ceja la cual parte del final de su coraza lo que haremos será simple, dibujaremos una espiral para luego hacer un trazo recto dibujando su ceja por completo y como última necesidad haremos un círculo mediano para hacer su ojo al terminarlo ya daríamos por terminado nuestra primera bestia, sin embargo, ahora tendremos que dibujar su poder, para esto lo único que haremos será unas bolas con varias curvaturas simulando bolas de agua flotantes para finalizar nuestro dibujo.
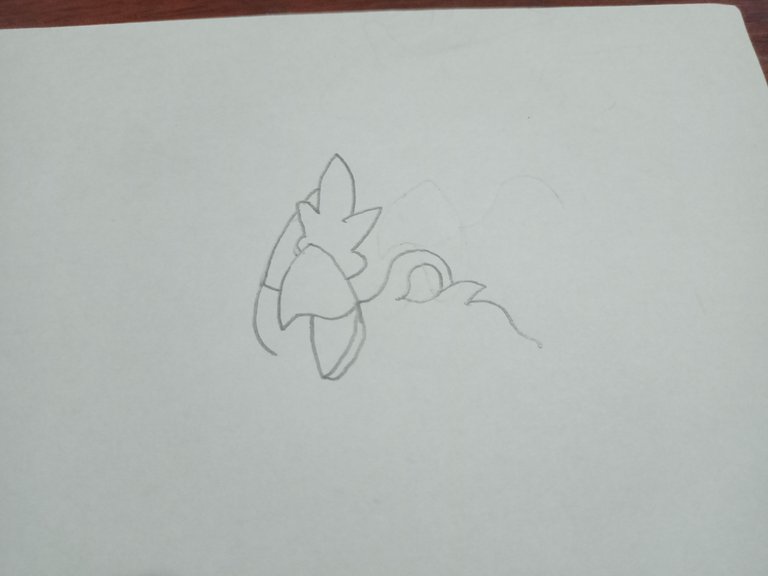
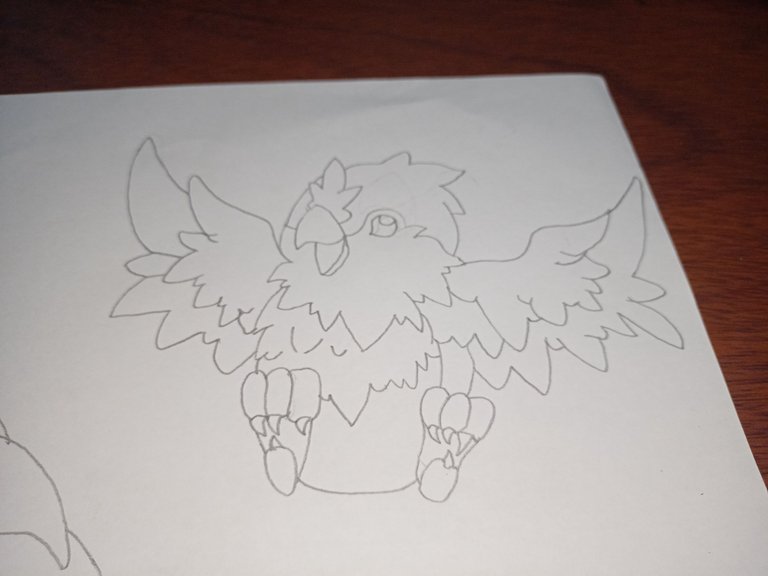
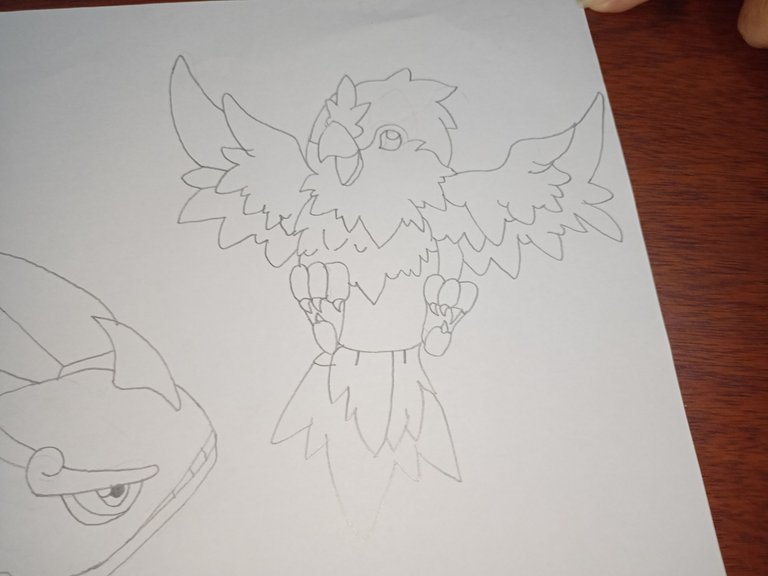
DRAWING OF CHIRPLE
STEP 1
As a first step we will take into account my beloved technique of starting the drawing from the snout, in this case the beak. For this we must draw a curve downwards and then we will make the pointed effect to the beak making a wave stroke to finish the upper part of it, then we will make a curvilinear stroke downwards and the same on the other side and to finish the beak we will draw an identical stroke to the previous one glued to the second line. Then we will make a curved line upwards starting from the middle of the bird's beak and we will draw the eye of our creature inside that curved line. To continue we will make the fur that is just above the beak following the image.
Now, we will have to draw a small straight line on the left side of the chirply's beak and to continue this we will draw its head making a curved line upwards following the pattern. To draw the body of our bird we will start from the straight line we made before and we will start with this taking care of the pattern of its fur which is a little bit pointed and we will continue like this one by one to finish with it.
DIBUJO DE CHIRPLE
PASO 1
Como primer paso tomaremos en cuenta mi querida técnica de iniciar el dibujo por el hocico en este caso pico. Para esto debemos trazar una curva hacia abajo y luego le haremos el efecto puntiagudo al pico realizando un trazo en ola para terminar la parte superior de este, seguidamente haremos un trazo curvilíneo hacia abajo y lo mismo del otro lado y para terminar el pico dibujaremos un trazo idéntico al anterior pegado a la segunda línea. Luego haremos una línea curva hacia arriba que partirá desde la mitad del pico del ave y dibujaremos el ojo de nuestra criatura dentro de tal línea curva. Para continuar realizaremos el pelaje que se encuentra justo arriba del pico siguiendo la imagen.
Ahora, tendremos que trazar una pequeña línea recta del lado izquierdo del pico de chirply y para continuar esto haremos su cabeza realizando una línea curva hacia arriba siguiendo el patrón. Para dibujar el cuerpo de nuestra ave partiremos desde la línea recta que realizamos anteriormente y empezaremos con este cuidando el patrón de su pelaje el cual es un poco puntiagudo y seguiremos así uno por uno para acabar con ello.

STEP 2
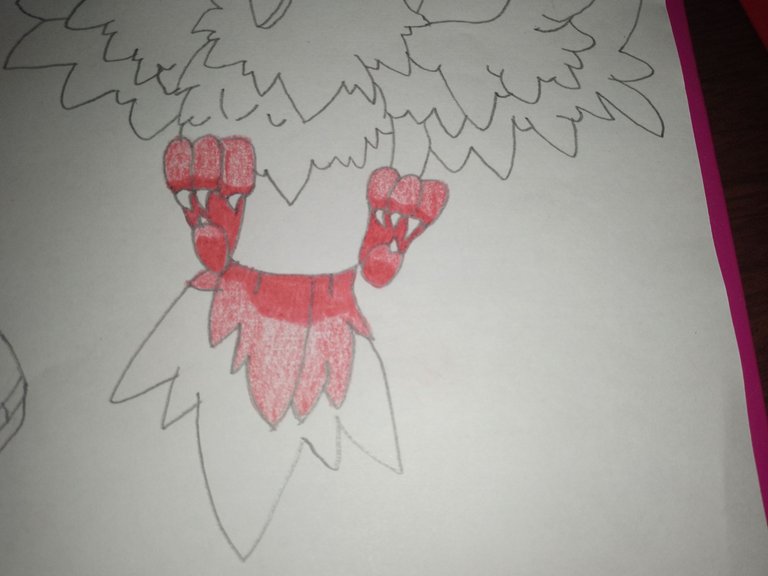
From the same fur of our creature will start the realization of our first paw. Therefore, we must make three circles together representing the toes and just below these we will draw its claws, when we finish the toes we will draw a line that starts from the first toe down and we will make one more toe but this time the claw will be on top when we finish it we will draw a line equal to the previous one to complete the paw. Having ready our first paw we will draw a curved line that would be the complement of the chirply's body when we have it ready we will do the same process that we applied in the previous paw.
To draw the wings of this animal we will do something simple a straight line to the right that at one point will go up and then once again will go in a straight line. Then we will proceed to make with a line down and we will make one by one each feather taking care of its lines that give it that effect of feathers and we will go step by step following the image until we finish with both wings, to finish our drawing we will make the tail of our beast which consists of a series of feathers in this case we will draw each feather taking care of its pointed effect until we finish with it and completing this we will make the power of our beast drawing two small feathers and just in its forehead two daggers and our drawing would be complete my friend.
PASO 2
Del mismo pelaje de nuestra criatura partirá la realización de nuestra primera pata. Por lo tanto, debemos realizar tres círculos juntos representado los dedos y justo debajo de estos dibujaremos sus garras, al acabar los dedos dibujaremos una linea qué parta desde el primer dedo hacia abajo y realizaremos un dedo más pero en esta ocasión la garra quedará arriba al terminarlo dibujaremos una línea igual a la anterior para completar la pata. Teniendo lista nuestra primera pata dibujaremos una línea curva que sería el complemento del cuerpo de chirply al tenerla lista haremos el mismo proceso que aplicamos en la anterior pata.
Para dibujar las alas de este animal haremos algo simple una línea recta hacia la derecha que en un punto se dirigirá hacia arriba y luego una vez más irá en línea recta. Después procederemos a hacer con una línea hacia abajo y realizaremos una por una cada pluma cuidando sus líneas que le dan ese efecto de las plumas e iremos paso con paso siguiendo la imagen hasta acabar con ambas alas, para finalizar nuestro dibujo realizaremos la cola de nuestra bestia la cual consiste en una serie de plumajes en este caso dibujaremos cada pluma cuidando su efecto puntiagudo hasta acabar con ello y completando esto realizaremos el poder de nuestra bestia dibujando dos plumas pequeñas y justo en su frente dos dagas y nuestro dibujo estaría completo mis amigo.
And well my friends it's time to color our great drawing, however, as everyone has their own way of coloring, I will simply show you each step of my colored drawings, I leave them to your taste. I hope this content has been of your great pleasure, I hope you liked the drawing. See you soon my friends and take it away minimi!
Y bueno mis amigos llego la hora de colorear nuestro grandioso dibujo sin embargo, como cada quien tiene su diferente forma de coloreo simplemente mostraré cada paso de mis dibujos colorados a ustedes se los dejo a su gusto. Espero este contenido haya sido de su gran agrado, el dibujo les haya gustado. Nos vemos pronto mis amigos y ¡llévatelo minimi!


READY FOR THE FINAL RESULT OF OUR DRAW
LISTOS PARA EL RESULTADO FINAL DE NUESTRO DIBUJO

images taken by my dad of his Tecno camon 18P.
Imágenes tomadas por mi papá de su Tecno camon 18P.
All rights reserved by @elmiguelacho. I do not authorize the use of any material of my property.
Todos los derechos reservados de @elmiguelacho. No autorizo el uso de ningún material de mi propiedad
...Gracias... Dando Lo Mejor Para Tí...
...Thank You... Giving The Best For You...
Cover edited in Canva
Portada editada en Canva
Translation made in/Traducción realizada enDeepl
https://inleo.io/threads/omarcitorojas/re-leothreads-fu9rggrf
The rewards earned on this comment will go directly to the people ( omarcitorojas ) sharing the post on LeoThreads,LikeTu,dBuzz.
#posh
~~~ embed:1758710634693144611?t=iCod5-DKBfVliKEHBIuWkA&s=19 twitter metadata:TWlndWVsUm9qYXNIaXZlfHxodHRwczovL3R3aXR0ZXIuY29tL01pZ3VlbFJvamFzSGl2ZS9zdGF0dXMvMTc1ODcxMDYzNDY5MzE0NDYxMXw= ~~~