.jpeg)

Español
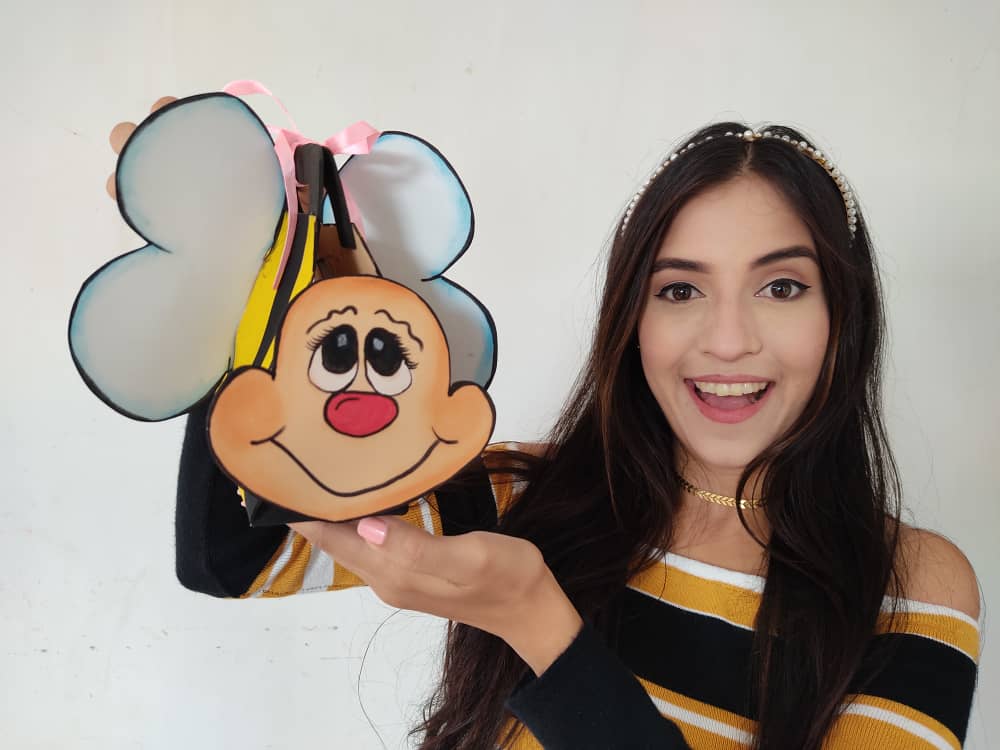
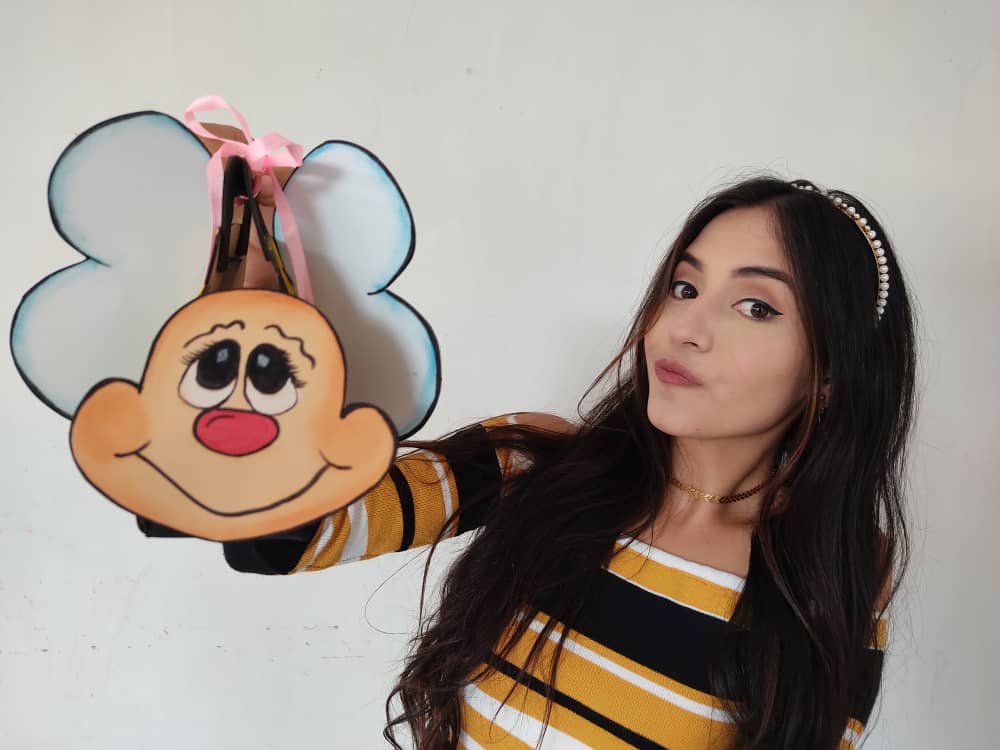
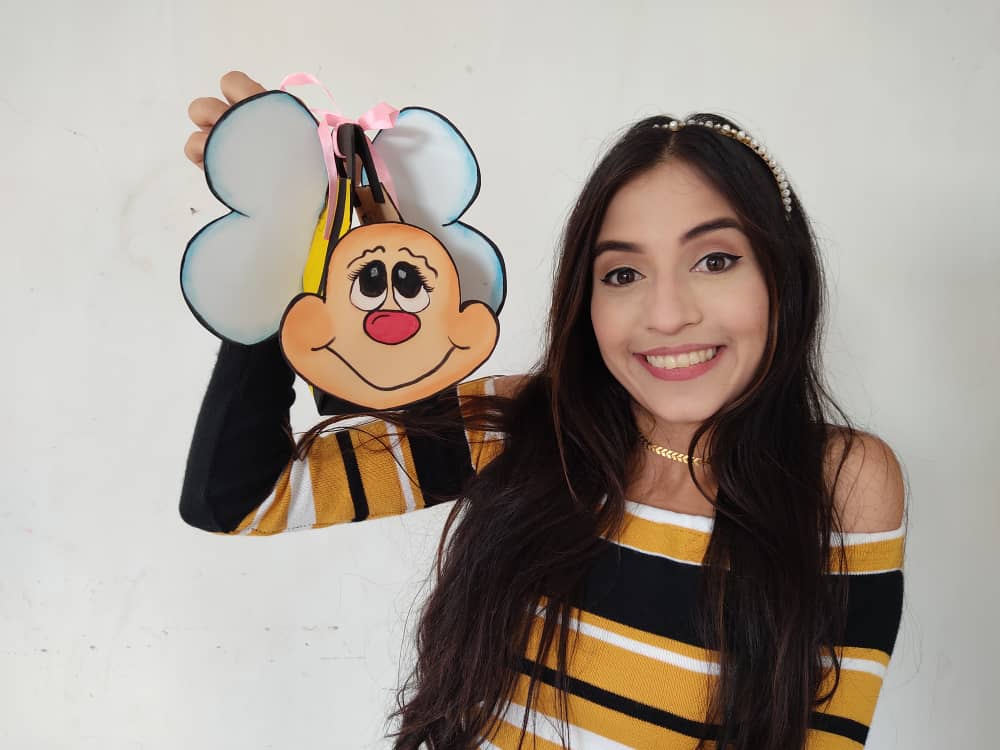
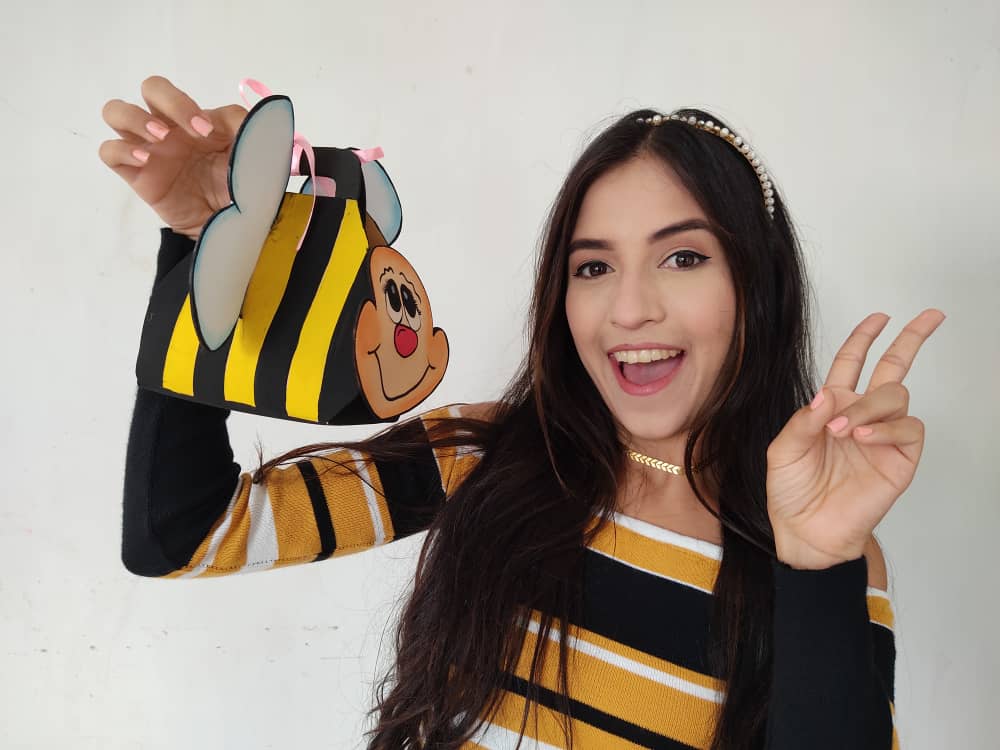
Hola querida familia de Hive ❤️ Este hermoso día traigo para ustedes un genial y divertido paso a paso, en dónde les mostrare como elaborar una hermosa bolsa de abeja, ideal para obsequiarlo a tus seres queridos con sus golosinas, y así, endulzar un poco sus corazones, pues este increíble abejita está hecha de materiales realmente económicos y muy fáciles de obtener. Este hermoso proyecto podemos elaborarlo de la manera que más nos guste y hasta podemos elaborar nuestro animal favorito.
English
Hello dear hive family ❤️ This beautiful day I bring you a great and fun step by step, where I will show you how to make a beautiful bee bag, ideal to gift your loved ones with their goodies, and thus, sweeten their hearts a little because this incredible bee is made of really cheap materials and very easy to obtain. We can make this beautiful project in the way that we like the most and we can even make our favorite animal.
¿Qué están esperando?
Utilizar estos hermosos y económicos materiales para crear una hermosa bolsa en forma de abeja es una idea muy original y económica para darle un toque de personalidad y creatividad a nuestros obsequios. Antes de comenzar no olvidemos lavarnos nuestras manos.
What are they waiting for?
Using these beautiful and inexpensive materials to create a beautiful bag in the shape of a bee is a very original and inexpensive idea to give a touch of personality and creativity to our gifts. Before we start, let's not forget to wash our hands.

[Materiales | Materials]
Para realizar esta hermosa abeja necesitaremos:
- Moldes.
- Foami o goma eva.
- Pinturas.
- Pinceles.
- Marcador.
- Tijera.
- Cinta.
- Pegamento o silicón liquido.
To make this beautiful bee we will need:
- Molds.
- Foamy or EVA foam.
- Paintings.
- Brushes.
- Bookmark.
- Scissors.
- Ribbon.
- Glue or liquid silicone.
Procedimiento (paso a paso)
Process (step by step)

Primero, elaboramos los moldes de la abeja dibujando sobre el papel, en partes separadas para facilitar la transferencia al foami. Y seguidamente, recortamos cada pieza cuidadosamente para que esta no pierda su linda forma, y así lograr que todo nos encaje perfectamente.
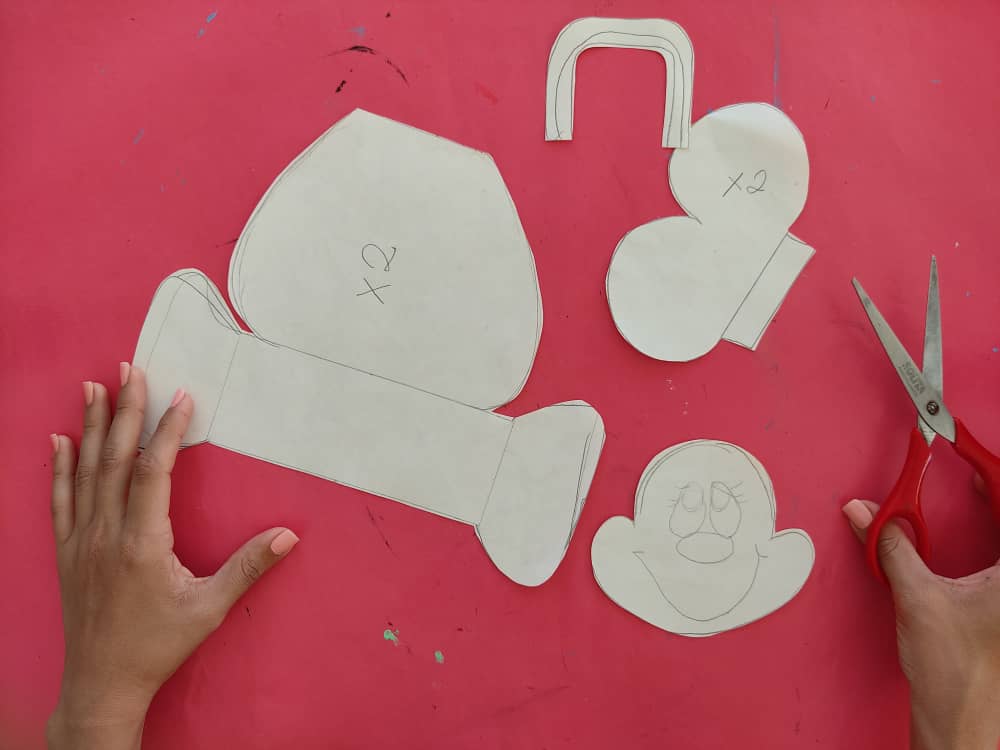
First, we make the molds of the bee drawing on the paper, in separate parts to facilitate the transfer to the foam. And then, we cut each piece carefully so that it does not lose its beautiful shape, and thus make everything fit perfectly.
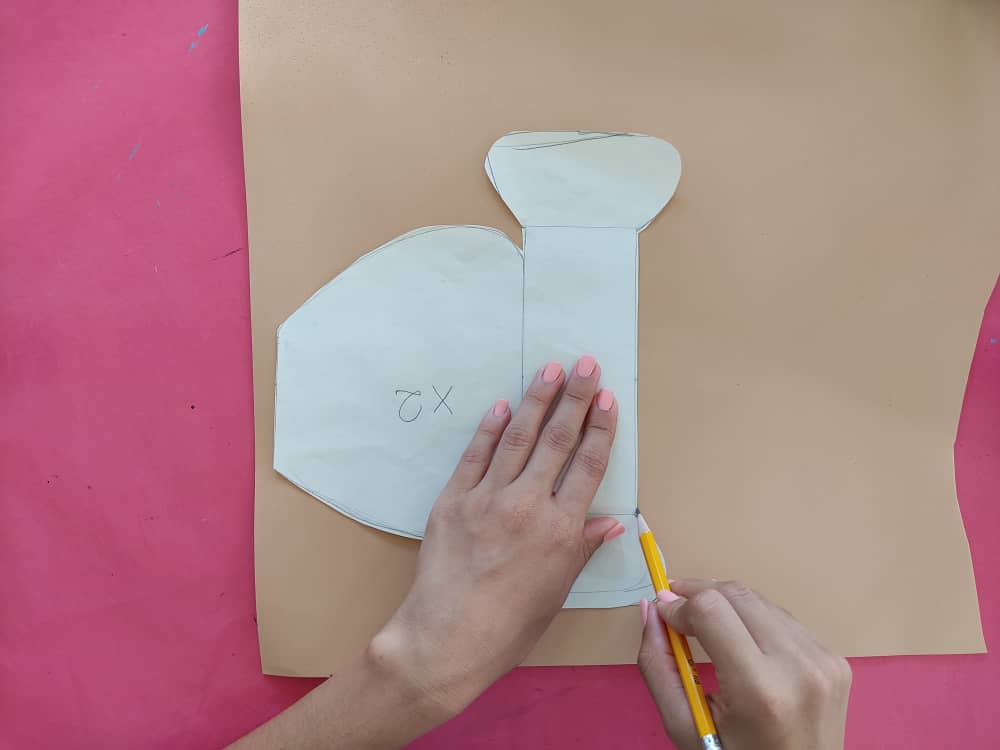
Ahora, transferimos los moldes al foami sin olvidar repetir las partes que están marcadas (x2), y recortamos cuidadosamente de manera que las formas mantengas su tamaño intacto.
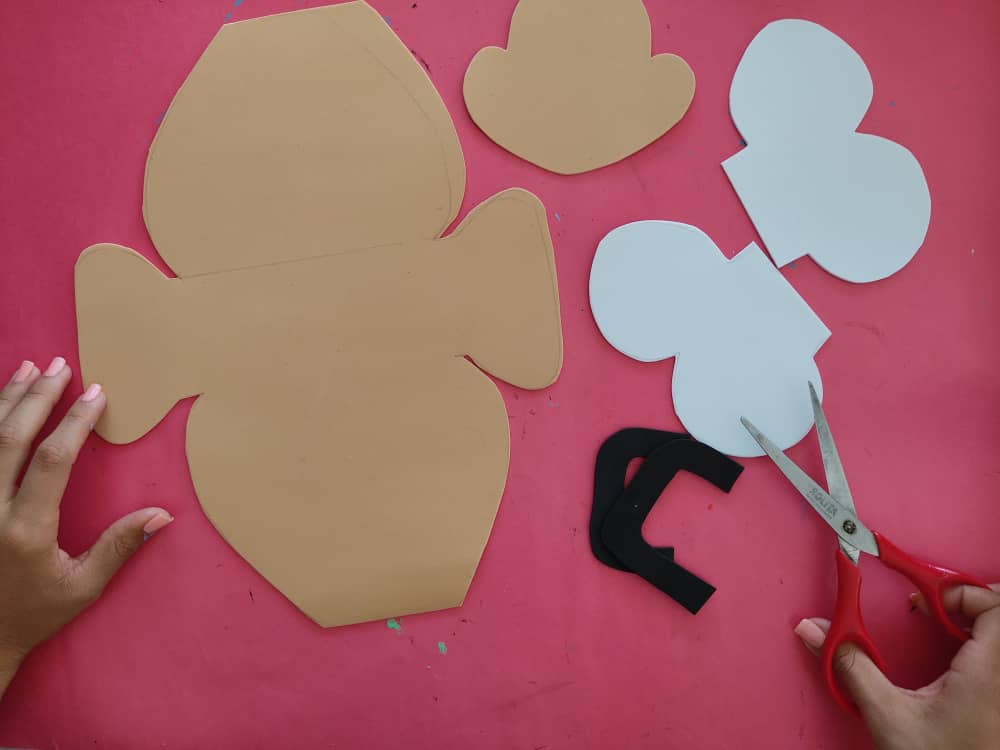
Now, we transfer the molds to the foam without forgetting to repeat the parts that are marked (x2), and we carefully cut out so that the shapes keep their size intact.
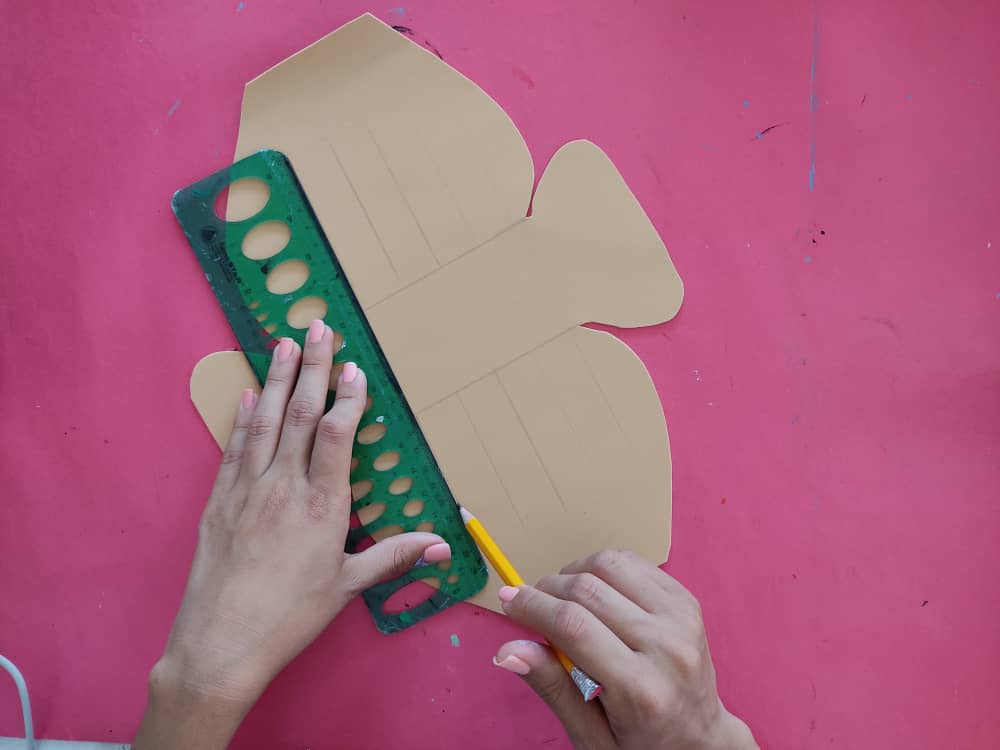
Luego, definimos el cuerpo de la abejita marcando varias líneas con la ayuda de un lápiz y una regla para que las líneas queden muy rectas.
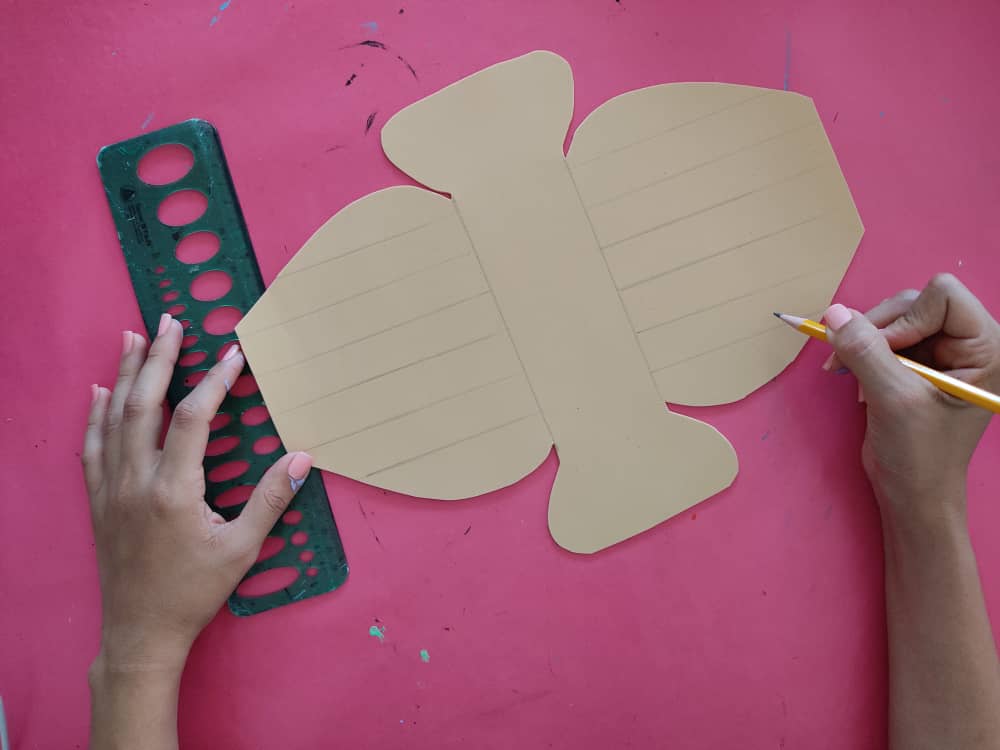
Next, we define the body of the bee by marking several lines with the help of a pencil and a ruler so that the lines are very straight.
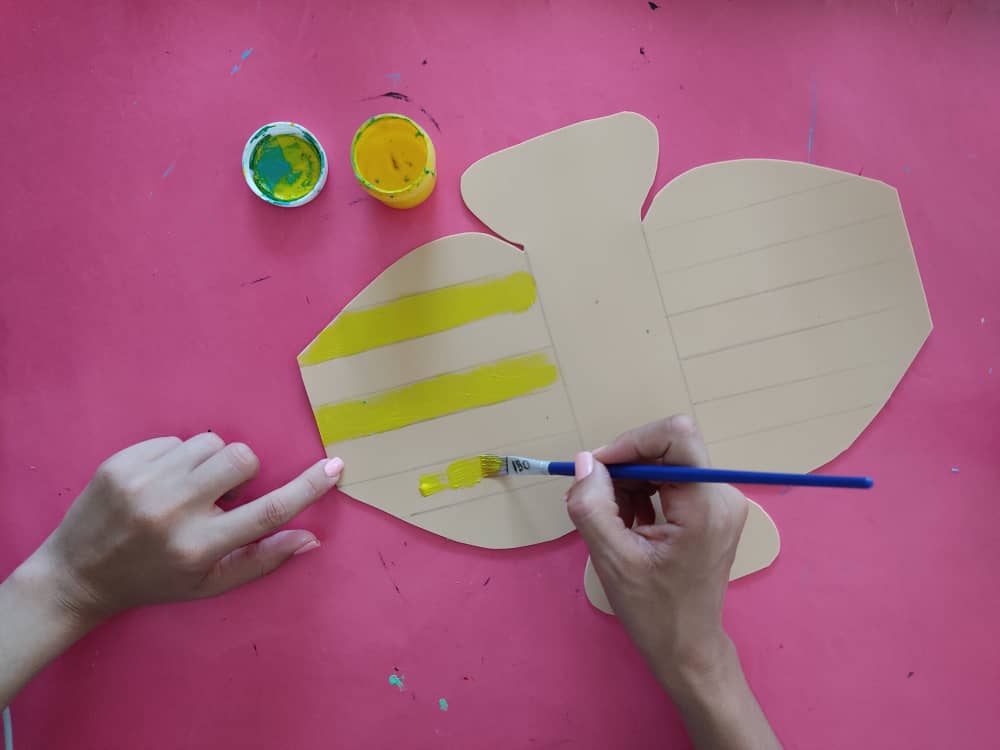
Ahora, pintamos el cuerpo de abeja comenzado con las líneas amarillas, y luego el resto de negro. Dejemos secar por unos segundos
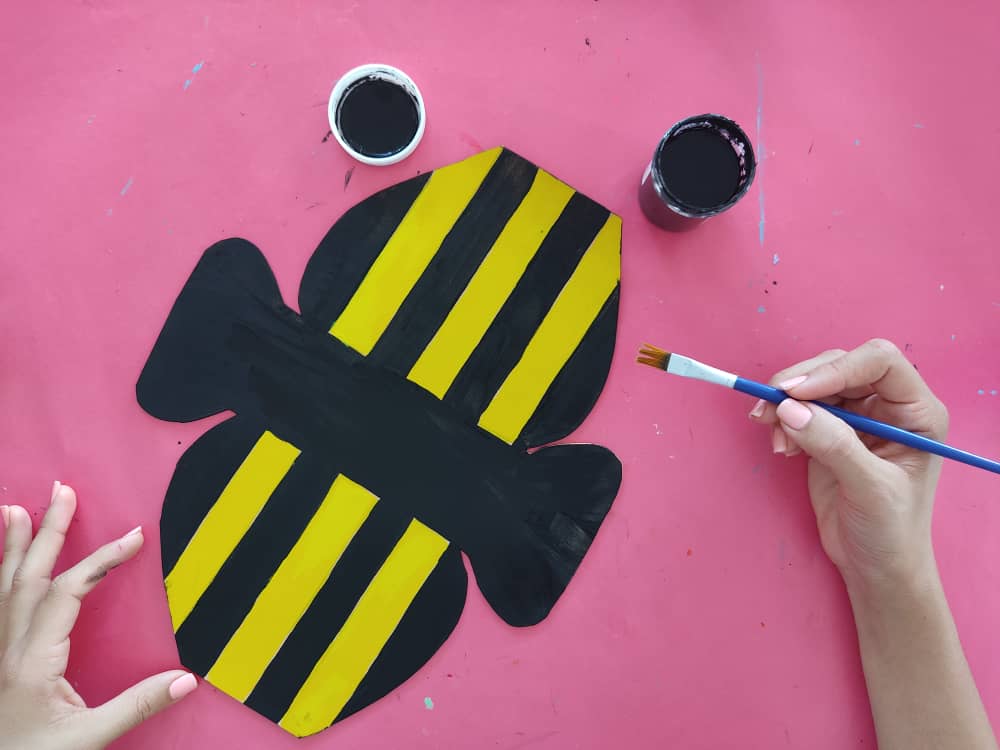
Now, we paint the body of the bee starting with the yellow lines, and then the rest with black. Let dry for a few seconds
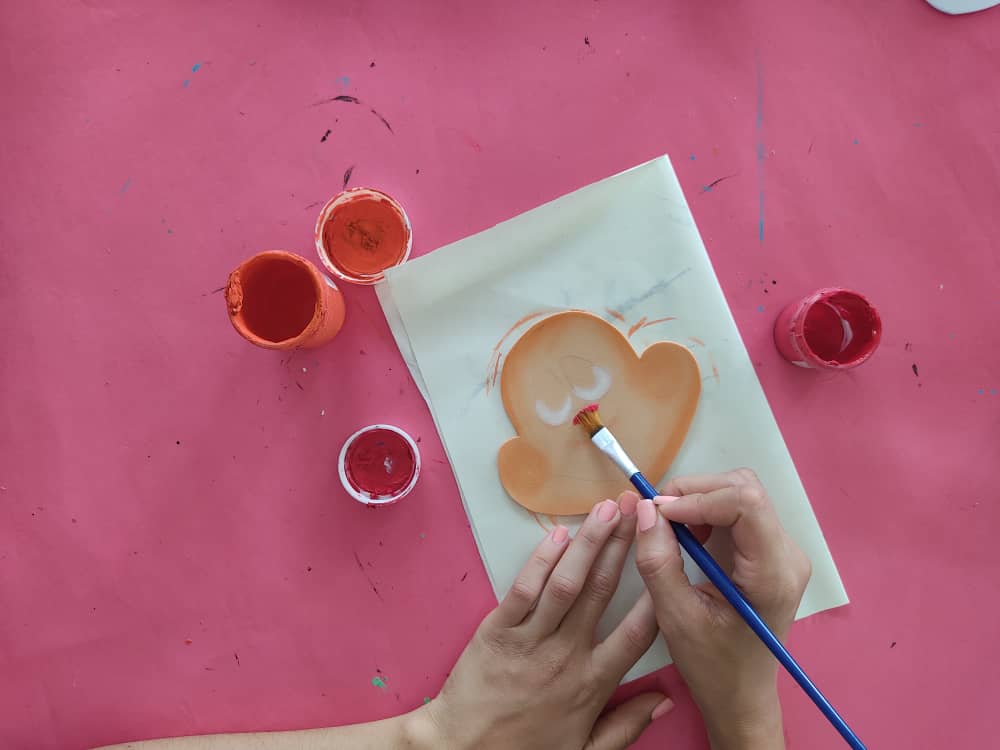
Seguidamente, pintamos la cara de la abeja sombreando sus bordes en tonos naranja o marrones muy claros para que luzca muy hermosa, y definimos sus grandes ojos, sin olvidar realzar la belleza de esta marcando sus bordes con un marcador negro de punta fina.

Next, we paint the face of the bee shading its edges in very light orange or brown tones so that it looks very beautiful, and we define its large eyes, without forgetting to enhance its beauty by marking its edges with a fine-tipped black marker.

Luego, pintamos los bordes de las alas de la abeja de color azul muy claro para darle un toque más profundo, y marcamos sus bordes.
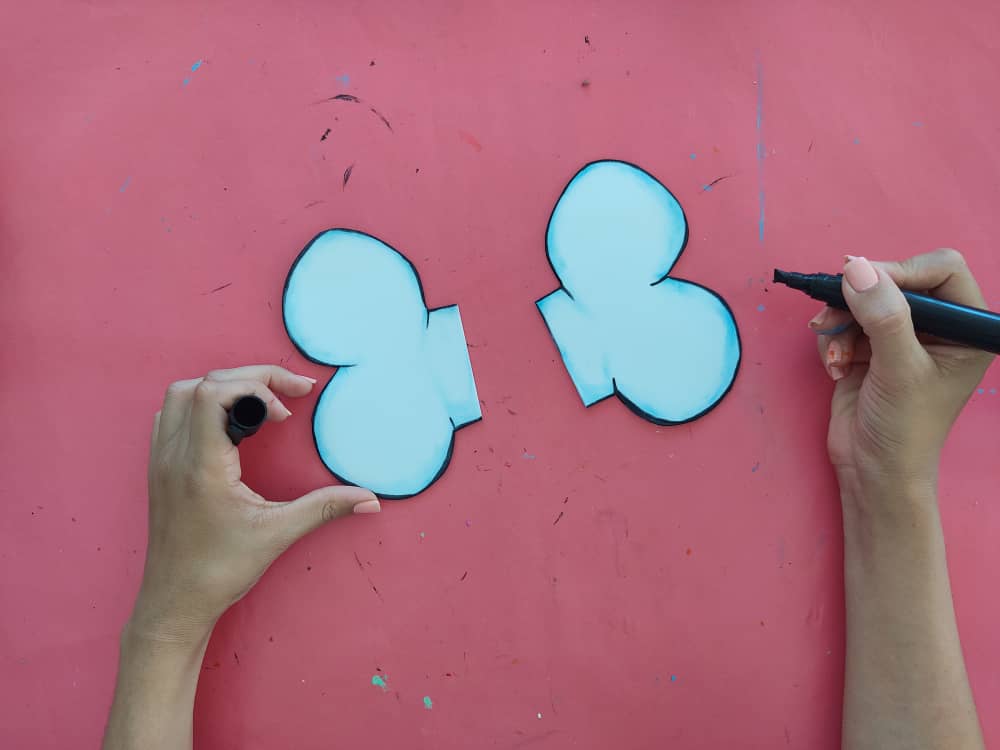
Next, we paint the edges of the bee's wings very light blue to give it a deeper touch, and we mark their edges.
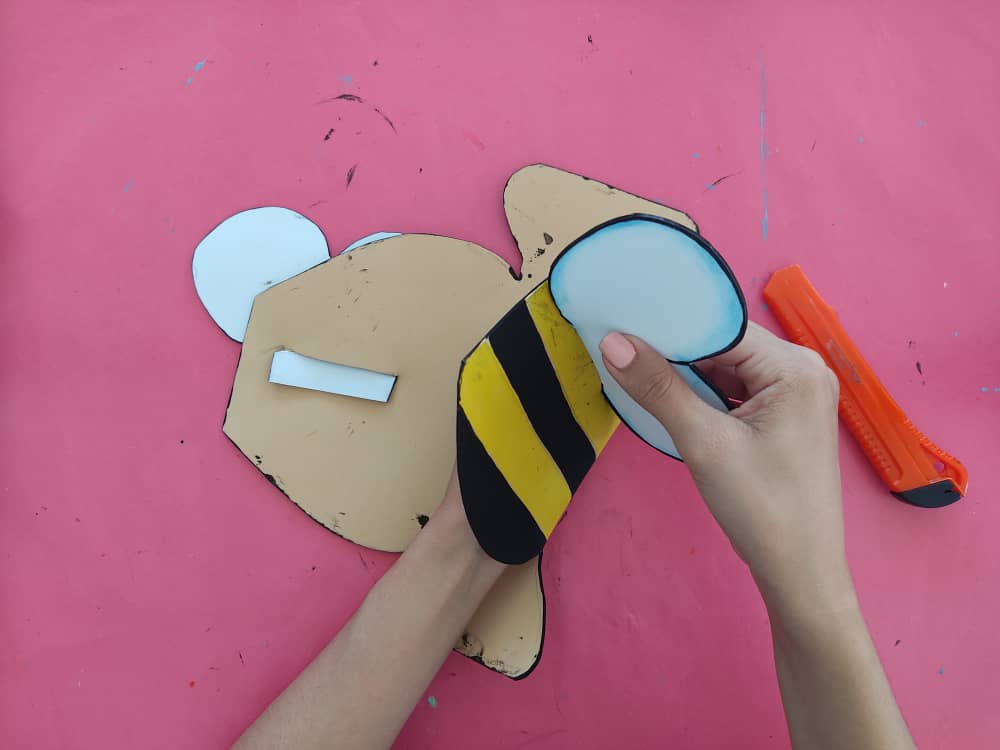
Ahora, elaboramos unas ranuras en las dos caras del cuerpo de la abeja, y pasamos cada una de las alas por estás pequeñas ranuras de manera que queden muy bien niveladas, y parezca que está volando, genial no?
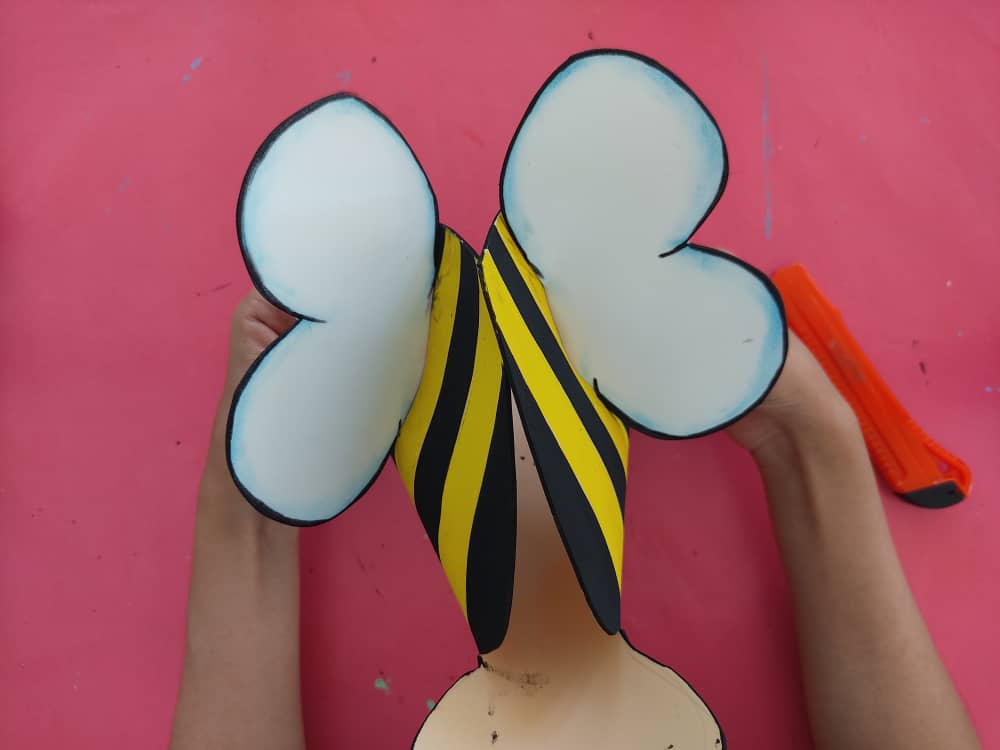
Now, we make some grooves on the two sides of the body of the bee, and we pass each of the wings through these small grooves so that they are very well leveled, and it looks like it is flying, great right?
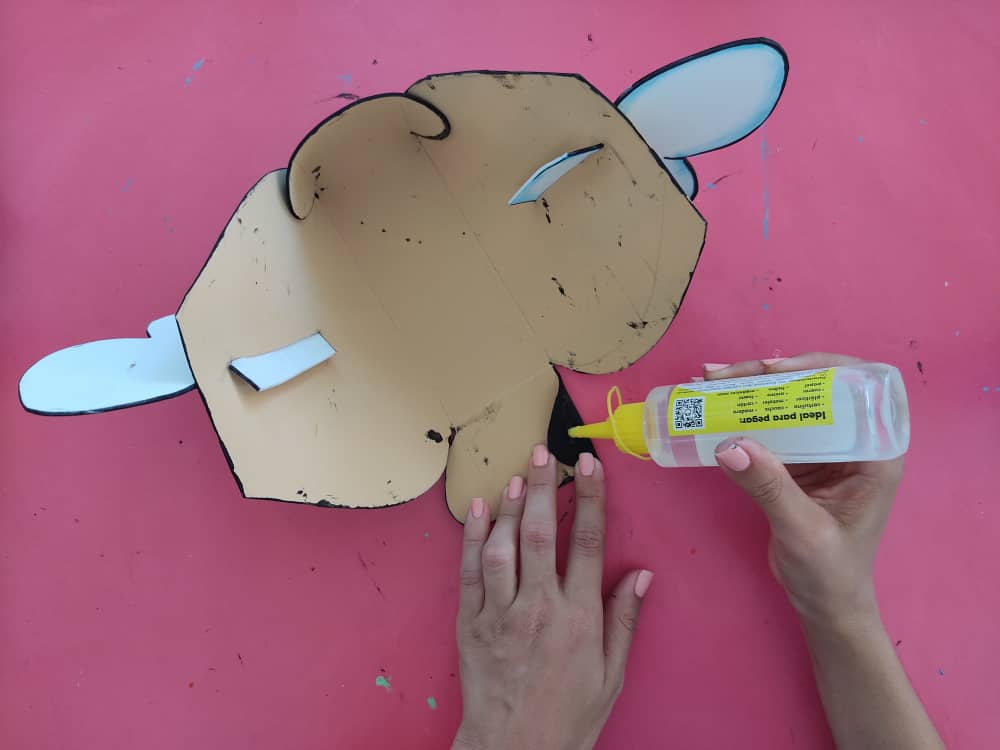
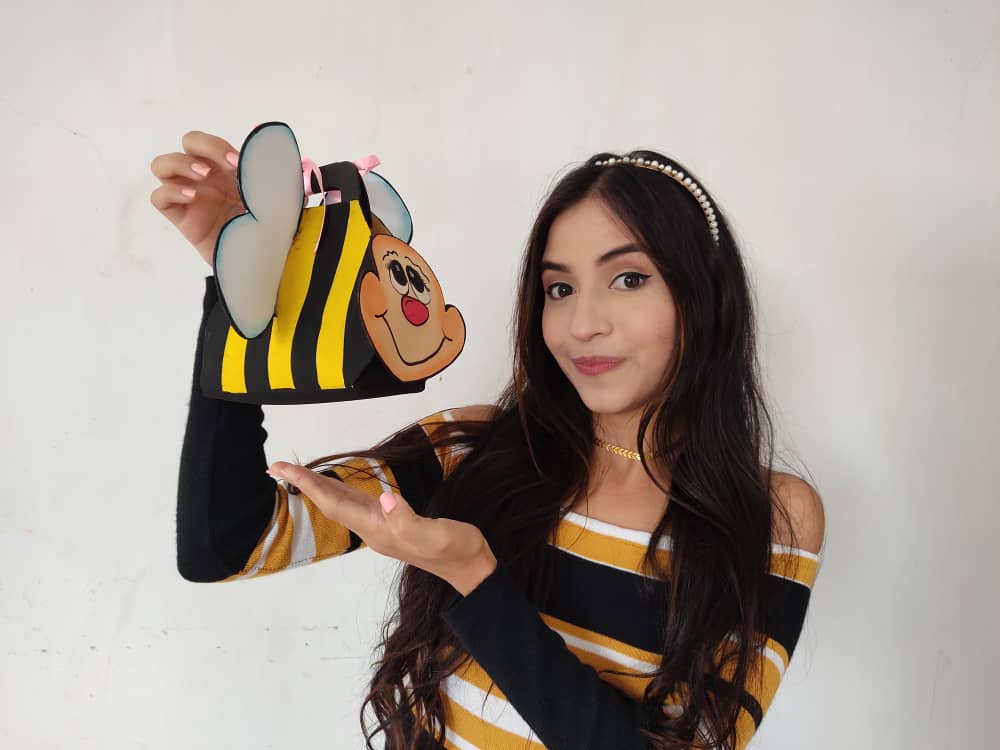
Seguidamente, armamos el cuerpo pegando las pequeñas pestañas que sobresalen de la base a cada una de las partes que conforman el cuerpo de la abeja, hacemos presión por unos segundos para que todo quede muy bien, repetimos con las pestañas del otro extremo, y finalmente pegamos con mucho cuidado las asas o agarraderas de nuestra abejita.
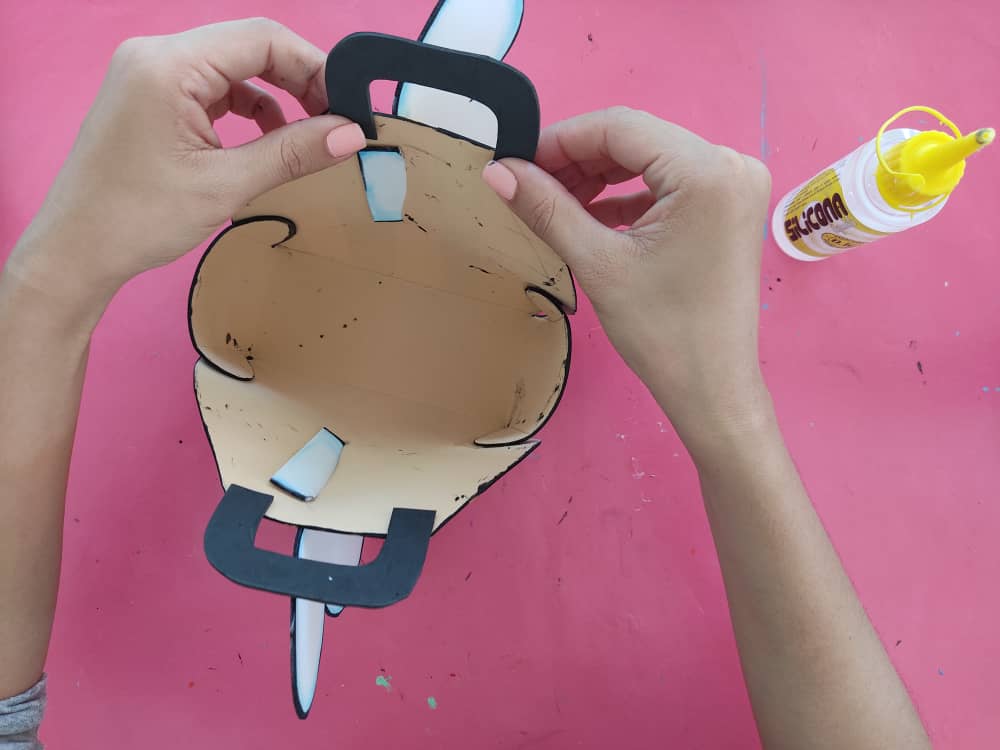
Next, we assemble the body by gluing the small tabs that protrude from the base to each of the parts that make up the body of the bee, we press for a few seconds so that everything is very well, we repeat with the tabs at the other end, and finally, We glue very carefully the handles or handles of our little bee.
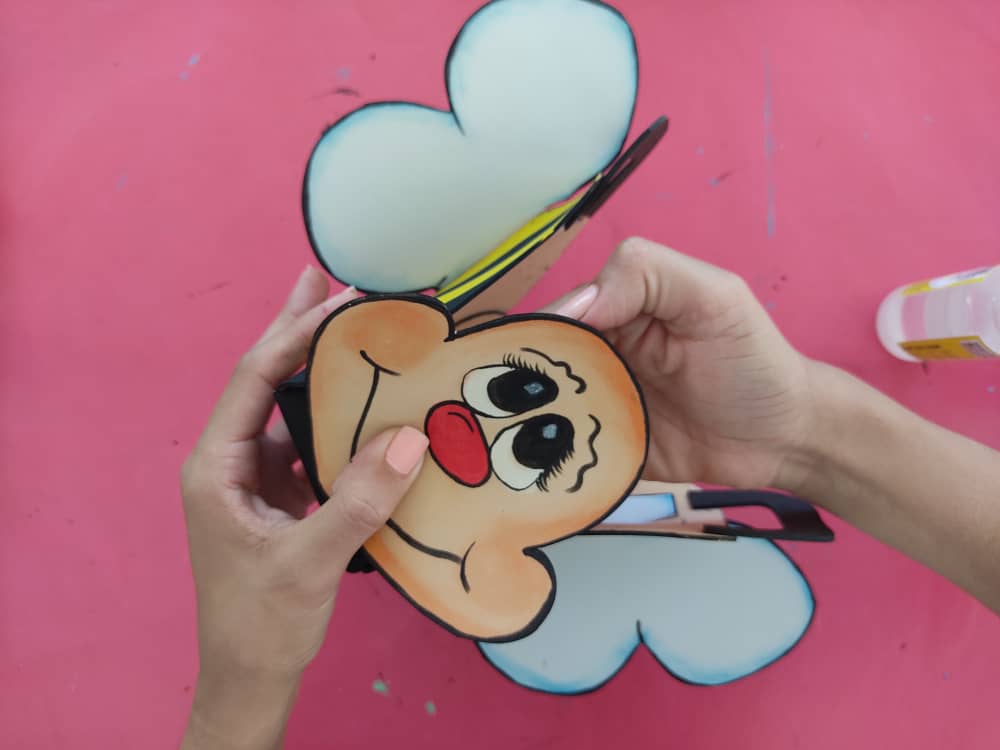
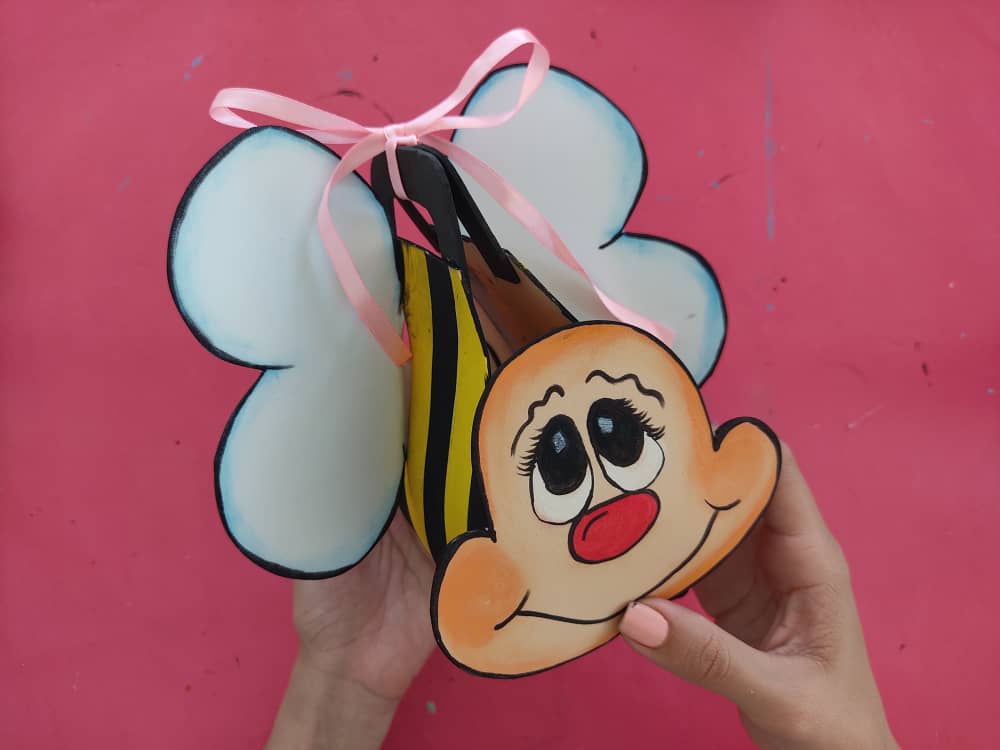
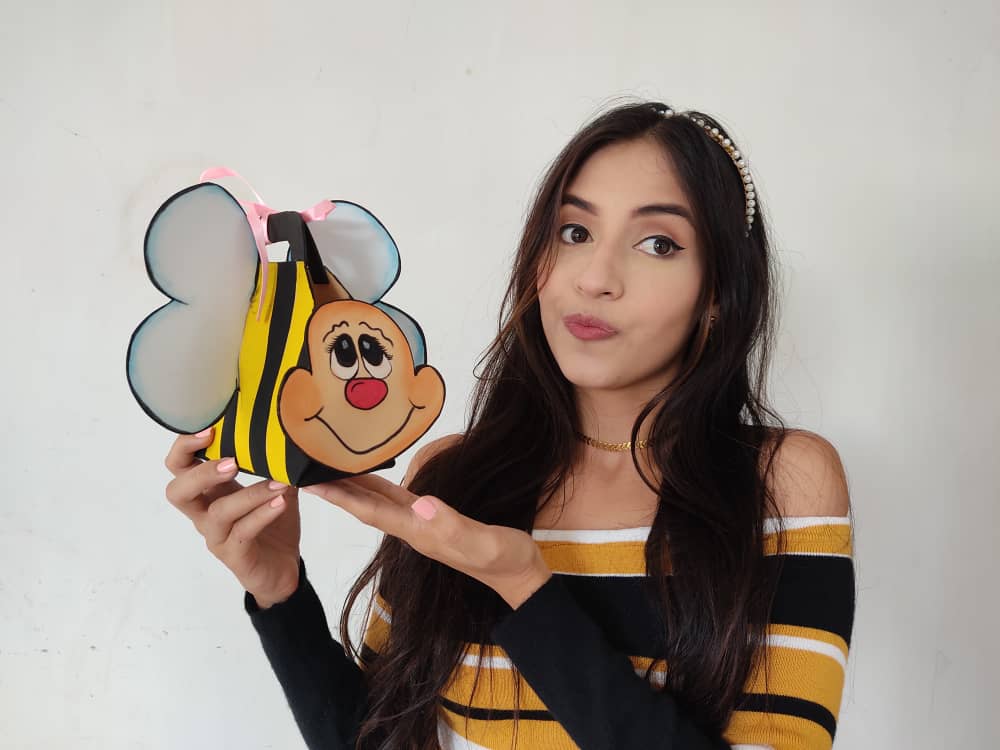
Luego, pegamos la linda y tierna cara de la abeja sobre uno de los extremos de la cesta, la ubicamos en una posición centrada de manera que todo se vea en su lugar, y luzca muy divertida y original.
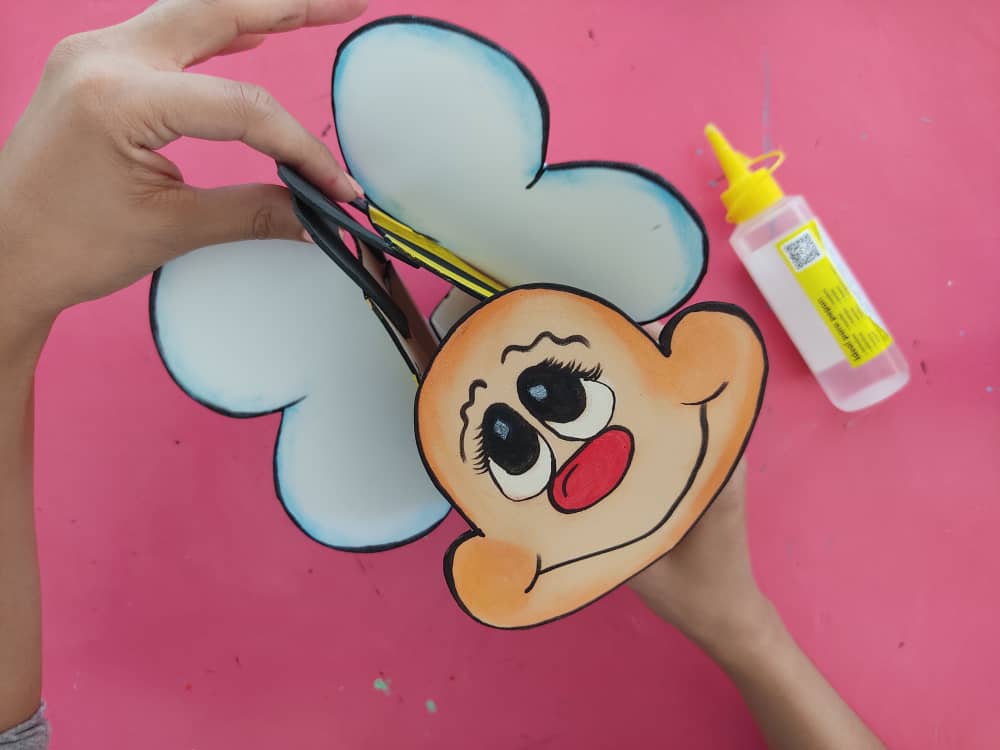
Then, we glue the cute and tender face of the bee on one of the ends of the basket, we place it in a central position so that everything looks in its place, and it looks very funny and original.
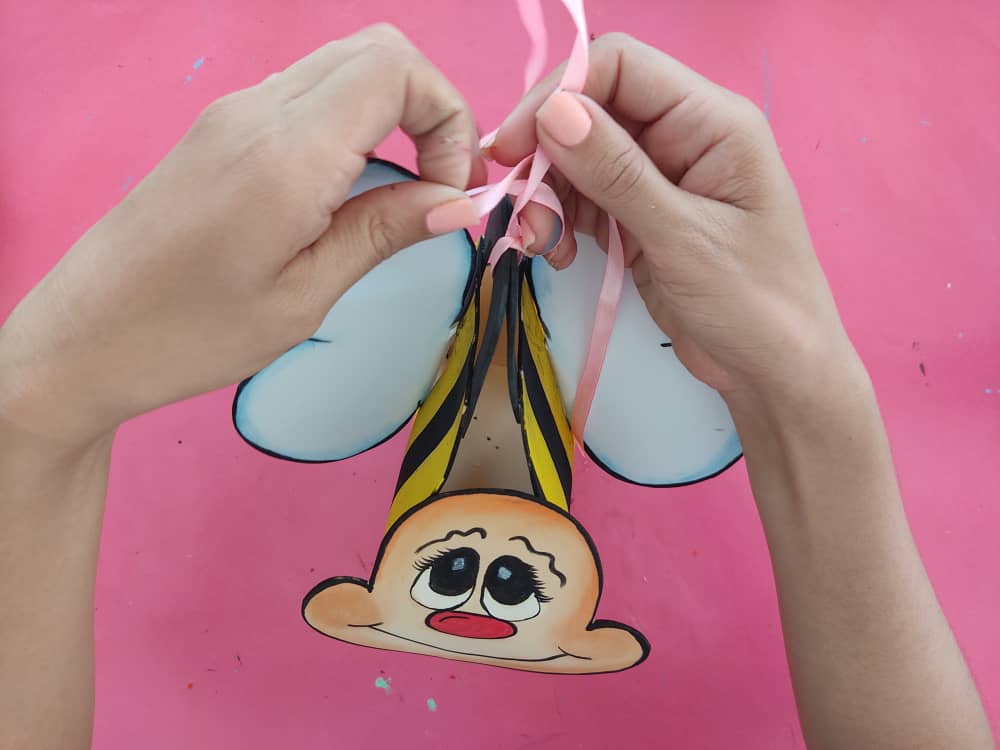
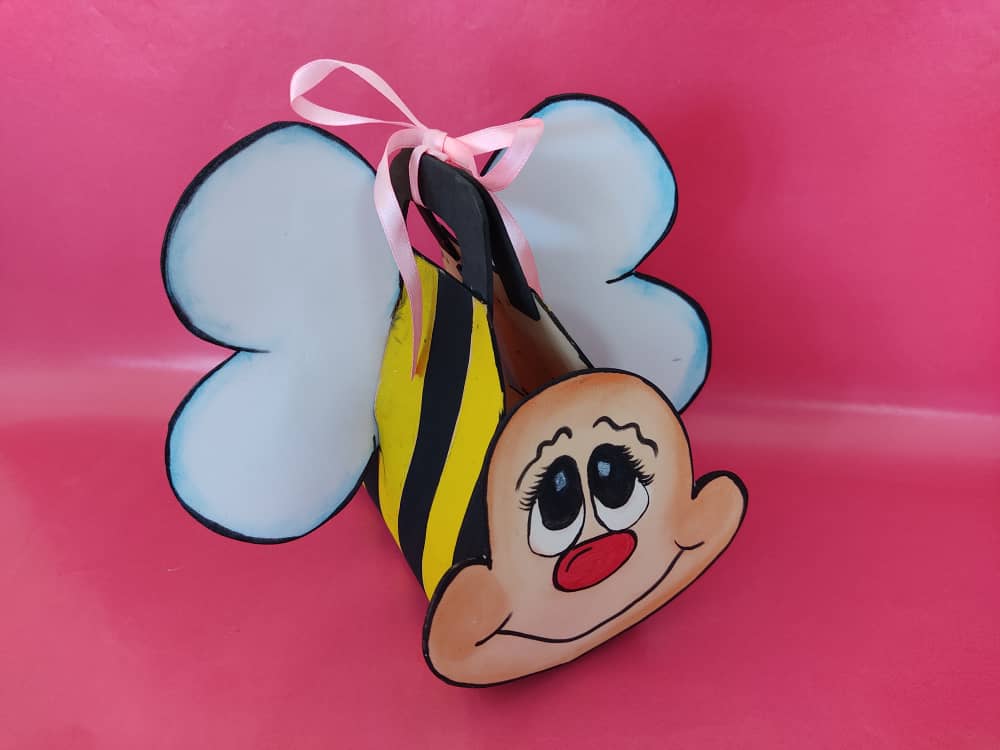
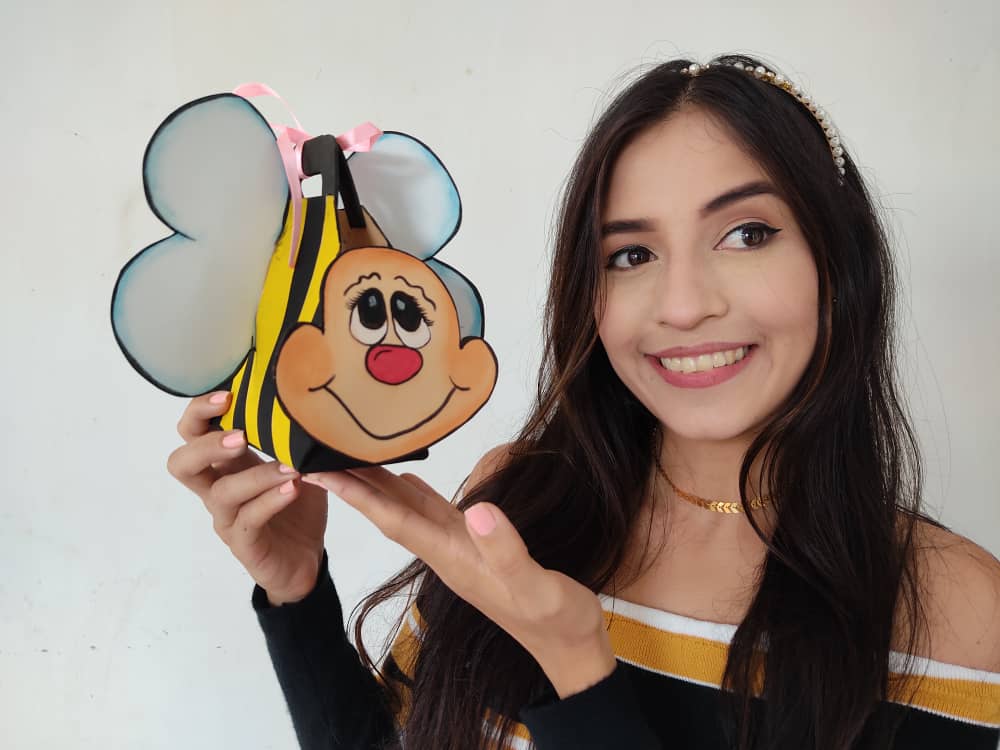
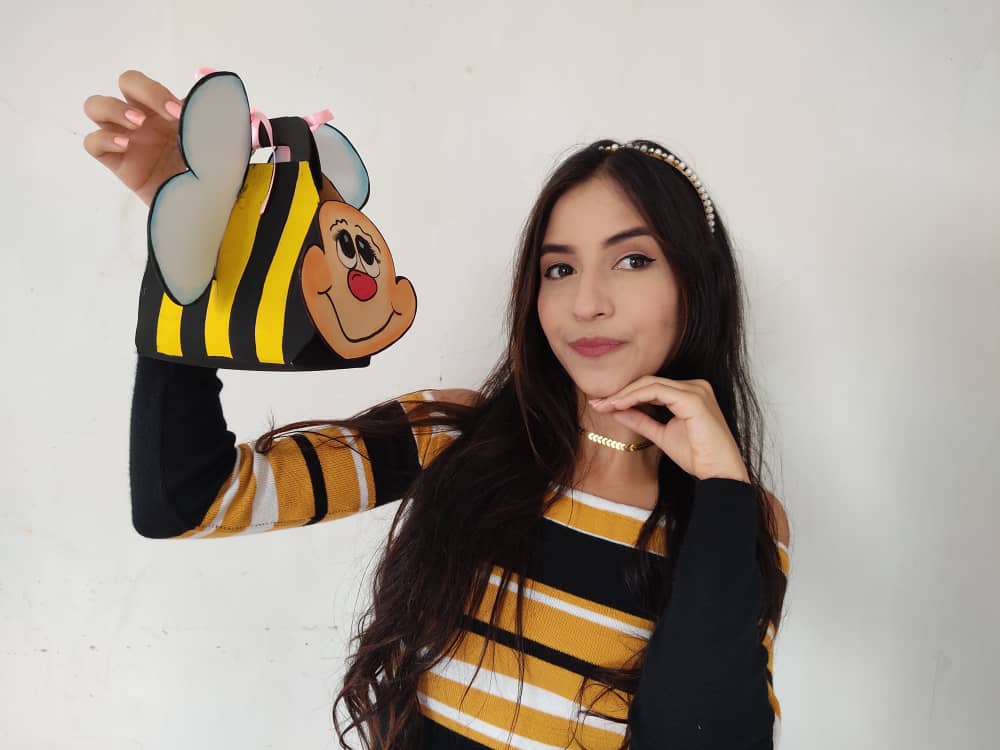
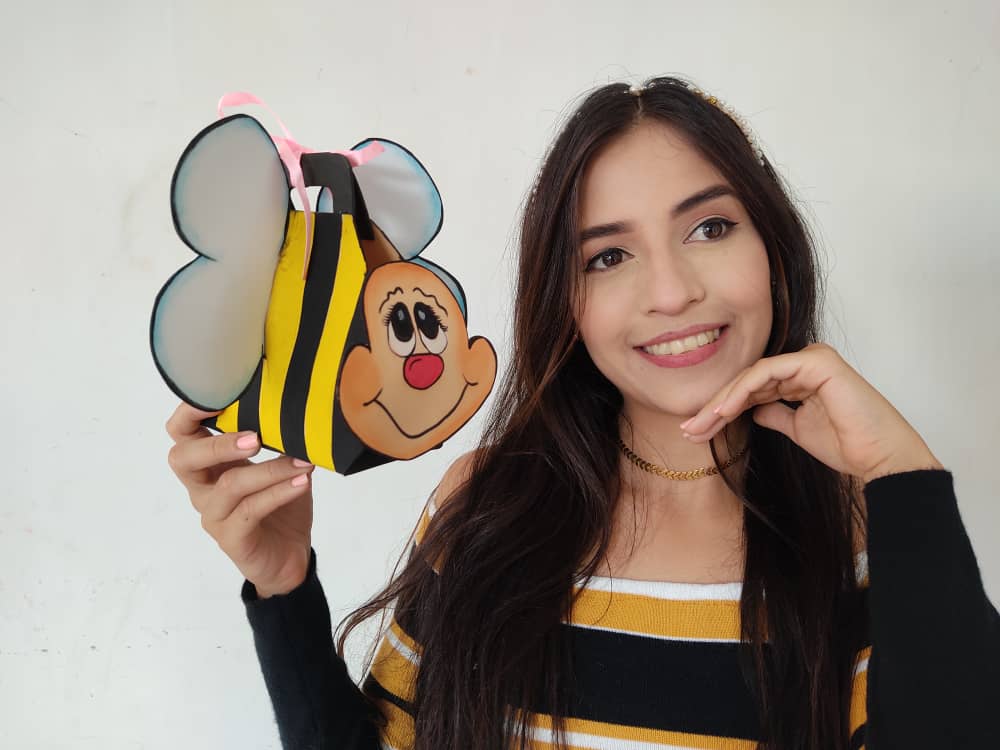
Finalmente, elegimos una cinta y hacemos un hermoso lazo que mantenga cerrada esta hermosa bolsa, que llegara para endulzar el día de nuestros seres más especiales.
Finally, we choose a ribbon and make a beautiful bow that keeps this beautiful bag closed, which will arrive to sweeten the day of our most special beings.
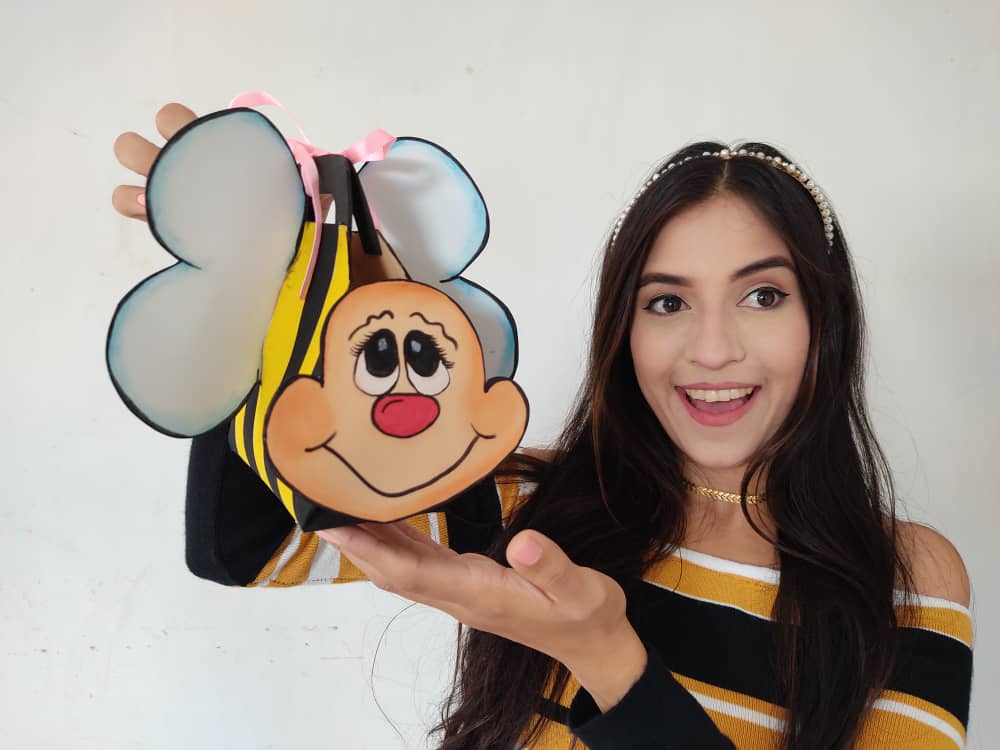
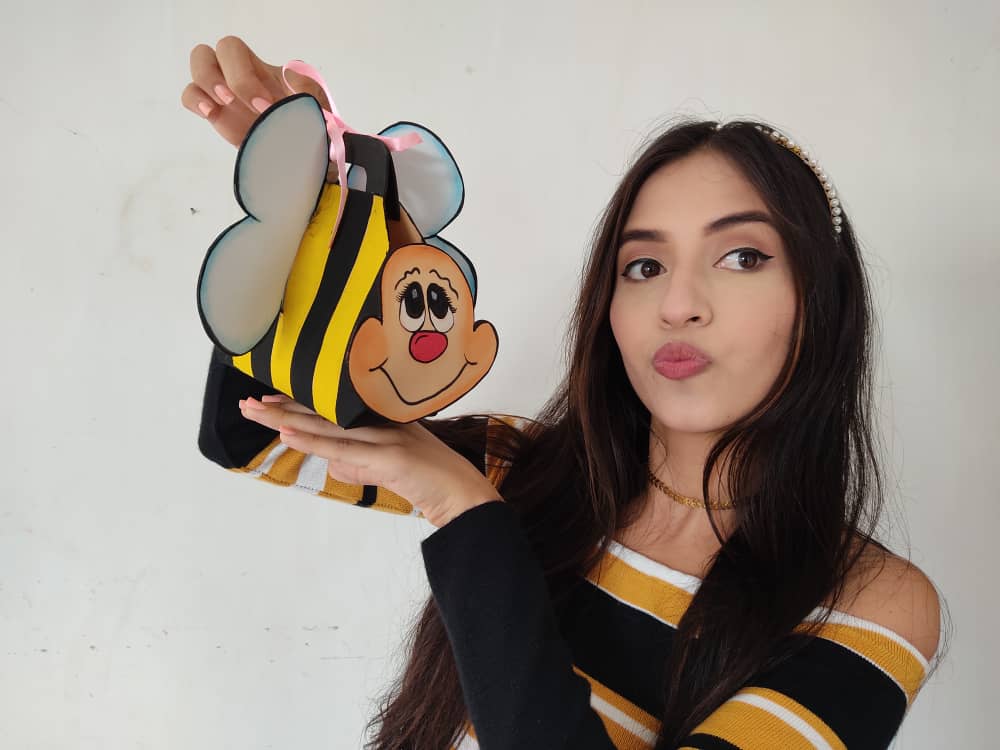
Gracias por acompañarme y espero que lo hayan disfrutado. ❤️
Thanks for joining and I hope you enjoyed it.❤️
.jpeg)
.jpeg)
.jpeg)
.jpeg)
.jpeg)
.jpeg)
.jpeg)
.jpeg)
.jpeg)
.jpeg)
.jpeg)
.jpeg)
Clic para ver trabajos anteriores | Click to see previous works


Preciosa la bolsa de abeja. Saludos. Muy lindos todos tus tutoriales. Felicidades. Muy detallado los pasos. Me gusta tu blog. Éxitos. Más éxitos 😉
This bag has most coolest look. It very deserve for the kids who're going to primary school. I know children really like to carry out. Very well presentation how to make it.
Congratulations, your post has been upvoted by @dsc-r2cornell, which is the curating account for @R2cornell's Discord Community.