.jpeg)

Español
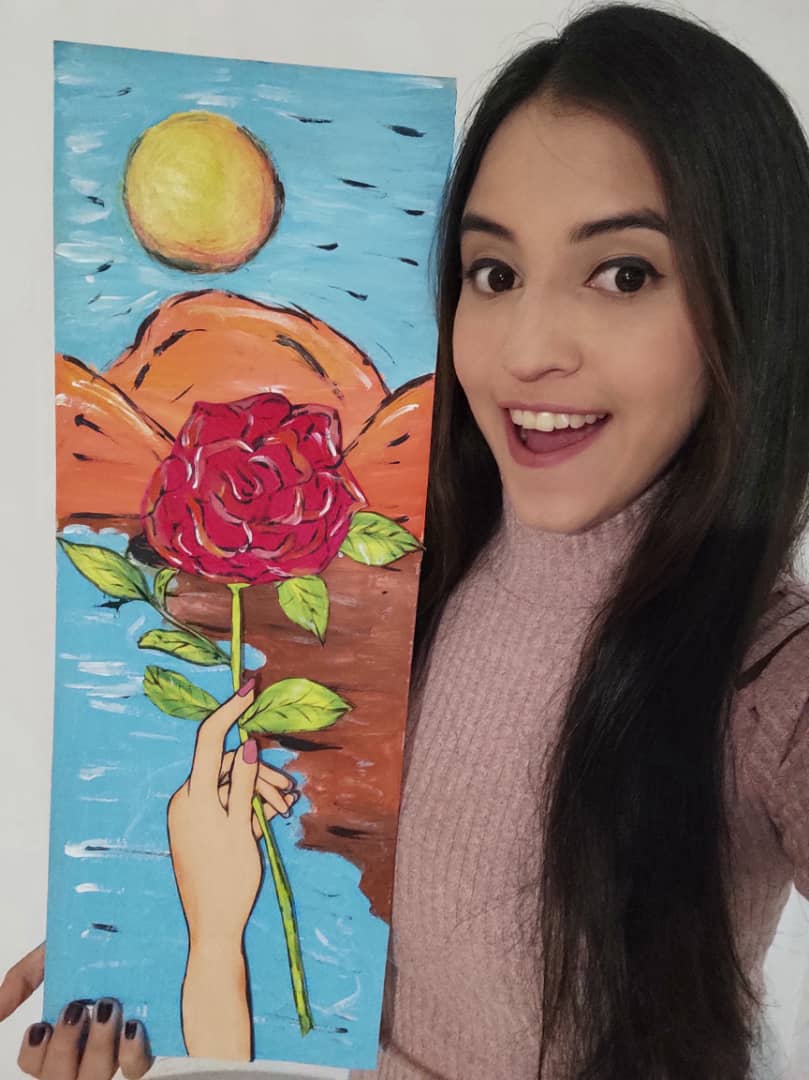
Hola querida familia ❣️ Hoy les traigo un nuevo y divertido paso a paso en donde les mostrare como realizar un precioso cuadro donde veremos una linda flor sostenida por una chica en la playa, hecho con foami y otros materiales fáciles de conseguir. Esta es una idea muy económica para decorar nuestras paredes. Así que, los invito a disfrutar de este divertido momento, ideal y perfecto para el desarrollo de la creatividad tanto de niños como adultos. Además es una idea perfecta para pasar un rato agradable con nuestros pequeños en casa e incentivarlos, ya que, pueden ir, de a poco, desarrollando su ingenio y acercándose un poco más al trabajo artístico.
English
Hello beautiful family 💓 Today I bring you a new and fun step by step where I will show you how to make a beautiful painting where we will see a beautiful flower held by a girl on the beach, made with foam and other easy-to-find materials. This is a very economical idea to decorate our walls. So, I invite you to enjoy this fun moment, ideal, and perfect for the development of creativity for both children and adults. It is also a perfect idea to spend a pleasant time with our little ones at home and encourage them, since they can go, little by little, developing their ingenuity and getting a little closer to artistic work.
¿Qué están esperando?
Gracias a esta técnica podemos crear nuestro propio cuadro de flor sostenida, además, una hermosa obra hecha en casa es una manera creativa y muy económica de darle un toque de alegría a nuestro entorno. Antes de comenzar no olvidemos lavarnos nuestras manos.
What are they waiting for?
Thanks to this technique we can create our own sustained flower painting, in addition, beautiful home-made work is a creative and very economical way to give a touch of joy to our surroundings. Before we start, let's not forget to wash our hands.
[Materiales | Materials]
Para hacer este hermoso cuadro necesitaremos:
- Moldes.
- Foami o goma eva.
- Papel vegetal o calco.
- Lamina de cartón.
- Regla.
- Lápiz.
- Marcador.
- Tijera.
- Cúter.
- Pincel o brocha.
- Pinturas.
- Silicón liquido o pegamento.
To make this precious painting will need:
- Molds.
- Foamy or eva foam.
- Vegetable paper or tracing.
- Cardboard sheet.
- Rule.
- Pencil.
- Bookmark.
- Scissors.
- Cutter.
- Brush or brush.
- Paintings.
- Liquid silicone or glue.
Procedimiento (paso a paso)
Process (step by step)
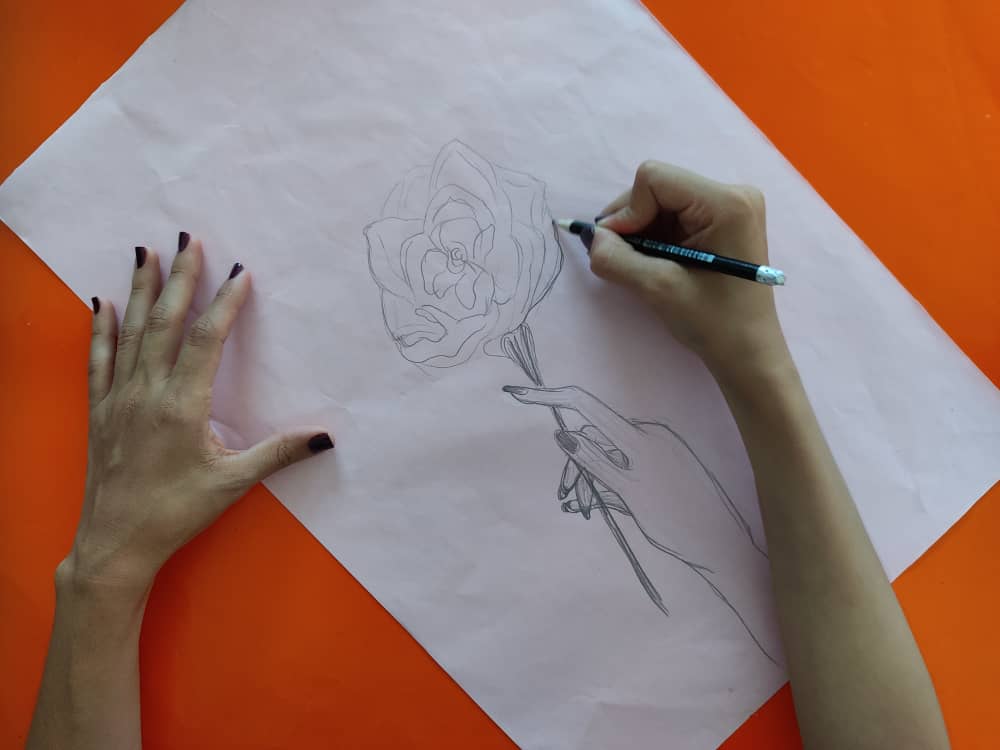
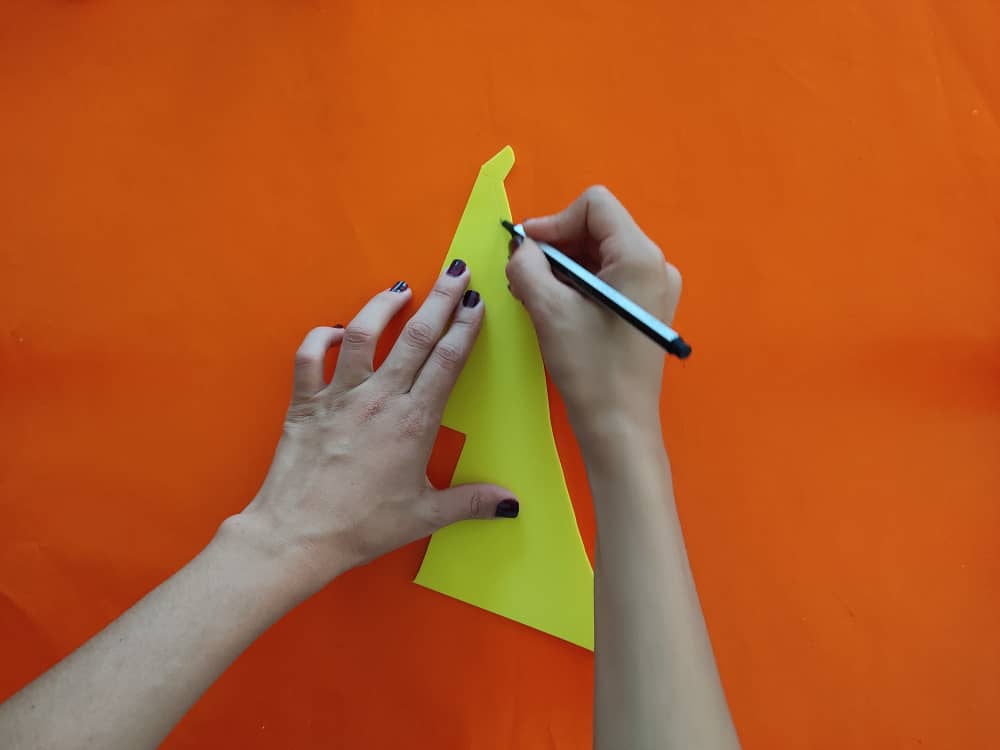
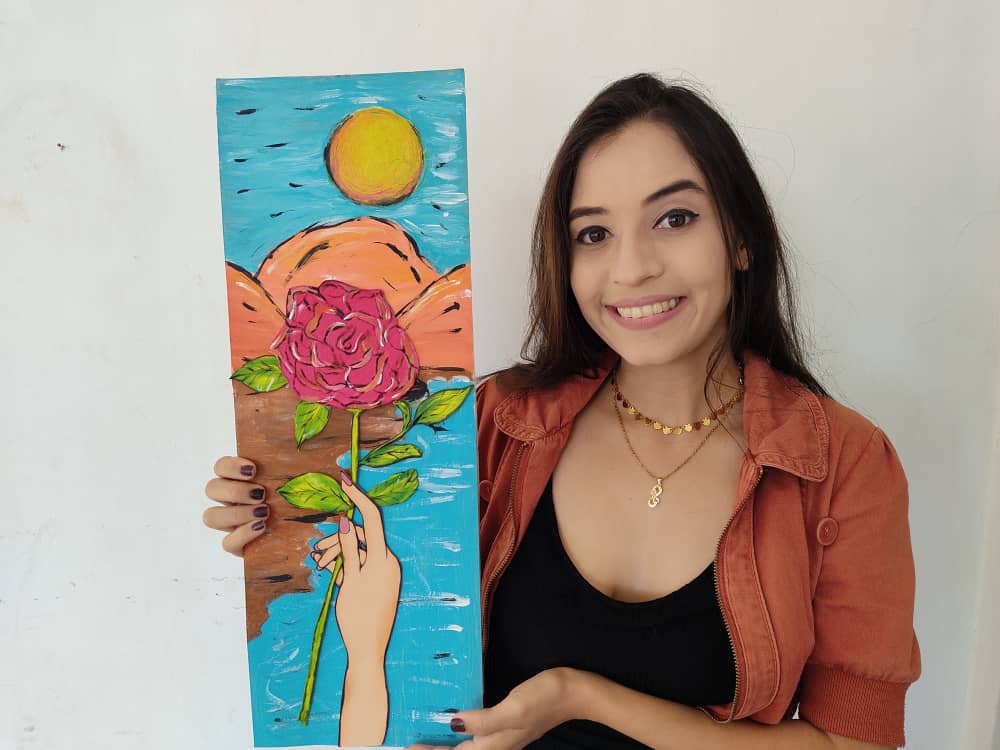
Primero, dibujamos una gran rosa sostenida por una mano muy delicada, está vez opte por dibujar un hermoso fondo que será la playa, para que esté cuadro luzca aún más romántico, y que ambiente más romántico que la playa no?
First, we draw a large rose held by a very delicate hand, this time I chose to draw a beautiful background that will be the beach, so that this painting looks even more romantic, and what more romantic atmosphere than the beach?
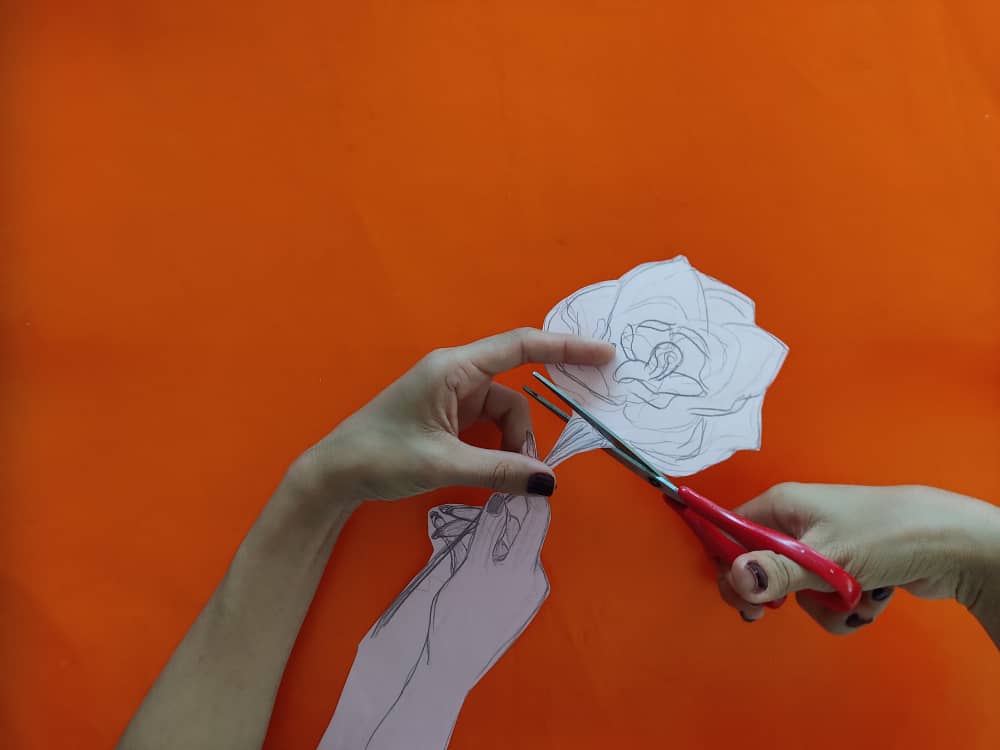
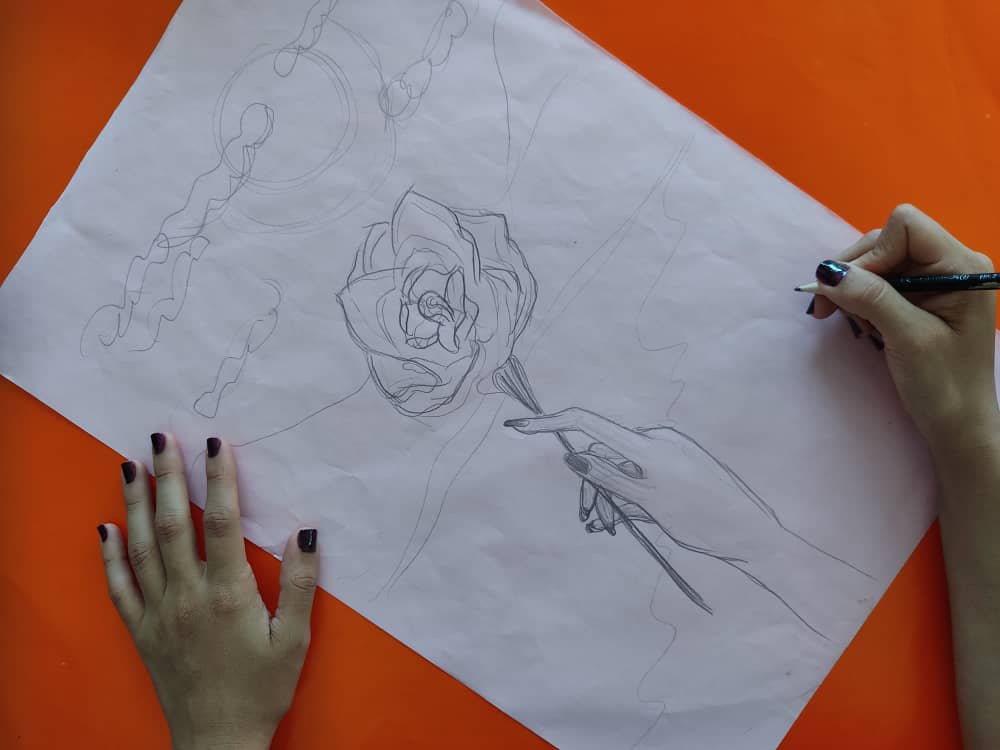
Luego, recortamos nuestro dibujo separando la rosa de su tallo, y el tallo de la mano de la chica, debemos recortar con mucho cuidado, para que sus medidas se mantengan intactas, y también evitar accidentes.
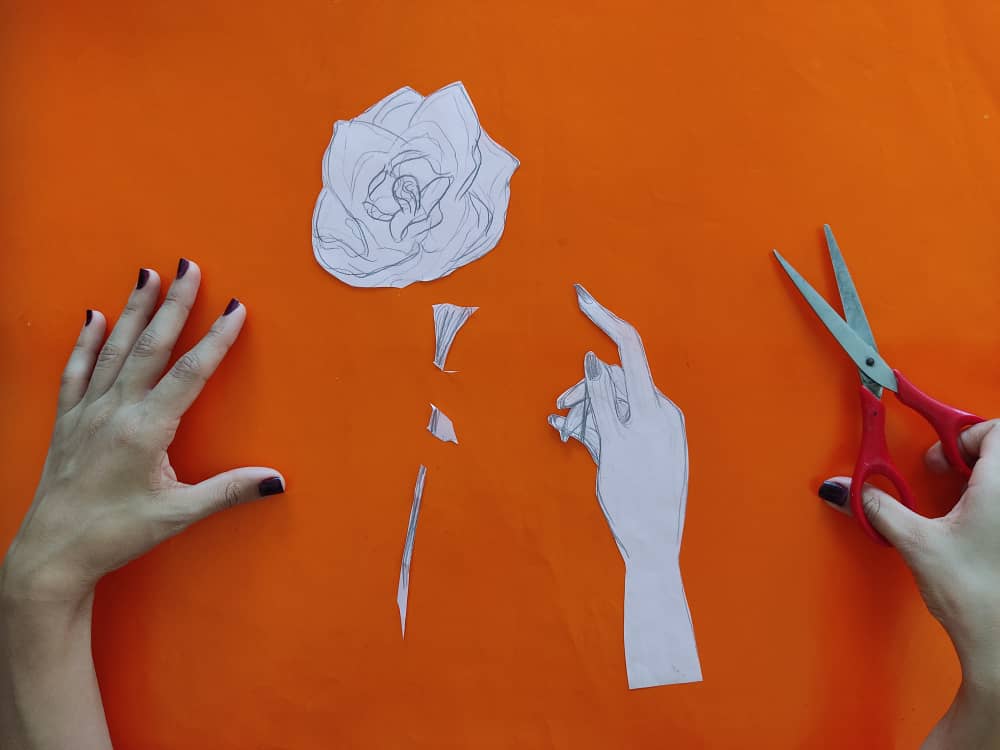
Then, we cut out our drawing by separating the rose from its stem, and the stem of the girl's hand, we must cut very carefully, so that her measurements remain intact, and also avoid accidents.
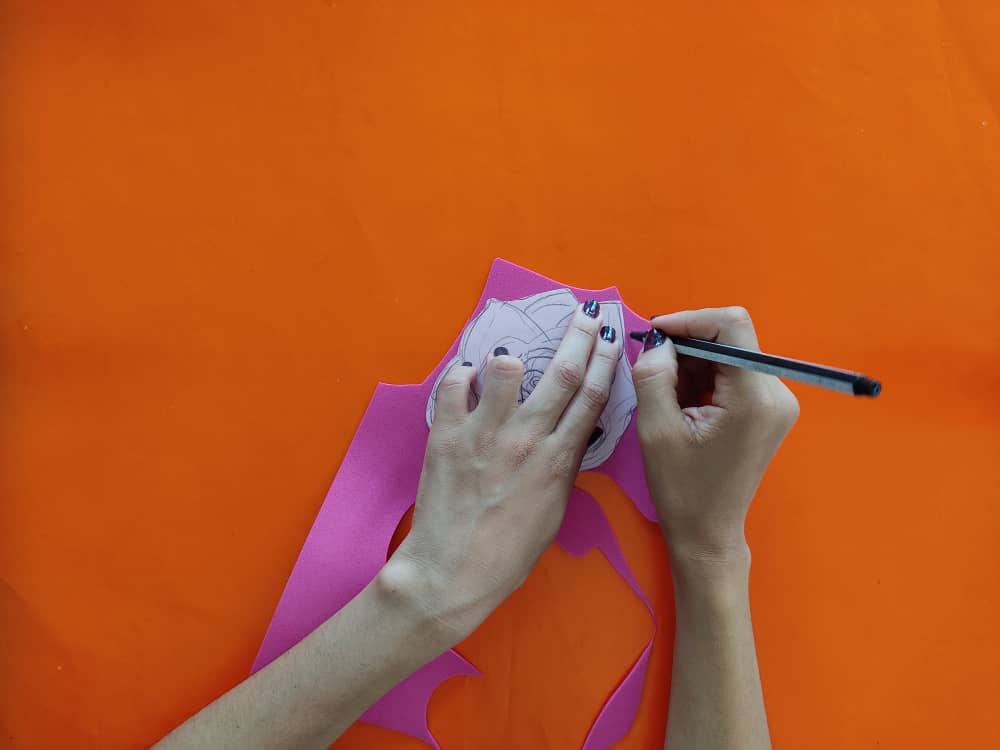
Una vez obtenidas las figuras deseadas, transferimos la flor y la mano al foami conservando las medidas, para que todo quede perfecto.
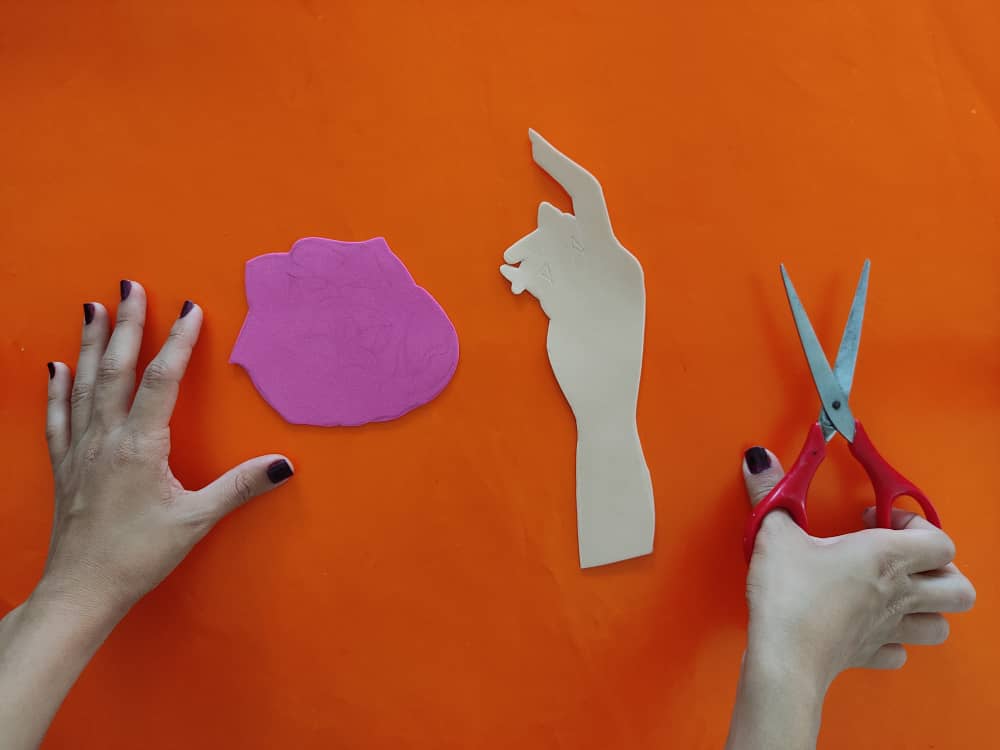
Once the desired figures are obtained, we transfer the flower and the hand to the foam, keeping the measurements, so that everything is perfect.
Seguidamente, elaboramos un lindo tallo y sus hermosas hojas en foami, para que nuestra flor sea muy autentica y hermosa.
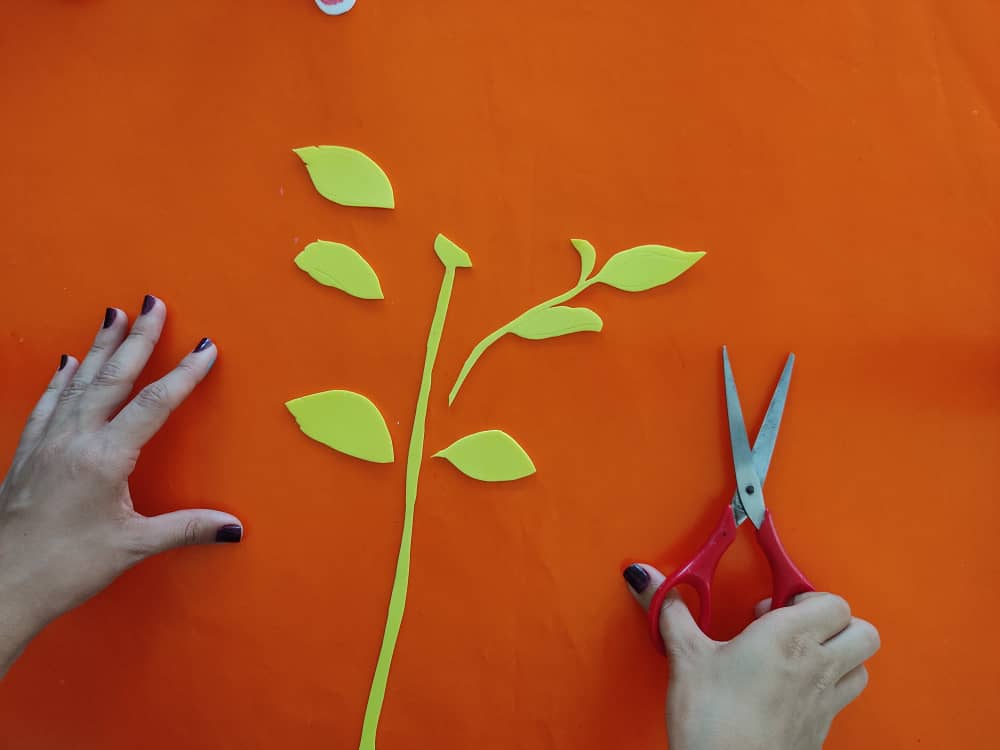
Next, we make a nice stem and its beautiful foamy leaves, so that our flower is very authentic and beautiful.

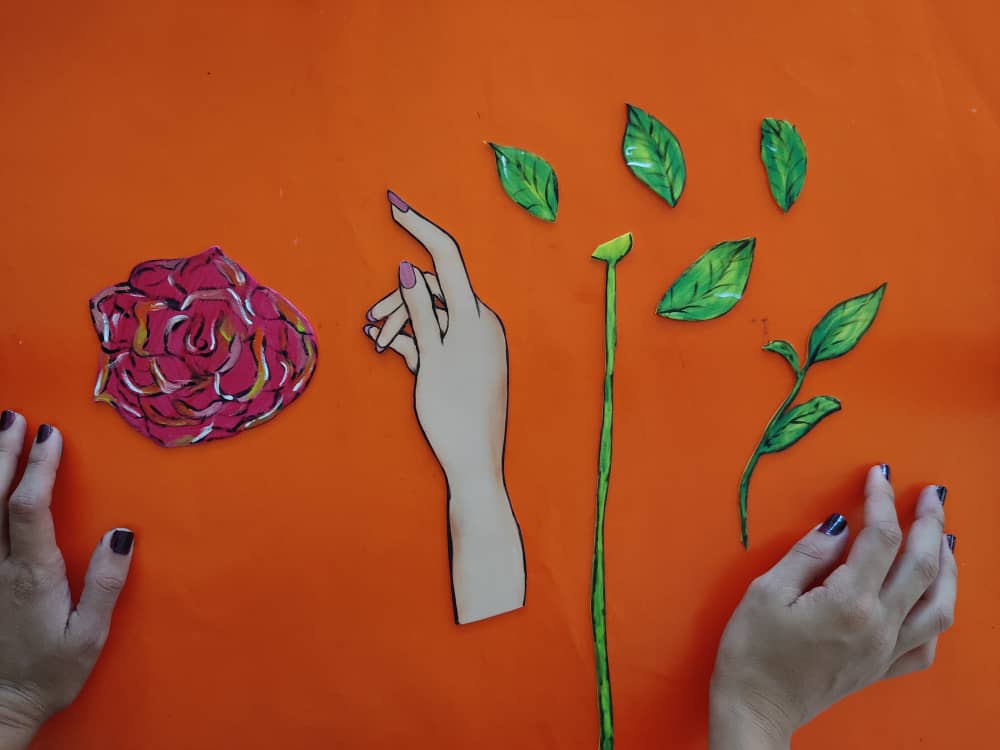
Ahora comenzamos a darle un poco de amor a la mano que sostendrá la rosa, sombreando un poco sus bordes con un hermoso color naranja, y marcamos sus bordes con un marcador negro de punta muy fina.

Now we begin to give a little love to the hand that will hold the rose, shading its edges a little with a beautiful orange color, and marking its edges with a very fine-tipped black marker.
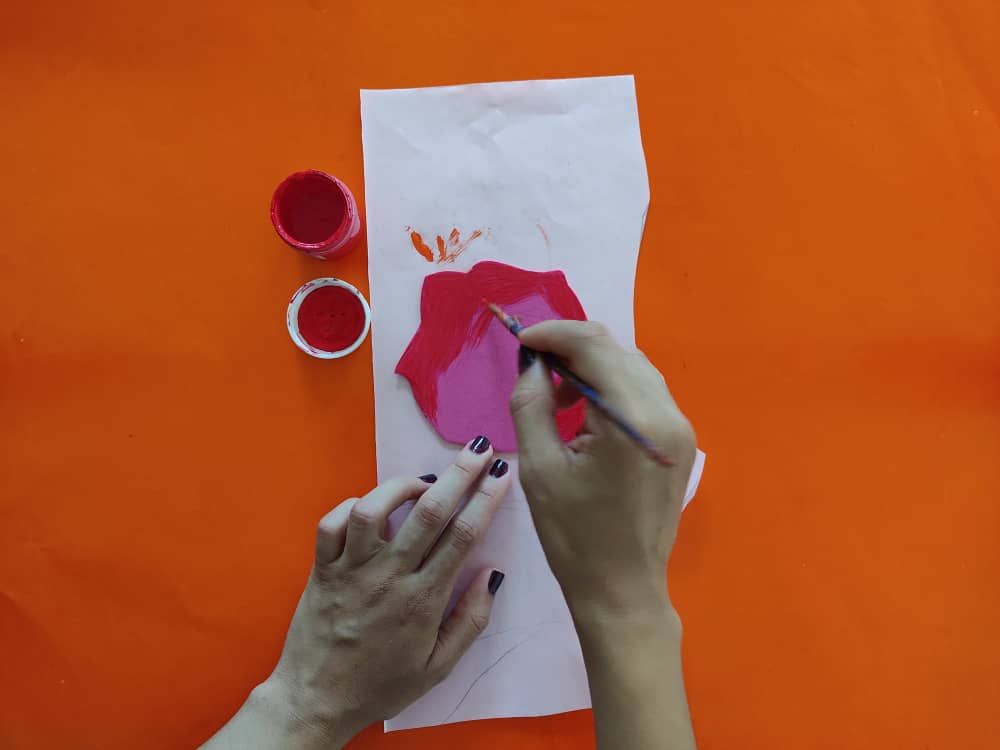
Luego, pintamos y definimos los detalles de nuestra rosa, haciendo algunas curvas en color blanco y rosado, para definir sus pétalos, y darle un poco de brillo. Seguidamente, pintamos sus bordes de negro incluyendo todas las separaciones.
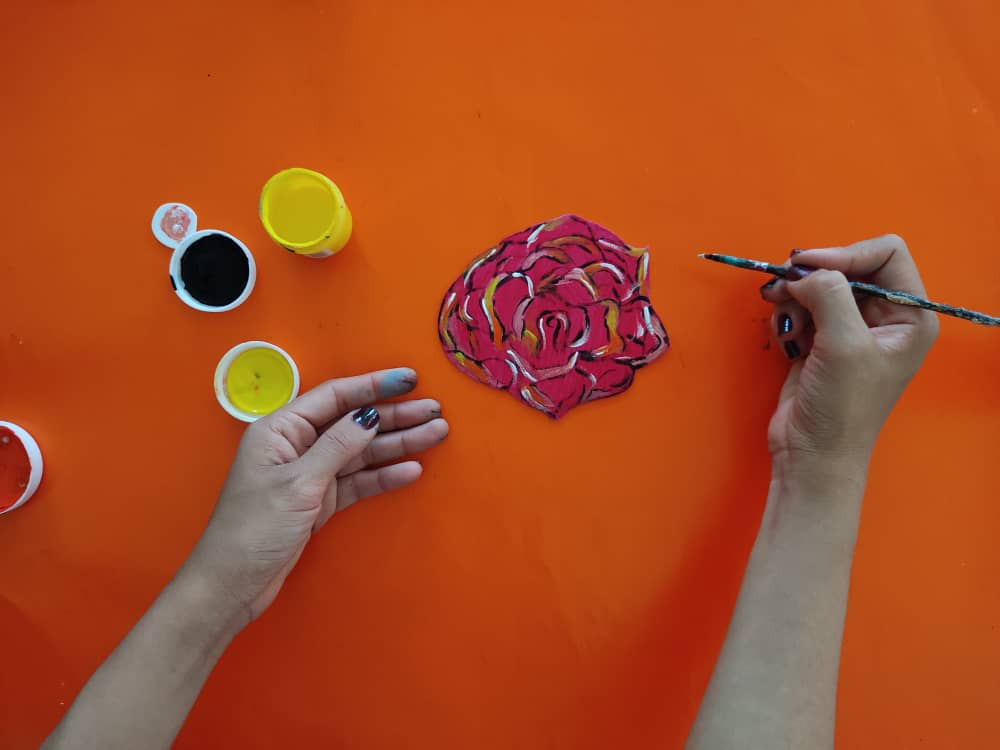
Then, we paint and define the details of our rose, making some curves in white and pink, to define its petals, and give it a little shine. Next, we paint its edges black including all the separations.
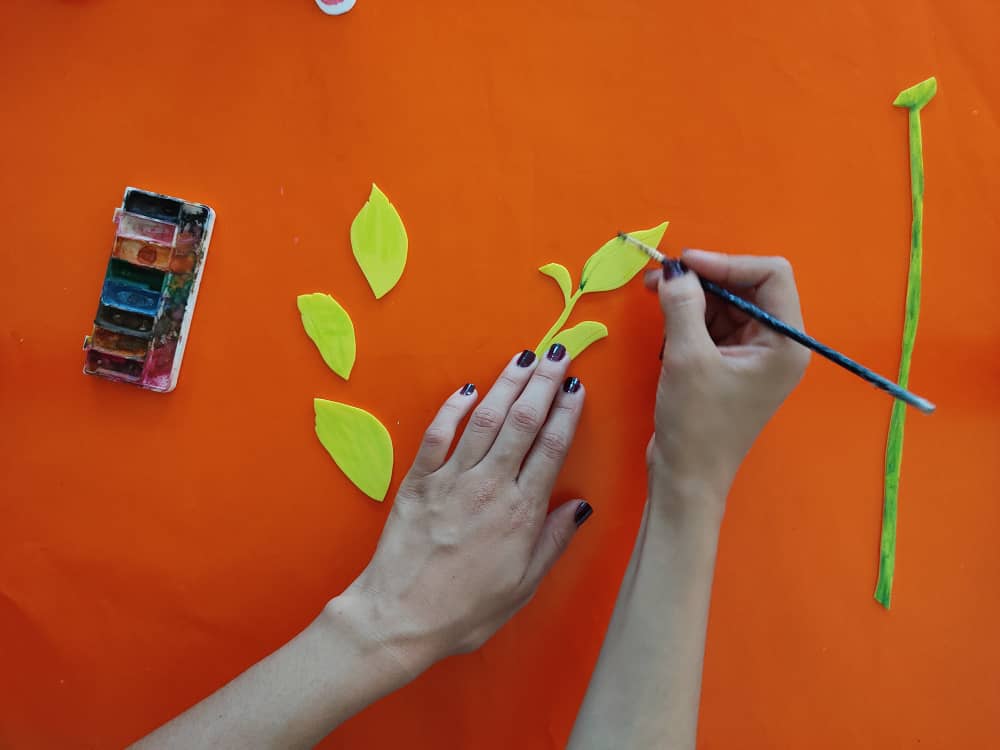
Ahora, pintamos el tallo y hojas de nuestra flor, con pequeñas pinceladas en tonos verdes, pues, esto hará que se vea más brillante, ya que, luce como que su color está difuminado en verde y un brillante amarillo gracias al color base del foami, genial no? Seguidamente, marcamos los bordes y detalles de las hojas con el marcador.
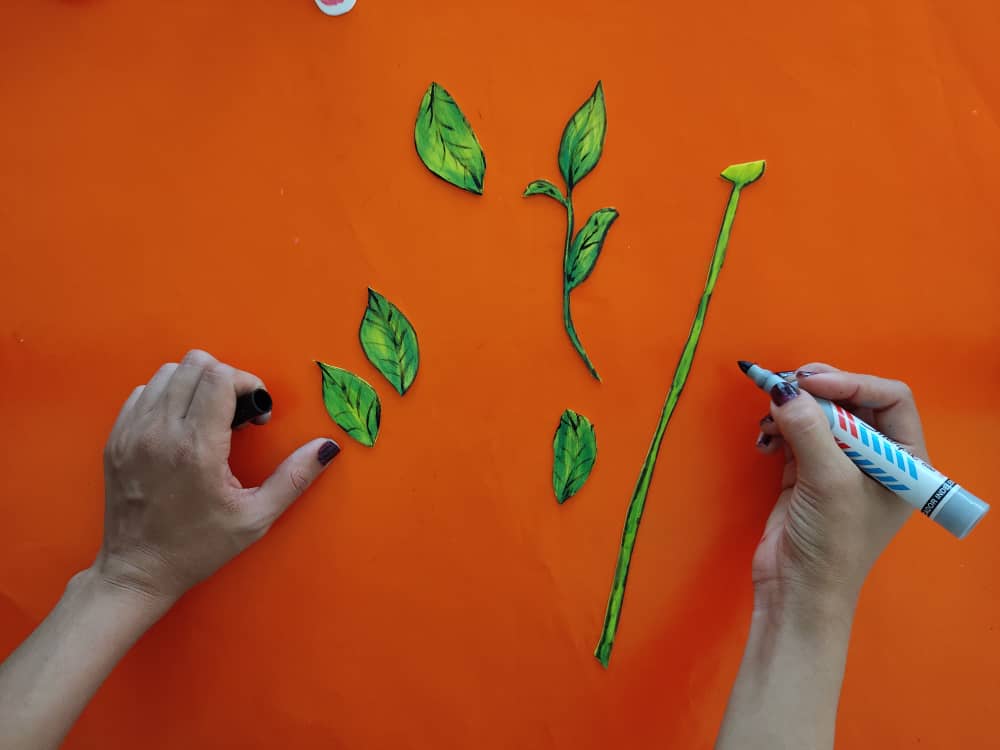
Now, we paint the stem and leaves of our flower, with small brushstrokes in green tones, well, this will make it look brighter, since, it looks like its color is blurred in green and a bright yellow thanks to the base color of the foamy cool right? Next, we mark the edges and details of the leaves with the marker.
Una vez que estén listas todas las partes de nuestra obra, las unimos pegando cada pieza con silicón y presionando por unos segundos de manera que todo quede bien pegado, comenzamos pegando el tallo a la rosa, luego, la mano de la chica, y así, sucesivamente.
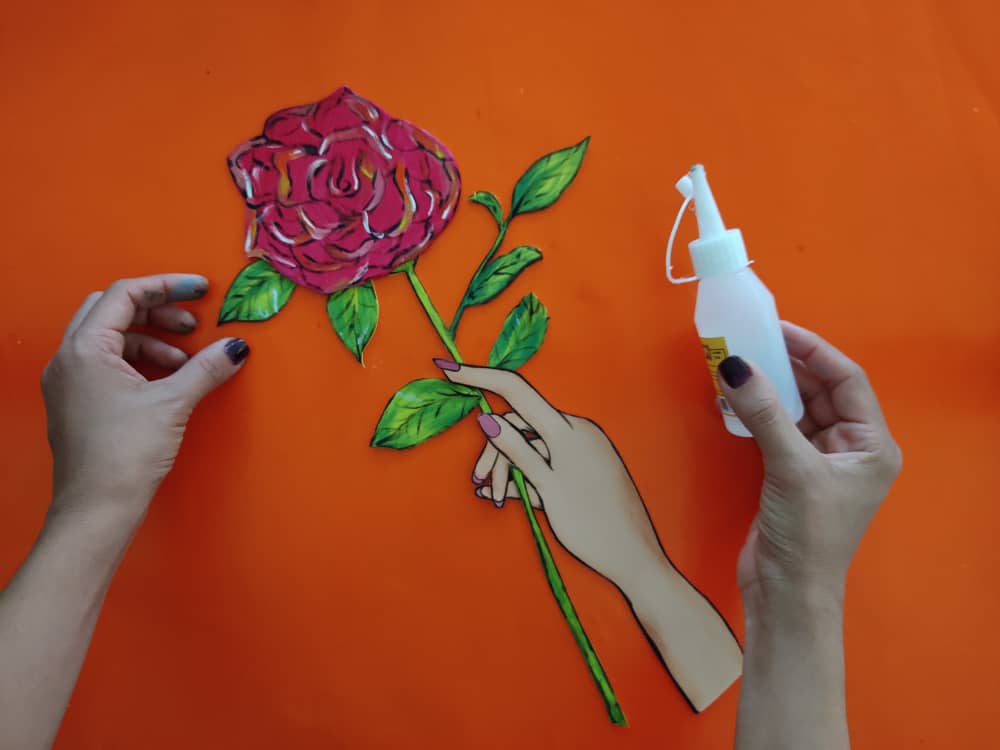
Once all the parts of our work are ready, we join them by gluing each piece with silicone and pressing for a few seconds so that everything is well glued, we begin by gluing the stem to the rose, then, the girl's hand, and so on, successively.
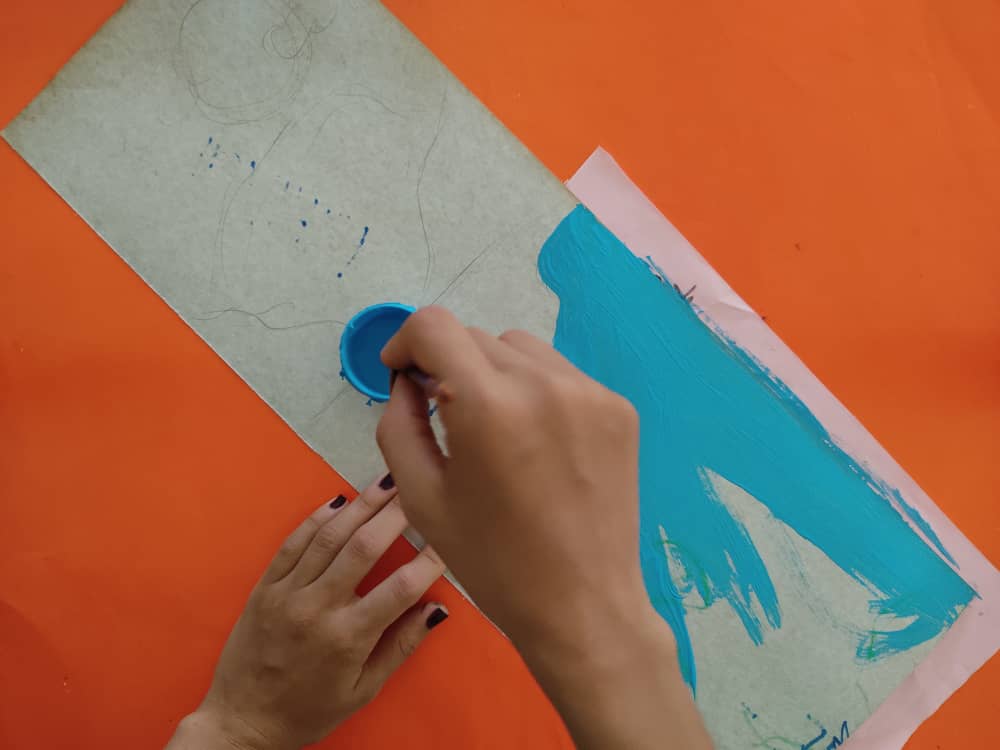
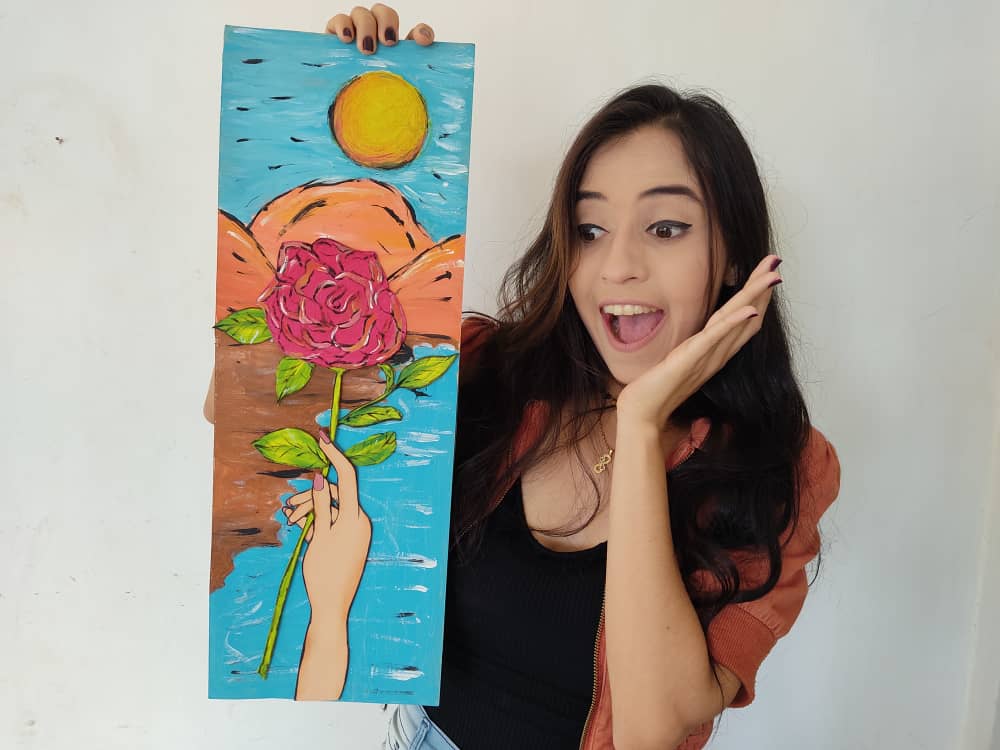
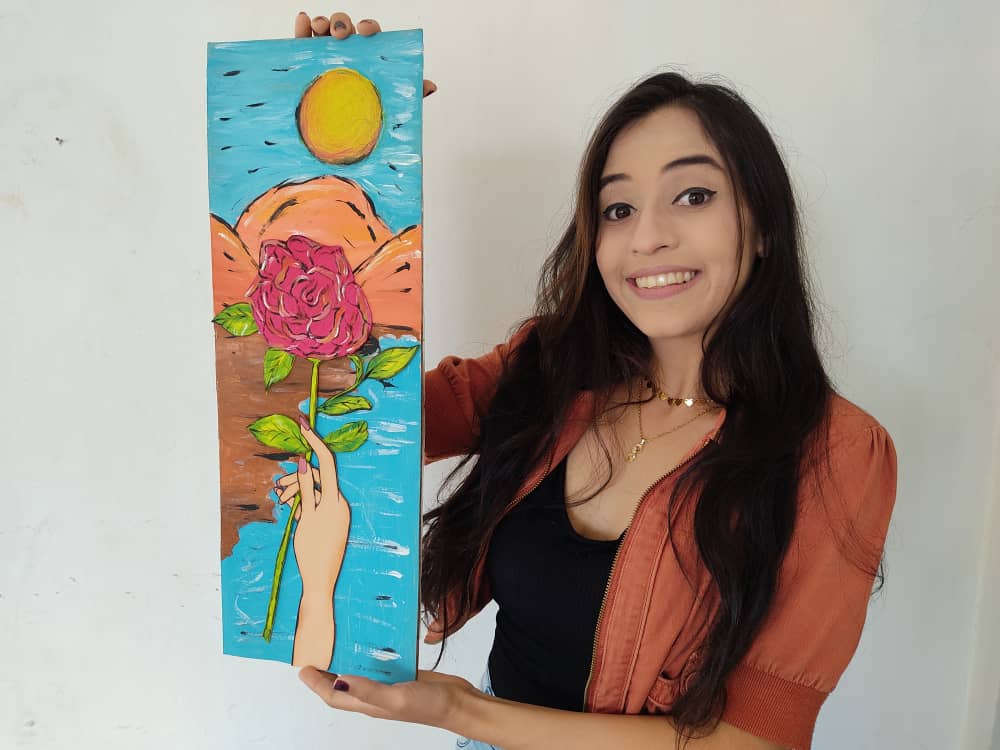
Ahora, fabricamos la base de cartón para nuestro cuadro de 58 x 28cm, y sobre ella dibujamos y pintamos una hermosa playa, y un sol muy radiante para crear un hermoso y romántico fondo para nuestra preciosa flor. Dejamos secar la pintura por unos minutos.
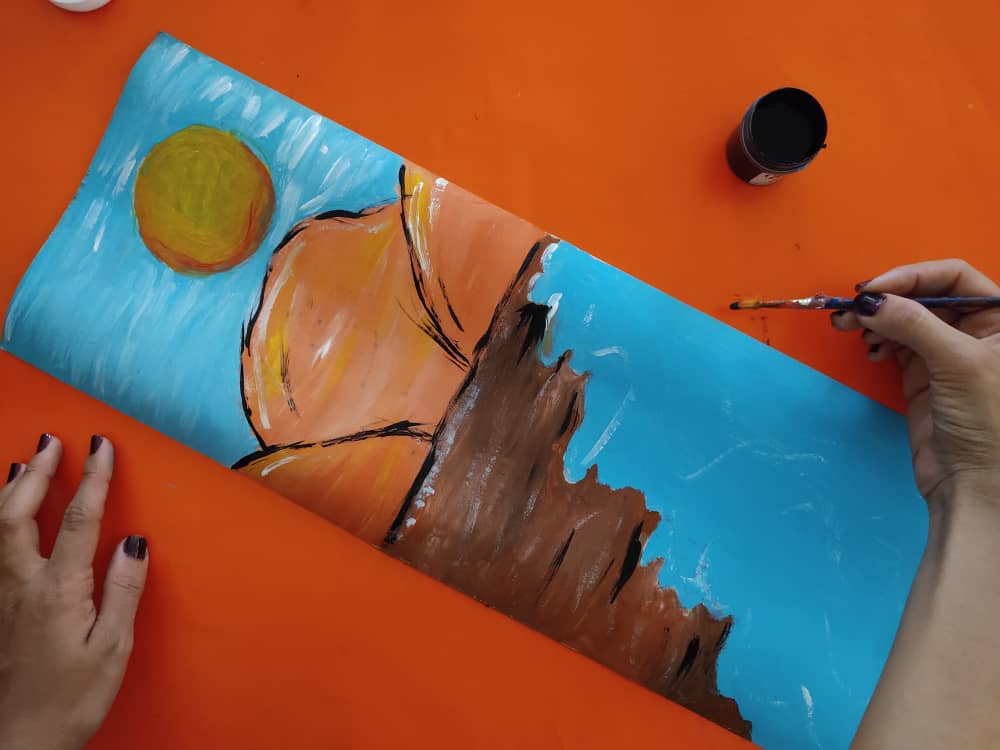
Now, we make the cardboard base for our 58 x 28cm painting, and on it we draw and paint a beautiful beach, and a very bright sun to create a beautiful and romantic background for our precious flower. We let the paint dry for a few minutes.
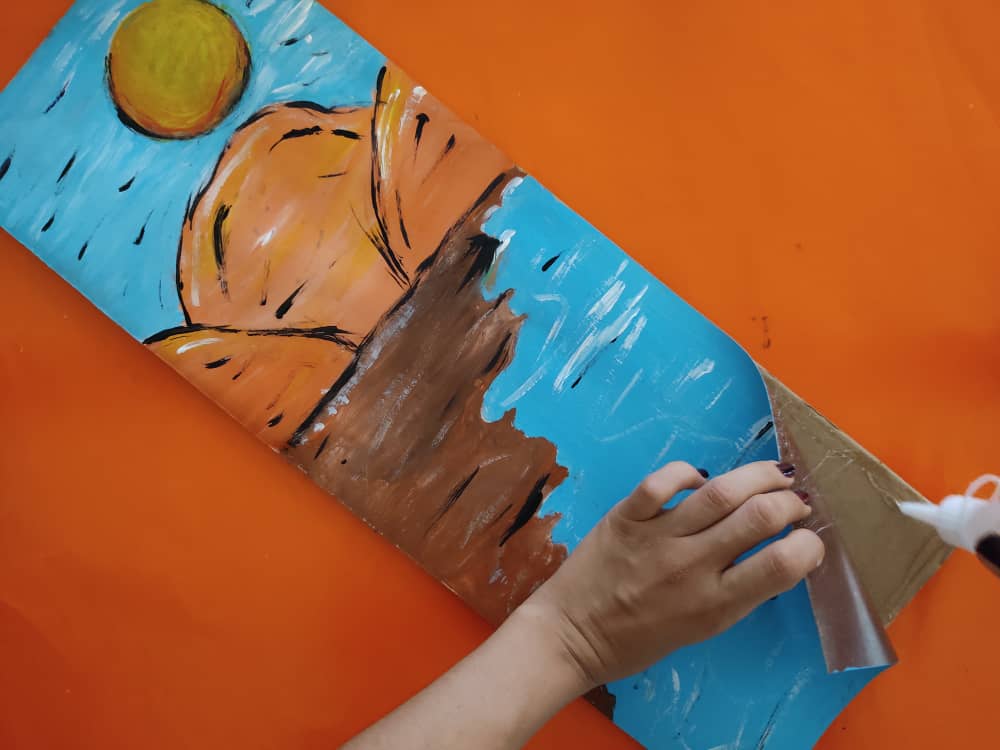
Seguidamente, pegamos nuestra base a un cartón más grueso para asegurarnos de que esta obra quedé bastante firme, y hermosa.
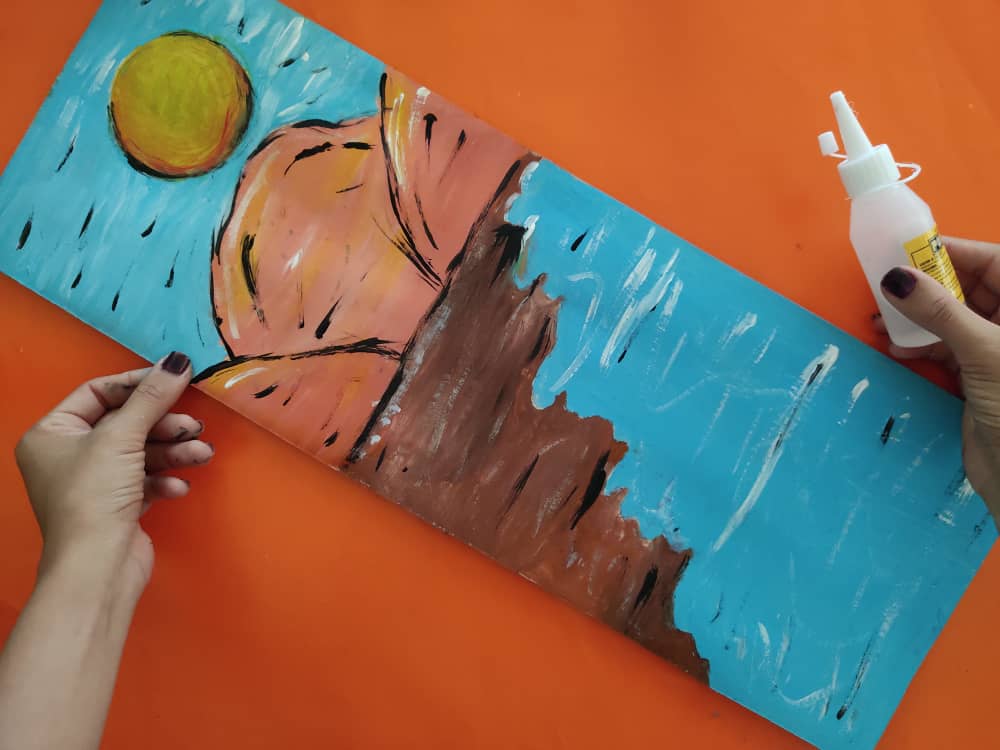
Next, we glued our base to thicker cardboard to make sure that this work was quite firm and beautiful.
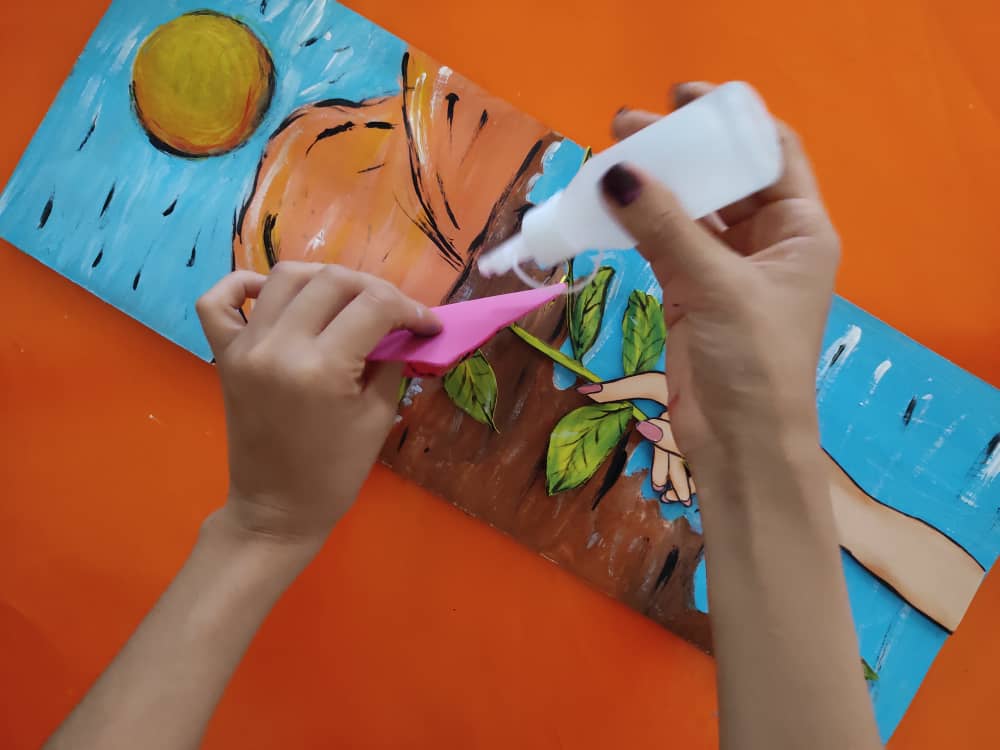
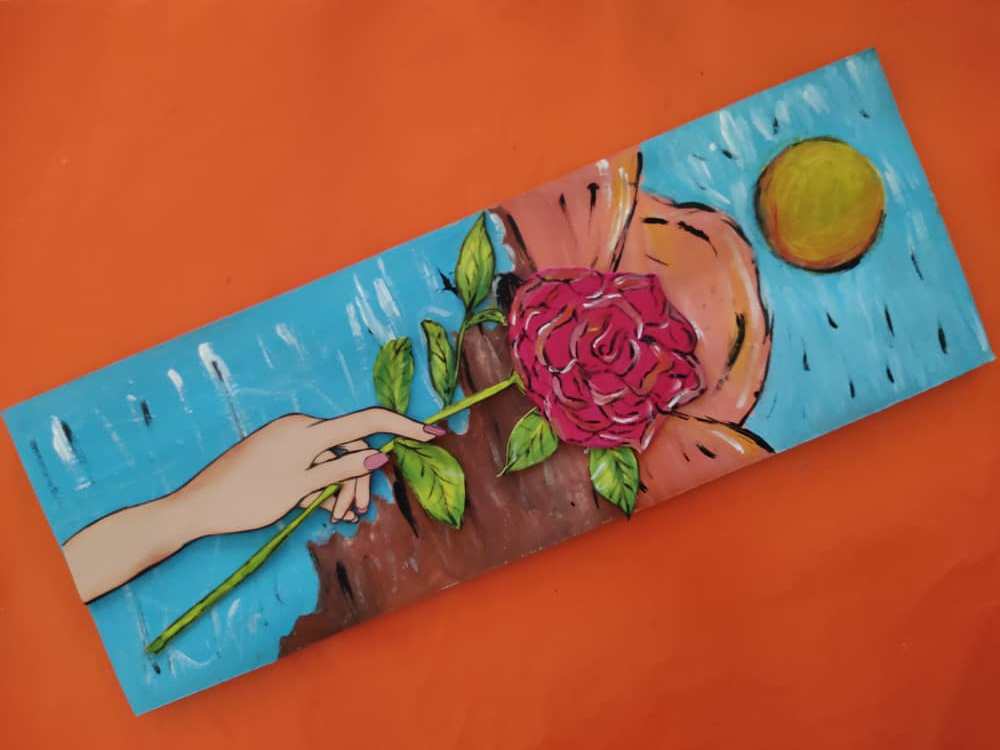
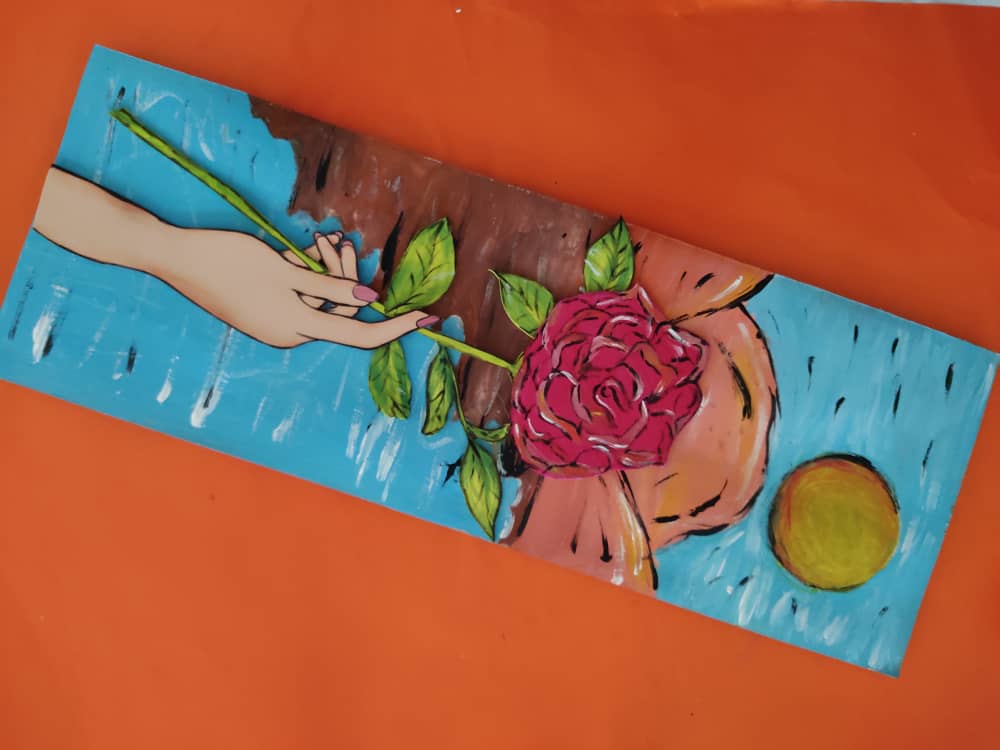
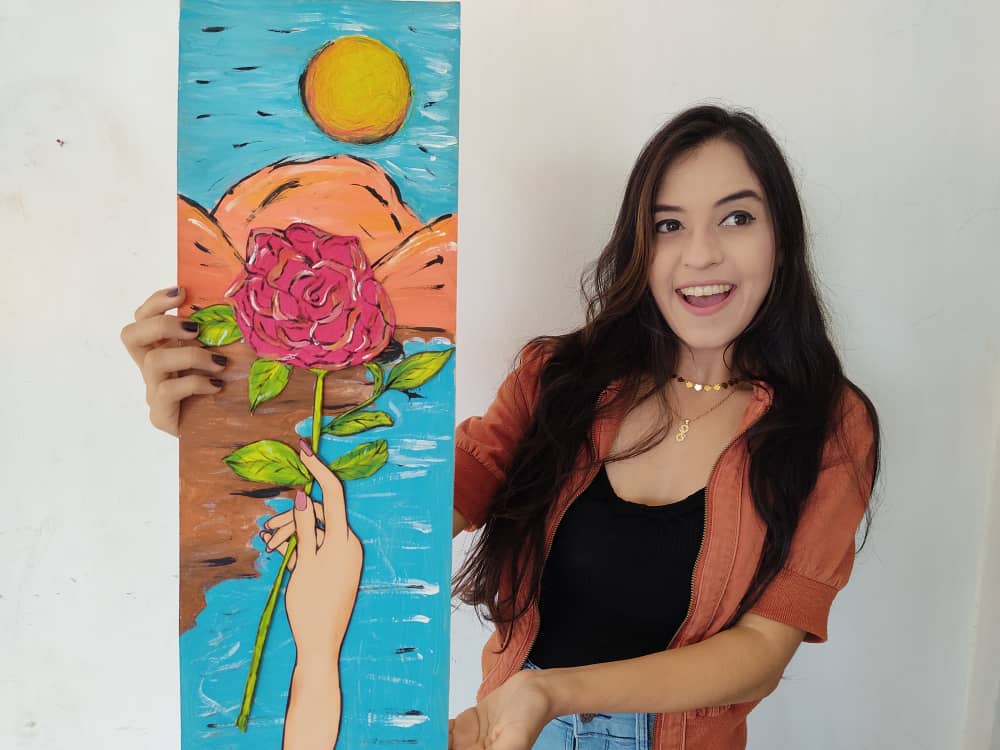
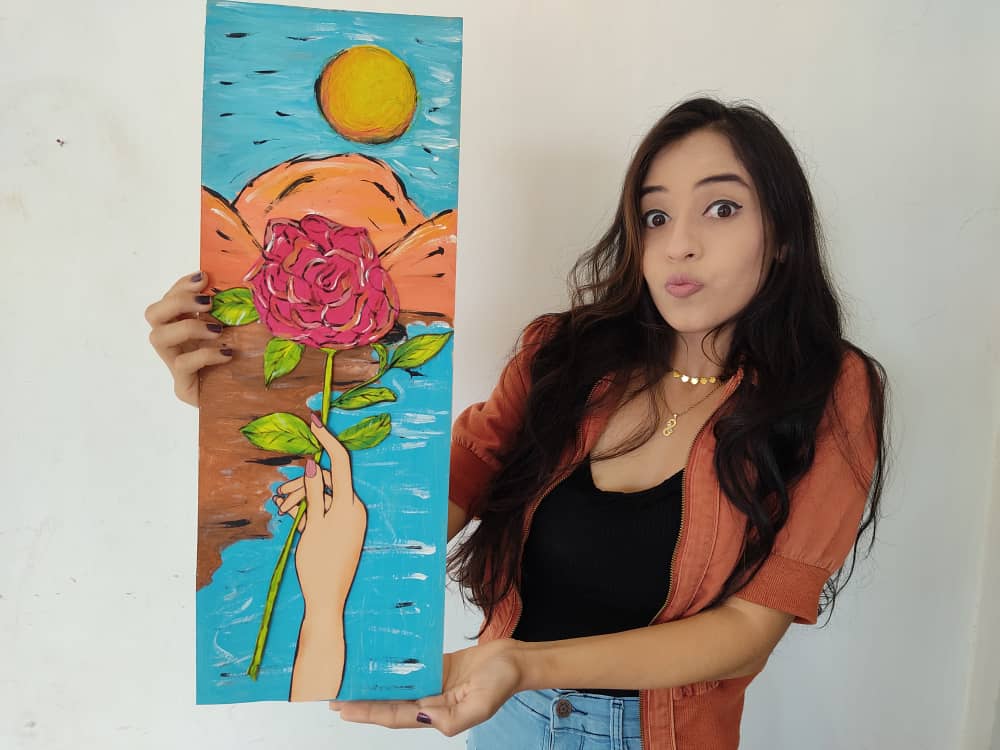
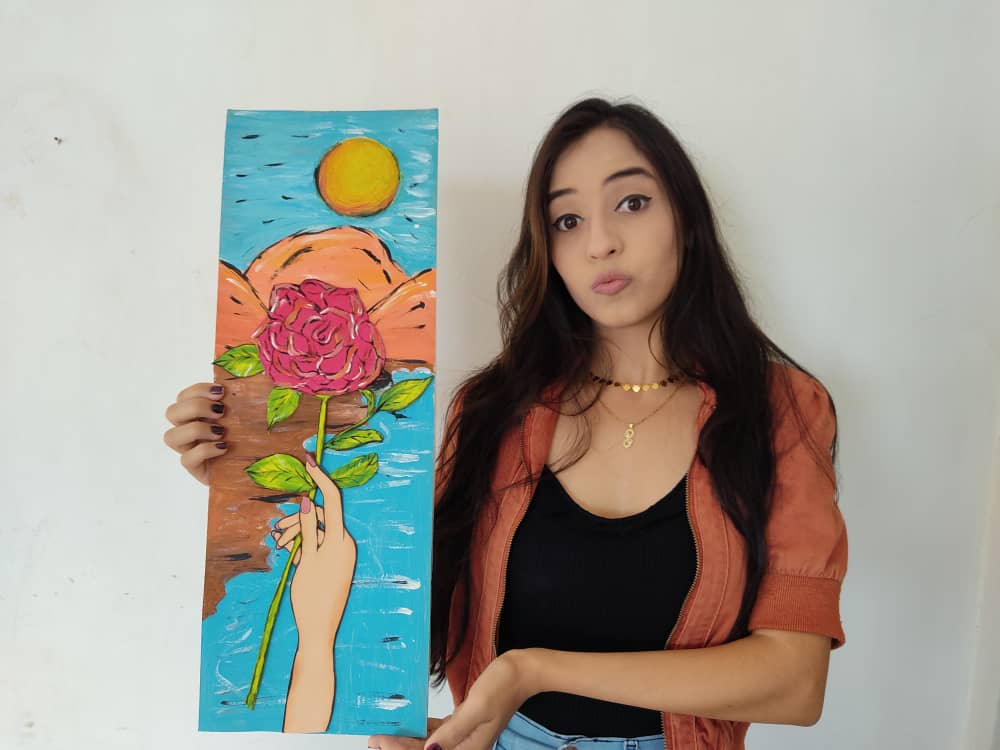
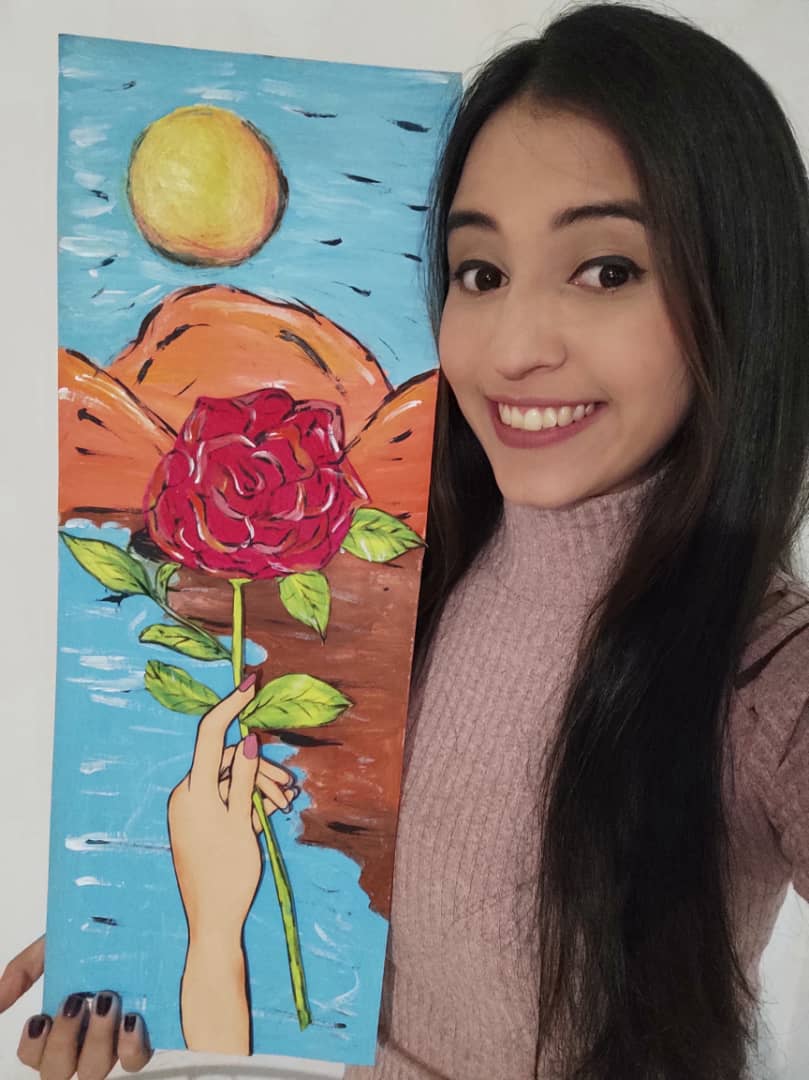
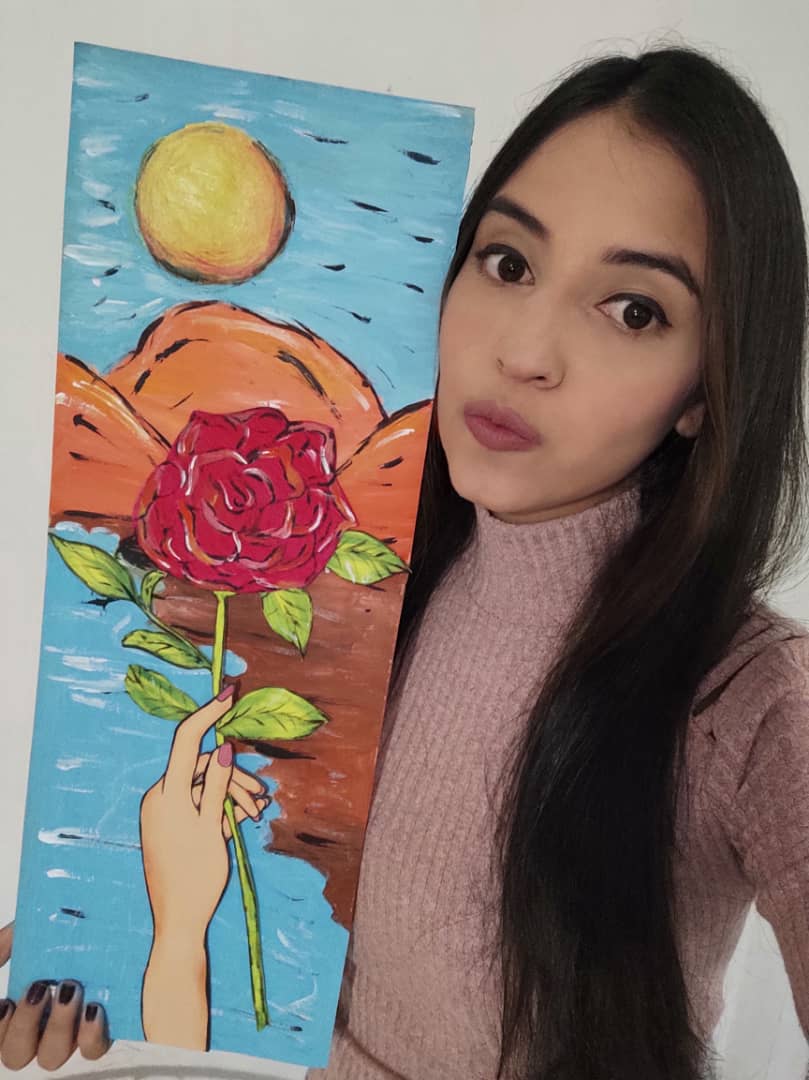
Finalmente, pegamos la flor sostenida a nuestra bella base, ubicando en el centro para que nuestro cuadro quede perfecto.
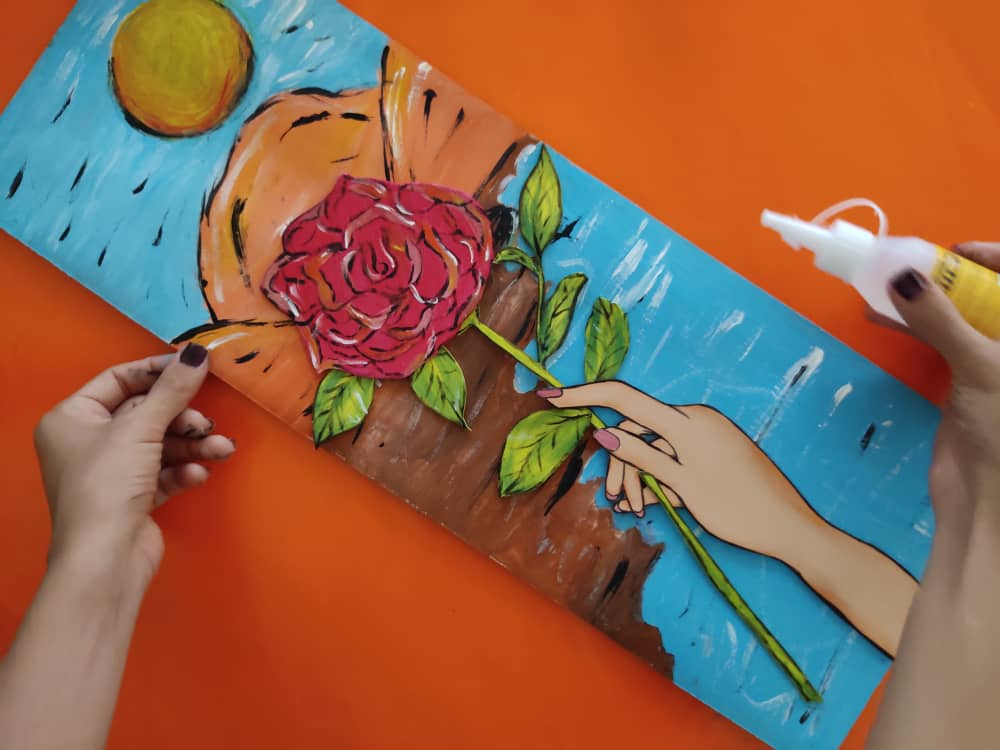
Finally, we glue the flower held to our beautiful base, placing it in the center so that our painting is perfect.
.jpeg)
.jpeg)
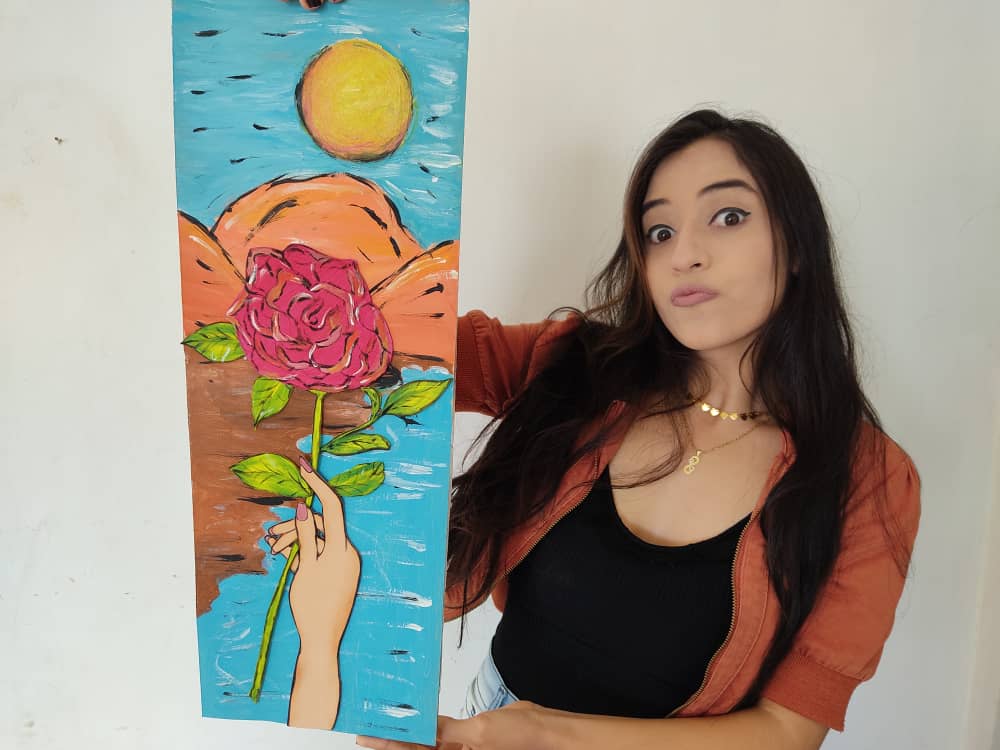
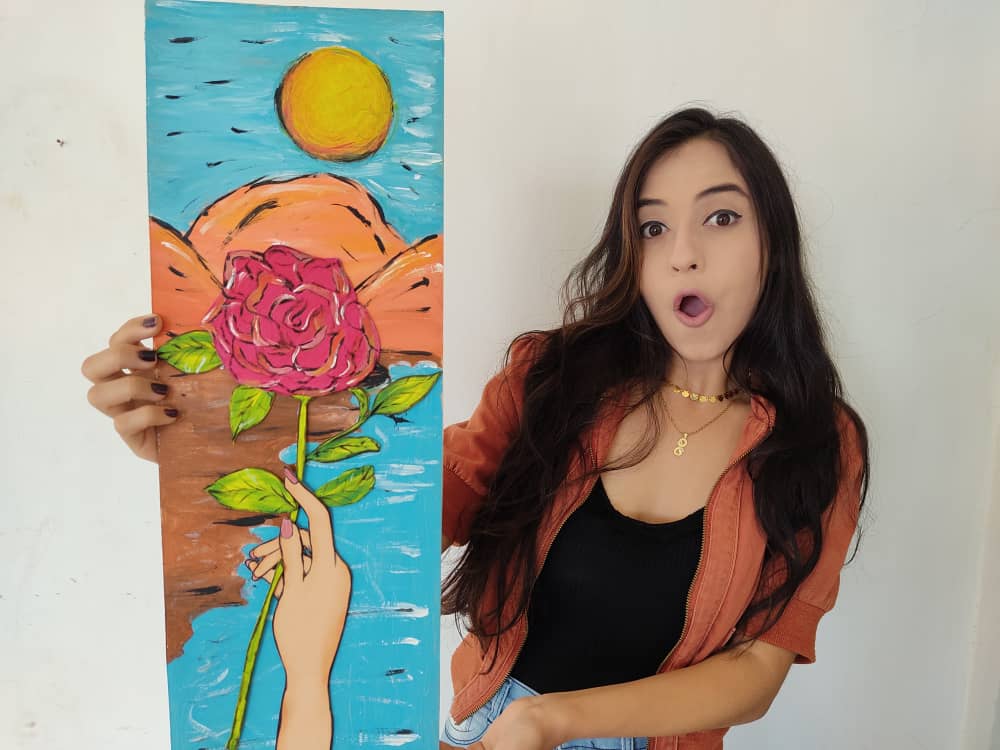
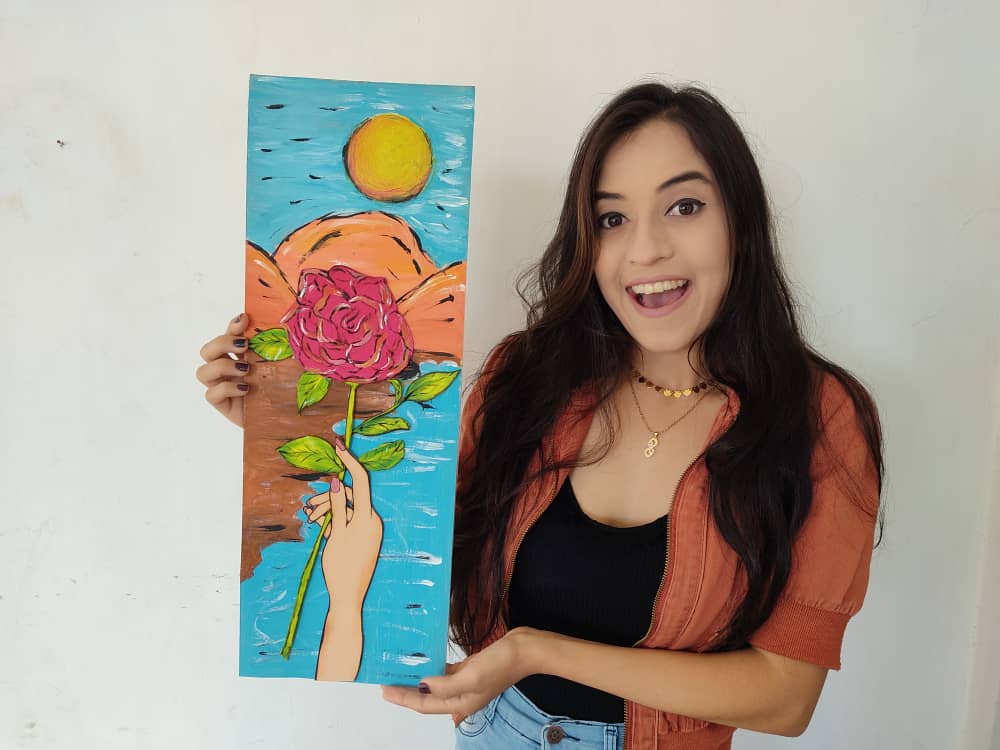
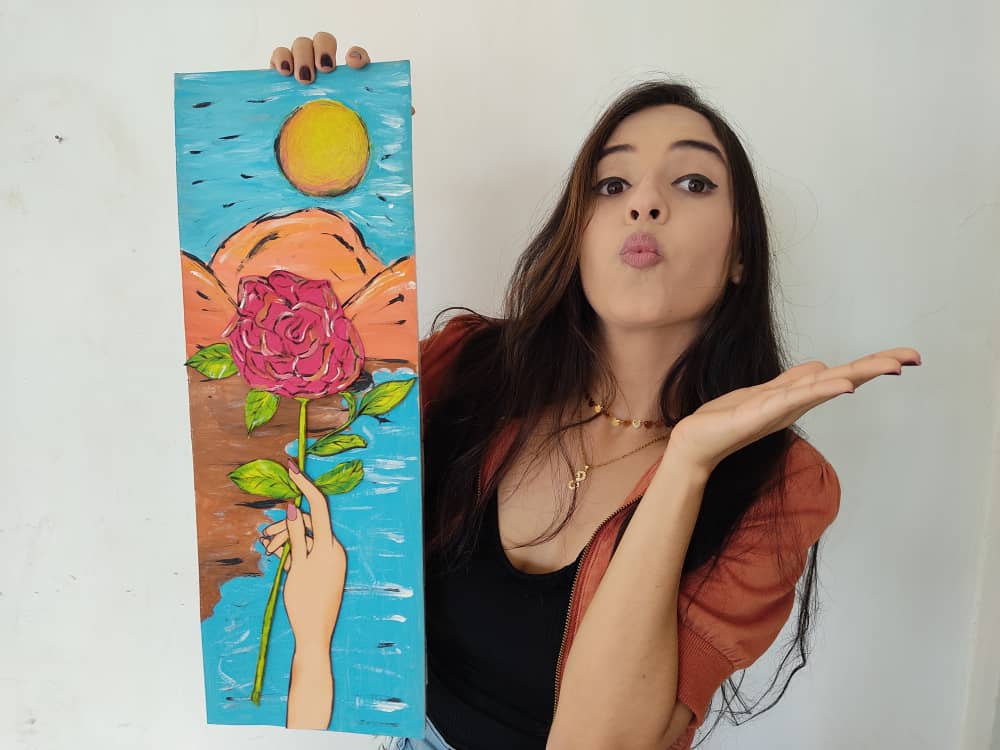
Gracias por acompañarme y espero que lo hayan disfrutado. ❤️
Thanks for joining and I hope you enjoyed it.❤️
.jpeg)
.jpeg)
.jpeg)
.jpeg)
.jpeg)
.jpeg)
.jpeg)
.jpeg)
.jpeg)
.jpeg)
.jpeg)
.jpeg)
.jpeg)
.jpeg)
.jpeg)
.jpeg)
Clic para ver trabajos anteriores | Click to see previous works


Final product like as fully painting work. But step by step you created beautiful art work.
You're so beautiful sis
and your work too
me encanto como quedo tu cuadro quedo hermosisimo
Me gusta mucho tu cuadro quedo muy hermoso, un abrazo <3