.jpeg)

Español
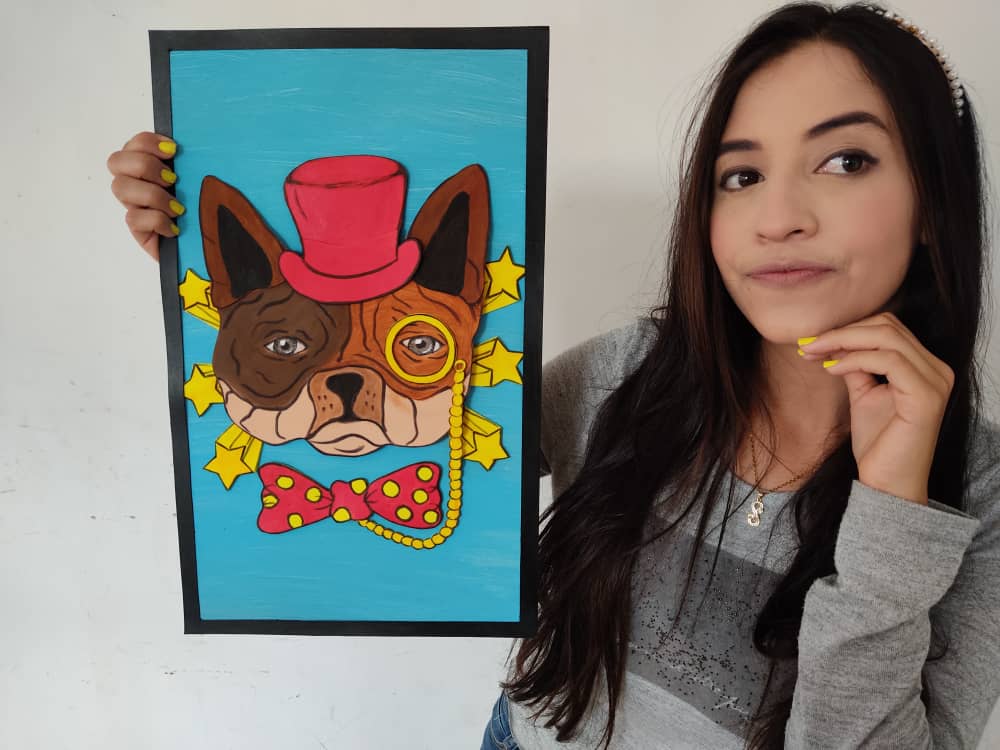
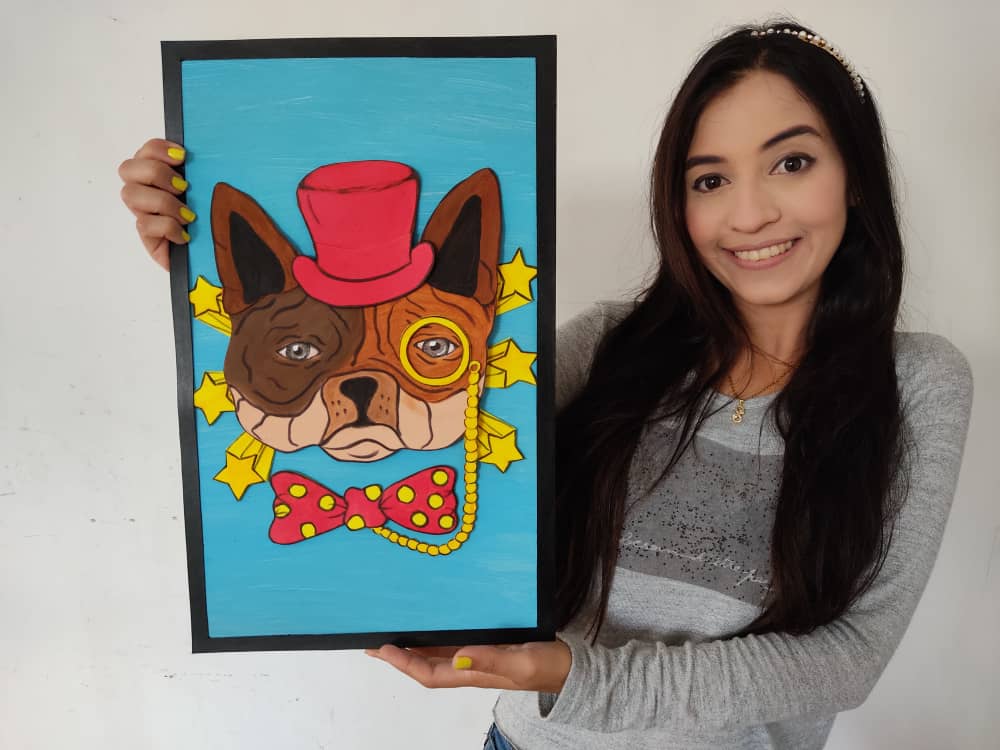
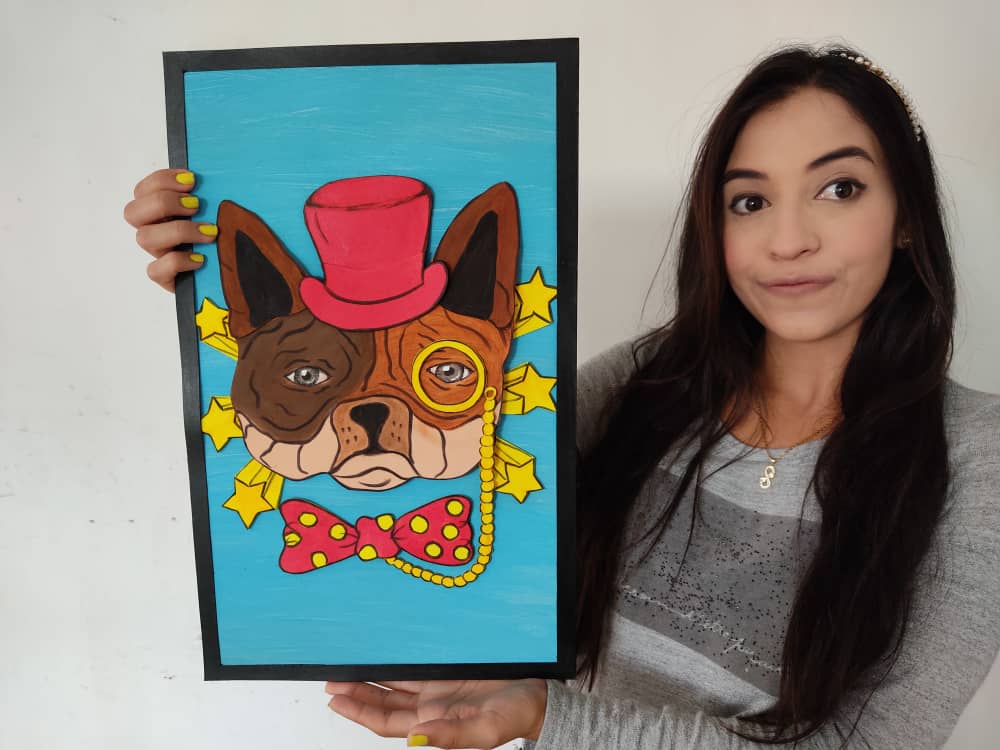
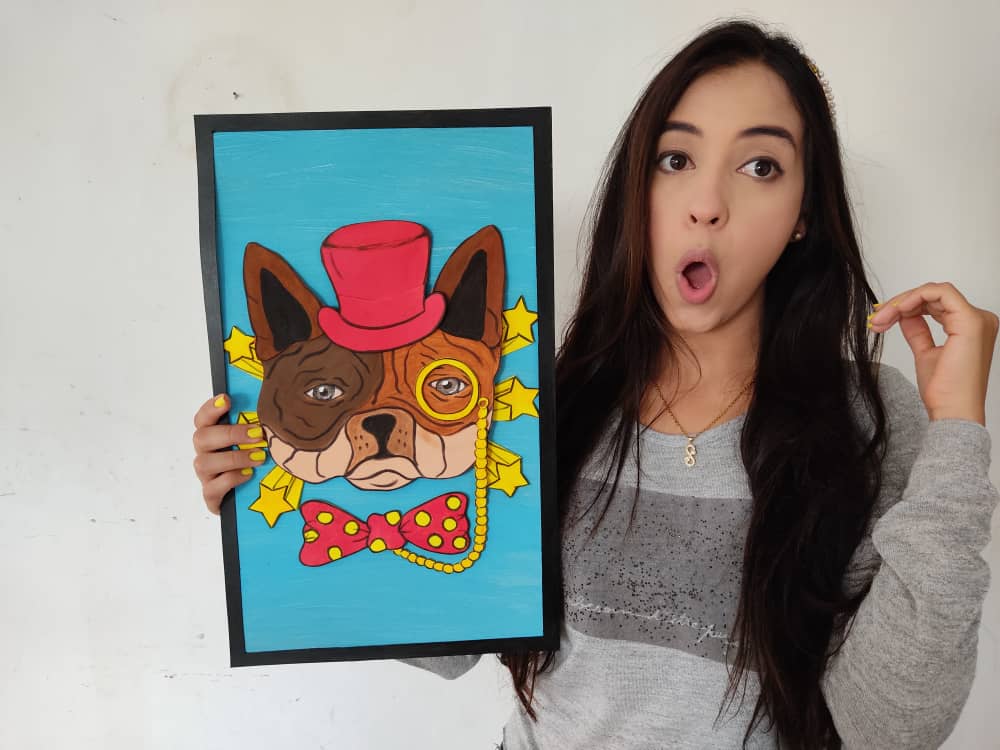
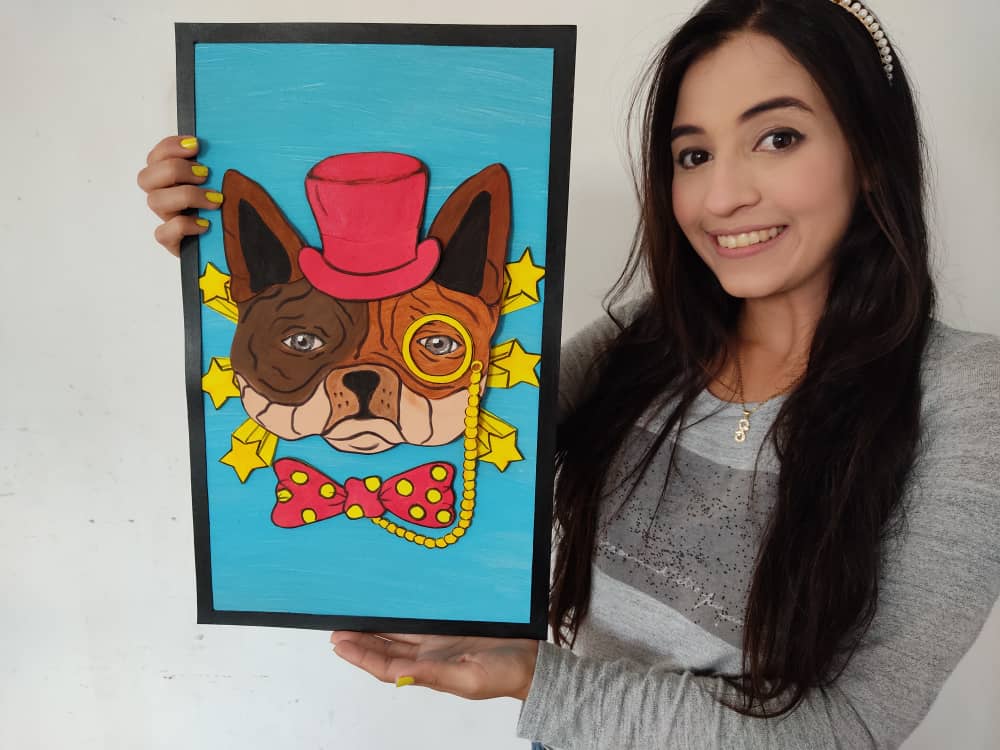
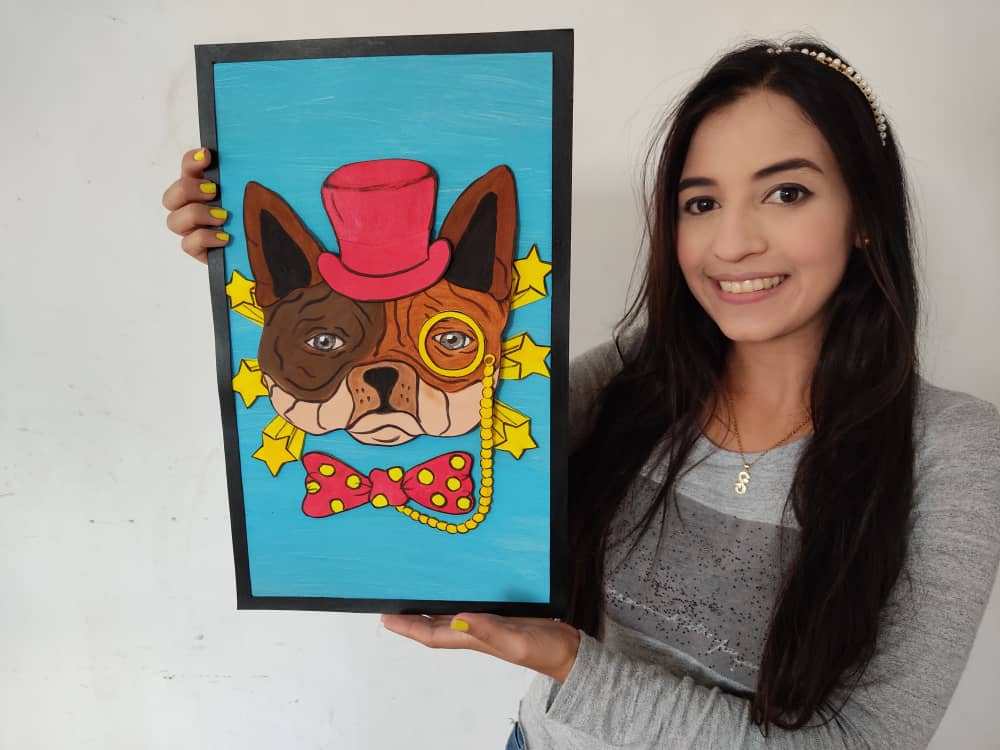
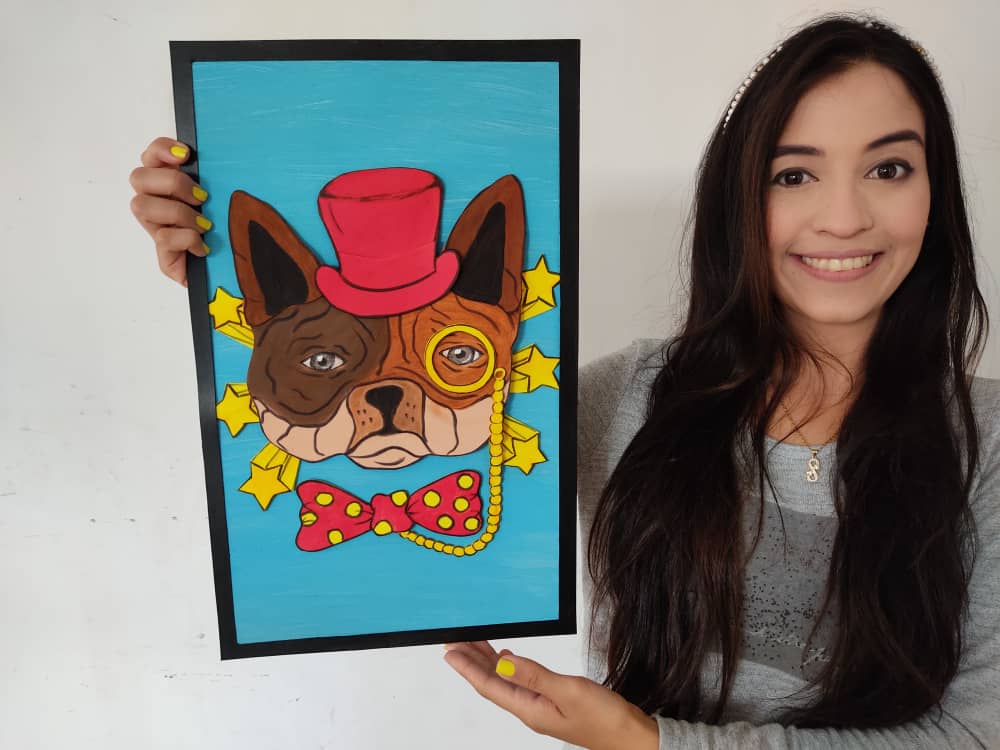
Hola queridos amigos 💋 Este hermoso día les traigo un divertido paso a paso donde les mostrare como elaborar un cuadro de un “perro elegante”, esta divertida y diferente obra está hecha de materiales súper económicos, y es perfecta y útil para decorar nuestras paredes, dándole un toque autentico y original a nuestro entorno. Ya que este hermoso perrito con aspecto de “mafioso” luce muy elegante gracias a sus accesorios. Sin duda este perrito vanidoso llegó para darle un toque muy elegante a tus espacios favoritos. Así que, los invito a que sigan disfrutando de este divertido trayecto donde podemos aprender a transformar sencillos materiales en divertidas obras de artes. .
English
Hello dear friends 👄 This beautiful day I bring you a fun step by step where I will show you how to make a painting of an "elegant dog", this fun and different work is made of super cheap materials and is perfect and useful to decorate our walls, giving it an authentic touch and original to our environment. Since this beautiful little dog with the look of a "mobster" looks very elegant thanks to its accessories. Without a doubt, this vain puppy came to give a very elegant touch to your favorite spaces. So, I invite you to continue enjoying this fun journey where we can learn to transform simple materials into fun works of art.
¿Qué están esperando?
Gracias a esta técnica podemos crear nuestro propio cuadro de perro elegante, además, una hermosa obra hecha en casa es una manera creativa y muy económica de darle un toque de alegría a nuestro entorno. Antes de comenzar no olvidemos lavarnos nuestras manos.
What are they waiting for?
Thanks to this technique we can create our own elegant dog painting, in addition, beautiful homemade work is a creative and very inexpensive way to give a touch of joy to our environment. Before we start, let's not forget to wash our hands.

[Materiales | Materials]
Para hacer este perro elegante necesitaremos:
- Moldes.
- Foami o goma eva.
- Papel vegetal o calco.
- Lamina de cartón.
- Regla.
- Lápiz.
- Marcador.
- Tijera.
- Cúter.
- Pincel o brocha.
- Pinturas.
- Silicón liquido o pegamento.
To make this elegant dog will need:
- Molds.
- Foamy or eva foam.
- Vegetable paper or tracing.
- Cardboard sheet.
- Rule.
- Pencil.
- Bookmark.
- Scissors.
- Cutter.
- Brush or brush.
- Paintings.
- Liquid silicone or glue.
Procedimiento (paso a paso)
Process (step by step)
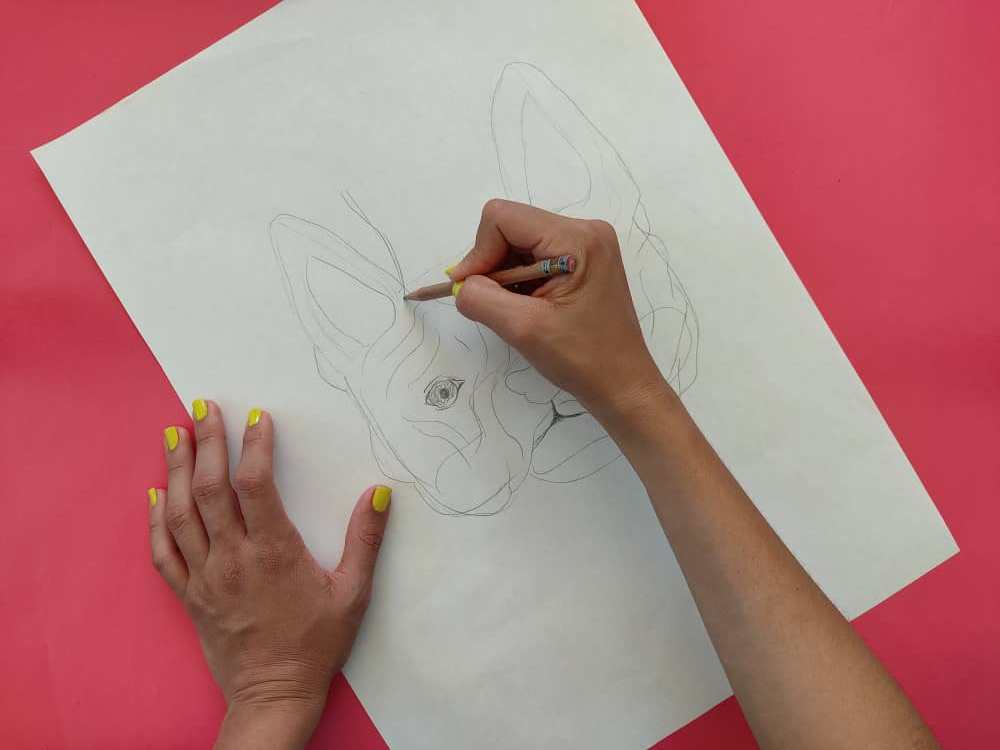
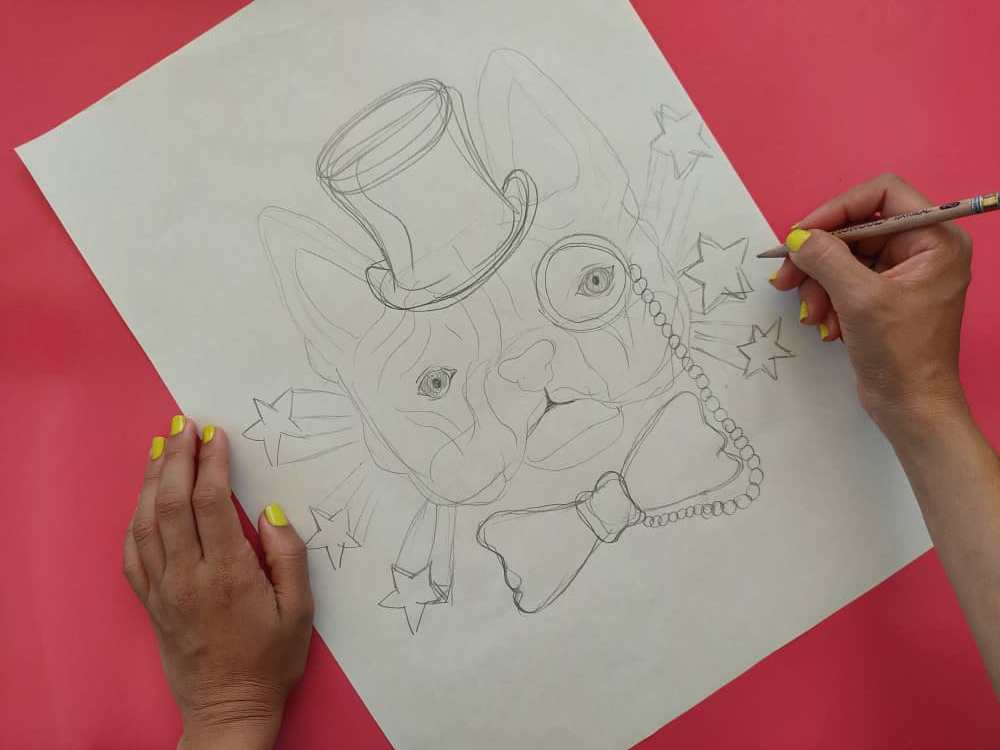
First, we draw a cute puppy with some incredibly elegant accessories, because this pet has a lot of style, which means that it will be ideal, to decorate a space with an elegant and different style, and well, who does not love dogs?
First, we draw a beautiful Hindu girl in whatever way we have in mind, and add precious details, letting our imagination and creativity run wild, to get amazing results.
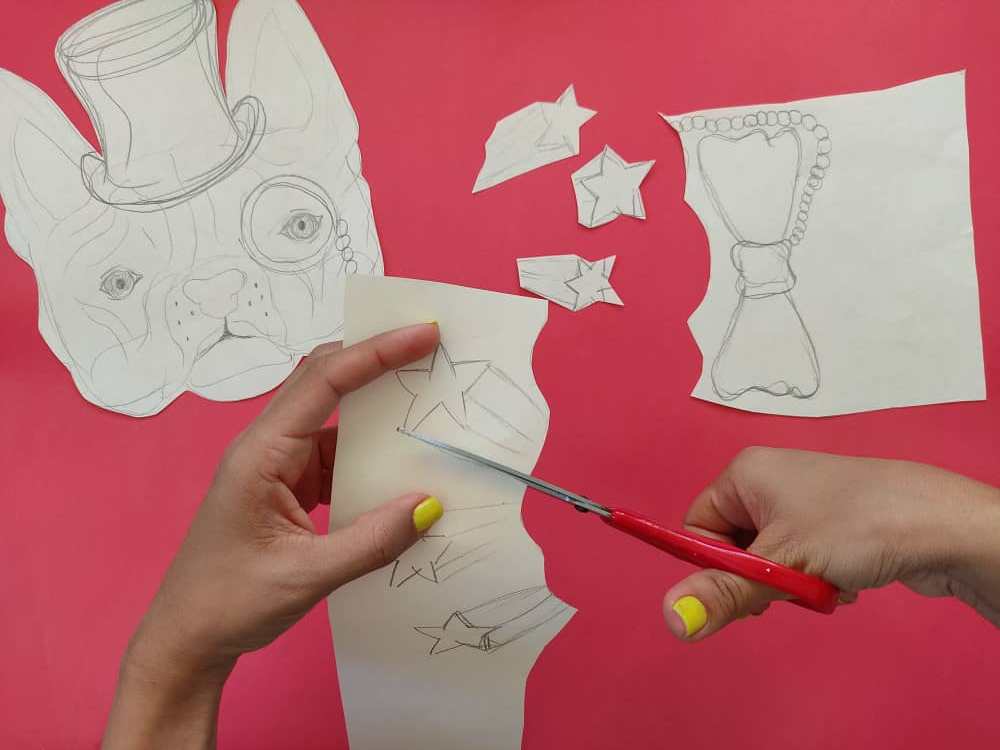
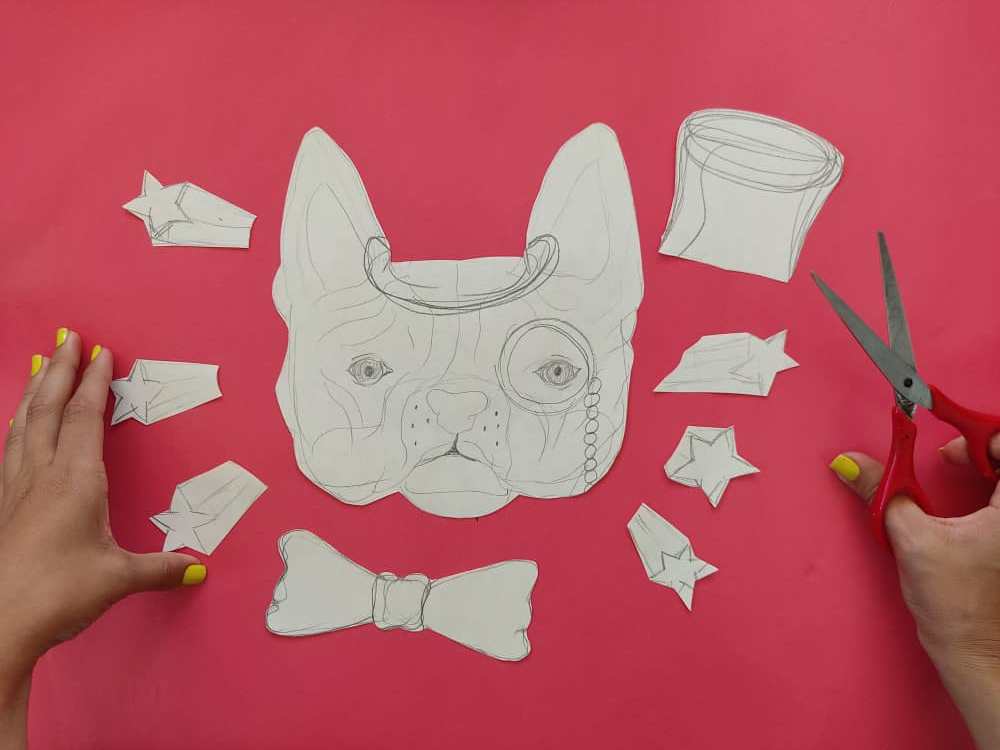
Seguidamente, recortamos nuestro increíble dibujo separando el perrito, de sus valiosos accesorios. Debemos tener mucho cuidado para mantener intactas sus partes.
Next, we cut out our beautiful girl, separating each of the pieces as they are; the veil, hair, face, body, clothing, and its small accessories.
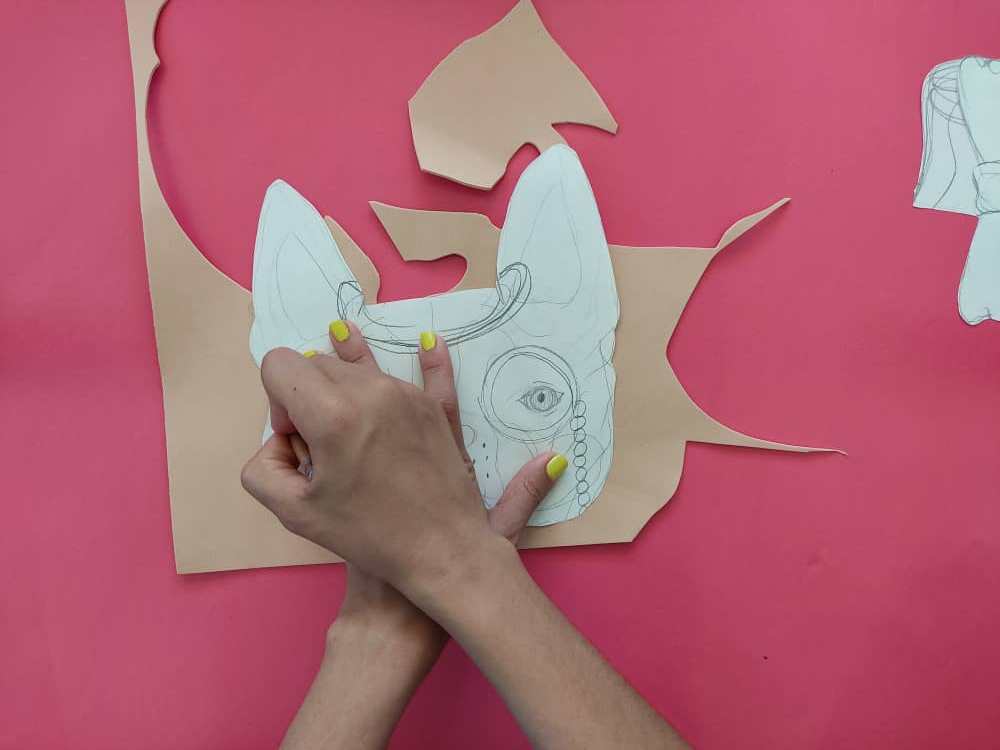
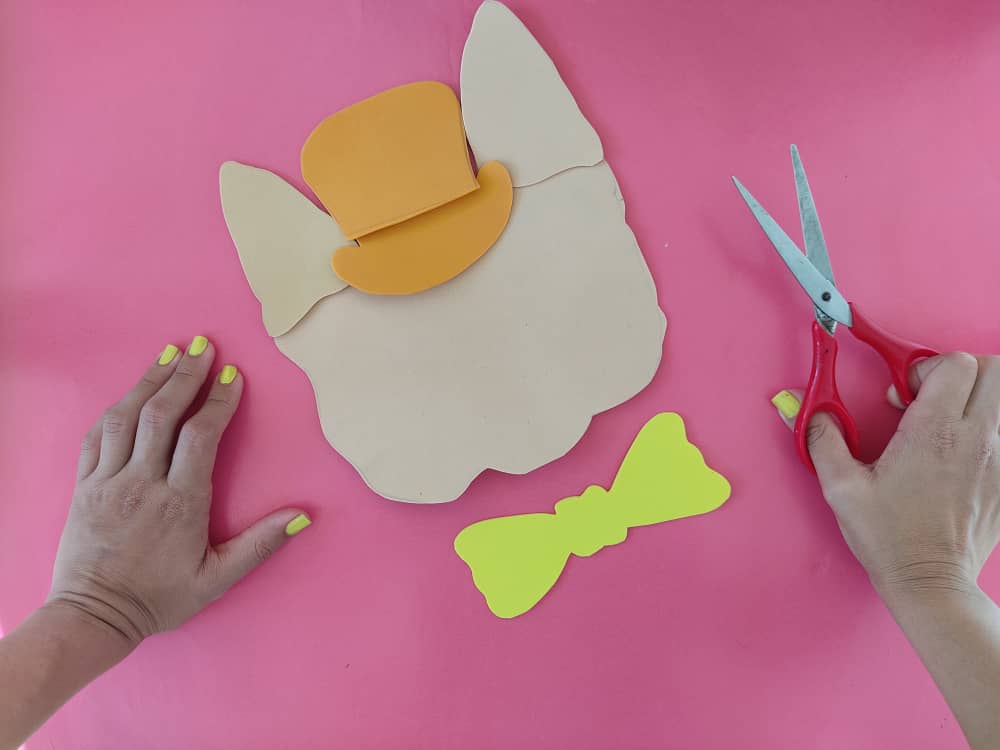
Luego de haber obtenido las figuras deseadas, comenzamos transfiriendo la cara, sombrero y lazo a los trozos de foami, en este caso no tenía un trozo de foami muy grande para la cara, pero como sabemos que es muy bueno reciclar, pues no me preocupe, y complete la parte que faltaba en otro trozo, además le da un toque ideal.
After having obtained the desired figures, we began by transferring the face, hat, and bow to the pieces of foam, in this case, I did not have a very large piece of foam for the face, but as we know that it is very good to recycle, well, don't worry, and complete the missing part in another piece, it also gives it an ideal touch.
Seguidamente, transferimos el resto de las partes de nuestra obra como lo son los accesorios.
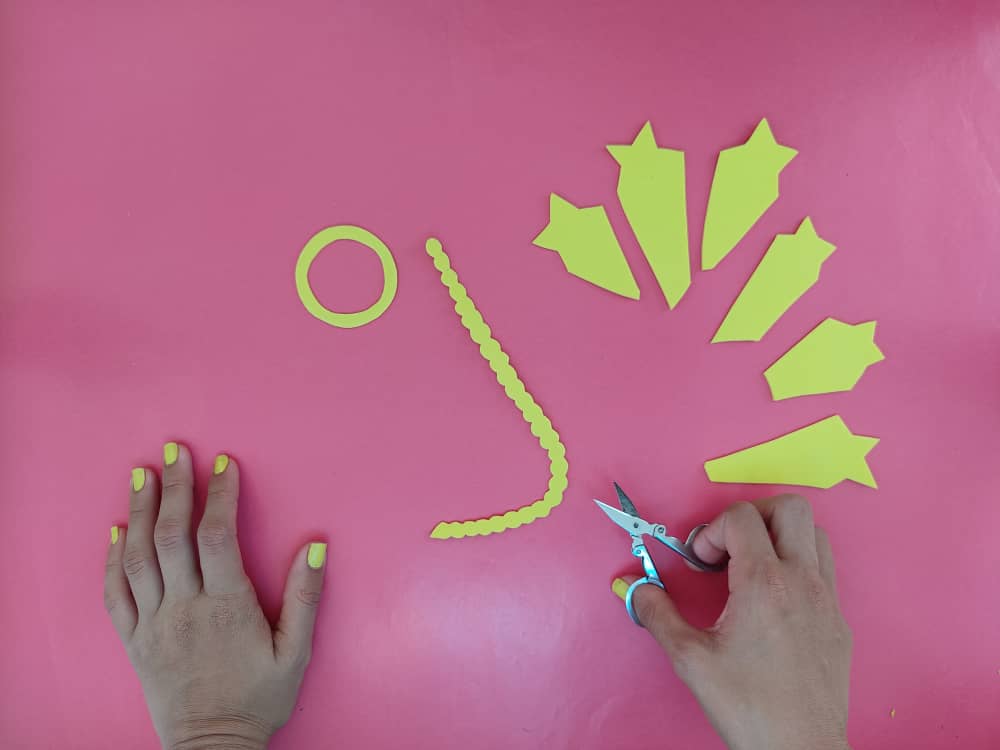
Next, we transfer the rest of the parts of our work such as accessories.
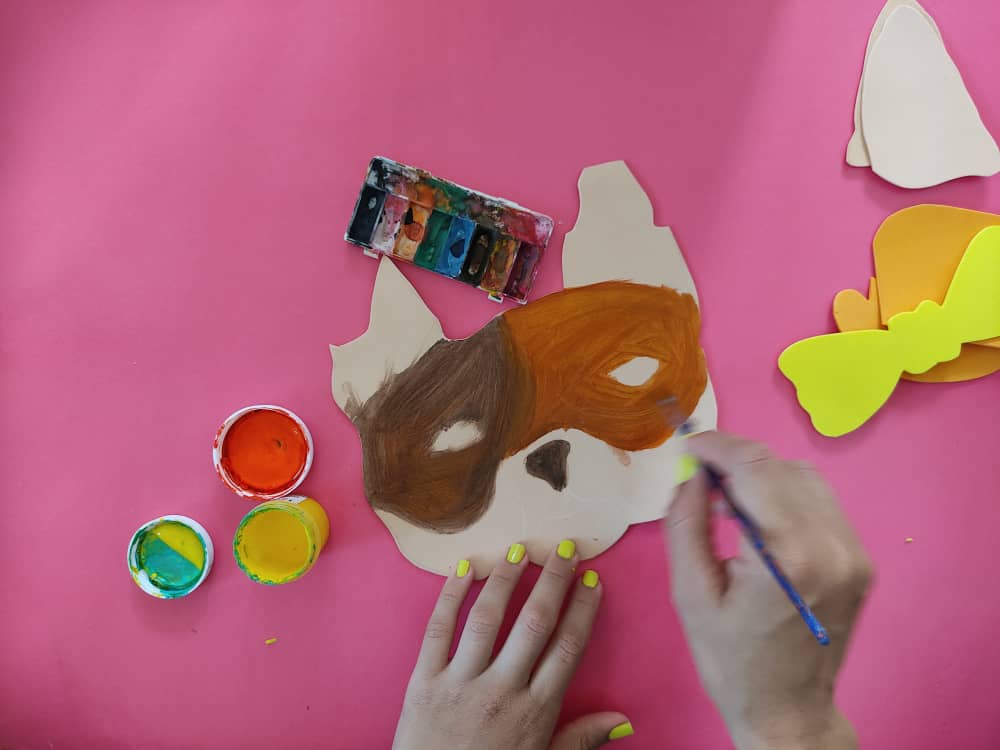
Ahora, comenzamos a darle vida a la cara y orejas de nuestro lindo perrito aplicando y creando hermosas manchas, entre marrón y color miel, y pues el resultado fue genial. Seguidamente, definimos sus hermosos ojos, entre tonos grises, y por supuesto debemos aplicar un toque blanco cerca de sus pupilas para darles algo de brillo y realismo.
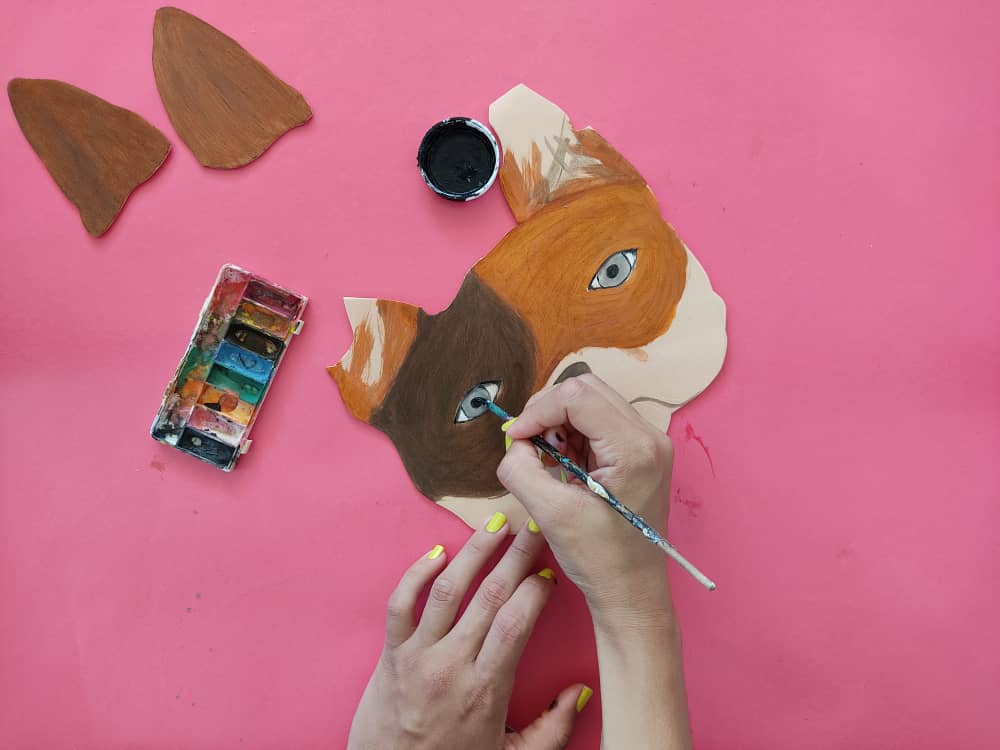
Now, we began to give life to the face and ears of our cute puppy applying and creating beautiful spots, between brown and honey, and the result was great. Next, we define his beautiful eyes, between gray tones, and of course, we must apply a touch of white near his pupils to give them some shine and realism.
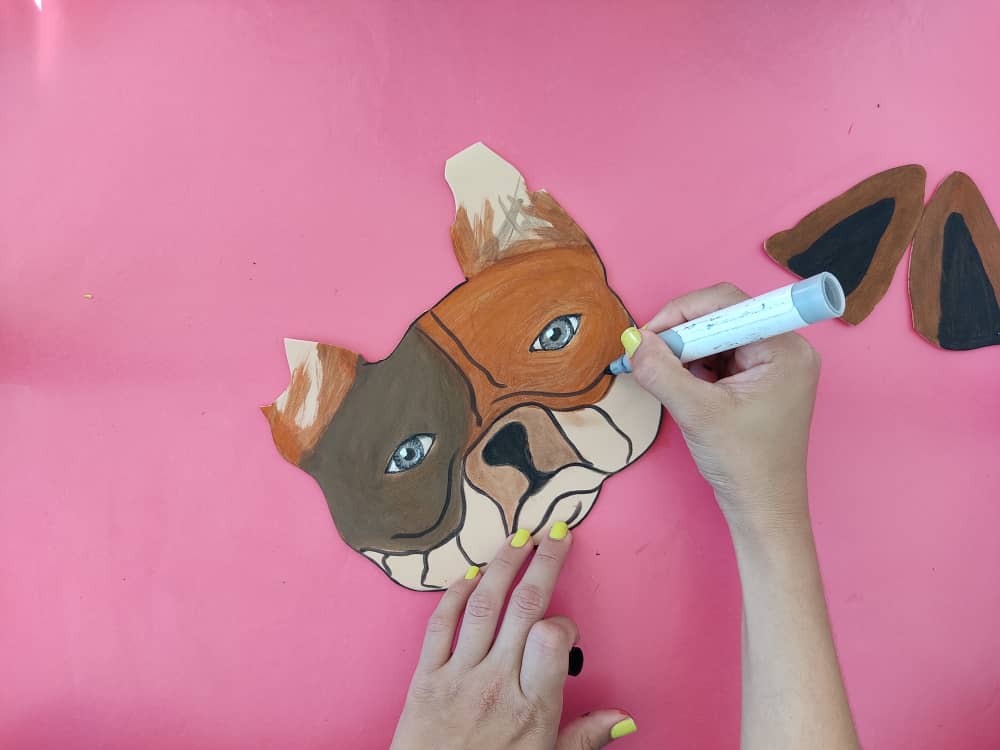
Luego de tener la cara y orejas del perro pintadas, marcamos cada uno de sus bordes con el marcador de punta fina negro, ya que esto nos ayudará a pronunciar un poco las arrugas del perrito, entre otras separaciones, genial no?.
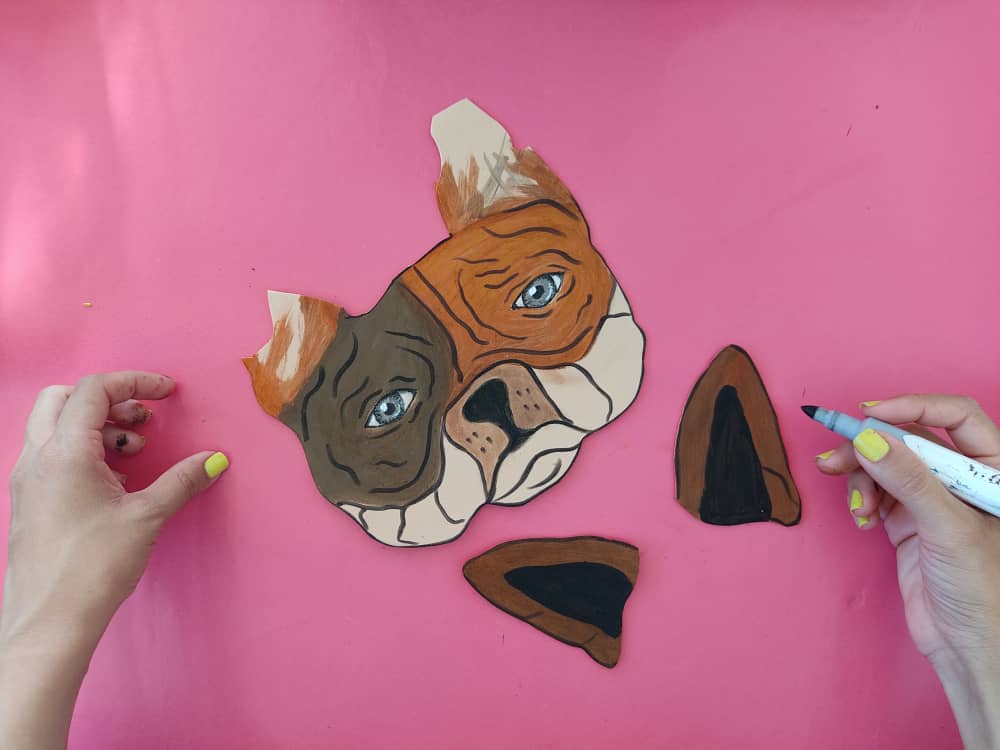
After having the dog's face and ears painted, we mark each of its edges with the black fine-tip marker, as this will help us to pronounce the puppy's wrinkles a little, among other separations, great no?
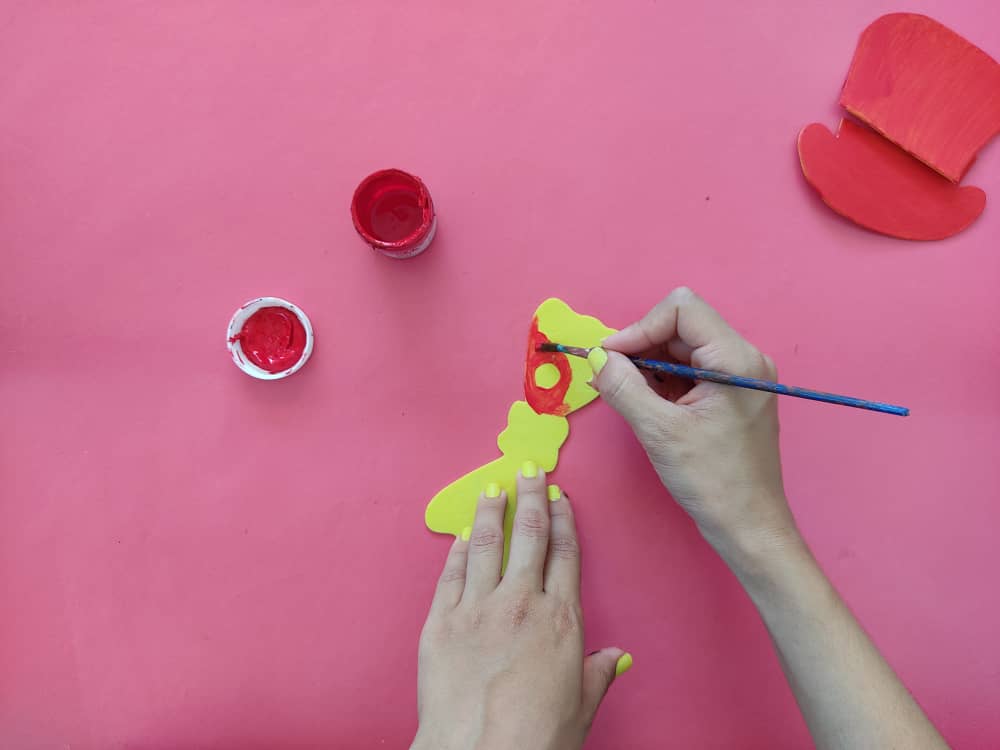
Ahora, pintamos el lazo y el sombrero de un hermoso color rojo, que dará un excelente toque de alegría y elegancia en nuestro cuadro, recuerden que está mascota tiene un estilo muy único y original, y seguidamente, marcamos los bordes de estas piezas con el marcador de punta fina.
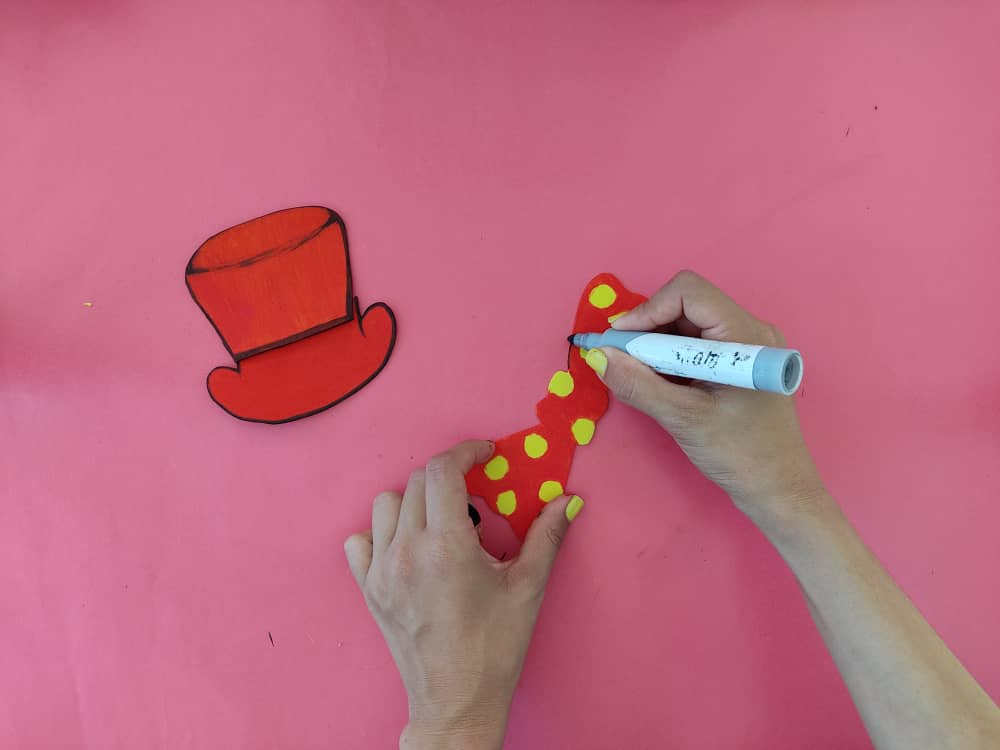
Now, we paint the bow and the hat a beautiful red color, which will give an excellent touch of joy and elegance in our painting, remember that this pet has a very unique and original style, and then we mark the edges of these pieces with the fine point marker.

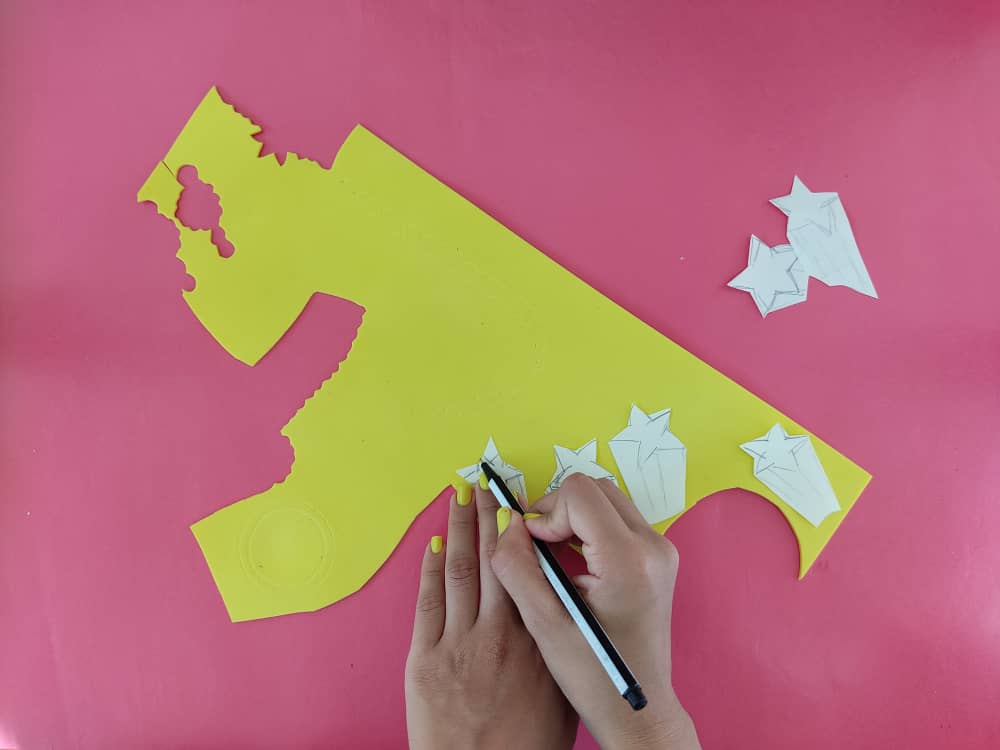
Luego, pintamos el lente para simular que es de “oro”, y para obtener un color muy parecido al dorado, mezclamos un poco de amarillo y naranja, y walla! Este hermoso lente realmente lucirá igual que uno de oro, sin olvidar las hermosas estrellas doradas que irán alrededor este perrito elegante. Seguidamente, marcamos sus bordes con mucha delicadeza, con la ayuda del marcador de punta fina, y así, darle el toque de profundidad que le hacía falta.

Then, we paint the lens to simulate that it is "gold", and to obtain a color very similar to gold, we mix a little yellow and orange, and walla! This beautiful lens will really look just like a gold one, not forgetting the beautiful gold stars that will go around this elegant little dog. Next, we mark its edges very delicately, with the help of the fine point marker, and thus, give it the touch of depth that it needed.
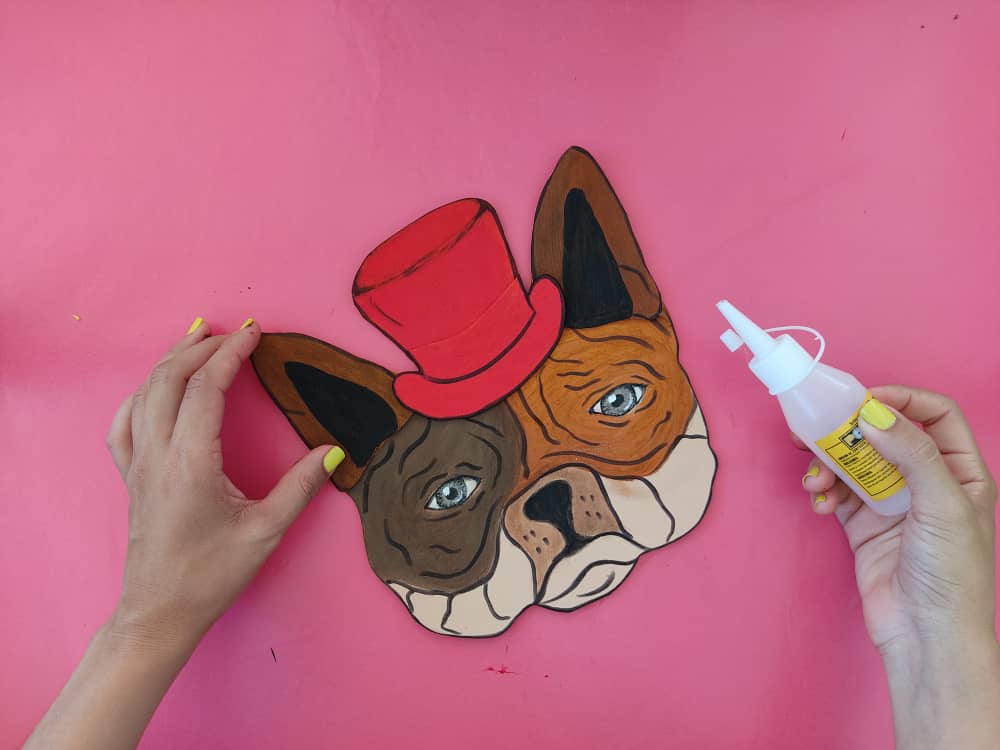
Ahora, comenzamos a armar este lindo perrito utilizando pegamento o silicón líquido, sin olvidar hacer presión durante unos segundos para que esté quede bien pegado.

Now, we begin to assemble this cute puppy using glue or liquid silicone, without forgetting to press for a few seconds so that it is well attached.
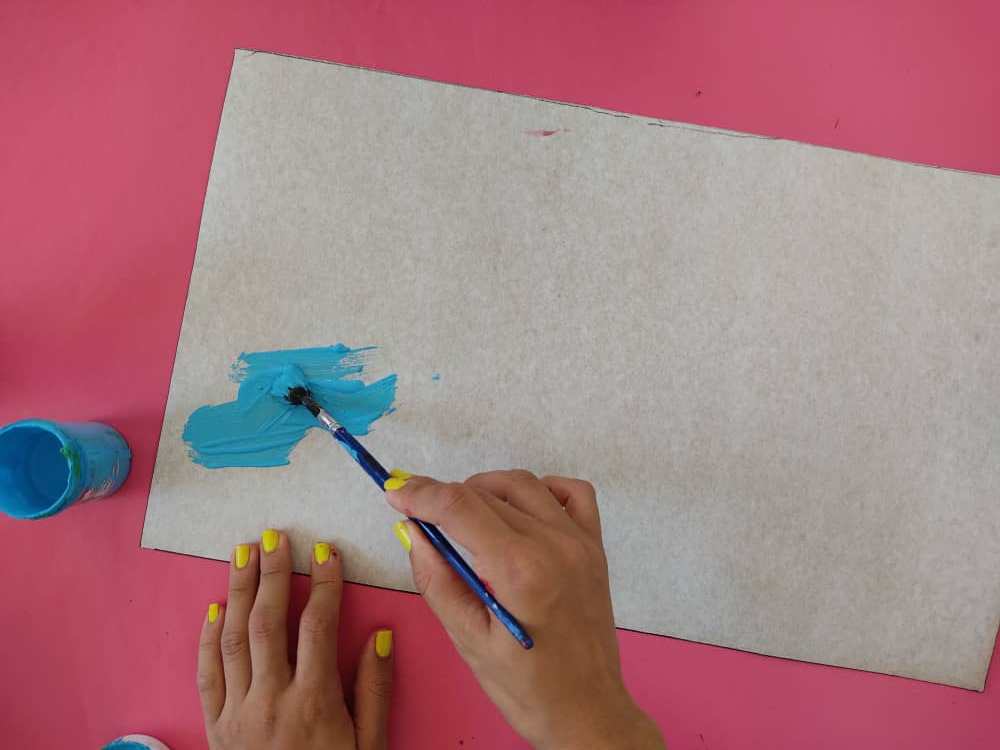
Luego, fabricamos una humilde y hermosa base de cartón de 48cm de largo y 28cm de ancho, y la pintamos de un color azul cielo muy hermoso, para que haga una combinación perfecta con los colores de nuestro elegante amigo. Y dejamos secar por unos segundos.
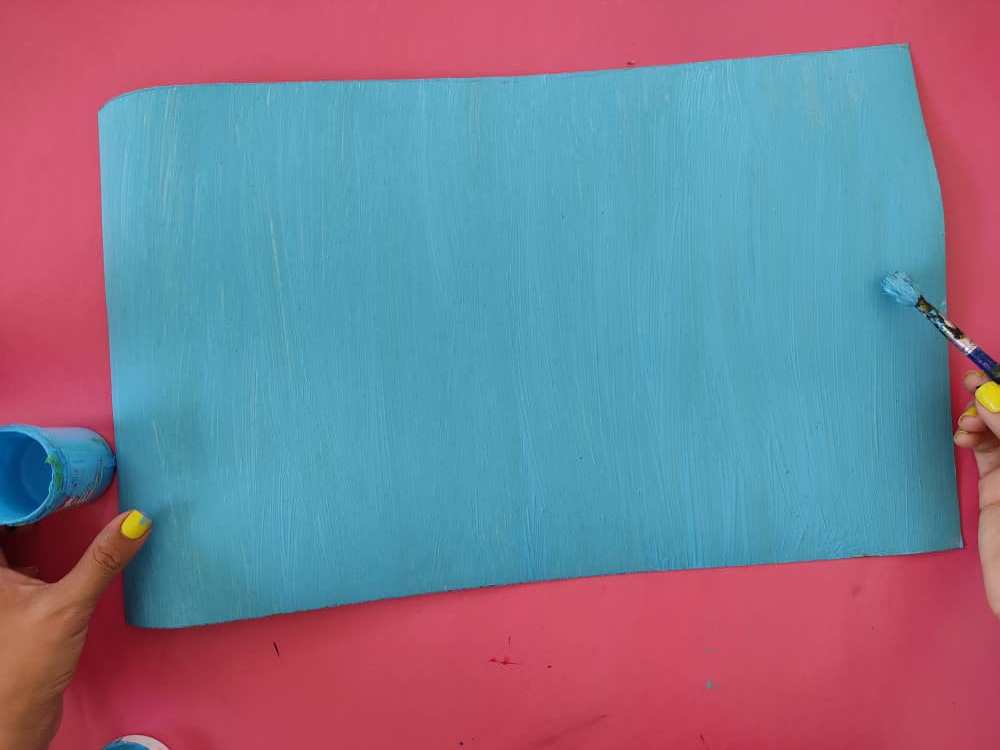
Then, we make a humble and beautiful cardboard base 48cm long and 28cm wide and paint it a very beautiful sky blue color, to make it a perfect match with the colors of our elegant friend. And we let it dry for a few seconds.
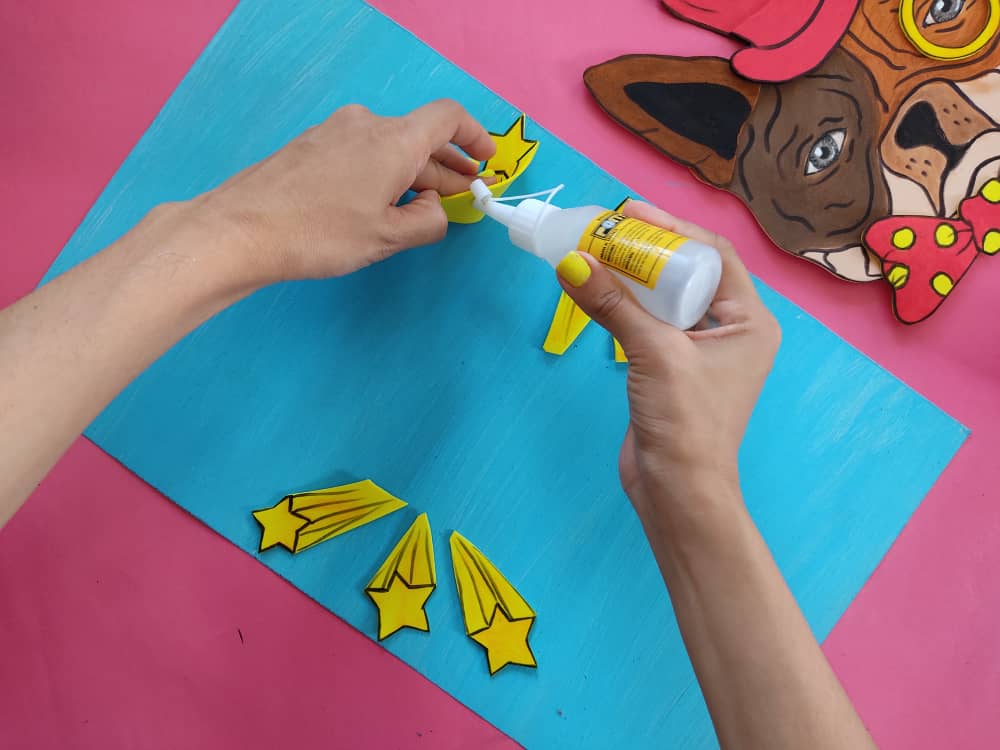
Luego de que la pintura de la base este totalmente seca, comenzamos a pegar las estrellas a los lados de la base, considerando la ubicación del perrito, y luego con mucho cuidado ubicamos la figura principal “el perrito” en el centro.
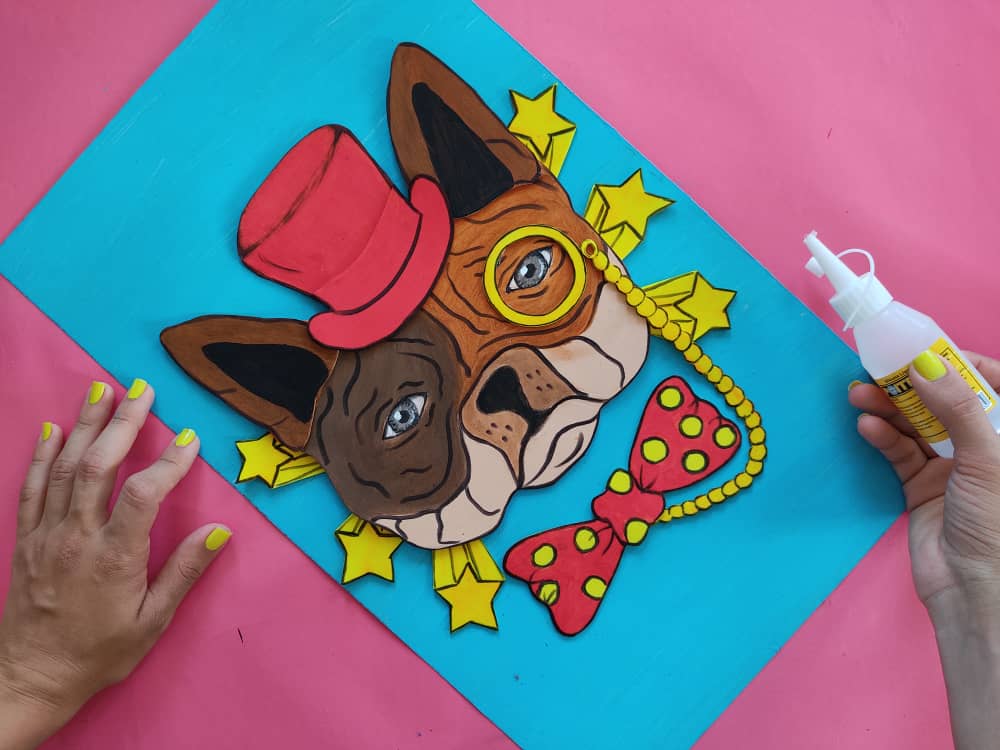
After the paint on the base is completely dry, we begin to glue the stars to the sides of the base, considering the location of the puppy, and then very carefully place the main figure "the puppy" in the center.
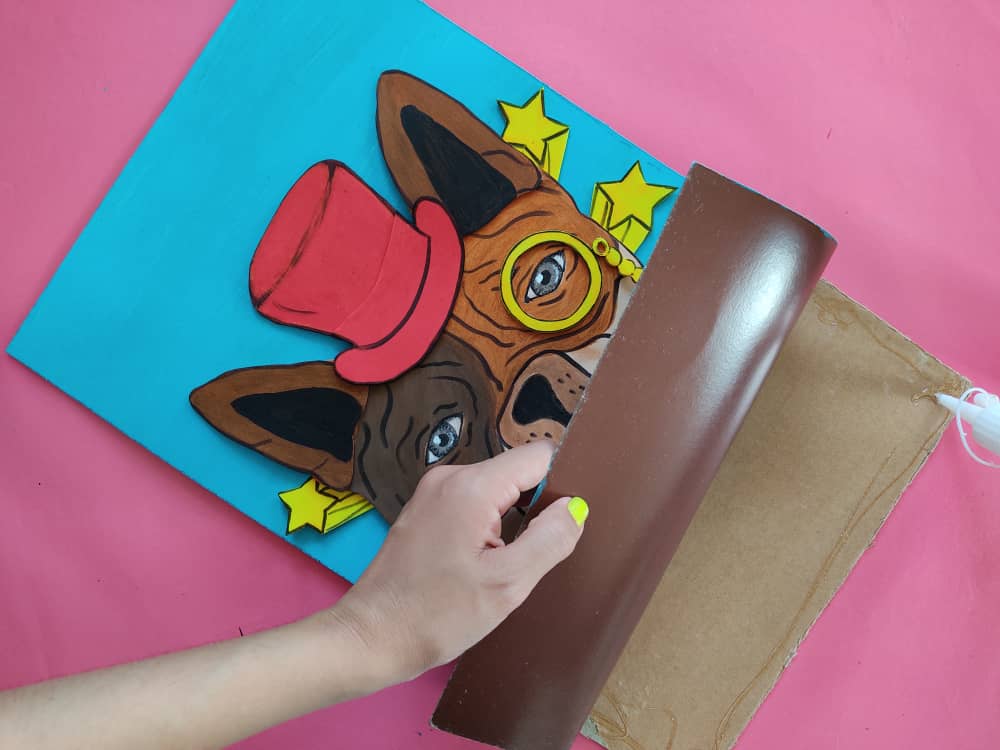
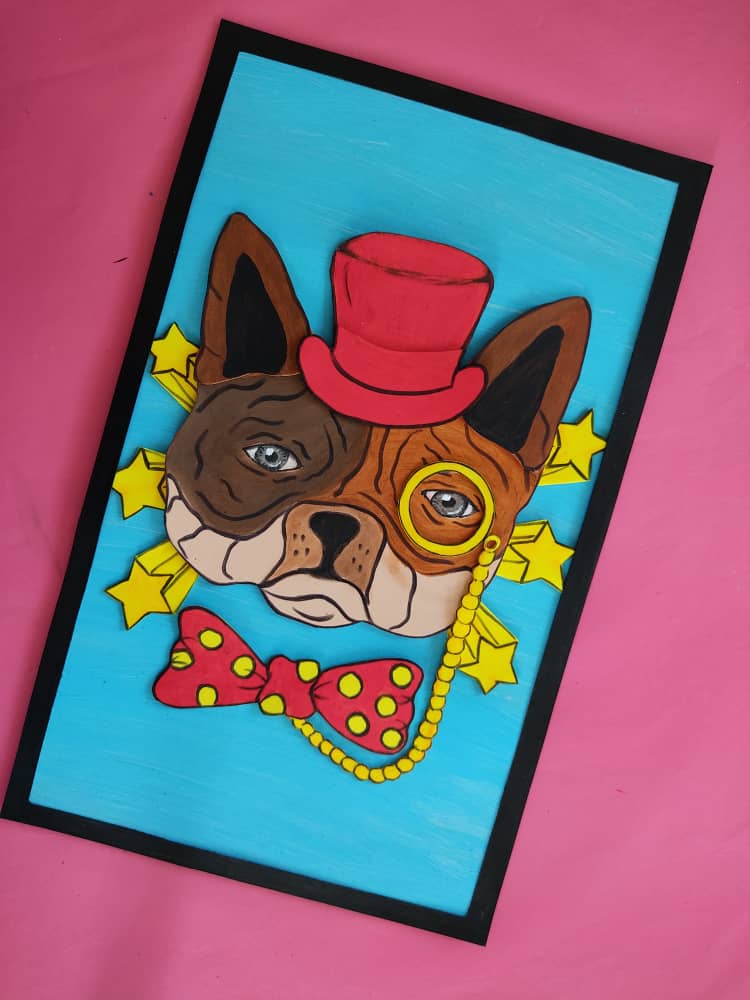
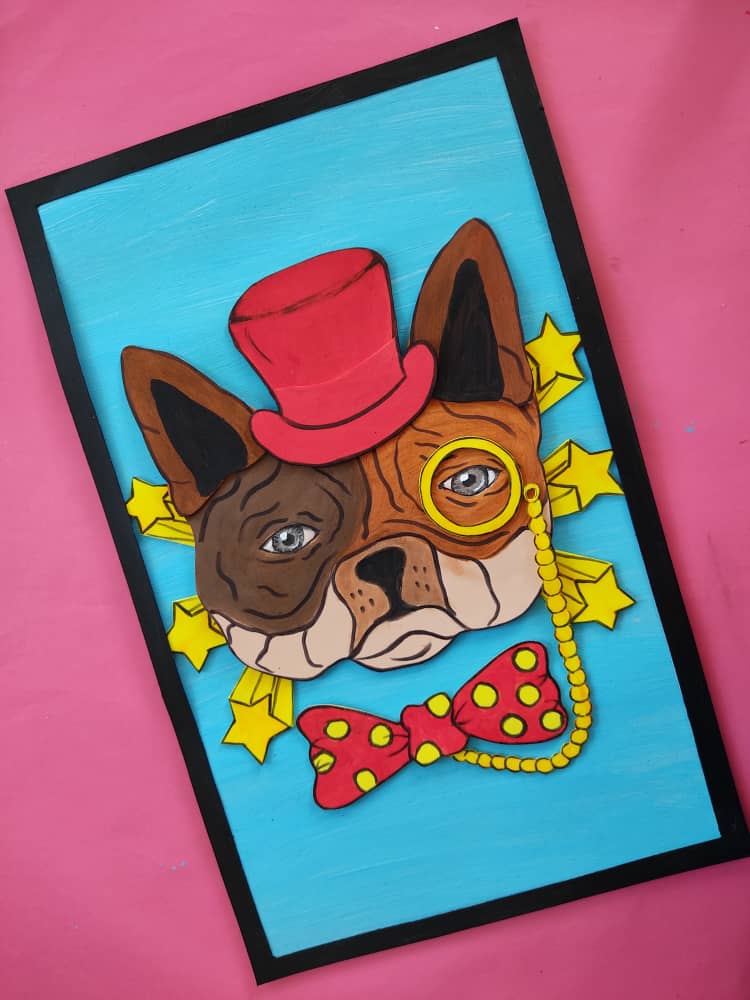
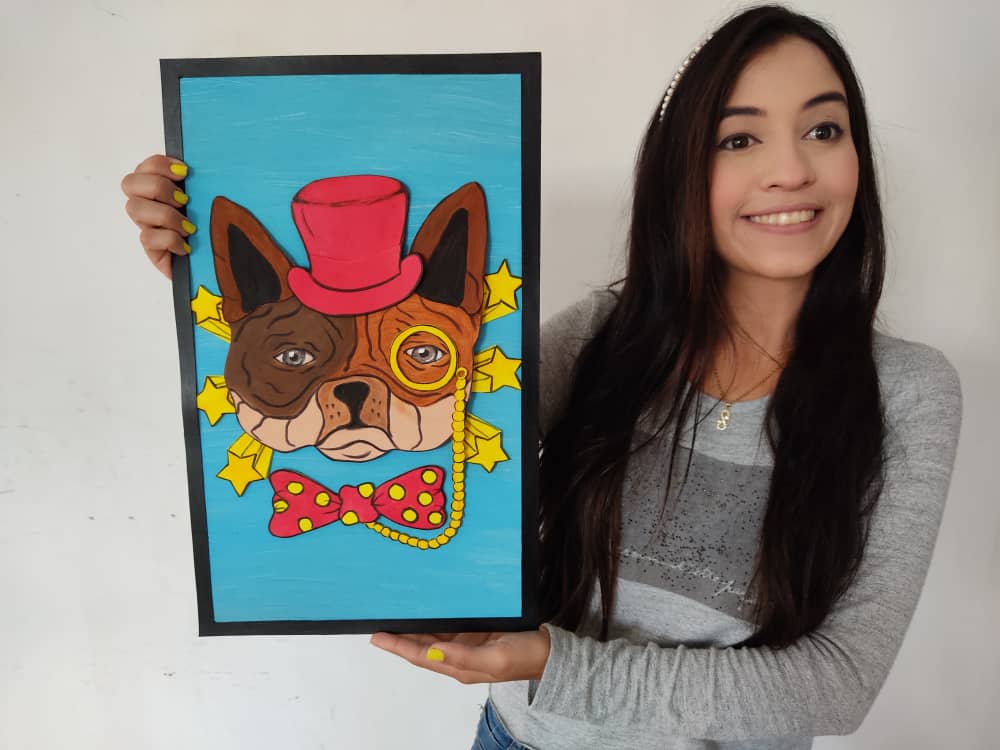
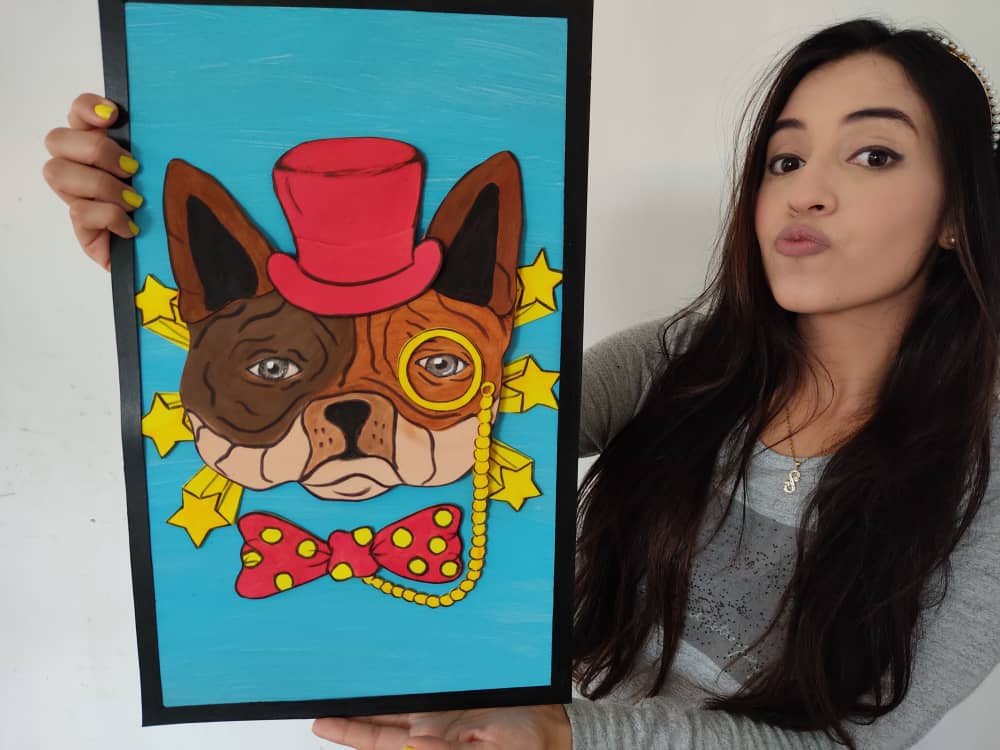
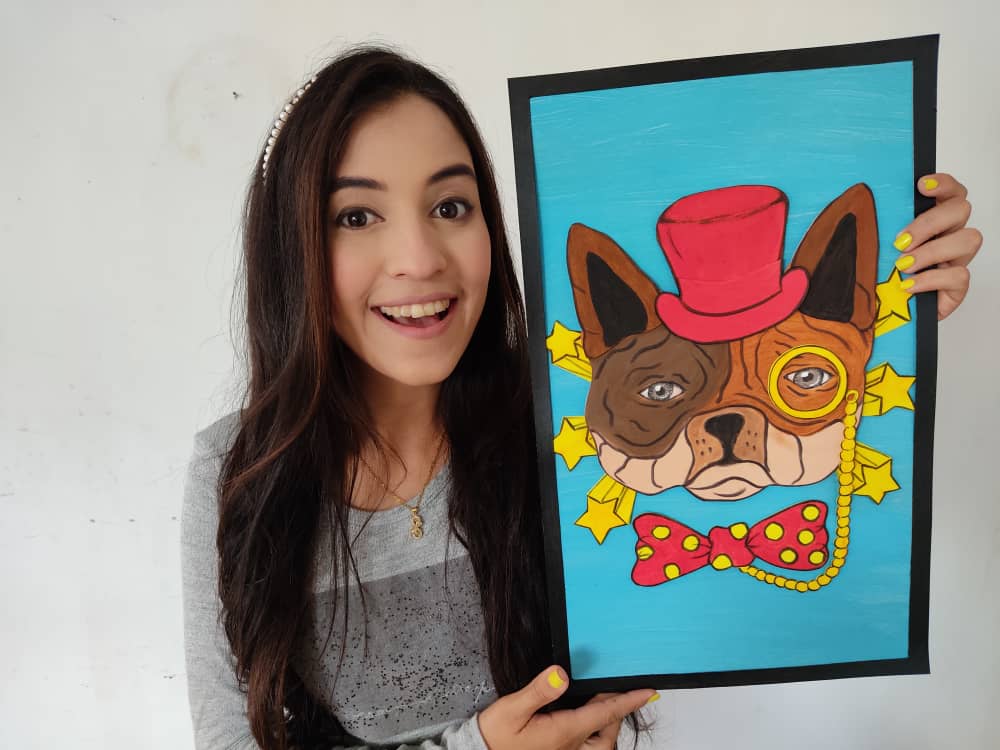
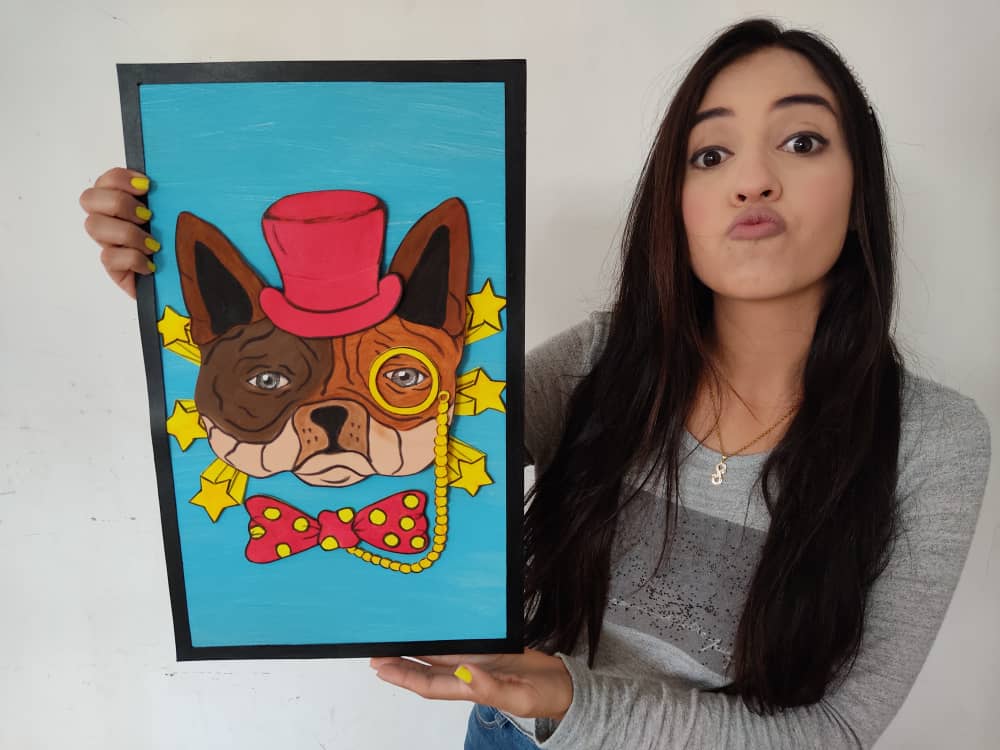
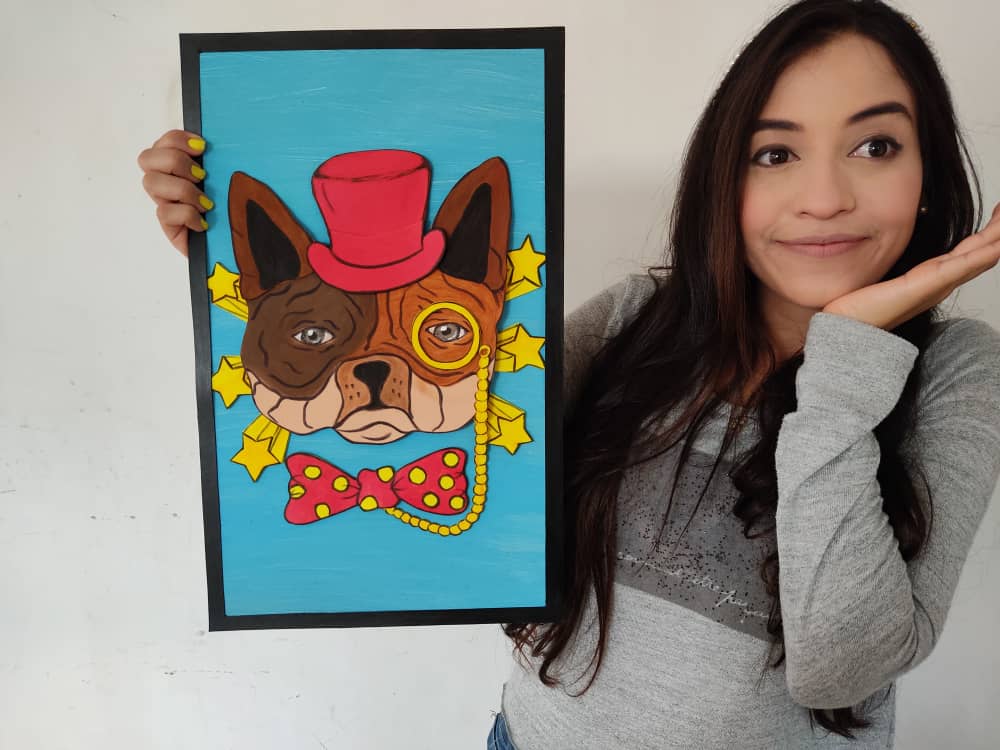
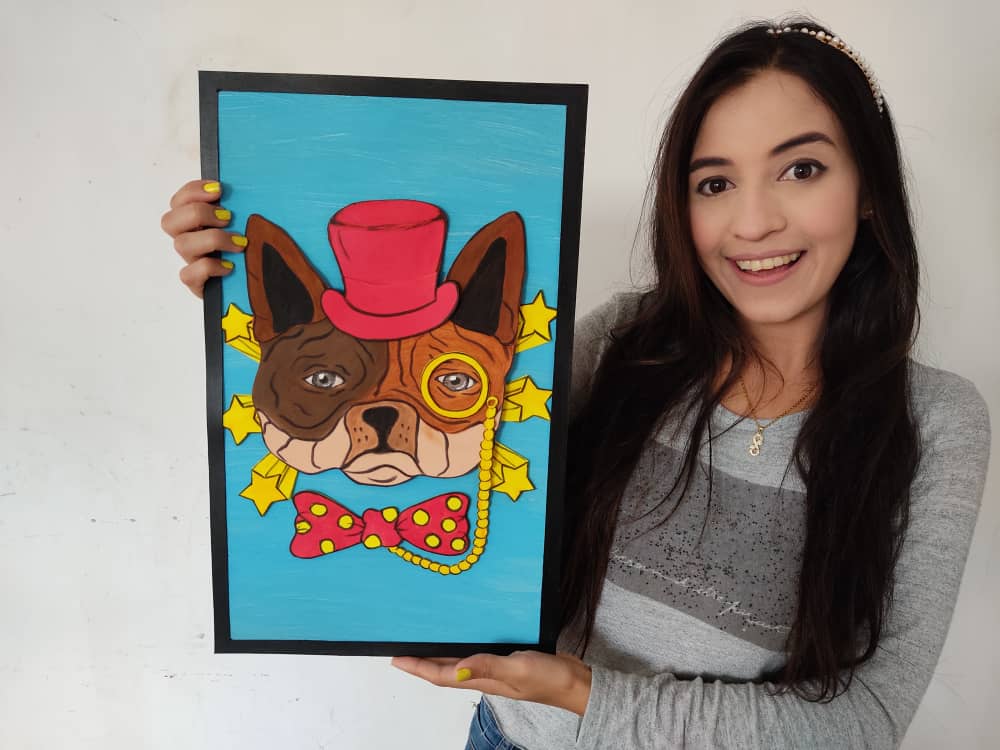
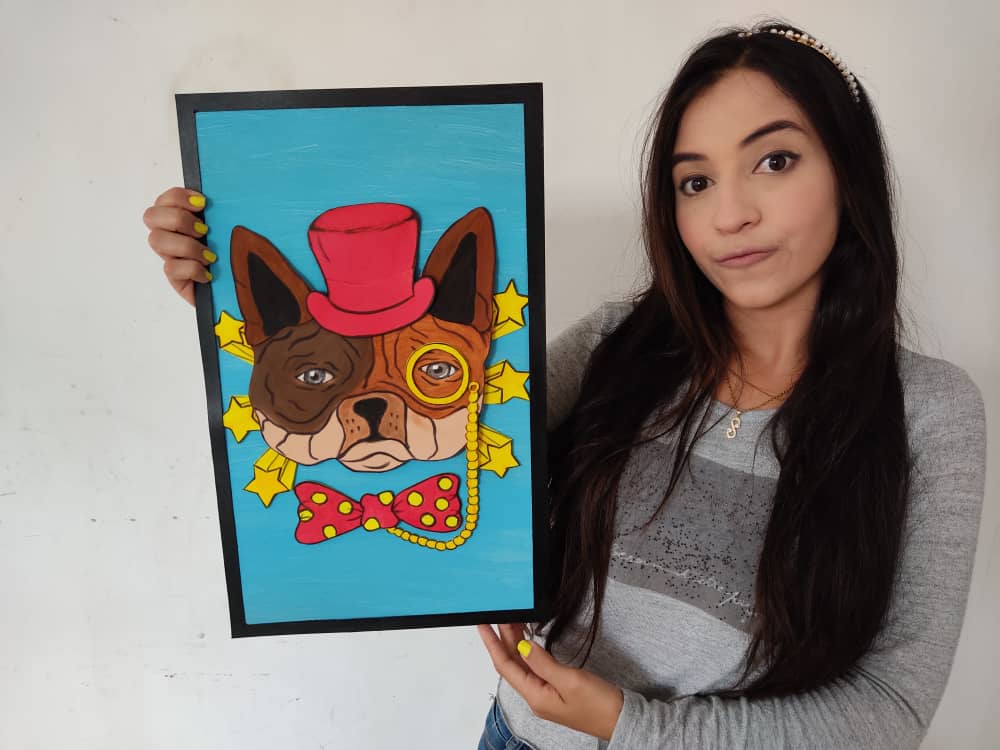
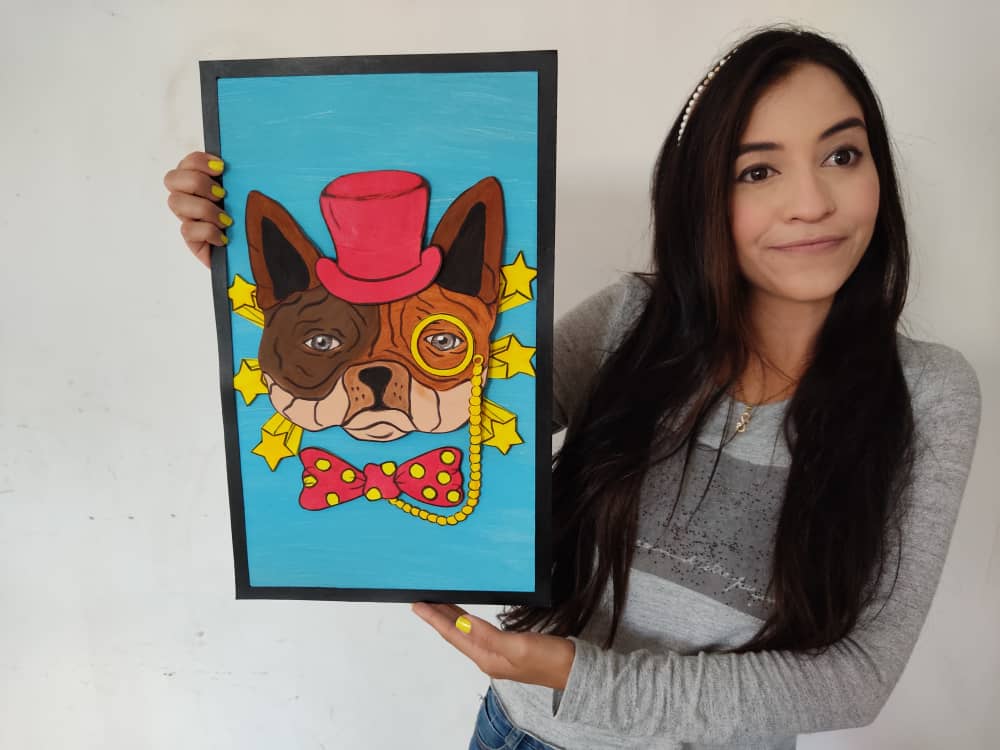
Finalmente, reforzamos la base del cuadro con un cartón más grueso para darle más firmeza y resistencia a nuestro cuadro. Seguidamente, fabricamos un lindo marco de cartón y lo pintamos de color negro, para pegarlo al borde de la base. Y ya tenemos Listo nuestro hermoso cuadro.
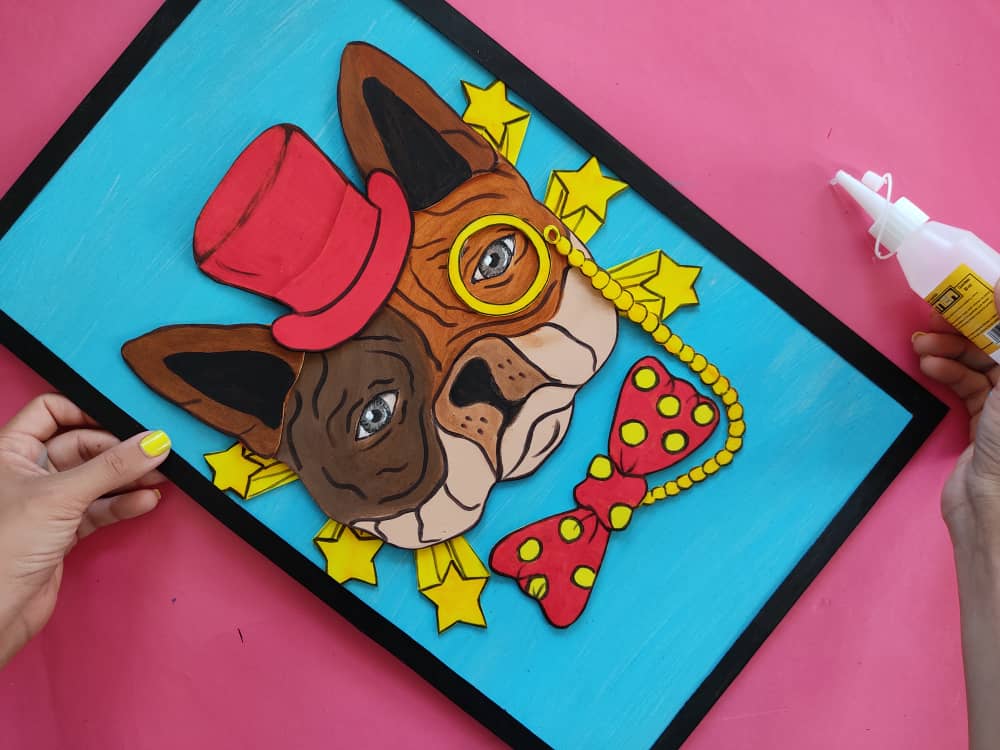
Finally, we reinforce the base of the painting with thicker cardboard to give our painting more firmness and resistance. Next, we make a nice cardboard frame and paint it black, to glue it to the edge of the base. And we already have our beautiful painting ready.
.jpeg)
.jpeg)
Gracias por acompañarme y espero que lo hayan disfrutado. ❤️
Thanks for joining and I hope you enjoyed it.❤️
.jpeg)
.jpeg)
.jpeg)
.jpeg)
.jpeg)
.jpeg)
.jpeg)
.jpeg)
.jpeg)
.jpeg)
.jpeg)
.jpeg)
.jpeg)
.jpeg)
.jpeg)
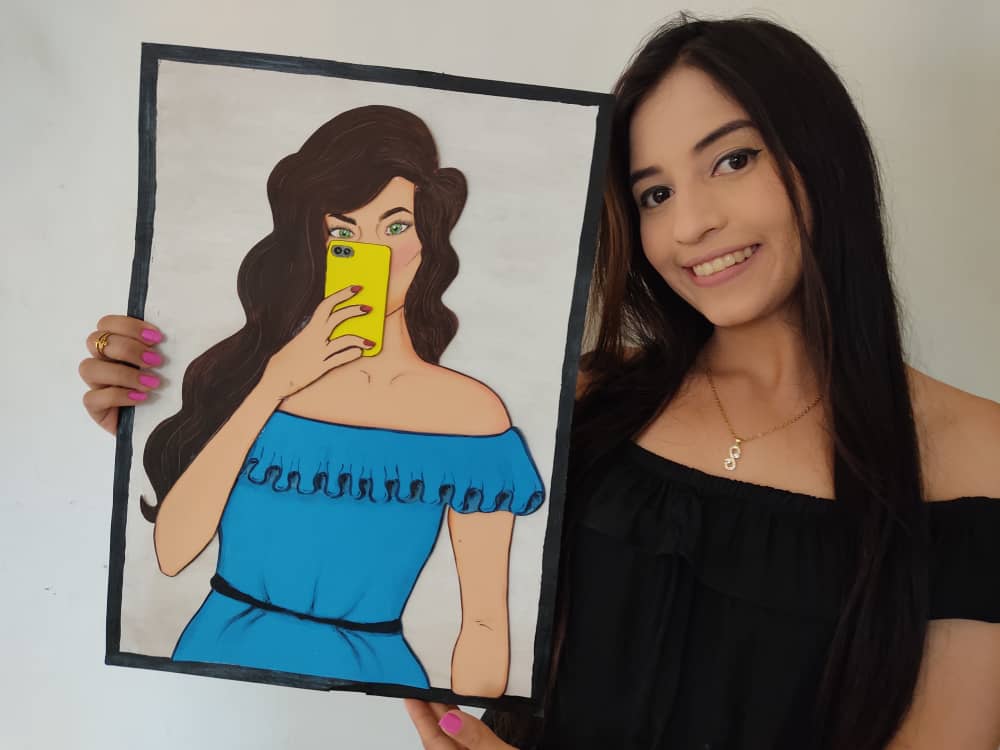
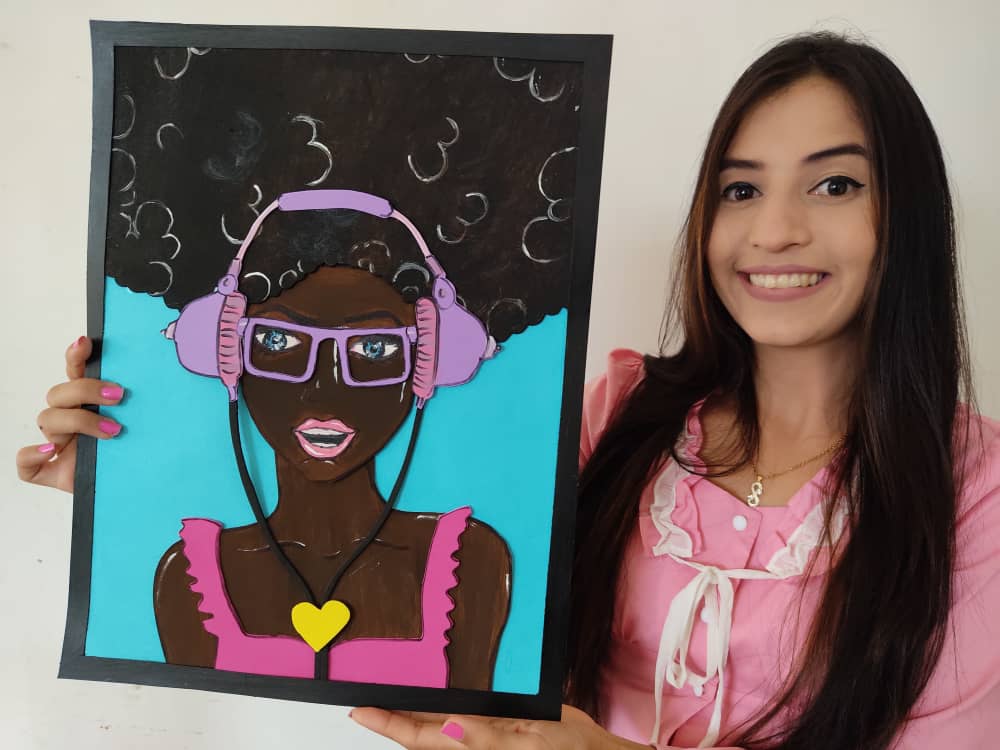
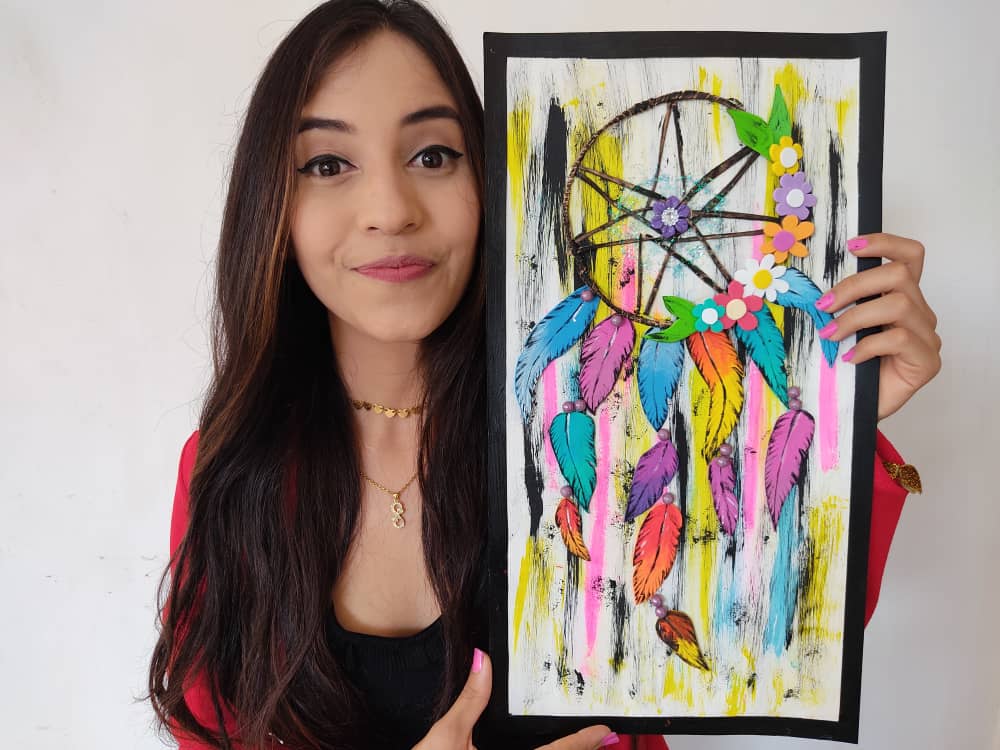
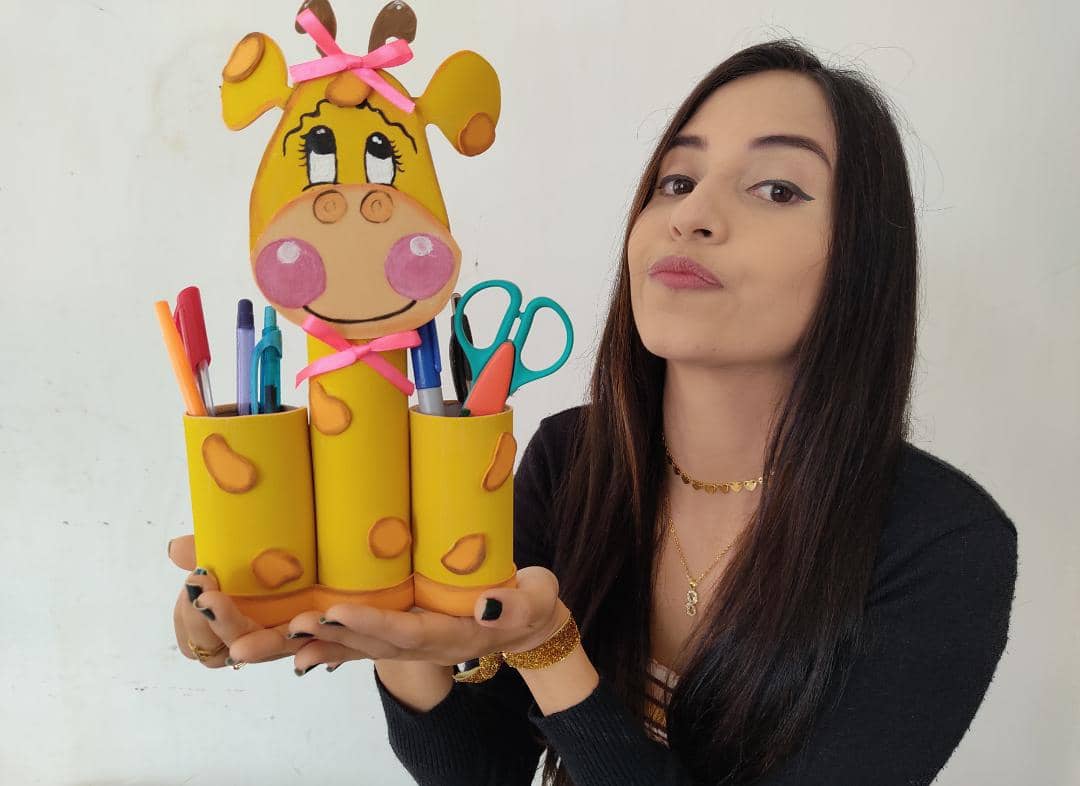
Clic para ver trabajos anteriores | Click to see previous works


Me gustan muchos tus post, son muy creativos, si mi mama viera tus post te mandaria a encargar muchos de esos cuadros para la casa, ella es amante de ellos, un saludo amiga.
Quedo increíble, cada vez me sorprenden mas tus trabajos y tu creatividad para traer siempre algo nuevo.