.jpeg)

Español
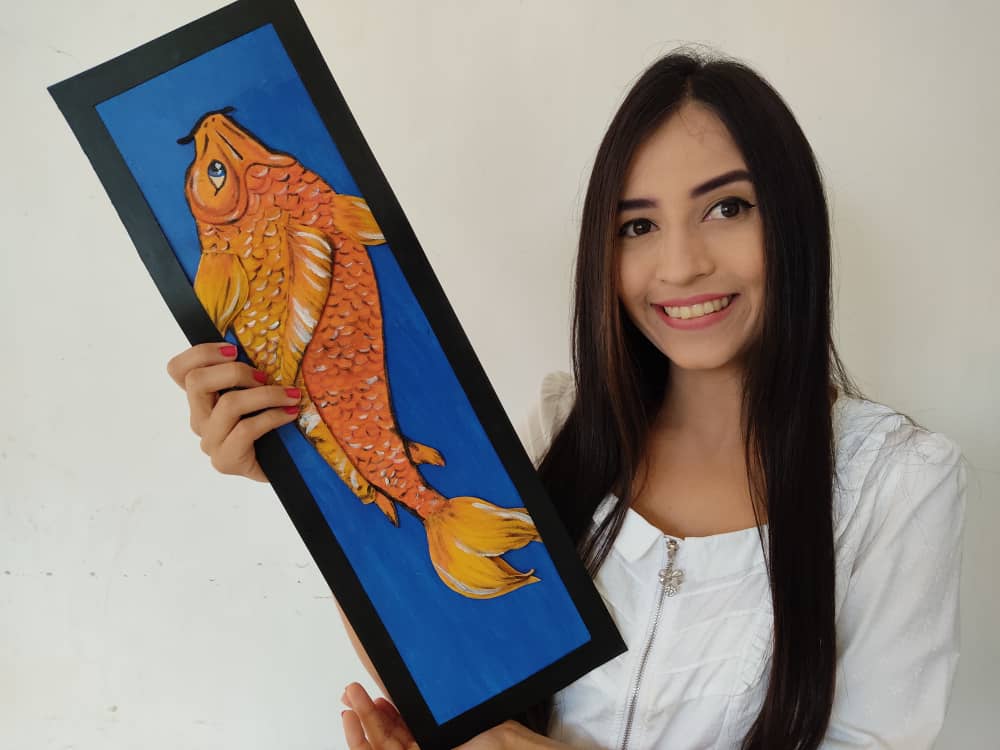
Hola querida y hermosa familia de hive, este hermoso día traigo para ustedes un divertidísimo paso a paso donde les mostrare cómo elaborar un hermoso cuadro de Pez Koi, pues este pez desde siempre me ha encantado, porque es un animal muy hermoso y sus colores tan intensos cautivan la atención de todos. Así que, manos a la obra y sigamos aprendiendo nuevas ideas en esta cuarentena.
English
Hello dear and beautiful family of hive, this beautiful day I bring for you a hilarious step by step where I will show you how to make a beautiful painting of koi fish because this fish has always enchanted me because it is a very beautiful animal and its colors so intense captivate everyone's attention. So let's get to work and continue learning new ideas in this quarantine.
¿Qué están esperando?
Gracias a esta técnica podemos crear su propio cuadro de pez koi, ideal y perfecto para decorar nuestras paredes de una manera económica y original. Antes de comenzar no olvidemos lavarnos nuestras manos.
What are they waiting for?
Thanks to this technique we can create your own koi fish painting, ideal, and perfect to decorate our walls in an economic and original way. Before we start, let's not forget to wash our hands.
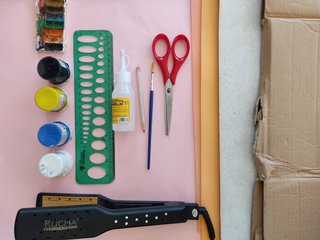
[Materiales | Materials]
Para hacer este hermosa cuadro necesitaremos:
- Moldes.
- Foami o goma eva.
- Lamina de cartón.
- Pinturas.
- Tijera.
- Cúter.
- Pegamento o silicón liquido.
To make this beautiful painting will need:
- Molds.
- Foami or EVA foam.
- Cardboard sheet.
- Paintings.
- Scissors.
- Cutter.
- Glue or liquid silicone.
Procedimiento (paso a paso)
Process (step by step)
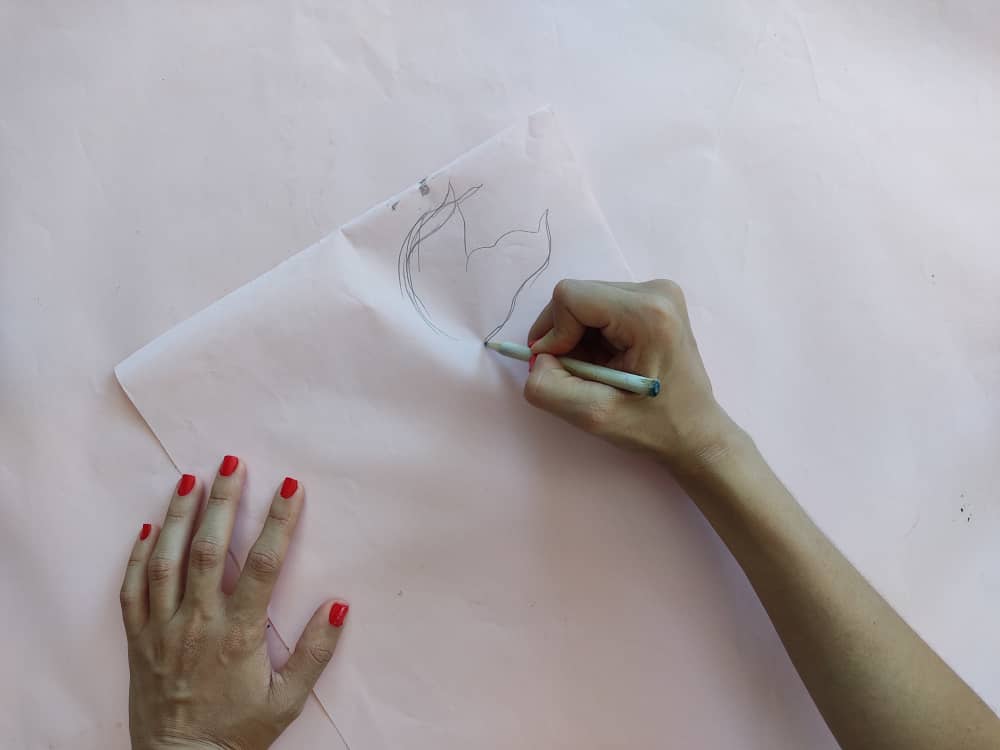
Primero, dejamos volar nuestra imaginación y dibujamos un pez Koi muy hermoso, con la forma que más les guste, sin olvidar el detalle de sus preciosas escamas tornasol.
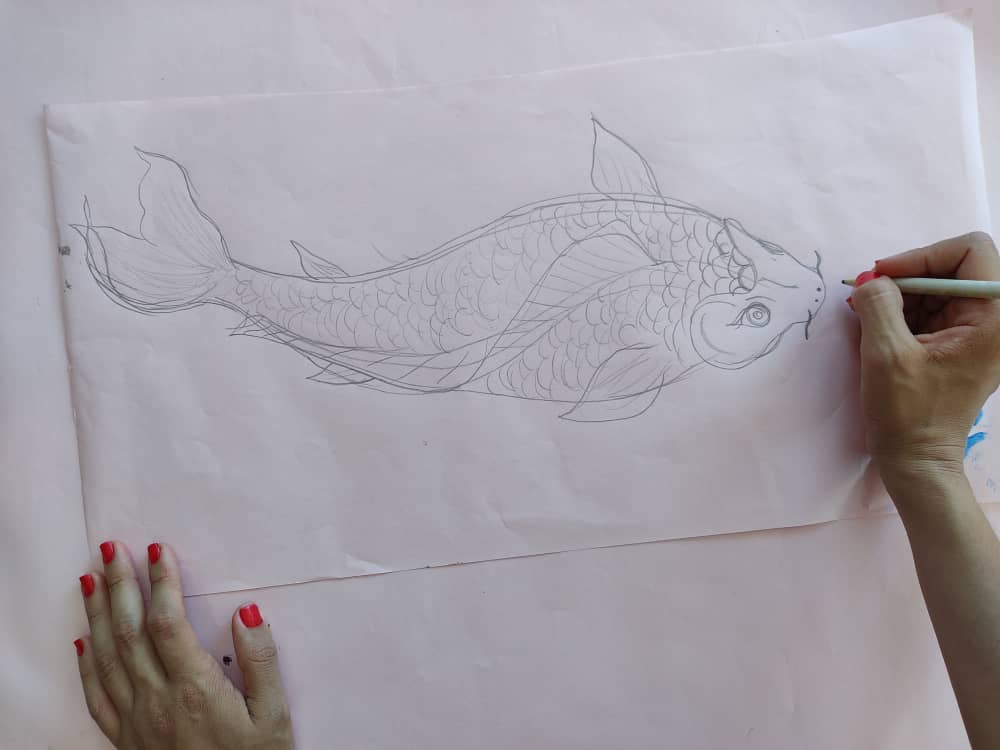
First, we let our imagination run wild and we drew a very beautiful Koi fish, with the shape that you like the most, without forgetting the detail of its precious litmus scales.
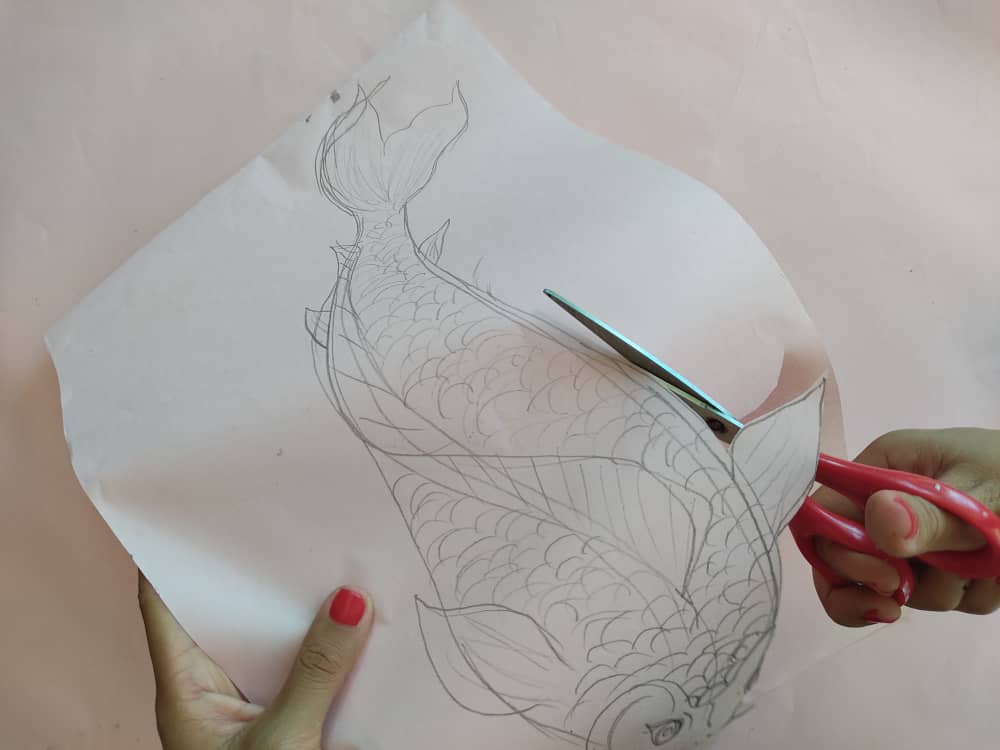
Ahora, recortamos cuidadosamente la figura de nuestro pez para obtener su silueta.
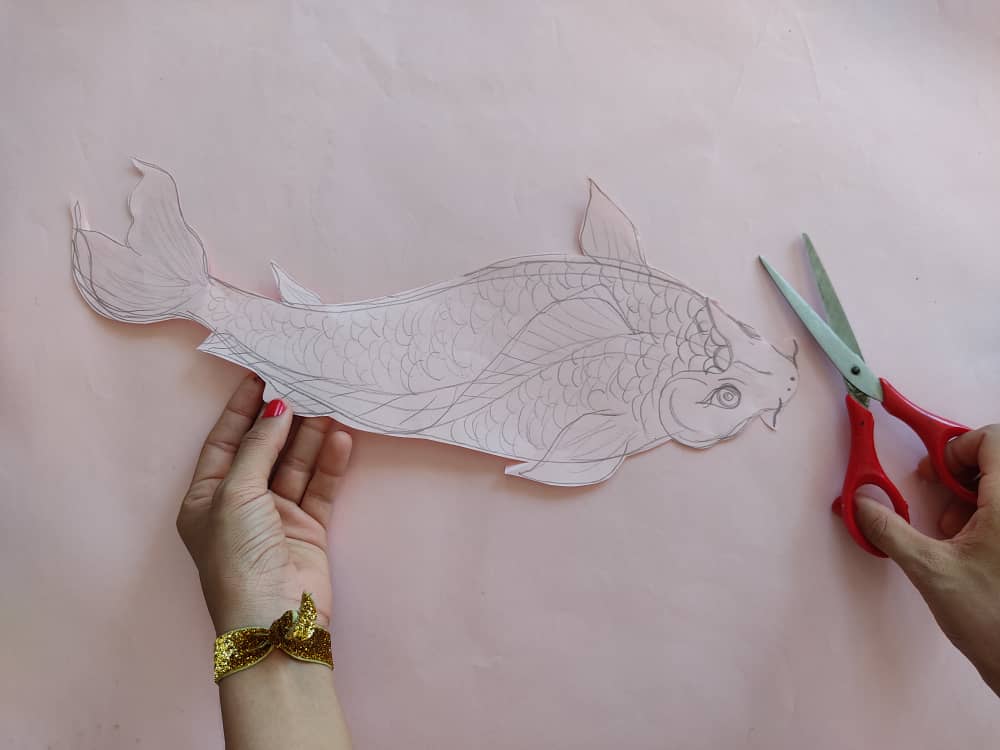
Now, we carefully cut out the figure of our fish to get its silhouette.
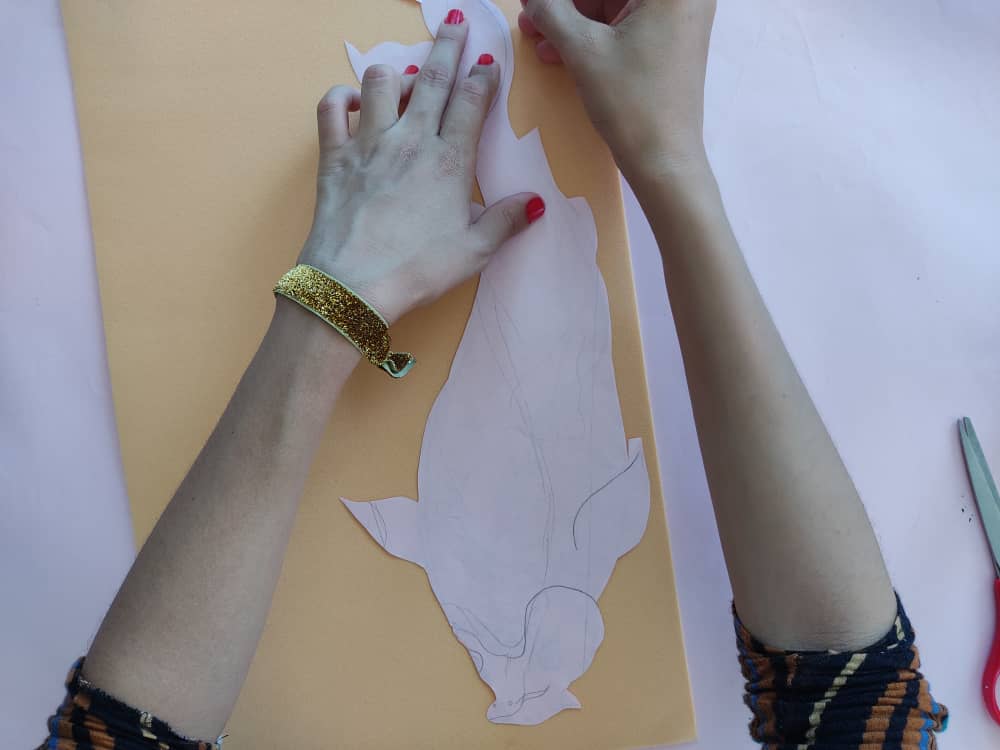
Seguidamente, transferimos la figura obtenida al foami del color que más nos guste o tengamos, recuerden hacerlo con mucho cuidado para así mantener intacta su forma.
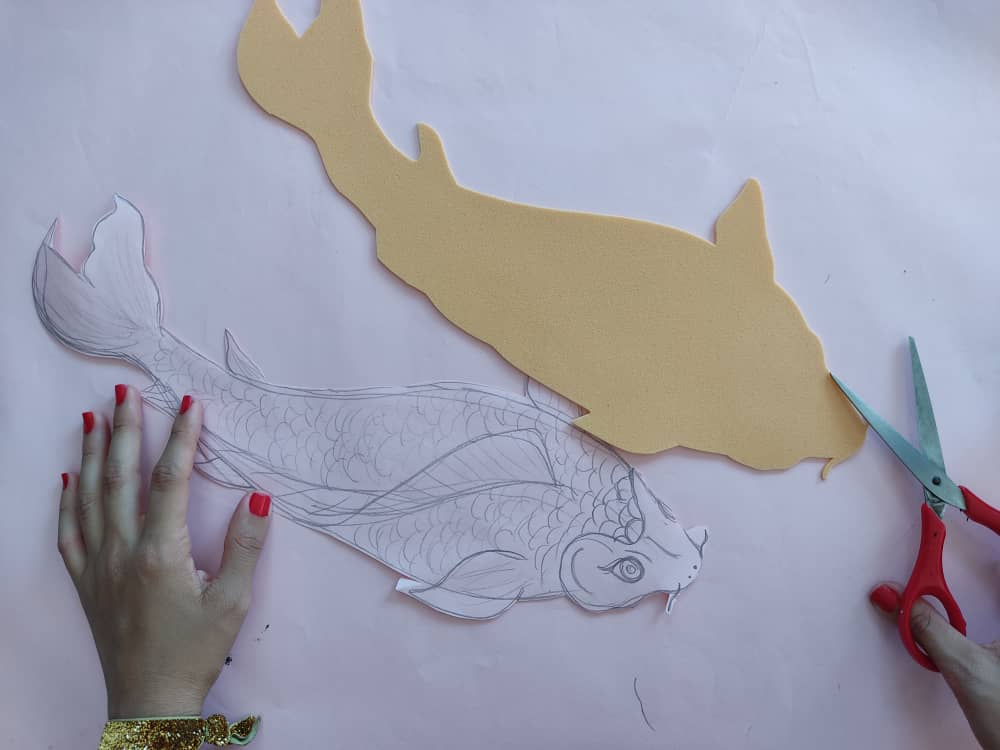
Next, we transfer the figure obtained to the foamy of the color that we like or have, remember to do it with great care to keep its shape intact.
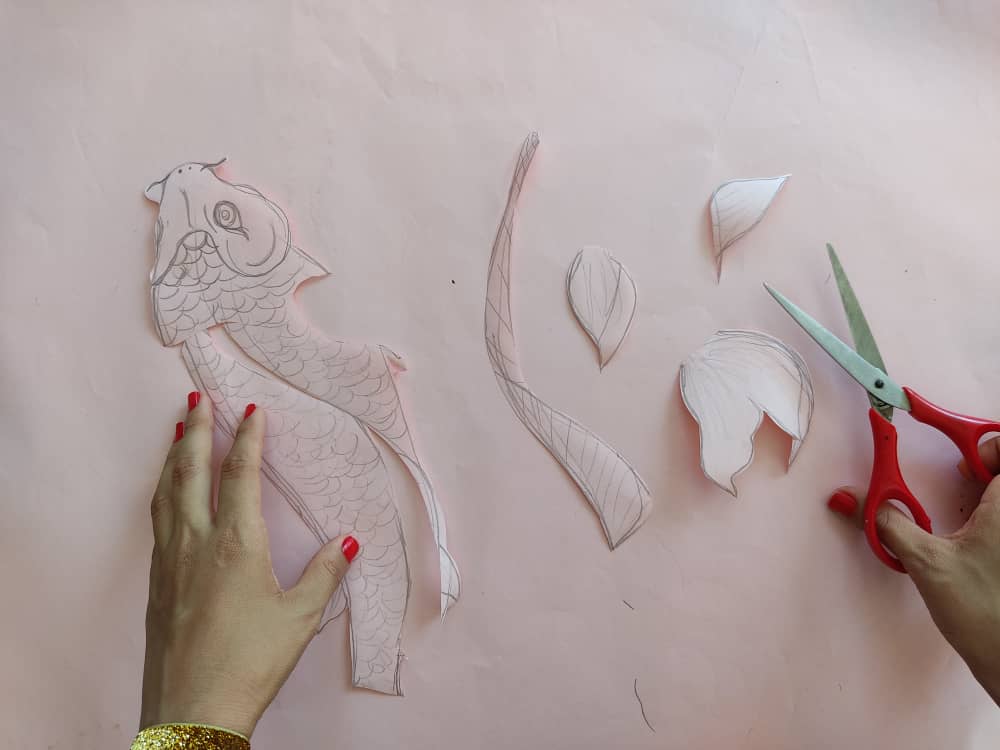
Una vez que hayamos obtenido la silueta de nuestro pez Koi en foami, separamos las aletas y la línea lateral del molde de papel o silueta, y transferimos al foami.
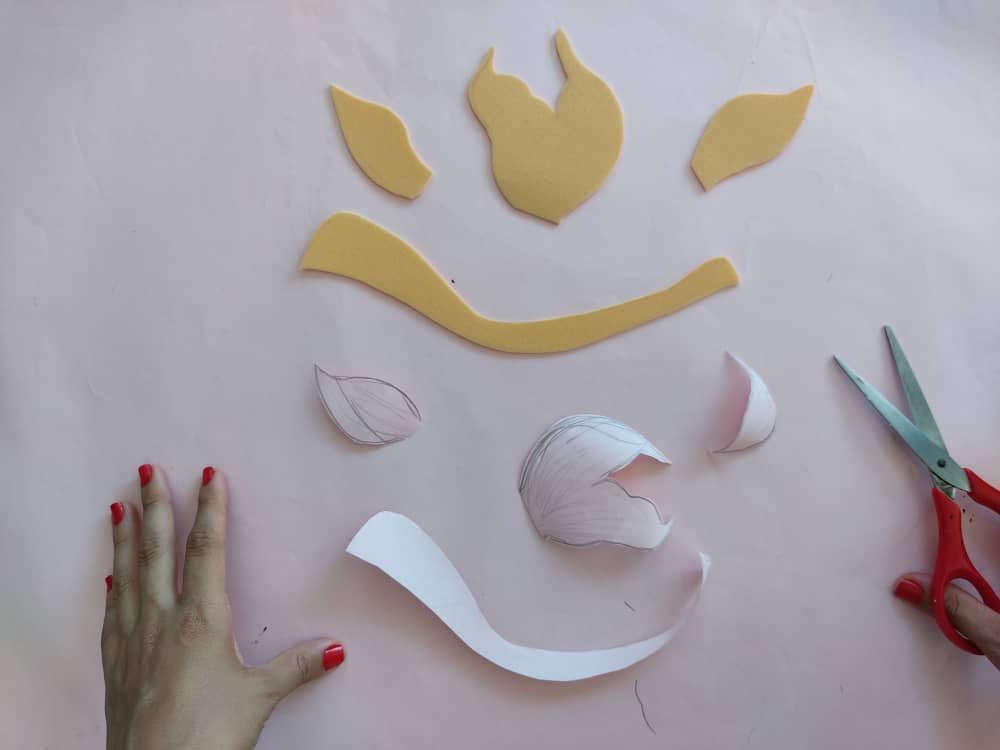
Once we have obtained the silhouette of our Koi fish in foamy, we separate the fins and the lateral line of the paper or silhouette mold and transfer to the foamy.

Antes de comenzar a pintar, definimos los detalles más indispensables del pez en foami con la ayuda de un lápiz.
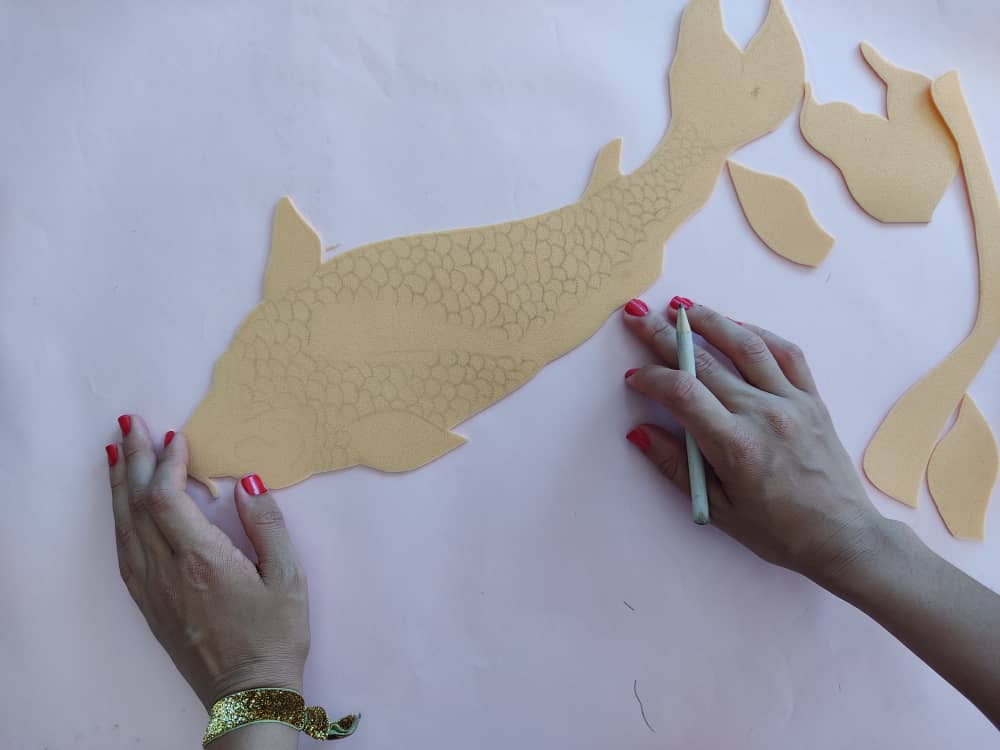
Before starting to paint, we define the most essential details of the fish in foamy with the help of a pencil.
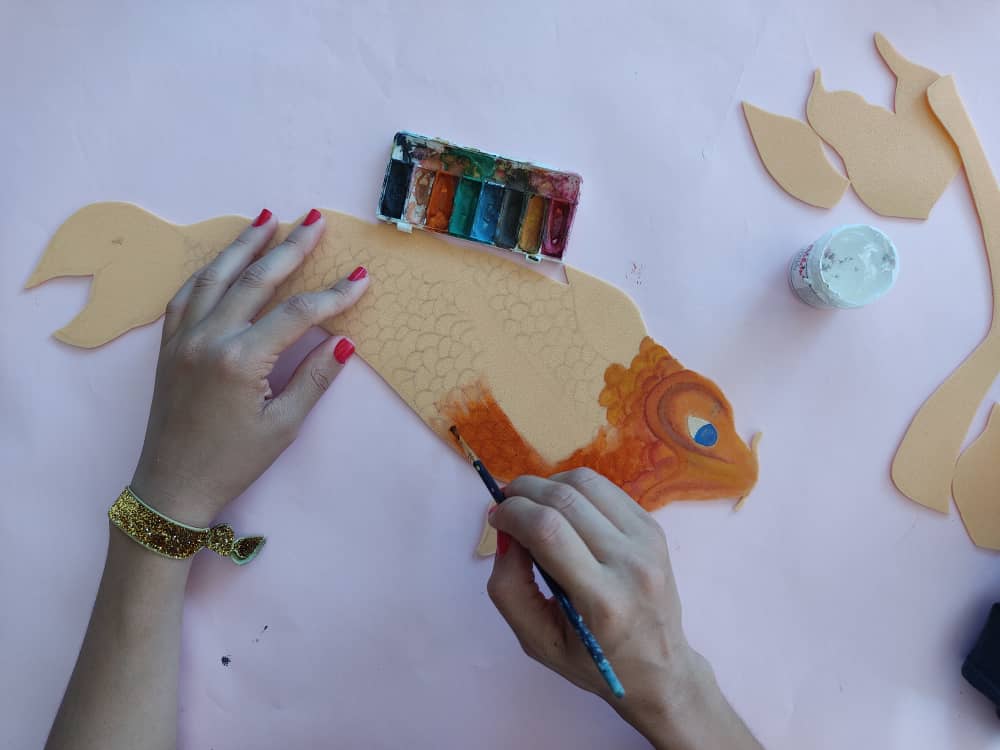
Ahora llegamos al mejor de los pasos, donde daremos amor y alegría a nuestras figuras, aplicando un poco de pintura, dejemos que nuestra imaginación se encargue de darle un toque increíble a este pez tan precioso. Recuerden que sus escamas son tornasol así que podemos jugar con varios tonos de colores, yo opte por combinar amarillo naranja y rojo.
Now we come to the best of steps, where we will give love and joy to our figures, applying a little paint, let our imagination take care of giving an incredible touch to this precious fish. Remember that its scales are litmus so we can play with various shades of colors, I chose to combine yellow, orange, and red.
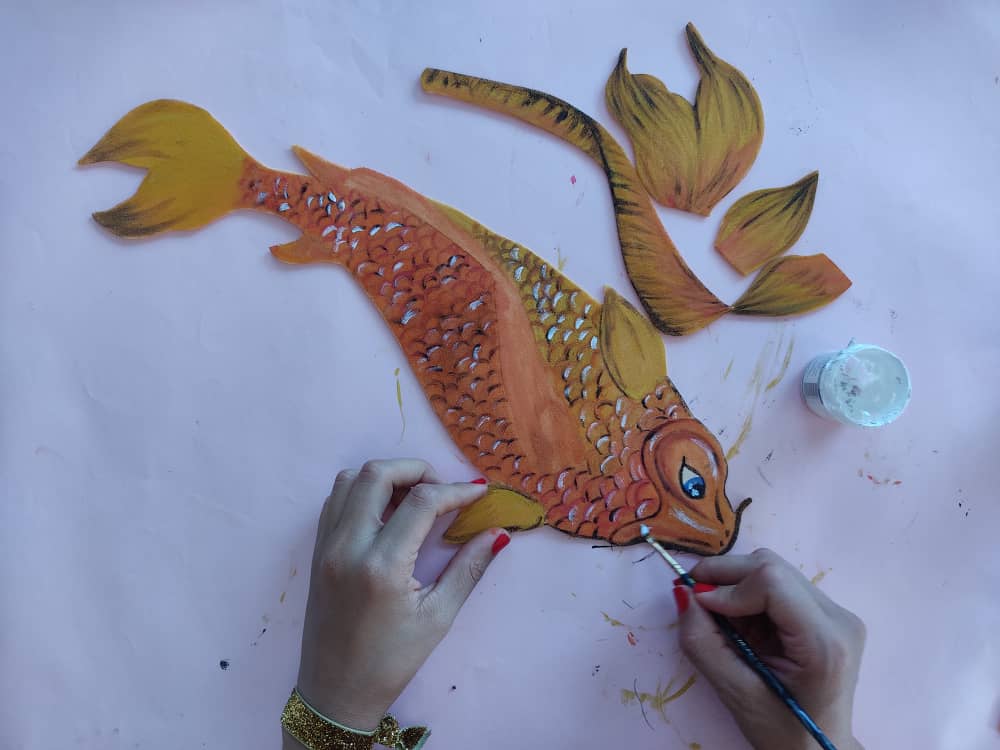
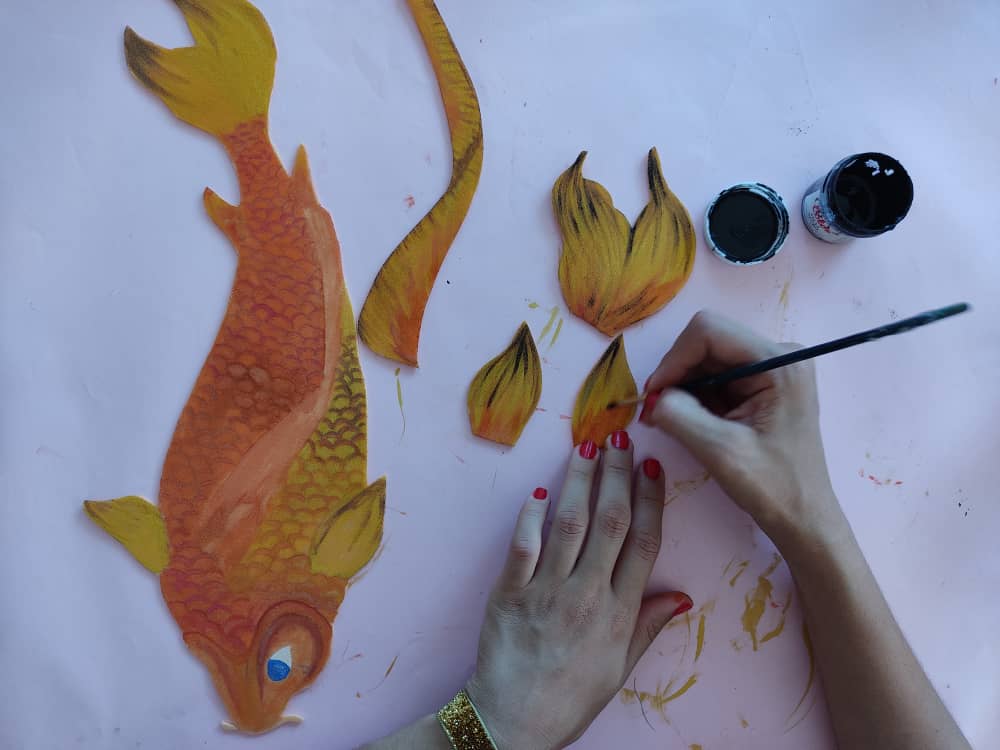
Seguidamente, remarcamos los bordes de nuestras figuras con color negro, y también añadimos toques de luz con pintura blanca con la ayuda de un pincel fino.
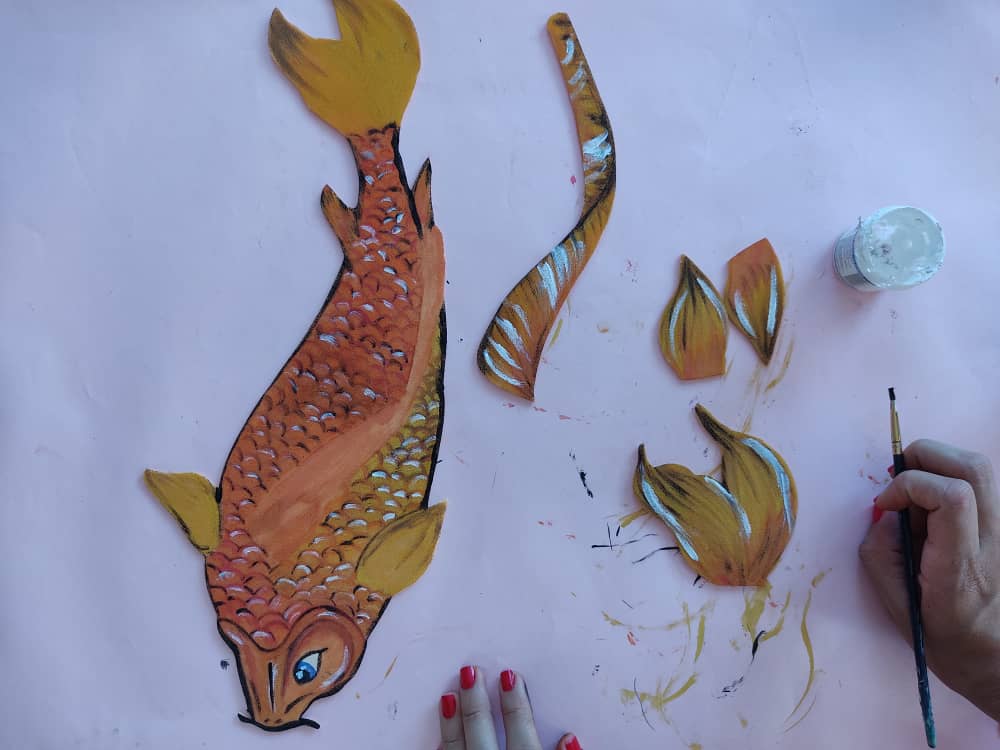
Next, we highlight the edges of our figures with black color, and we also add highlights with white paint with the help of a fine brush.
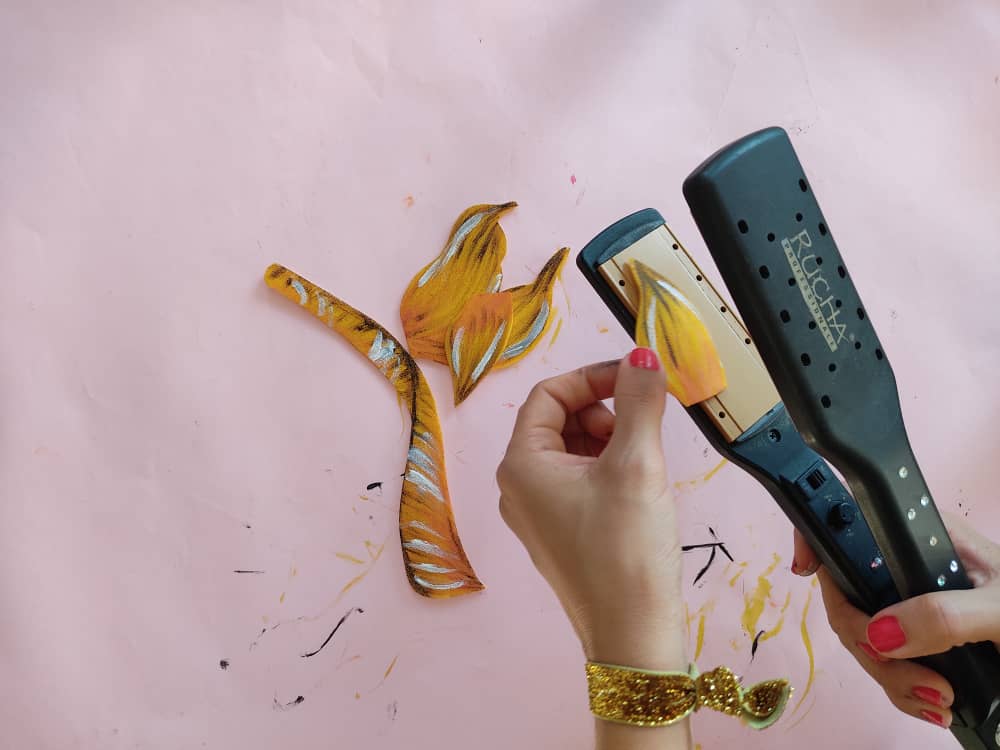
Luego, aplicamos la técnica del termoformado a nuestras partes de foami con la ayuda de la plancha una plancha para cabellos, abultamos las aletas y miren que increíbles lucen cuando aplicamos esta técnica tan práctica.
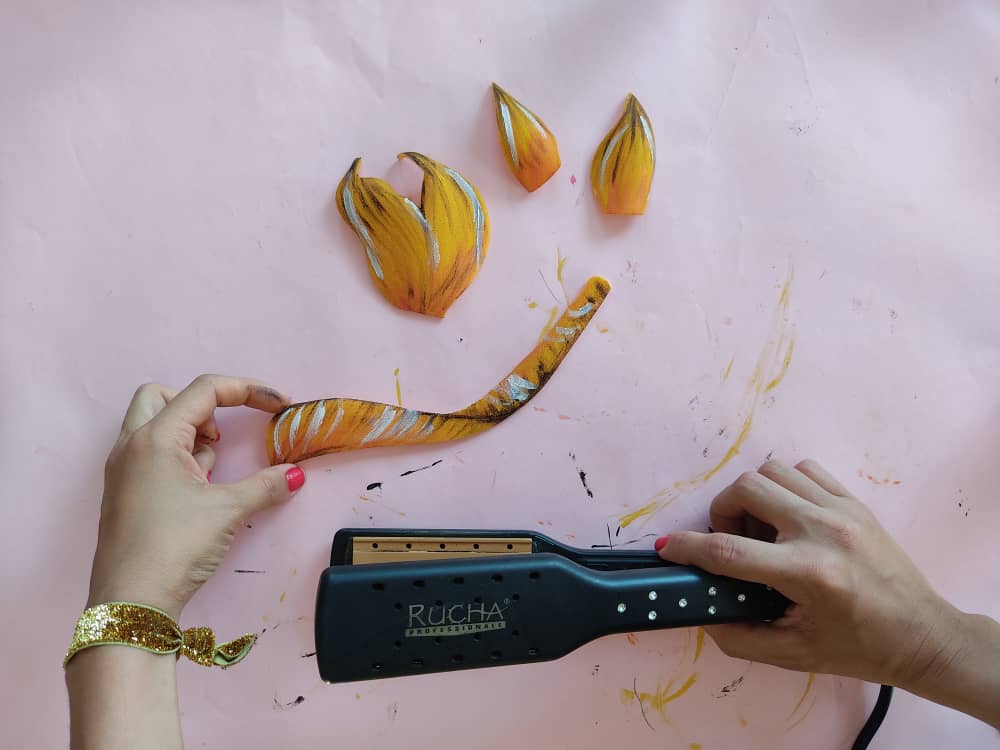
Then, we apply the thermoforming technique to our foamy parts with the help of the iron, a hair iron, we bulge the fins, and look how incredible they look when we apply this very practical technique.
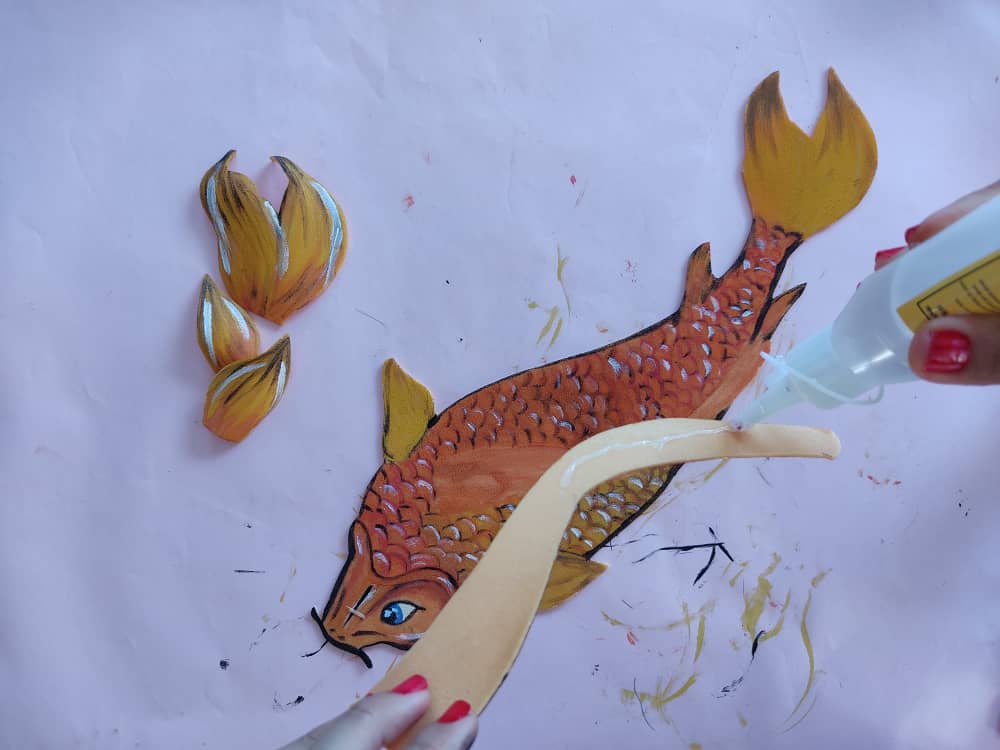
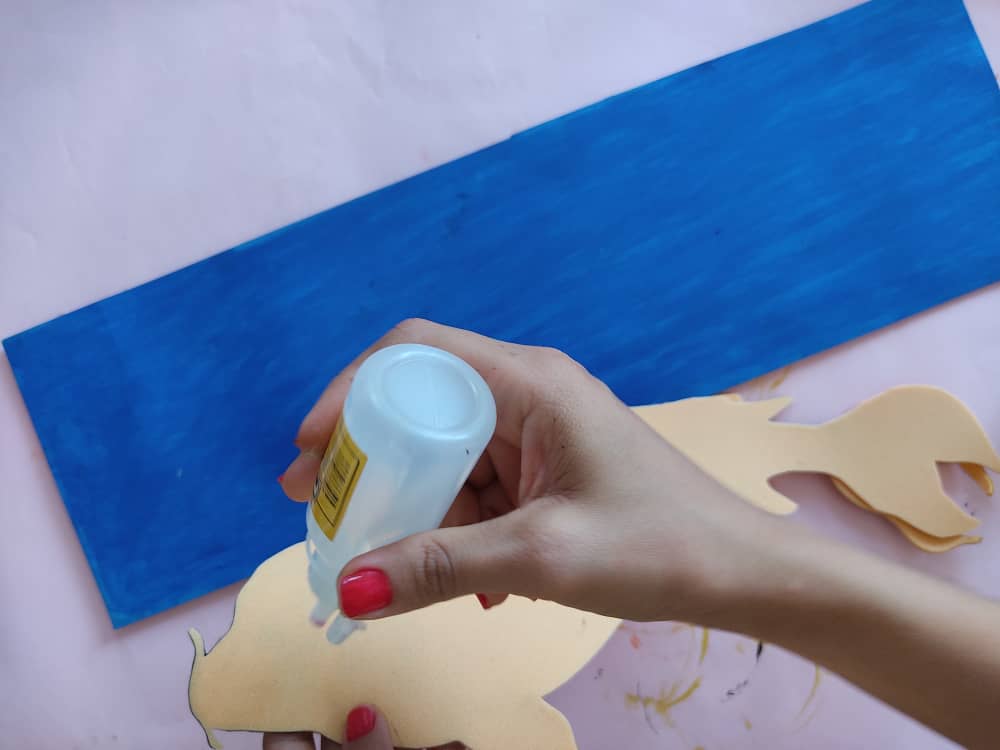
Ahora, armamos nuestro pez con la ayuda del pegamento. Debemos hacer un poco de presión para asegurarnos de que queden bien pegados.
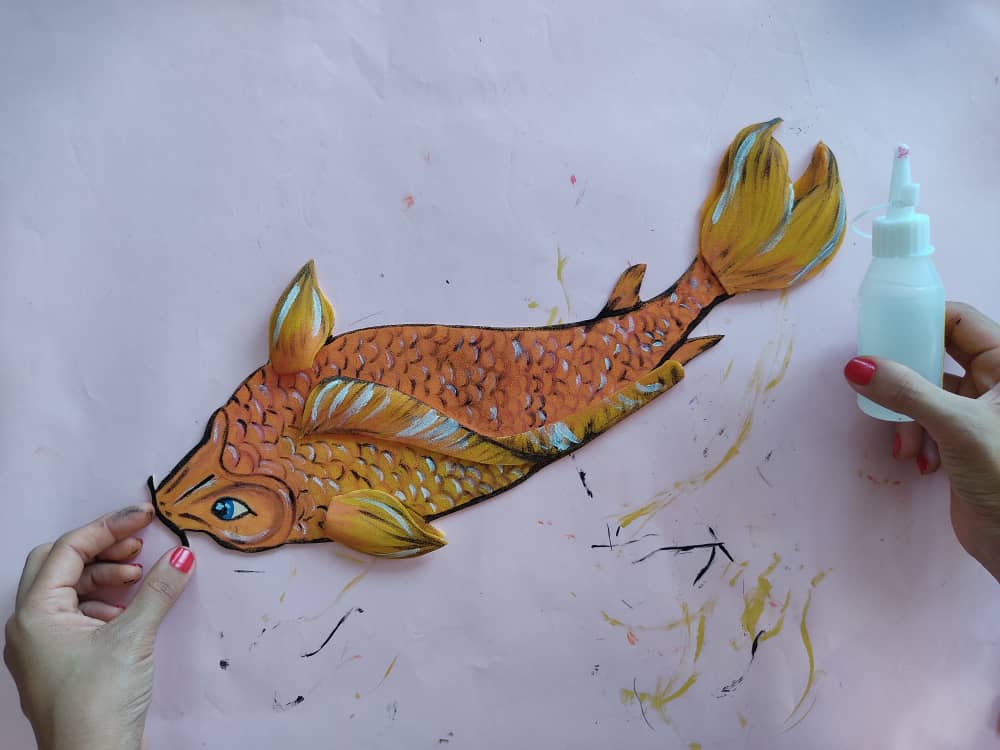
Now, we assemble our fish with the help of the glue. We need to do a little bit of pressure to make sure they stick together.
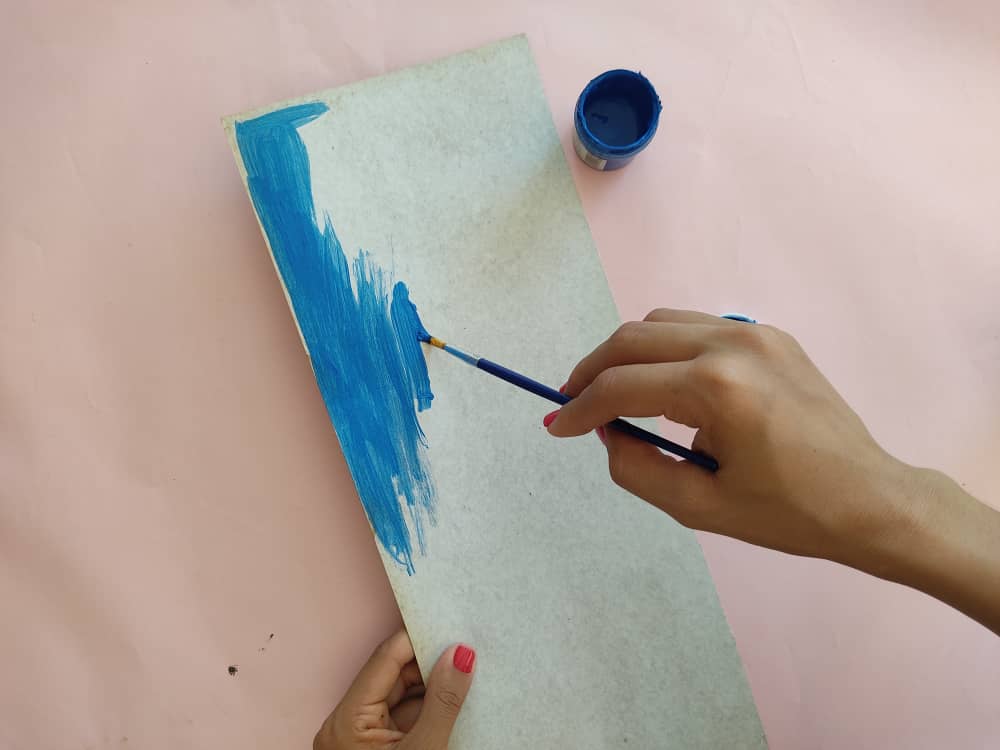
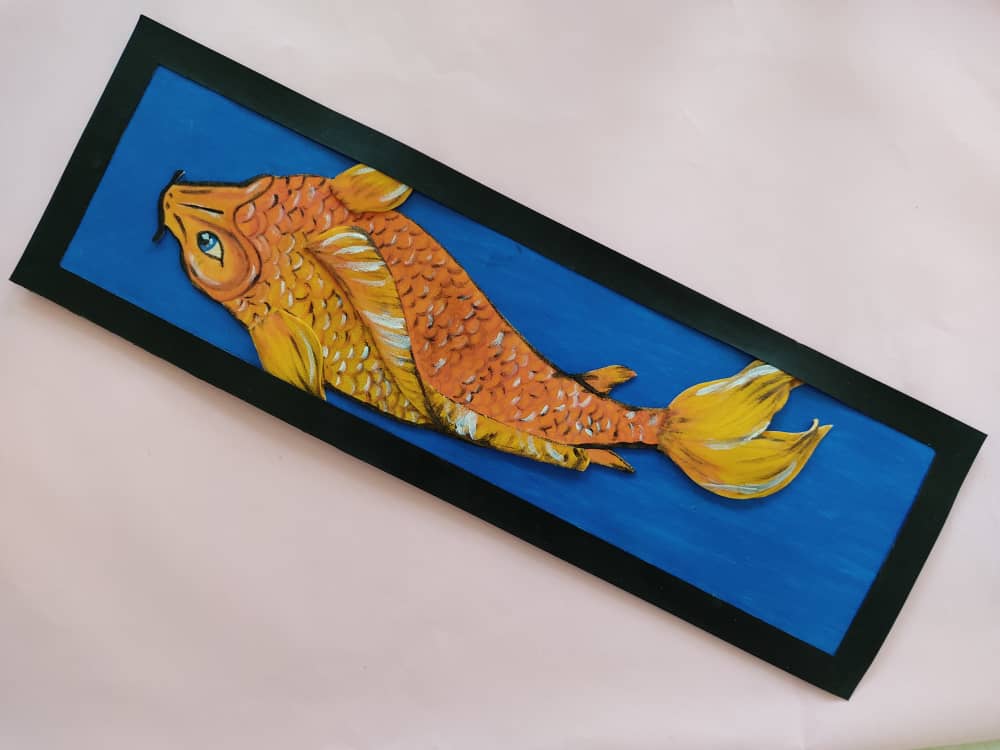
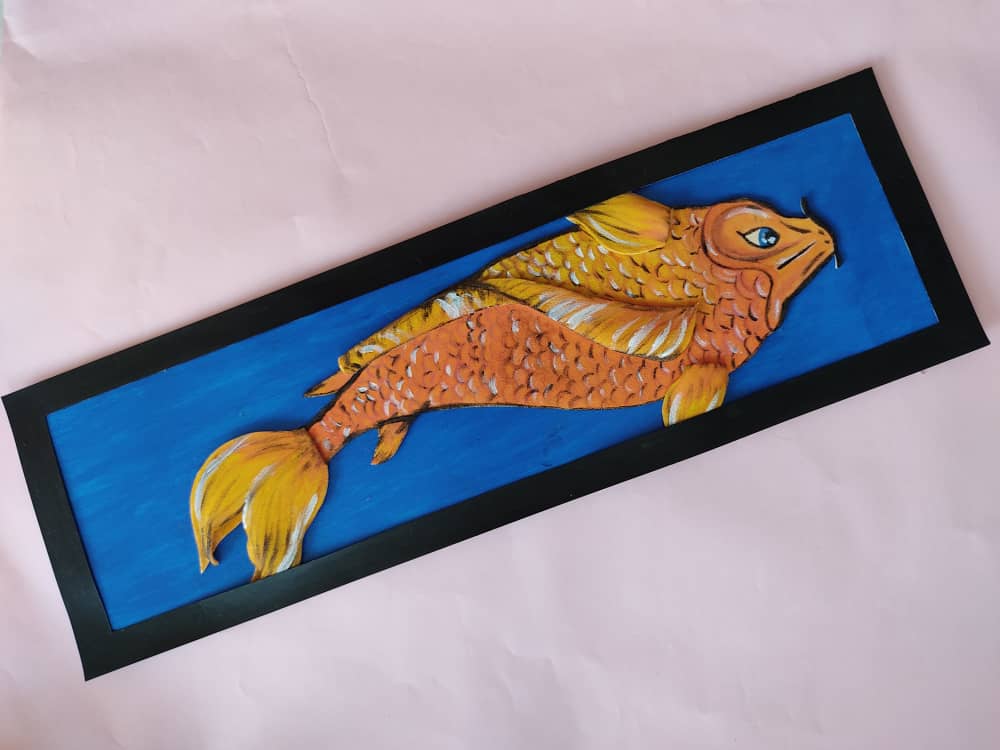
Luego fabricamos una base de cartón de aproximadamente 14 x 50cm para nuestro cuadro, y la pintamos de color azul, recuerden que pueden jugar con los tonos y pintarla del color que deseen, pues de negro estoy segura que quedaría muy bien, pero en este caso opte por pintarla de azul. Dejamos secar por unos minutos…
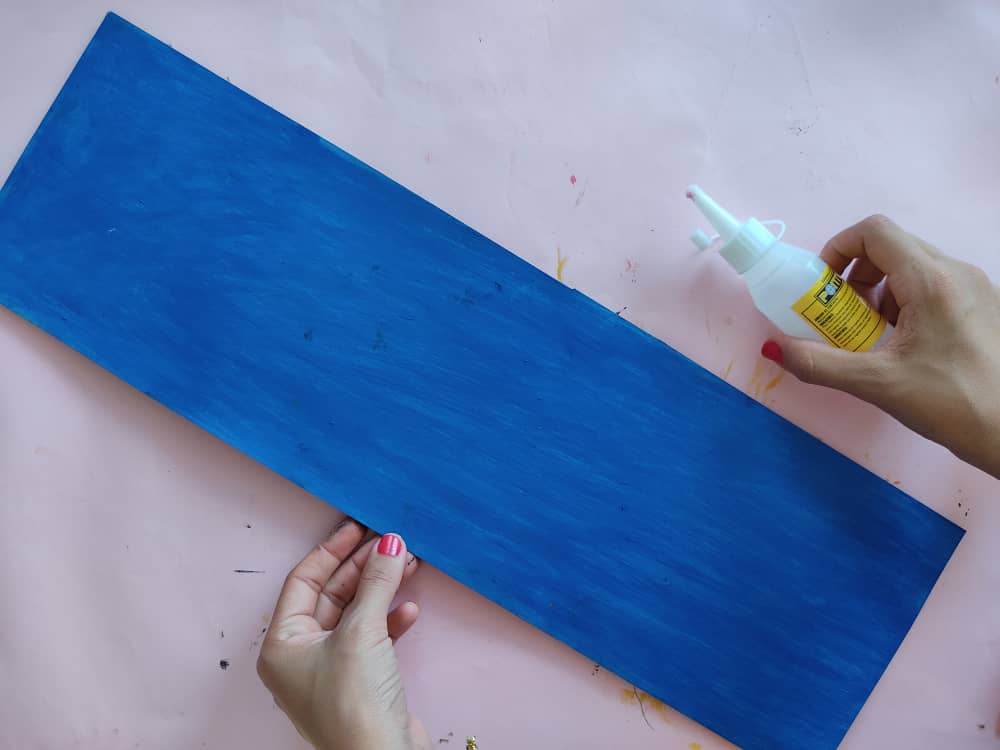
Then we make a cardboard base of approximately 14 x 50cm for our painting, and we paint it in blue, remember that you can play with the tones and paint it in the color you want because in black I am sure it would look great, but in this case choose to paint it blue. Let it dry for a few minutes ...
Una vez que esté totalmente seca la pintura base, comenzamos a decorar nuestro cuadro, pegando el hermoso pez, y nos aseguramos de que quede bien pegado.
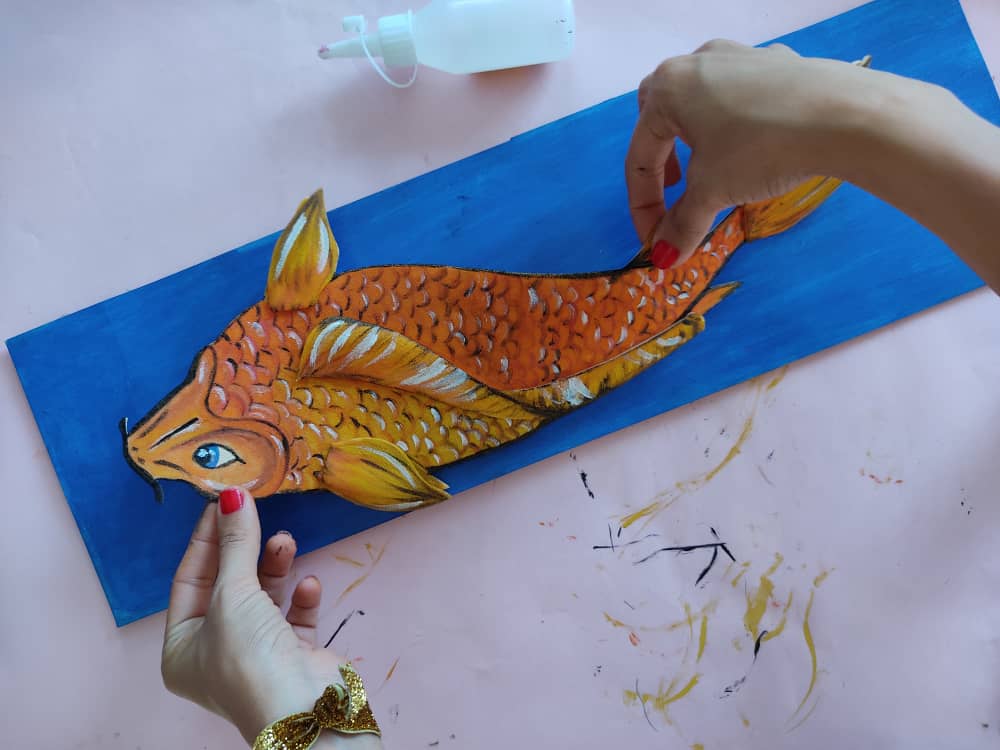
Once the base paint is completely dry, we begin to decorate our painting, gluing the beautiful fish, and we make sure that it is well glued.
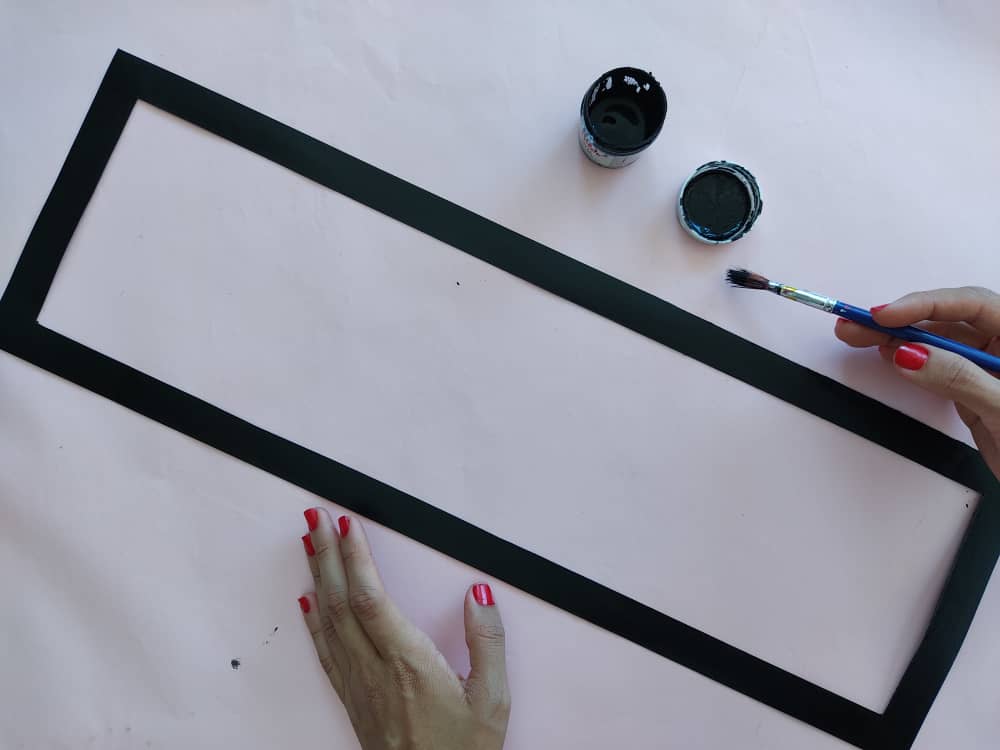
Luego, fabricamos un marco súper genial usando una técnica distinta a las anteriores, “ojo” esto es si contamos con el material suficiente, marcamos en la cartulina y recortamos los dispositivos sin separar las tiras. Y seguidamente, pintamos el marco del color que más nos guste, en este caso yo decidí pintarlo de negro, para que luzca muy elegante y la vez hermoso, y finalmente lo pegamos al cuadro.
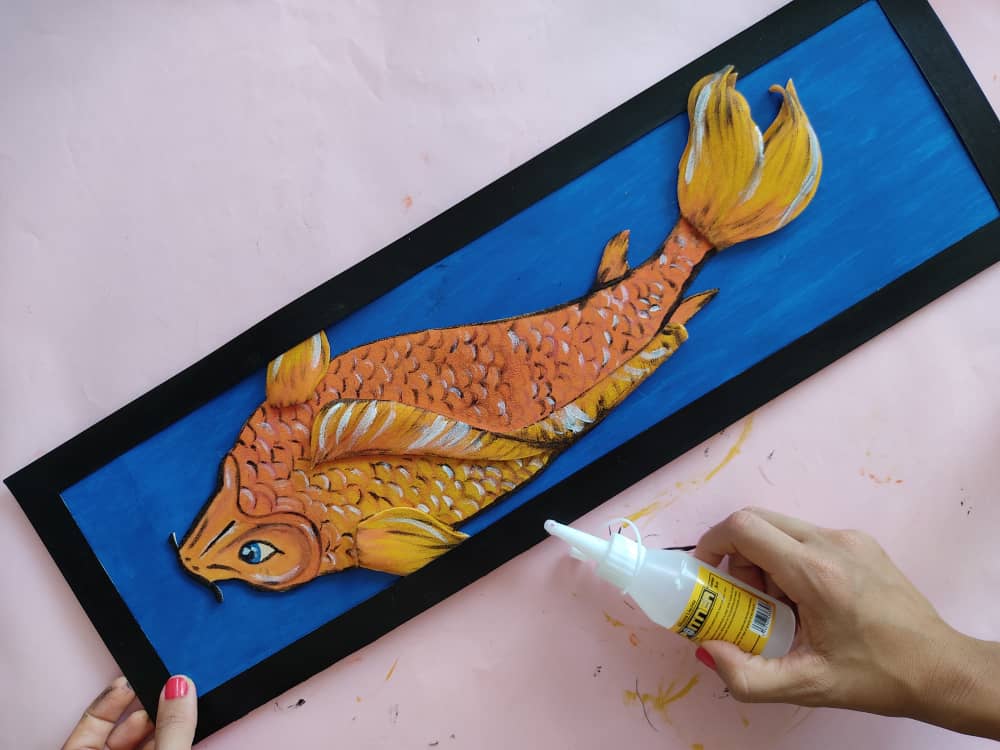
Then, we make a super cool frame using a different technique than the previous ones, "eye" this is if we have enough material, we mark on the cardboard and cut the devices without separating the strips. And then, we painted the frame in the color that we like the most, in this case, I decided to paint it black, so that it looks very elegant and at the same time beautiful, and finally, we glued it to the painting.
.jpeg)
.jpeg)
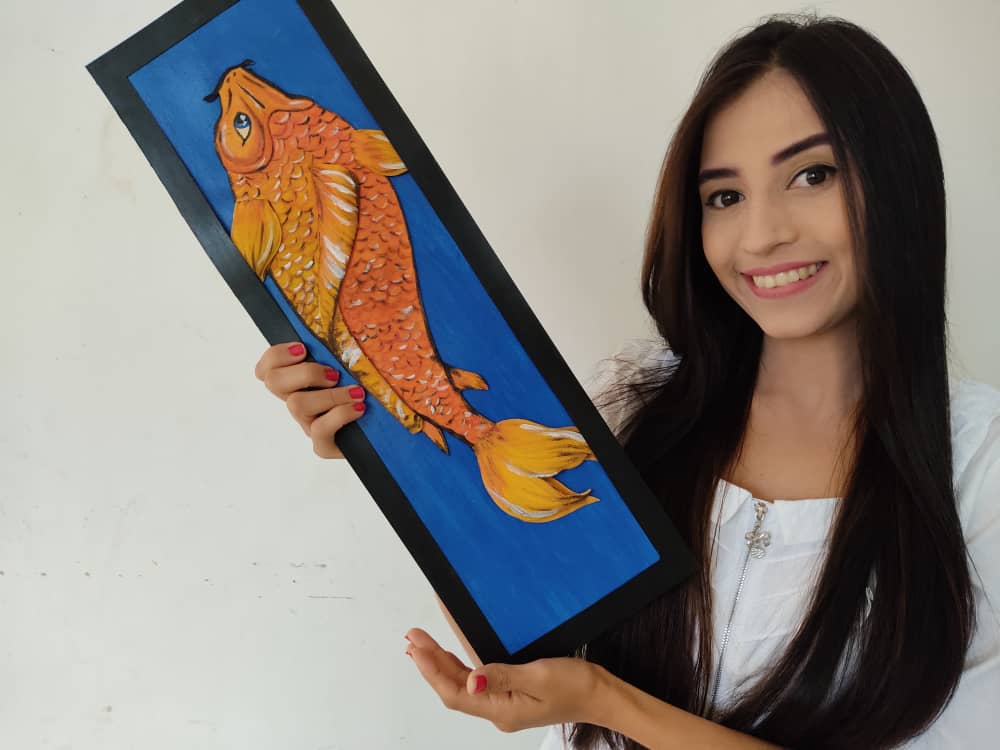
Gracias por acompañarme y espero que lo hayan disfrutado. ❤️
Thanks for joining and I hope you enjoyed it.❤️
.jpeg)
.jpeg)
.jpeg)
.jpeg)
.jpeg)
.jpeg)
.jpeg)
.jpeg)
.jpeg)
.jpeg)
.jpeg)
.jpeg)
.jpeg)
.jpeg)
Clic para ver trabajos anteriores | Click to see previous works
.jpeg)


My twt #posh
Congratulations, your post has been upvoted by @dsc-r2cornell, which is the curating account for @R2cornell's Discord Community.
Really Beautiful Golden fish