.jpg)

Español
Este nuevo día les vengo a enseñar cómo realizar su propia cartuchera de foamy, muy fácil hacer, utilizando foamy o goma eva que es un material muy económico y muy fáciles de conseguir. Así que, los invito a que no se pierdan este divertido trayecto, ideal y perfecto para el desarrollo de la creatividad de los niños. Además es un idea perfecta para pasar un rato agradable con nuestros pequeños en casa, ya que, pueden ir, de a poco, desarrollando su ingenio y acercándose un poco más al trabajo artístico.
English
This new day I come to teach you how to make your own foamy cartridge, very easy to make, using foamy or Eva rubber which is a very economical material and very easy to get. So, I invite you not to miss this fun journey, ideal and perfect for the development of children's creativity. It is also a perfect idea to spend a pleasant time with our little ones at home, since, they can go, little by little, developing their ingenuity and getting a little closer to artistic work.
¿Qué están esperando?
Con esta nueva técnica los niños podrán desarrollar sus habilidades ya que tendrán que diseñar su propia cartuchera para el colegio. Antes de comenzar no olvidemos lavarnos nuestras manos.
What are they waiting for?
With this new technique, children will be able to develop their skills since they will have to design their own pencil case for school. Before we start, let's not forget to wash our hands.
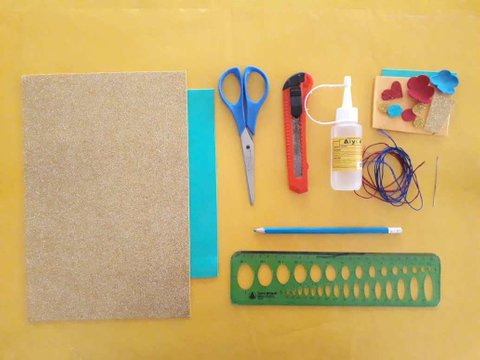
[Materiales | Materials]
Para hacer esta hermosa cartuchera necesitaremos:
- Lamina de foamy o goma eva.
- Tijera.
- Cuter.
- Regla.
- Lápiz o marcador.
- Pegamento.
- Hilo.
To make this beautiful Pencil case we will need:
- Foamy sheet or Eva foam.
- Scissors.
- Cuter.
- Rule
- Pencil or marker.
- Glue.
- Thread.
Procedimiento (paso a paso)
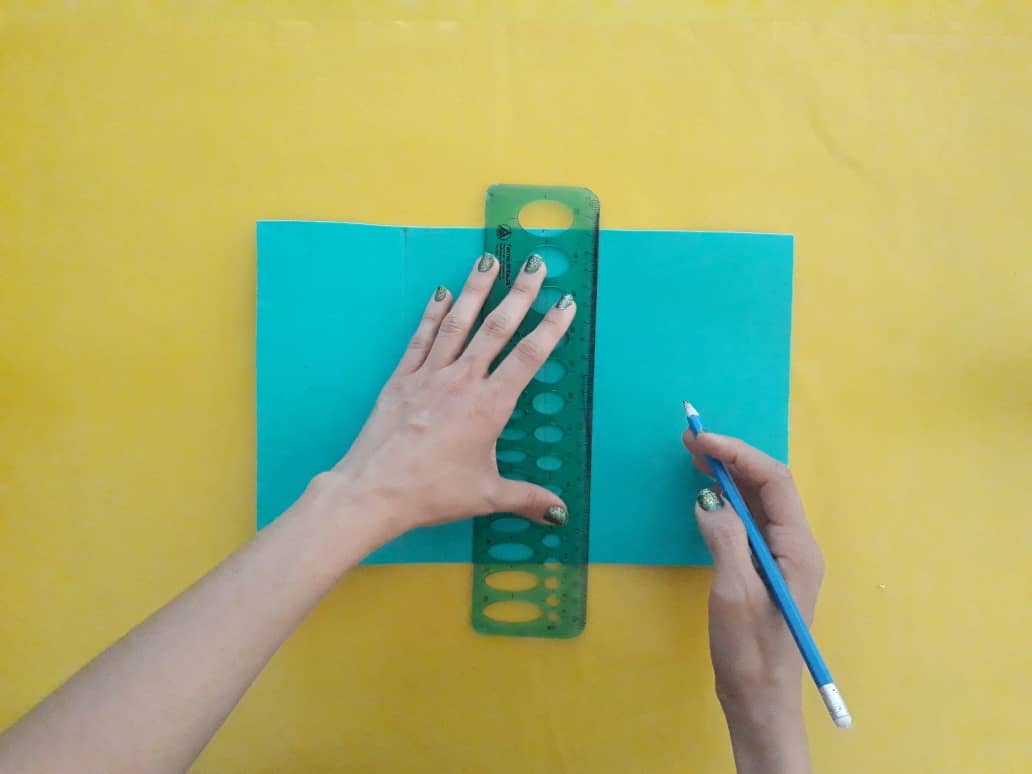
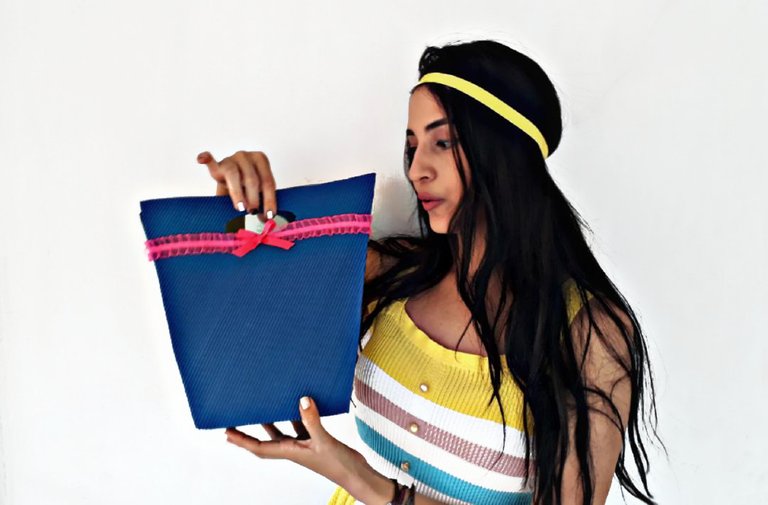
Primero, trazamos el patrón de nuestra cartuchera del tamaño que más nos guste, en este caso yo la elabore de 20x20cm.
Process (step by step)
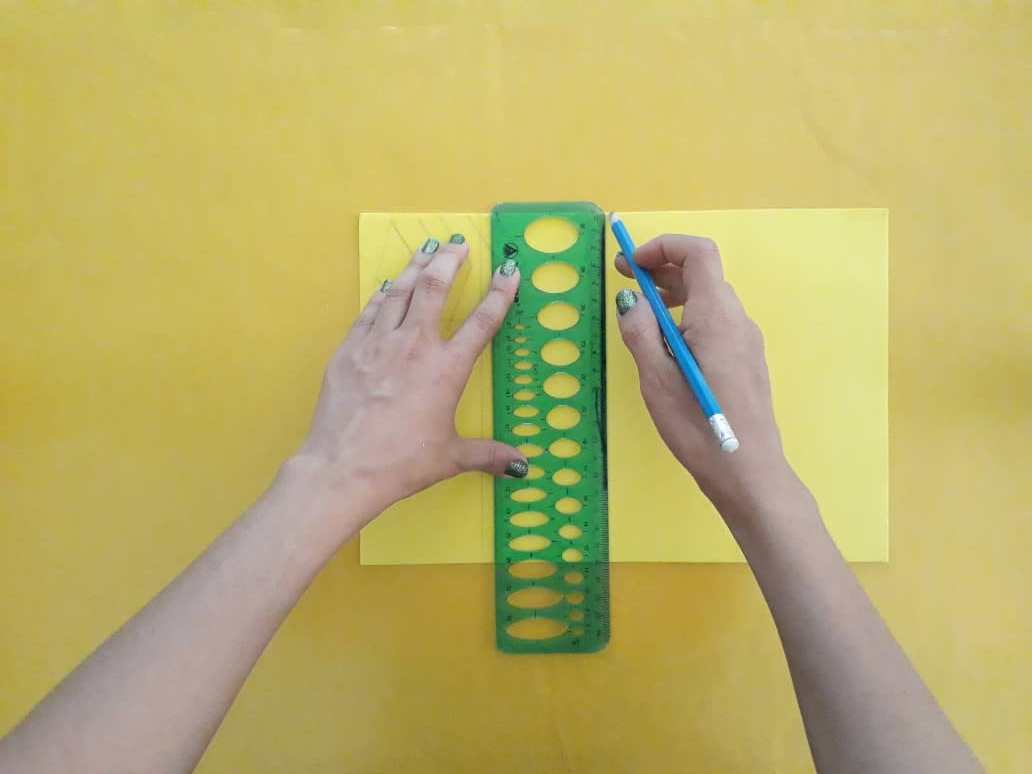
First, we trace the pattern of our cartridge case in the size that we like the most, in this case, I made it 20x20cm.
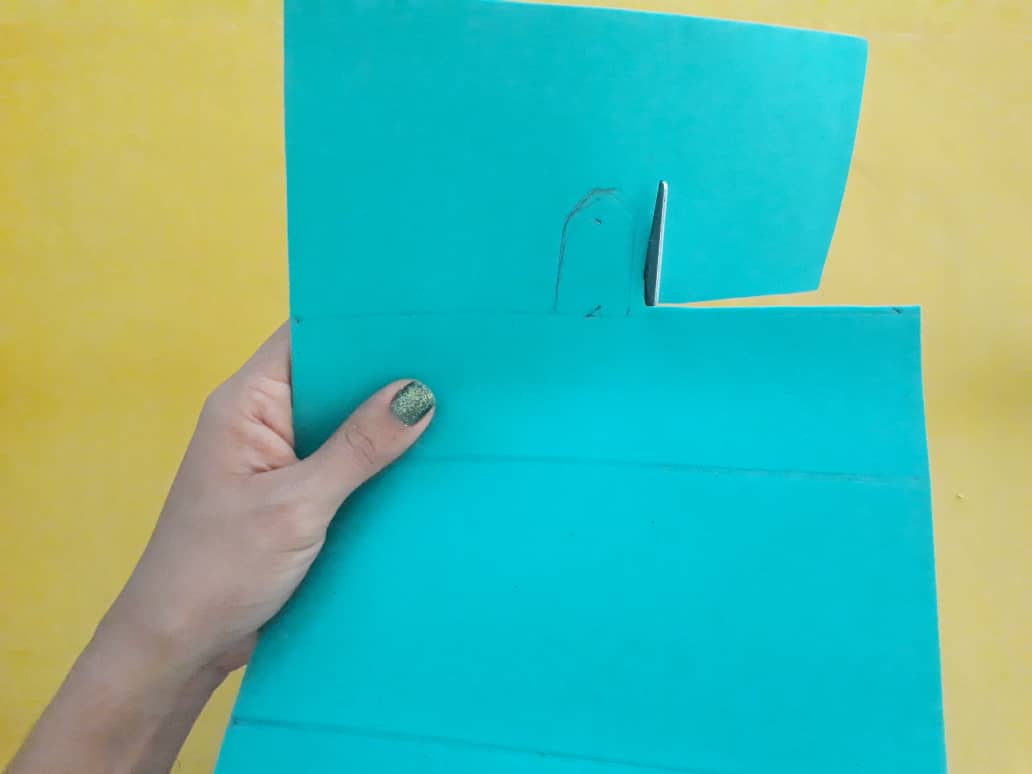
Ahora, recortamos con mucho cuidado el molde trazado dejando una pestaña en el centro de la parte superior para que sea el broche de nuestra cartuchera.

Now, we very carefully cut the traced mold leaving a tab in the center of the upper part to be the clasp of our cartridge case.

Luego, doblamos nuestro molde a un poco menos de la mitad y lo unimos utilizando aguja e hilo. La parte sobre saliente será la tapa de nuestra cartuchera.
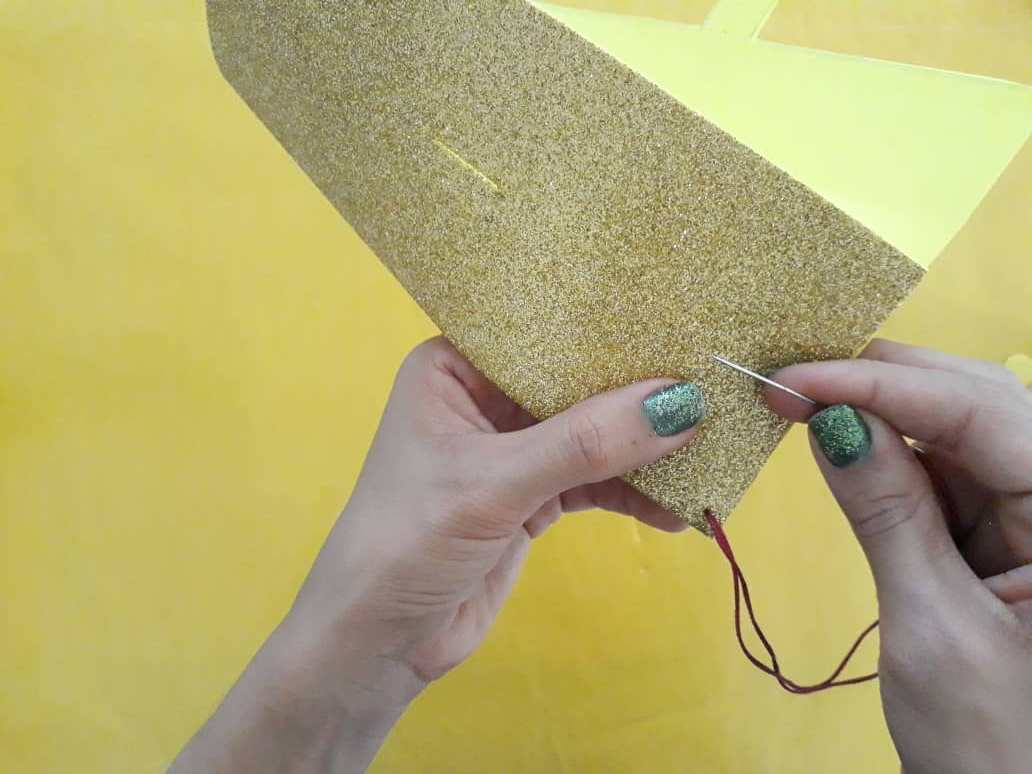
Then we fold our mold to a little less than half and join it together using a needle and thread. The overhang part will be the lid of our cartridge case.

Ahora, con la ayuda del cúter hacemos 2 pequeñas aberturas en centro de la cartuchera para poder sujetar el broche.
Now, with the help of the cutter, we make 2 small openings in the center of the cartridge case to be able to hold the clasp.
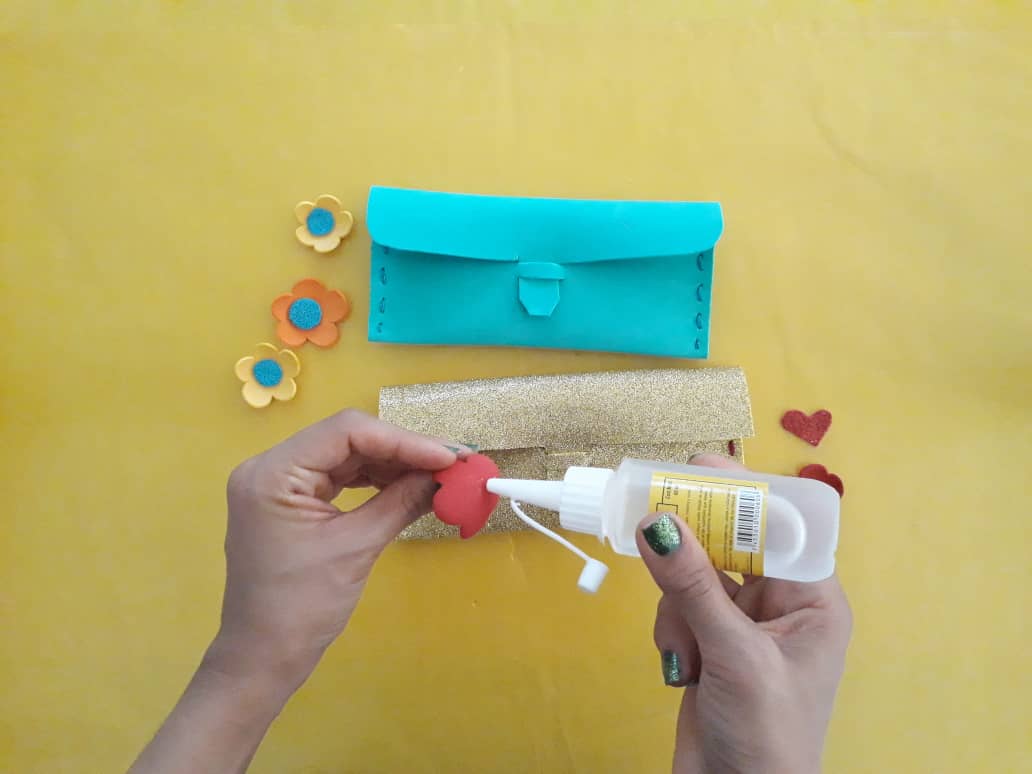
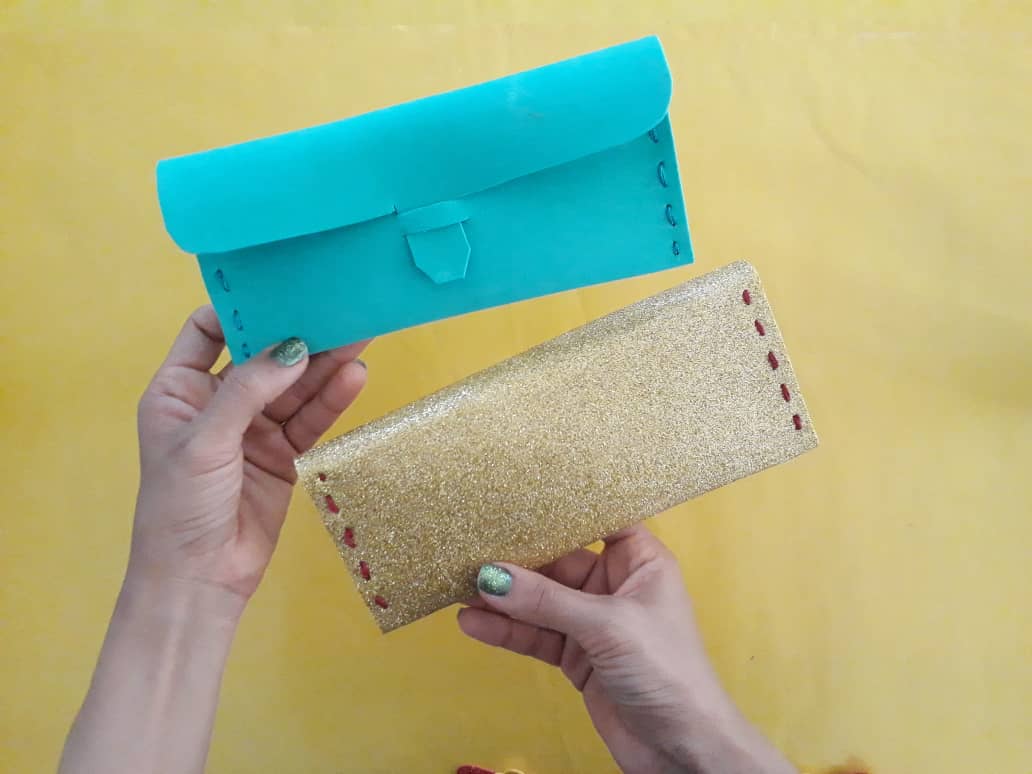
Finalmente armada nuestra cartuchera decoramos dejando volar nuestra imaginación.

Finally armed our cartridge case we decorate letting our imagination fly.

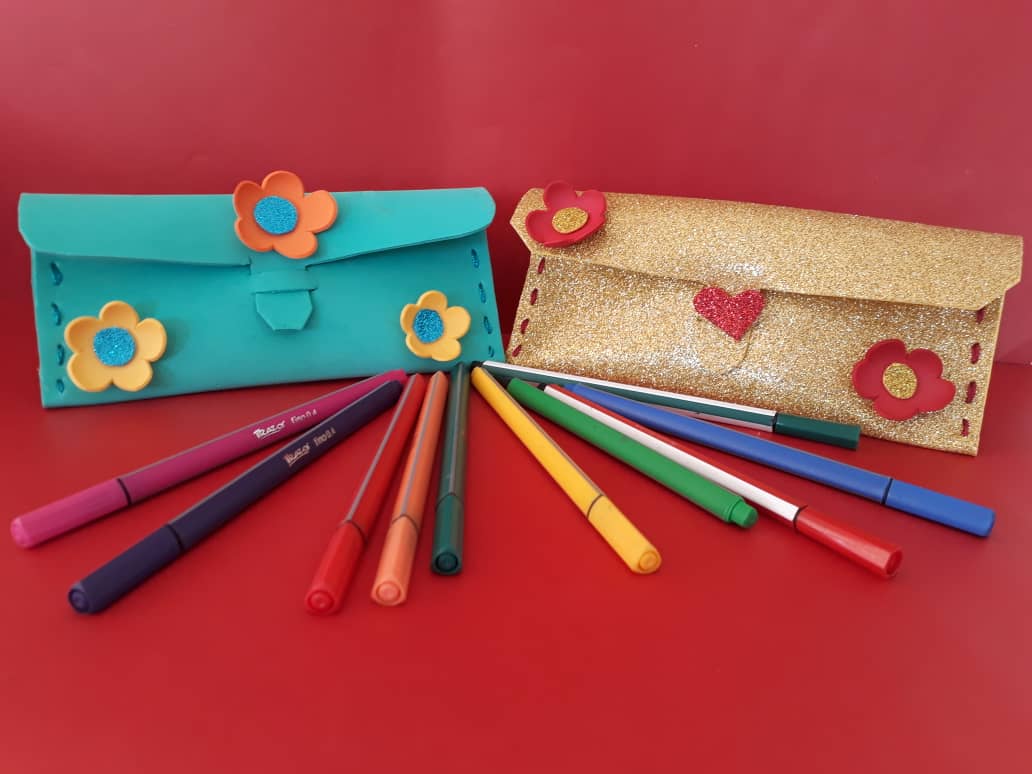
Espero que les guste y muchas gracias a todos por su apoyo 🍎
I hope you like it and thank you all very much for your support 🍎
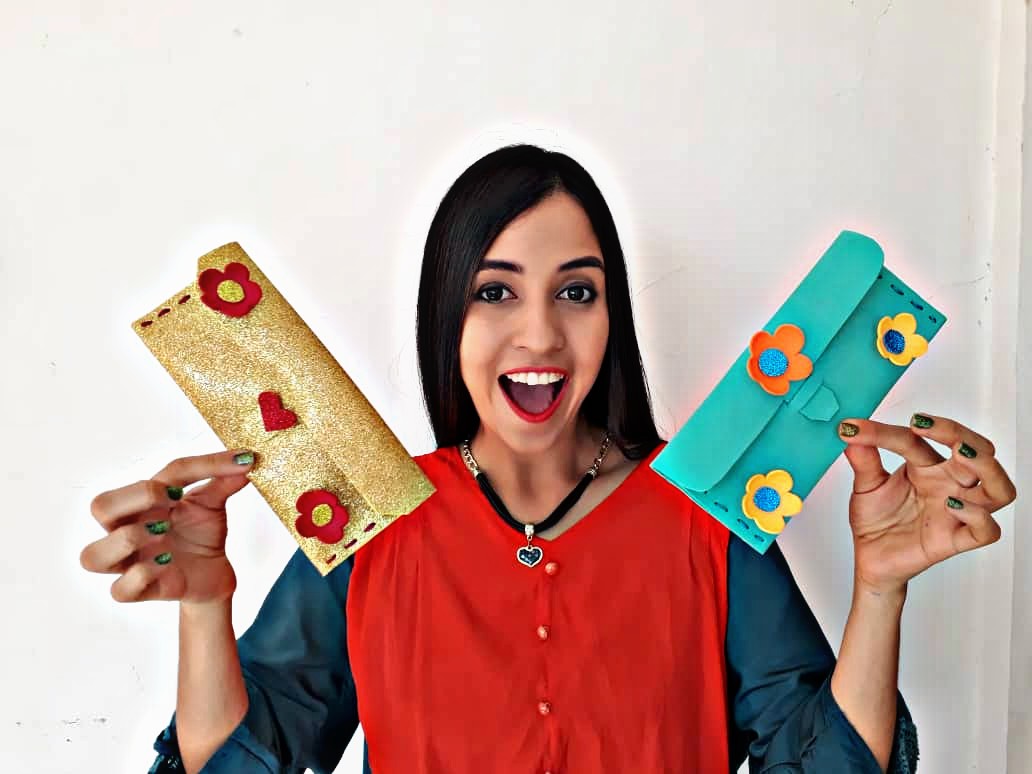
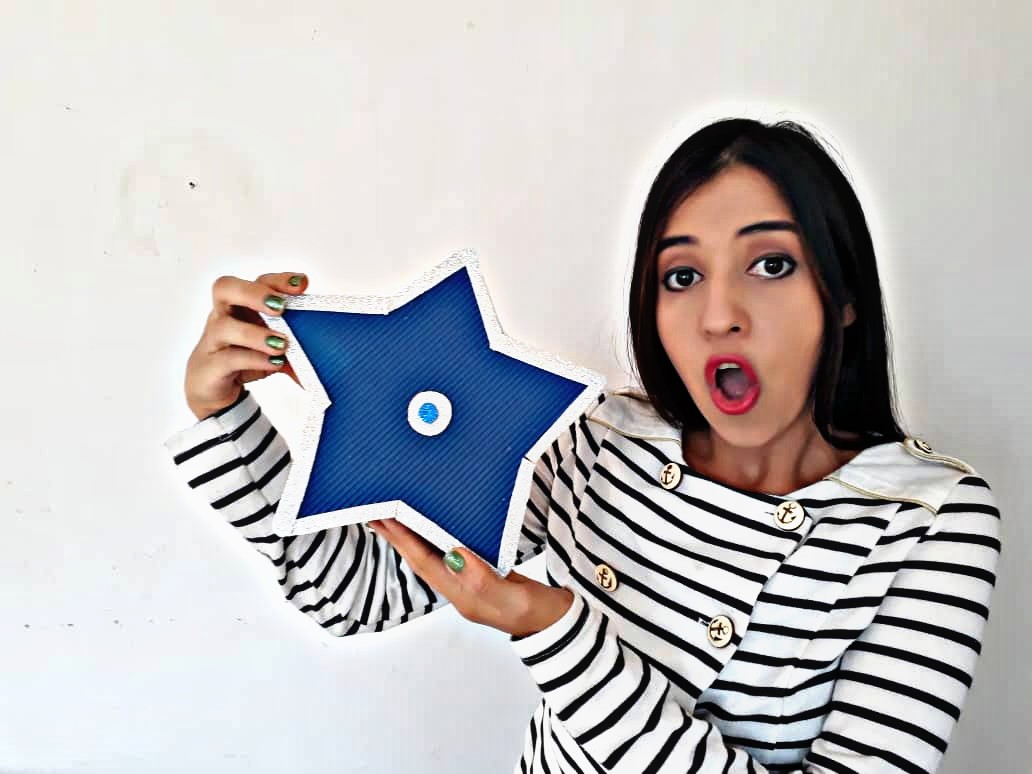
Clic para ver trabajos anteriores | Click to see previous works


Una vez más me sorprende todo el trabajo que has puesto en este post, muy bonita alternativa para poder tener todas las cosas en orden y ahorrarse el tener que comprar una cartuchera nueva jaja, muy buen detalle el dejar links e imágenes de tus trabajos anteriores al final del post, muy innovador, excelente post espero seguir viendo trabajos tan bonitos como este un saludo❗🐻🚀
Este es el mejor comentario que me ha dejado. :D GRacias por visitarme este dia ;) Eres increible...
Gracias a ti por compartir el contenido 🐻💖
My #posh
Congratulations @saracampero! You have completed the following achievement on the Hive blockchain and have been rewarded with new badge(s) :
You can view your badges on your board And compare to others on the Ranking
If you no longer want to receive notifications, reply to this comment with the word
STOPTo support your work, I also upvoted your post!
Do not miss the last post from @hivebuzz:
Support the HiveBuzz project. Vote for our proposal!
This post earned a total payout of 12.414$ and 6.207$ worth of author reward that was liquified using @likwid.
Learn more.