.jpeg)

Español
Hola querida y apreciada familia de Hive, este lindo día les traigo un divertido paso a paso, que estoy segura va a encantarles y pues se que hacía falta ya que casi siempre elaboró cosas para niñas, pues se trata de un precioso bolso para niños, muy hermoso y además increíblemente fácil de hacer, para no perder la costumbre de crear nuevos proyectos personalizados cada día, dejando volar nuestra imaginación y creatividad. Este bolso está hecho de materiales muy fáciles de obtener, pues no olviden que el foami o goma eva es un material maravilloso y mágico porque con el podemos crear cosas realmente hermosas y originales, con este accesorio dejaran impresionados a todos sus amigos.
English
Hello dear and appreciated Hive family, this beautiful day I bring you a fun step by step, which I am sure you will love and well I know it was necessary since it almost always made things for girls, because it is a beautiful bag for children, very beautiful and also incredibly easy to do, so as not to lose the habit of creating new personalized projects every day, letting our imagination and creativity fly. This bag is made of materials that are very easy to obtain, so do not forget that foam or EVA foam is a wonderful and magical material because with it we can create really beautiful and original things, with this accessory you will impress all your friends.
¿Qué están esperando?
Con esta nueva técnica podemos crear un hermoso bolso para niños, donde podrán llevar sus cosas preferidas como maquillajes, lápices, colores, golosinas, entre otras. Antes de comenzar no olvidemos lavarnos nuestras manos.
What are they waiting for?
With this new technique, we can create a beautiful bag for children, where they can carry their favorite things such as makeup, pencils, colors, sweets, among others. Before we start, let's not forget to wash our hands.

[Materiales | Materials]
Para hacer este precioso bolso necesitaremos:
- Moldes.
- Foami o goma eva.
- Cúter.
- Aguja.
- Hilo.
- Tijera.
- Cierre de pantalón.
- Velcro o cierre mágico.
- Pegamento o silicón liquido.
To make this precious bag will need:
- Molds.
- Foamy or EVA foam.
- Cutter.
- Needle.
- Thread.
- Scissors.
- Trouser closure.
- Velcro or magic closure.
- Glue or liquid silicone.
Procedimiento (paso a paso)
Process (step by step)

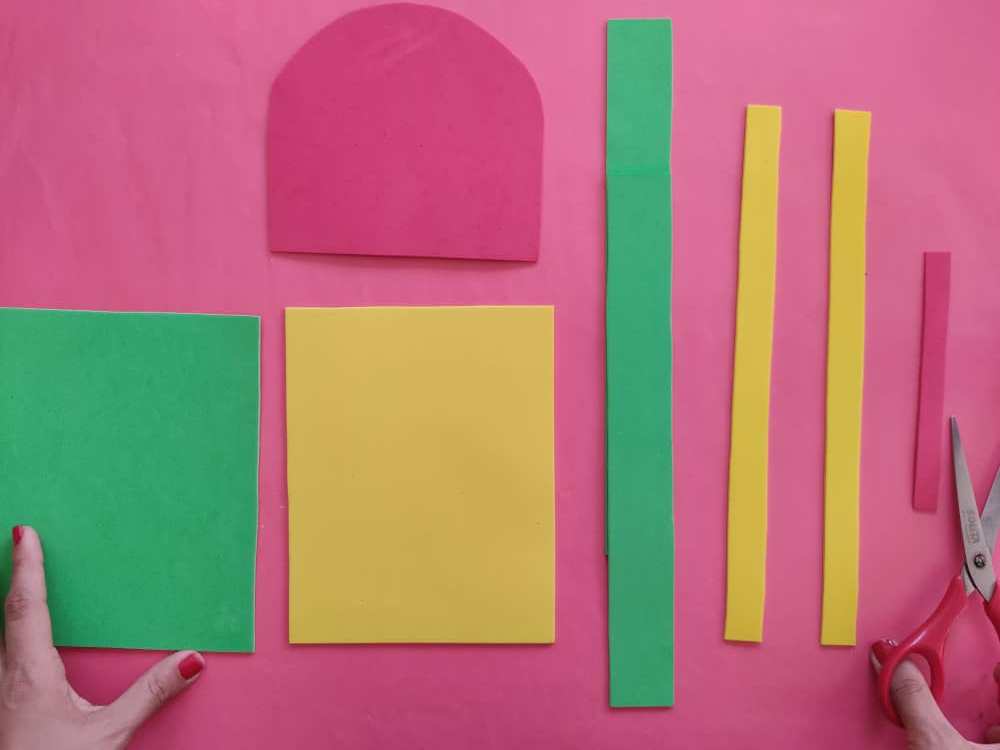
Primero, elaboramos el molde para nuestro bolso realizando un rectángulo de 18 por 14cm que será el cuerpo, la tapa, y 3 tiras, una grande de 4 x 40cm, una mediana de 2 x 25cm y la más pequeña de 1 x 5 cm.
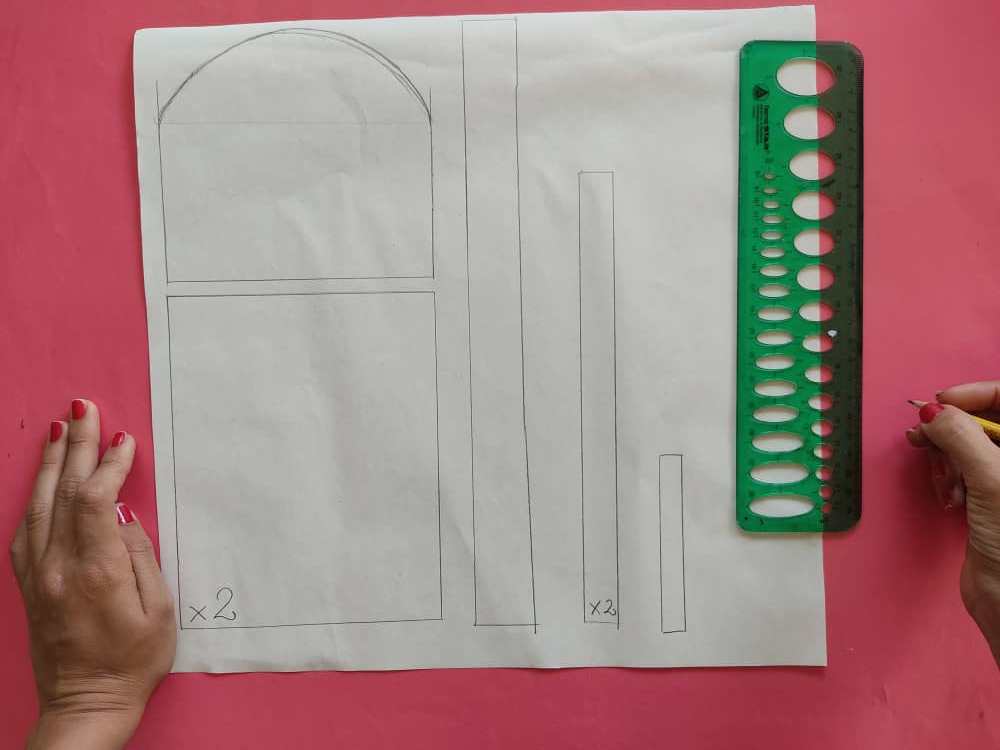
First, we make the mold for our bag by making an 18 by 14cm rectangle that will be the body, the lid, and 3 strips, a large one measuring 4 x 40cm, a medium one measuring 2 x 25cm and the smallest one measuring 1 x 5cm.
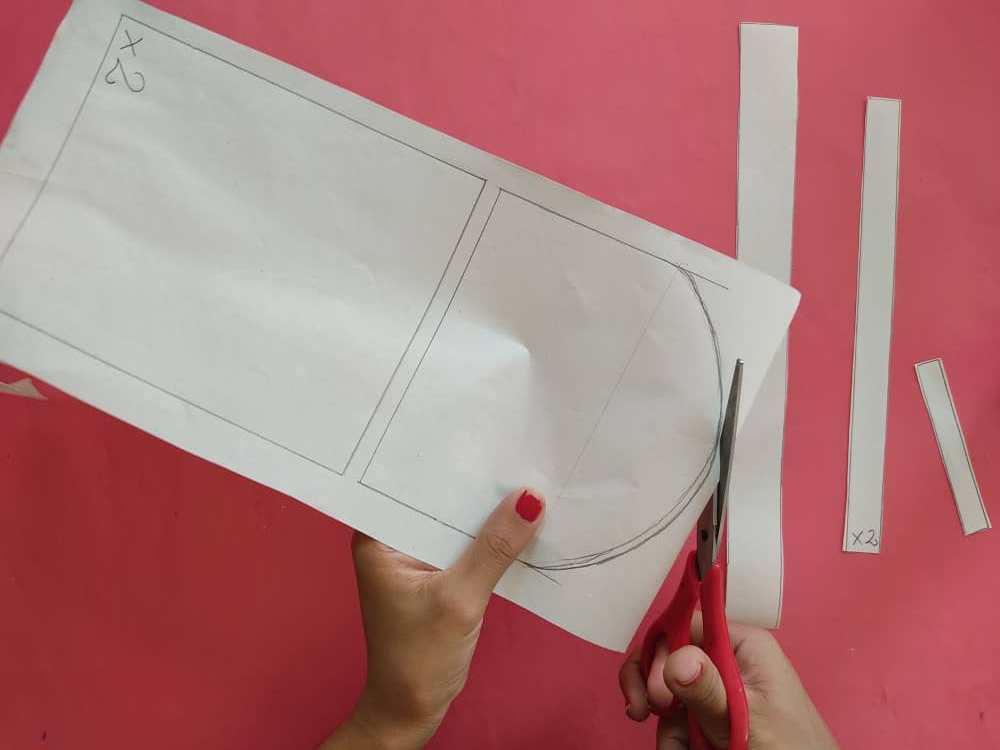
Luego de haber diseñado nuestros moldes, recortamos cuidadosamente conservando las medidas, y así facilitar la transferencia al foami.
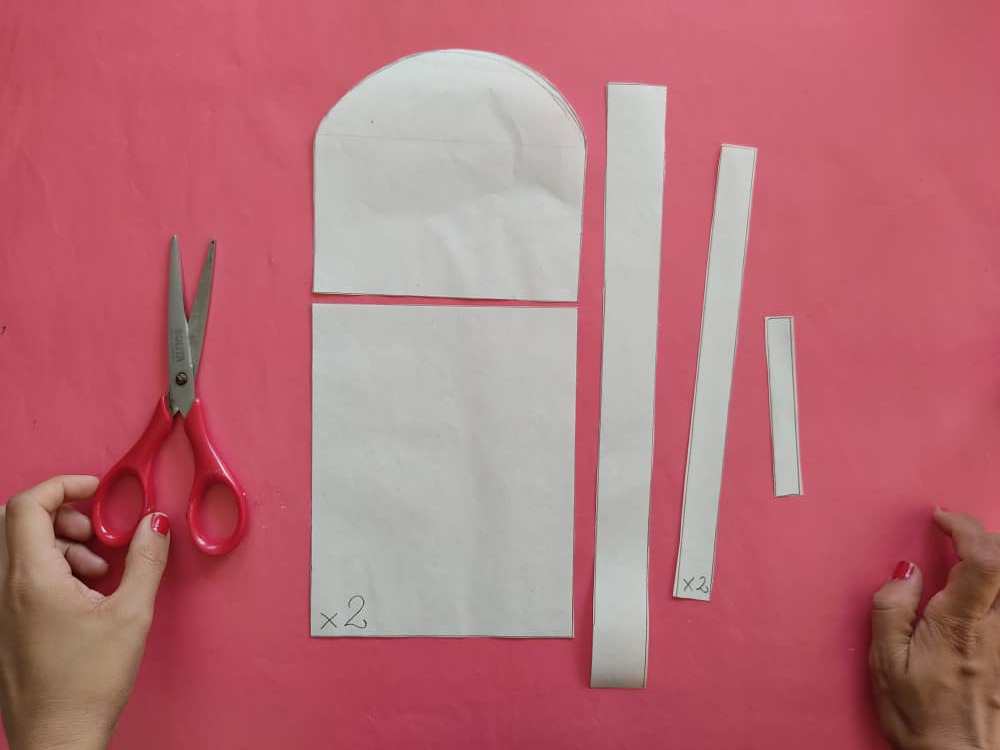
After having designed our molds, we cut carefully keeping the measurements, and thus facilitate the transfer to the foam.
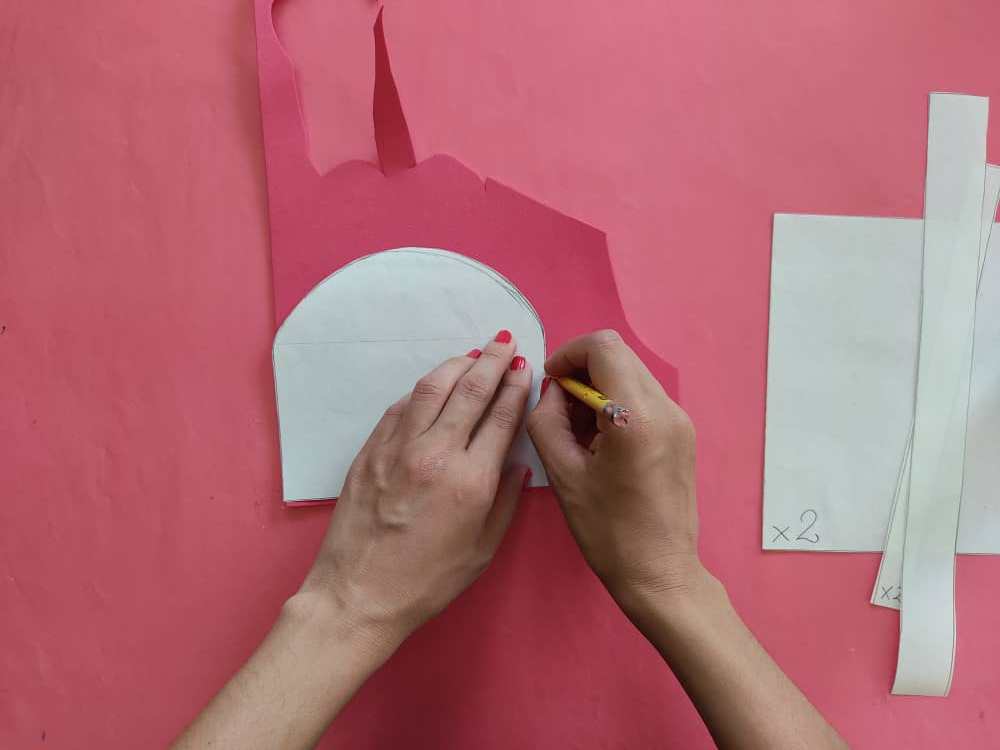
Una vez obtenidos los moldes en papel, transferimos cuidadosamente al foami, como el papel suele ser blando les recomiendo que utilicen la regla, y así, sus líneas quedarán rectas, seguidamente recortamos con mucho cuidado. Sin olvidar repetir el molde del cuerpo dos veces en foami de los colores que más nos gusten.
Once the paper molds are obtained, we carefully transfer to the foam, as the paper is usually soft, I recommend that you use the ruler, and thus, your lines will be straight, then we cut very carefully. Without forgetting to repeat the body mold twice in foamy of the colors that we like the most.
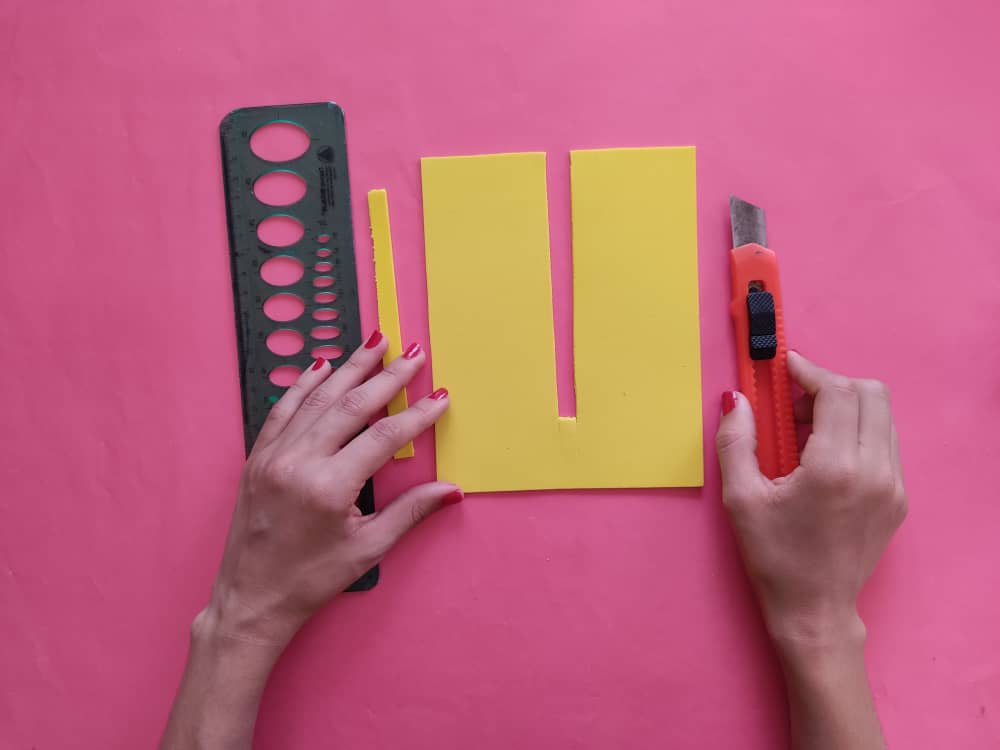
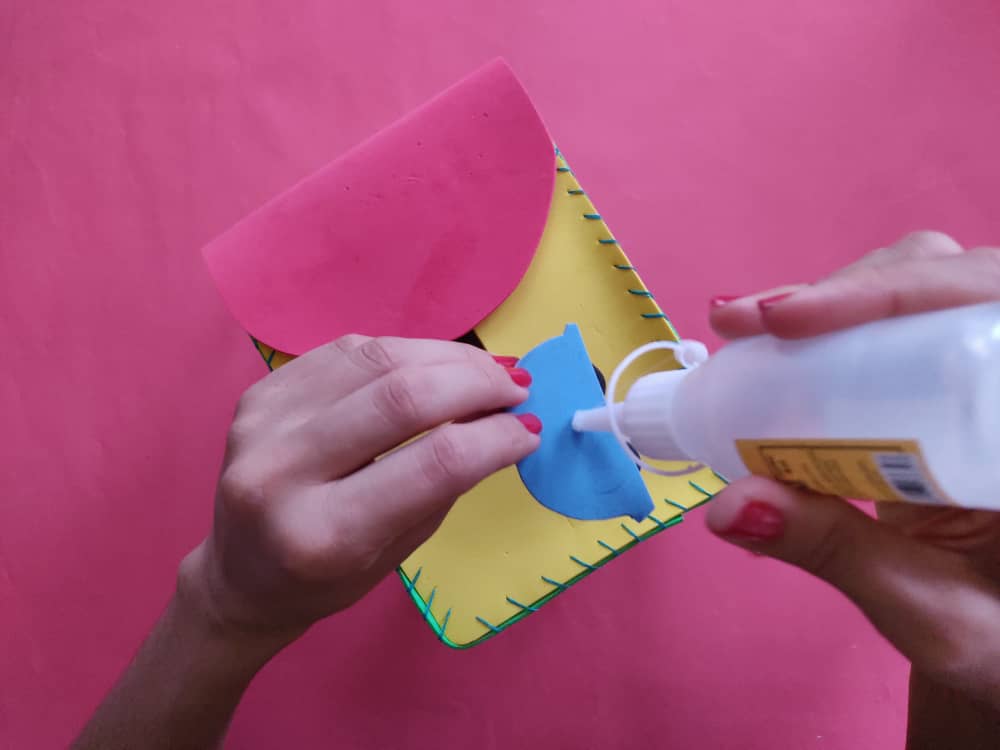
Ahora, hacemos una ranura en medio del cuadrado de color amarillo, y en medio de esta pegamos el cierre para darle un toque muy real a este bolsito.
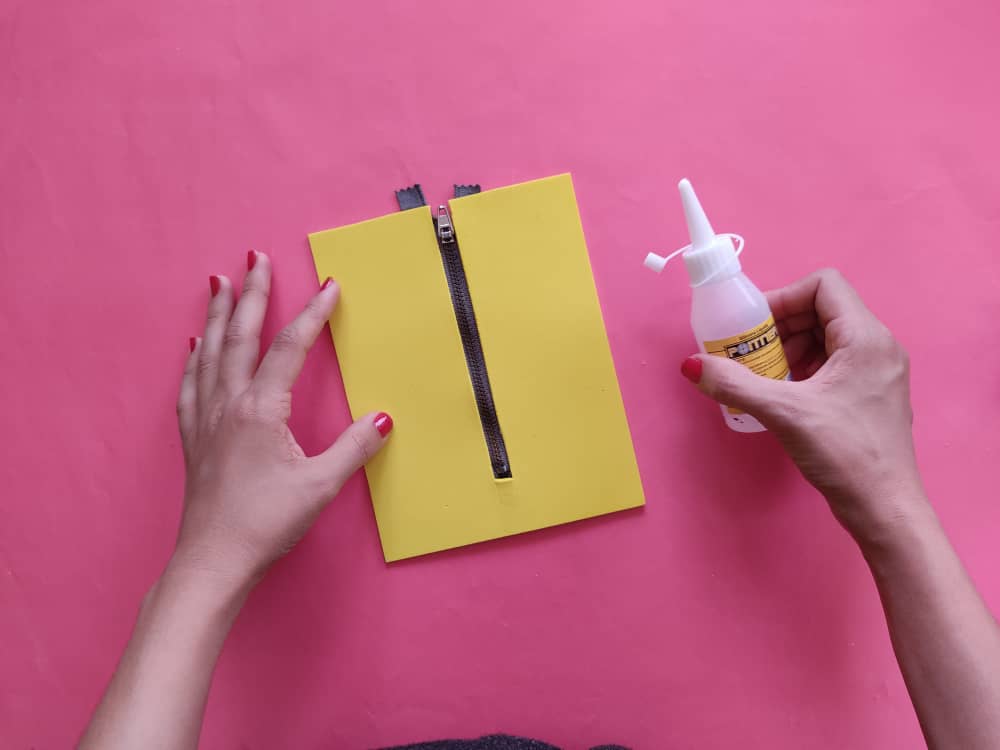
Now, we make a slot in the middle of the yellow square, and in the middle of it, we glue the closure to give this bag a very real touch.
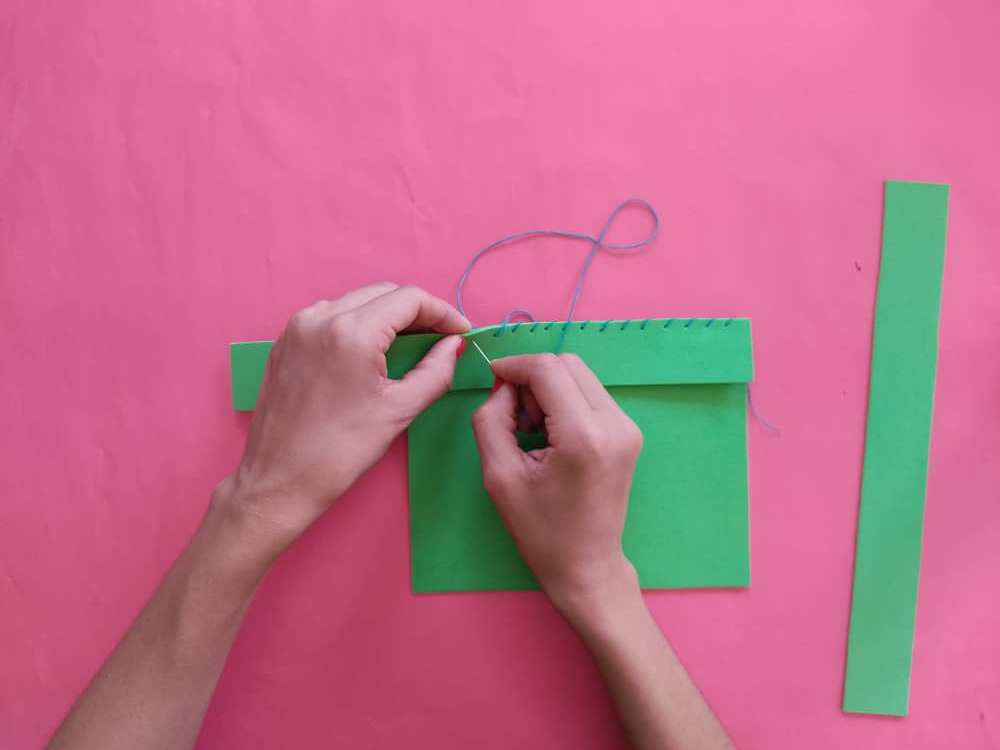
Luego, cosemos con puntadas separadas las paredes de nuestro bolso, primero unimos la tira más larga del cuadrado de color verde (parte trasera), y luego, el cuadro amarillo (parte delantera).
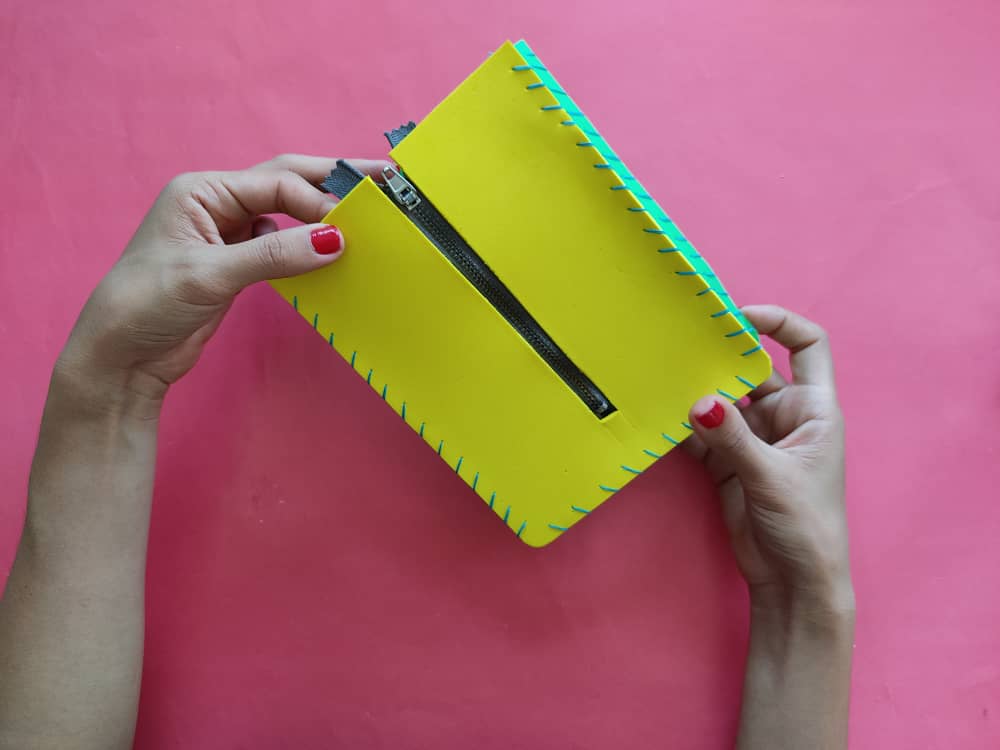
Then, we sew the walls of our bag with separate stitches, first, we join the longest strip of the green square (back part), and then, the yellow square (front part).
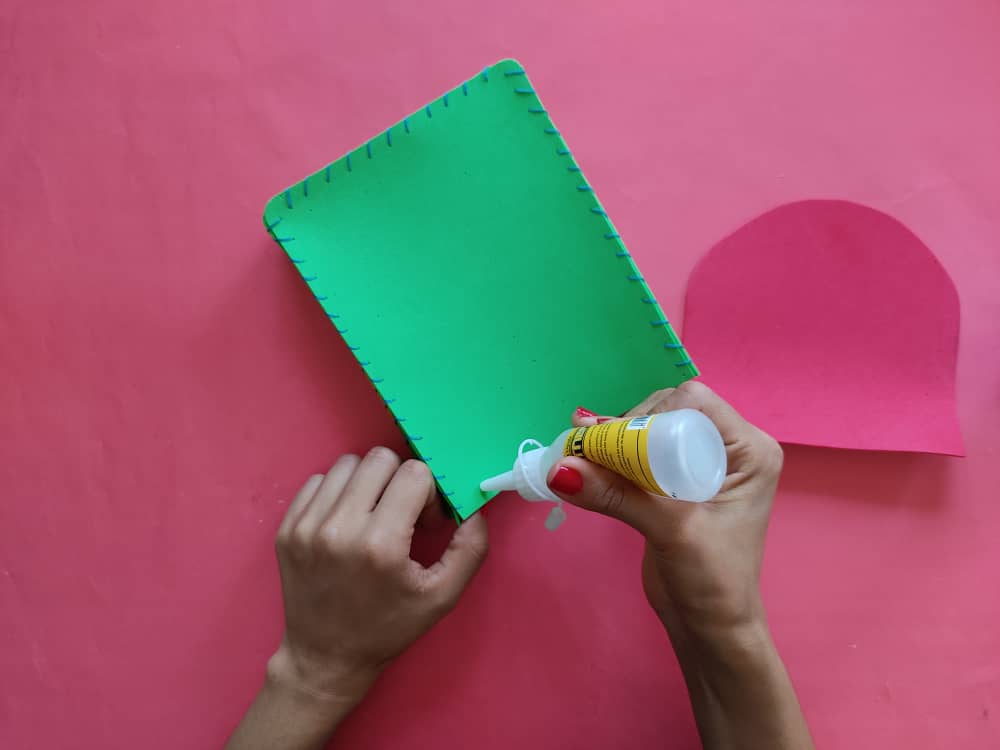
Una vez que esté listo el cuerpo del bolso, comenzamos a pegar las otras partes indispensables, como lo es la tapa en forma de lengua, aplicando pegamento o silicón en la parte superior trasera, y nos aseguramos que quede bien pegada haciendo un poco presión durante unos segundos.
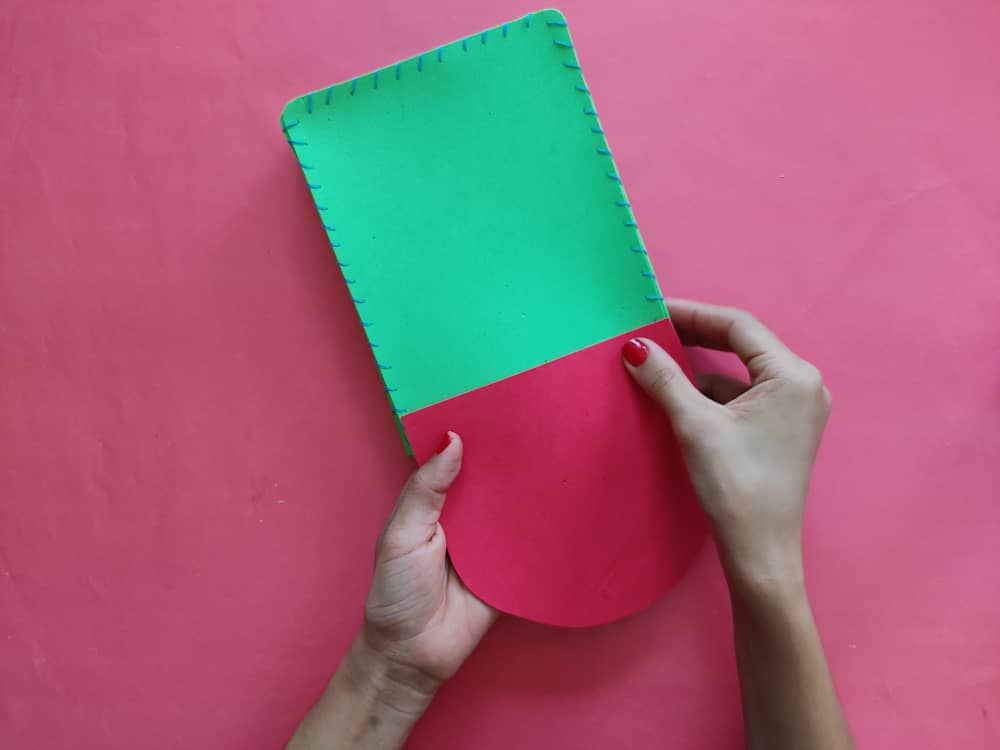
Once the body of the bag is ready, we begin to glue the other essential parts, such as the tongue-shaped lid, applying glue or silicone to the upper back, and we make sure that it is well glued by applying a little pressure during a few seconds.
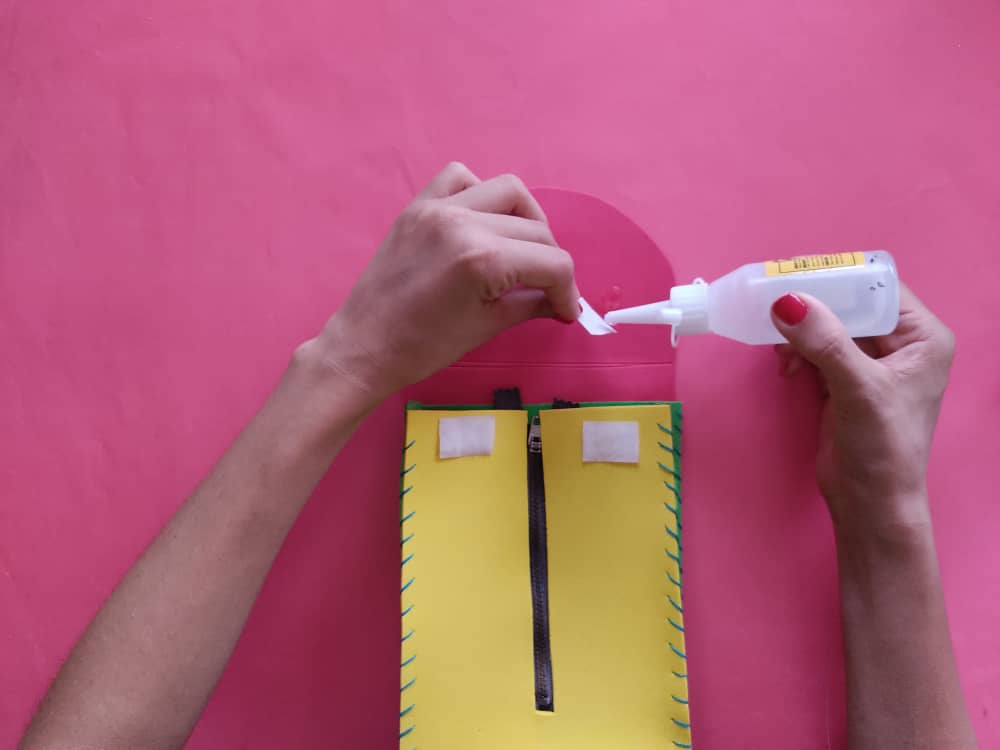
Seguidamente, pegamos trozos de velcro en la tapa y cuerpo para que se el cierre mágico de nuestra tapa.
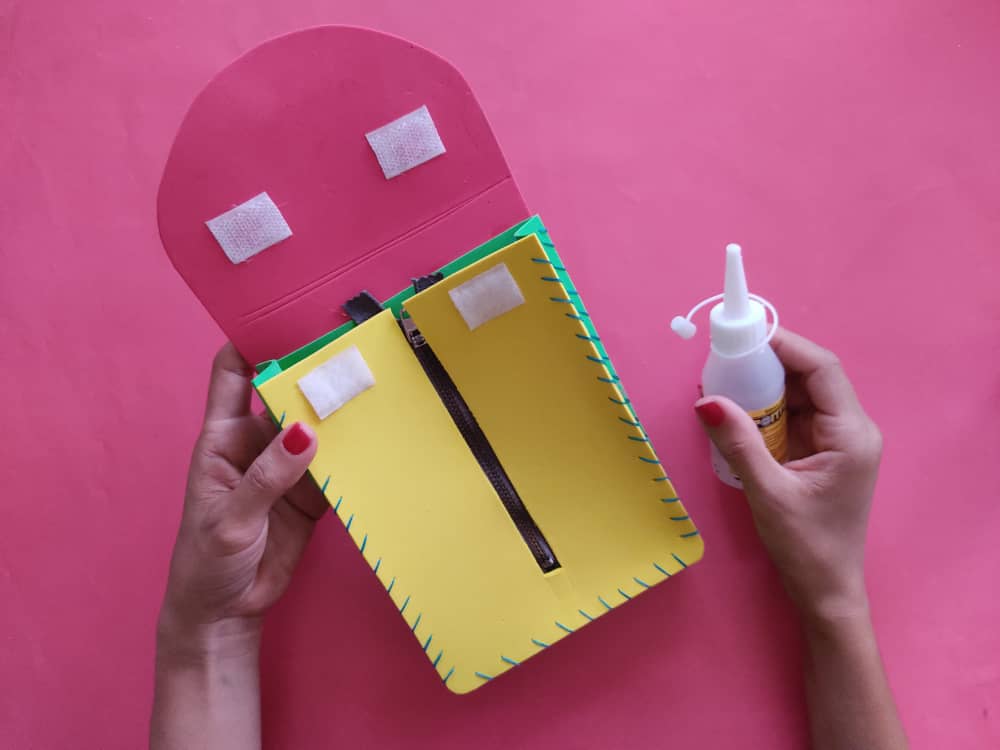
Next, we stick pieces of velcro on the lid and body so that the magic closure of our lid becomes.
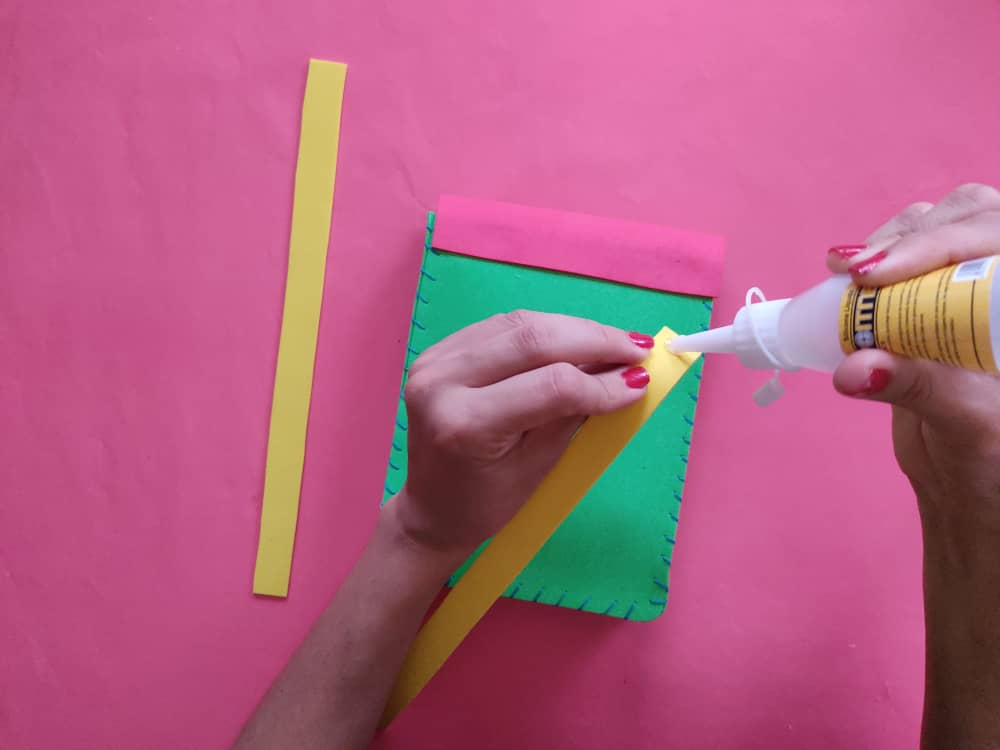
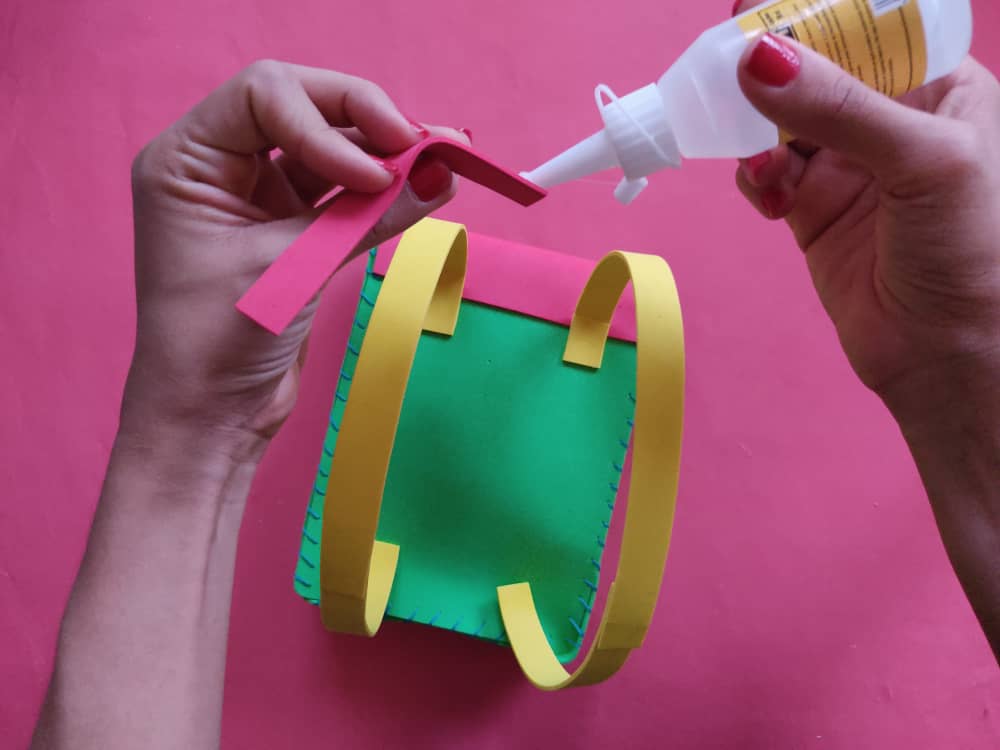
Luego, pegamos las tiras medianas en la parte trasera del bolso, las cuales serán las colgaderas o tirantes.
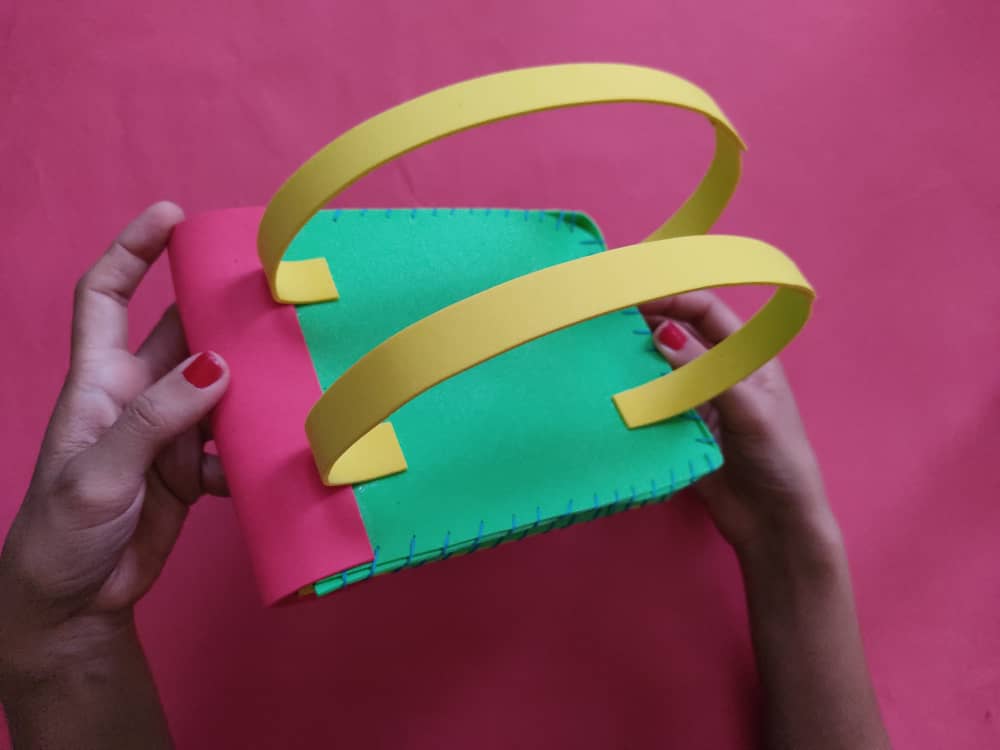
Then, we glue the medium strips to the back of the bag, which will be the hangers or braces.

Para darle un poco más de alegría, elaboramos un lindo carrito de foami para decorar nuestro hermoso bolso, y de inmediato armamos con silicón, y miren que lindo.
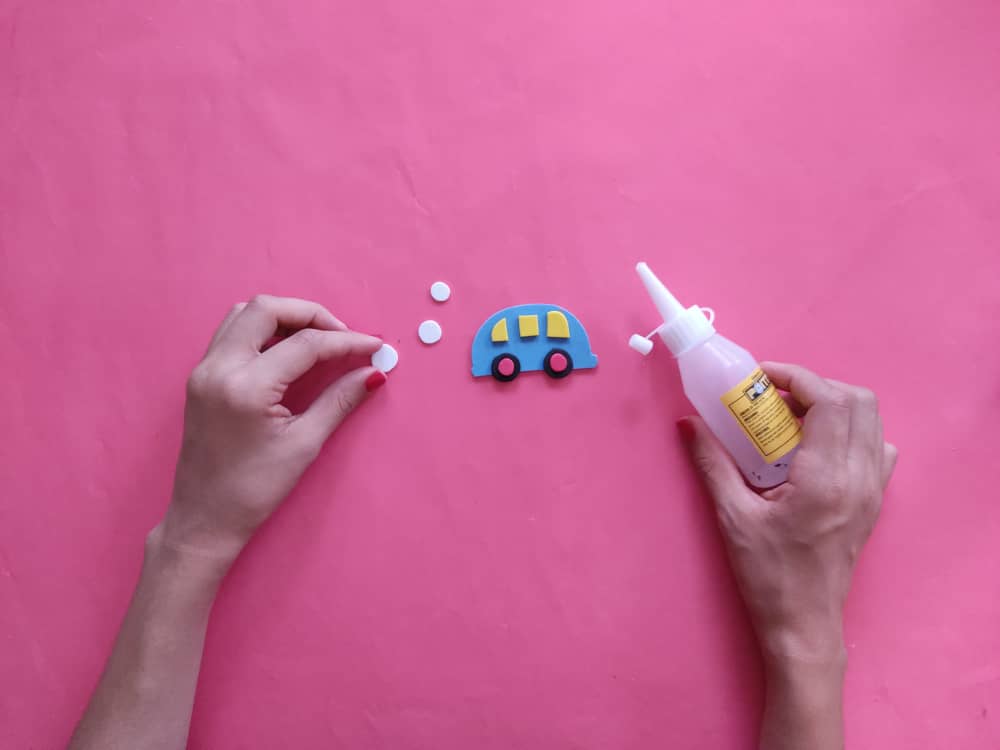
To give it a little more joy, we made a cute foam cart to decorate our beautiful bag, and we immediately assembled with silicone, and look how cute.
Ahora, agregamos los detalles que hemos elaborado para el bolso, y pegamos con silicón sobre la parte superior, aunque no olviden que pueden personalizar este bolso como más les guste.
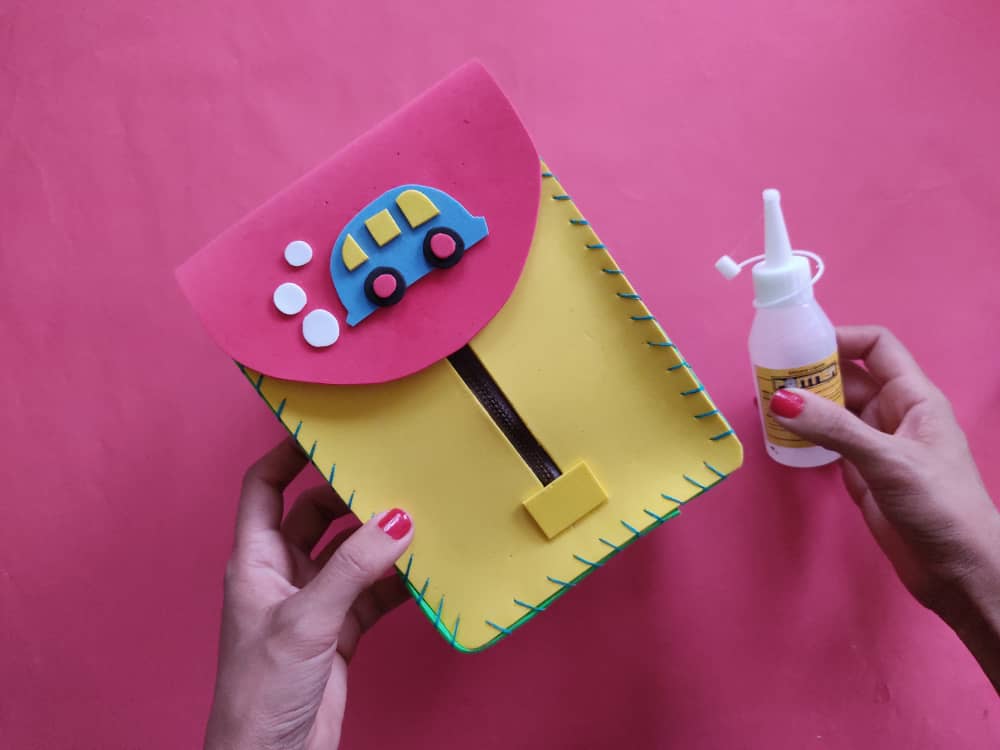
Now, we add the details that we have made for the bag, and we glue with silicone on the upper part, although do not forget that you can customize this bag as you like.
Y para finalizar pegamos la tira más pequeña en la parte trasera de la tapa, y ya tendremos listo este precioso bolso, para que nuestros niños lleven sus objetivos favoritos a todas partes.
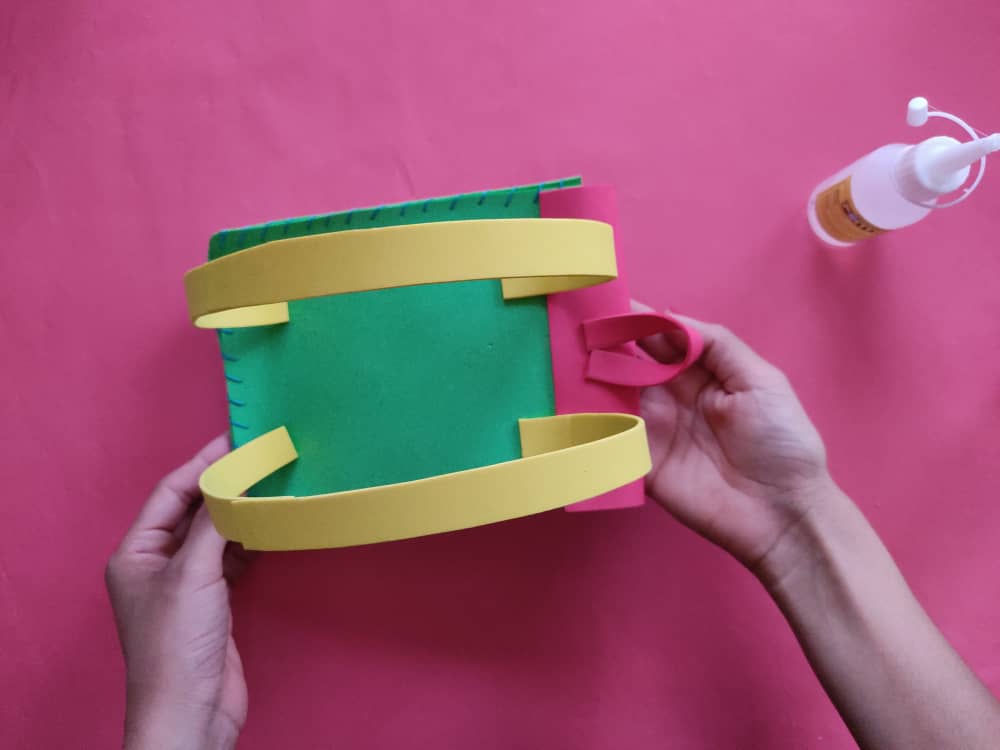
And finally, we stick the smallest strip on the back of the lid, and we will have this beautiful bag ready so that our children can carry their favorite lenses everywhere.
.jpeg)
.jpeg)
.jpeg)
Gracias por acompañarme y espero que lo hayan disfrutado. ❤️
Thanks for joining and I hope you enjoyed it.❤️
.jpeg)
.jpeg)
.jpeg)
.jpeg)
.jpeg)
.jpeg)
.jpeg)
.jpeg)
.jpeg)
Clic para ver trabajos anteriores | Click to see previous works
.jpeg)


My twt #posh
!discovery 20
Very much friend!
This post was shared and voted inside the discord by the curators team of discovery-it
Join our community! hive-193212
Discovery-it is also a Witness, vote for us here
Delegate to us for passive income. Check our 80% fee-back Program
Hi @saracampero, I believe every children will be prefer with this creative bag design. It would be save our money without going to buy bag from shop. Homemade bag has less cost. Selected colors really matched. Just excellent thinking again.
Thank you for your nice comment, it is very motivating. : D Thanks friend!
Very cool and interesting work, Sara.
Recently I've found a bag like that lying on the floor, next to a school. It was made with the same technique but it was much more raw and less beautiful than yours. 😅
Hehehe, this bag is very practical. I love it. And my daughter is happy haha
que bonito me encanta tu creatividad