![]()
How are you all architectural design friends? This week I just finished an architectural project for the exterior design of the construction of a house which is a minimalist window making project and in my area the villagers often call it the soapbox window design, sometimes it sounds a little strange to you with that name of the window in our everyday language but this is not a problem in terms of the language of a design.
After I finished publishing the first phase of window designs which are generally liked by local residents in my area, this week I republished the architectural design of the 2nd stage of furniture making windows with different designs and includes designs that are liked by many people.
And in my architectural design publication, I am happy to share about how to make every element of the house, starting from windows, frames, doors and others made of wood and this time I am back to sharing tutorials on how to make these minimalist windows with basic materials from meranti wood and is a hard type of wood and is often used as a building construction material and this time I'm back working on a window project that belongs to a local resident of my area.
To build architectural exterior elements of house window designs, in general, we furniture workers follow the design rules given by buyers ranging from the size, type of wood ordered to the color of the glass they want by the buyer and what we prioritize is the quality that we balance with the price.
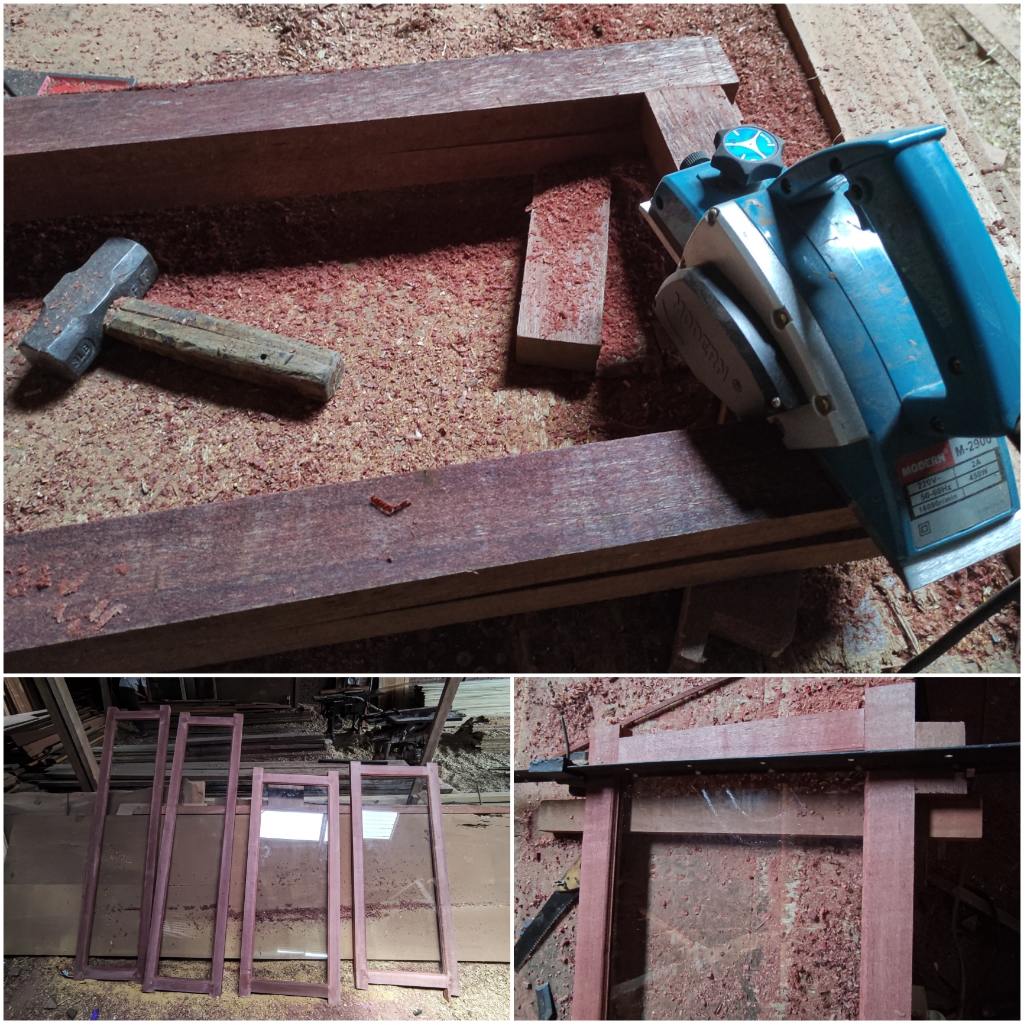
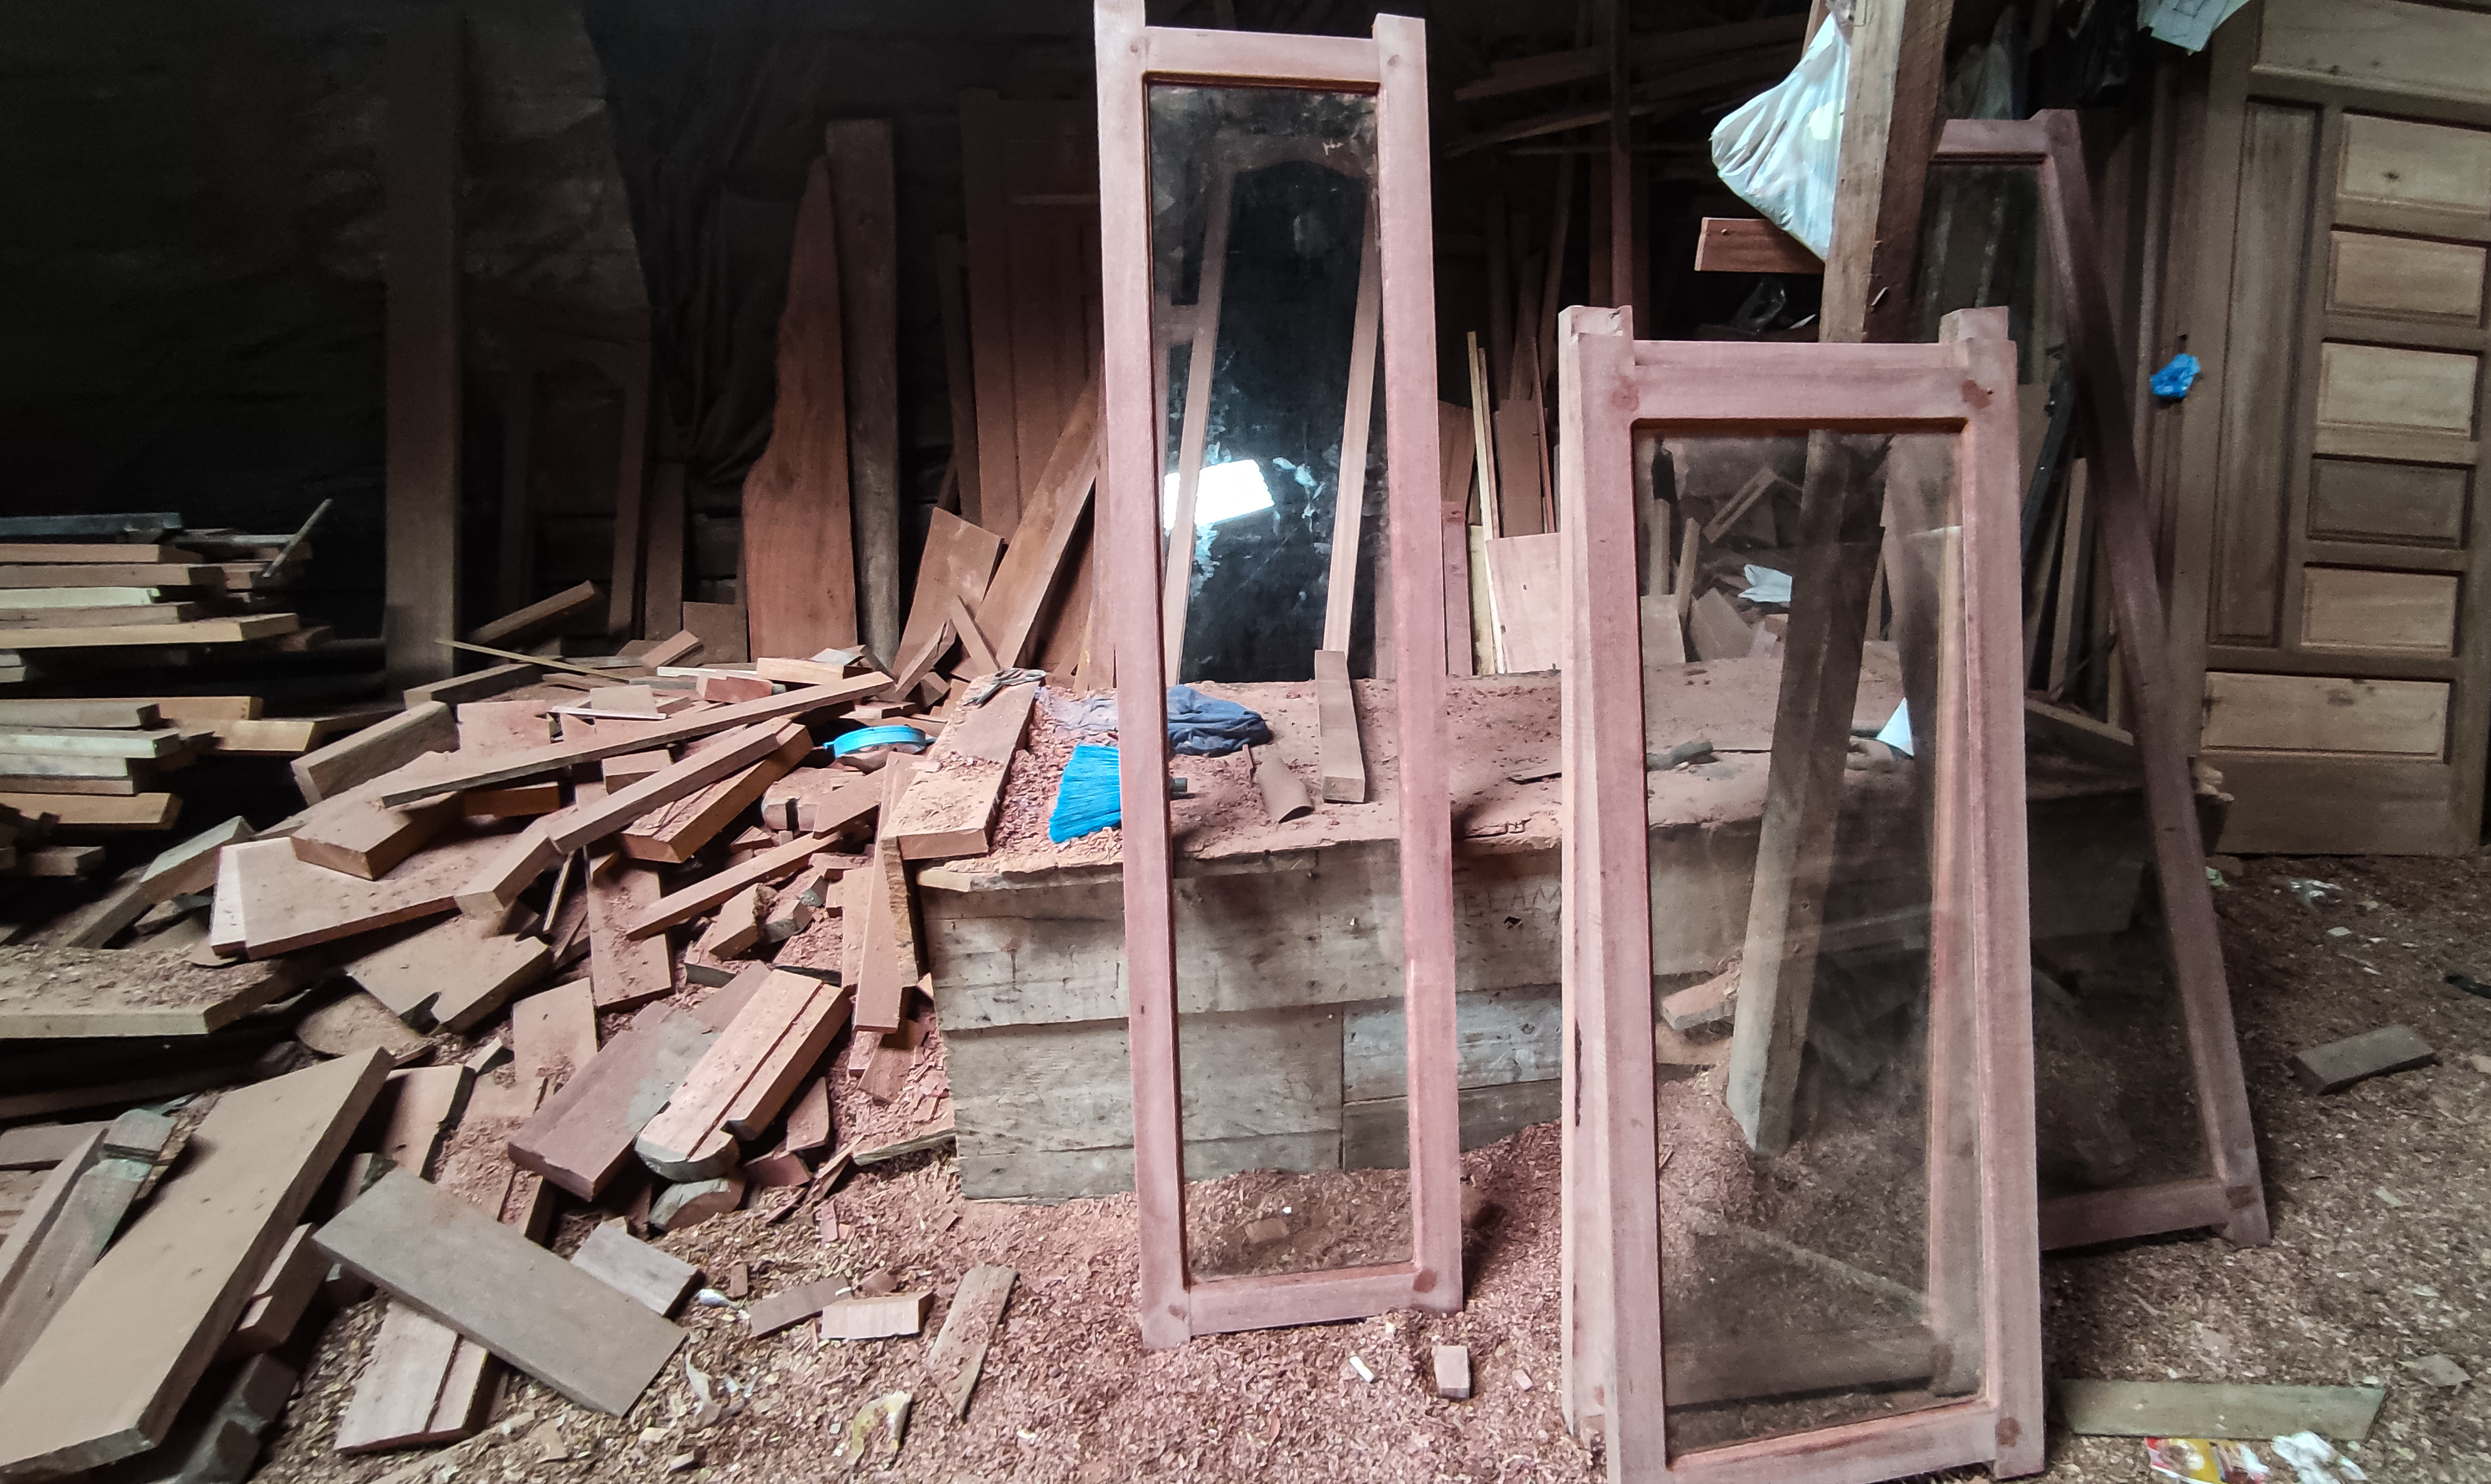
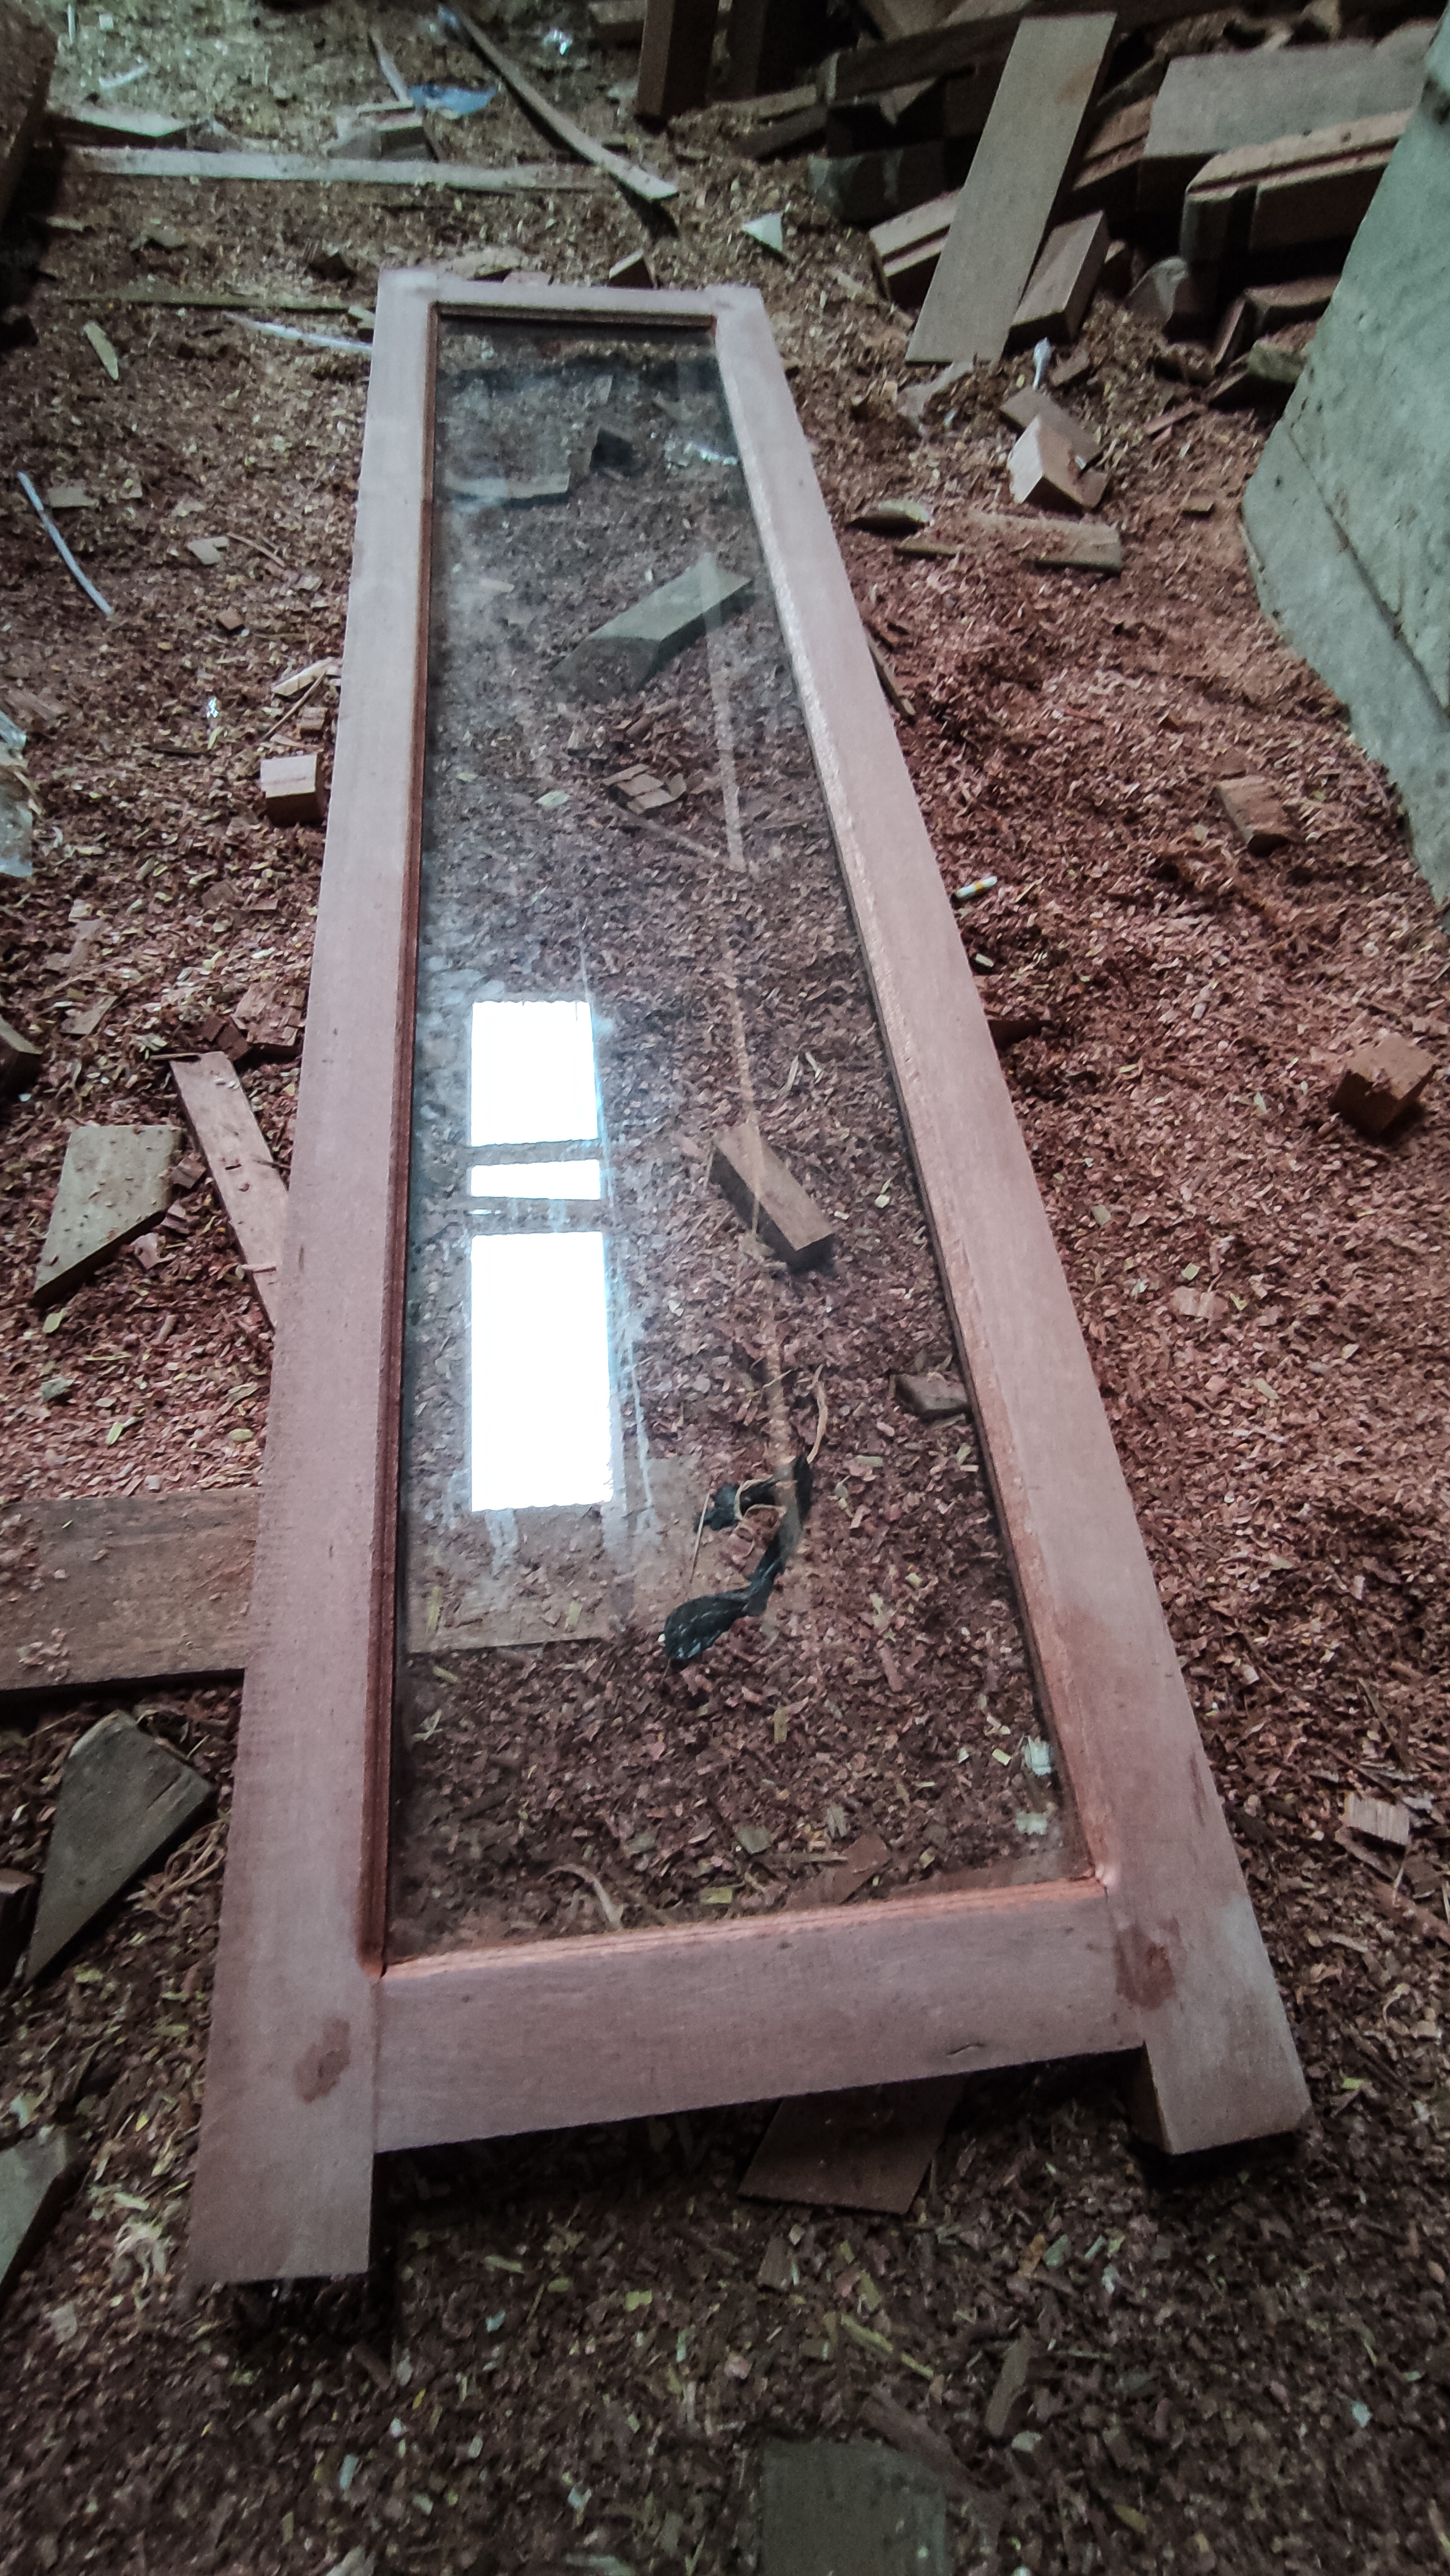
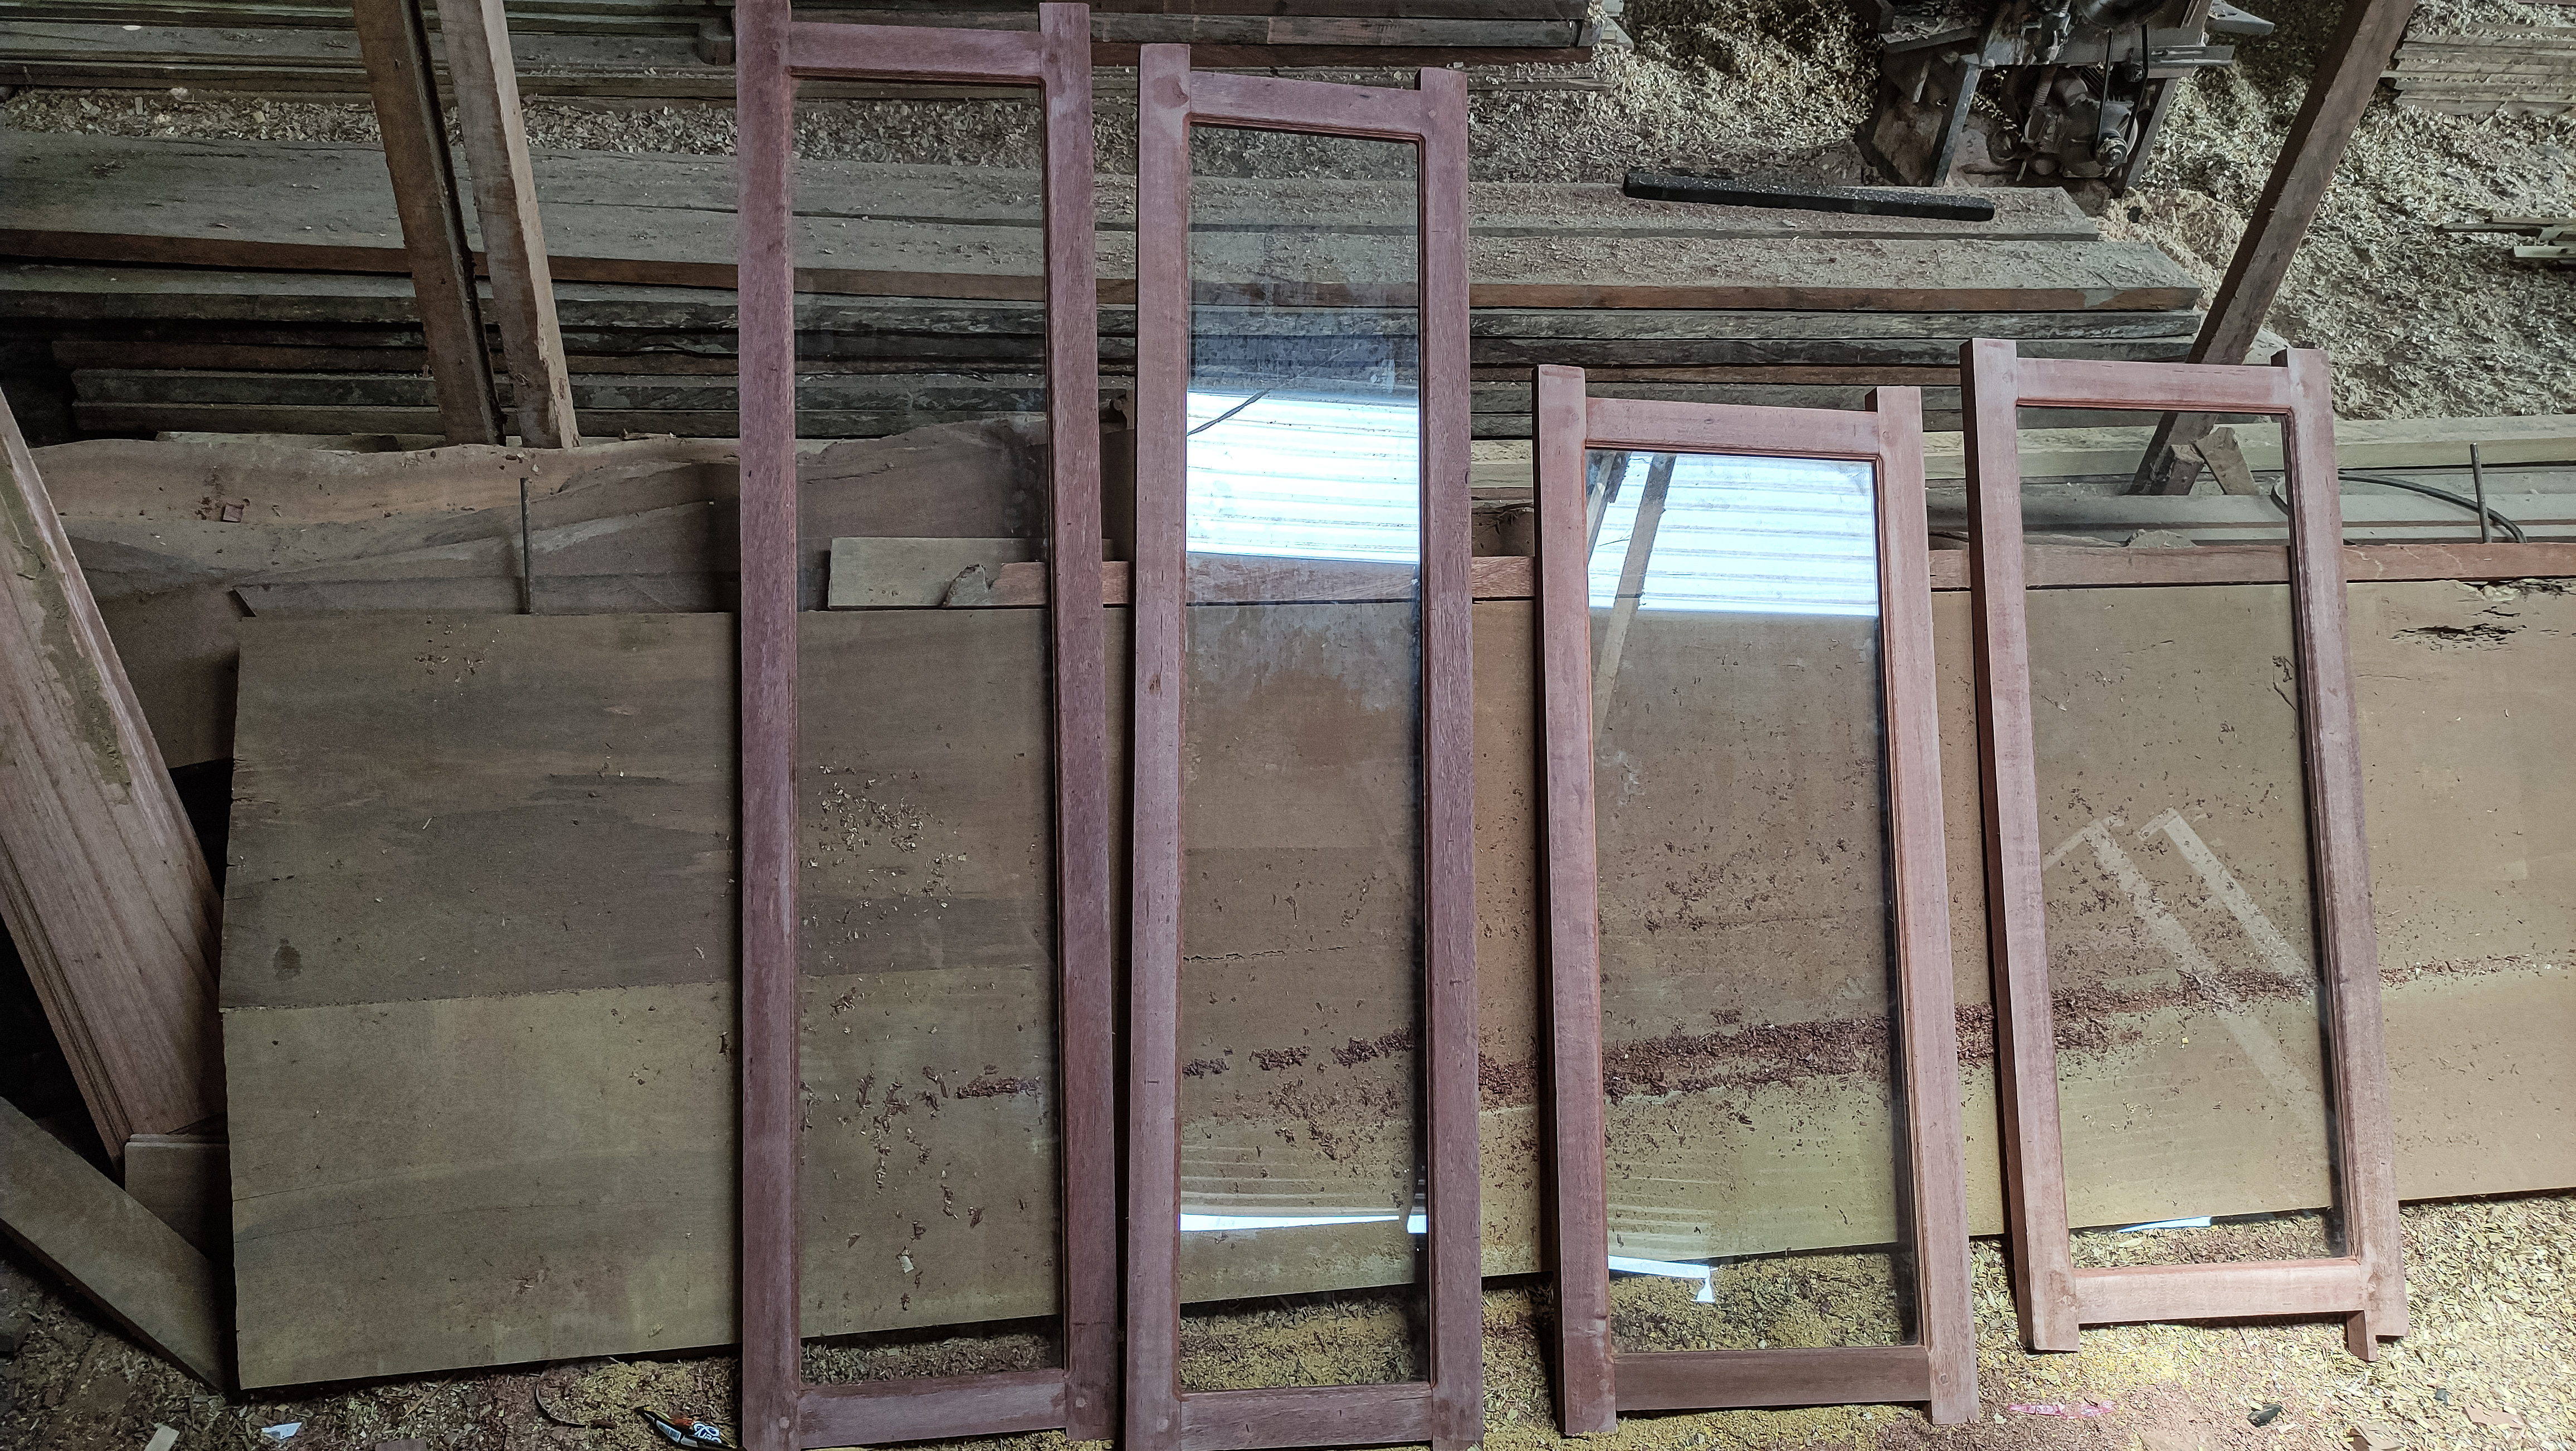
In this episode, I worked on 2 pairs of transparent white glass window projects with a simple minimalist design and the 2 pairs of windows were of different sizes which consists of 1 pair (2 windows) measuring 50cm x 120cm and 1 pair (2 windows) measuring 40cm x 160cm and a total of 4 windows.
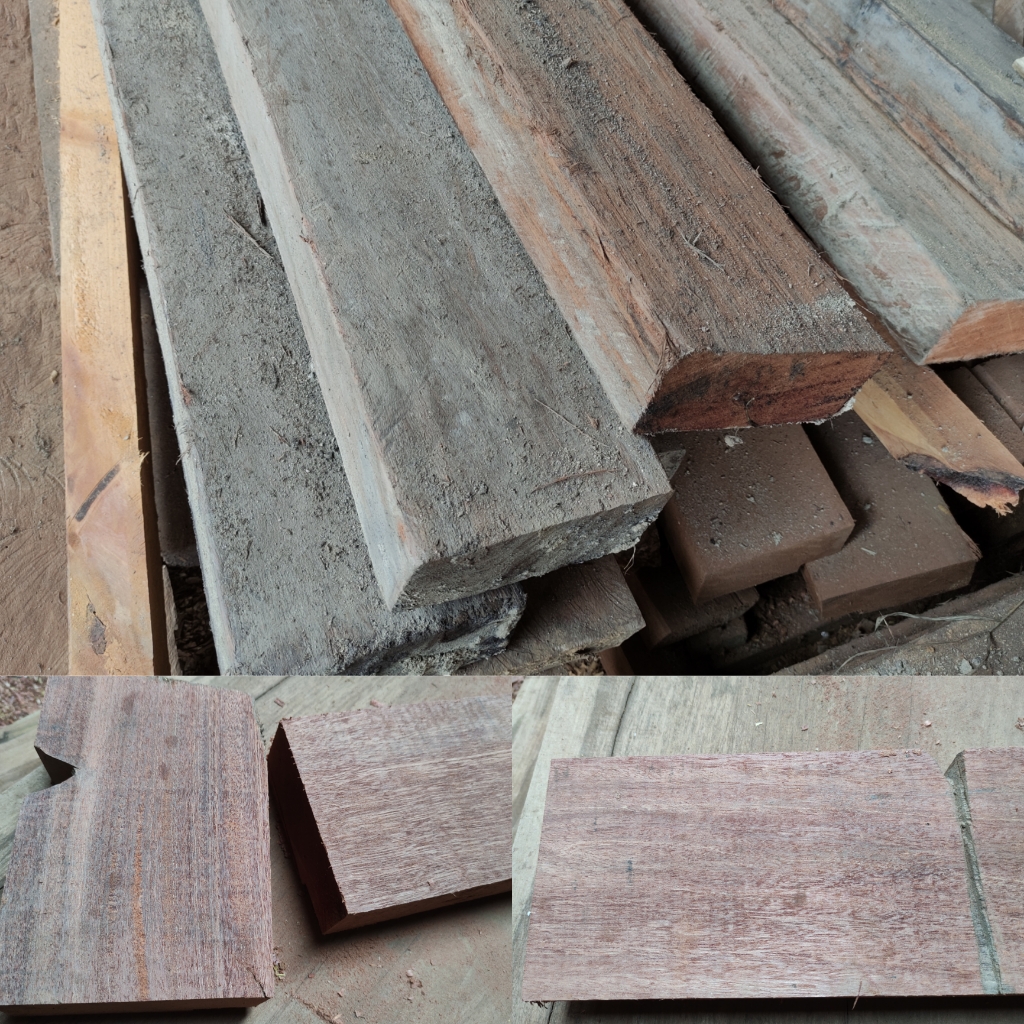
To complete the project on my CV, we often use wooden blocks for window and door bulkhead measuring 3.5cm x 6 cm which have been cleaned and now let's get straight into the manufacturing process and the materials I need to complete that project.

•Meranti wood that has been trimmed with a size of 3.5 cm x 6 cm is the main binding material for the window series.
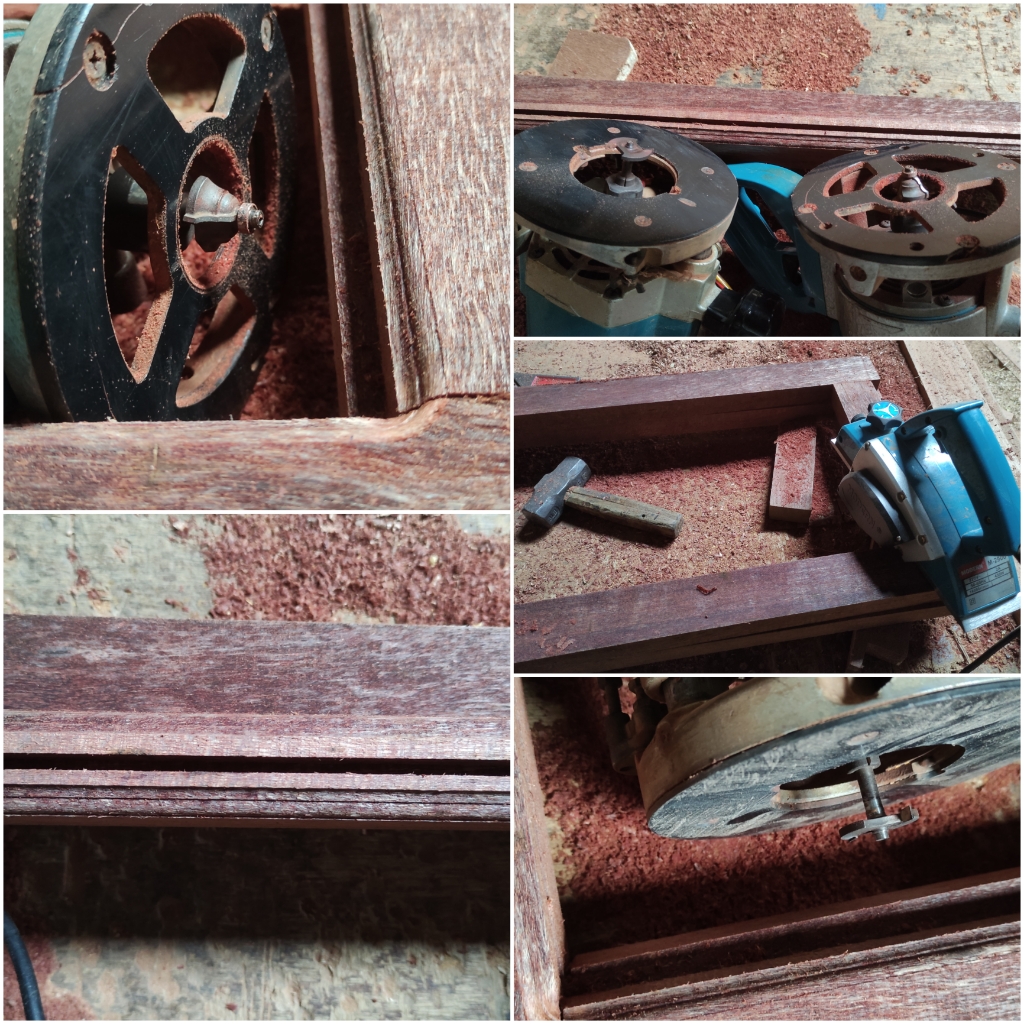
•Mini wood cutting machine.
•Hand drill(to make holes in the wood when installing the pegs) and sit drill(to make holes in the bulkhead of the top and bottom of the window).
•Meter and hammer
•Router machine(for making flowers on the inside corners of windows and making glass holder holes).
•Meter (measuring instrument)and elbow.
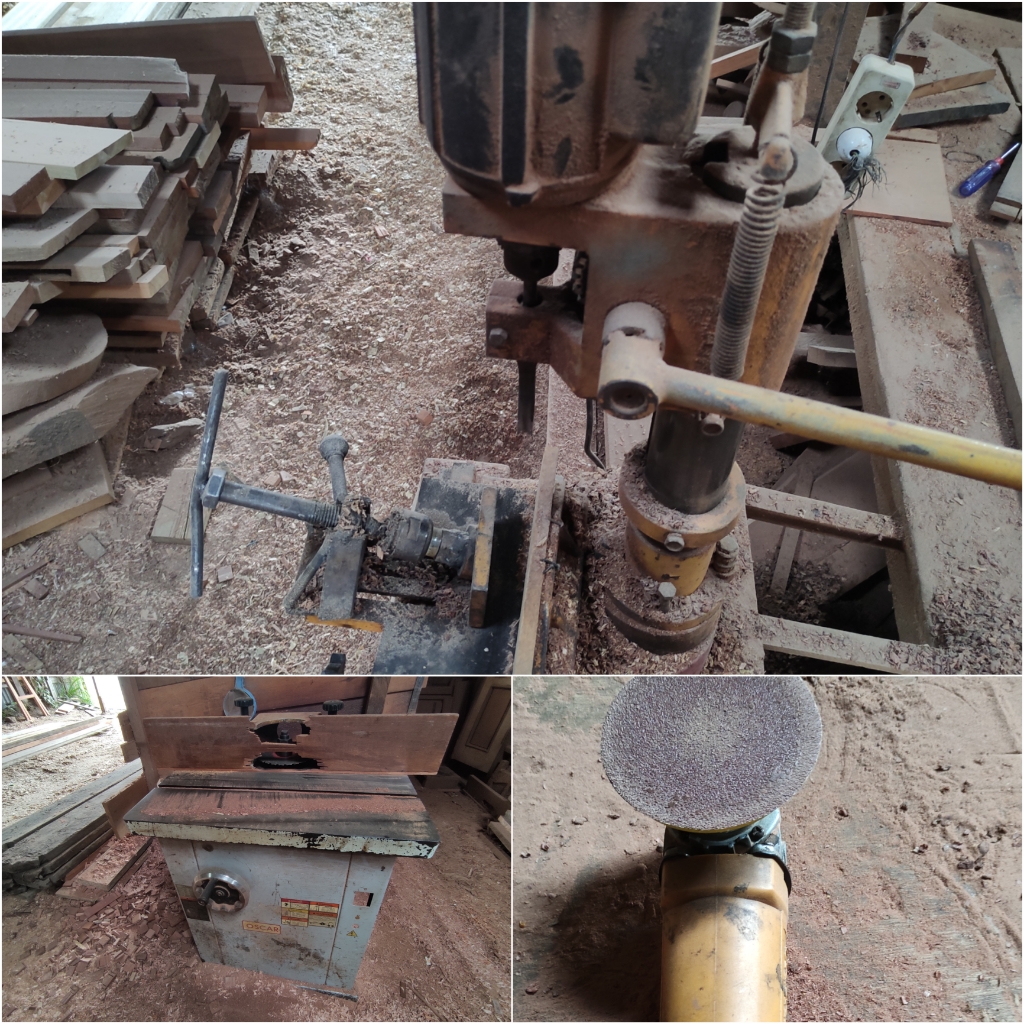
•Smoothing machine and.
•Panel machine (to make nipple pegs on frame sets).
Now we continue the manufacturing process by preparing the left, right and top, bottom frame of the window frame.
Although this window order consists of 2 pairs of different sizes, but to get my work target, I finished it in 1 work and for the first time, I prepared a series of windows measuring 40cm x 160 cm (2 pairs) and followed by cutting 1 pair of window material measuring 50cm x 120 cm.
The basic wooden beam that has been cleaned is 6cm wide x 3.5cm thick x 200cm long and I have to cut that wood for the left, right window frames with a length of 165cm (2 pairs)
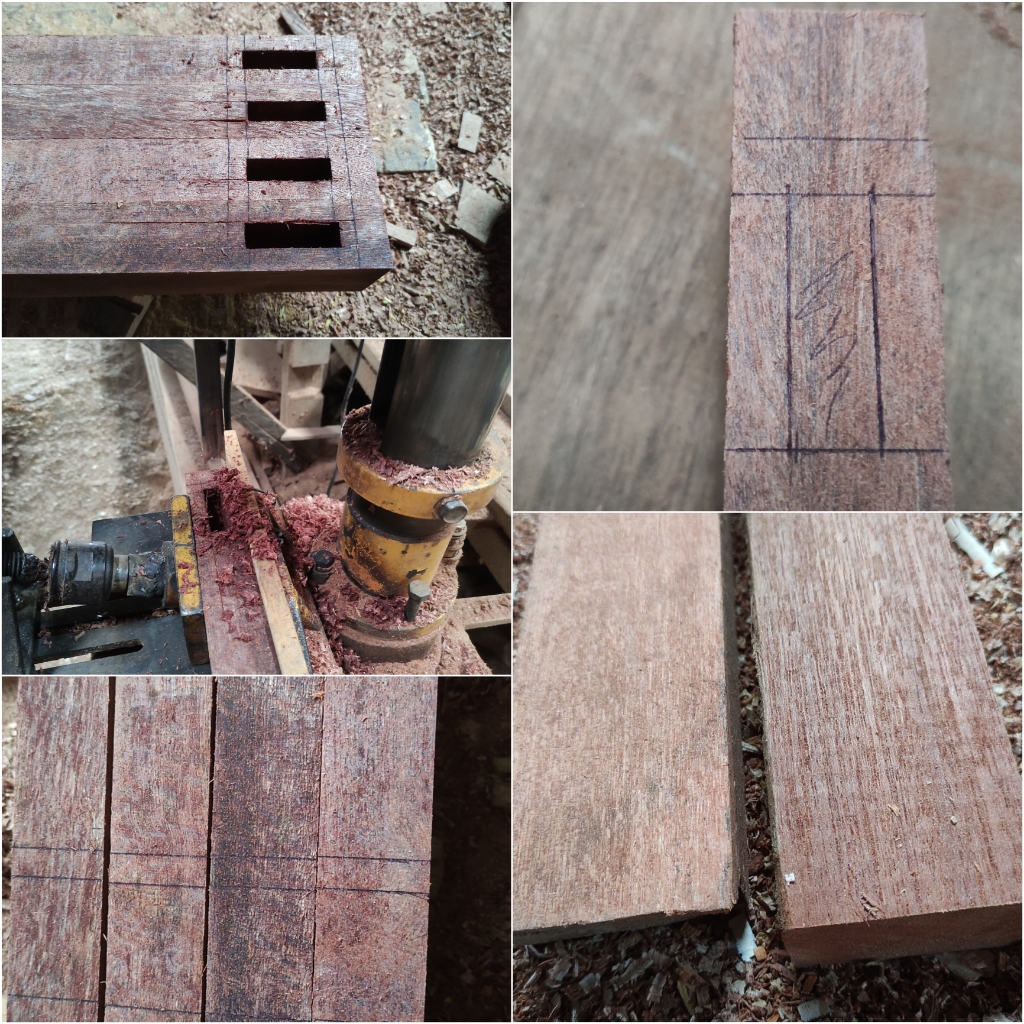
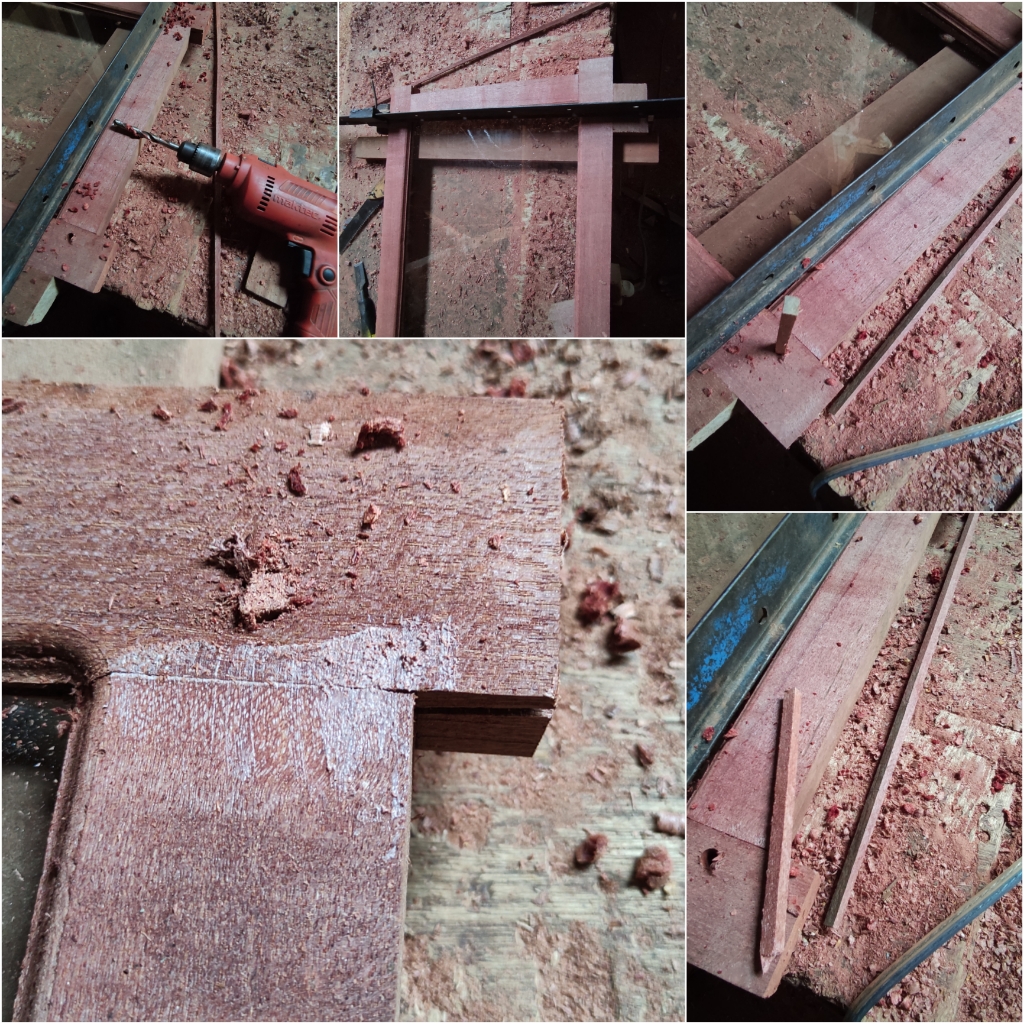
and I continued by making marking lines with a space of 2.5 cm from the top and bottom ends of the pole and making a boundary line for scraping (using a seated drill) where to insert the series of pegs (top, bottom of the window).
Then proceed with the process of drilling the upper and lower bulkheads of the frame posts with a drill bit width of 1.5 cm and a depth of 3.5 cm which will be the entry holes for the main pegs of the upper and lower bulkheads of the window series.
After the process of making 2 pairs of the main window pillars with different sizes, I continued with preparing the top and bottom bulkheads of the windows in 2 pairs of different sizes, namely 50cm x 120cm and 40cm x 160cm, in these cuts you have to be really careful because if it's wrong cut, the material will be wasted.
First, I cut the upper bulkhead of the window measuring 50cm x120cm and the process of connecting the chain using a connection using the peg method in a series of wood technicians, of course, requires multiplication, subtraction and addition so that the order results is what we want.
This means that for the upper and lower bulkheads of the window, the size is 50cm x 120cm. To get the length of the two window bulkheads, we must reduce the width of the left and right frames of the window, which is 6cm + 6cm = 12 cm, which means that the window width is 50cm - 12cm = 38 cm. Next we add The length of the nail is in accordance with the depth of the drill bit that we punched in the main partition on the left and right of the window,namely 3.5cm +3, 5cm = 7cm means 38 + 7cm = 45cm and the total length of the wood for the upper bulkhead of the window 50cm x120cm = 45 cm.
And for the 40cm x160cm window bulkhead, the way to calculate it is also the same and the results of the upper and lower bulkheads of the 40cm x160cm window after i count is are 35 cm.
it is our formula in making windows, doors and other furniture.
And after I finished cutting all the window bulkheads, then I continued with the process of making wood nipples on the upper and lower bulkheads of the windows using a sitting panel machine and for the series of processes you can see in the picture below.

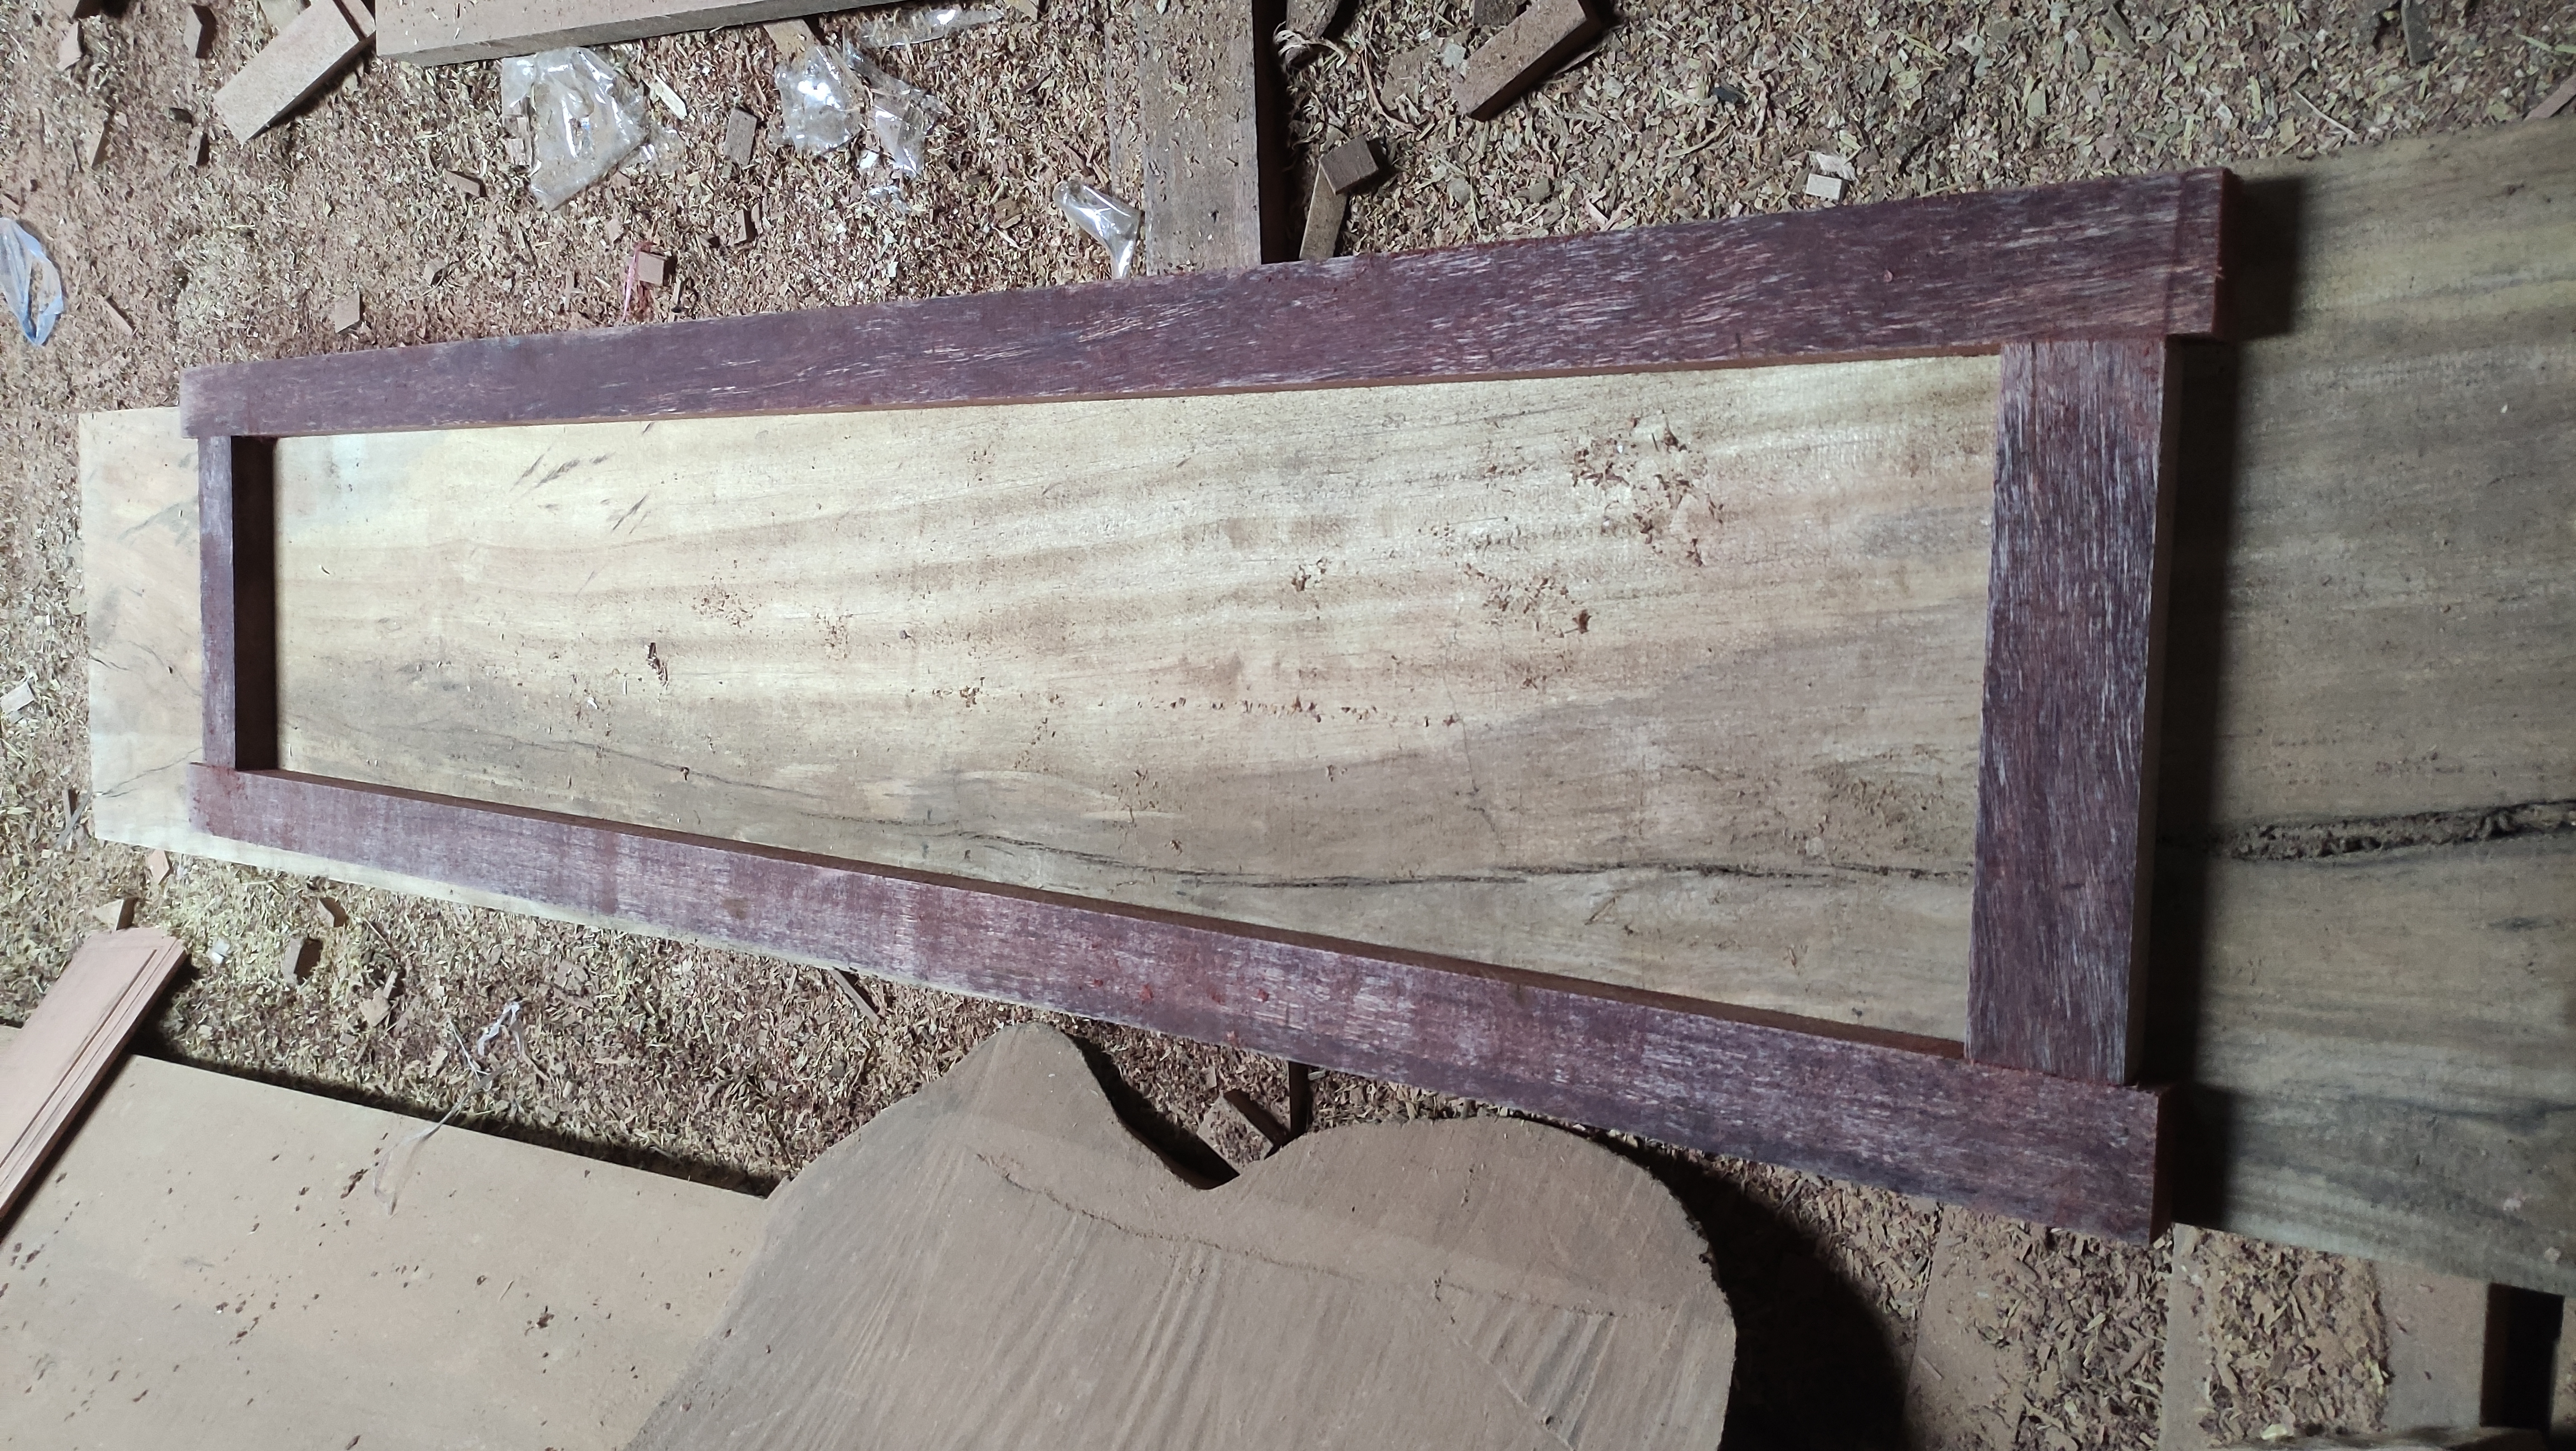
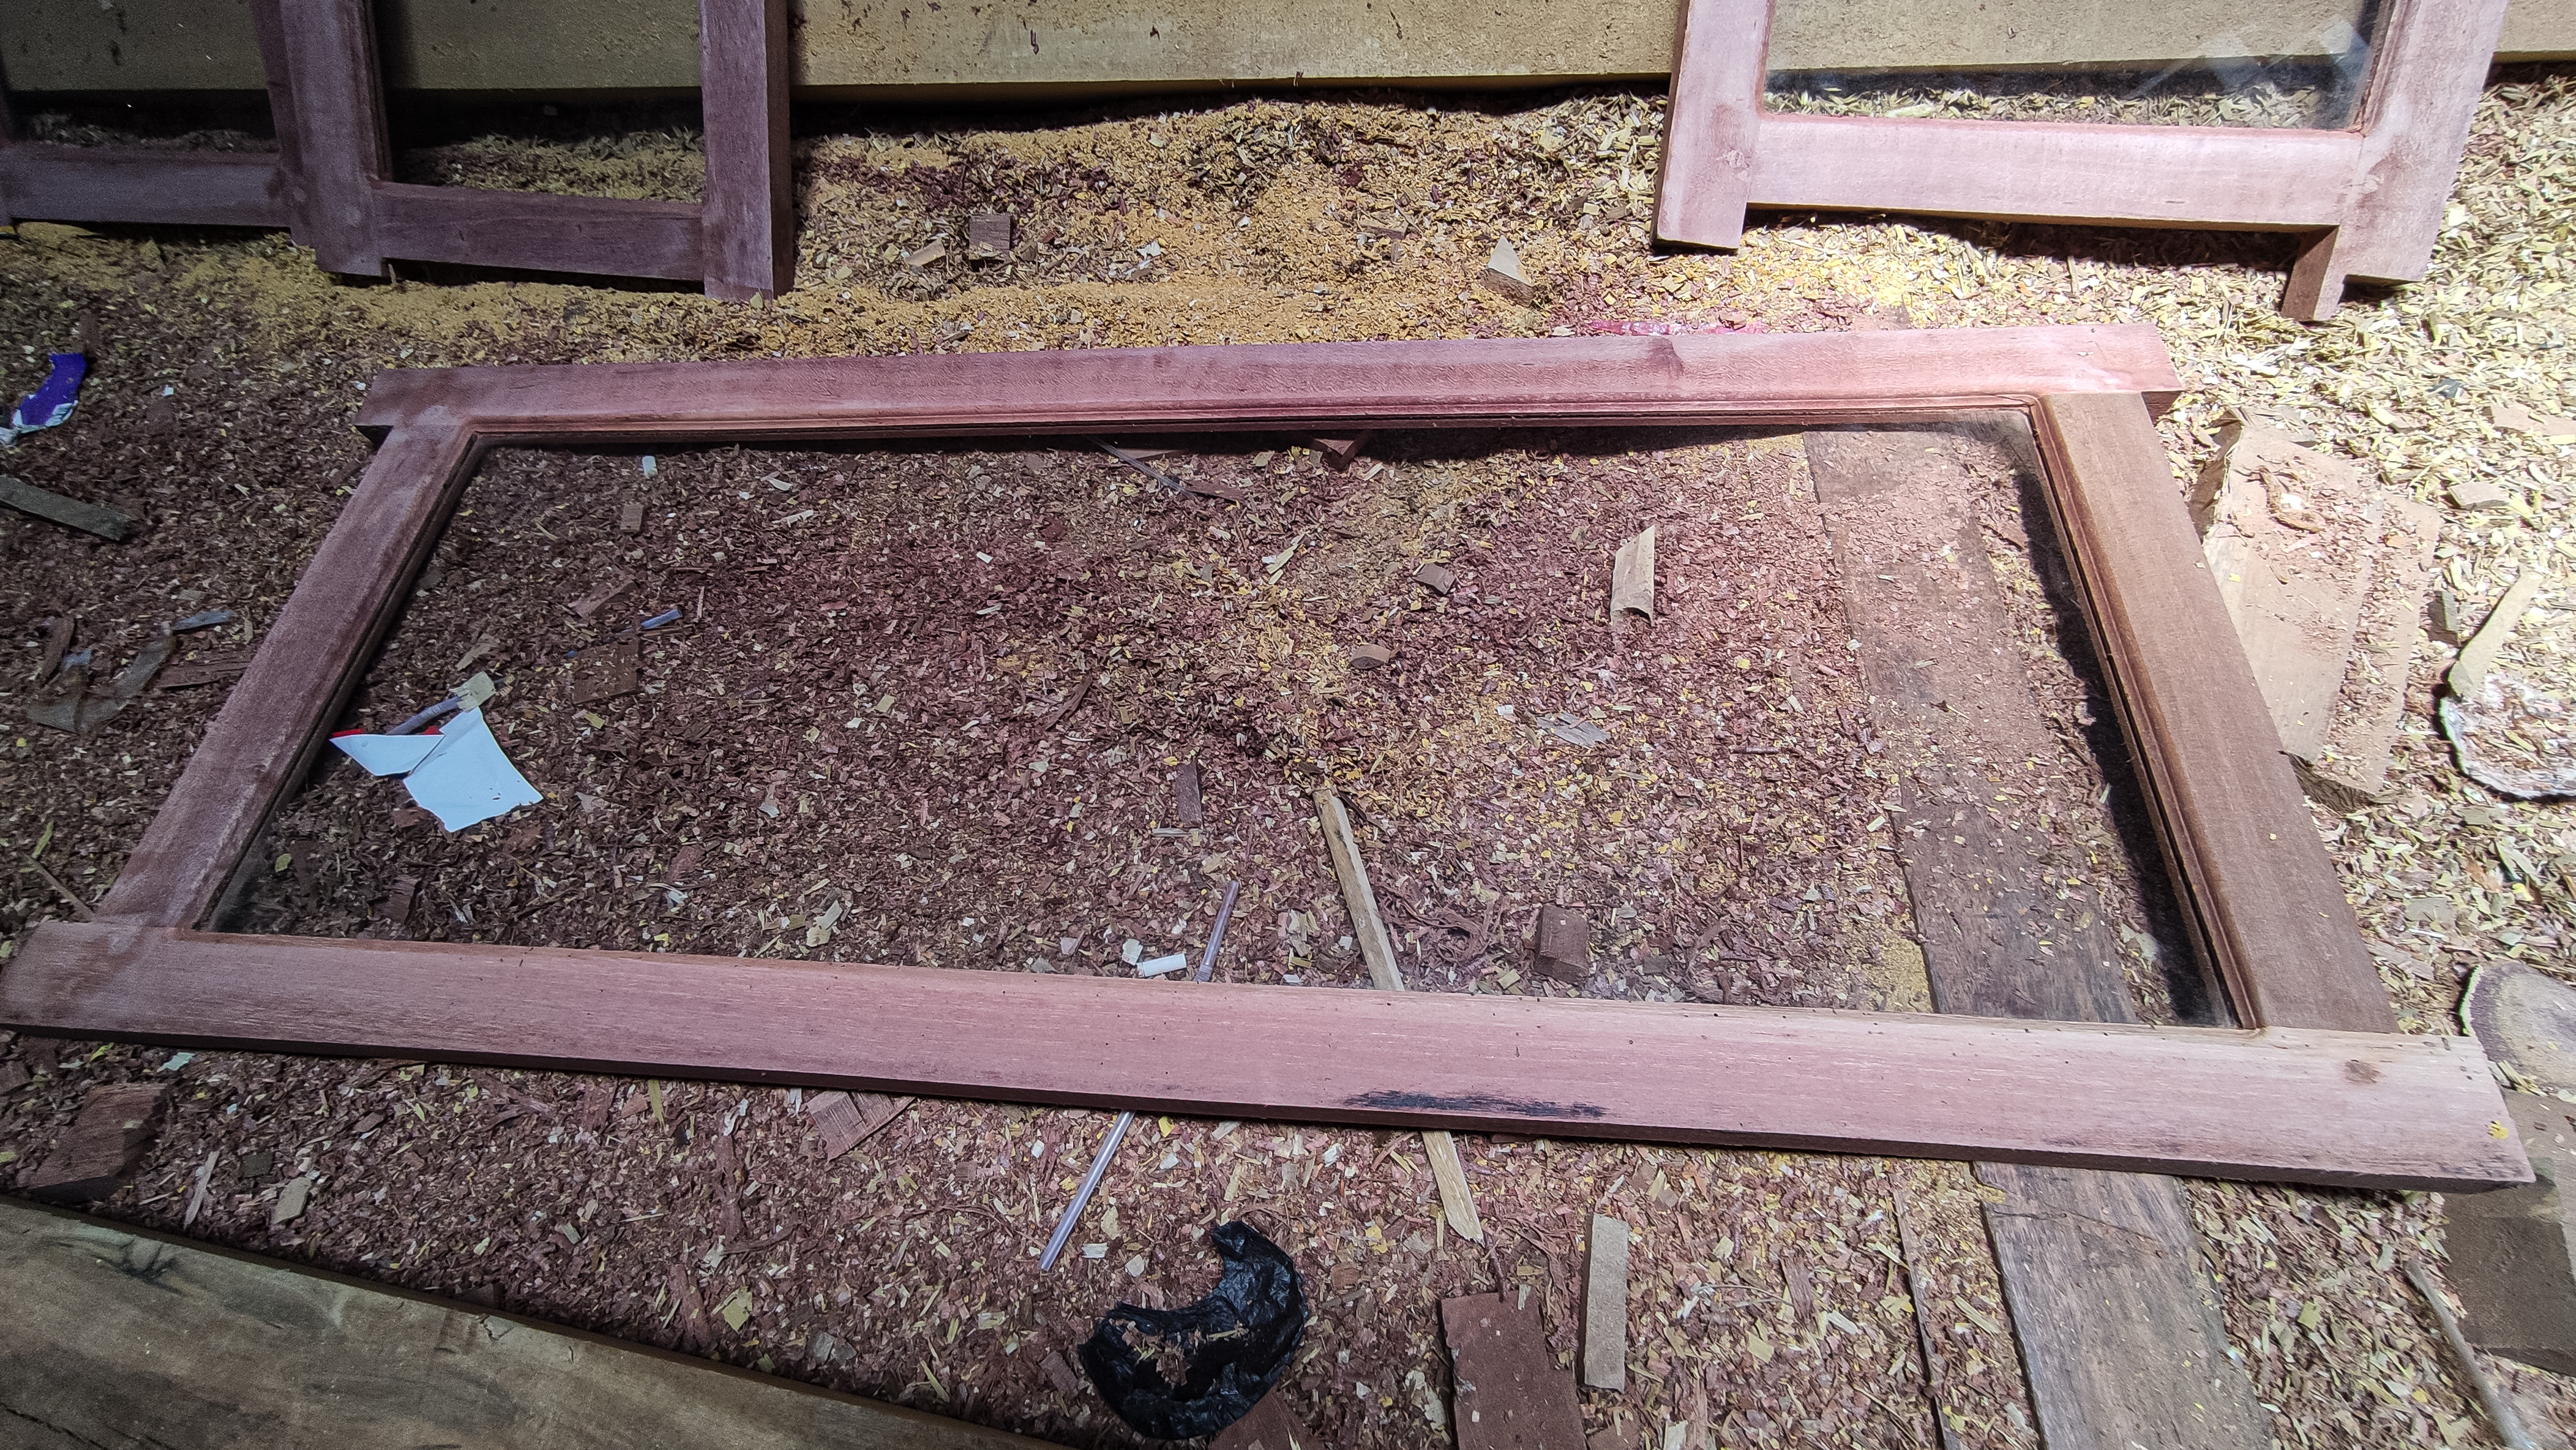
After the manufacturing process is complete, then I continue to unite the entire series of all the windows according to their respective partners.
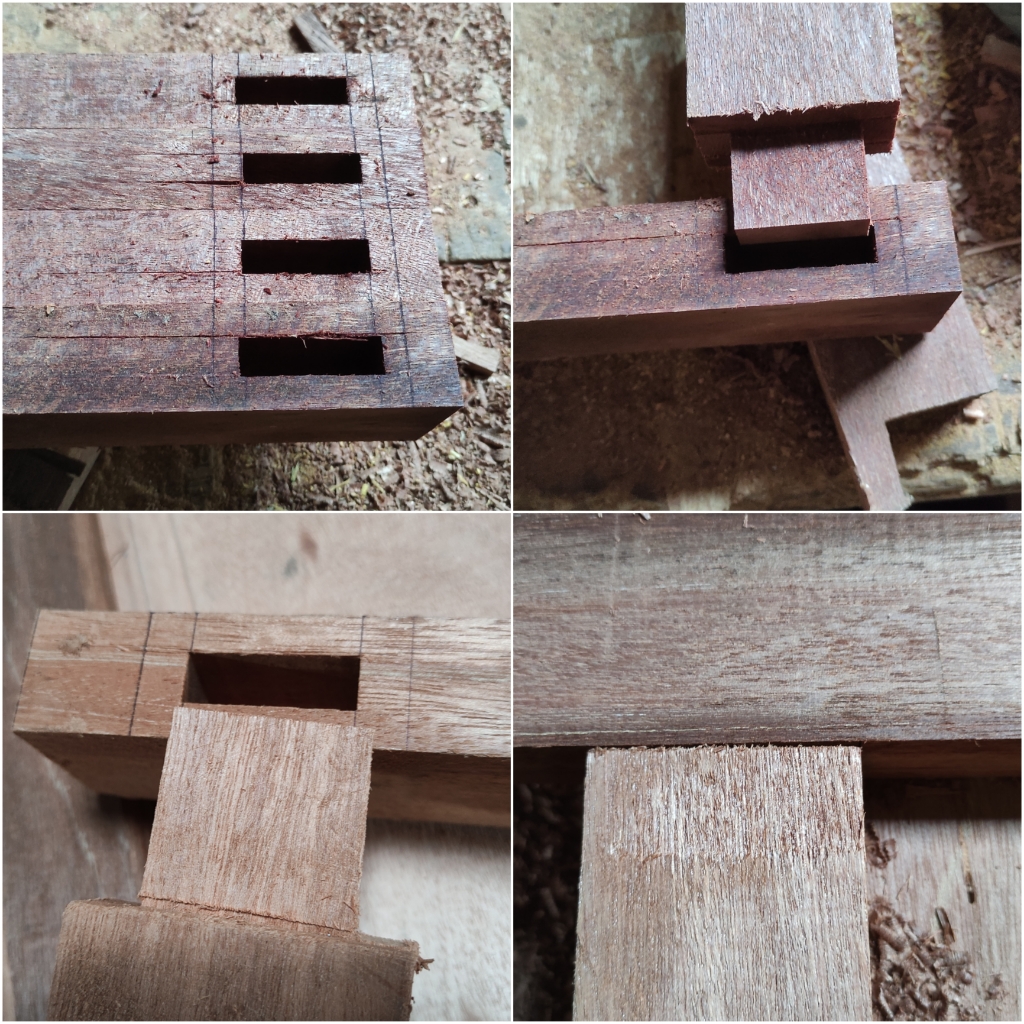
After that, I continued with the process tidying up the bulkhead connection holder above and below the window by using a hand planer of the front and back of the window, followed by the process of giving flowers to the inner corners of the front and rear windows and also continued with the process of carving the glass holder holes on a series of windows.
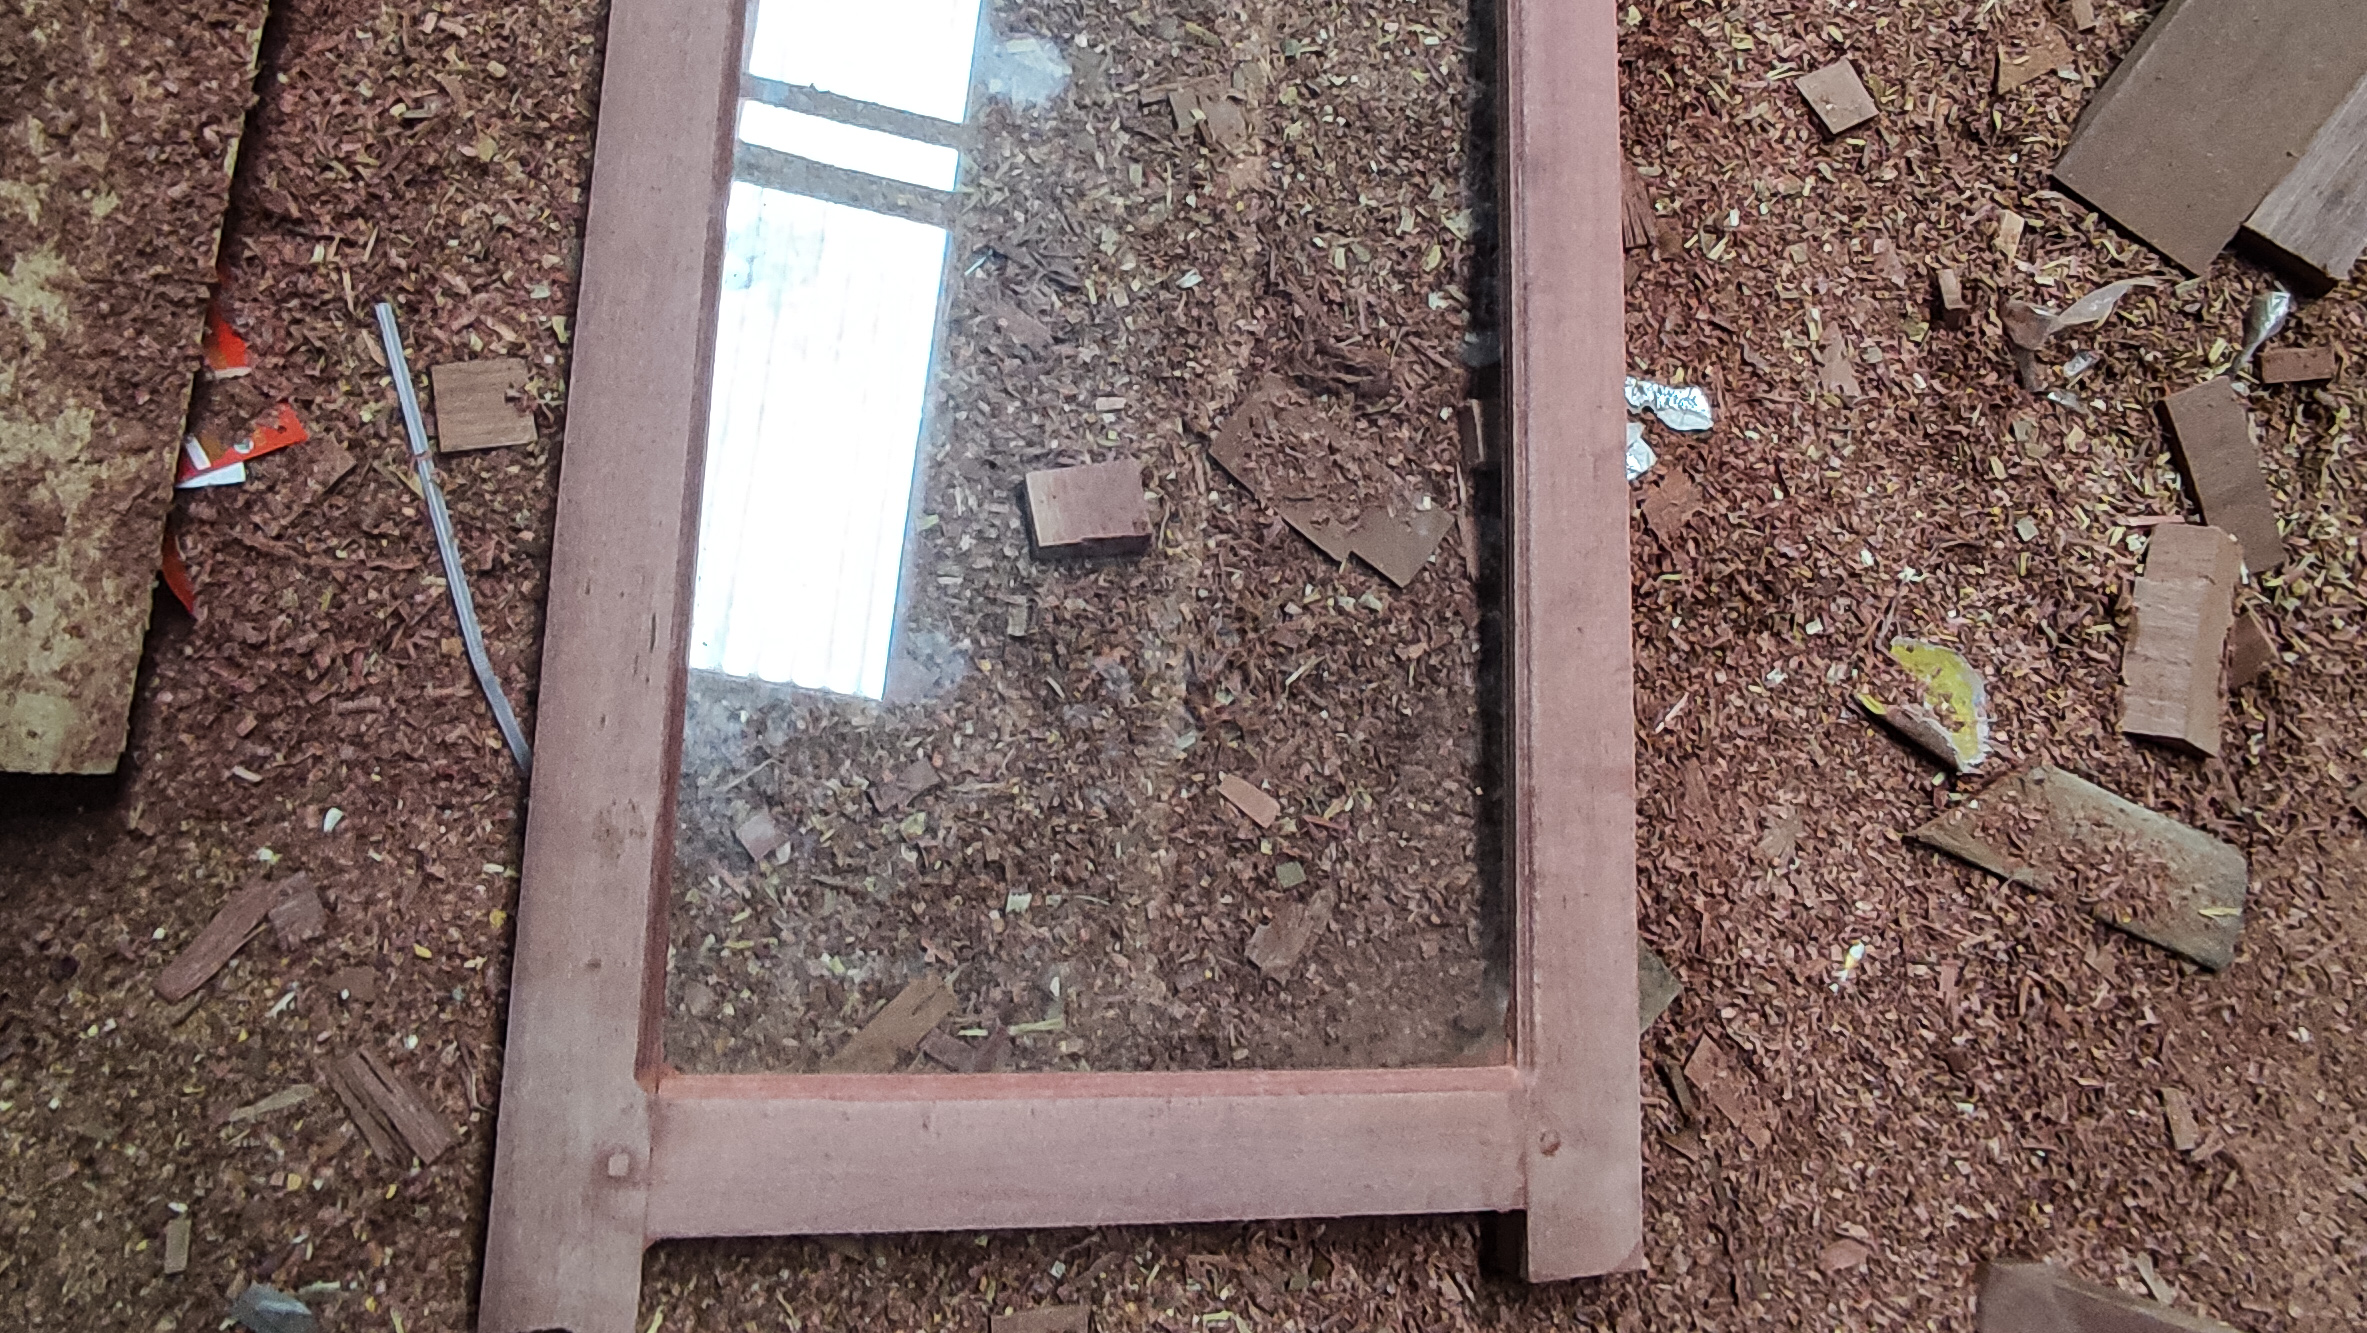
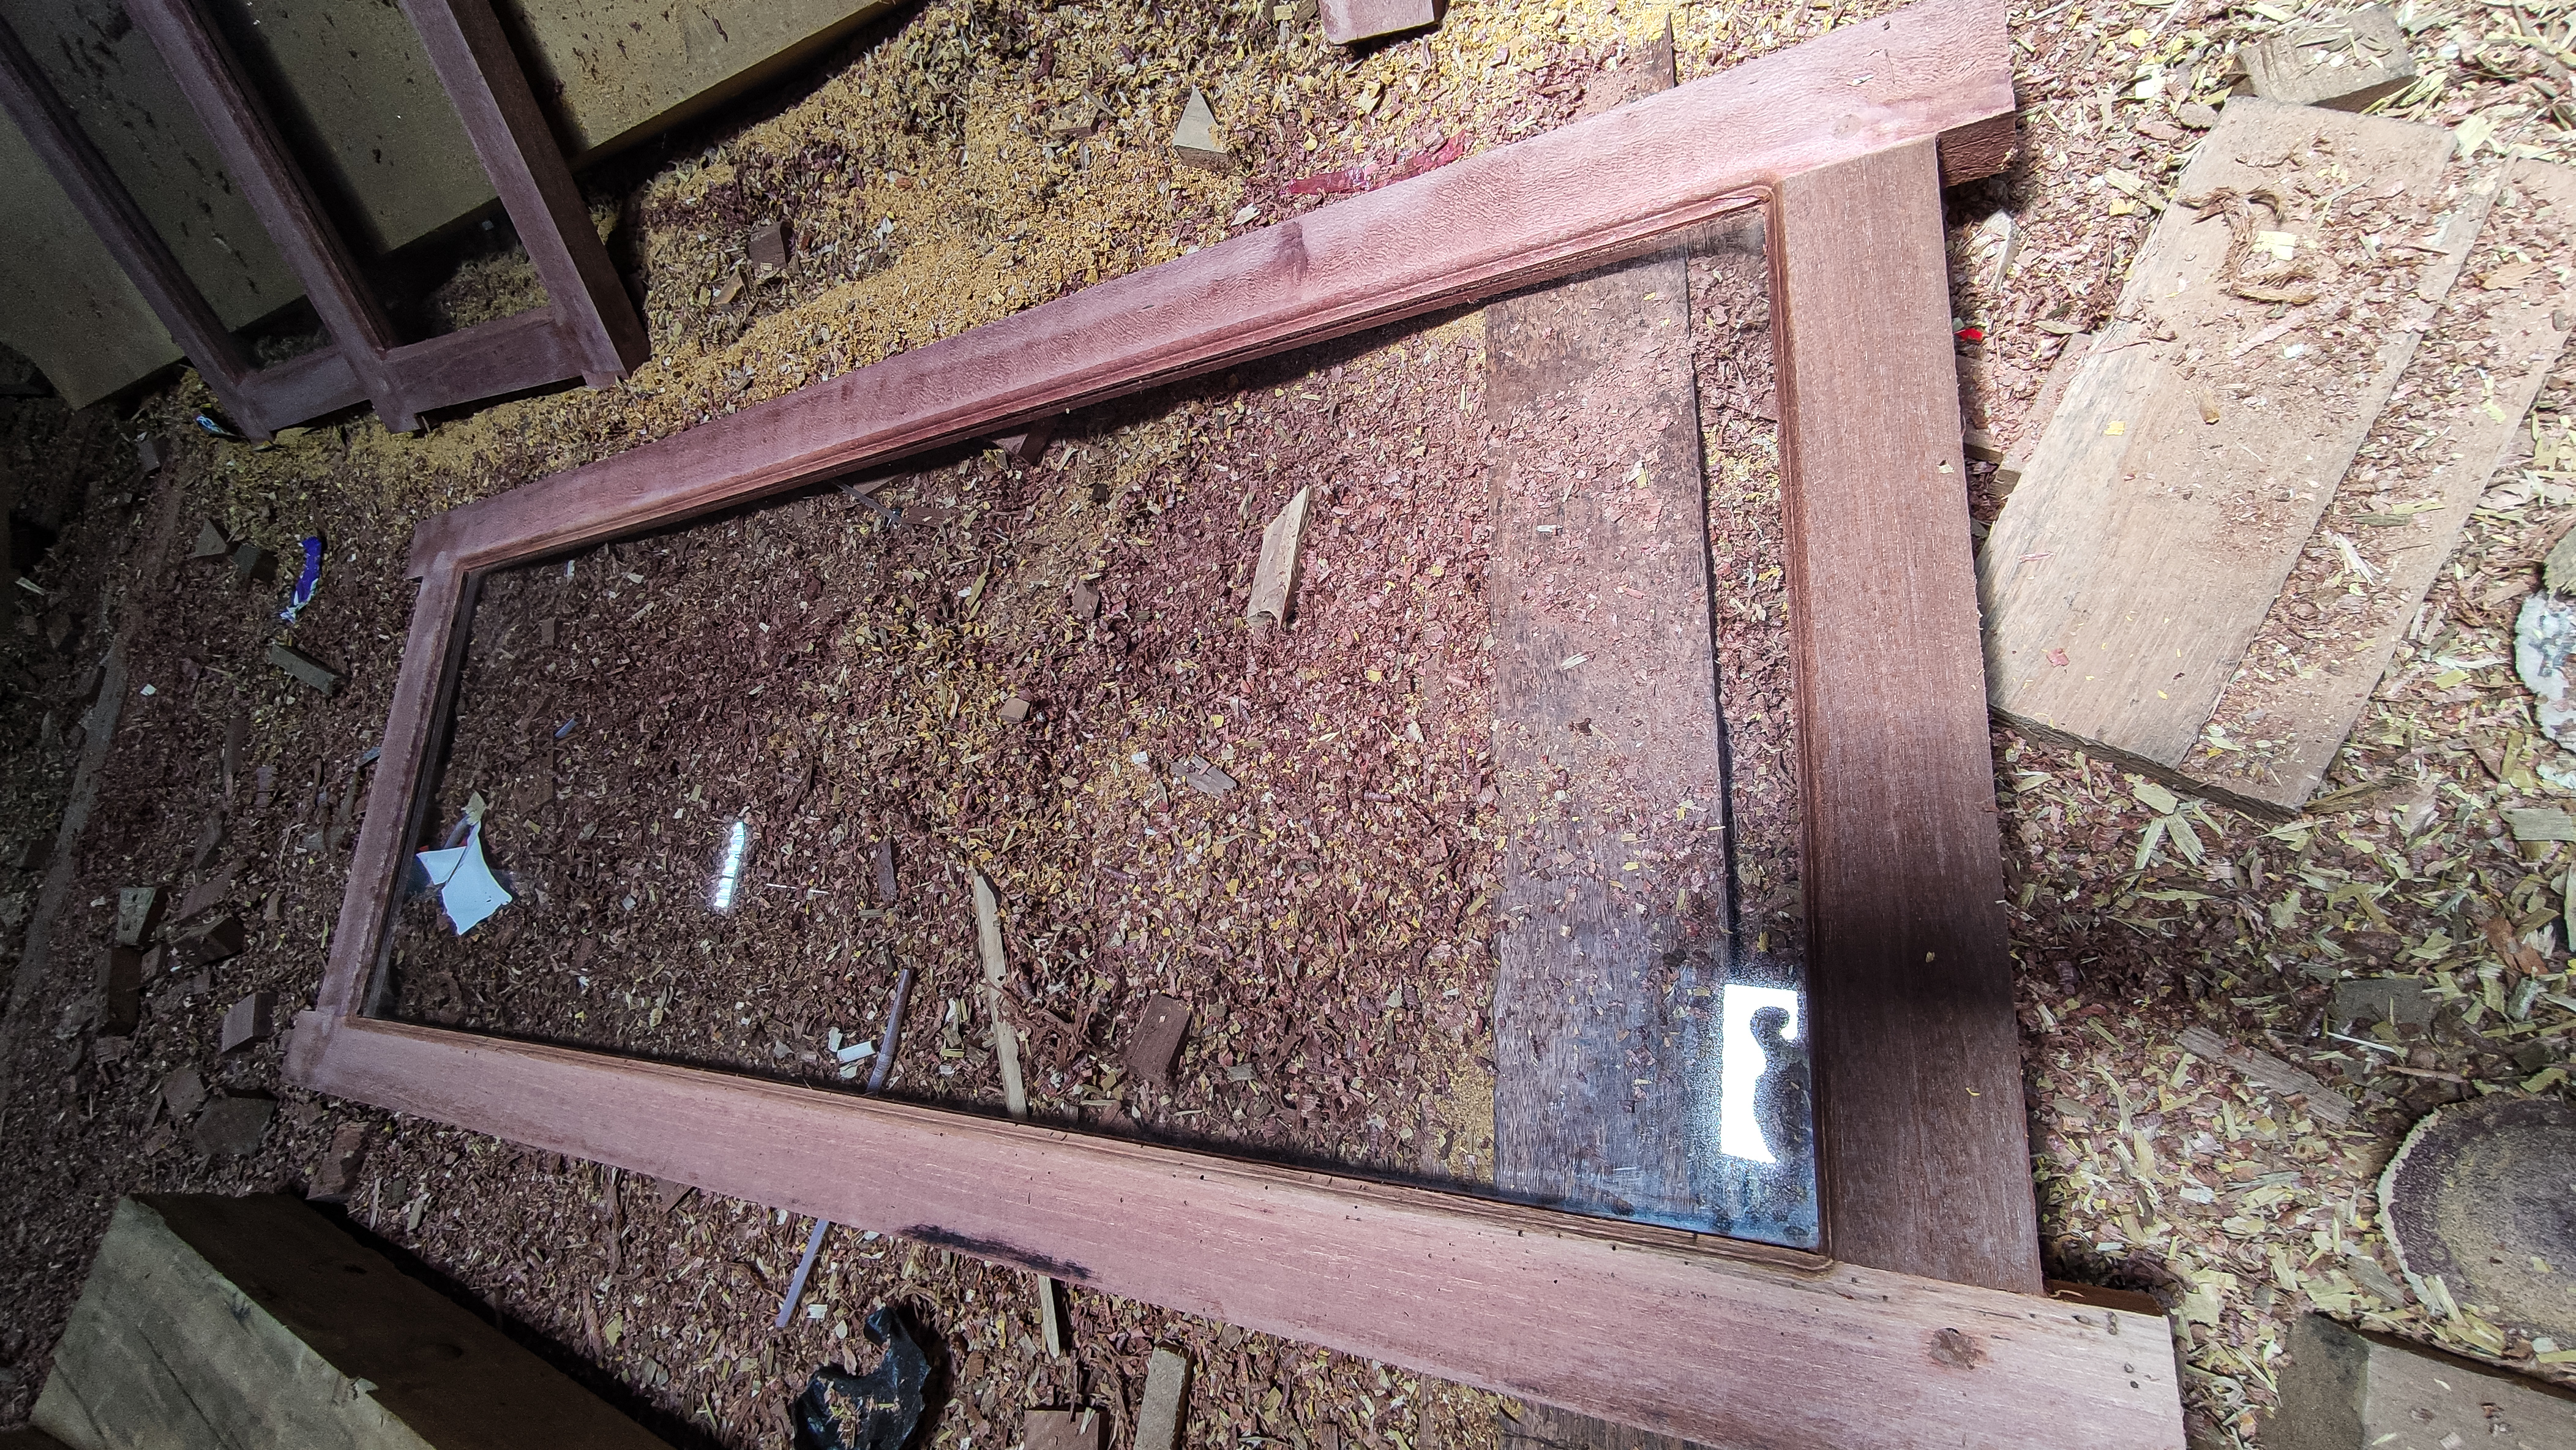
For the next stage, we enter the stage of installing glass with a glass system embedded in wood and for the size of the glass from the window we have to measure the inside of the series of windows and add 1cm to the left, right, top and bottom of the basic size of the part of the windows and for windows measuring 50cm x120cm the size of the glass we need is 40cm x 110cm,as for windows 40cm x160cm we need glass with a size of 30cm x150cm and for that two pairs of windows with different sizes, the owner of the order wanted transparent white glass with a standard glass density of 5mm.
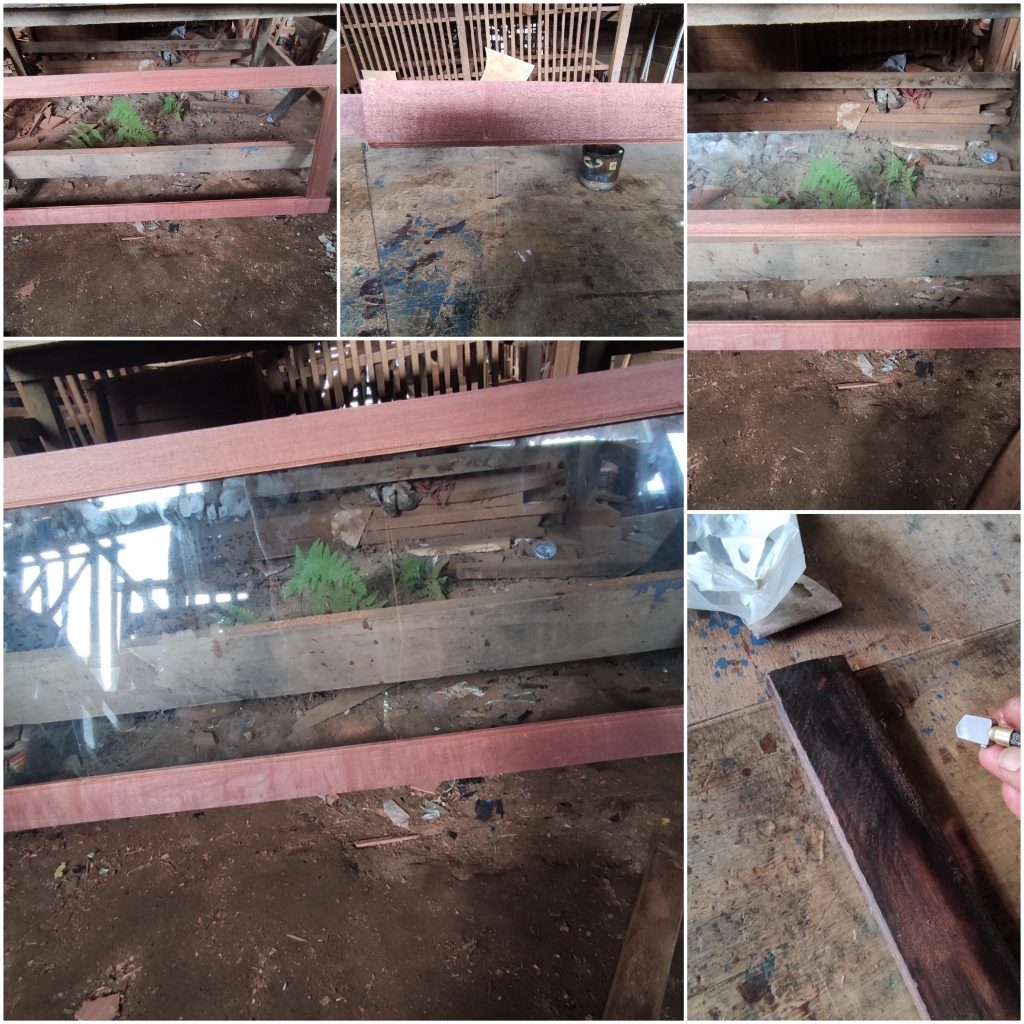
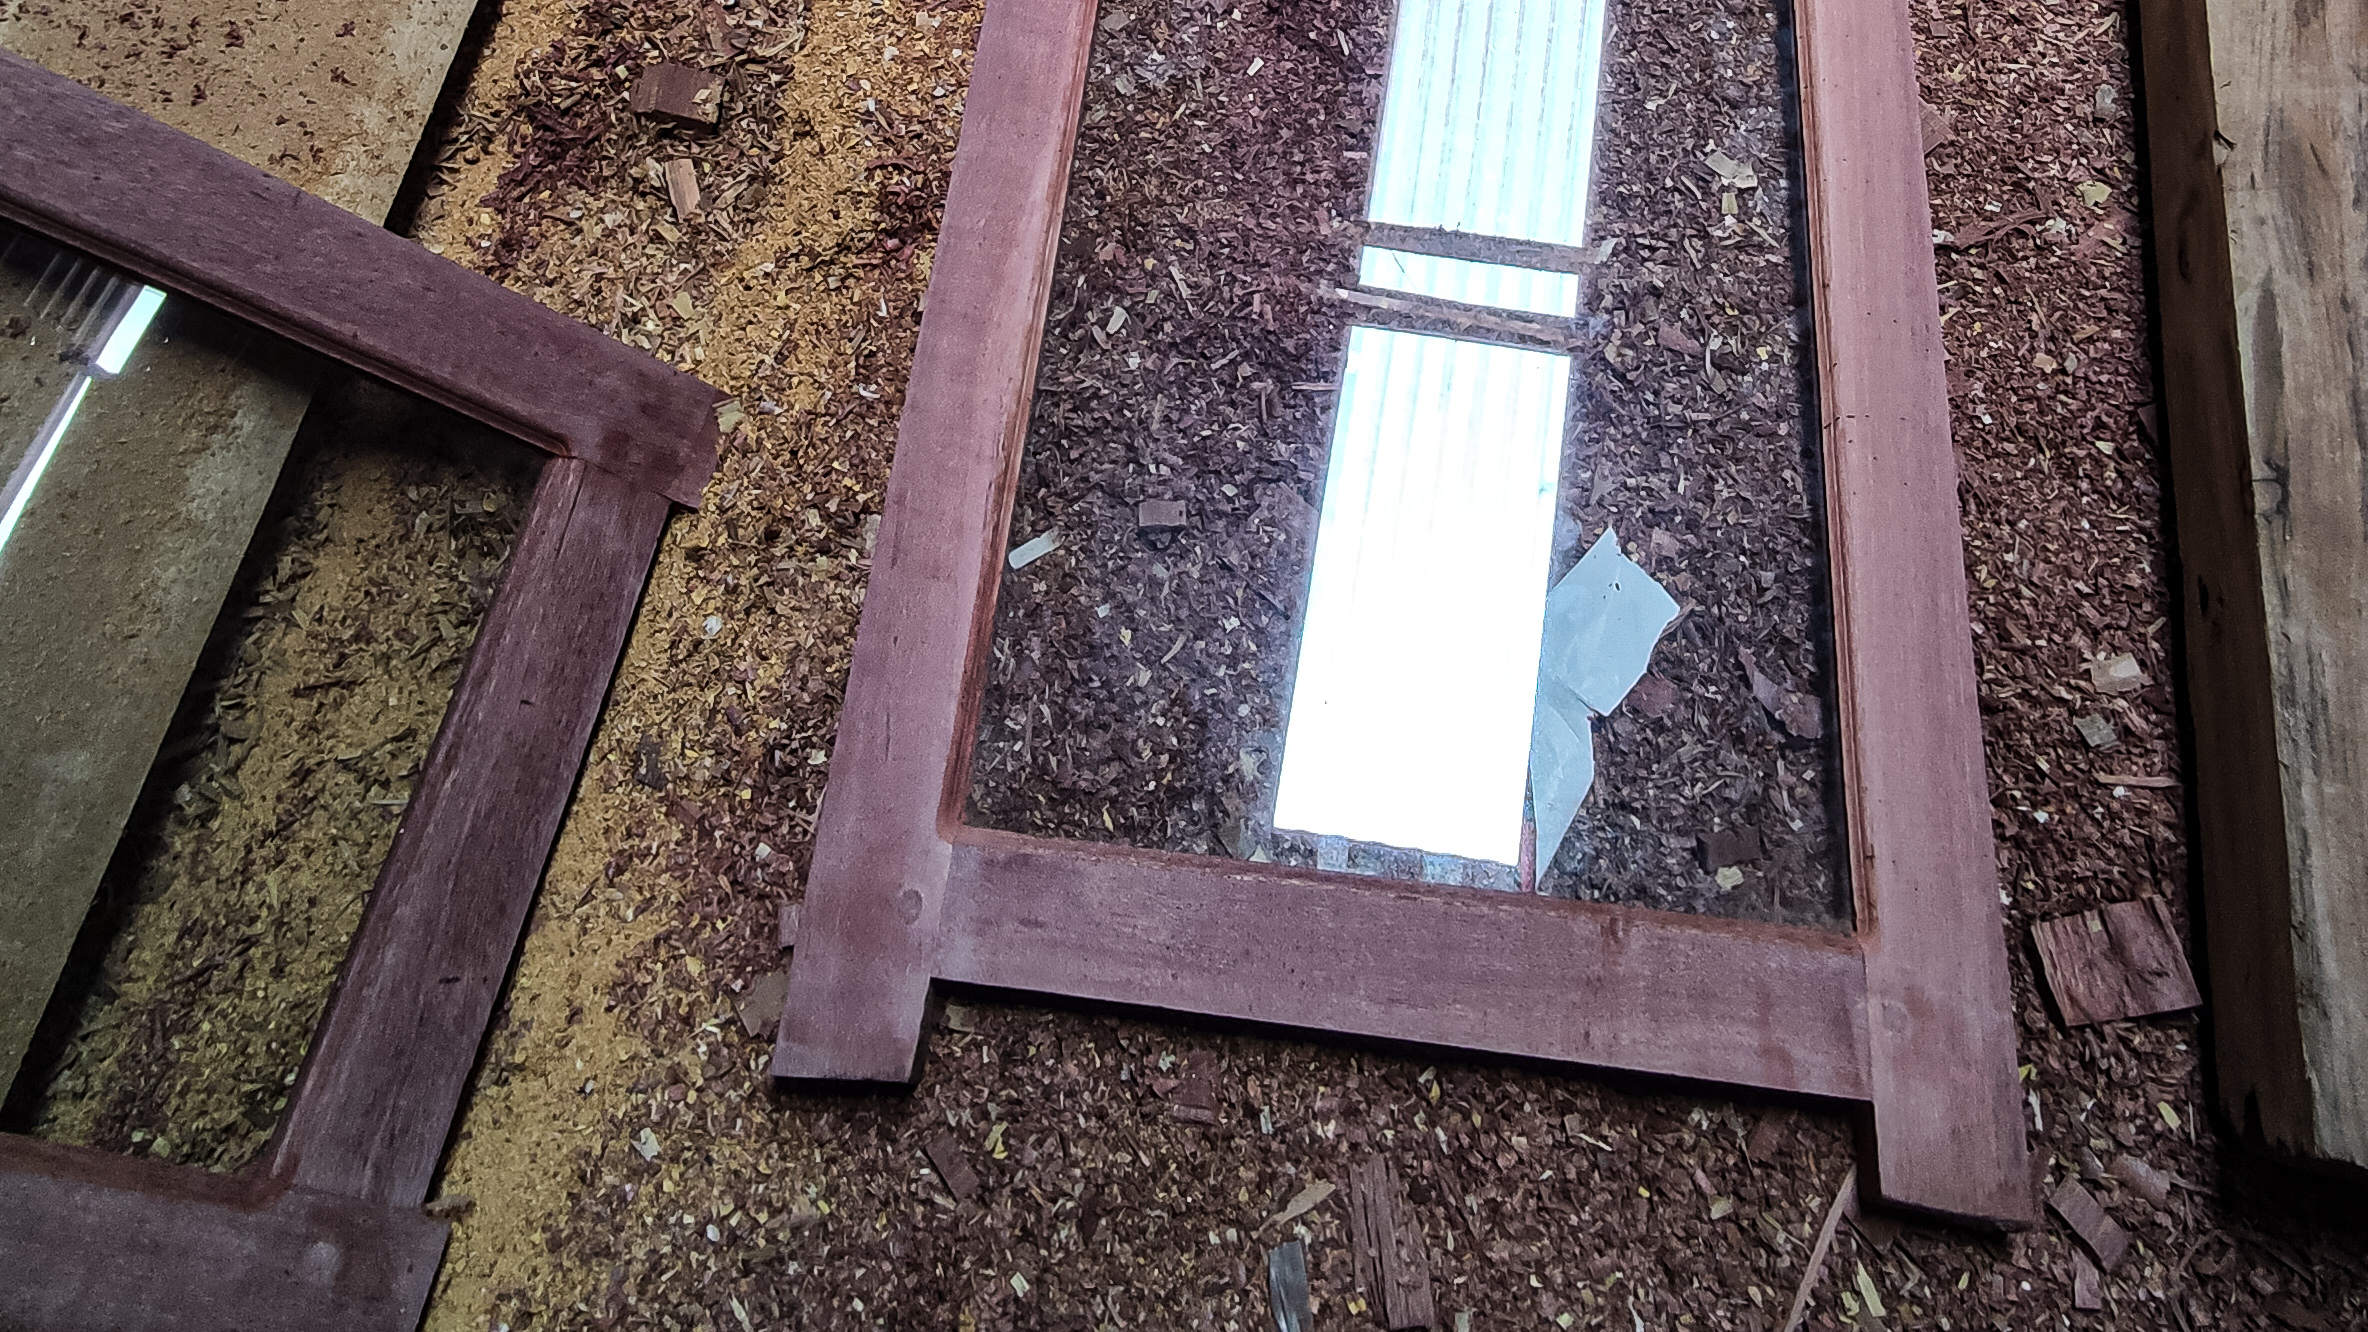
And after the process of cutting the glass and installing all the glass on the window series is complete, I continue with the process of pressing and locking the circuit to the four corners of the chain connection using wooden pegs which I started by drilling a 1cm x 1cm hole using a hand drill machine and a wooden dowel measuring 1cm x 1 cm and give a little dumpul (a mixture of glue and sawdust) at the joints.
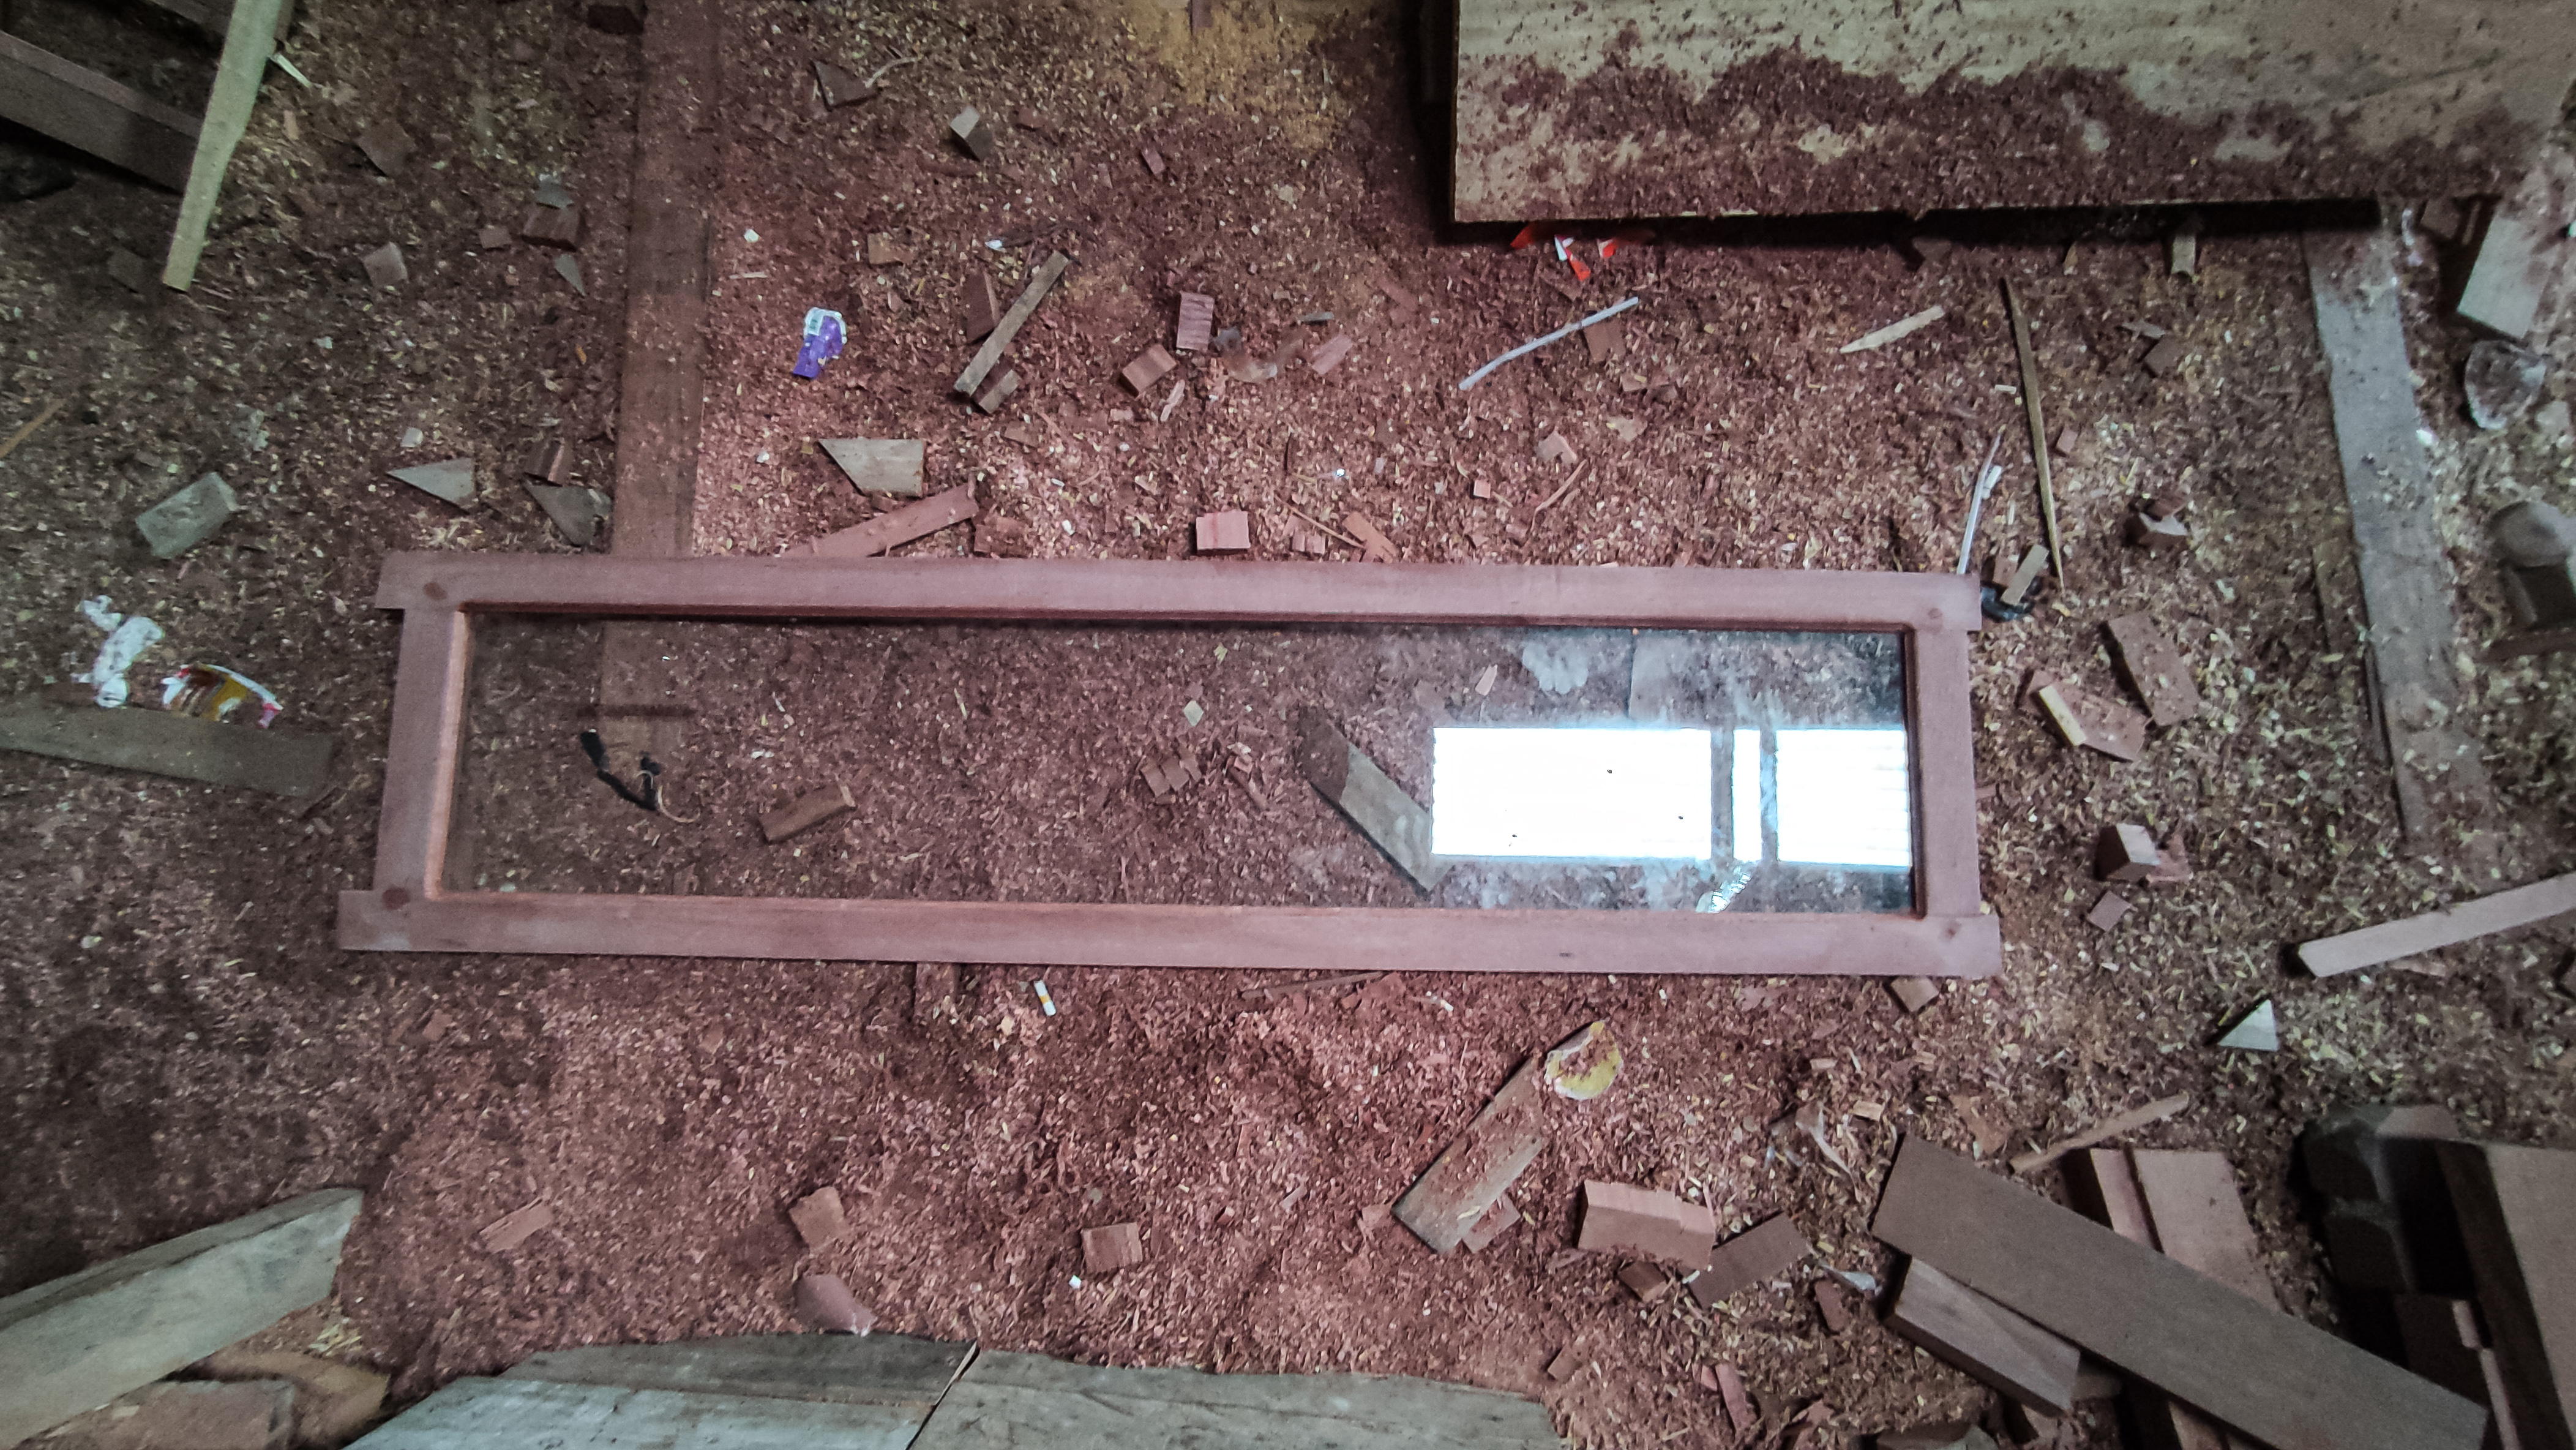
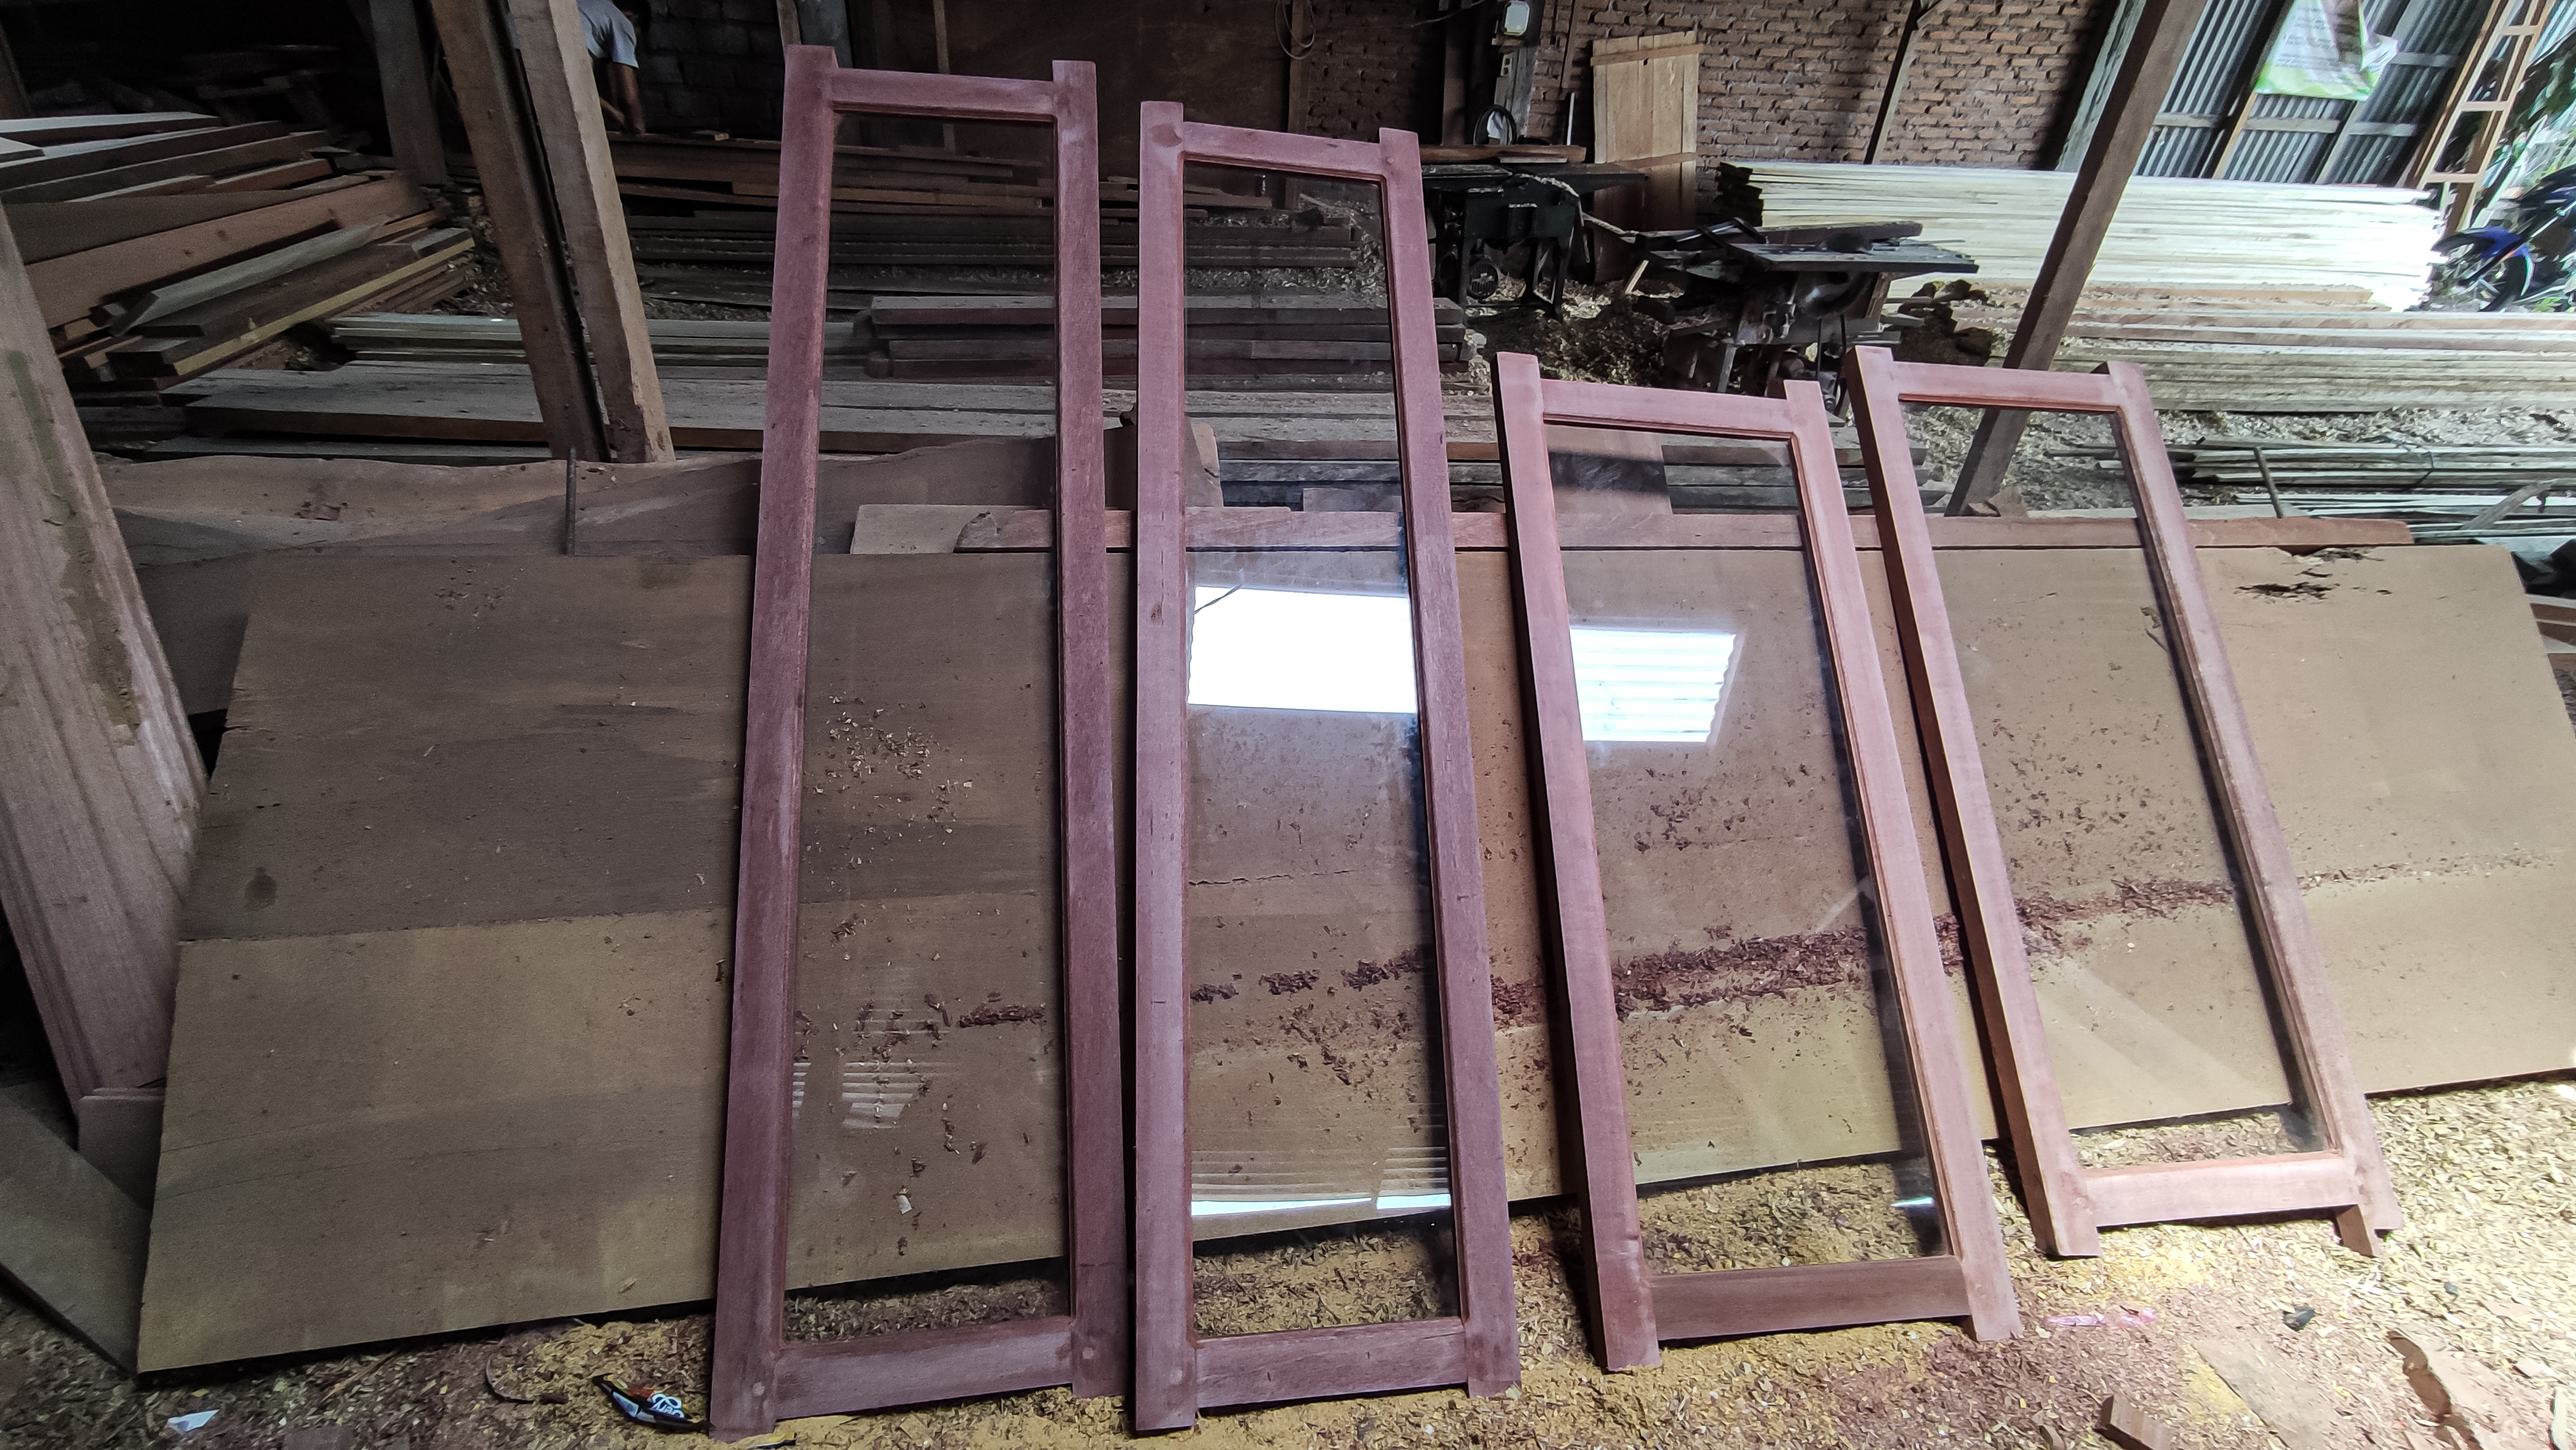
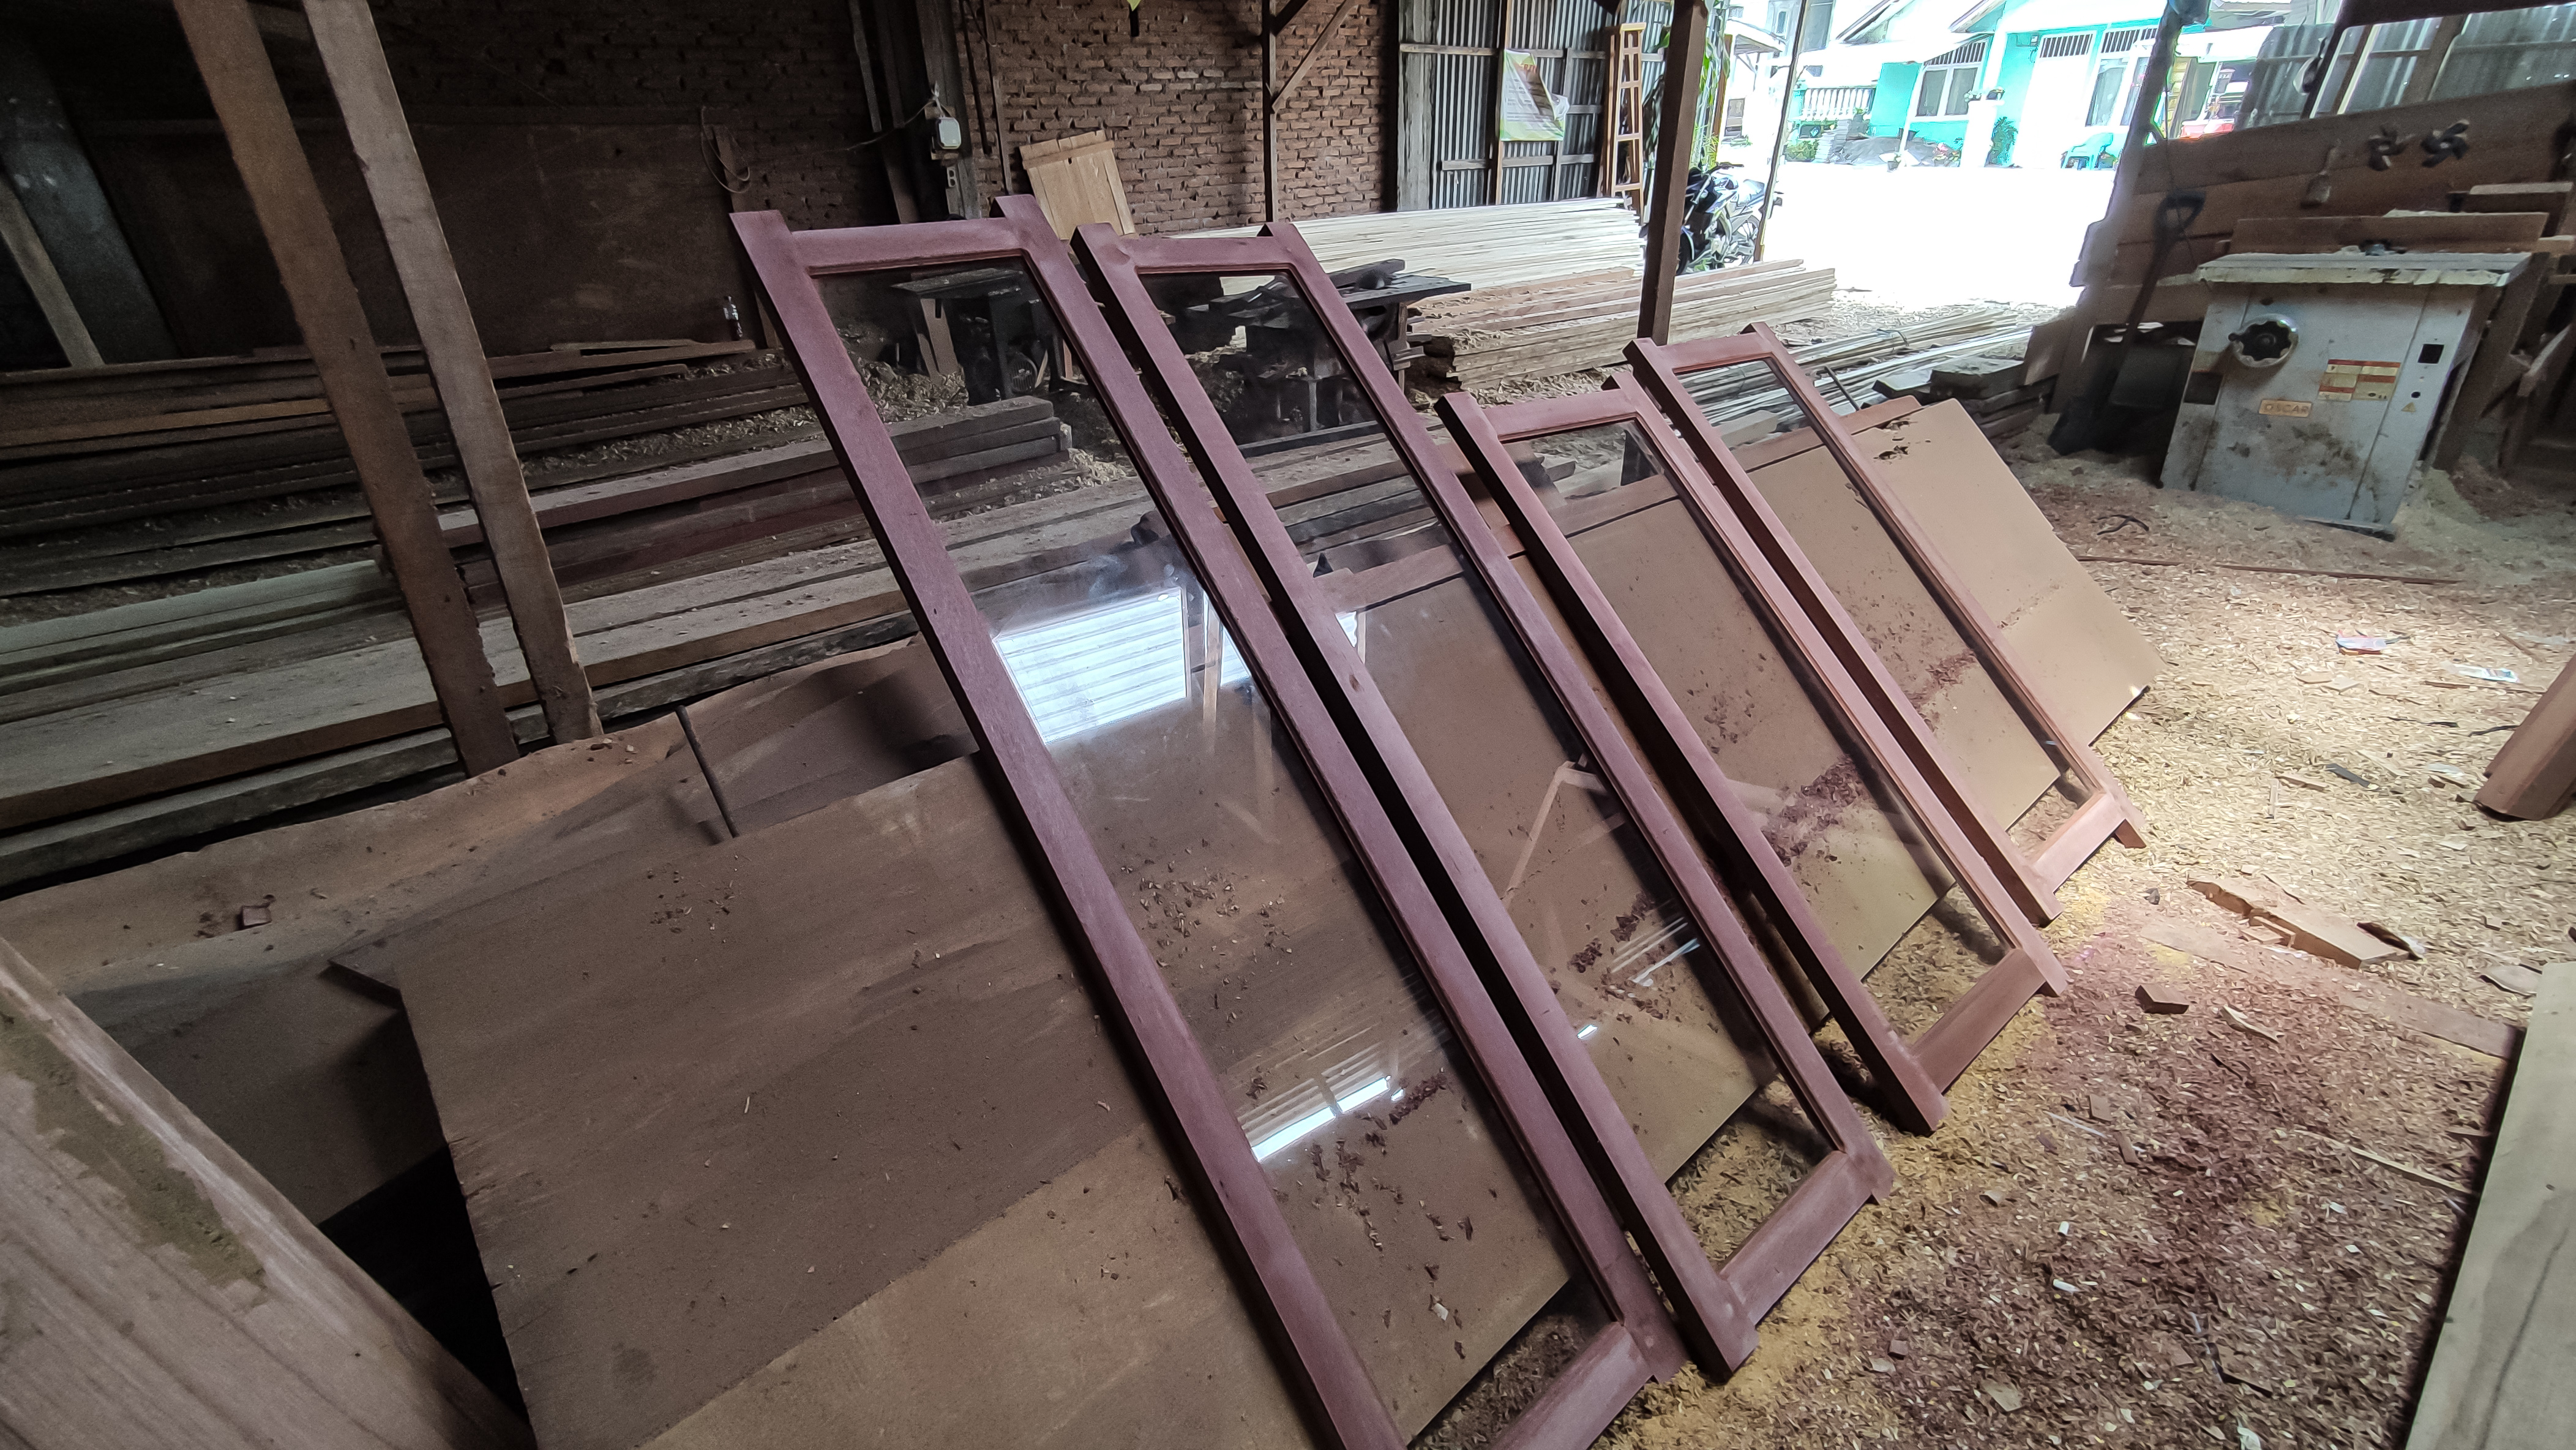
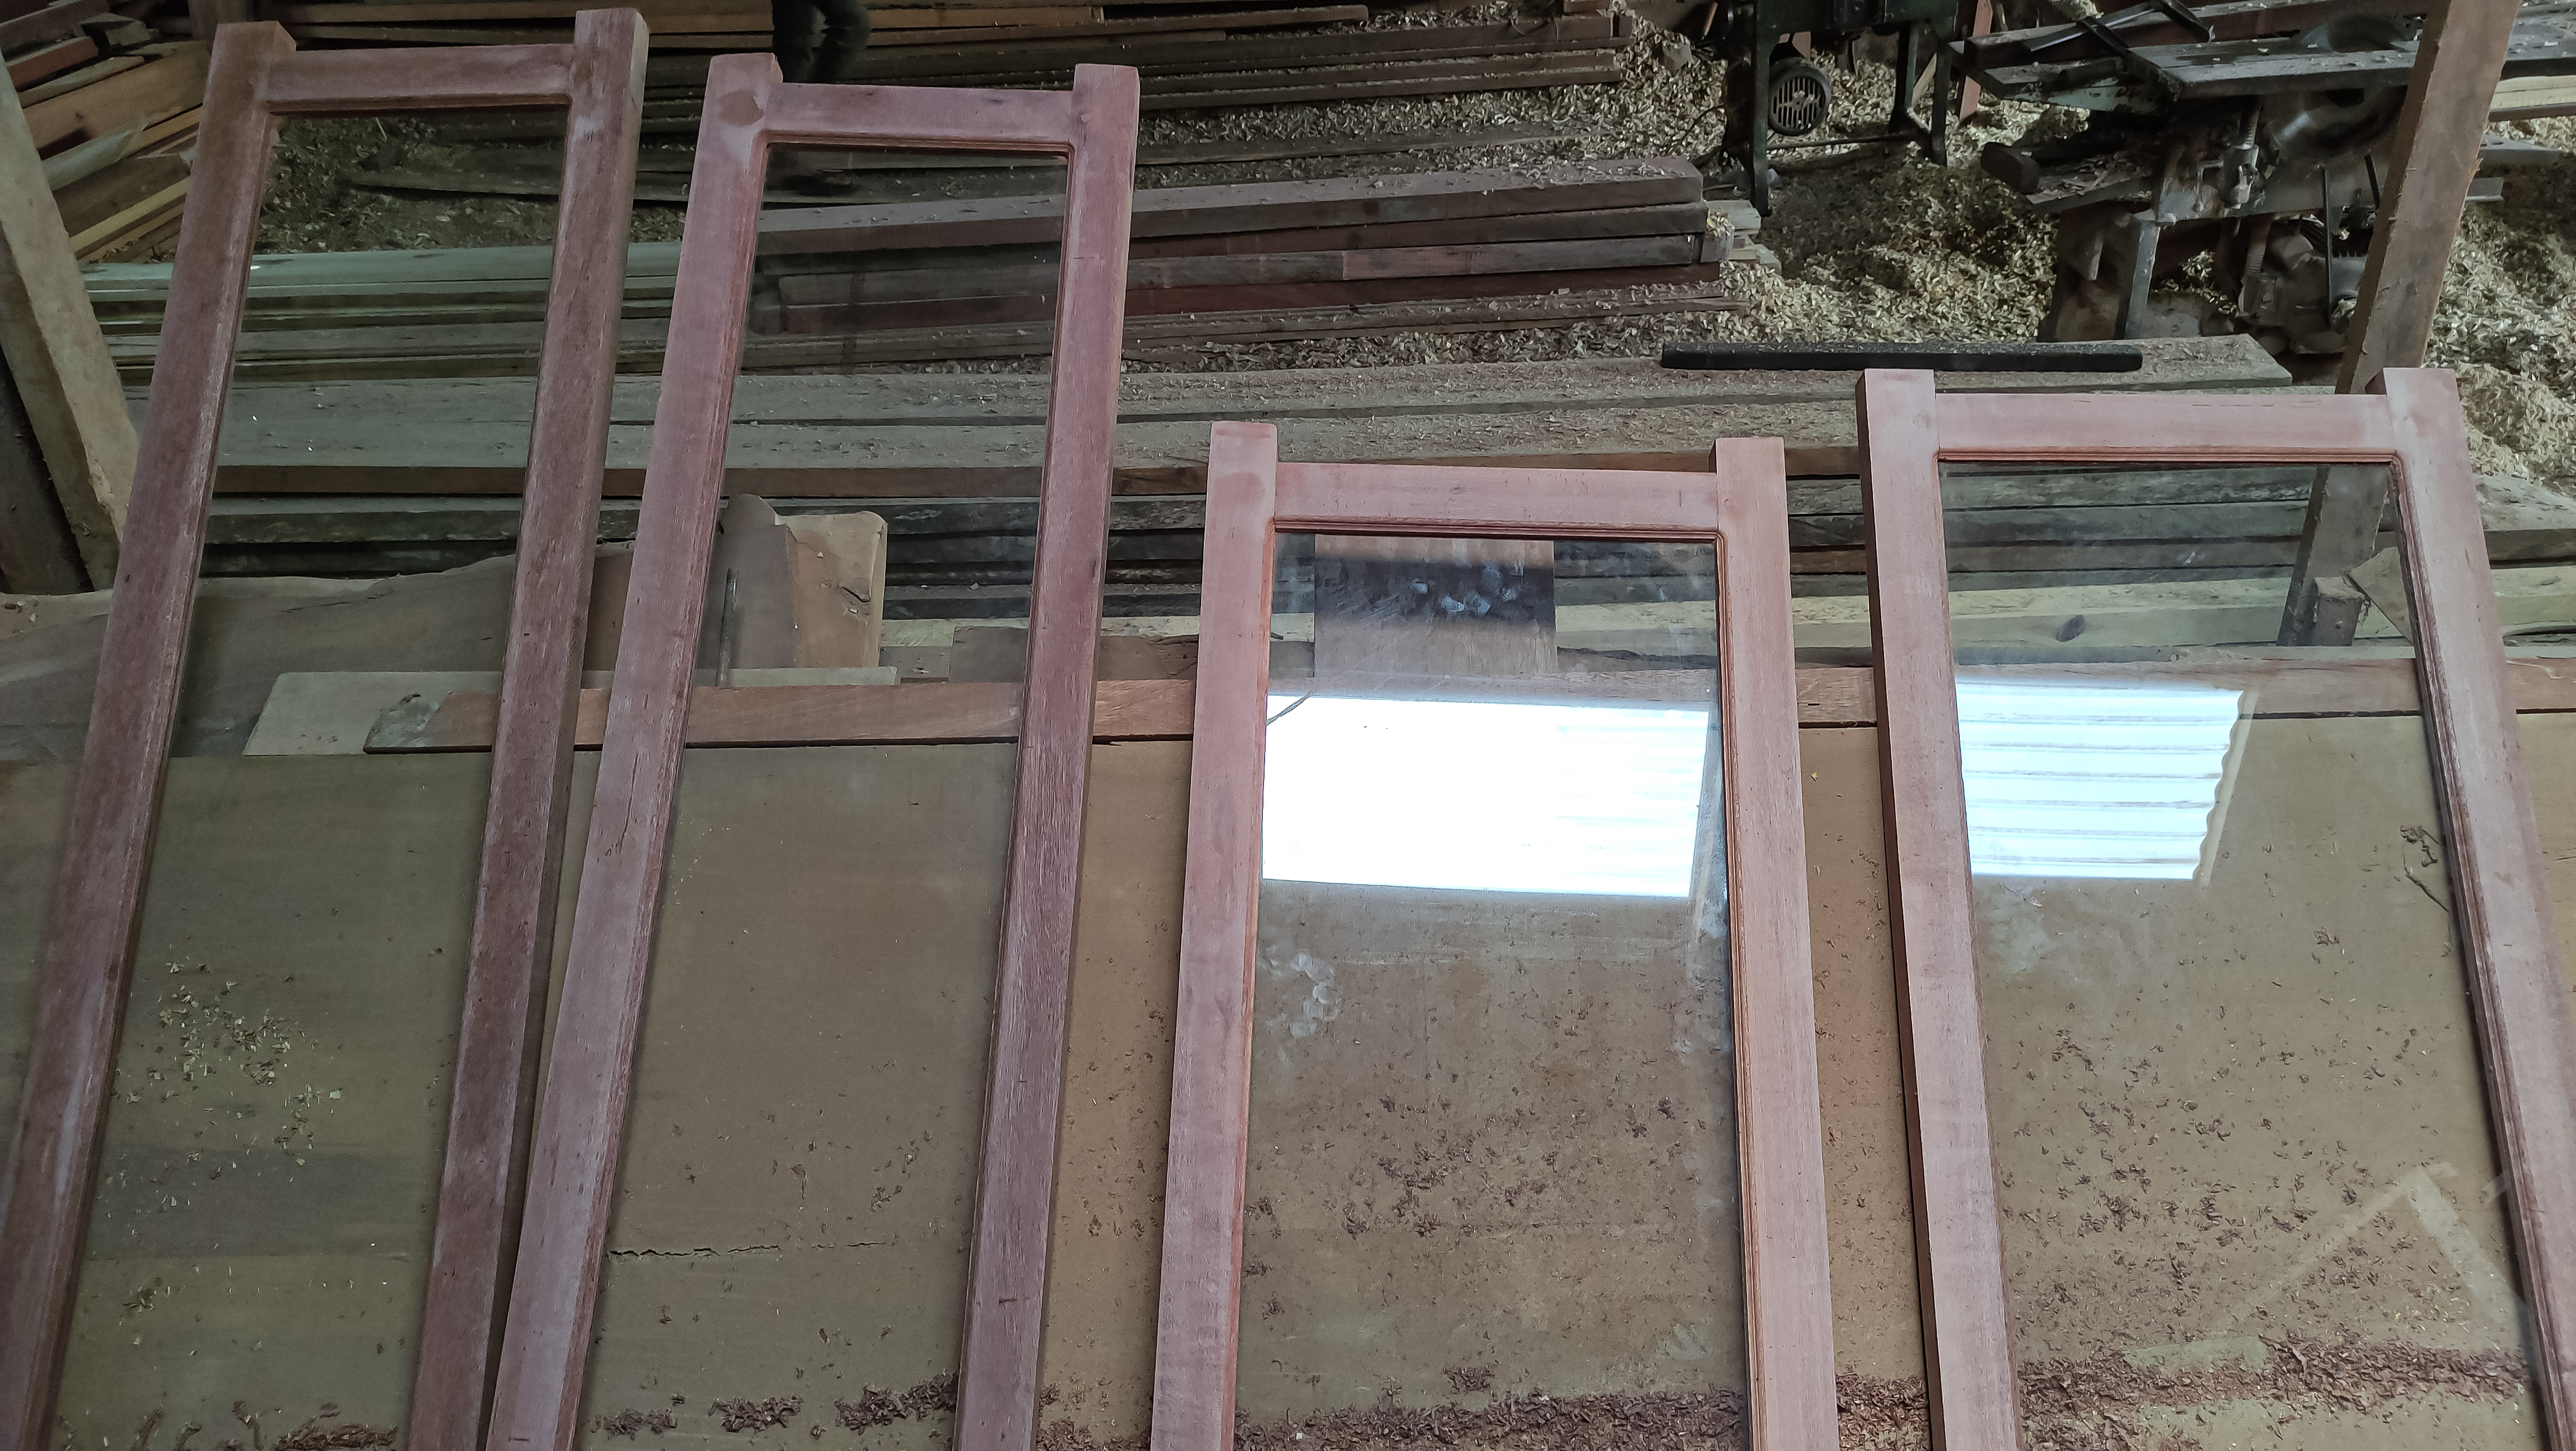
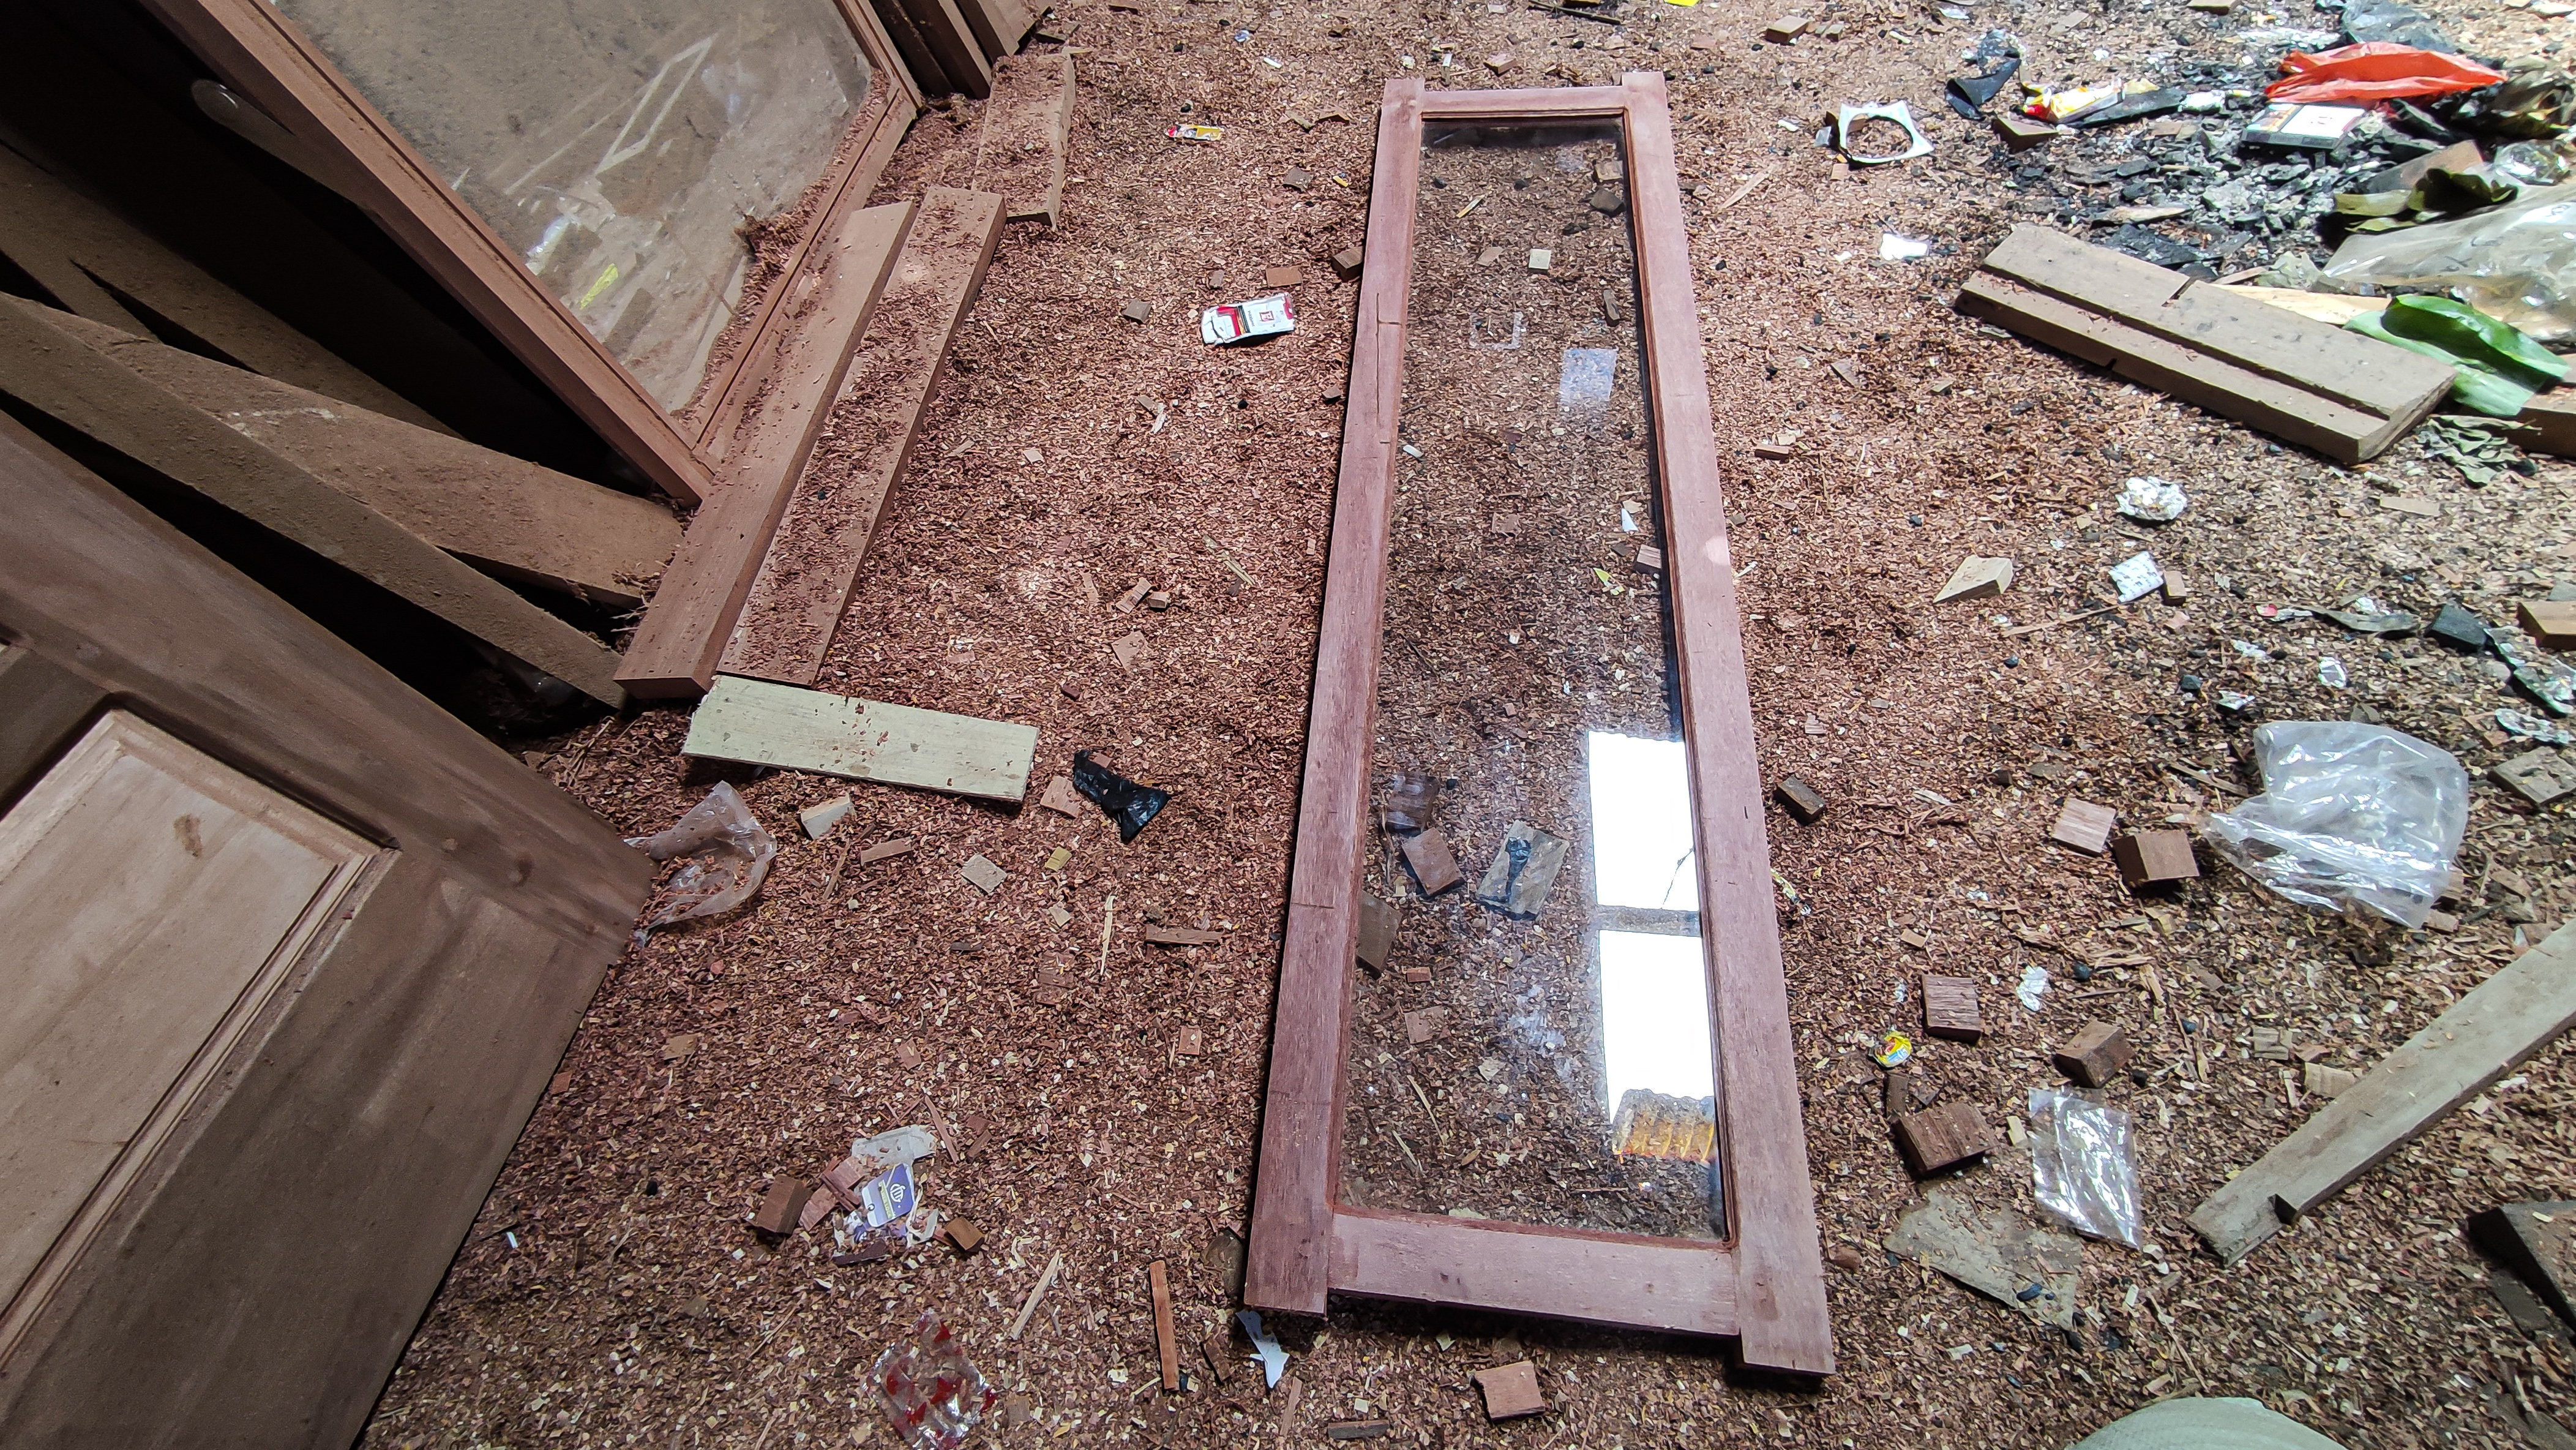
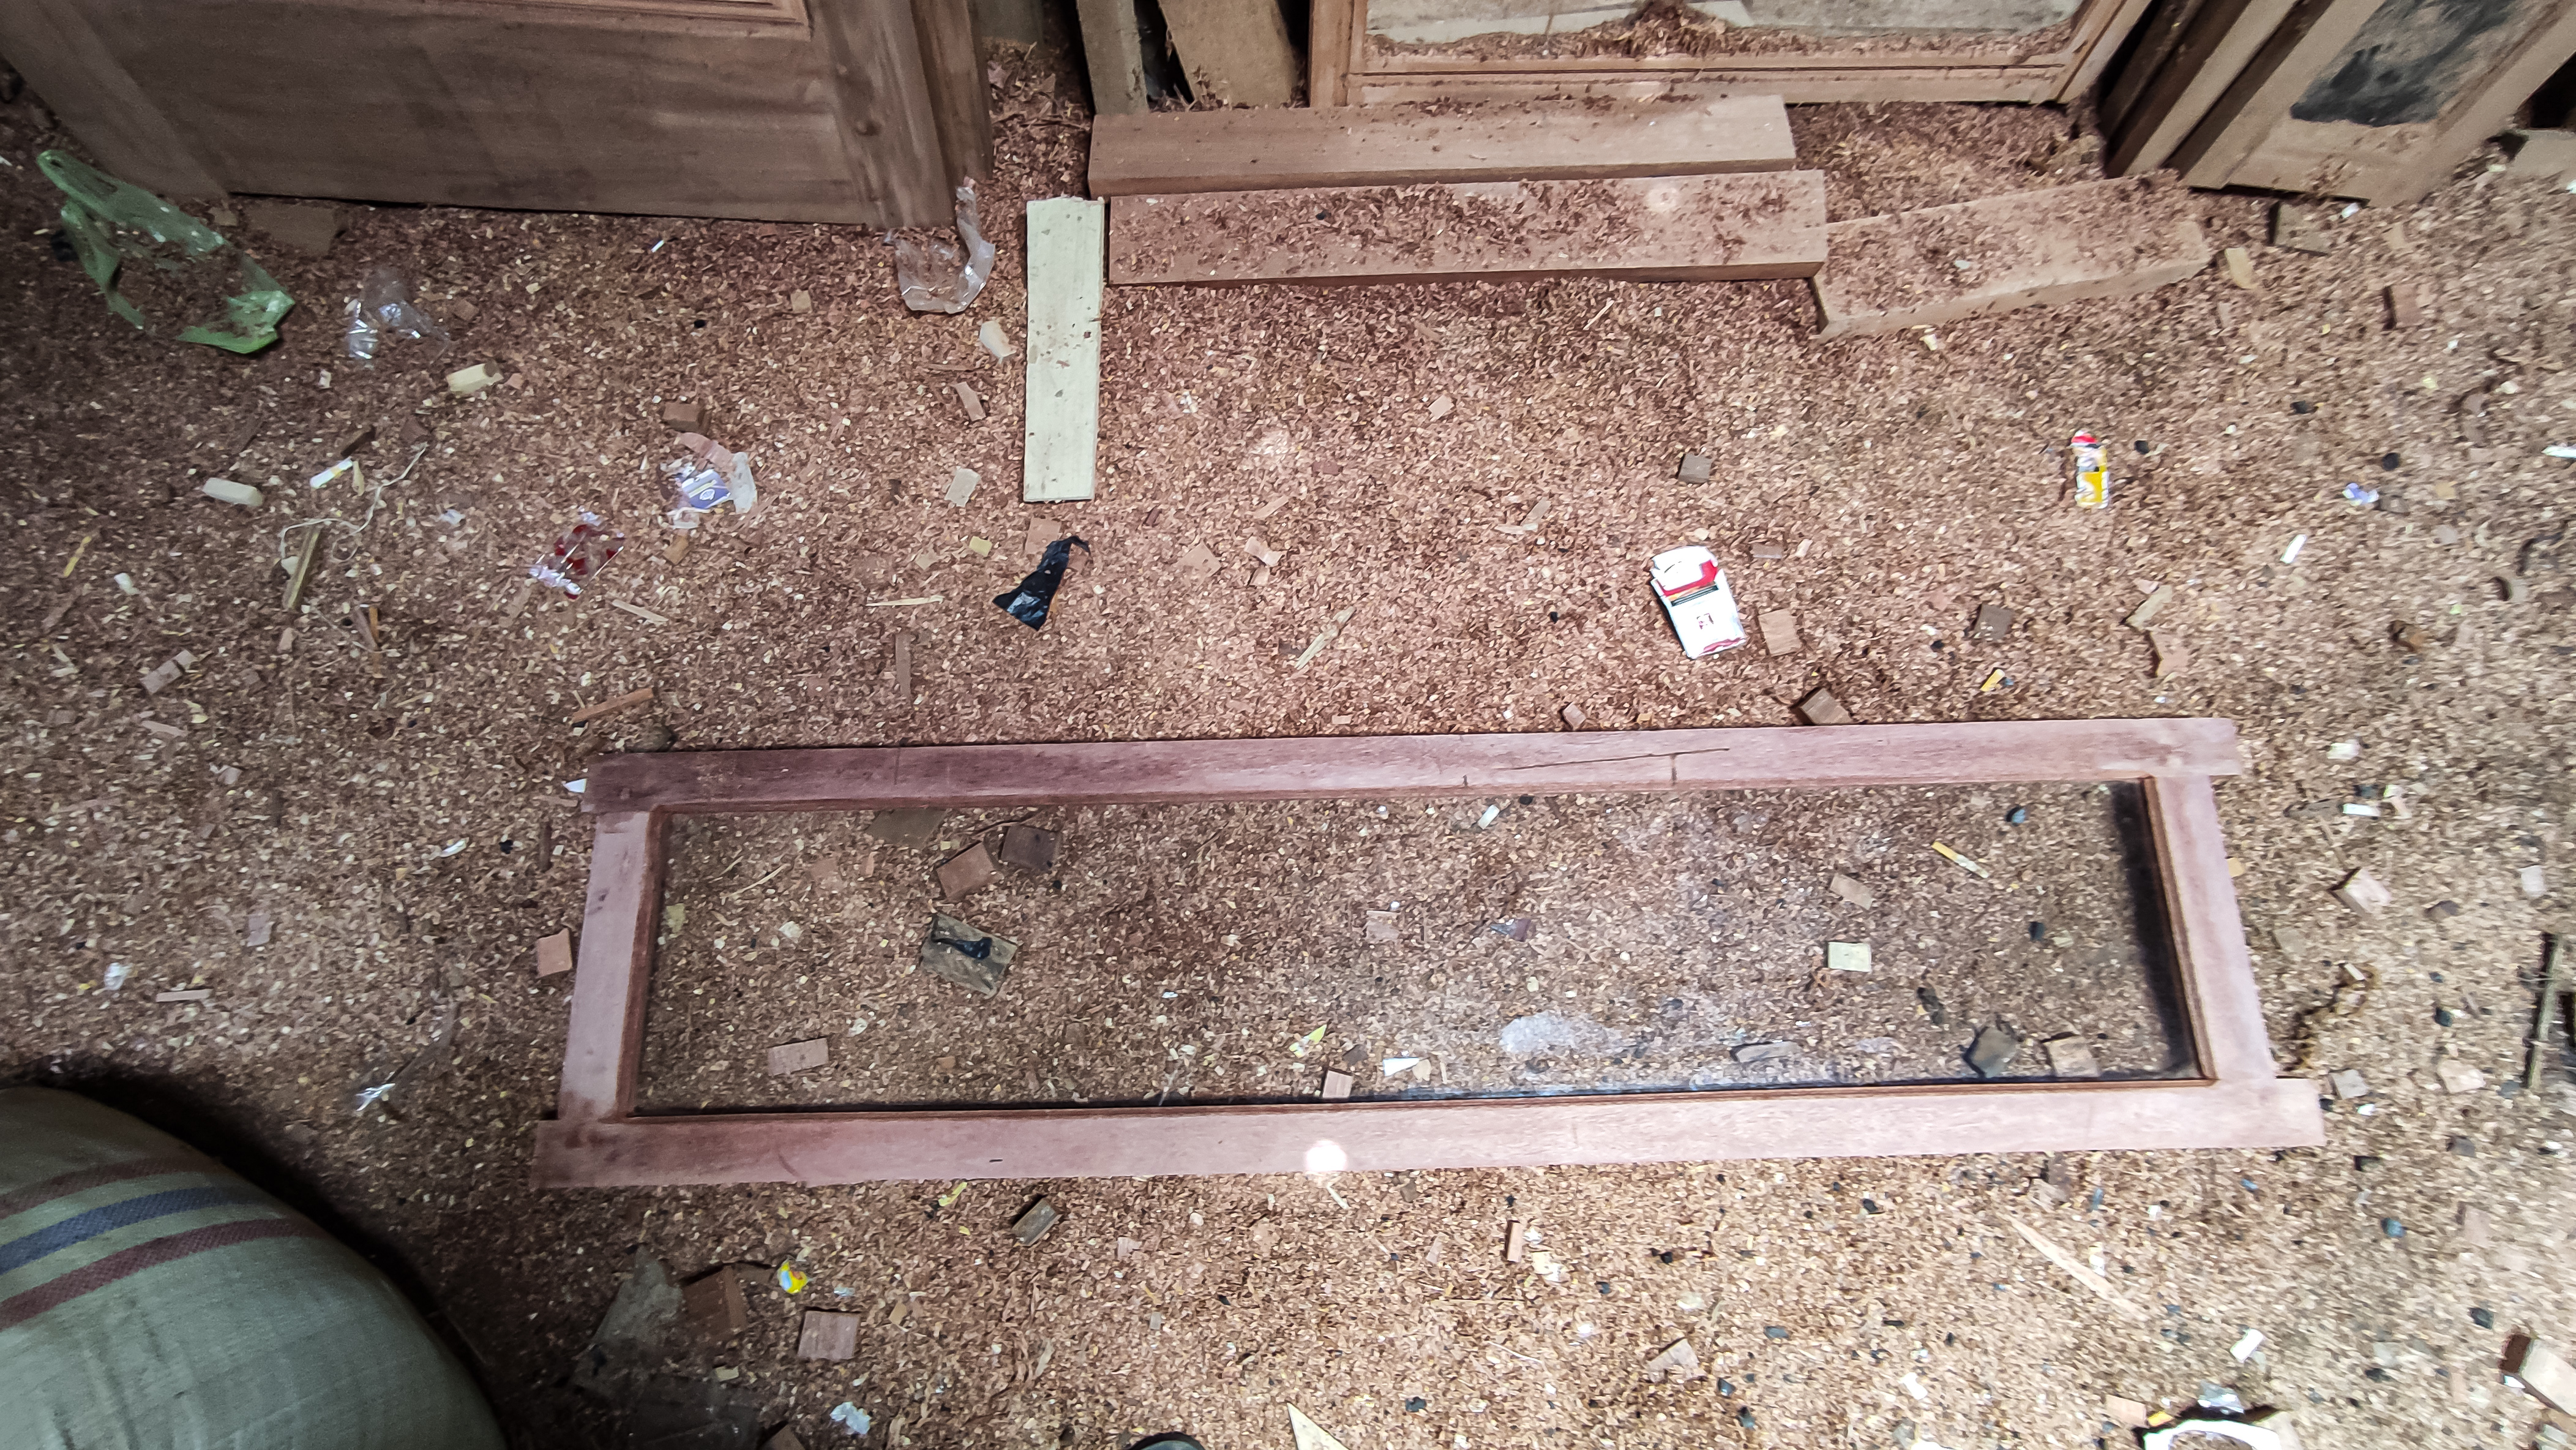
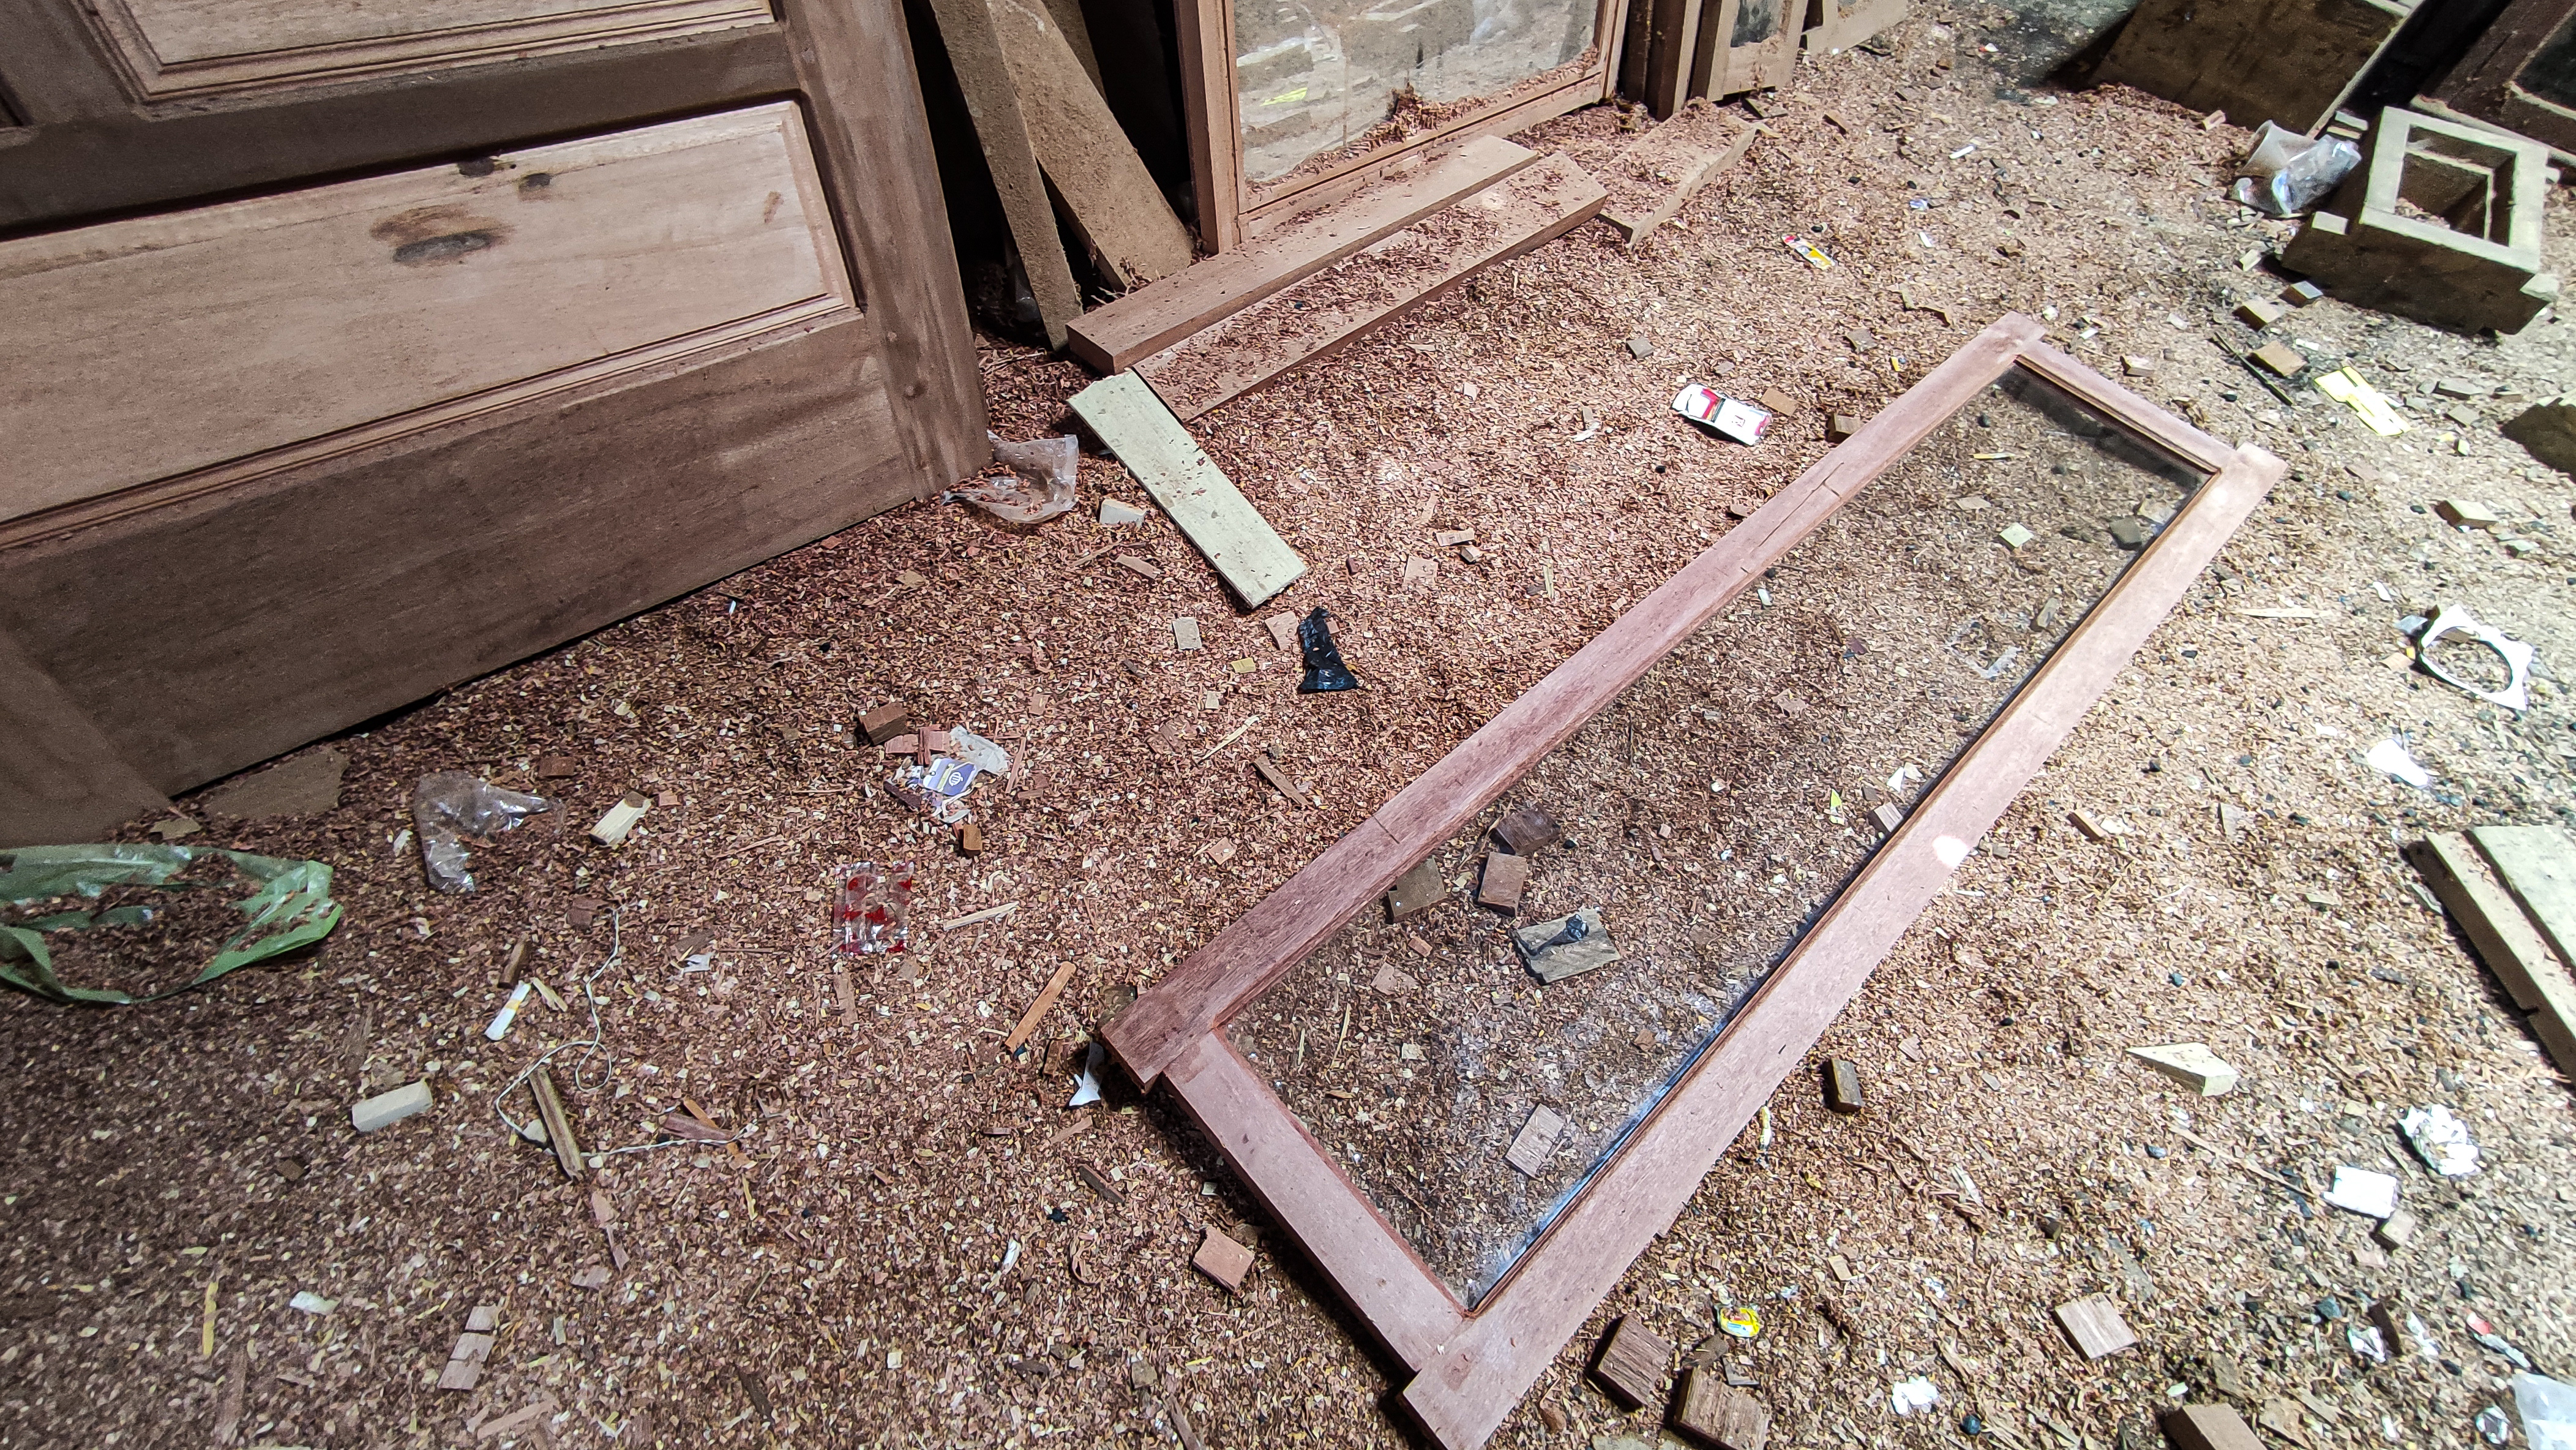
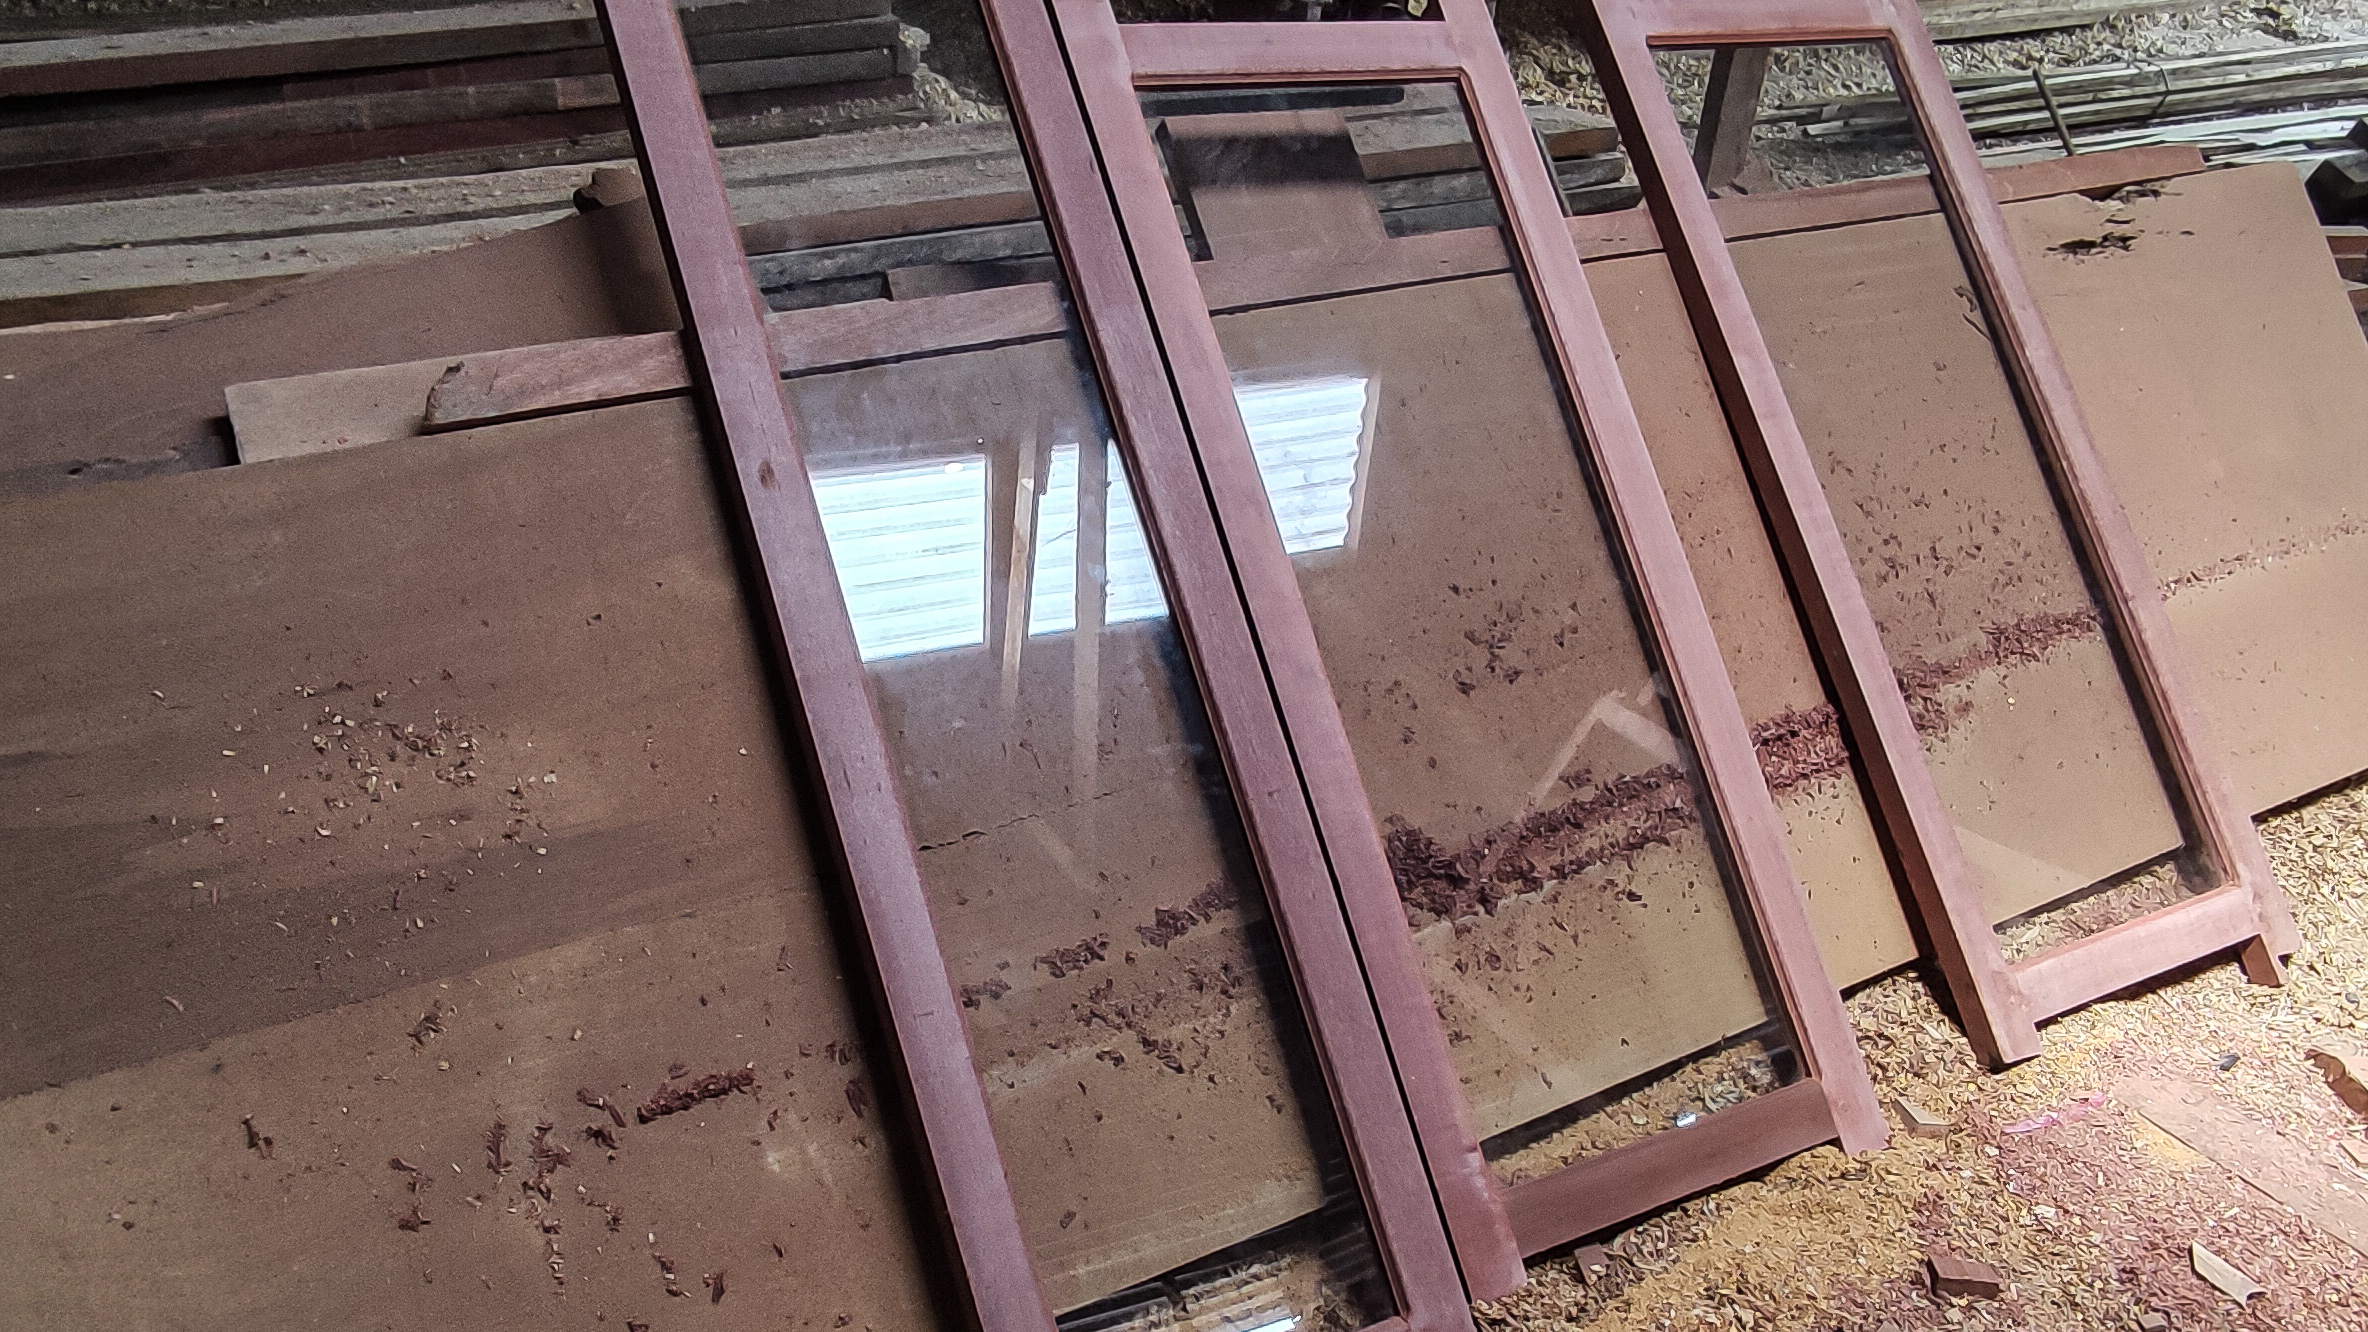
After the process was complete then I continued with the process of smoothing the front and back surfaces of the window using a sanding machine and after all the processes were complete, the order of two pairs of windows consisting of sizes 50cm x 120cm(2 units) and 40cm x 160cm(2units) was completed and here you can see the results of this simple minimalist window made of meranti wood and 5mm transparent white glass.


![]()

All of these pictures and videos were taken using a smartphone camera, if you want to enjoy my previous architectural design works, please visit the post link below.
1.Architectural design- simple cafe bar table
2.Architectural design - Wooden tray with natural wood color combination/utilization of wood waste
3.Architectural design - Flower vases / utilization of wood waste.
4.Architectural design-Simple architectural design of my baby crib basket.
5.Architectural design-Table simple the combination of natural wood colors and classic table tops
6.Architectural design- Shophouse frame jalousie
7.simple-minimalist-mini-wall-shelf-architectural-design-to-decorate-your-home-room
8.architectural-design-of-the-ventilation-jalousie
9.architectural-design-of-windows -desain-part 1.
10.Architectural-design-interior-desain-simple-makeup-mirror-frame.
![]()
The rewards earned on this comment will go directly to the person sharing the post on Twitter as long as they are registered with @poshtoken. Sign up at https://hiveposh.com.
Hi @deltasteem I like the people power for these windows, I am just now starting the adventure of making outdoor furniture.
Your designs inspire me even more
wow that's awesome and it's one hell of a job, isn't it? and this is a simple design of a house window and in my city many people like this window design because they are very simple and beautiful.
Greetings @deltasteem. Fantastic visuals of the fabrication process of window frames! Definitely meticulous work, that's why furniture specialists like you are required for this special job. Which one do you commonly use frequently? - drilling holes for wooden pegs or dowels to attach wooden frames together, or mortise and tenon joints for such purposes?
thanks @storiesoferne send back Regards, I often use both to make the circuit sturdier,
the first peg is a connection peg and the second peg is a locking peg (master peg nipple lock).,
Wow! Those interlocking pegs really do wonders for your window frameworks. And with the smart combination of those 2 techniques you've mentioned, the resulting assembly is a sure winner. Have an amazing week friend! 😊
thank you and with pleasure every week nyan I will be in the publication of the furniture designs that I work on and I will share the manufacturing process so that the furniture community can taste them easily ☺
Yes, we are always thrilled to experience your interesting publications on various furniture editions since you're one of our experts here. Keep up the excellent work! 😊
Good job as always. I learned a lot again on this blog of yours. And by the way, your hammer is the same as mine (^_^)
haha it means we are in the same sky 😁,
thank you for enjoying it happily in each episode I will show a different publication 😊
You're welcome (^_^)
Great project. The colour and warmth of the wood is beautiful.
It is also quite hard, I tried some wood carving on it a long time ago. A small statue… can’t remember where it went. To bad I don’t have photographs of it.
Have a wonderful day @deltasteem 😊
hehe thanks @littlebee4 we will learn better in every project I work on every day.
You are welcome @deltasteem 😊 yes we do 😁😎
Very nicely done! Great to see how you carefully show all the tools used and then step by step of the whole process from start to finish. Im not familiar with Meranti wood. I will need to learn about that.
in my area meranti wood is a hard wood with a brown texture with white fiber, maybe in your area you call the wood by another name, my freind :)
Congratulations @deltasteem! We're delighted to specially curate your awesome publication and award it BRONZE MARK in Architecture Brew #59. More power!
Thank you for subscribing to Architecture+Design, an OCD incubated community on the Hive blockchain.
Thank you @aplusd for your warm welcome and I will always be passionate about the architectural designs I work on with passion.
You're most welcome @deltasteem. We truly admire the passion you show with your furniture projects. Wish you the best always! 😀
yach of course and every time I am always here with you all and architectural furniture design is part of my daily work.
greetting @deltasteem from indonesia.