.jpg)

Español
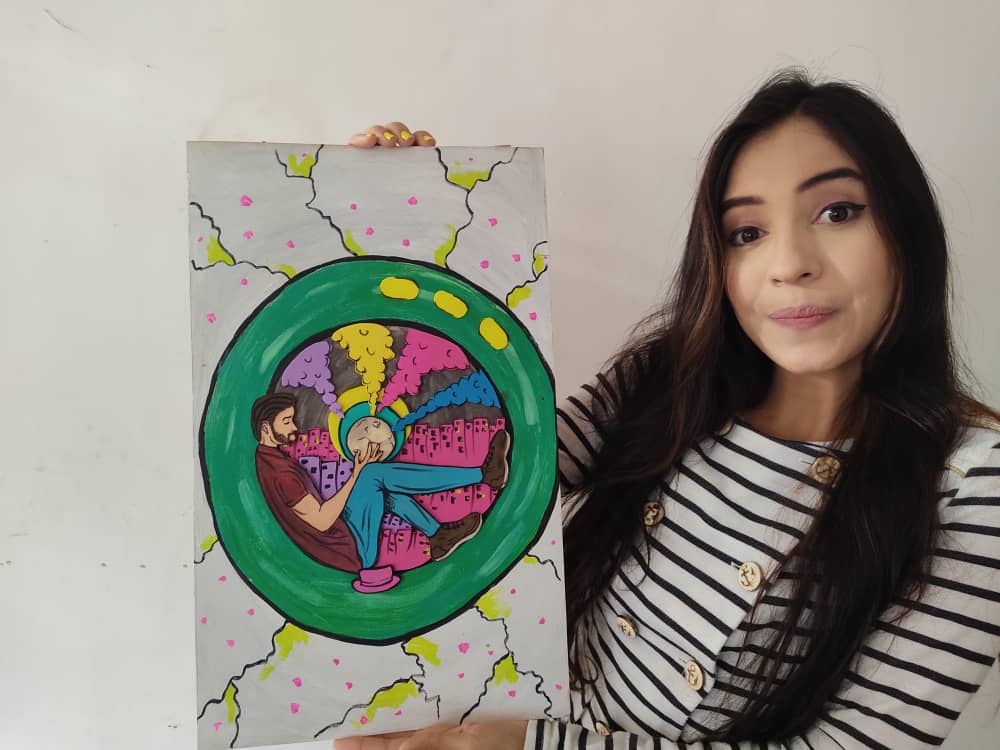
Hola querida familia❤️ En esta oportunidad les traigo un alegre y divertido paso a paso dónde les mostrare como elaborar un hermoso cuadro de un mago que está sentado en las afueras de su ciudad, manteniendo viva la magia de la luna, que da hermosos brillos a cada noche. Este hermoso cuadro está elaborado de materiales bastante económico y muy fáciles de obtener, así que, sigamos disfrutando de esta larga y productiva cuarentena, recuerden debemos mantener nuestros pensamientos positivos para atraer cosas positivas.
English
Hello dear family❤️ In this opportunity I bring you joyful and fun step by step where I will show you how to make a beautiful painting of a magician who is sitting on the outskirts of his city, keeping alive the magic of the moon, which gives a beautiful shine to each night. This beautiful painting is made of materials that are quite cheap and very easy to obtain, so, let's continue enjoying this long and productive quarantine, remember we must keep our thoughts positive to attract positive things.
¿Qué están esperando?
Gracias a esta técnica podemos crear nuestro propio cuadro de mago luna, además, una hermosa obra hecha en casa es una manera creativa y muy económica de darle un toque de alegría a nuestro entorno. Antes de comenzar no olvidemos lavarnos nuestras manos.
What are they waiting for?
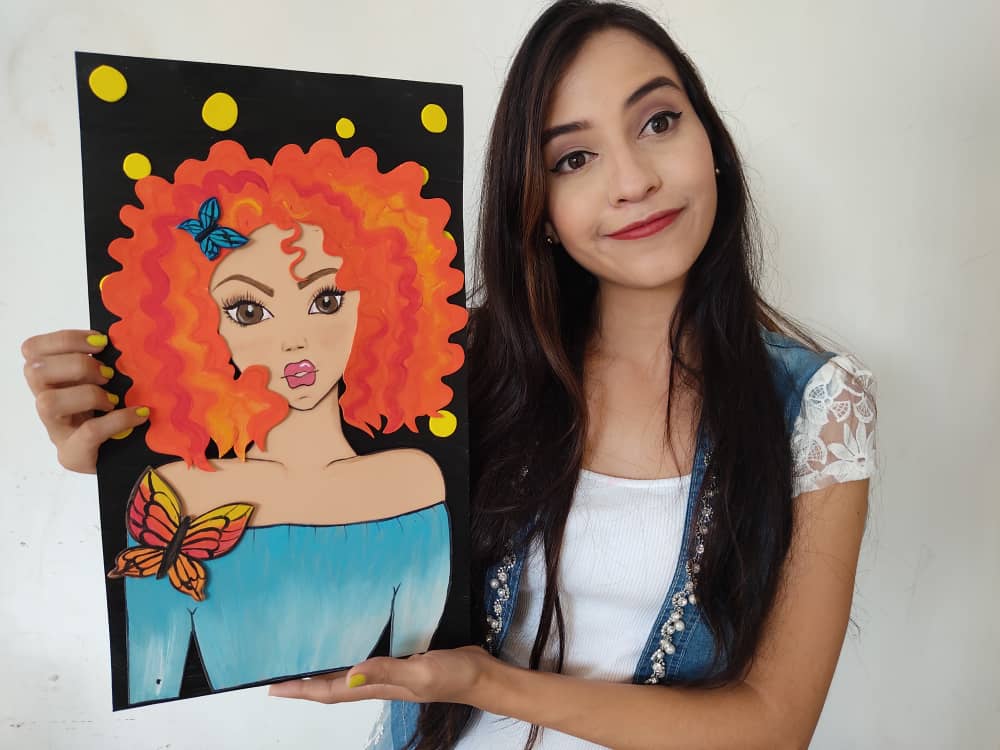
Thanks to this technique we can create our own painting of a curly-haired girl, in addition, beautiful homemade work is a creative and very cheap way to give a touch of joy to our surroundings. Before we start, let's not forget to wash our hands.
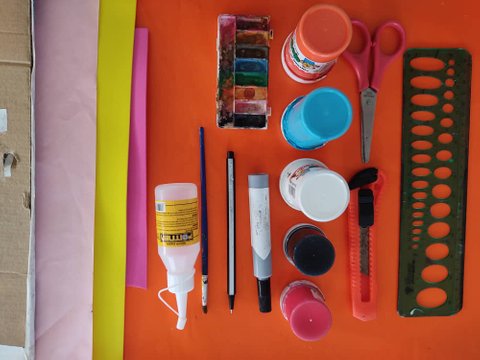
[Materiales | Materials]
Para hacer este hermoso mago necesitaremos:
- Moldes.
- Foami o goma eva.
- Papel vegetal o calco.
- Lamina de cartón.
- Regla.
- Lápiz.
- Marcador.
- Tijera.
- Cúter.
- Pincel o brocha.
- Pinturas.
- Silicón liquido o pegamento.
To make this beautiful Magician we will need:
- Molds.
- Foamy or EVA foam.
- Vegetable paper or tracing.
- Cardboard sheet.
- Rule.
- Pencil.
- Bookmark.
- Scissors.
- Cutter.
- Brush or brush.
- Paintings.
- Liquid silicone or glue.
Procedimiento (paso a paso)
Process (step by step)
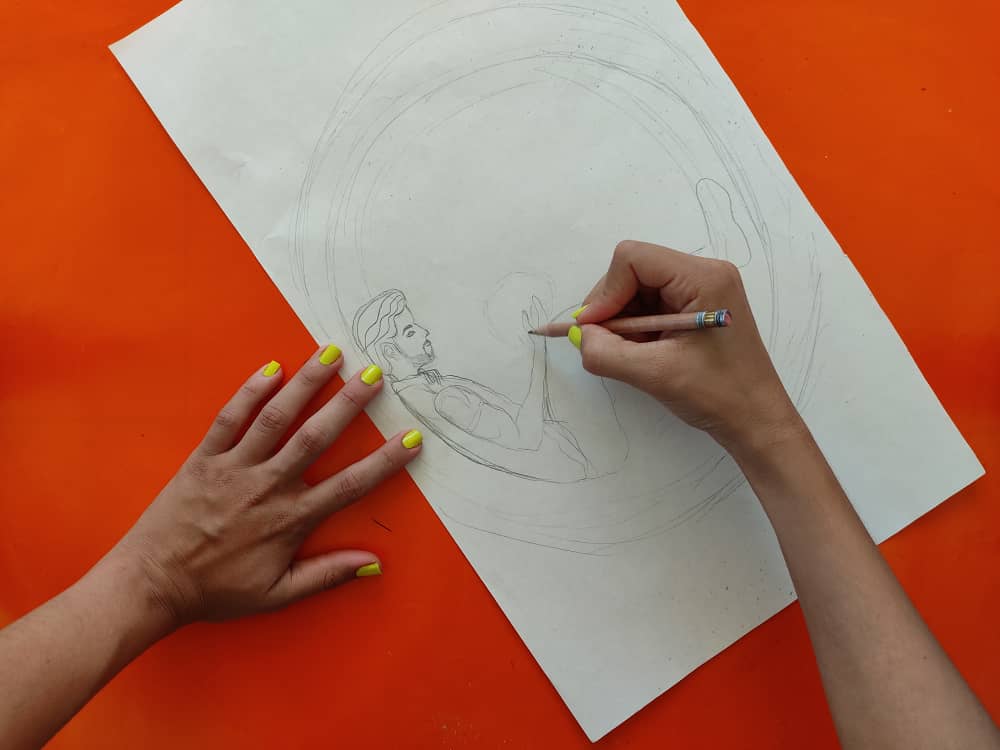
Primero, dibujamos un mago en una especie de túnel, con la luna entre sus manos para mantener todas las noches de su ciudad llenas de brillo y magia.

First, we draw a magician in a kind of tunnel, with the moon in his hands to keep all the nights of his city full of brightness and magic.
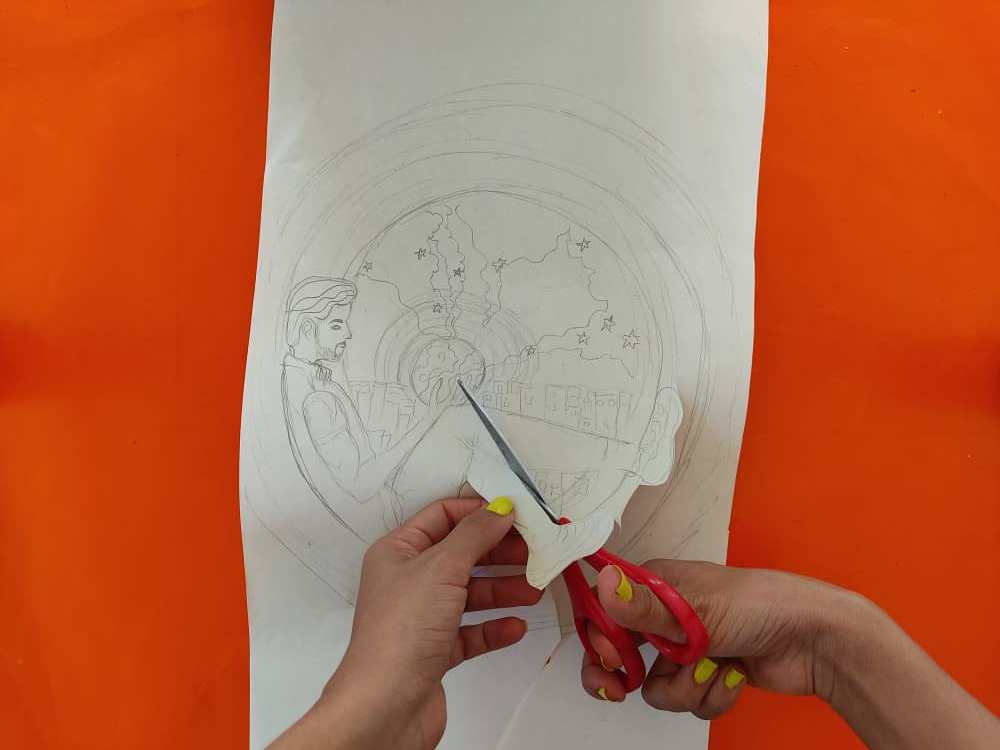
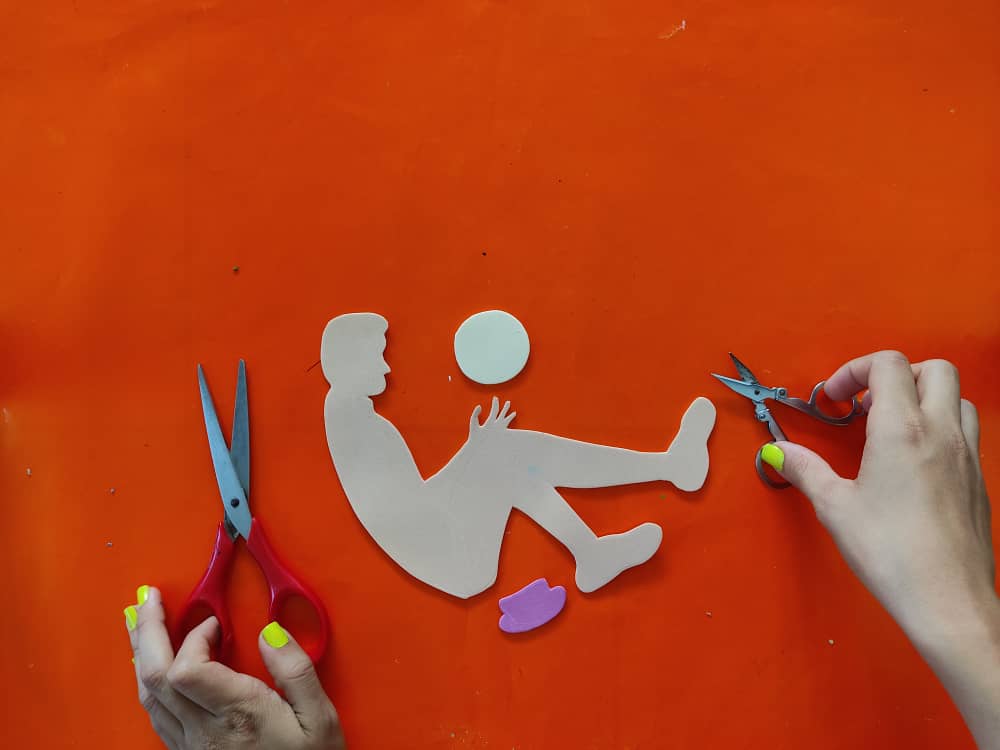
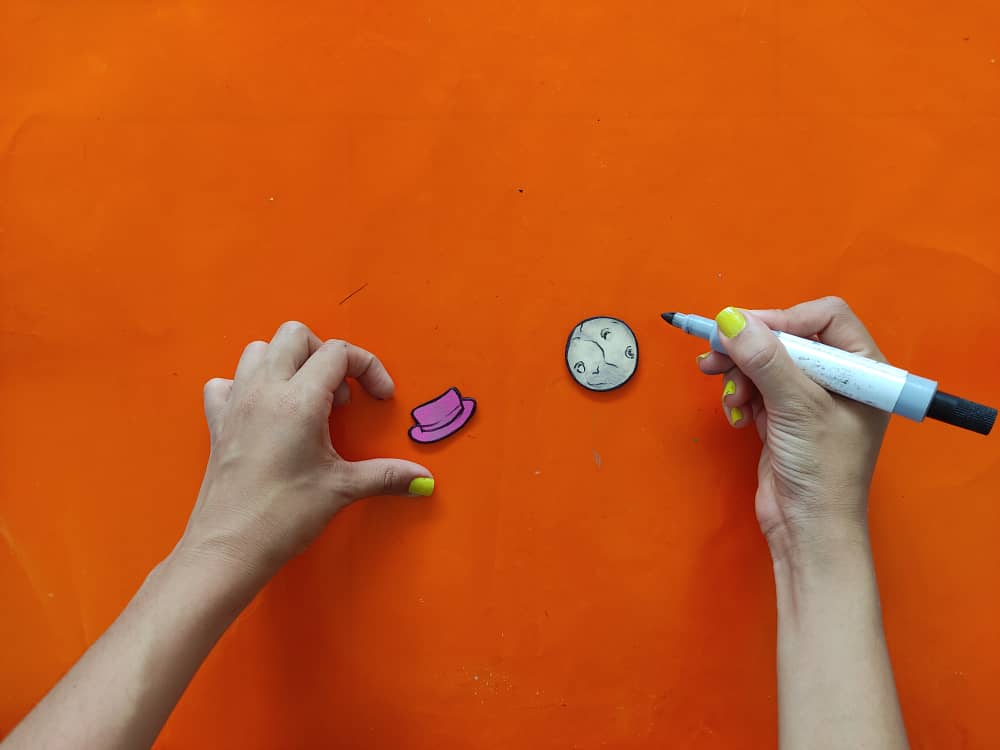
Seguidamente, recortamos separando este solitario mago y a su sombrero del túnel. Y listo, recuerden recortar con mucho cuidado para mantener intactas las medidas de nuestra obra.

Next, we cut out separating this lonely wizard and his hat from the tunnel. And voila, remember to cut very carefully to keep the measurements of our work intact.
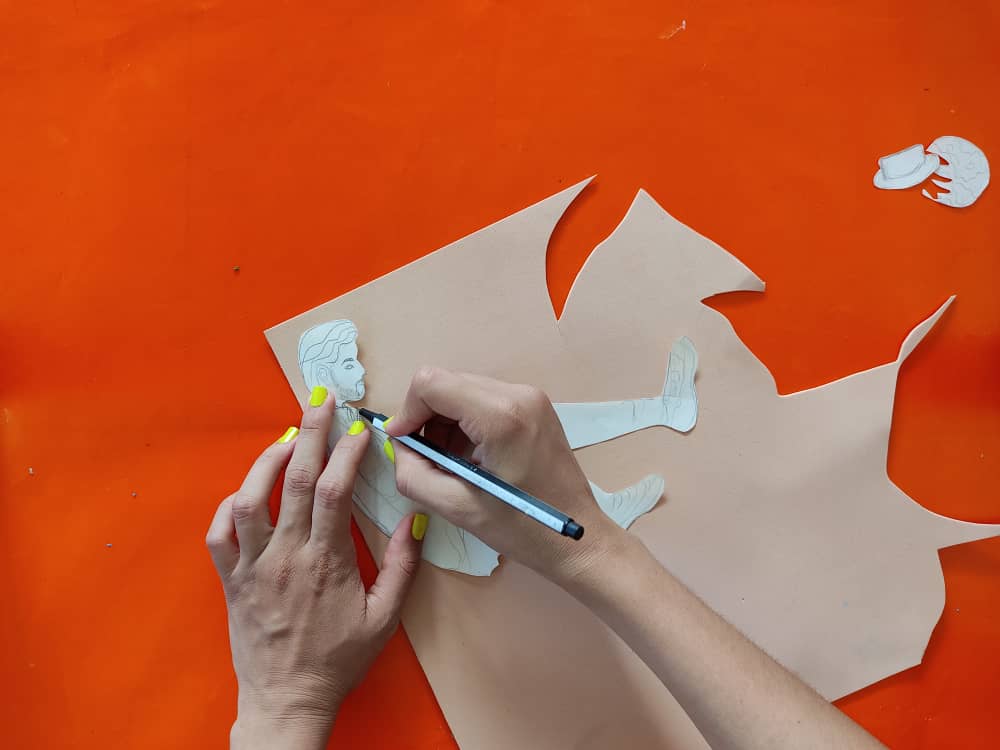
Una vez obtenido el molde del mago, lo transferimos cuidadosamente al foami, en este caso decidí elaborar la figura en un solo trozo, ya que es algo pequeña.
Once the magician's mold was obtained, we carefully transferred it to the foamy, in this case, I decided to make the figure in a single piece, since it is somewhat small.
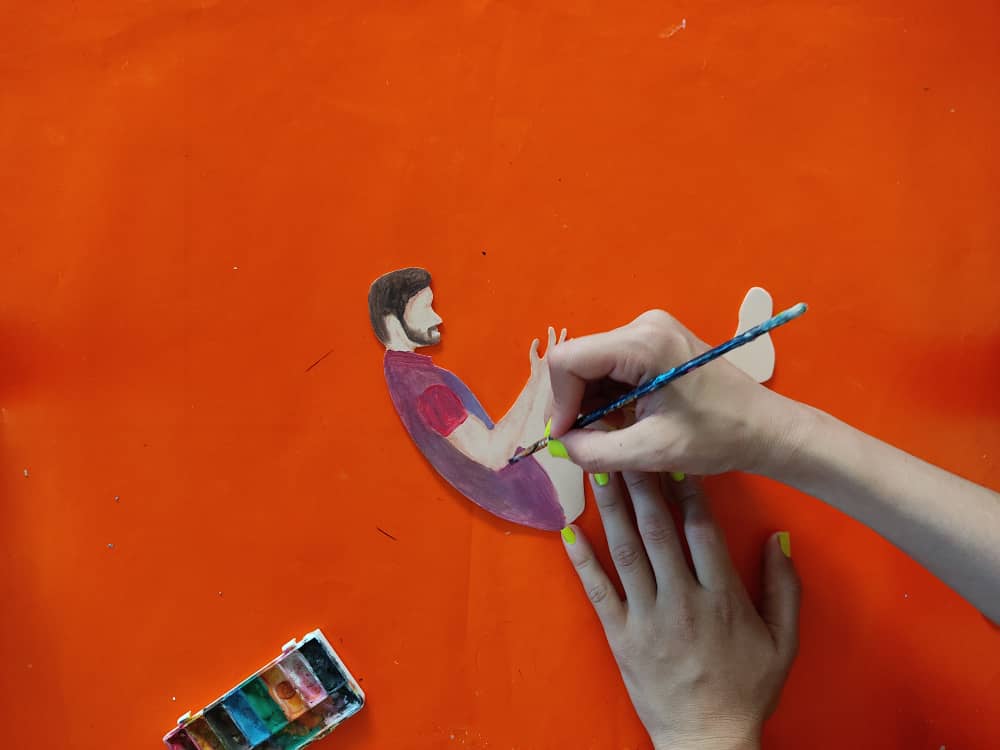
Ahora, pintamos al chico, definiendo su cabello, ropa, barba, y zapatos, en este caso opte por pintar su cabello de color castaño al igual que su barba, y su camisa en tonos morados. Seguidamente, marcamos todos los bordes y los detalles faltantes con el marcador de punta fina, y definimos delicadamente los rasgos de su cara, como lo son; las cejas, y ojos, entre otros.
Now, we paint the boy, defining his hair, clothes, beard, and shoes, in this case, he chose to paint his hair brown as well as his beard, and his shirt in purple tones. Next, we mark all the missing edges and details with the fine point marker, and delicately define the features of his face, as they are; eyebrows, and eyes, among others.
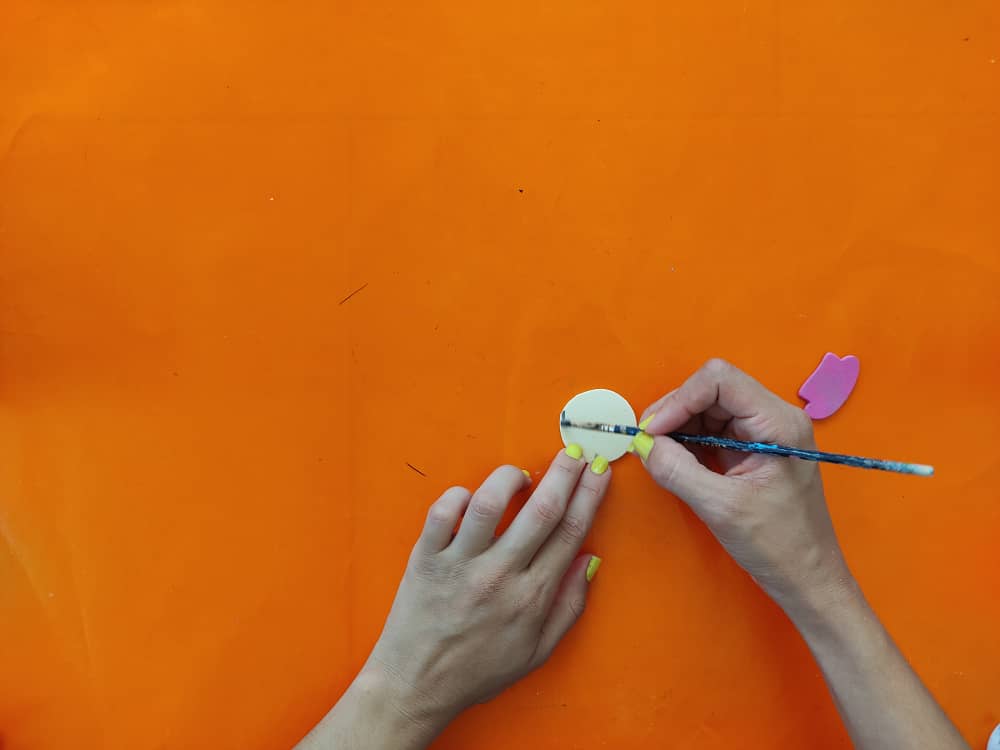
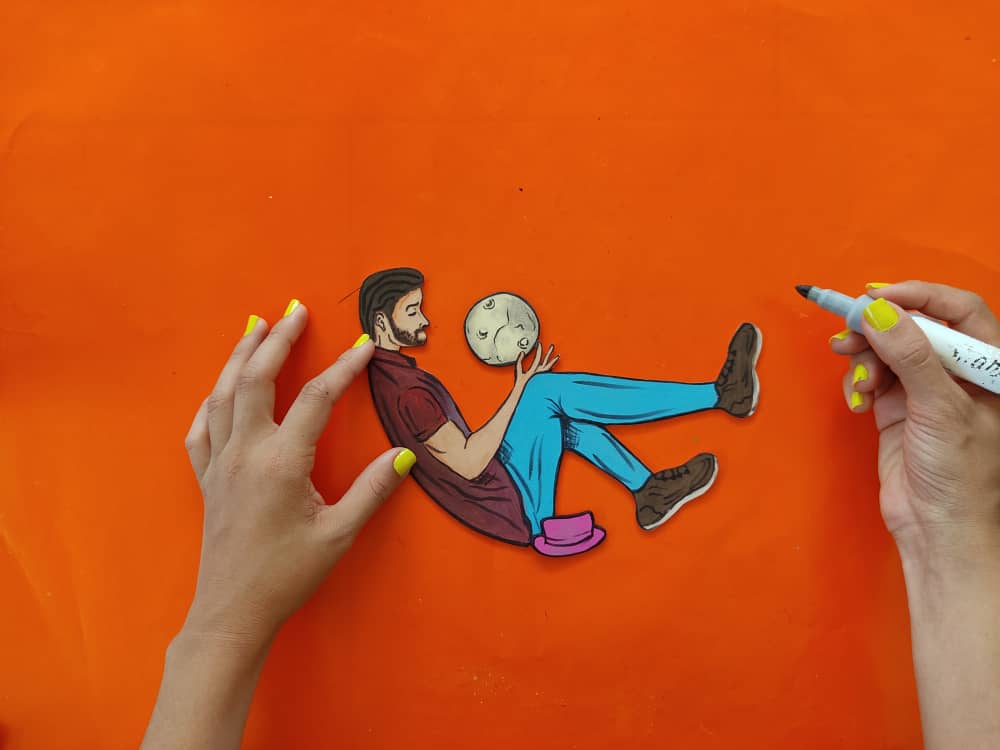
Luego, pintamos la pequeña luna y sombreados un poco el sombrero, para después, definir y marcar los bordes de la luna y del sombrero, y darle el toque de profundidad que nunca debe faltarle a nuestras piezas.
Then, we paint the little moon and shading the hat a bit, to later define and mark the edges of the moon and the hat, and give our pieces a touch of depth that should never be lacking.

Ahora, para completar nuestra linda y mágica obra elaboramos algunos círculos, nubes y un rectángulo, en pequeños trozos de foami para que simule unos edificios, y así, decorar el fondo de nuestro cuadro, ya que desde el túnel nuestro mago observará los edificios de una ciudad llena de luces, sin olvidar marcar los bordes de estas figuras pequeñas pero indispensables. Sin olvidar definirlos con ayudar del marcador.

Now, to complete our beautiful and magical work, we make some circles, clouds, and a rectangle, in small pieces of foam to simulate buildings, and thus, decorate the background of our painting, since from the tunnel our magician will observe the buildings of a city full of lights, without forgetting to mark the edges of these small but indispensable figures. Without forgetting to define them with the help of the marker.
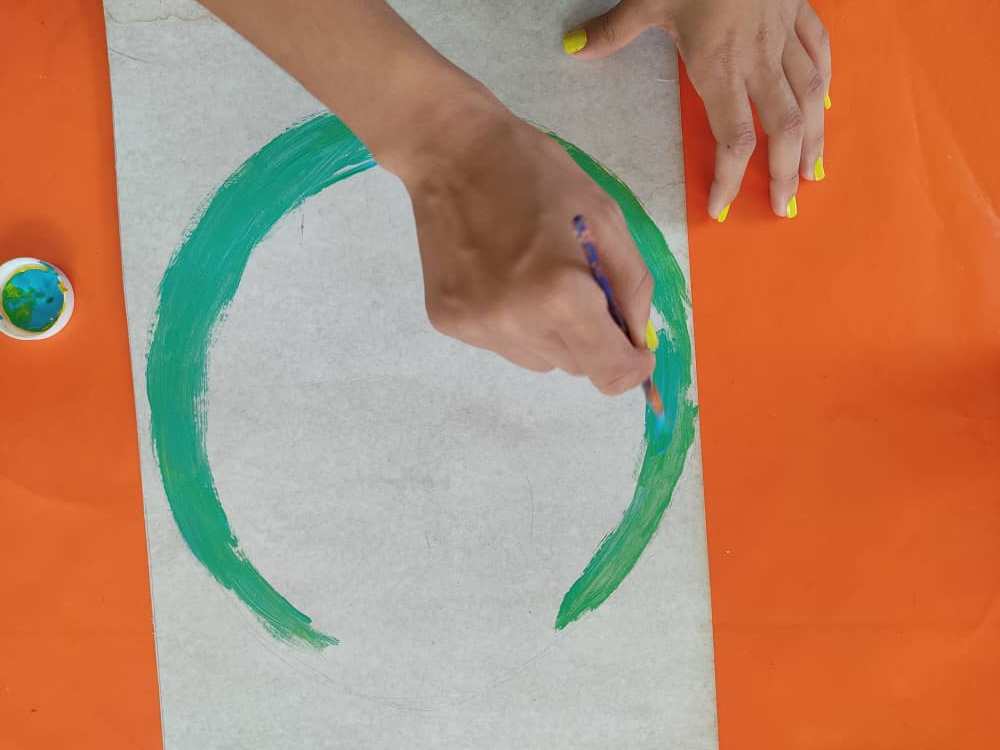
Luego, elaboramos una base de cartón de aproximadamente 50cm de largo por 20cm de ancho, y la pintamos a nuestro gusto, en este caso decidí pintar una especia de túnel parecido a un circulo imperfecto dónde se esconderá este lindo mago, y a su alrededor una especie de rayos de luz.
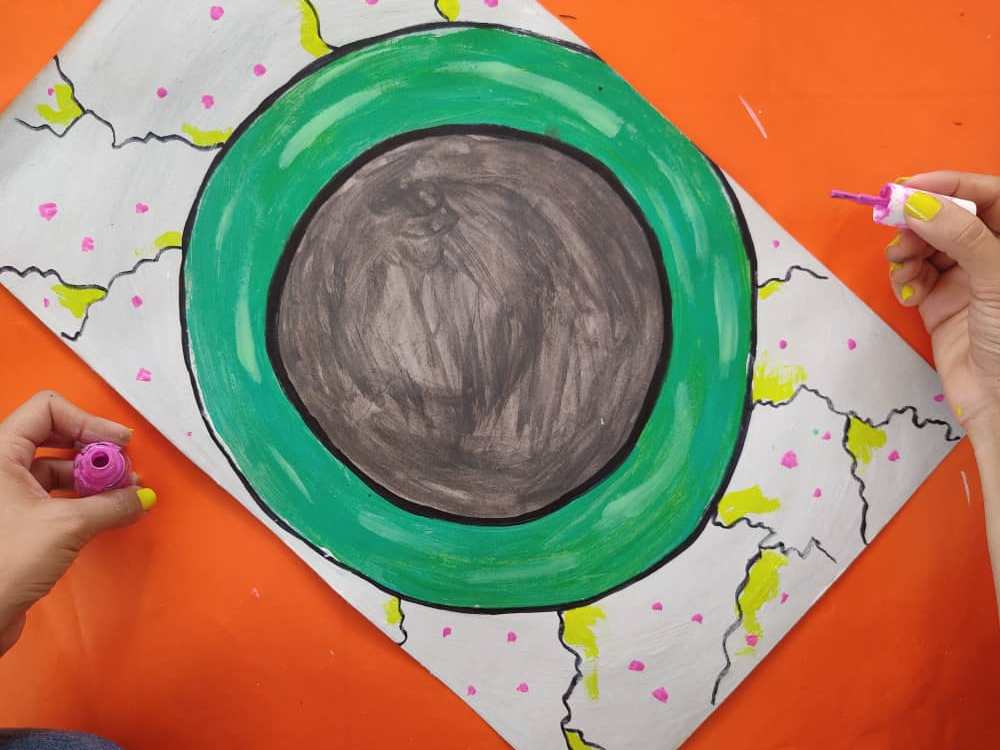
Then, we made a cardboard base of approximately 50cm long by 20cm wide, and we painted it to our liking, in this case, I decided to paint a kind of tunnel similar to an imperfect circle where this cute magician will hide, and around him a species rays of light.
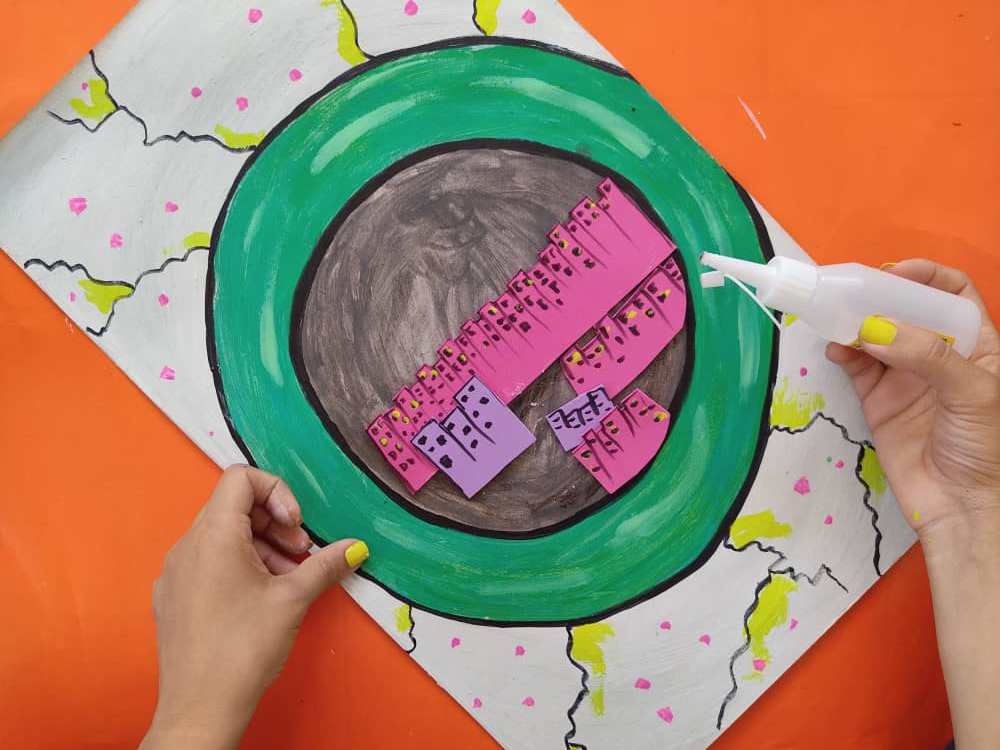
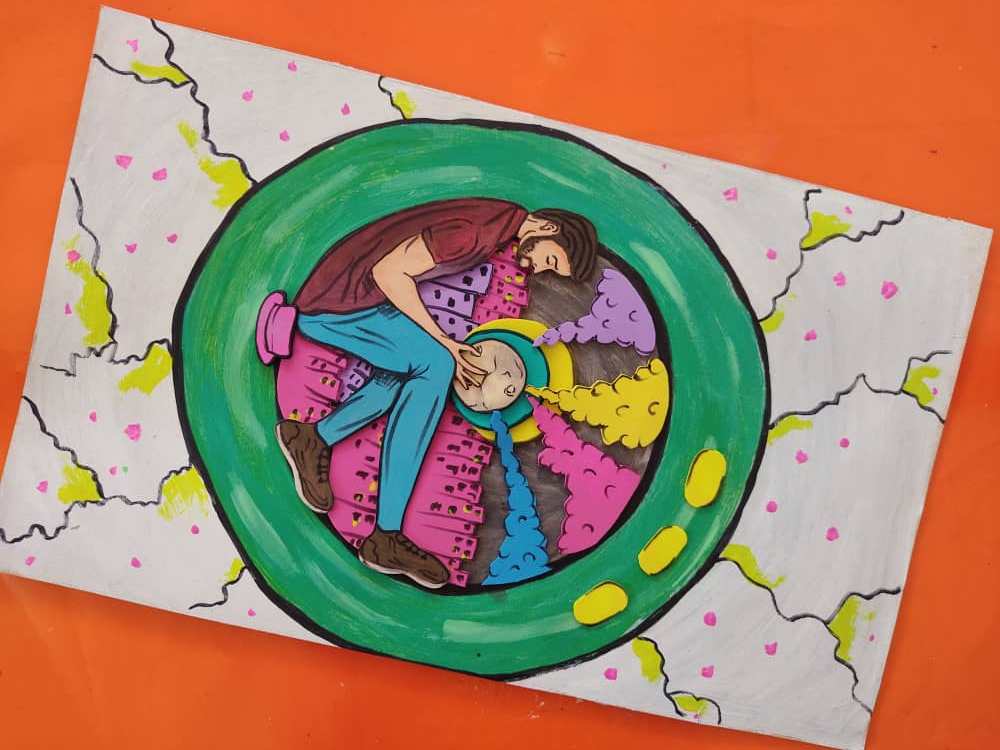
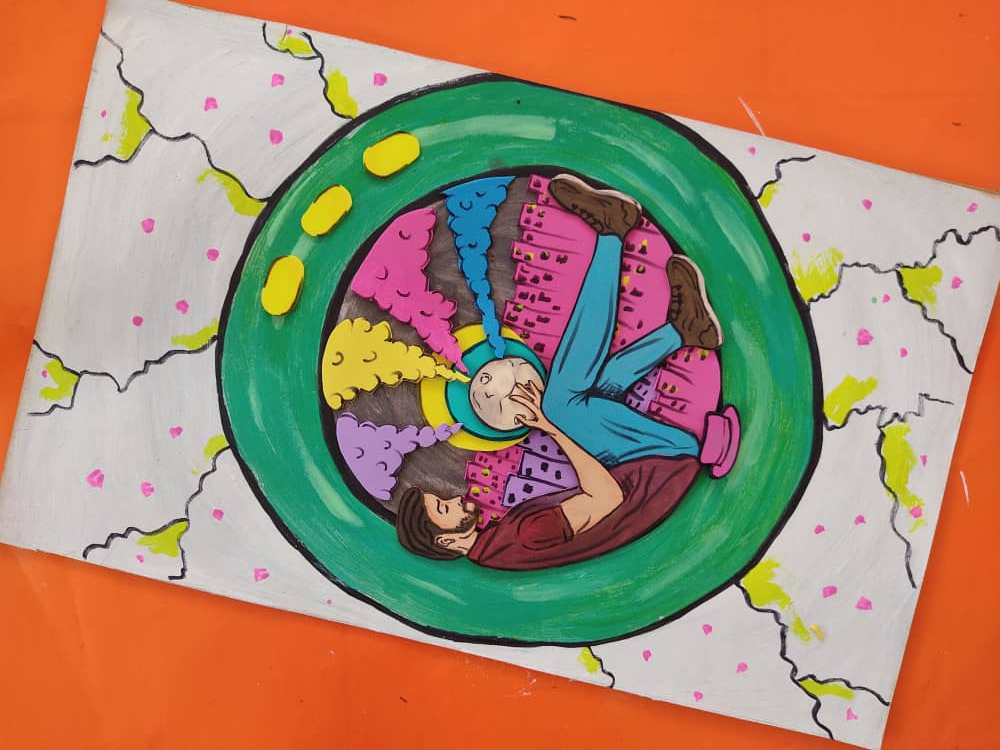
Una vez que esté totalmente seca nuestra base, armamos y pegamos cada pieza de nuestra obra, comenzando por los edificios, los cuales irán a la mitad del circulo y unos un poco más abajo. Seguidamente pegamos al mago, y la luna en sus manos, de la cual saldrán hermosas nubes de humo de colores, que harán brillar esta linda cuidad, y su sombrero.
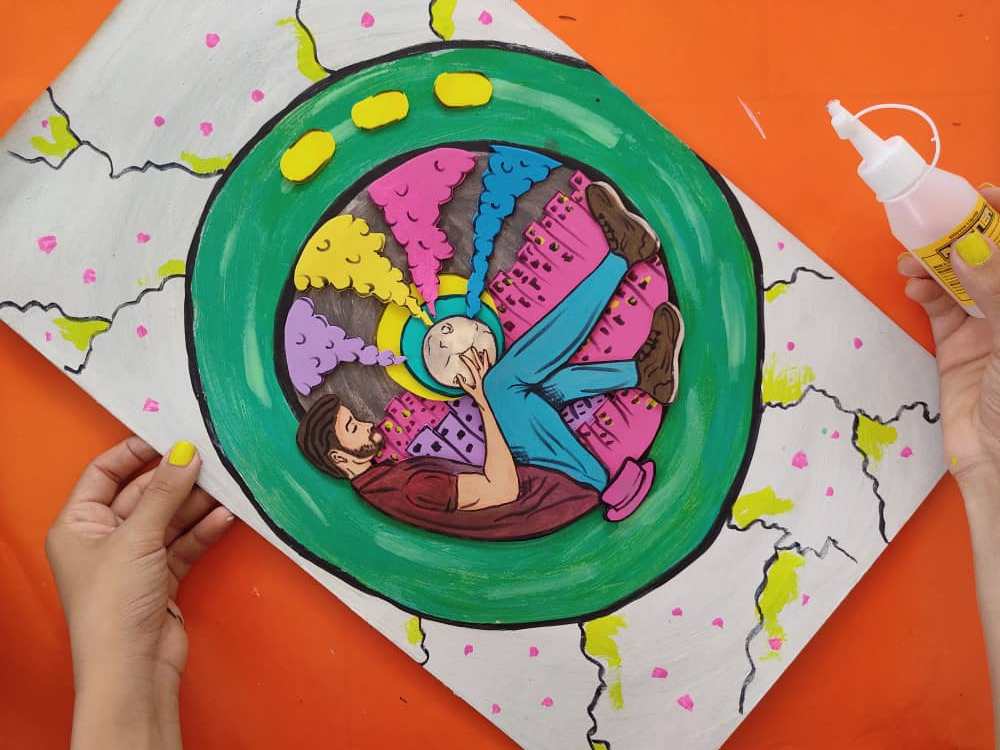
Once our base is completely dry, we assemble and glue each piece of our work, starting with the buildings, which will go to the middle of the circle and a little lower. Then we hit the magician, and the moon in his hands, from which beautiful clouds of colored smoke will come out, which will make this beautiful city shine, and his hat.
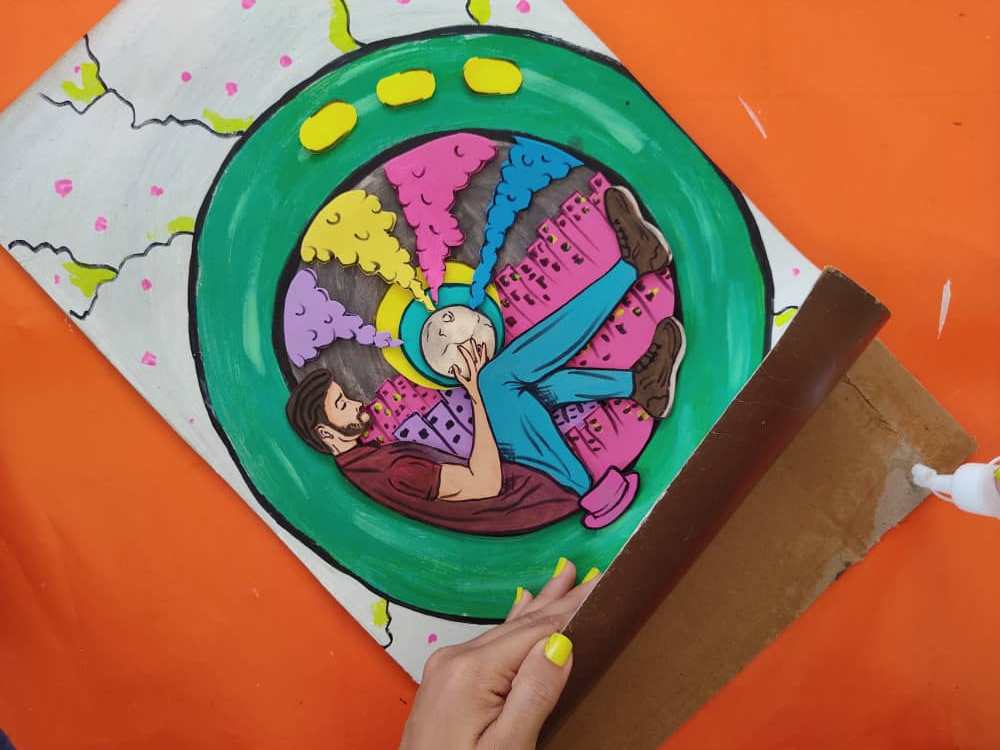
Finalmente, pegamos nuestra base sobre una lámina de cartón un poco más grueso y firme para que nuestro cuadro sea mucho más fuerte y resistente.
Finally, we glue our base on a cardboard sheet a little thicker and firmer so that our painting is much stronger and more resistant.
Gracias por acompañarme y espero que lo hayan disfrutado. ❤️
Thanks for joining and I hope you enjoyed it.❤️
.jpg)
.jpg)
.jpg)
.jpg)
.jpg)
.jpg)
.jpg)
.jpg)
Clic para ver trabajos anteriores | Click to see previous works


me encanto te quedo hermoso
Gracias amigo!
Congratulations, your post has been upvoted by @dsc-r2cornell, which is the curating account for @R2cornell's Discord Community.
Wow it is so large, thought it would be smaller, nice!
waooo excelente trabajo... Gran artista, mucho talento, me encanto ver tu trabajo