.jpeg)

Español
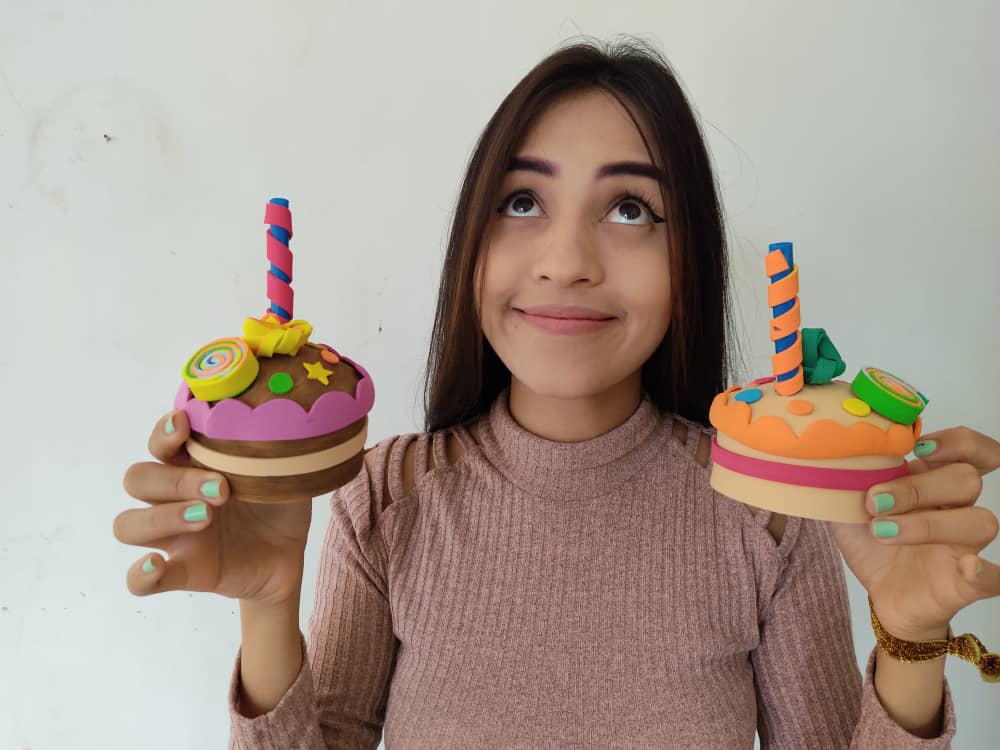
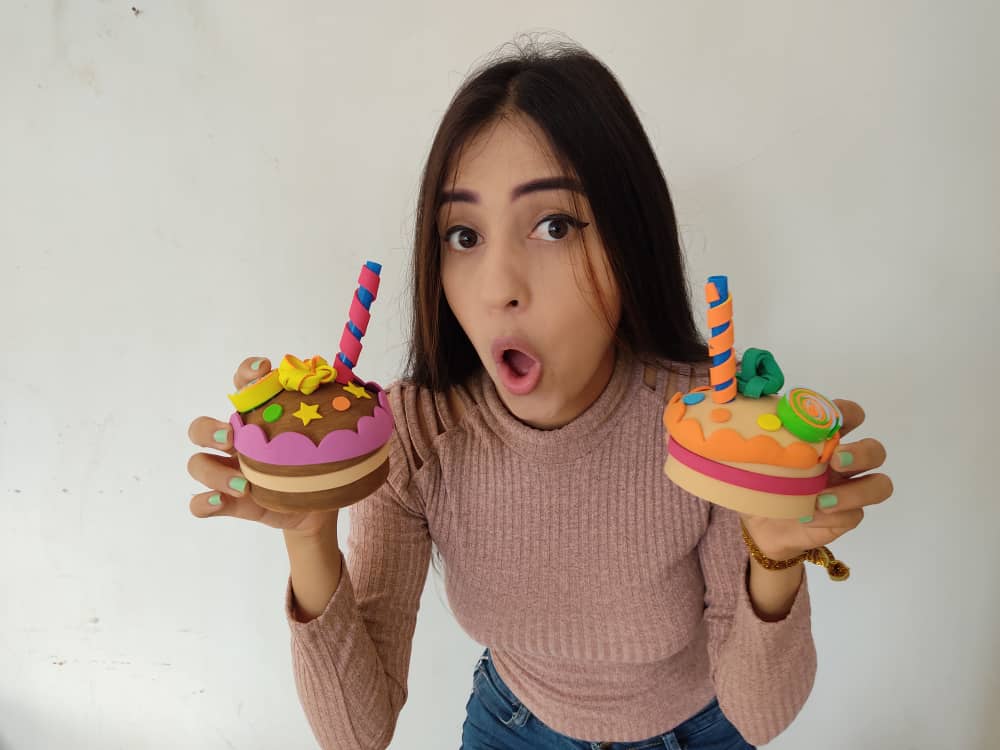
Hola queridos amigos 🙋 Este lindo día traigo para ustedes un divertido paso a paso lleno de color y creatividad, ideal para decorar nuestros espacios favoritos de una manera increíble y original, pues, hoy quiero mostrarles como hacer sus propios cofres cupcakes hechos de materiales muy económicos y fáciles de conseguir, así que, no dejen de hacerlos, y personalizarlos a su estilo.
English
Hello dear friends 💁 This beautiful day I bring for you a fun step by step full of color and creativity, ideal to decorate our favorite spaces in an incredible and original way, well, today I want to show you how to make your own cupcakes chests made of very cheap materials and easy to get, so be sure to make them, and customize them to your style.
¿Qué están esperando?
Utilizar estos hermosos y económicos materiales para transformarlos en unos preciosos cupcakes es una idea muy original y económica para decorar e incluso para hacer un hermoso regalo. Antes de comenzar no olvidemos lavarnos nuestras manos.
What are they waiting for?
Using these beautiful and inexpensive materials to transform them into beautiful cupcakes is a very original and inexpensive idea to decorate and even to make a beautiful gift. Before we start, let's not forget to wash our hands.
 >
>[Materiales | Materials]
Para hacer estos deliciosos cupcakes necesitaremos:
- Moldes.
- Foami o goma eva.
- Latas de aluminio desechables.
- Pitillos o sorbetes.
- Brillantina.
- Pincel.
- Pinturas.
- Tijera.
- Pegamento o silicón liquido.
To make this delicious will need:
- Molds.
- Foamy or EVA foam.
- Disposable aluminum cans.
- Straws or sorbets.
- Glitter.
- Brush.
- Paintings.
- Scissors.
- Glue or liquid silicone.
Procedimiento (paso a paso)
Process (step by step)
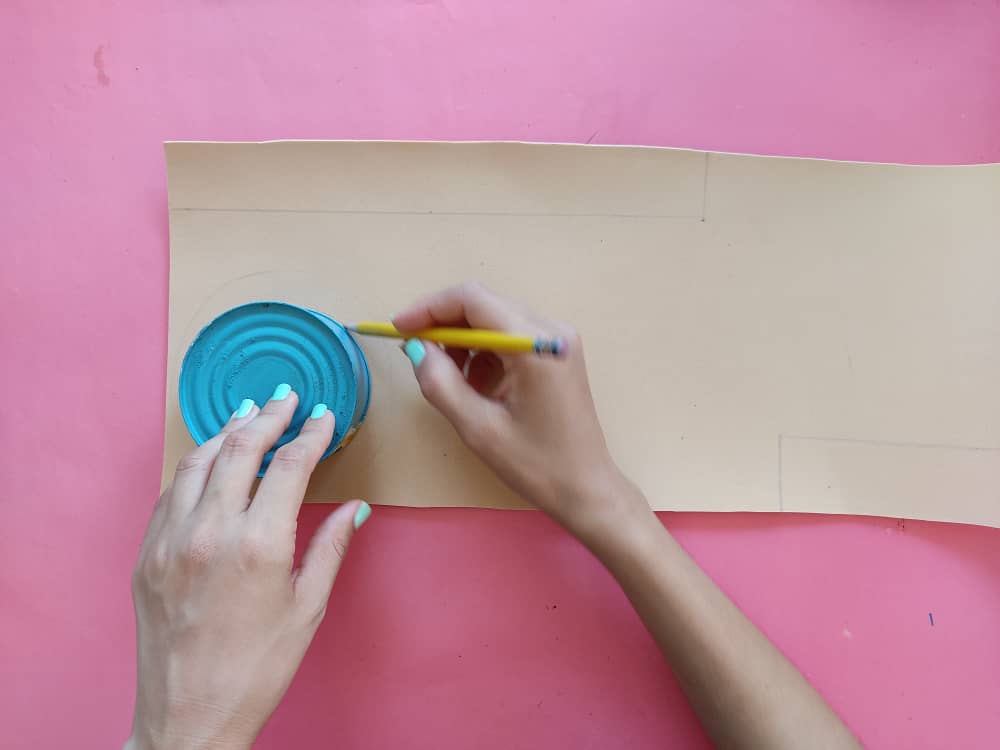
Primero, tomamos la medida de las latas, y elaboramos 2 tiras más 2 círculos, un centímetro de diámetro más grande que el tamaño original de la lata. Y recortamos cuidadosamente para mantener las medidas intactas y así, facilitar el armado de nuestros cupcakes.
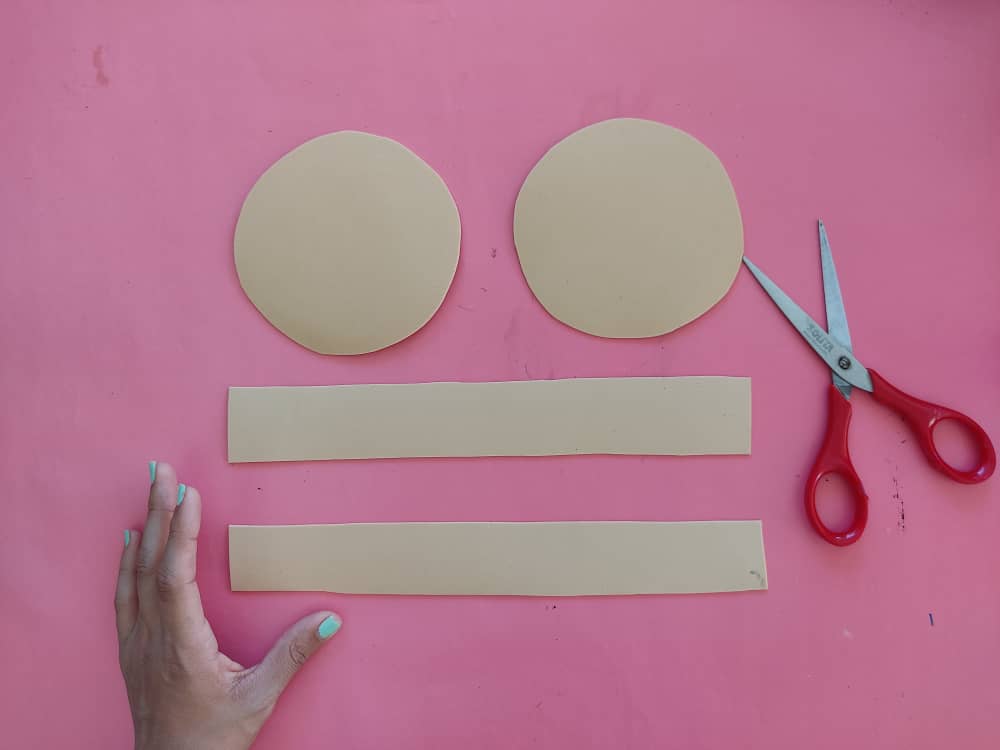
First, we measure the cans and make 2 strips plus 2 circles, one centimeter in diameter larger than the original size of the can. And we cut carefully to keep the measurements intact and thus, facilitate the assembly of our cupcakes.
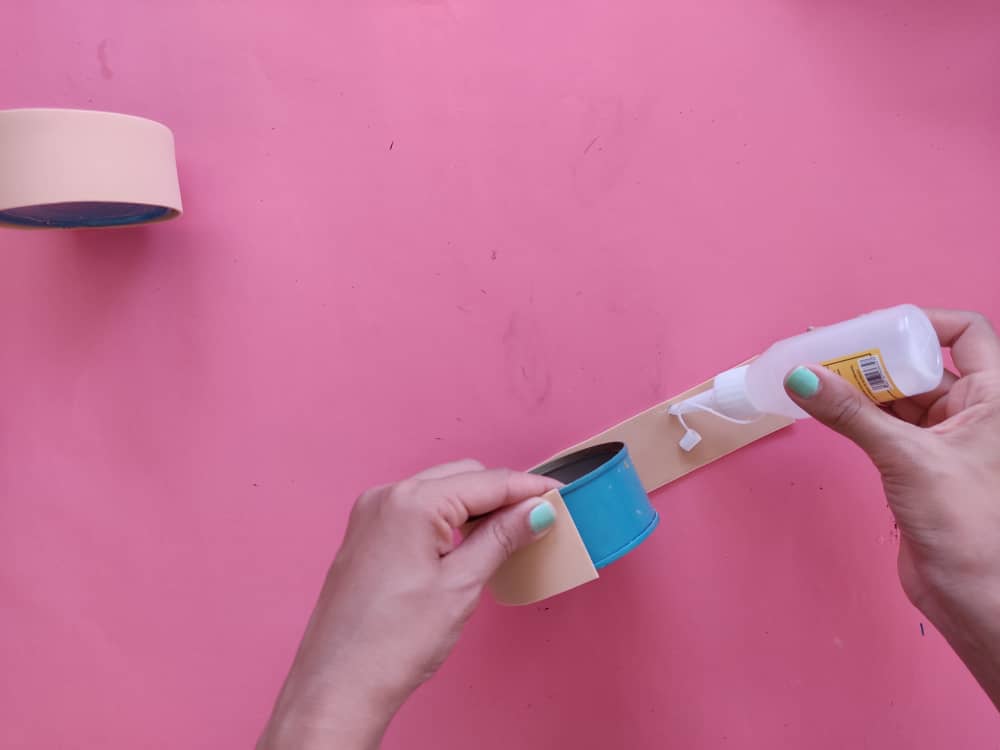
Ahora, pegamos las tira de Foami al rededor de la latas, haciendo presión durante unos segundos de manera que estás queden bien forradas.

Now, we glue the foamy strips around the cans, pressing for a few seconds so that they are well lined.
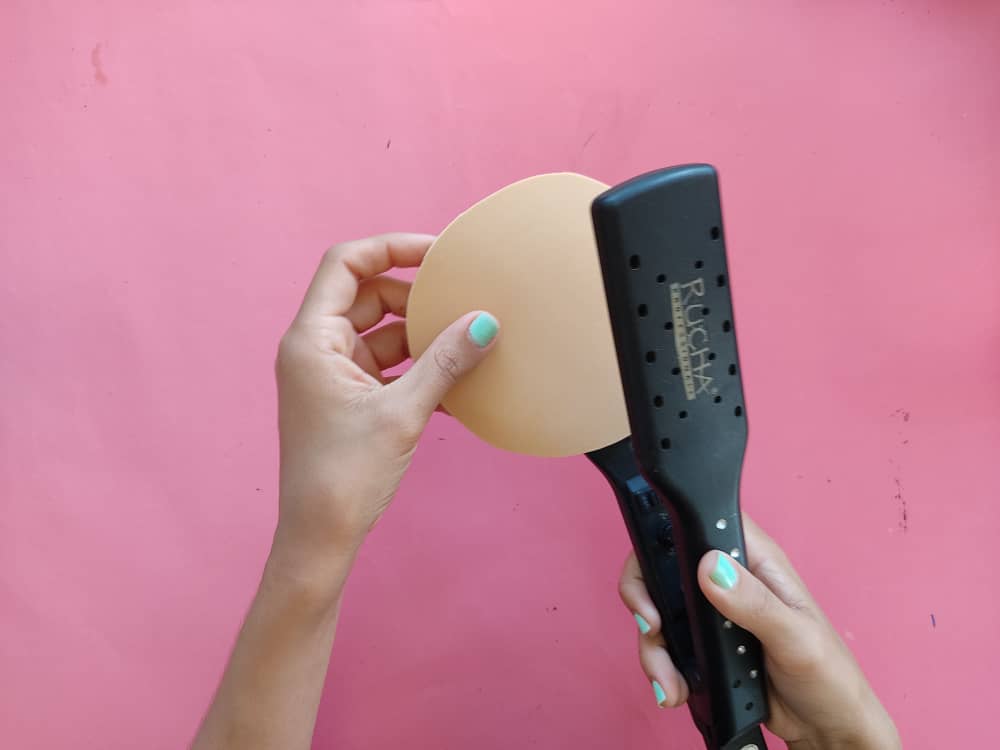
Luego, aplicamos la técnica de termoformado para darle un poco de volumen a los círculos que hemos obtenido en el primer paso, y lograr que nuestros cupcakes luzcan muy reales.
Then, we apply the thermoforming technique to give a little volume to the circles that we have obtained in the first step, and make our cupcakes look very real.

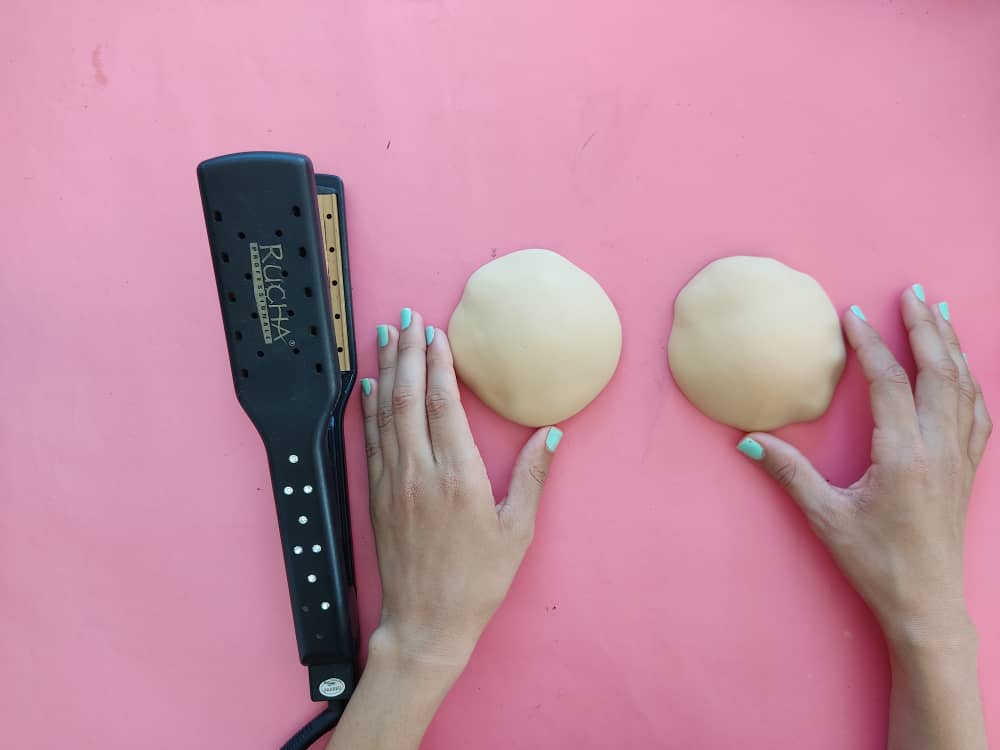
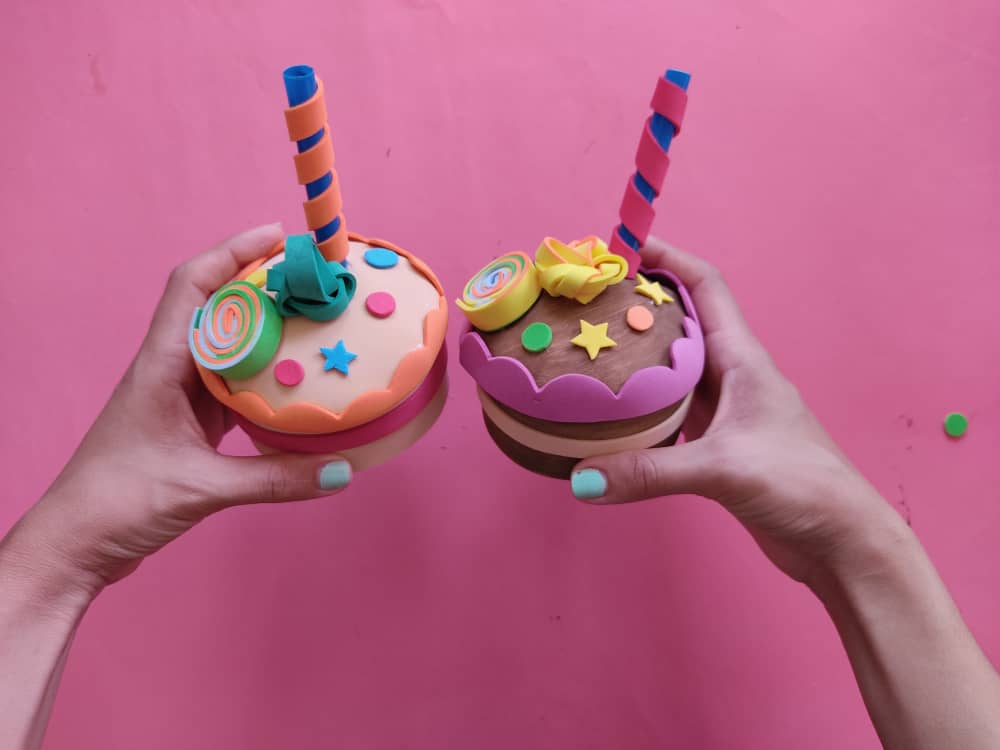
Seguidamente, le damos un poco vida y color a nuestros cupcakes, pintamos uno de color marrón, este será un delicioso cupcake de chocolate, genial no?. El otro lo dejamos de ese color para que sea cupcake de vainilla.
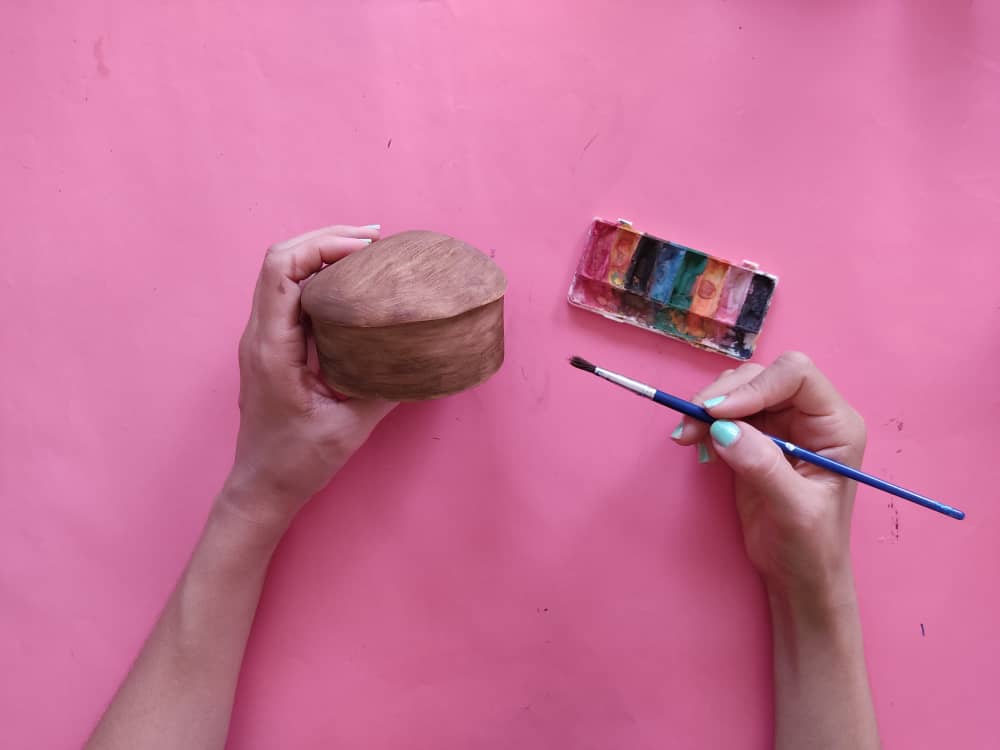
Next, we give a little life and color to our cupcakes, we paint one brown, this will be a delicious chocolate cupcake, great right? The other we leave that color to make it a vanilla cupcake.
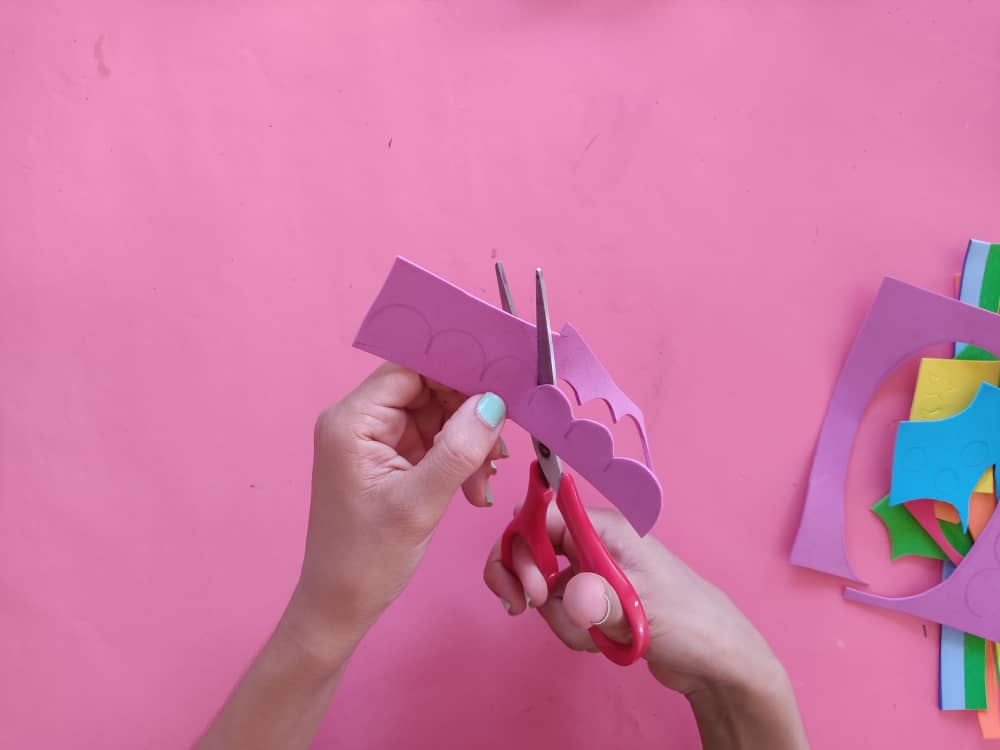
Una vez estén listos nuestros cupcakes de vainilla y chocolate, comenzamos a elaborar los más lindos detalles como lo son, tiras de colores, estrellas y círculos pequeños, que le darán una belleza única.
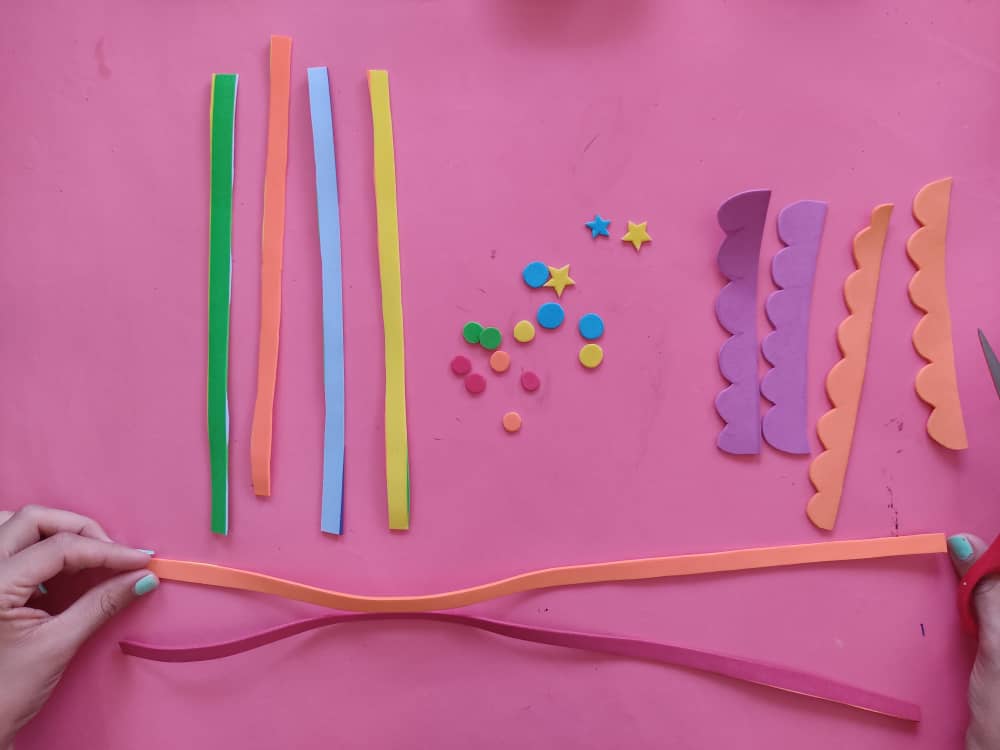
Once our vanilla and chocolate cupcakes are ready, we begin to elaborate on the most beautiful details such as colored strips, stars, and small circles, which will give it a unique beauty.
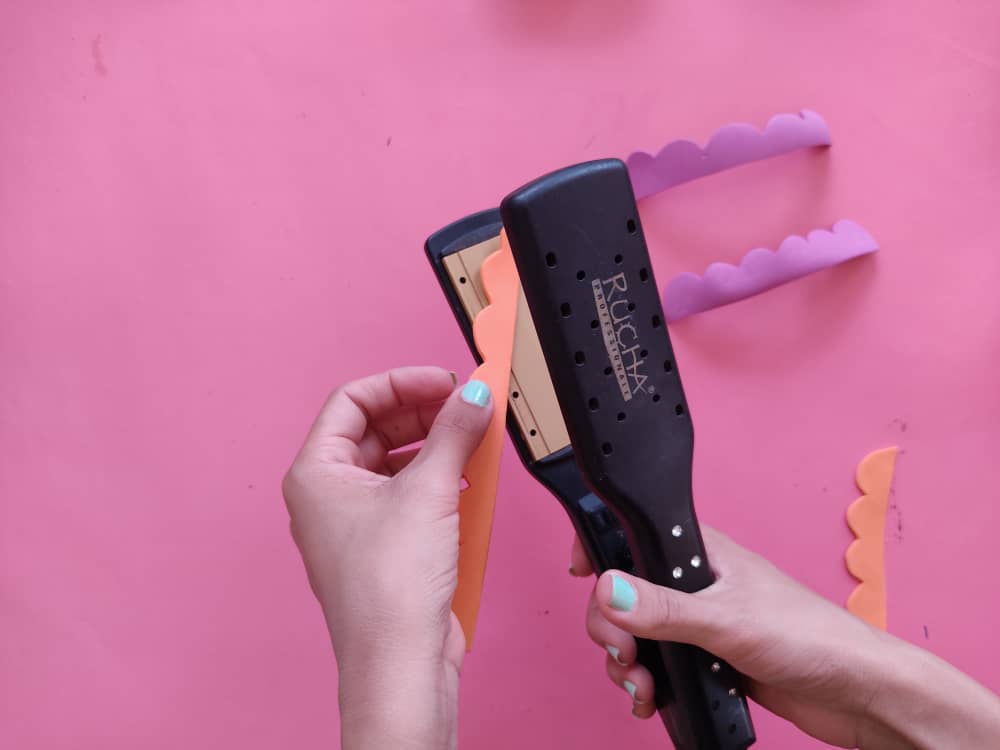
Luego de haber obtenido las tiras del borde, aplicamos nuevamente la técnica de termoformado en estás, ya que, irán al rededor de nuestros cupcakes.
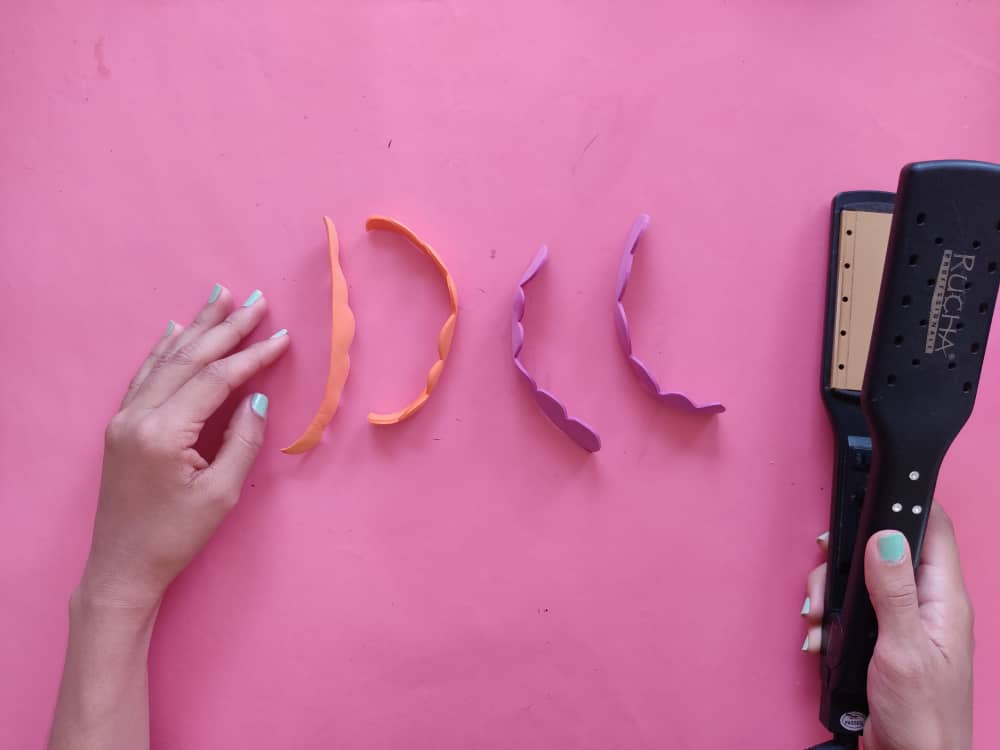
After having obtained the edge strips, we again apply the thermoforming technique on these, since they will go around our cupcakes.
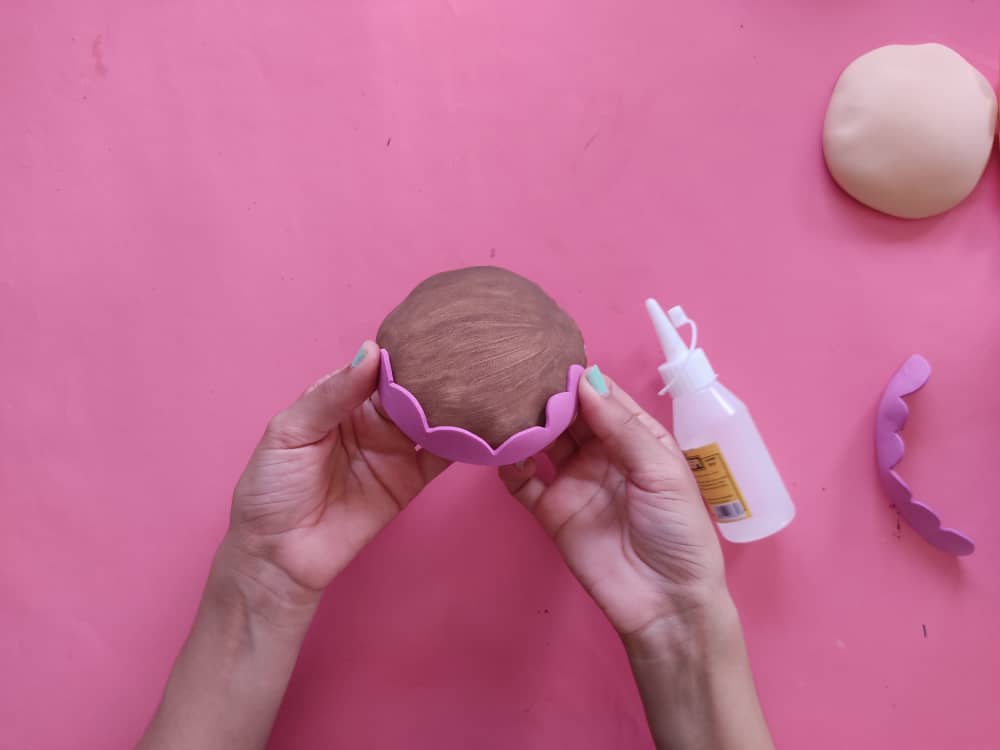
Seguidamente, pegamos las tiras del borde alrededor de la parte superior de cada cupcake.
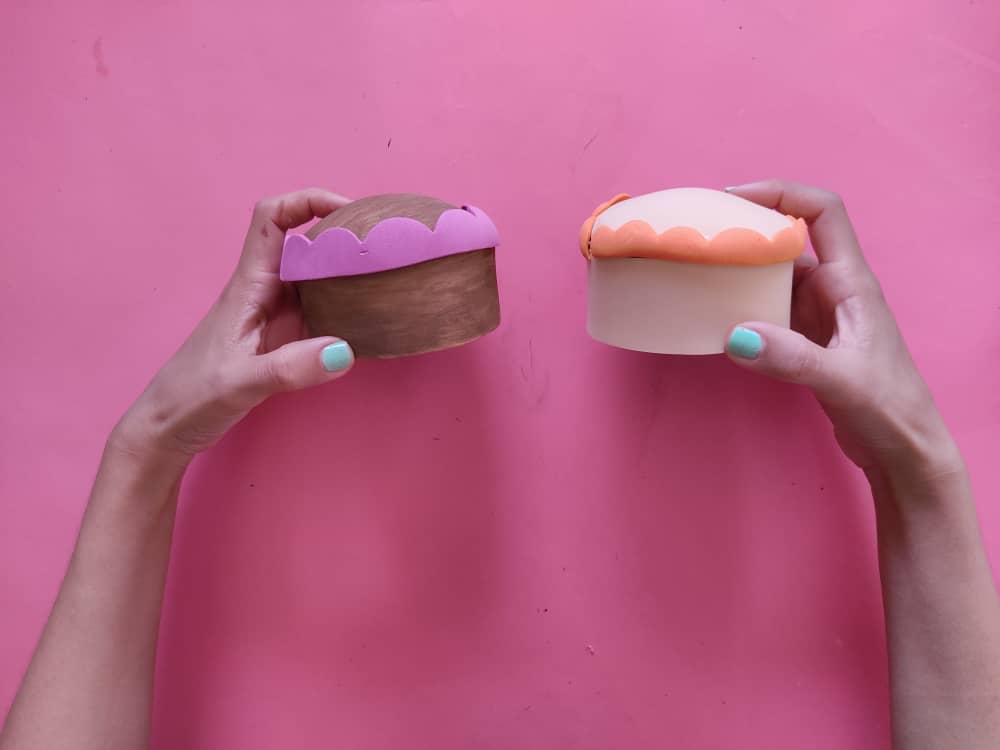
Next, we glue the border strips around the top of each cupcake.
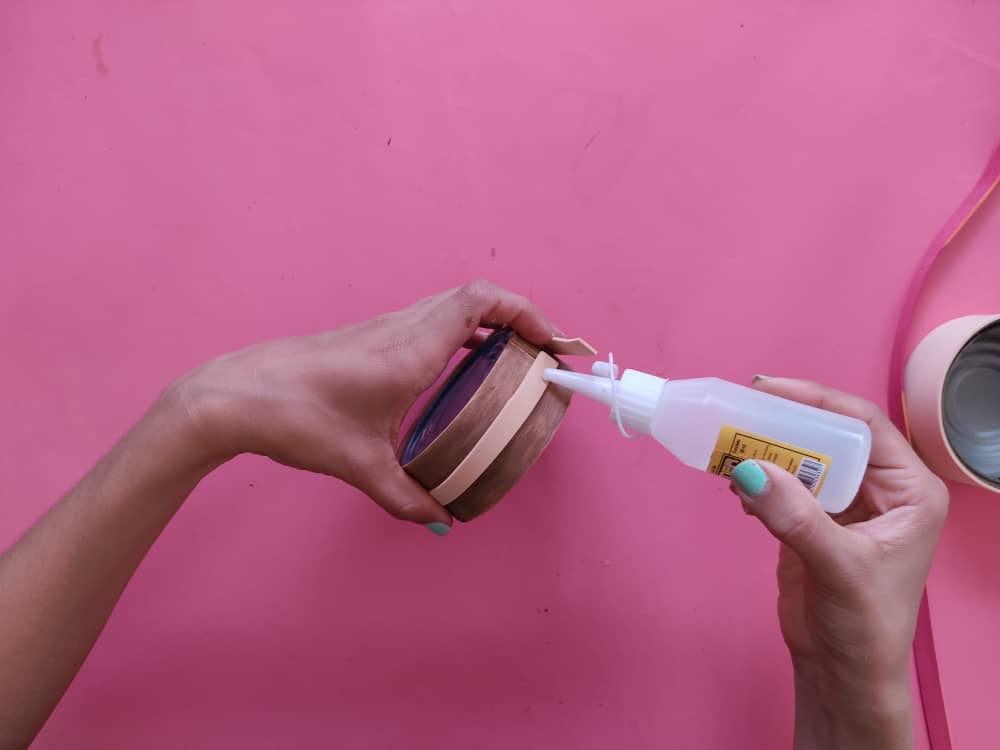
Ahora, pegamos dos tiras de colores en el centro de la parte inferior, para simular el relleno de estos ricos cupcakes.
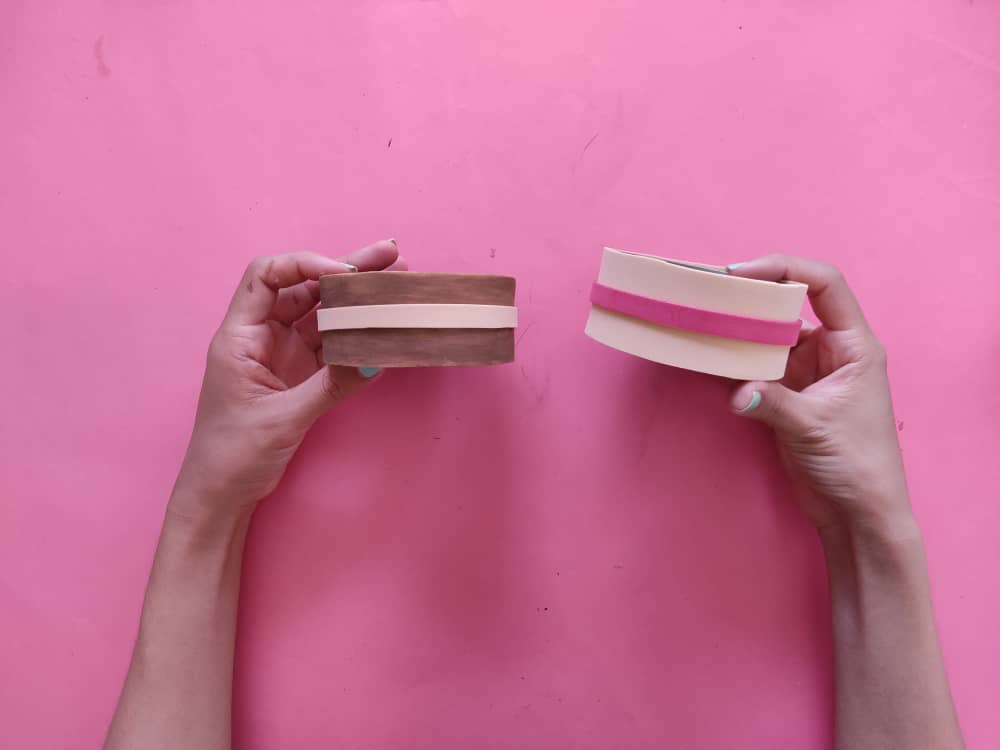
Now, we glue two colored strips in the center of the bottom, to simulate the filling of these rich cupcakes.
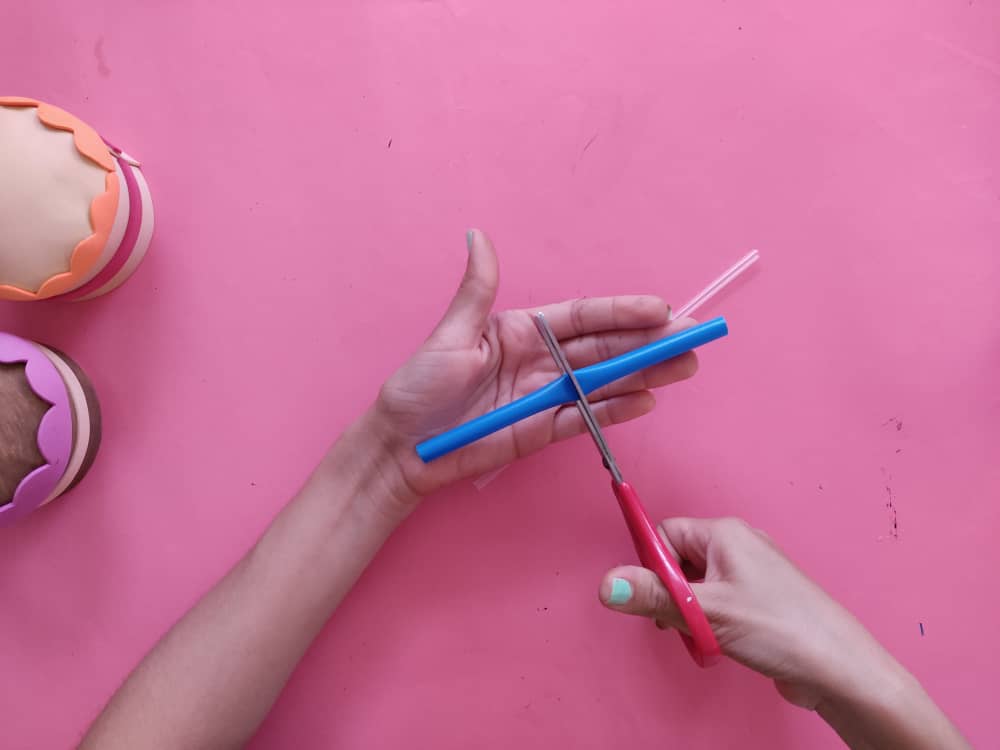
Luego, dividimos los pitillos o sorbetes en dos partes y los envolvemos con tiras de colores dejando pequeños espacios a medida que les dan vuelta, y así, quedarán de dos lindos colores.
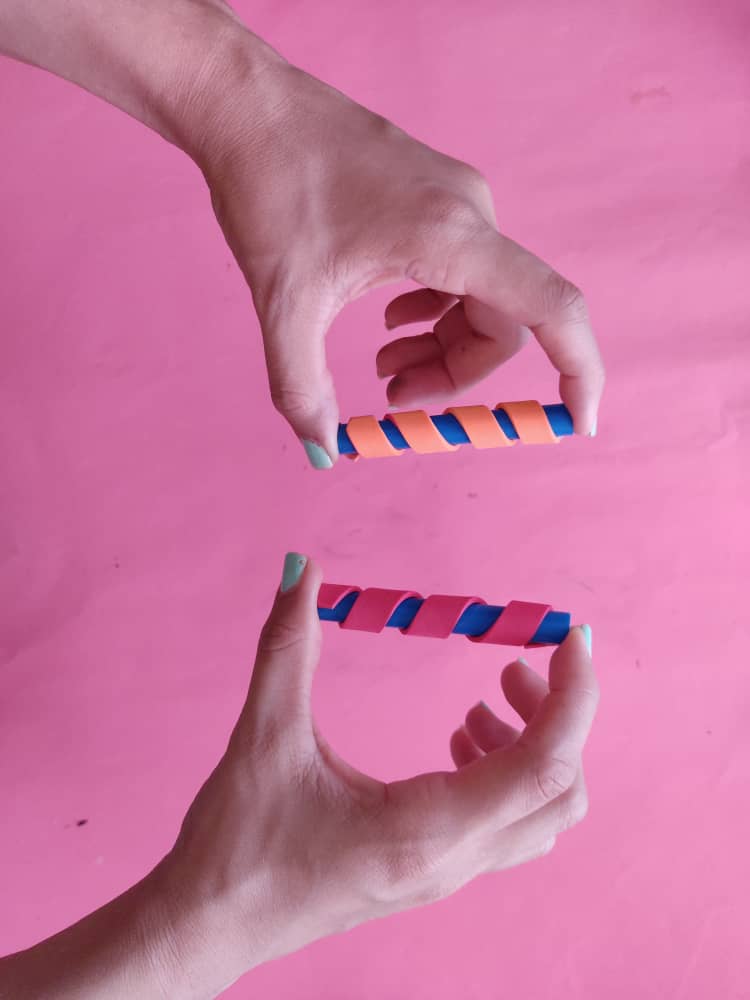
Then, we divide the straws or straws into two parts and wrap them with colored strips, leaving small spaces as they are turned, and thus, they will be two beautiful colors.
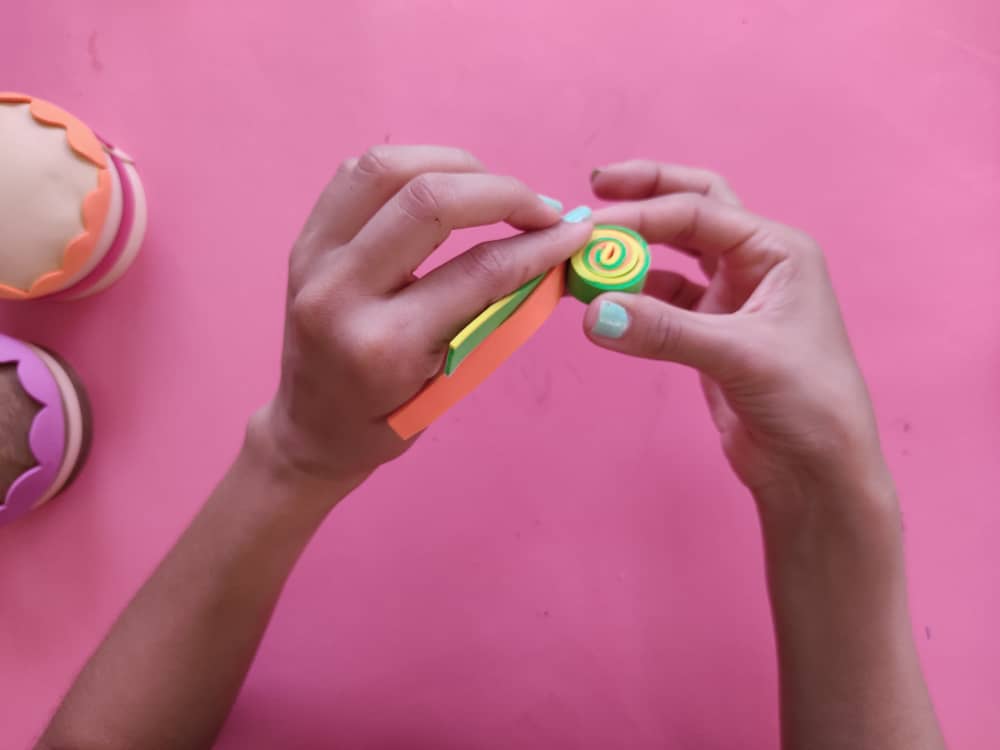
Ahora, elaboramos nudos, rollitos dobles, y figuras decorativas con el resto de las tiras de colores muy llamativos.
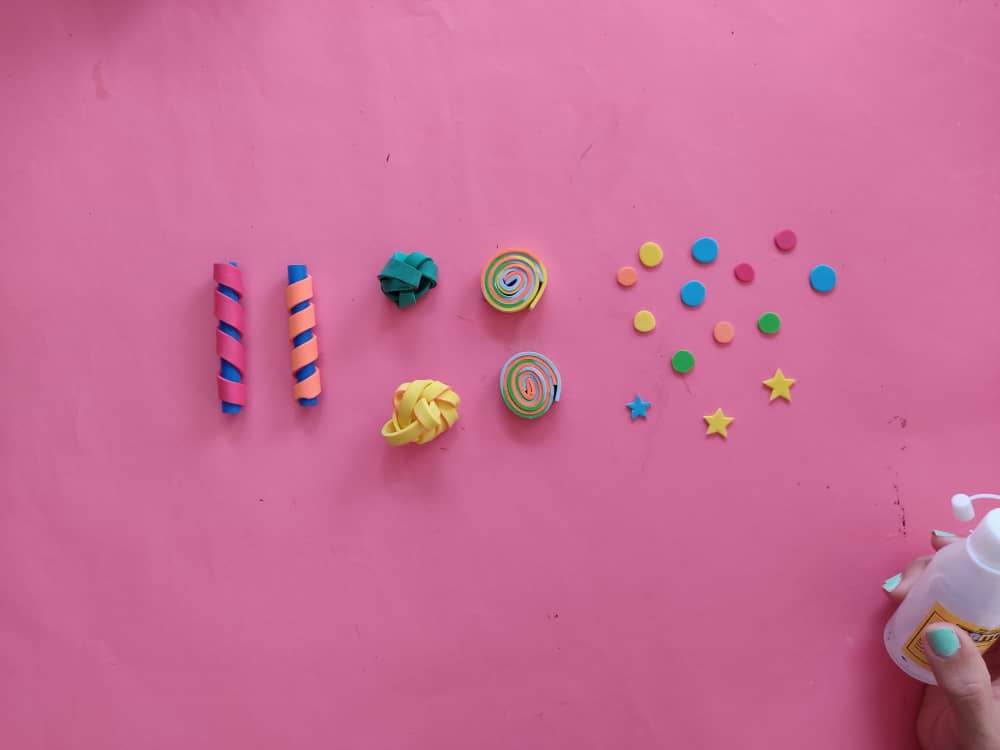
Now, we make knots, double rolls, and decorative figures with the rest of the strips of very bright colors.
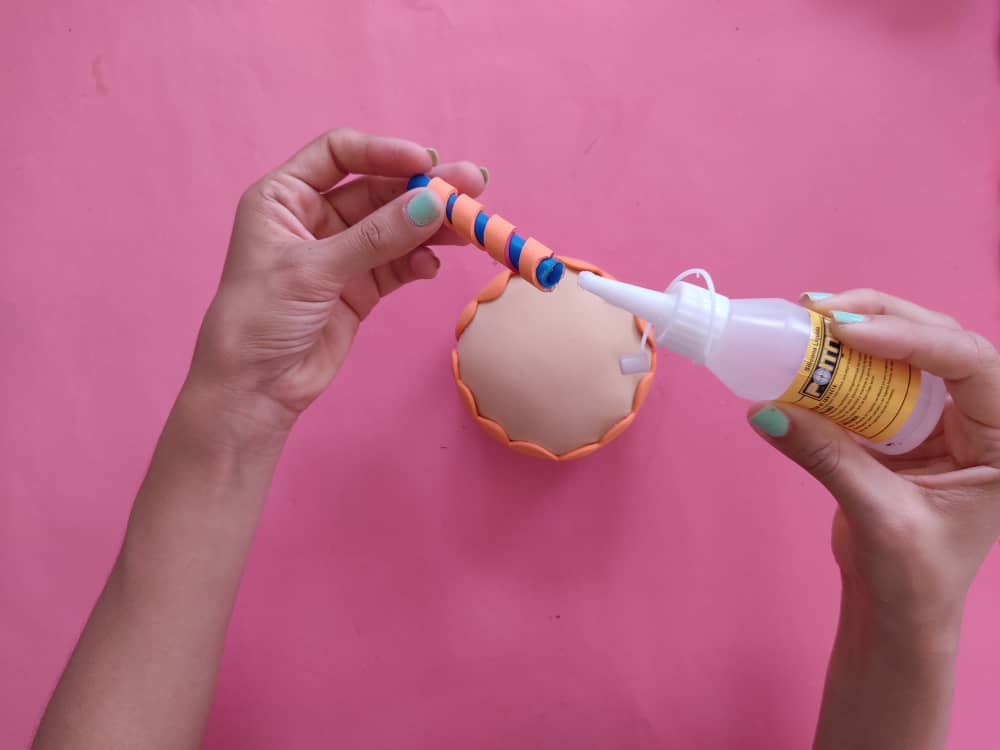
Una vez finalizados todos nuestros detalles, comenzamos a pegarlos sobre los cupcakes utilizando pegamento o silicón líquido. Sin olvidar hacer un poco de presión durante unos segundos para que todo se sostenga y quedé bien firme.
Once all our details are finished, we begin to glue them on the cupcakes using glue or liquid silicone. Without forgetting to apply a little pressure for a few seconds so that everything holds and I was very firm.
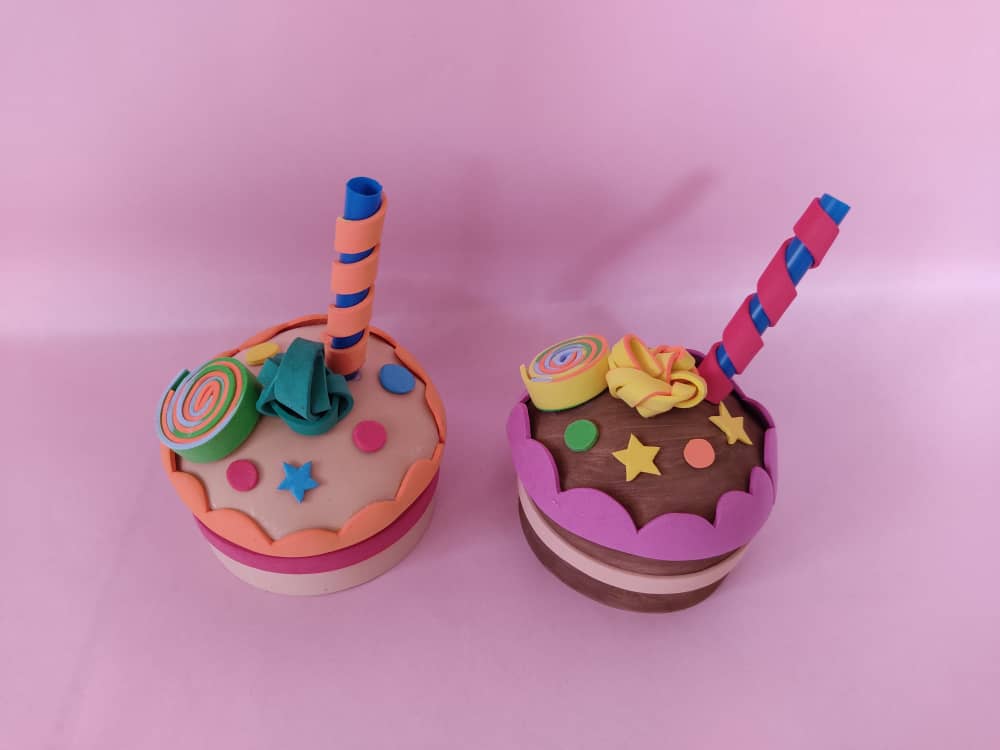
Gracias por acompañarme y espero que lo hayan disfrutado. ❤️
Thanks for joining and I hope you enjoyed it.❤️
.jpeg)
.jpeg)
.jpeg)
.jpeg)
.jpeg)
.jpeg)
.jpeg)
.jpeg)
.jpeg)
Clic para ver trabajos anteriores | Click to see previous works


#posh
Congratulations @saracampero! You have completed the following achievement on the Hive blockchain and have been rewarded with new badge(s) :
You can view your badges on your board And compare to others on the Ranking
If you no longer want to receive notifications, reply to this comment with the word
STOPTo support your work, I also upvoted your post!
Do not miss the last post from @hivebuzz:
Gracias por el apoyo
Congratulations, your post has been upvoted by @dsc-r2cornell, which is the curating account for @R2cornell's Discord Community.
Enhorabuena, su "post" ha sido "up-voted" por @dsc-r2cornell, que es la "cuenta curating" de la Comunidad de la Discordia de @R2cornell.