
![]()
How are all the architectural+design friends? today I am back again in my first publication in architectural design for house doors made of wood which is of course one of the customer orders I just completed this week.
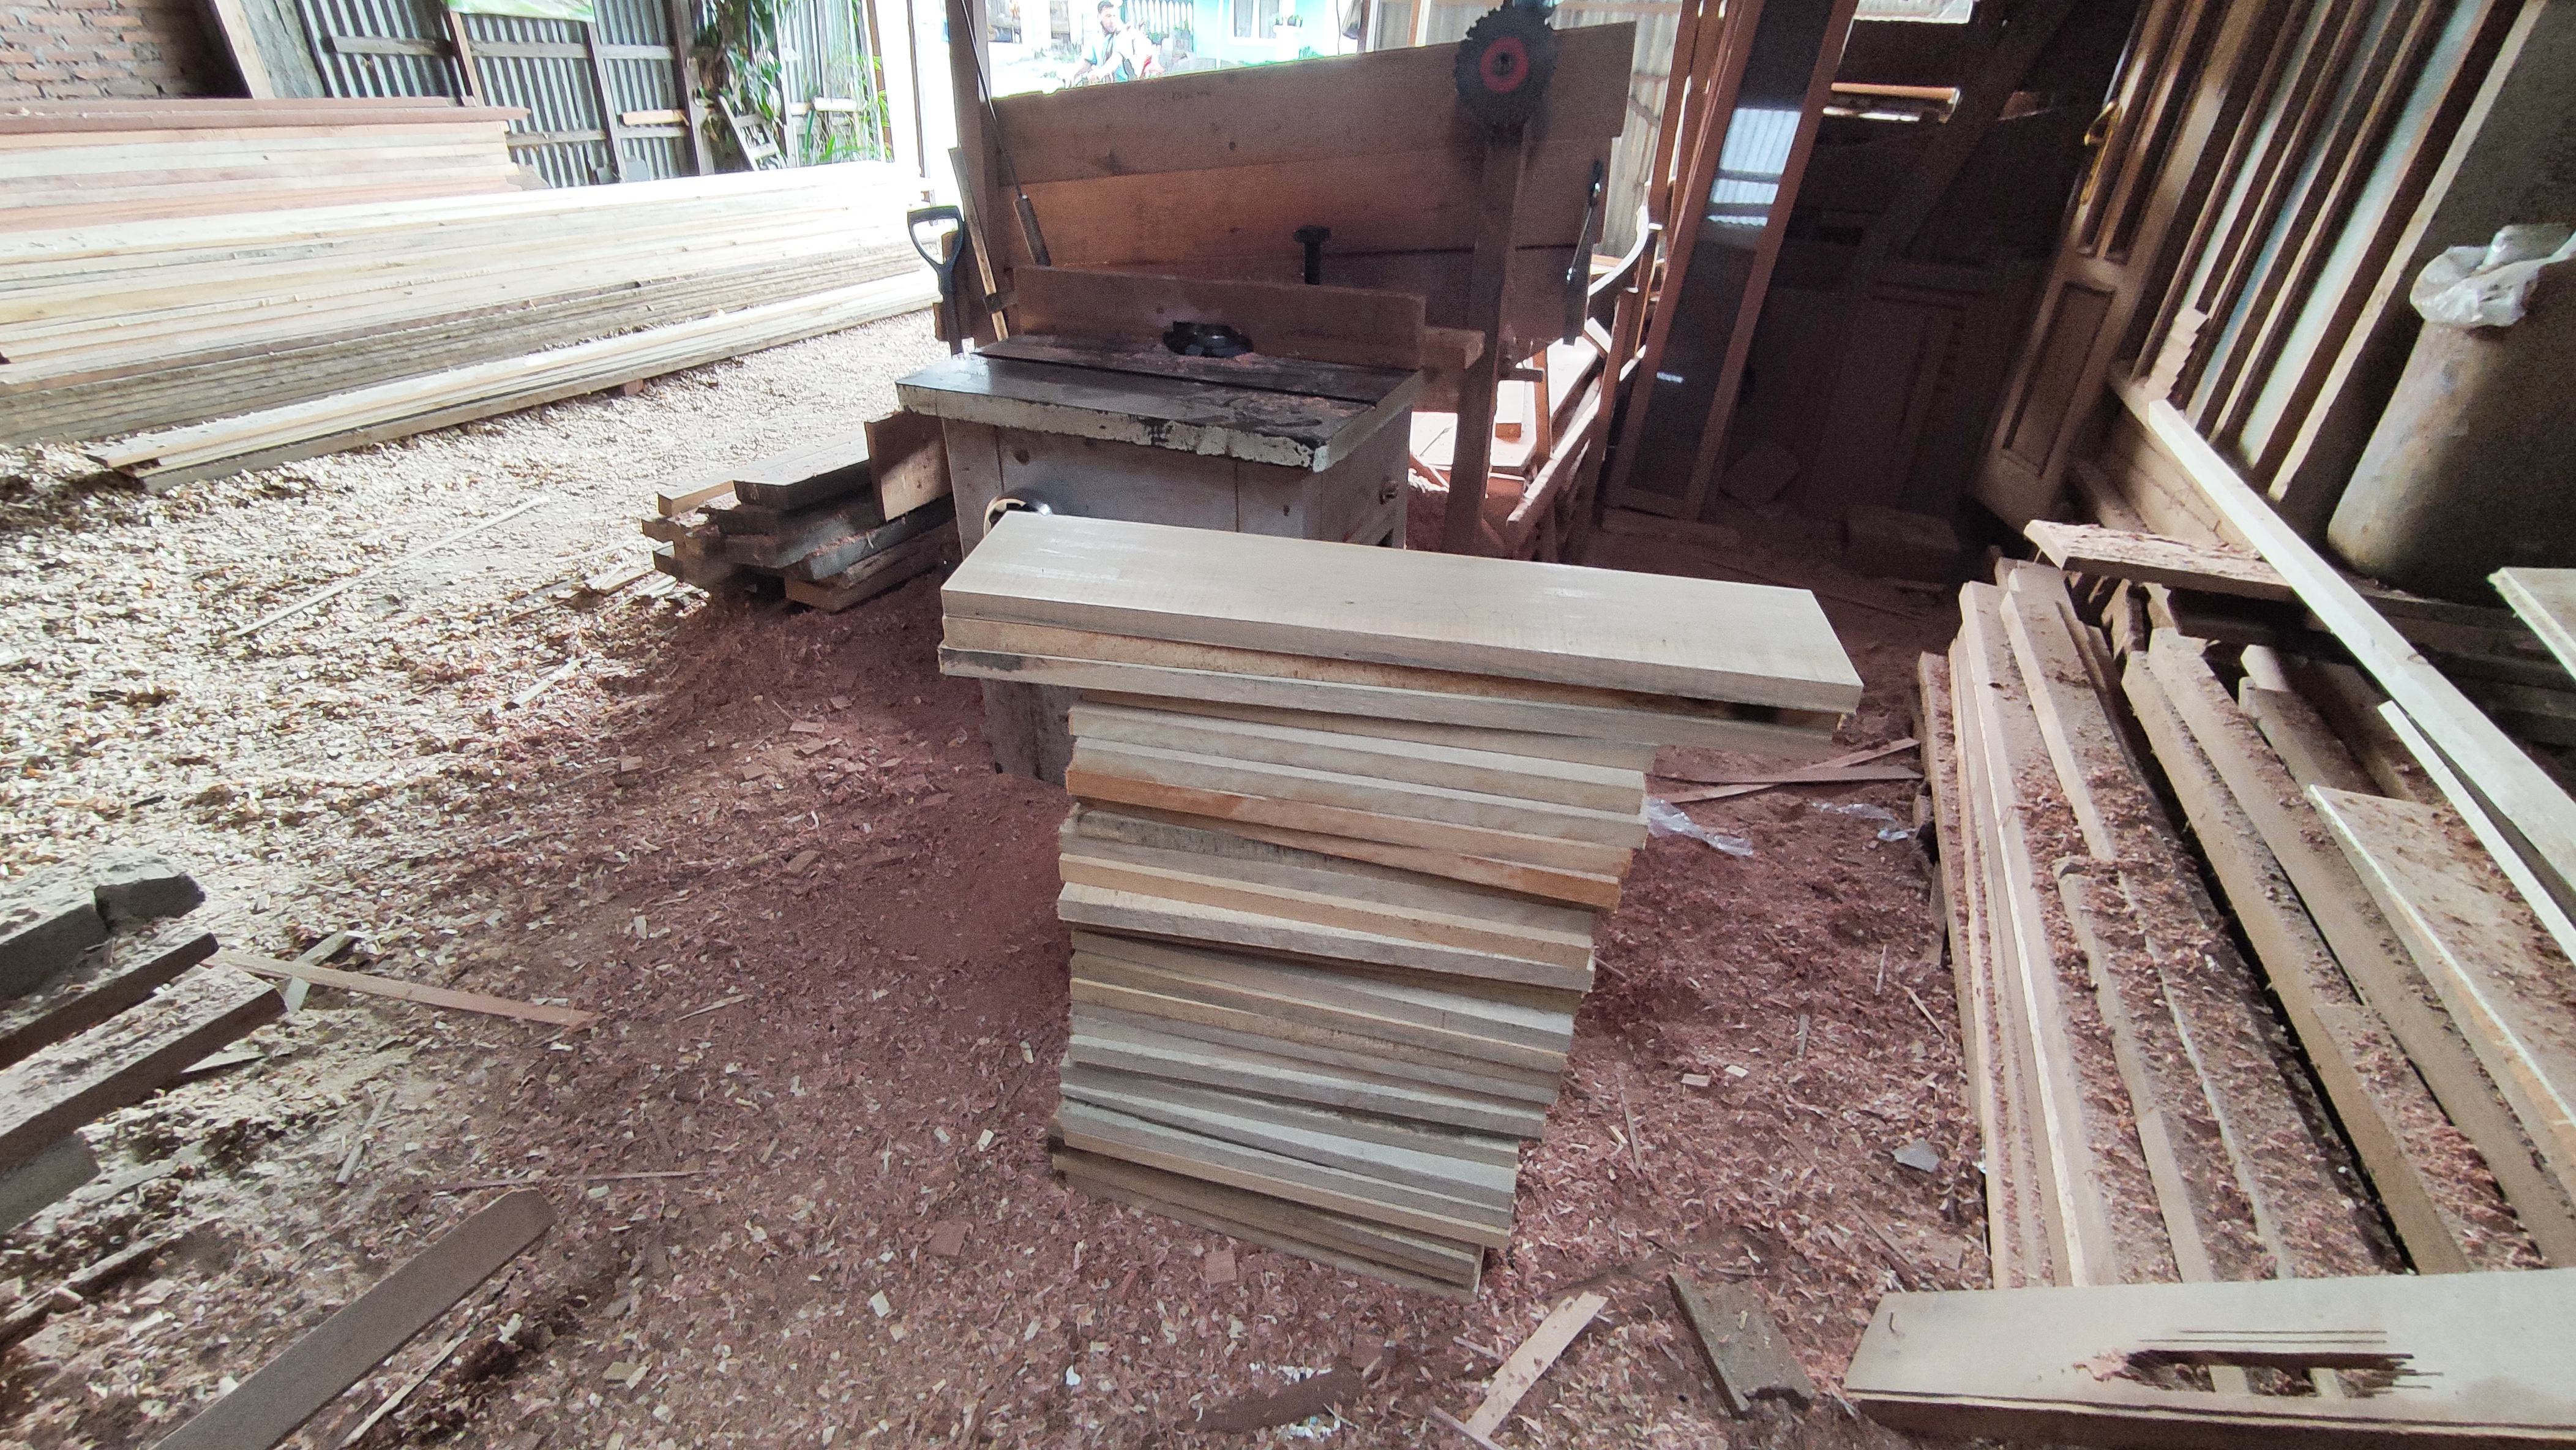
And if we pay attention in everyday life, there are various types of house door designs with very attractive shapes and designs ranging from wood to iron basic materials and I as one of the furniture builders ,today I want to share what maybe you can also learn how we work on architectural projects + design of making house doors with meranti wood as the basic material ,for the materials and machines I need to complete the project like the regular equipment I used in my previous projects i.e.,
•Meranti wood that has been trimmed with a size of 3.5 cm x 6 cm for the bones inside the door and 3,5cm x10,5cm x 205 cm is the main binding material for the door series.
•chisel.
•Mini wood cutting machine.
•Hand drill(to make holes in the wood when installing the pegs) and sit drill(to make holes in the bulkhead of the top and bottom of the window).
•Meter and hammer
•Router machine(for making flowers on the inside corners of windows and making glass holder holes).
•Meter (measuring instrument)and elbow.
•Smoothing machine and.
•Panel machine (to make nipple pegs on frame sets) and and to make flowers on the surface of the door leaf.
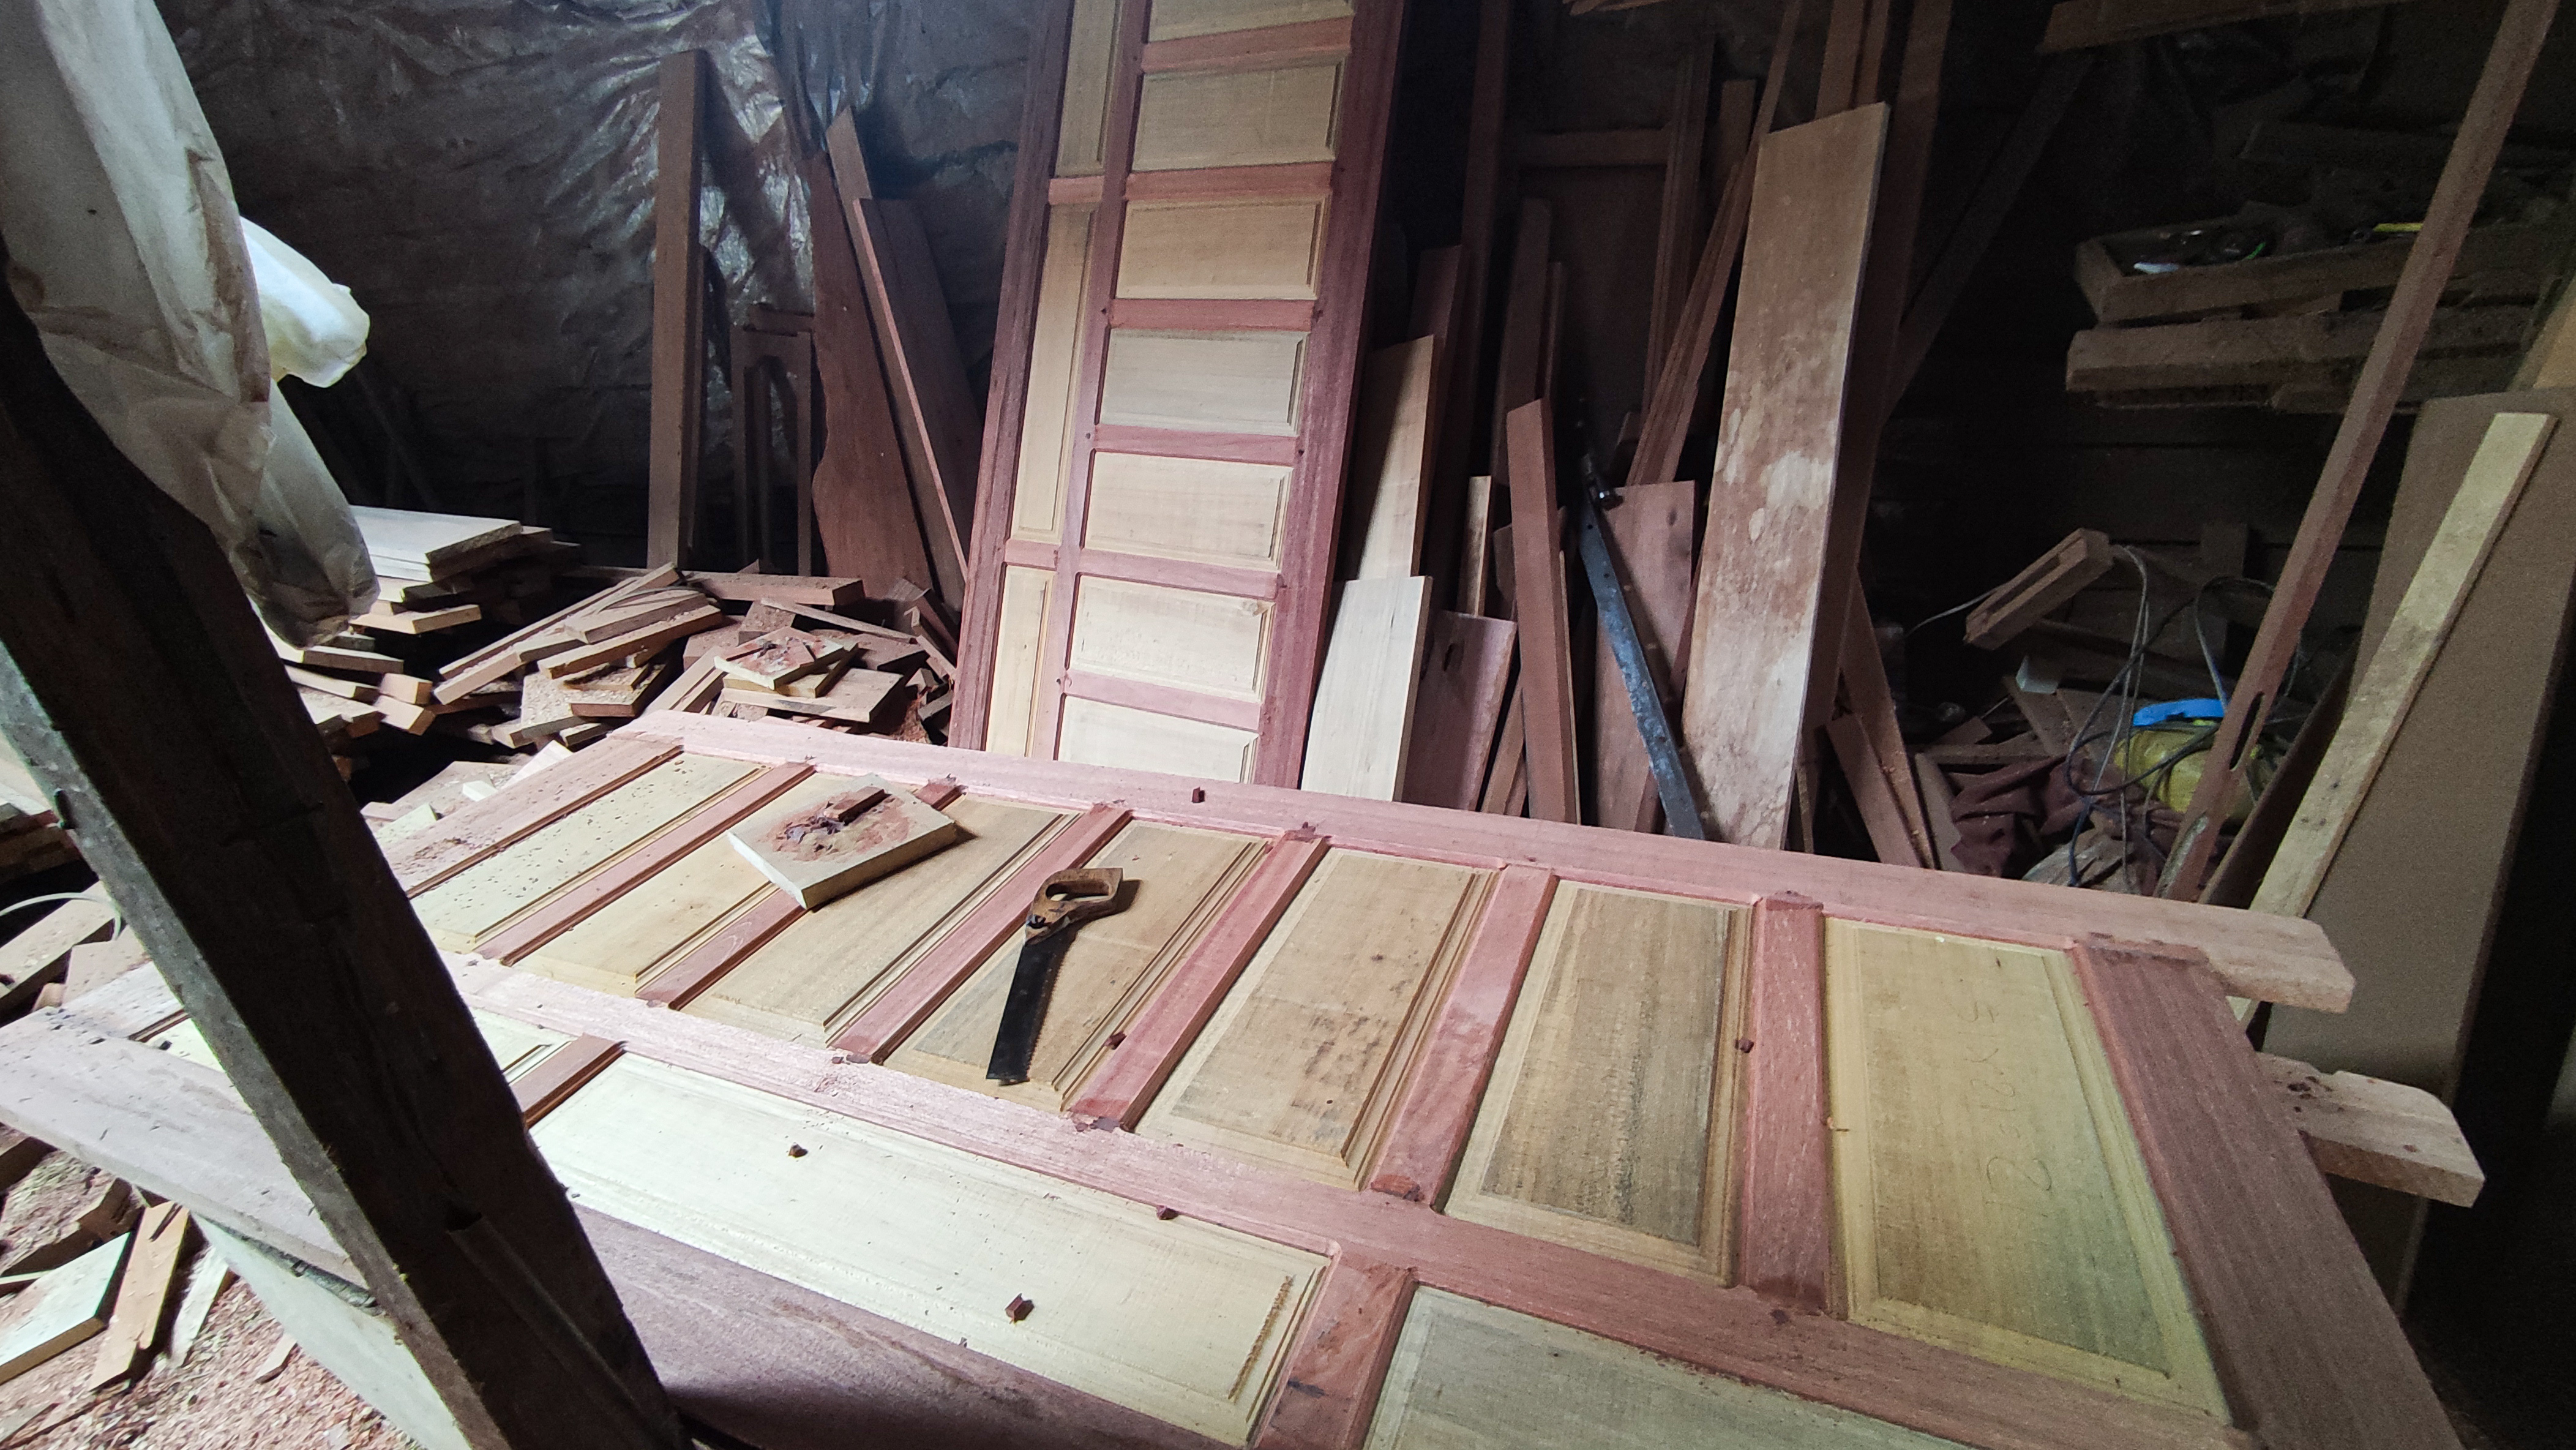
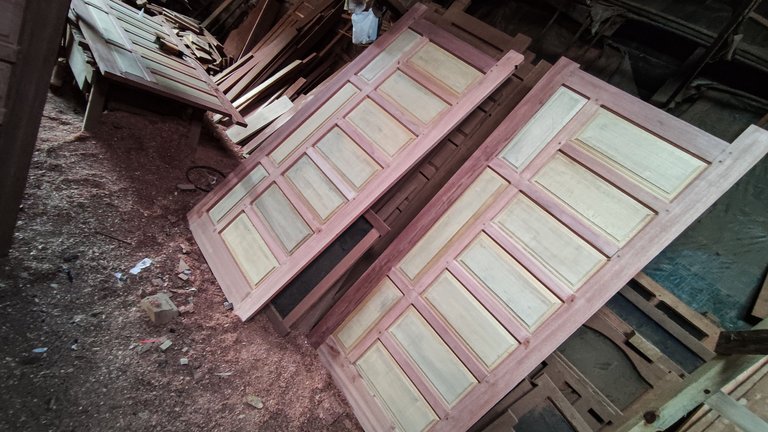
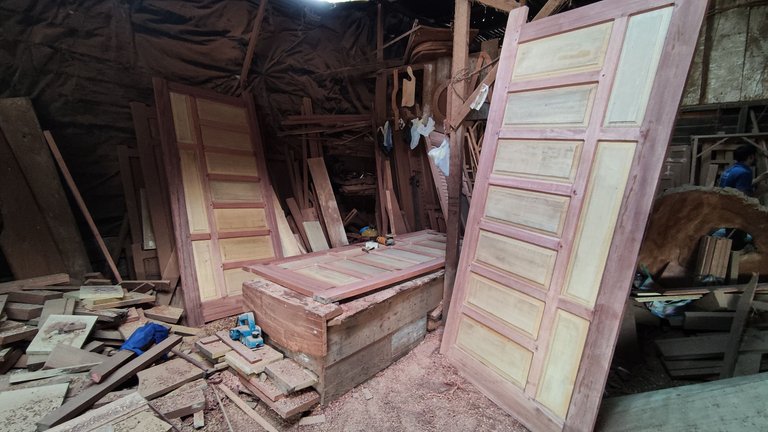
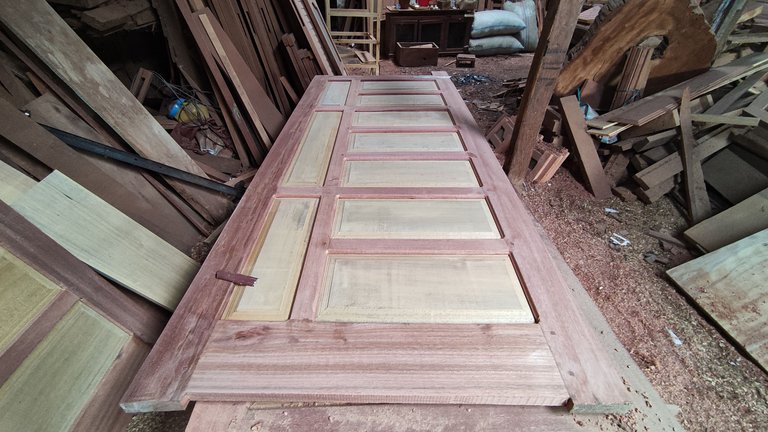
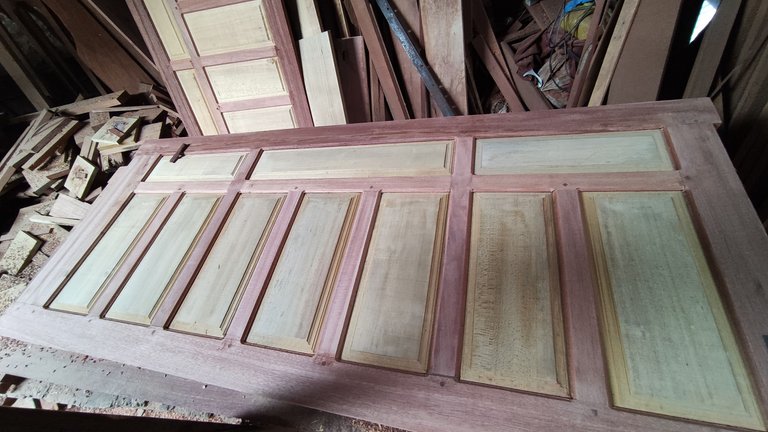
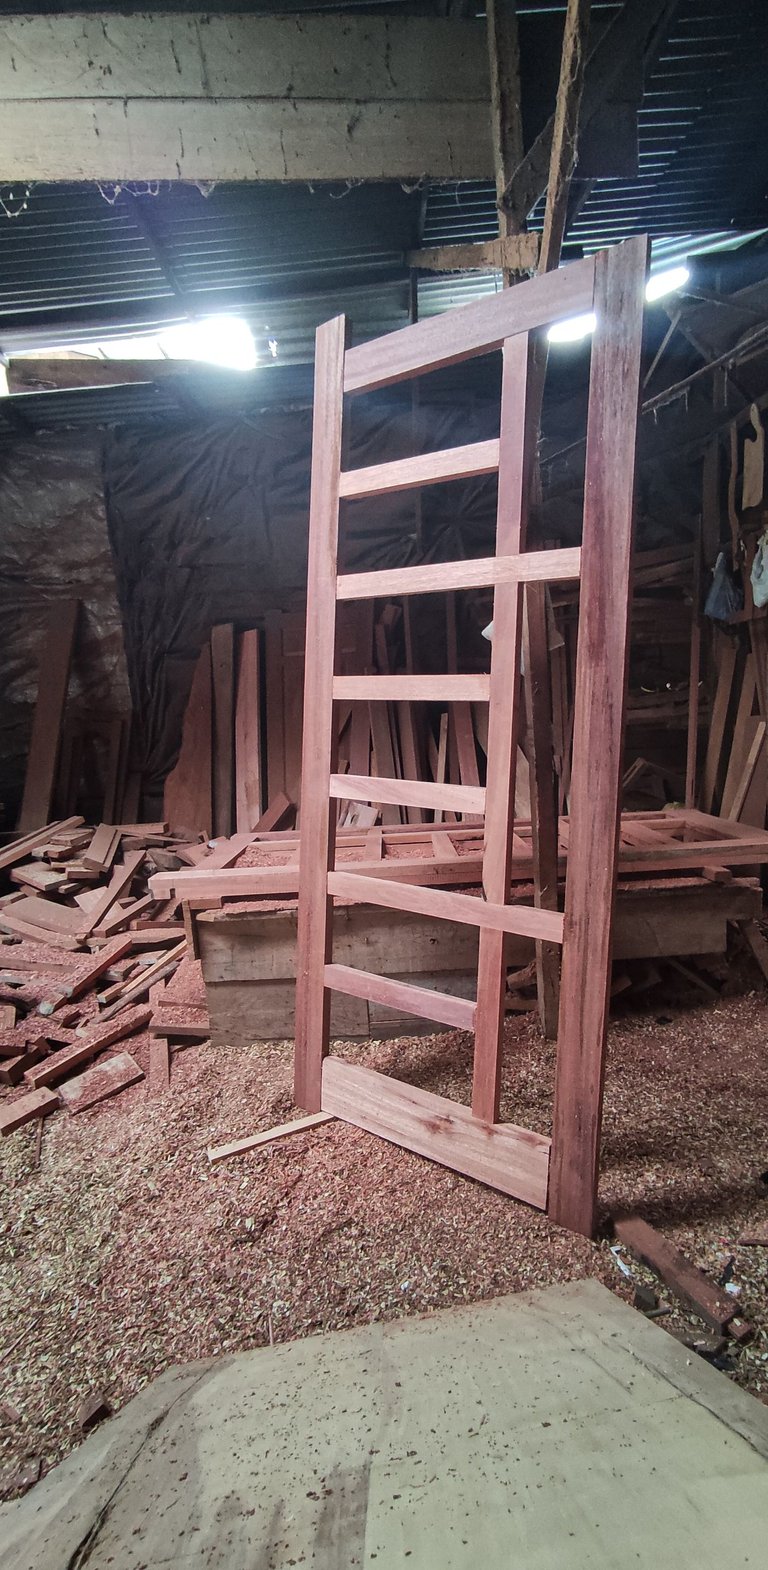
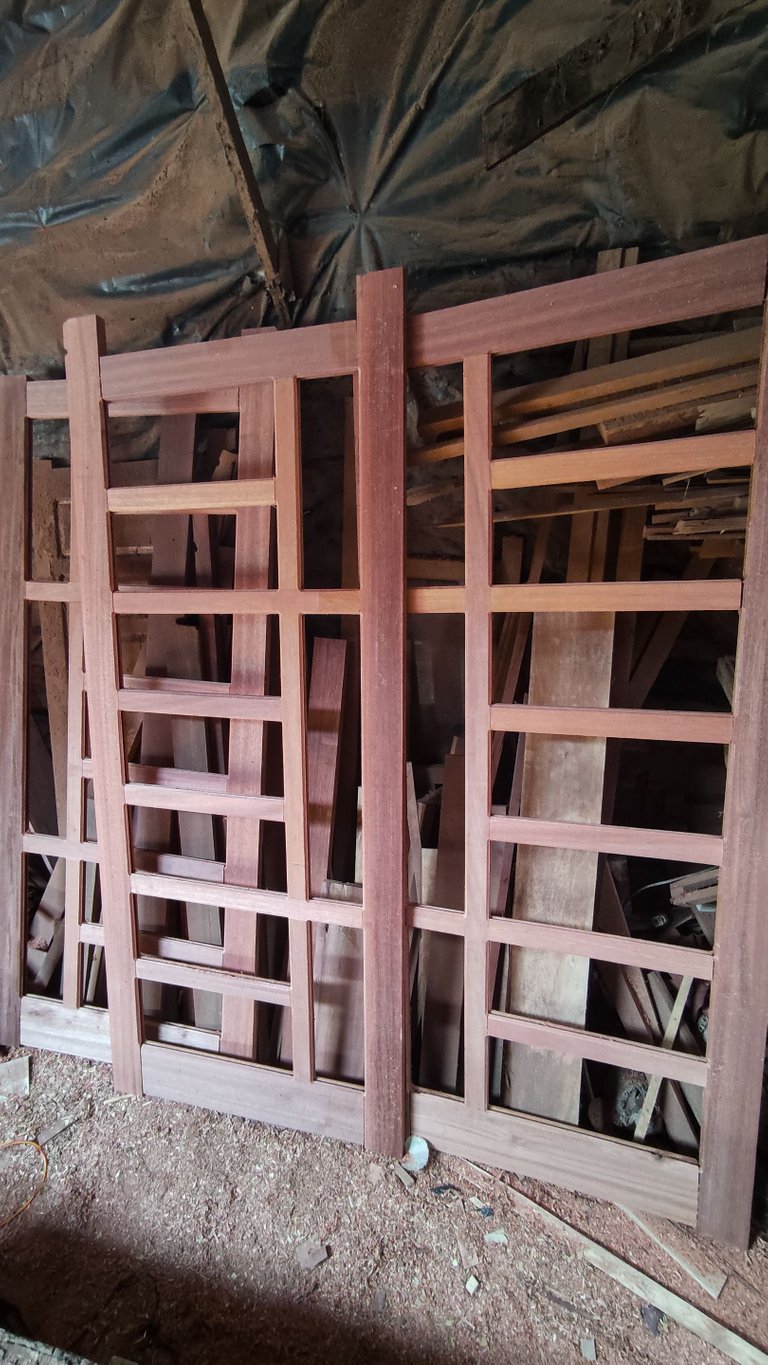
For the size of the door project that I am working on today, it is 90cm x 200cm with the door design as shown below.
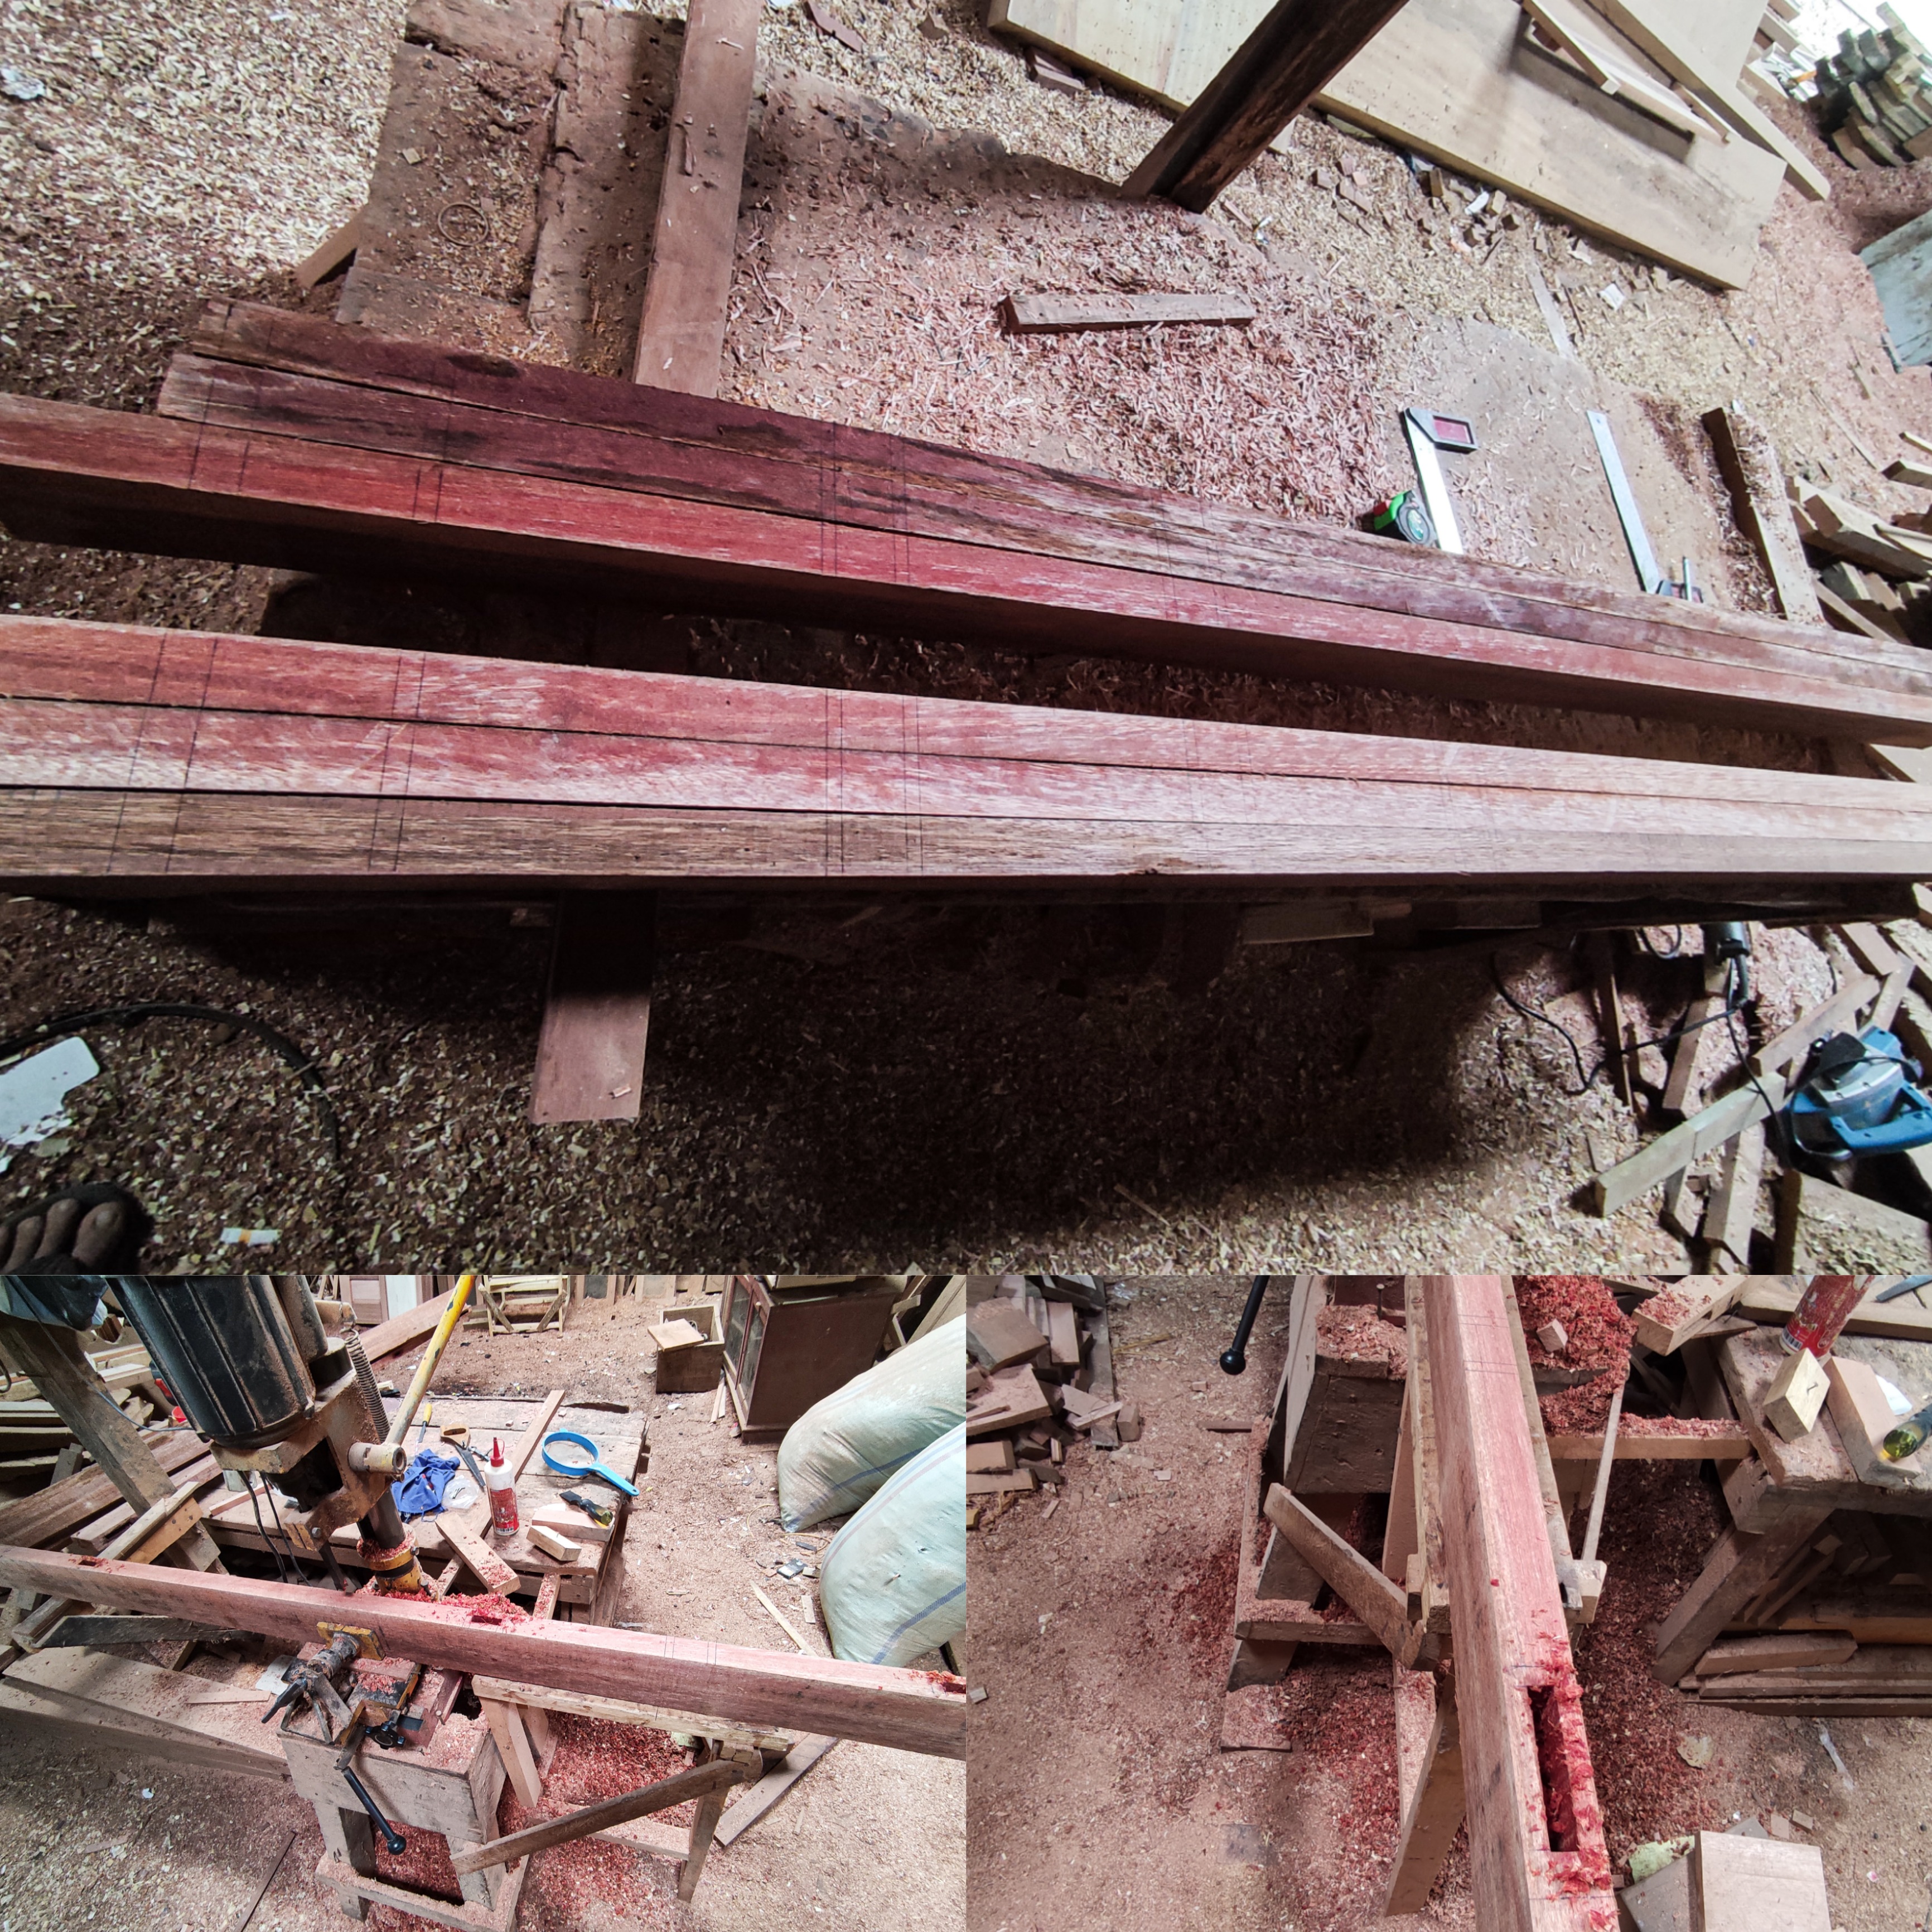
To make a series of door designs, I used meranti wood according to customer orders, namely wood that has a brown texture with standard prices and quality and this time I finished 3 units of doors with the same design, so I did everything at the same time.
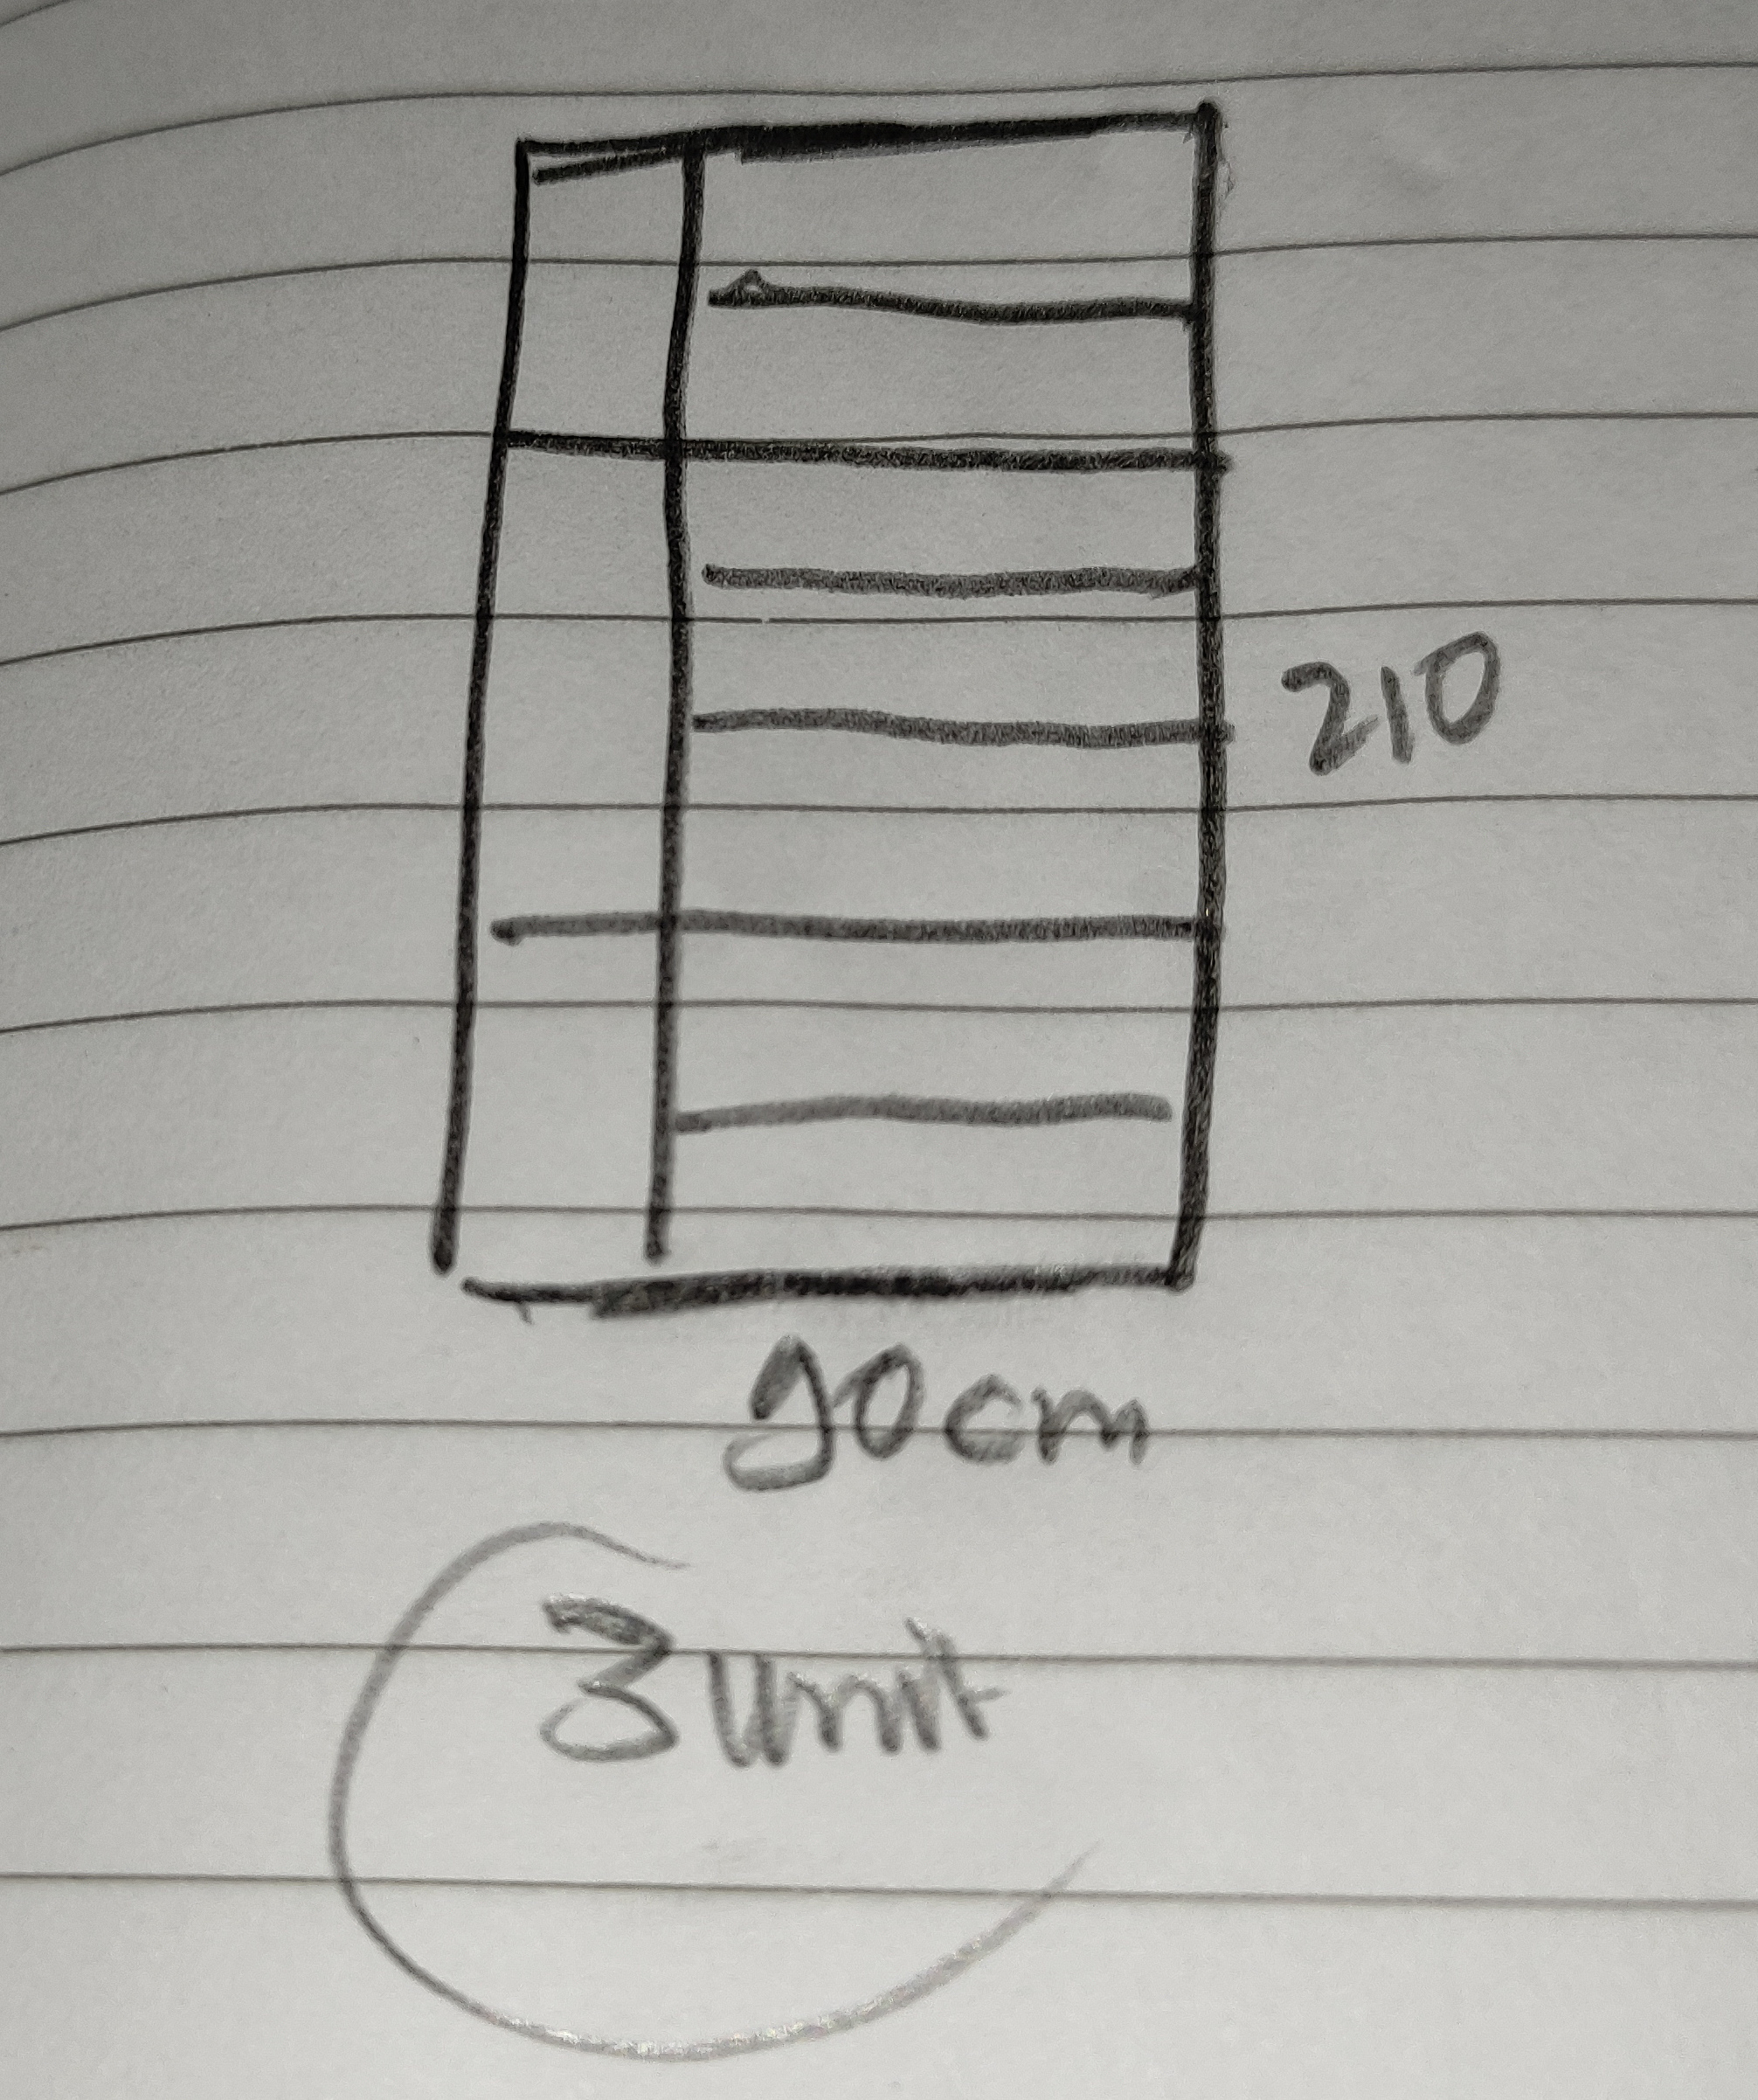
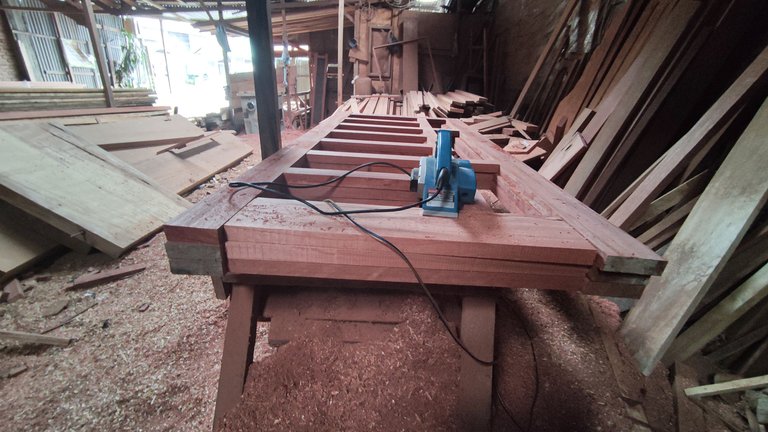
To make the main series of doors here, I used wood with a thickness of 3.5 cm, X 10.5 cm sheet X 210 cm door length and for the length of the door here I am exaggerating 2.5 cm up and 2.5 cm down so that the wood does not break when inserting the series of pegs.
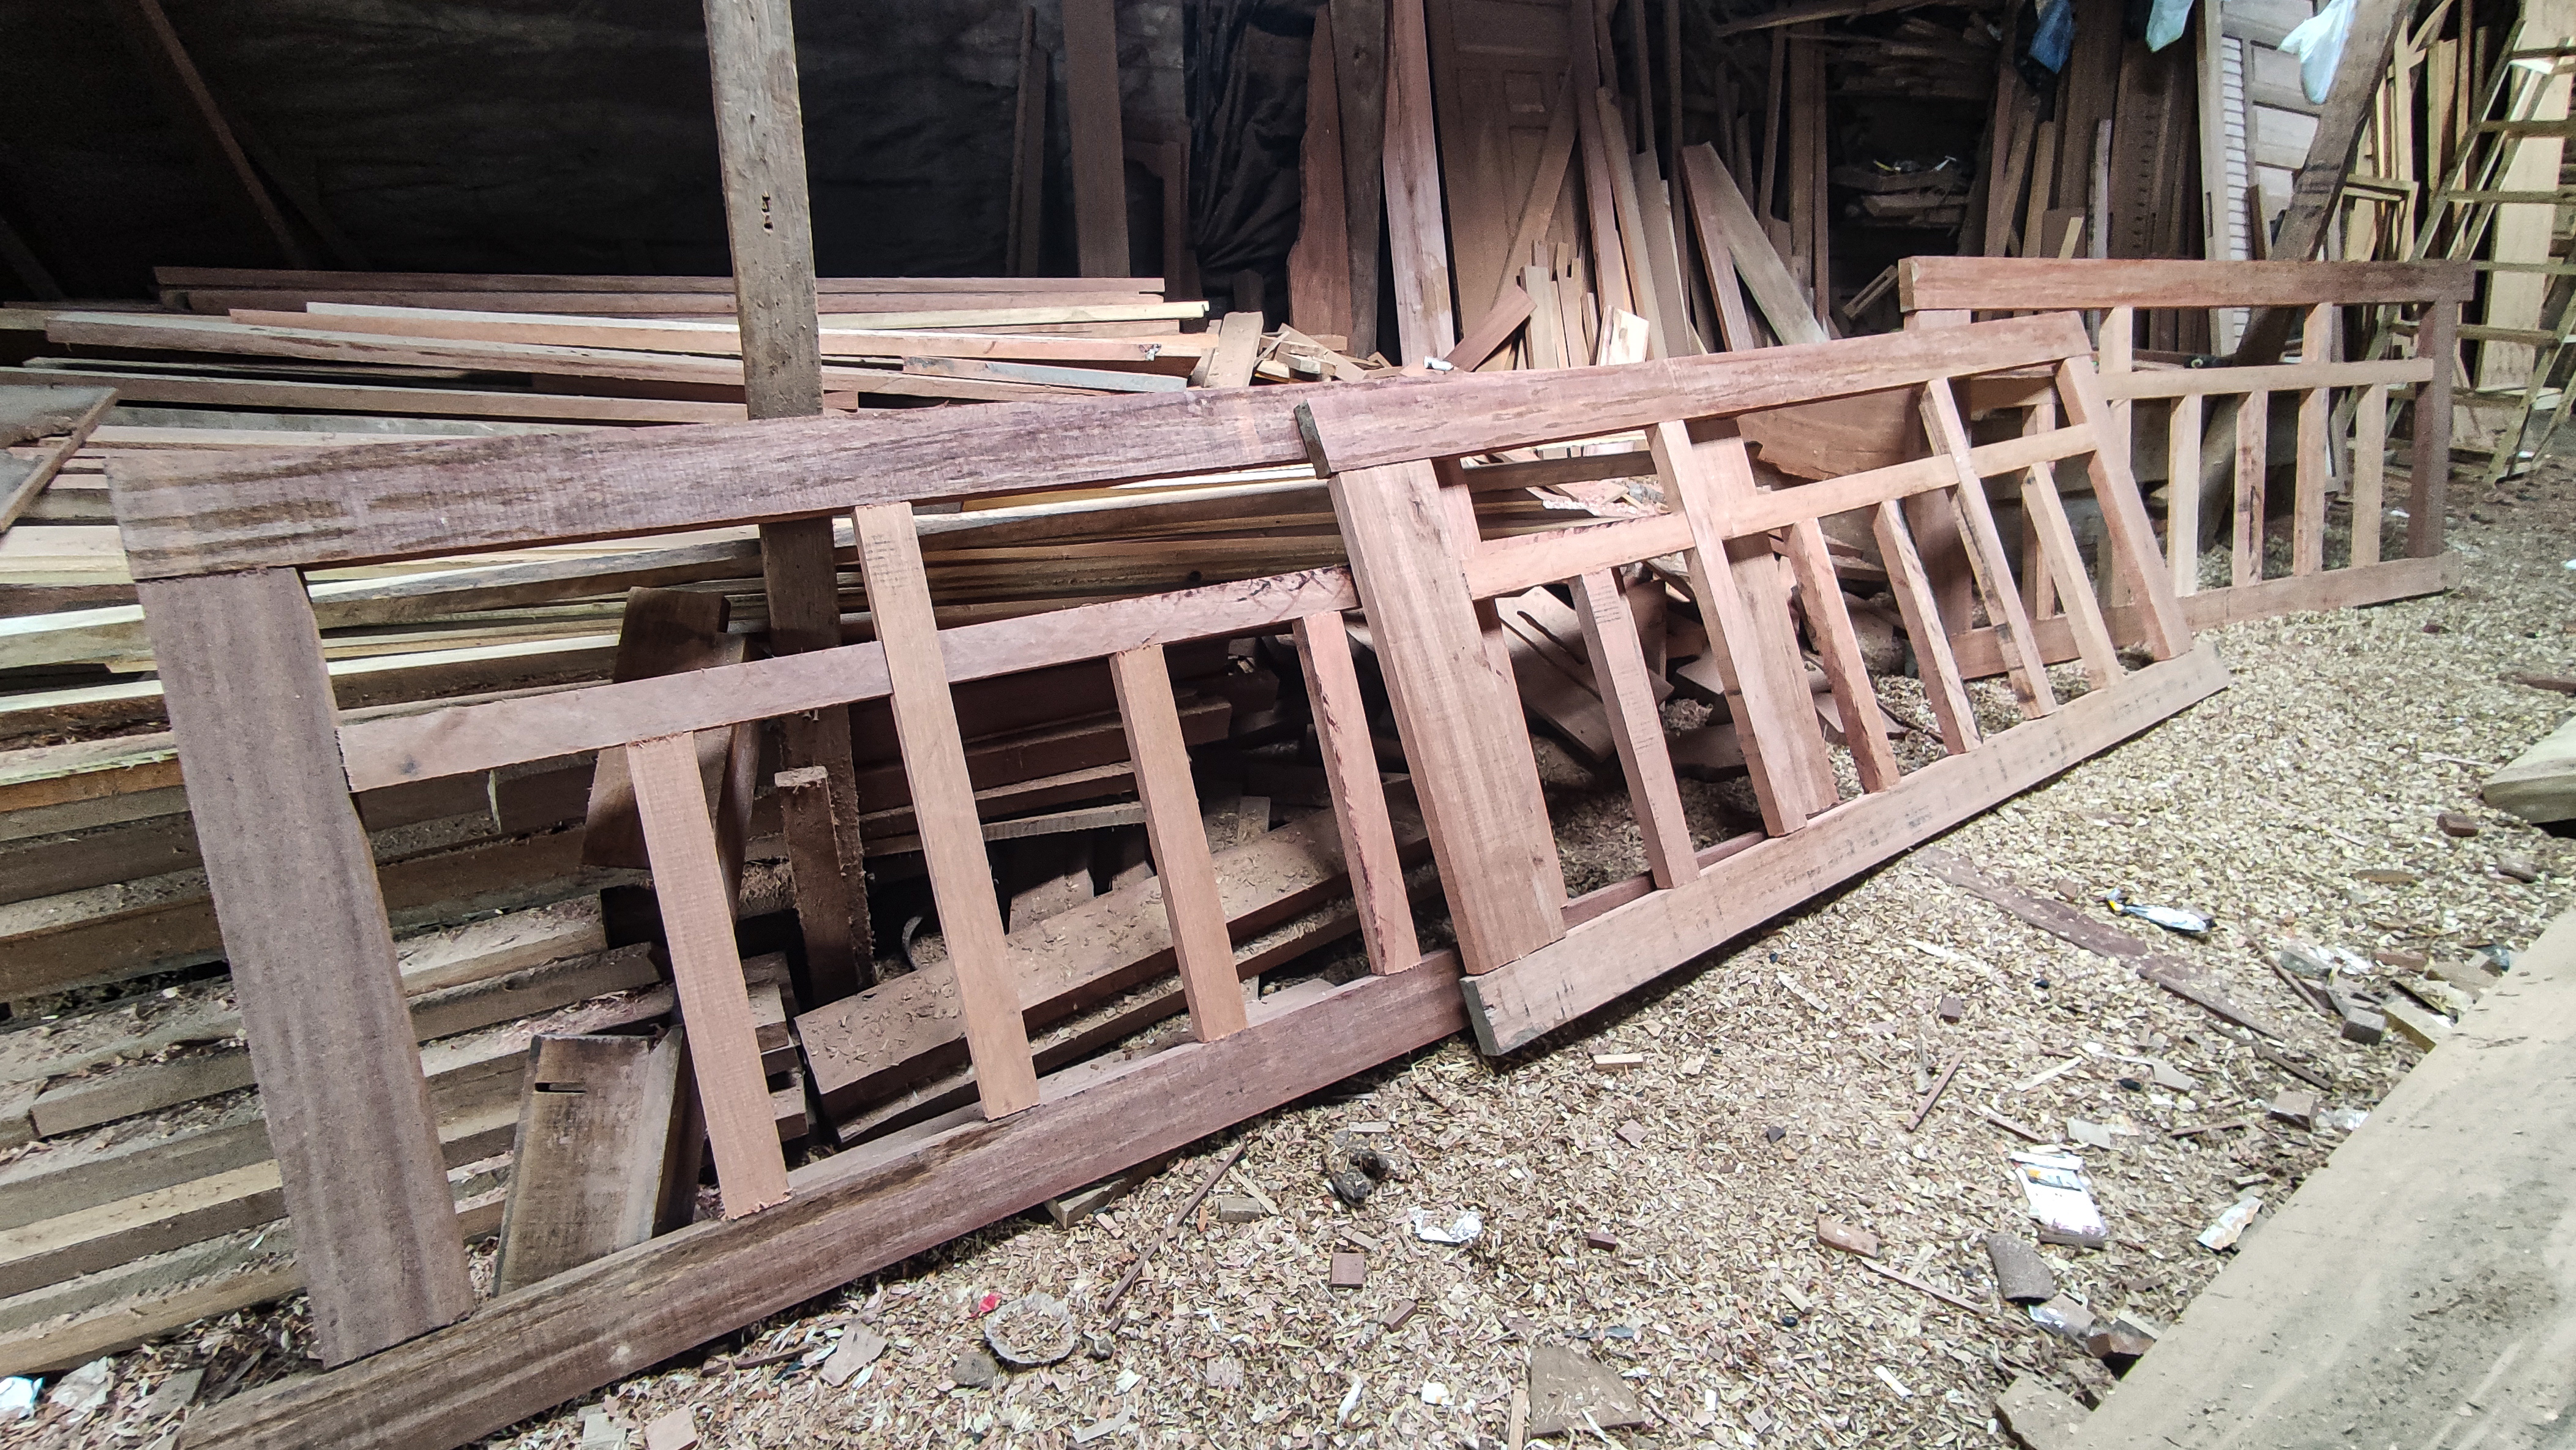
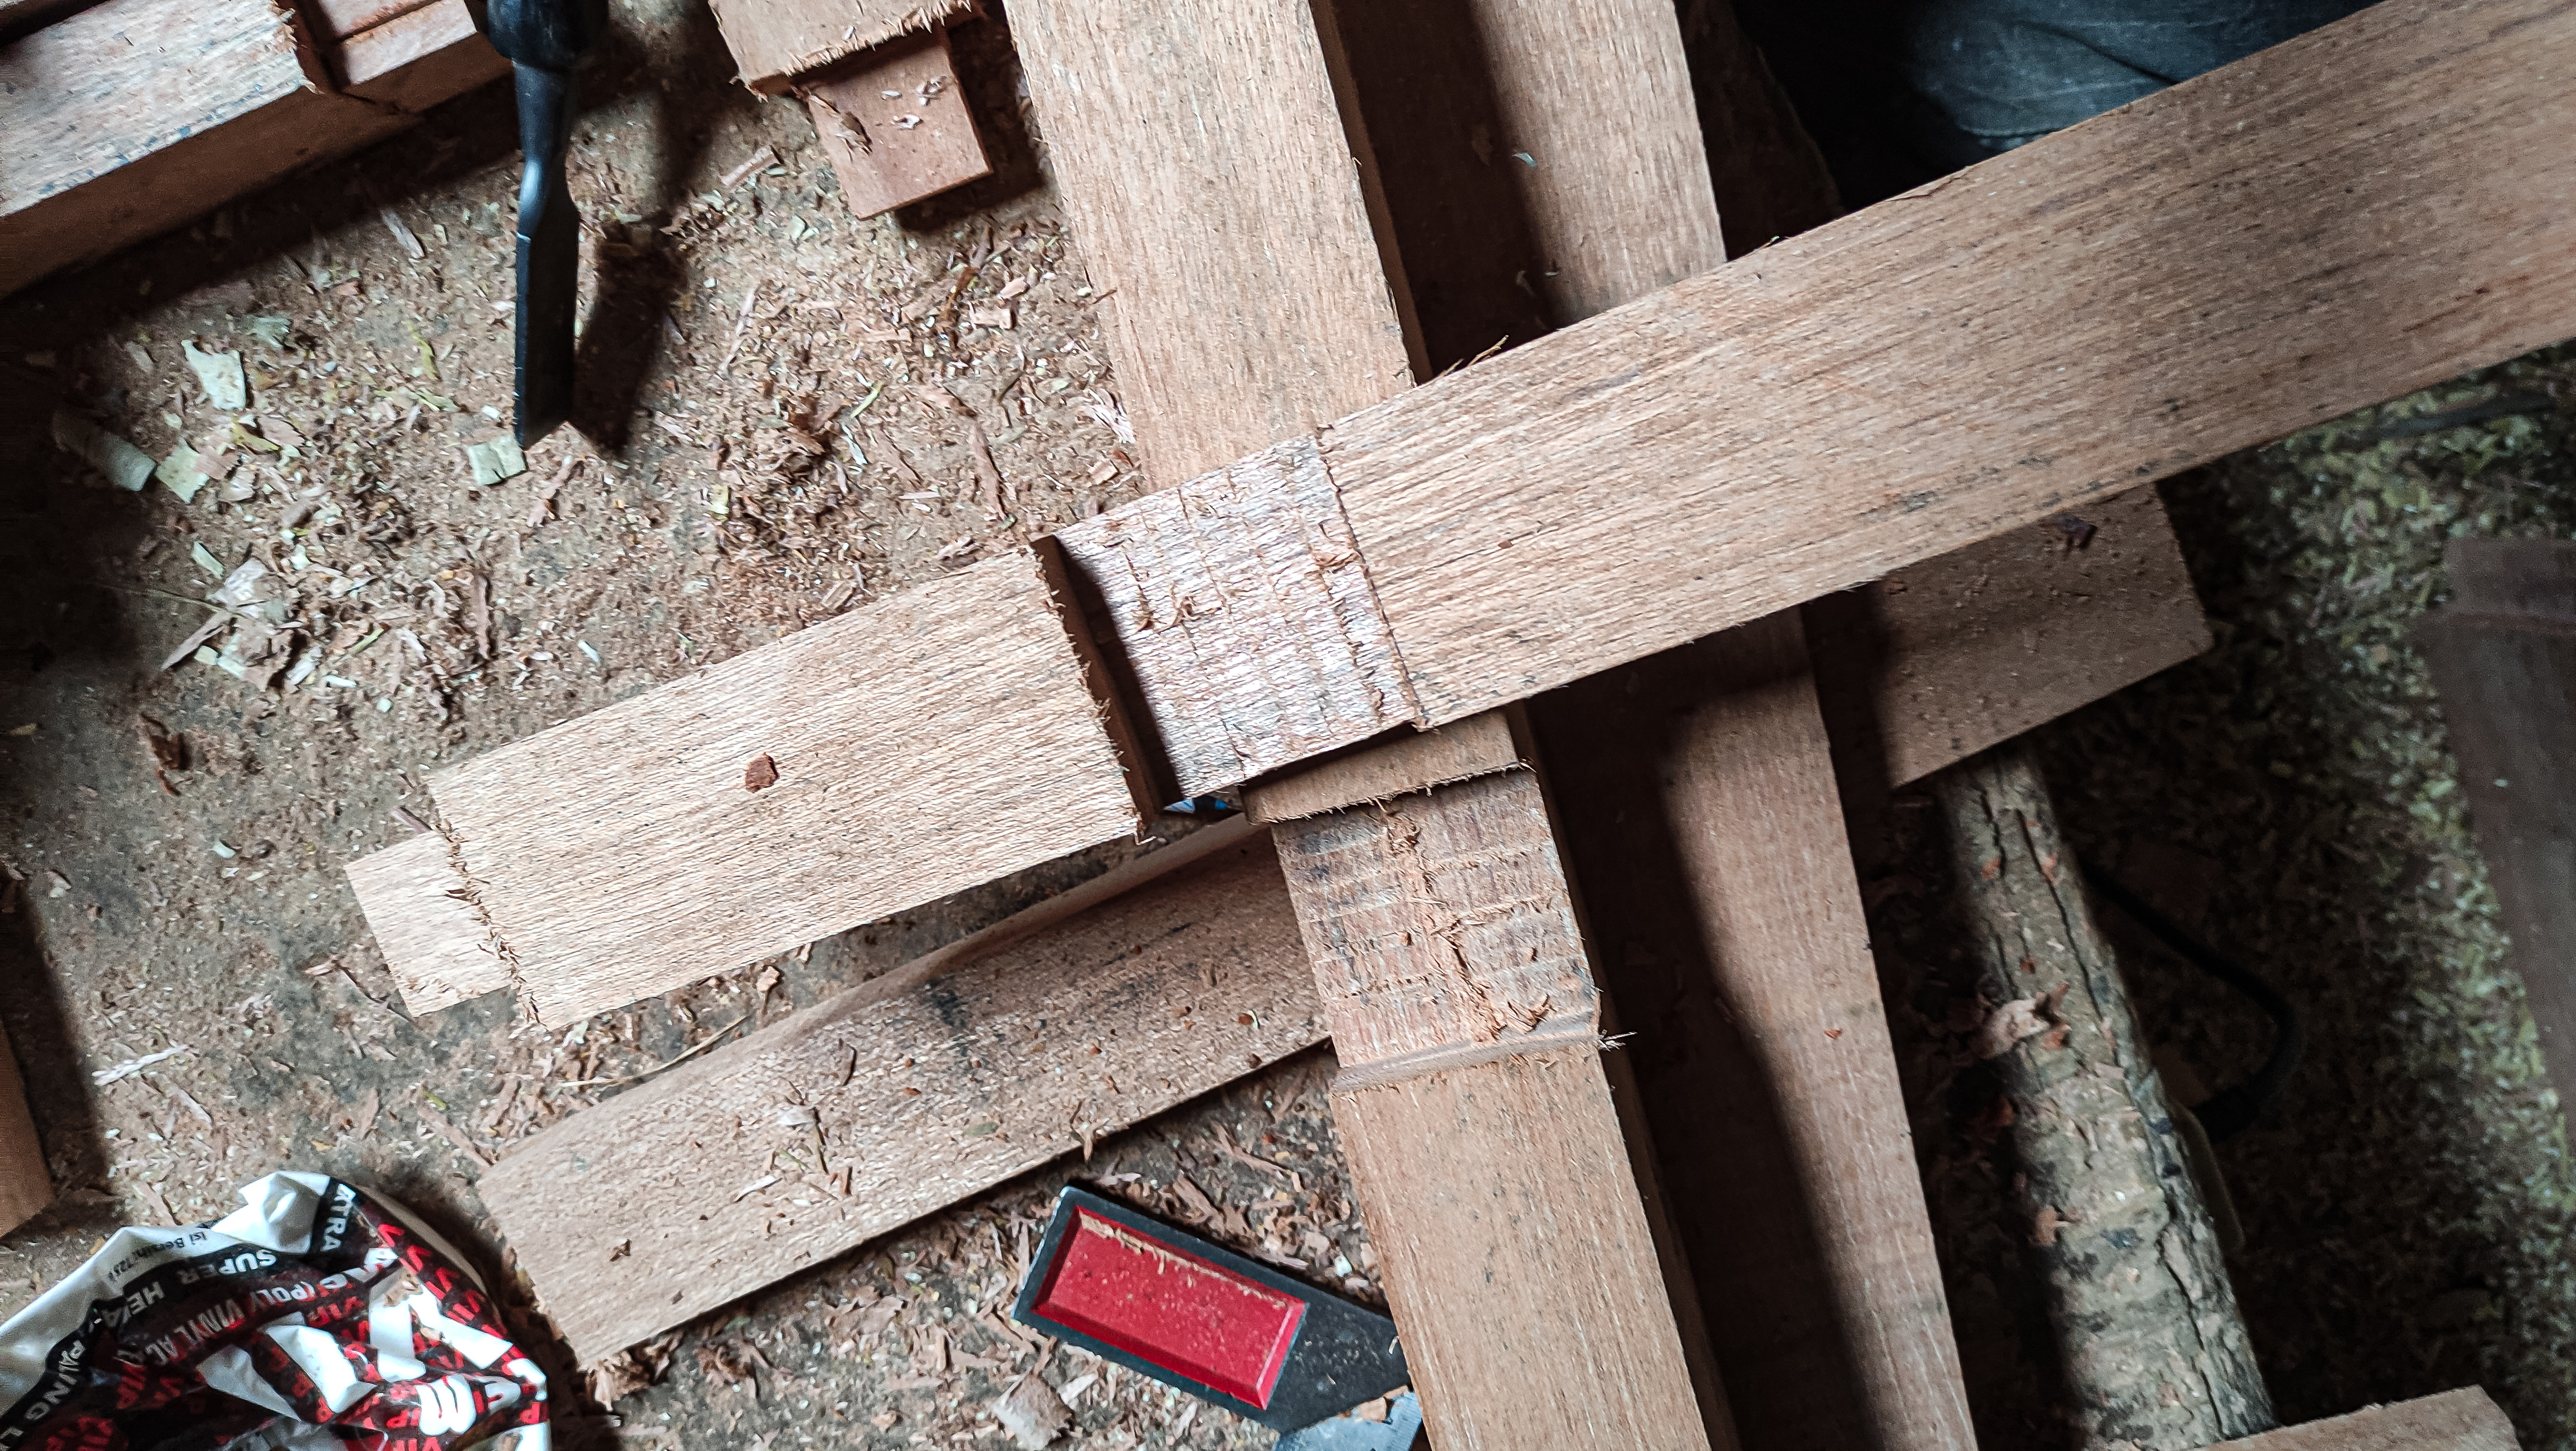
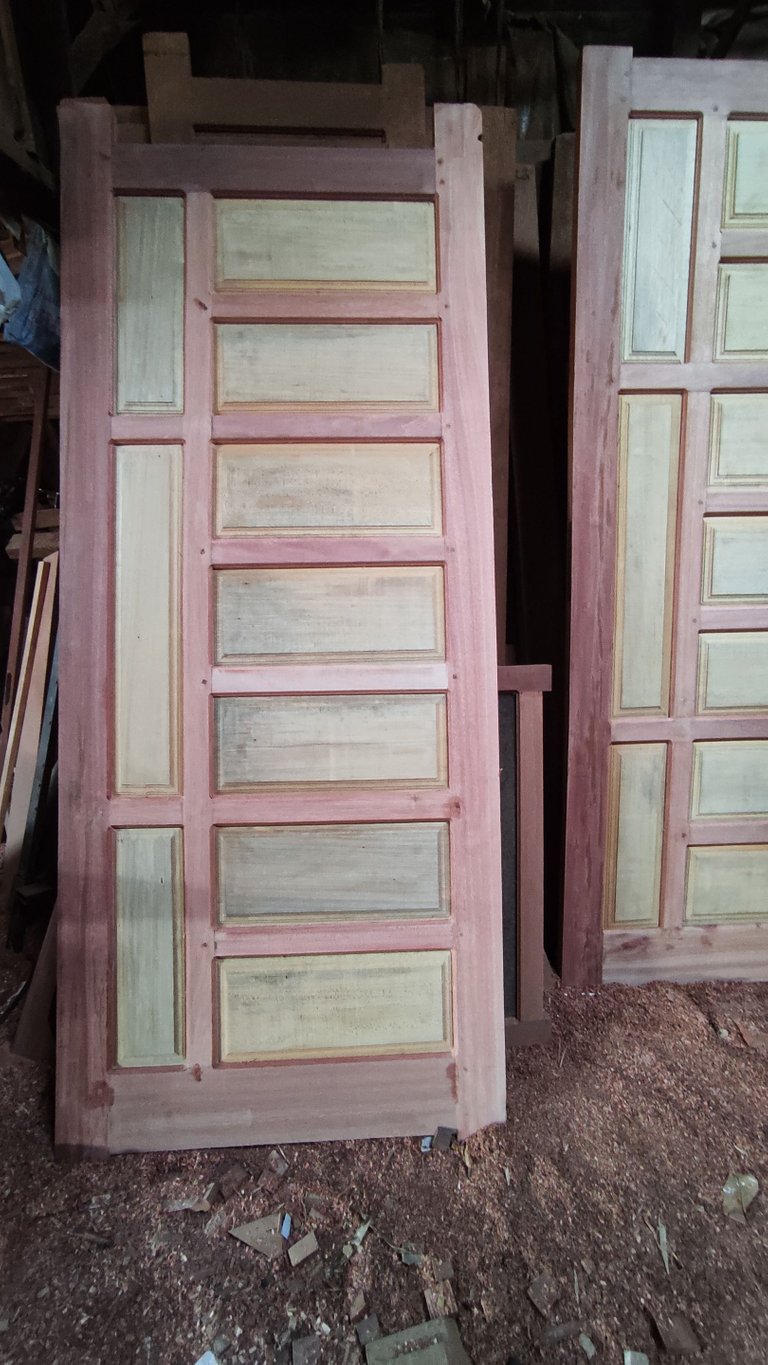
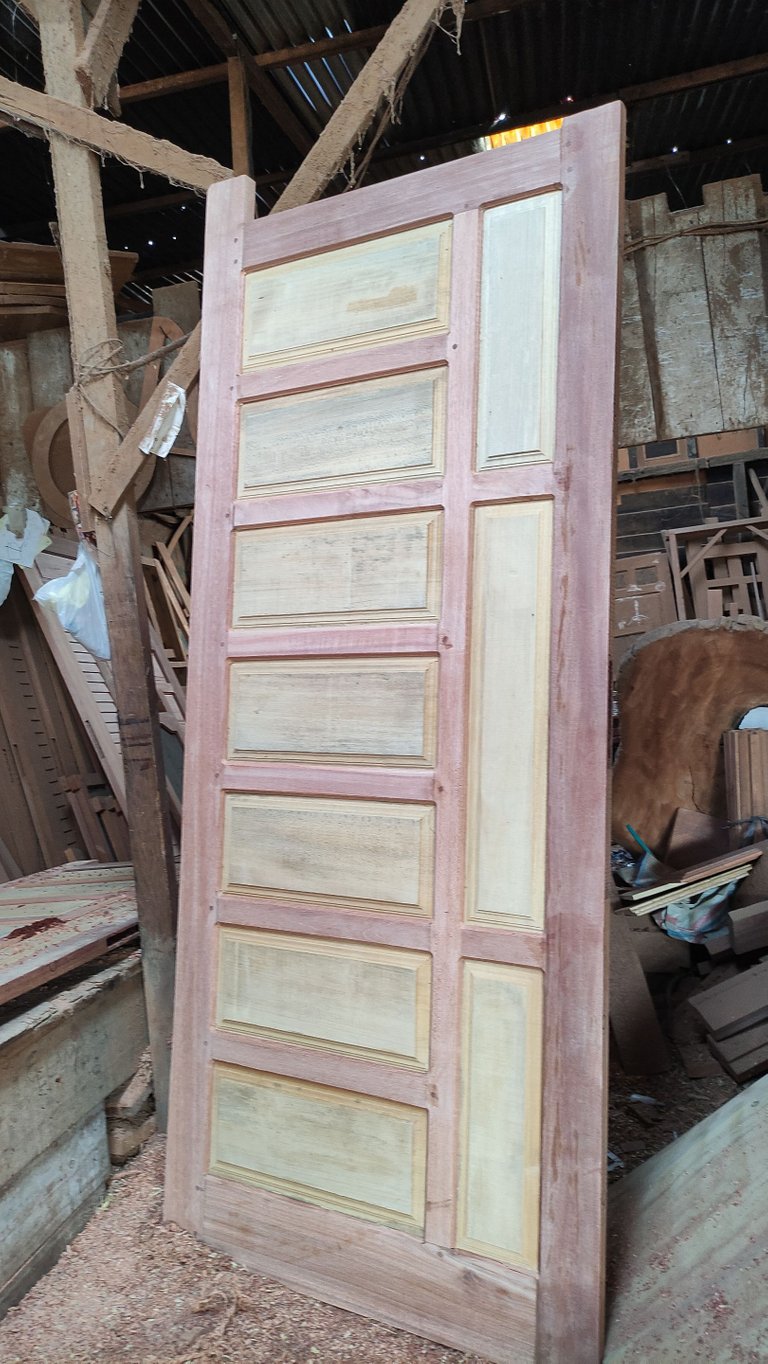
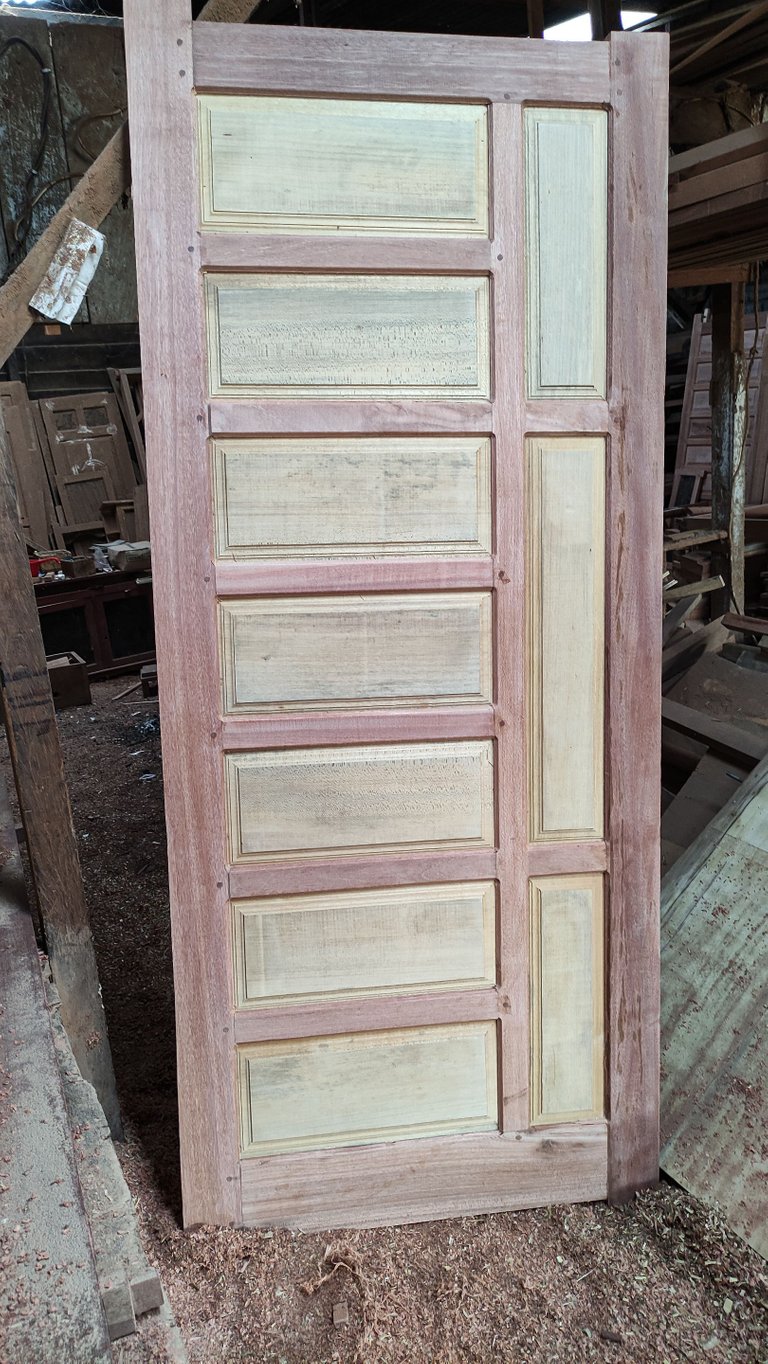
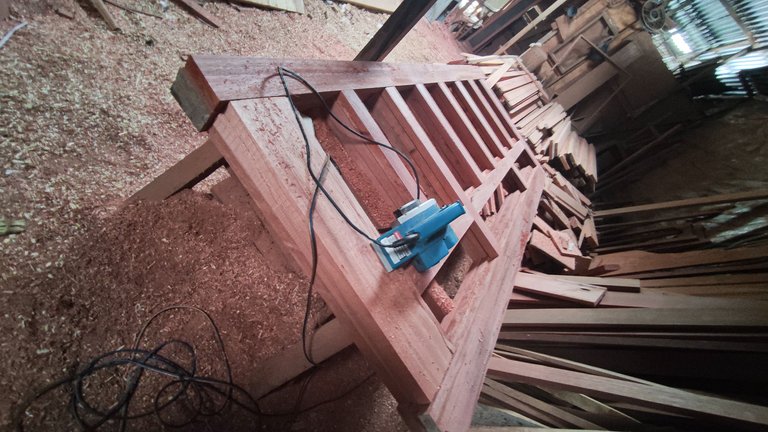
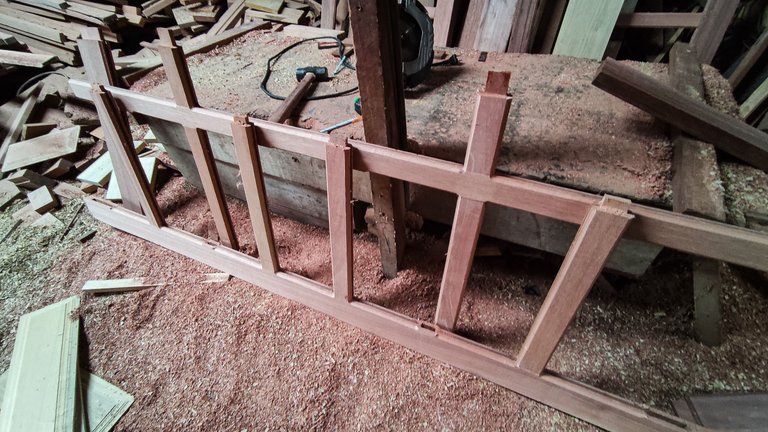
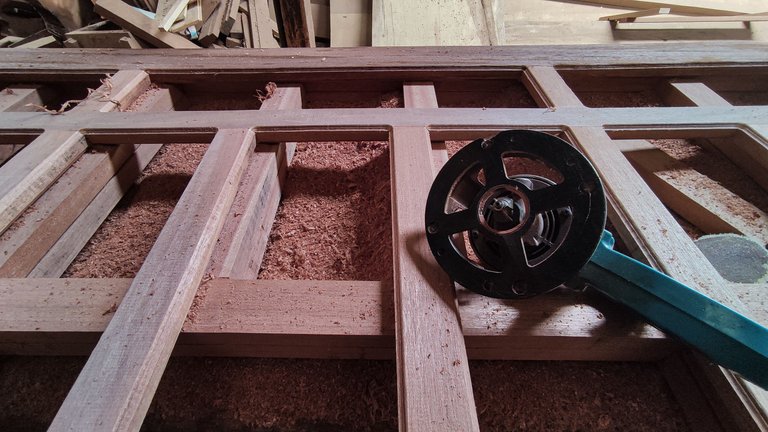
After I smoothed out the main set of wood, then I continued to outline using a roller with a pen the parts of the wood that I would drill for the peg holder (width) of the door series and the door unit means it consists of 6 main posts which I have to line together and so that the peg holder is not drilled wrong on the main bulkhead, we again pay attention to the design of the picture / door bone holder in the picture.
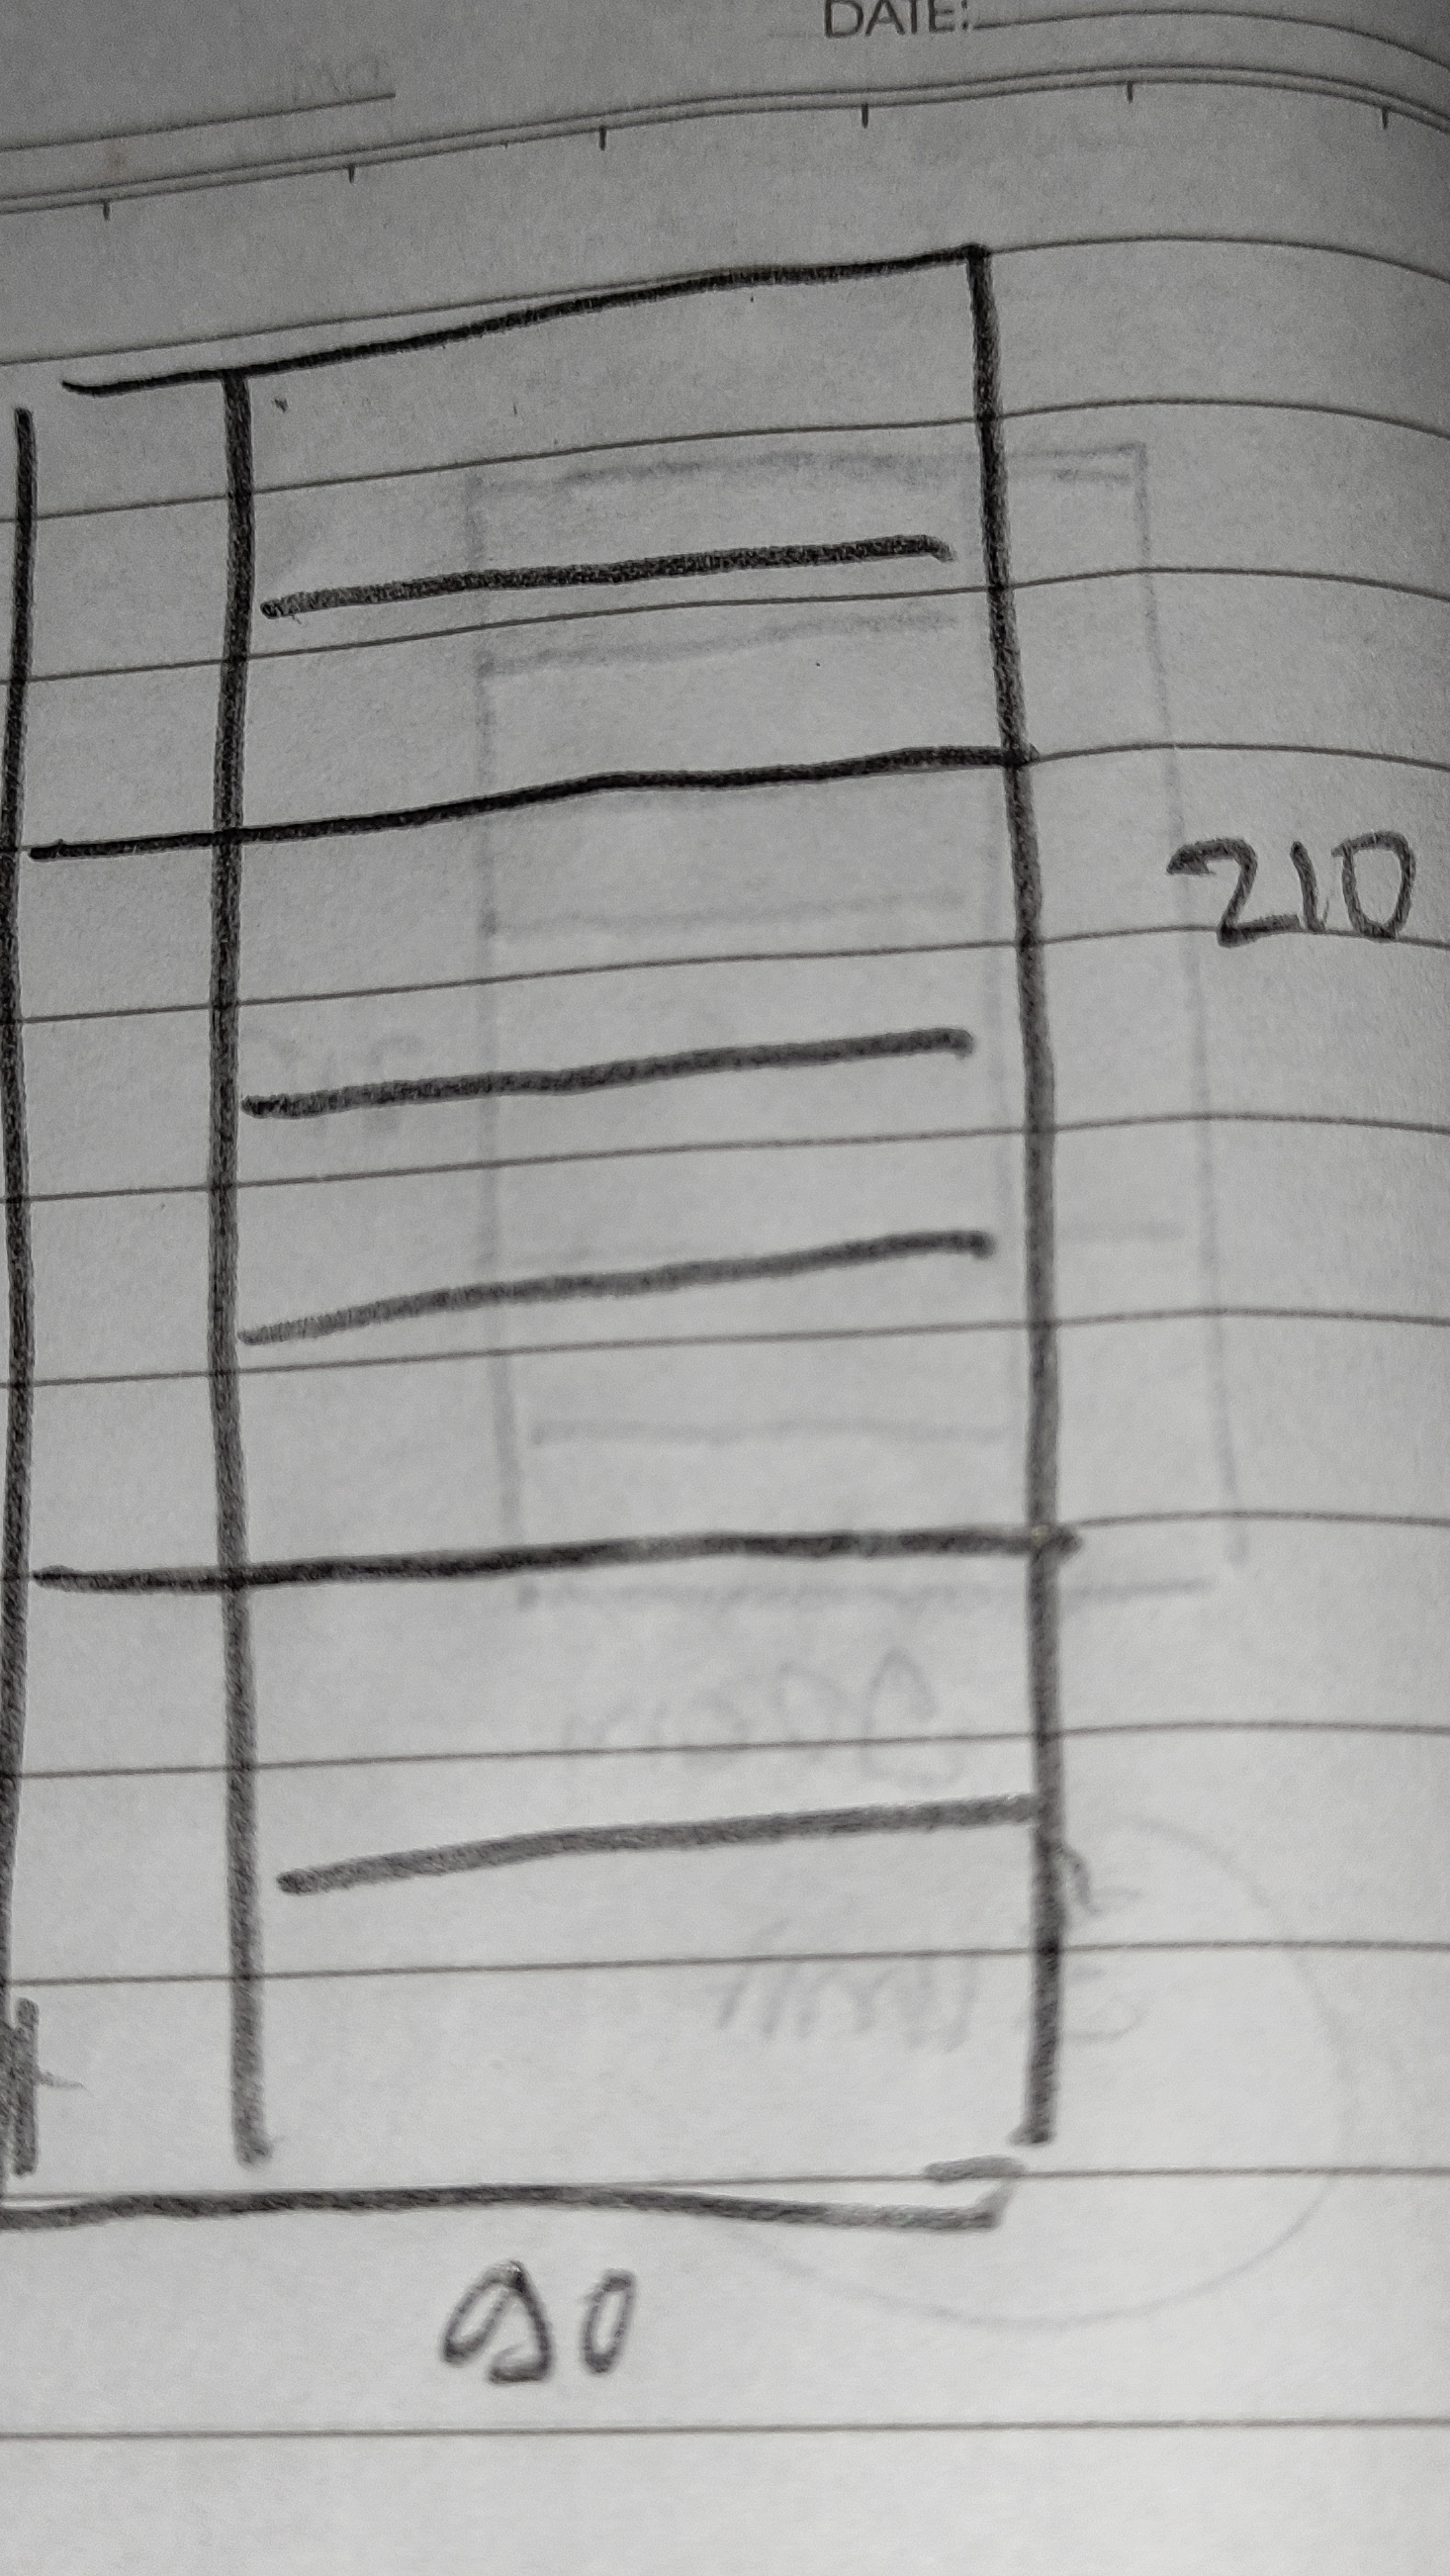
In the picture, it can be seen that the left side consists of 6 bulkheads in the width of the door and the right side consists of 2 bulkheads in the door which are located between the main bulkhead above and below the door and for the inner partition of the door here I use wood measuring 3.5cm x 6cm ,so for the drilling of the pegs on the main pillar of the door frame, it is clearly different, namely 3:3 and for the top and bottom base partitions the width of the door is also different because they are the main series, for the main bulkhead the width of the top door I use wood measuring 10.5cm wide x 3.5cm wide (the same as the size of the left and right poles of the door) and for the size of the main bulkhead at the bottom of my door uses wood with a width of 16cm x 3.5cm, after I finished I did outline all the parts of the main bulkhead holder in the series, I continued drilling door width connection pegs and all the processes took place like this.
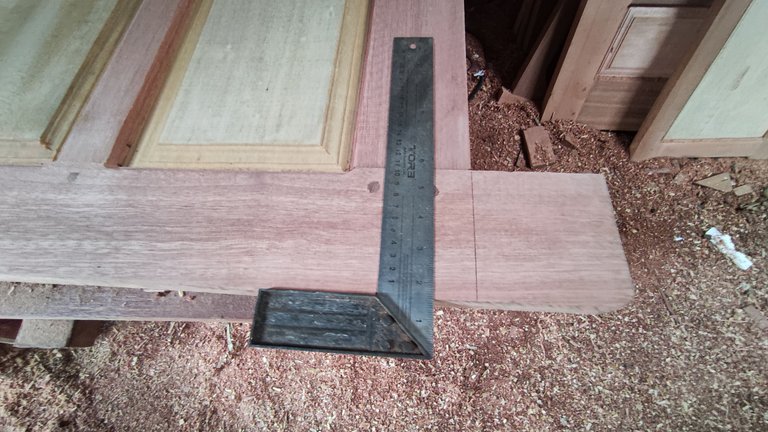
When I'm done I make all the holes using a drill machine for the door width connection pegs, then I continued the process of cutting the door width series bulkhead and to get the right size here we need a detailed multiplication so that there are no mistakes during the material cutting process.
To get the right size, how I calculate it is 10.5cm (the width of the main door post) X 2 (left-right) = 21cm and the size of the door width 90cm means 90cm - 21cm = 69cm then for the nipple which is 4 cm left + 4 cm right = 8 cm it means 69cm + 8cm = 77cm and this is the size of the wood I have to cut for the 90cm wide door bulkhead.
and for the middle door bulkhead and the way I calculated ,it was the height of the door 200cm then I subtracted the main bulkhead, the width of the top door was 10.5cm and the bottom was 16cm + the top and bottom pegs were 8cm and after I calculated the wooden display for the bulkhead, 181, 5cm.
You may ask how to calculate all the inner door bulkheads in a series consisting of 6 bulkheads, excluding the upper and lower bulkheads of the main part of the door width?
Here we stock the size of the width of the door leaf that we have, for now we have stock of the leaf/board measuring 22.5cm meaning I have to make the width of the door leaf in each plot of 20.5cm (181.5cm - 6 partitions with a width of 6cm = 181, 5cm - 36 = the remaining 145.5 then I divide 7 plots = 20.7mm).

That means the total bulkhead that I have to cut for the 3 doors which I added with the size of the 8cm peg graft nipple for the left and right is, ,
• 3 main bulkheads with a width of the top door with a size of 10.5cm x 77 cm.
• 3 main bulkheads with a width of the bottom door with a size of 16cm x 77cm.
• 3 central door bones that extend upwards with a width of 6cm x 181.5 cm.
•6 bones wide door with a width of 6cm x 77cm.
• 12 door leaf bones with a width of 6cm x 56cm.
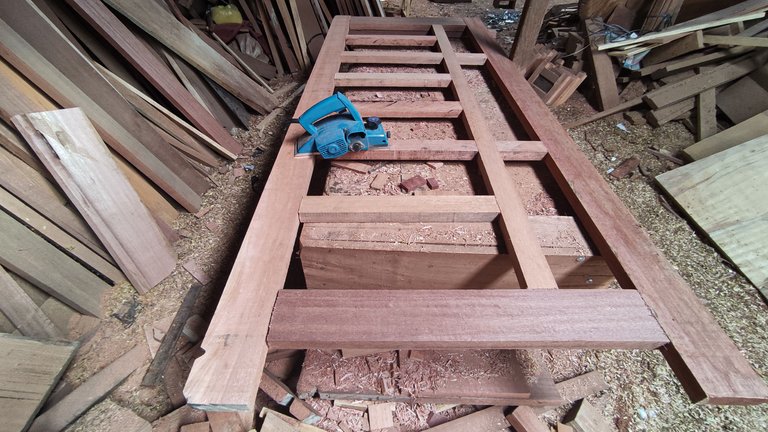
After everything is finished I cut it then I continue the process of making the nipple using the panel machine.
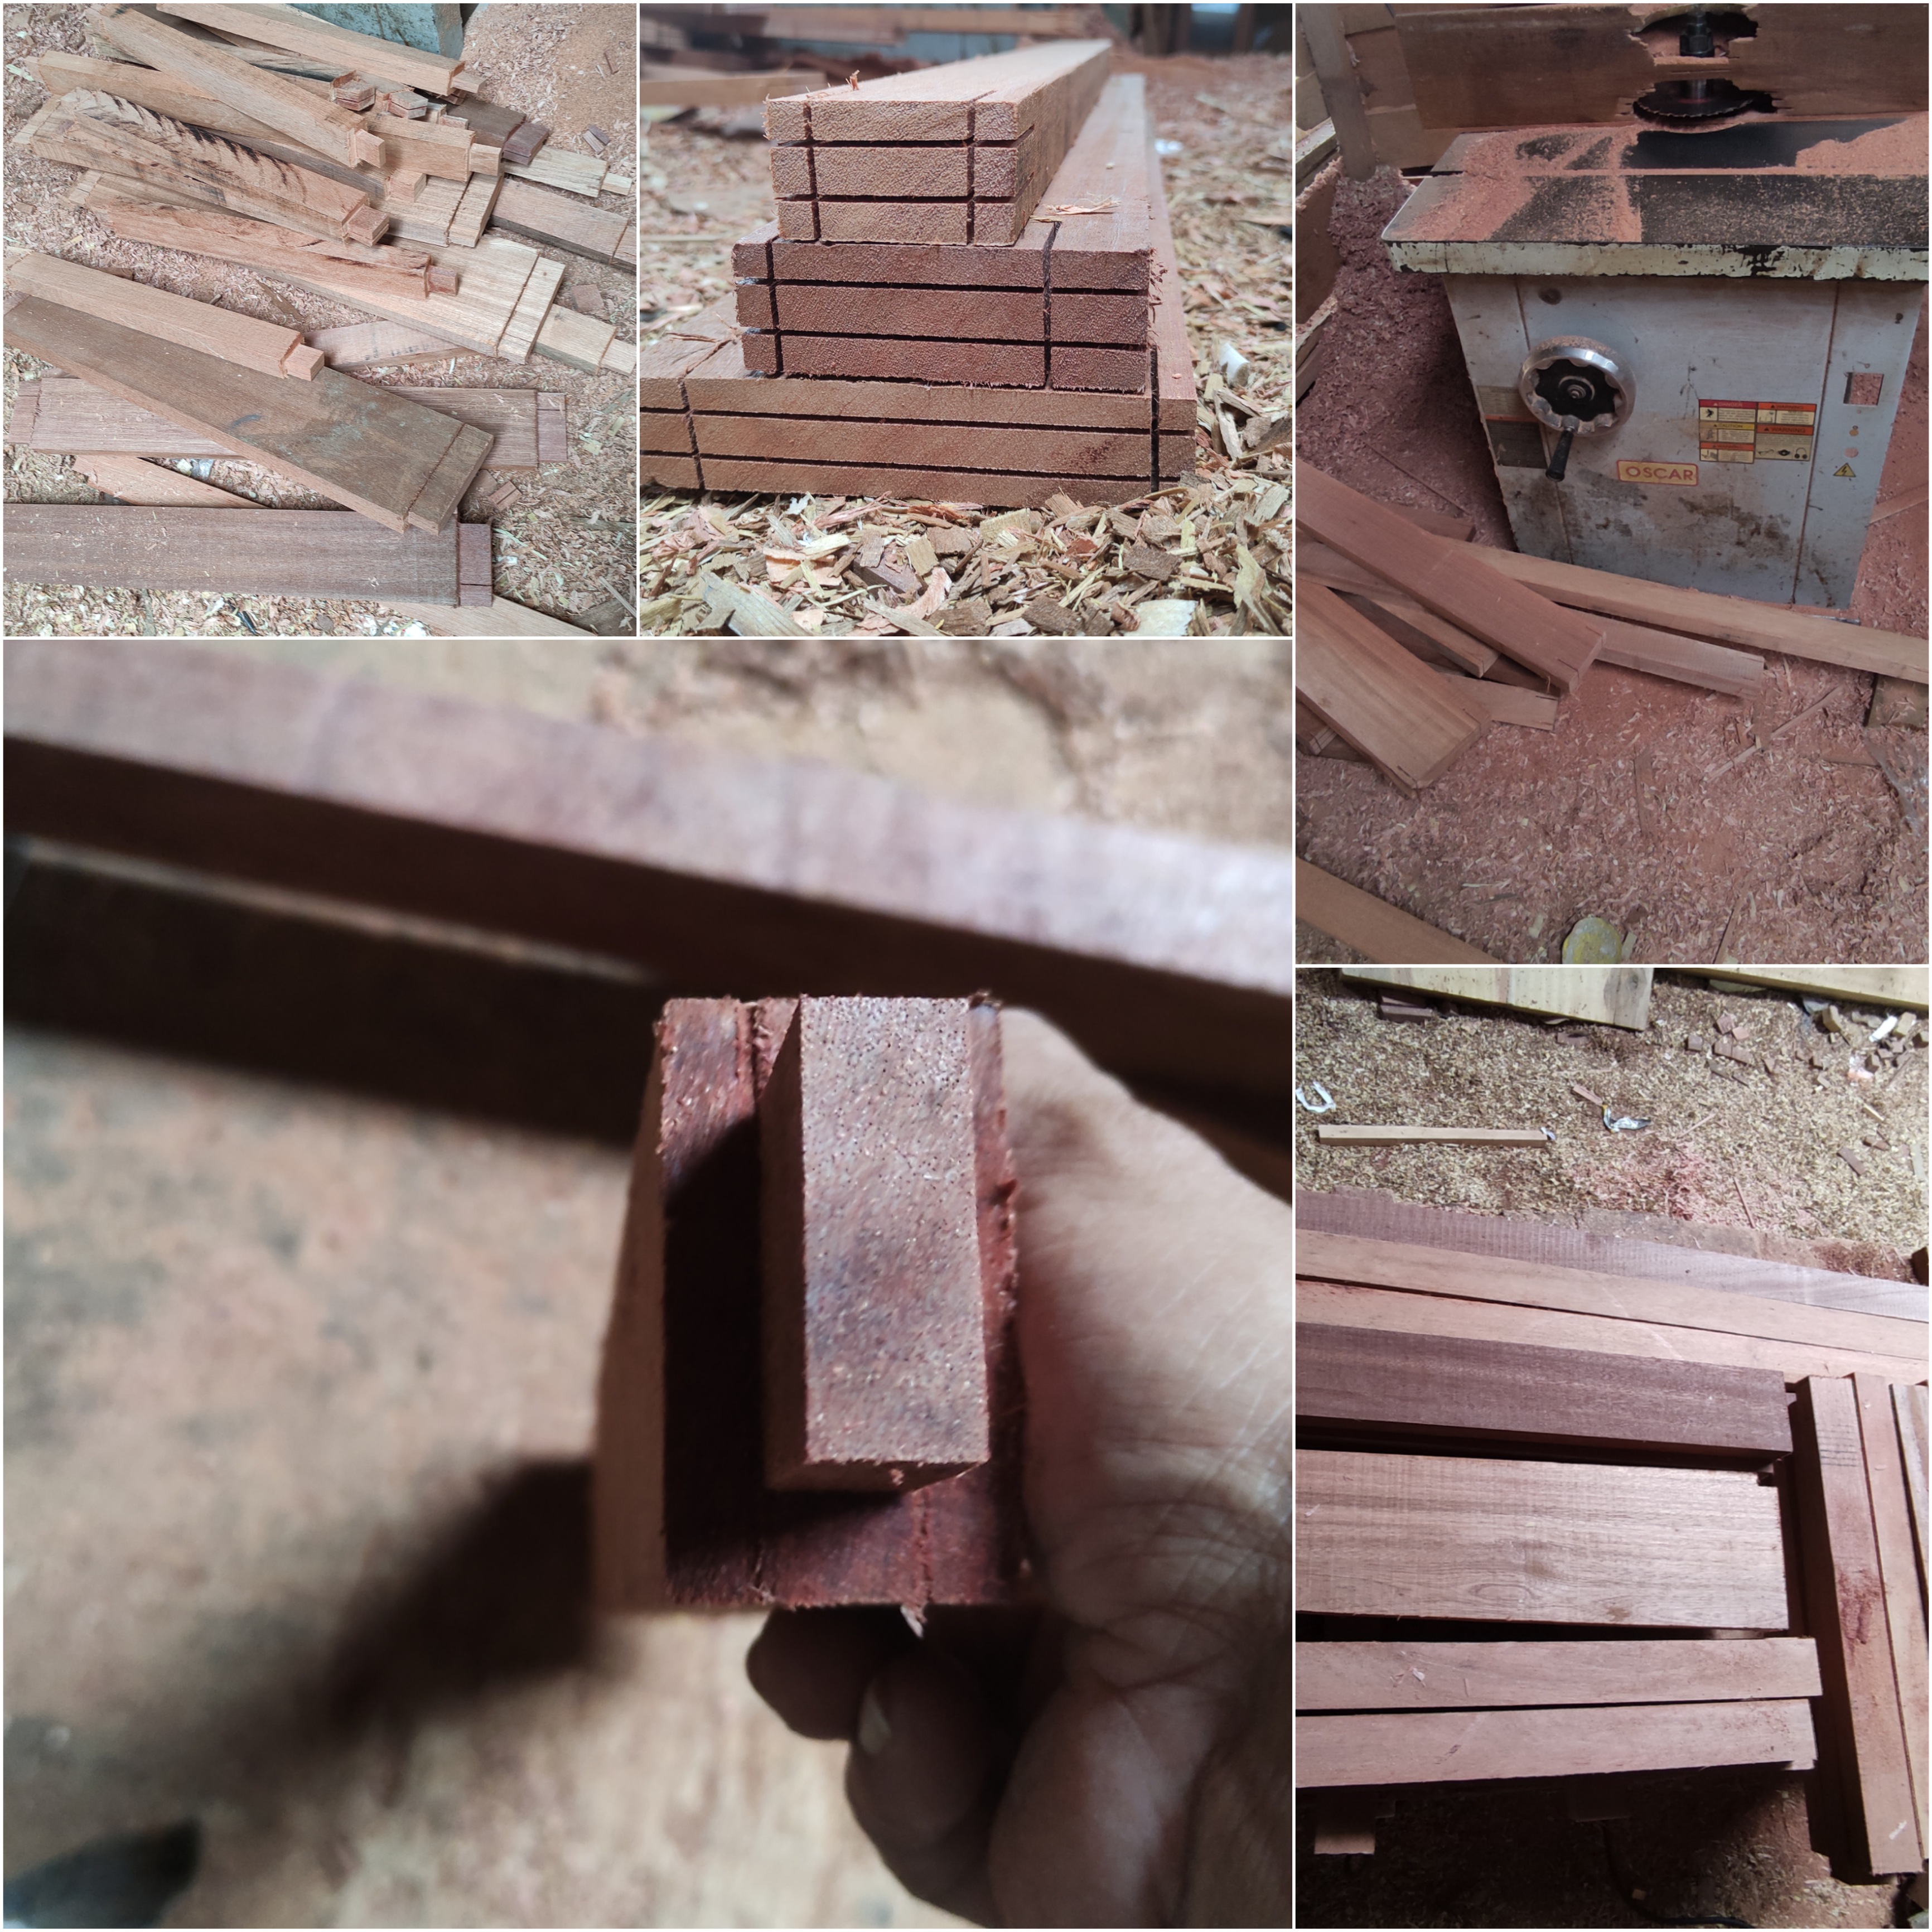
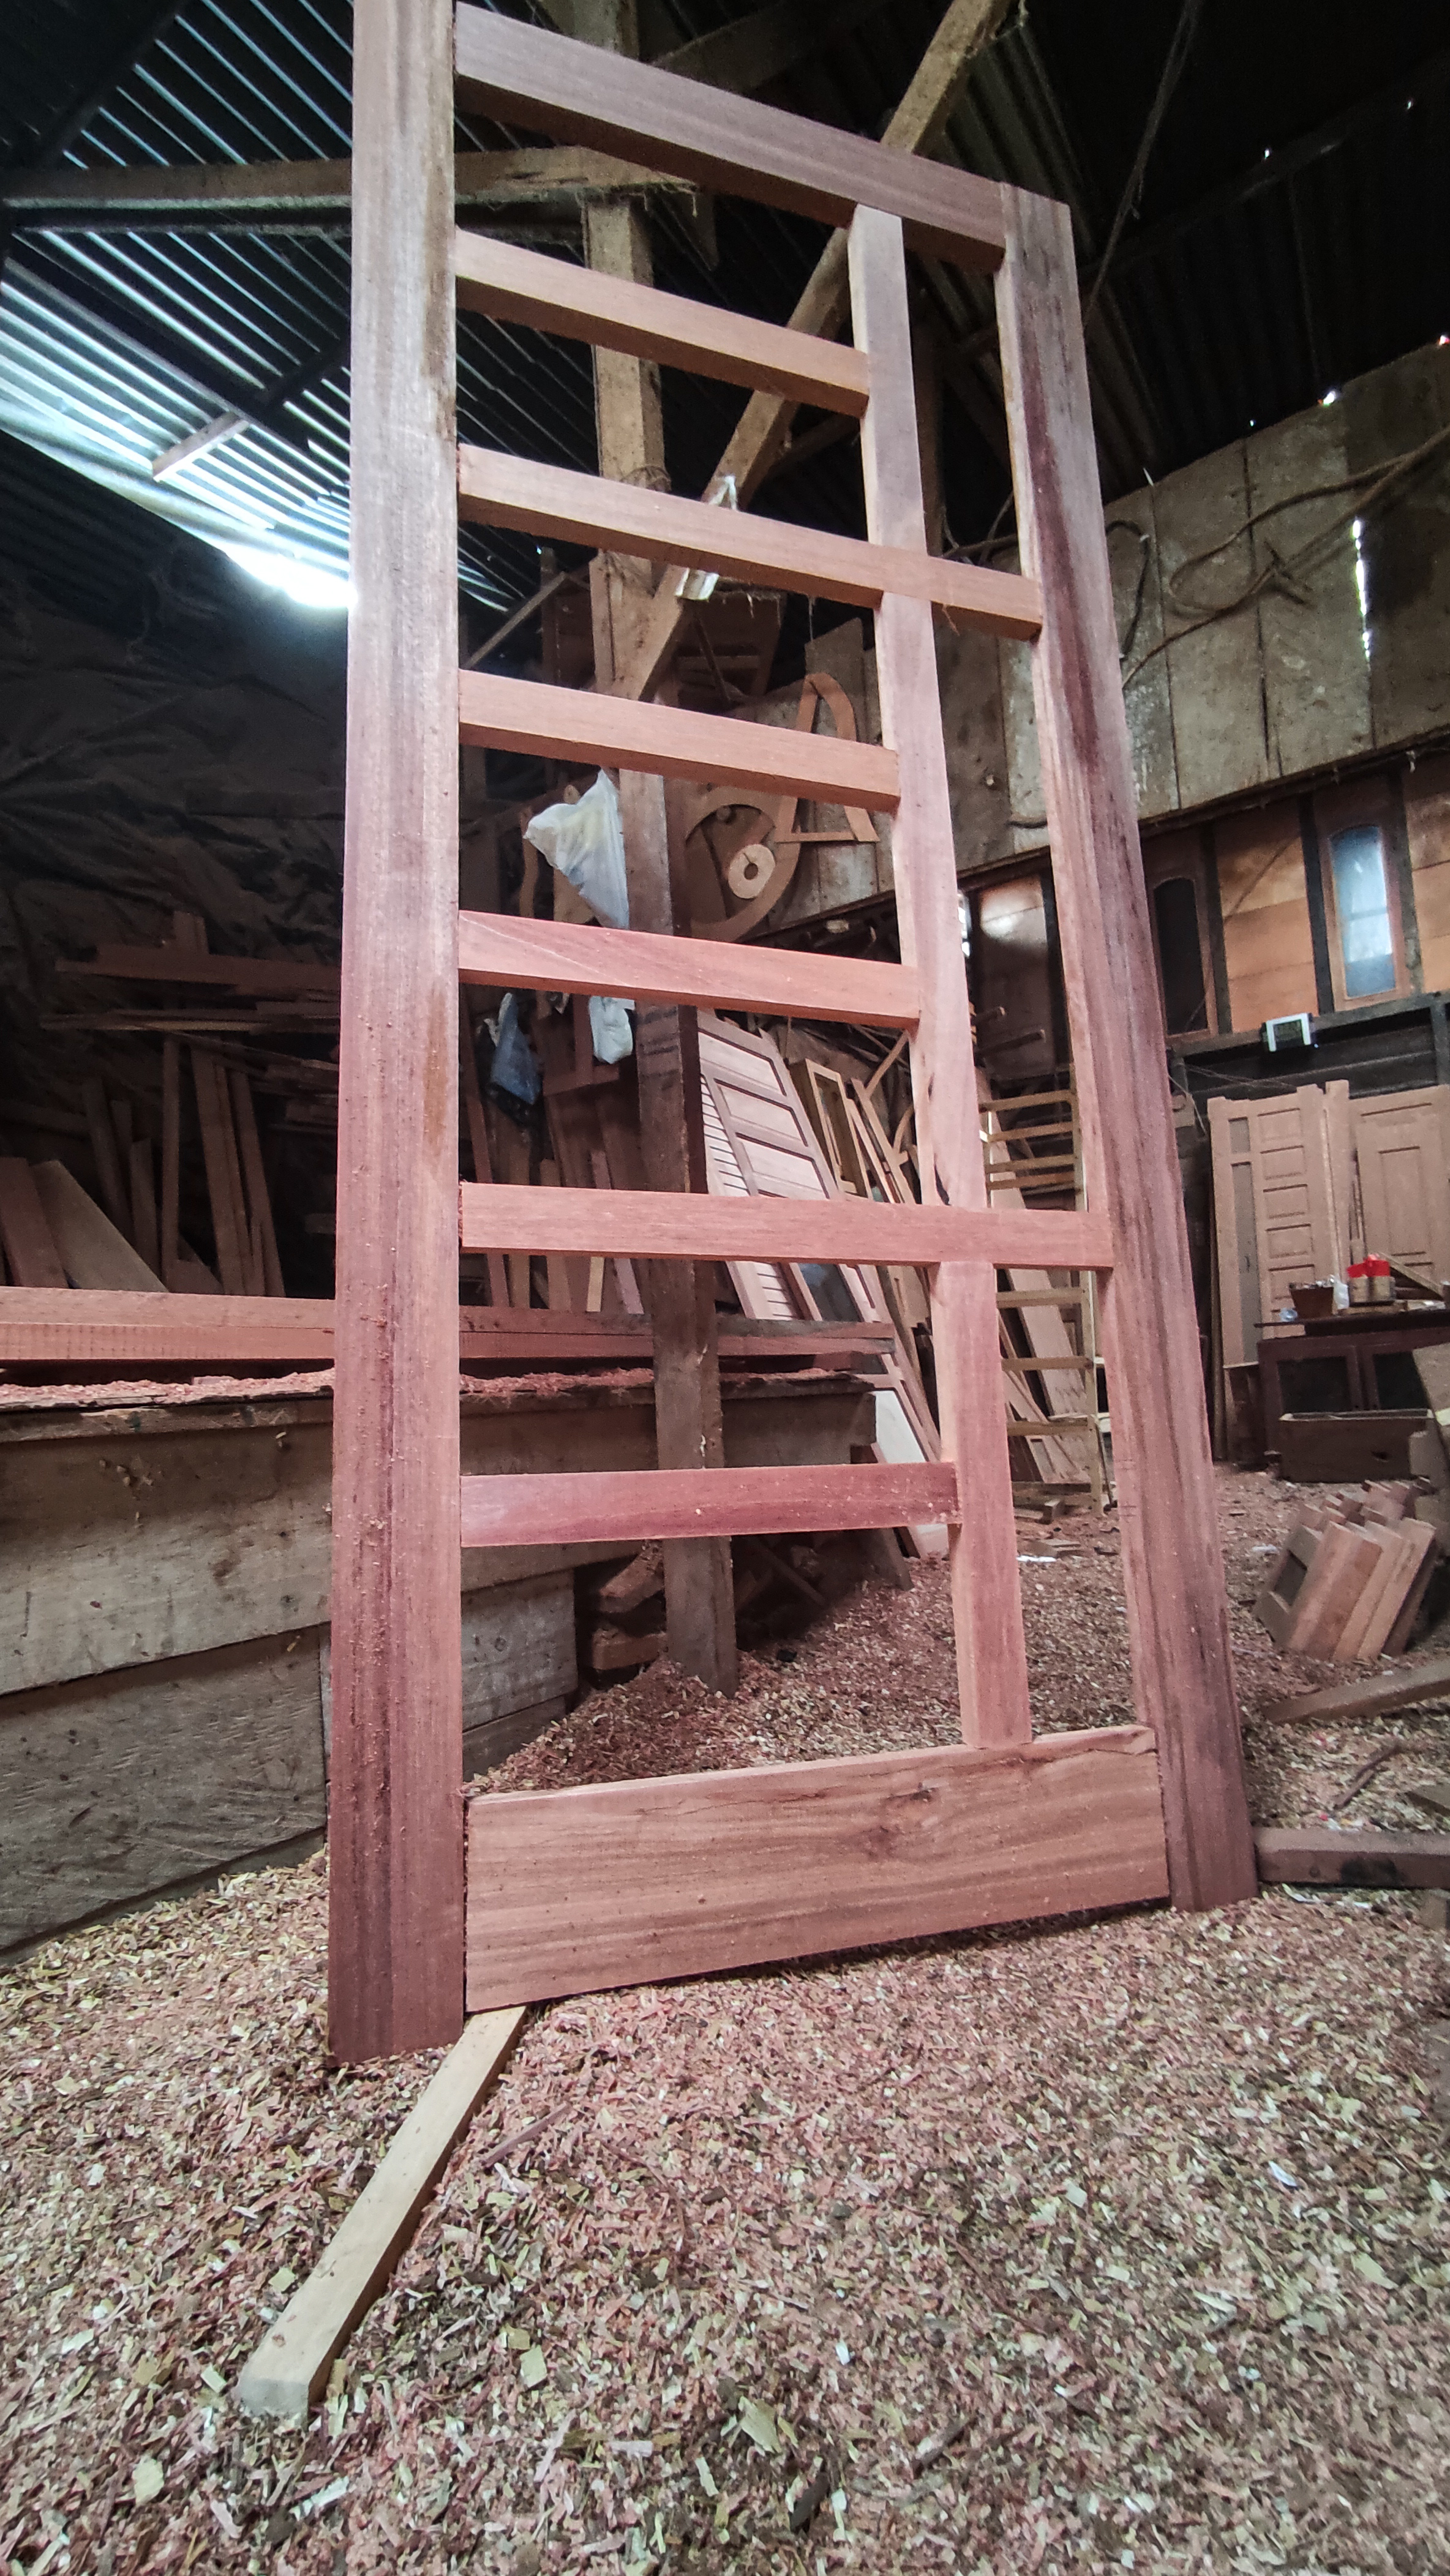
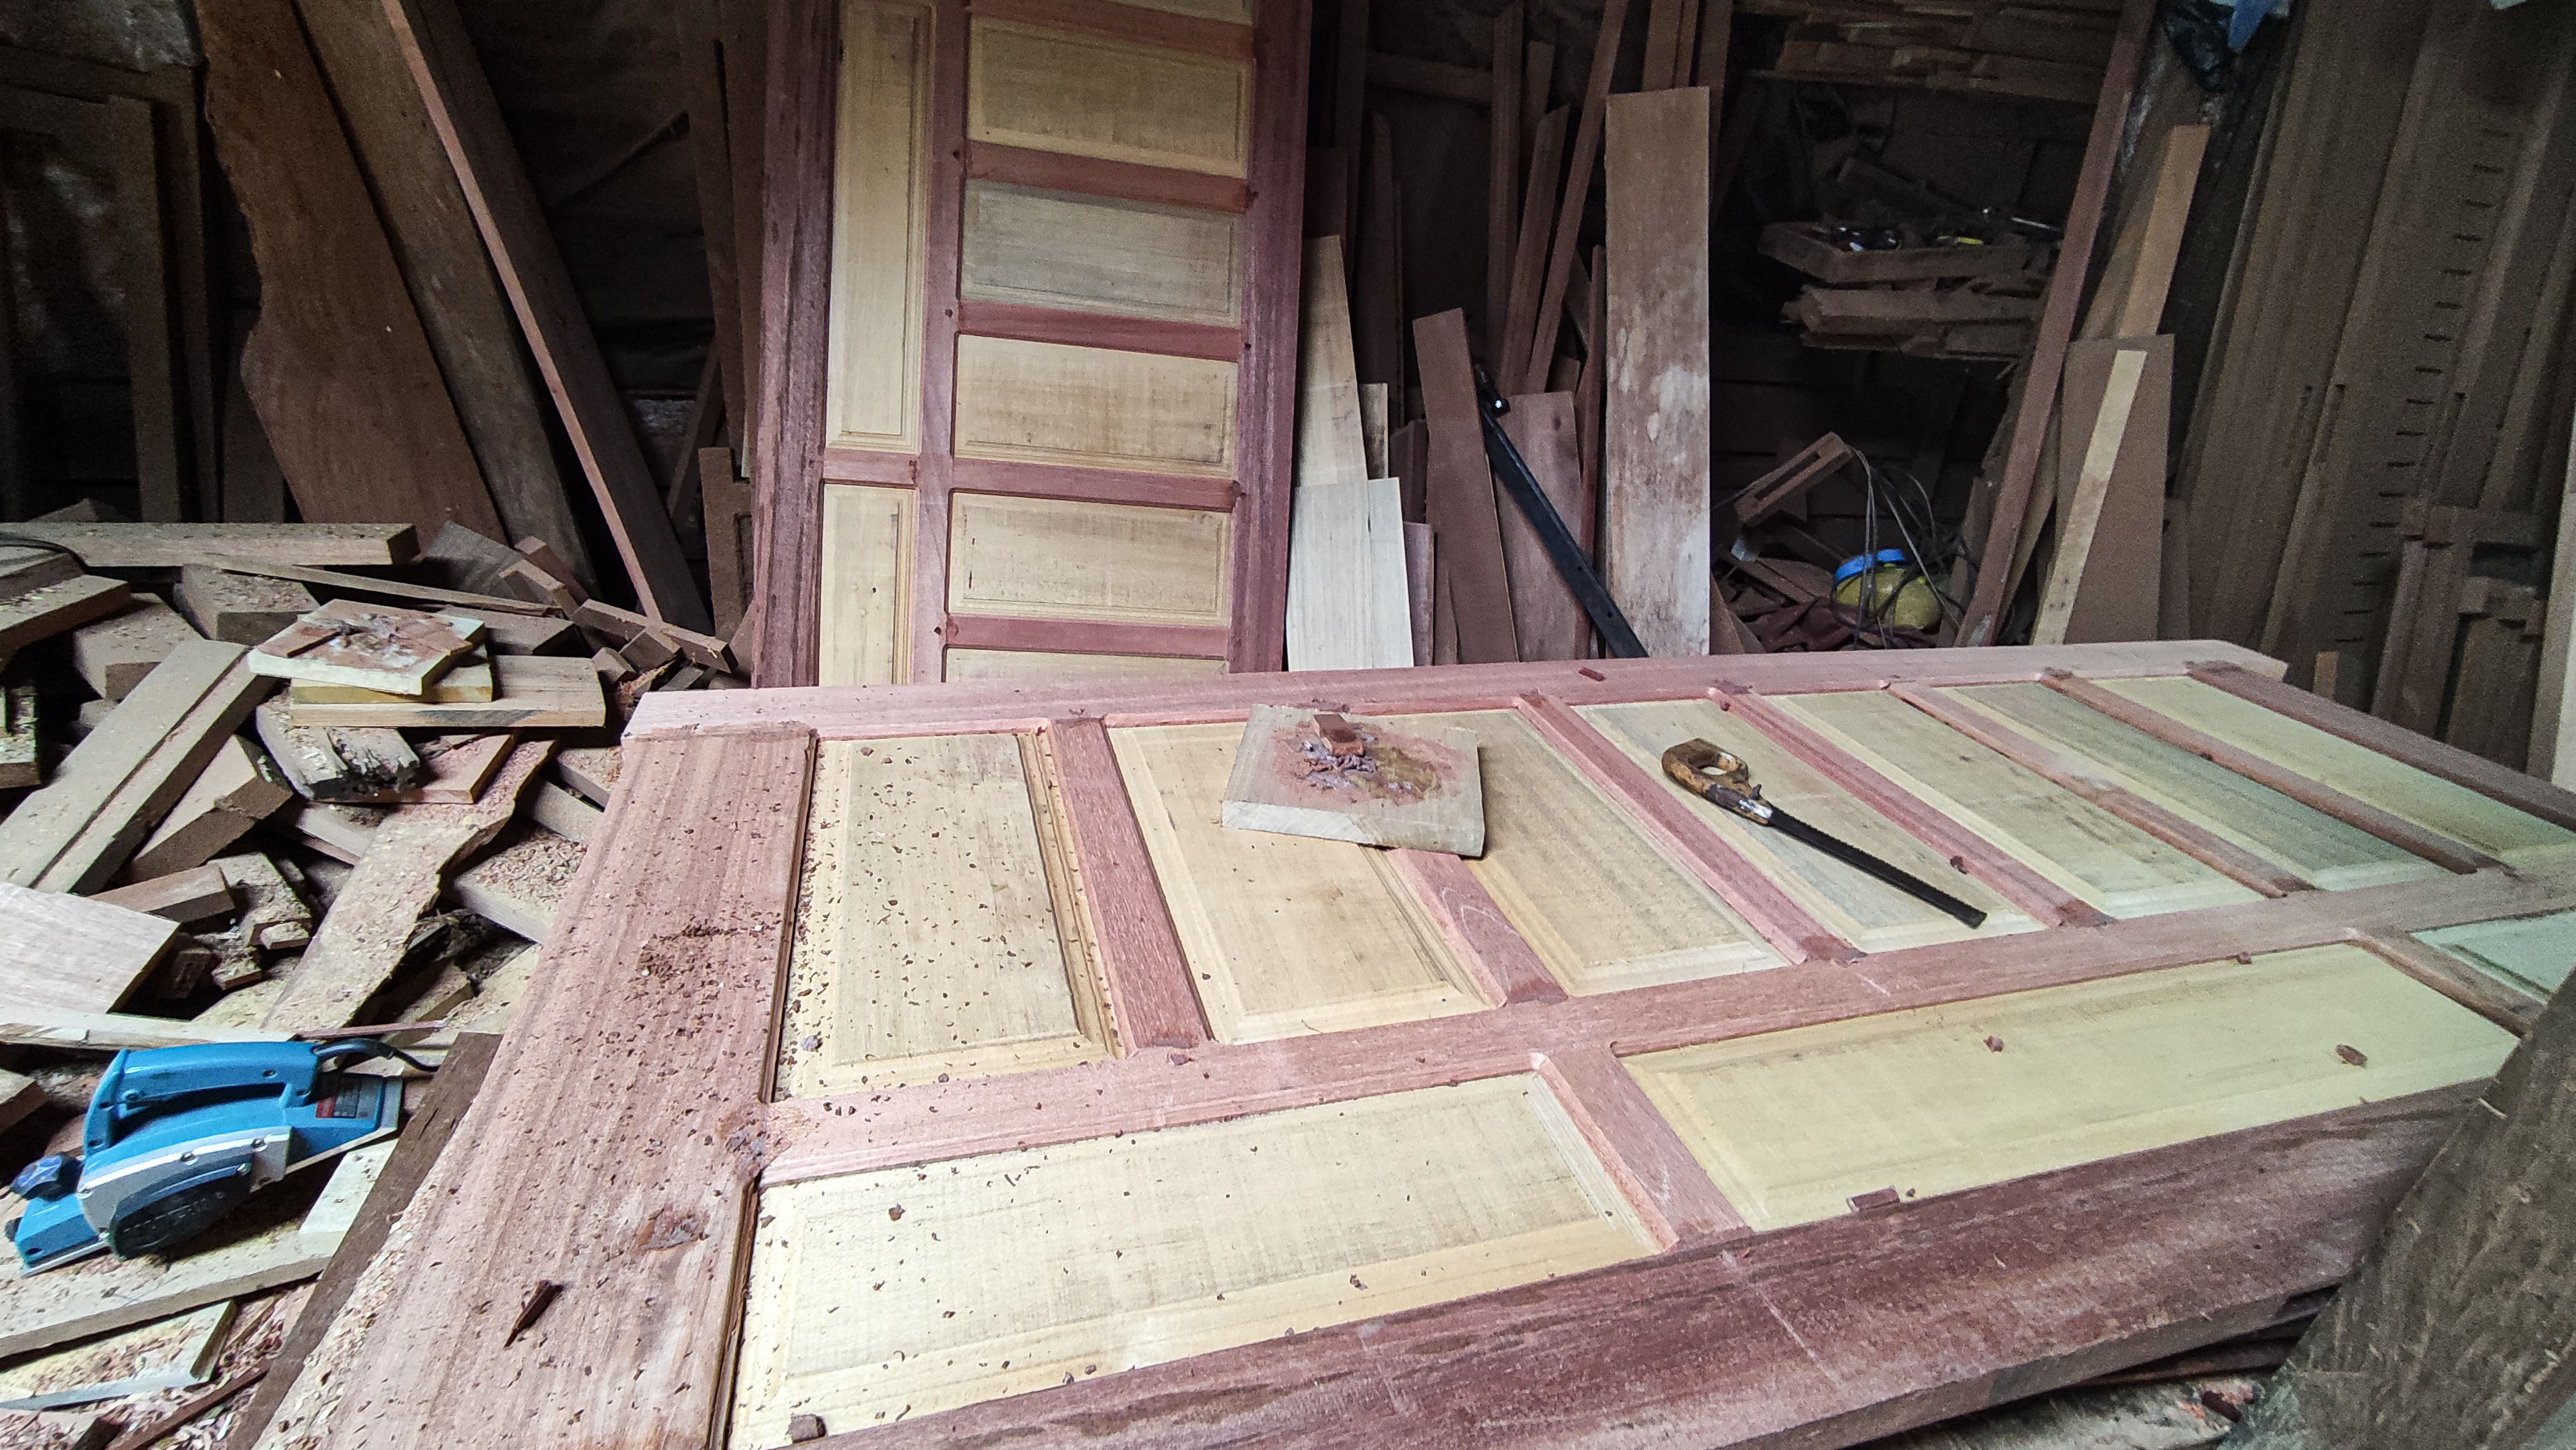
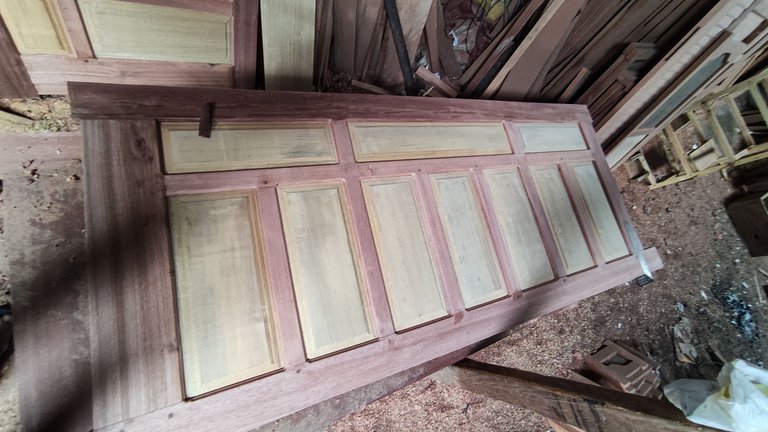
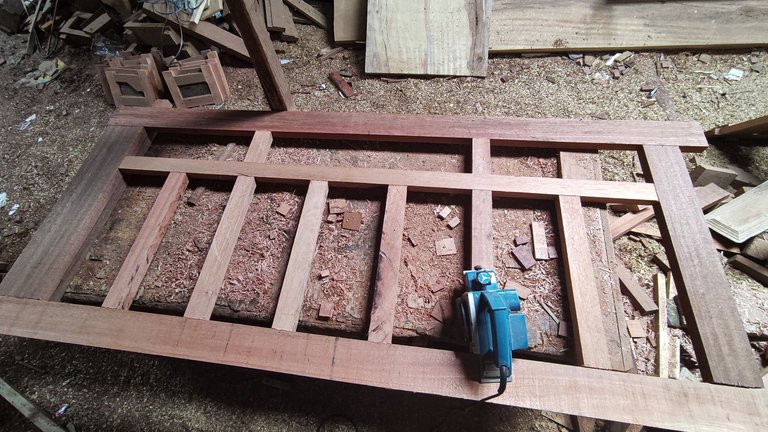
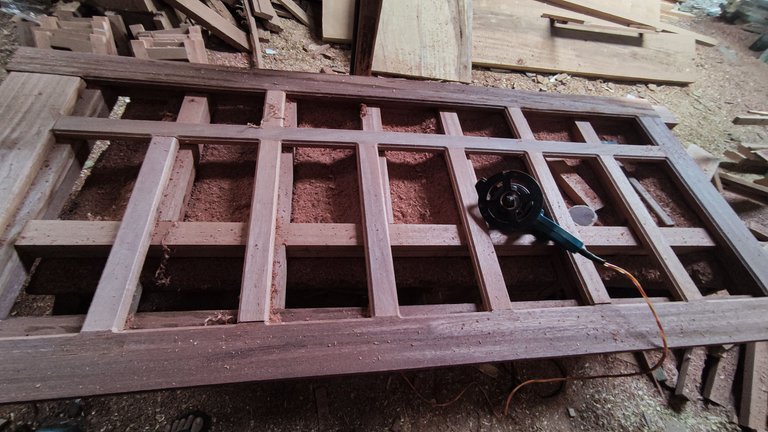
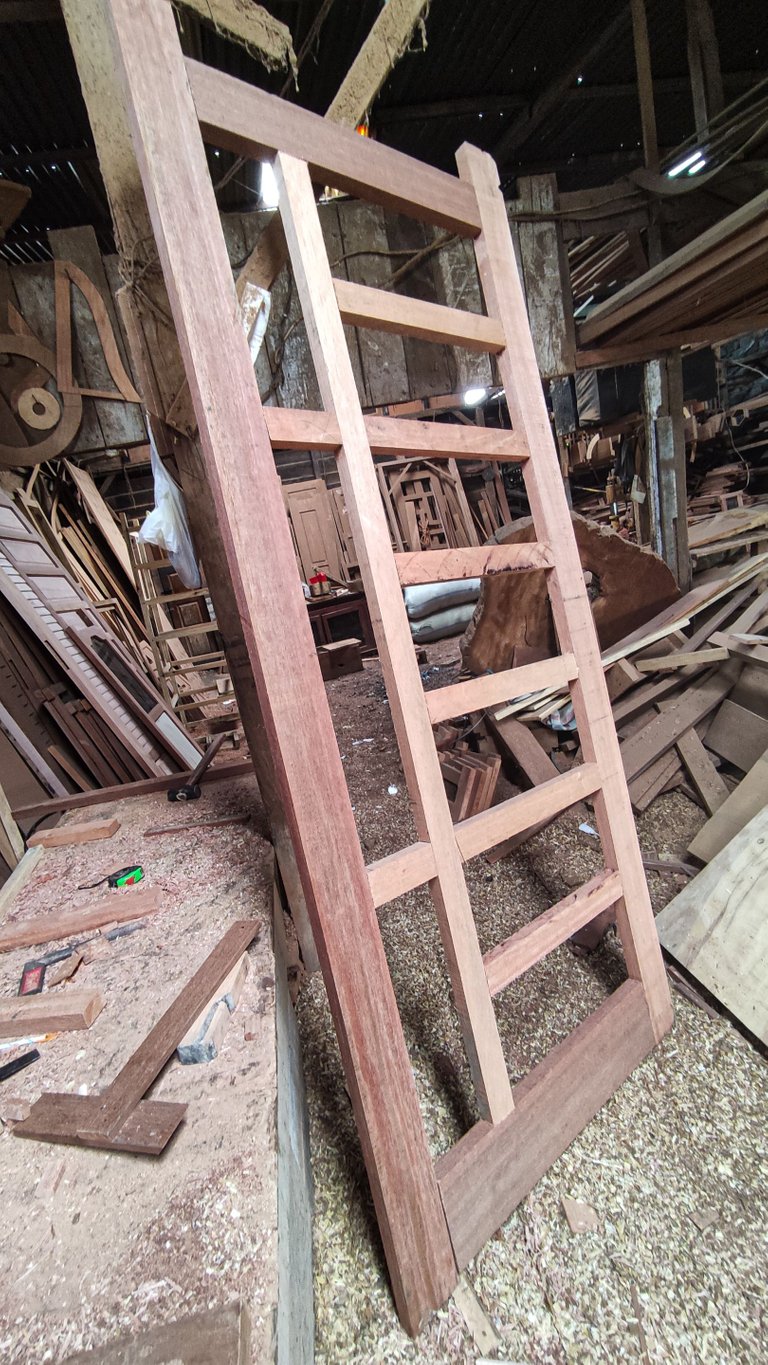
After I finished I made the peg nipple machine and all the process of making the peg seat on all the circuits was complete now I continue the process of unifying all parts of the bulkhead so that the design of the door structure can be seen and then I proceed to assemble all the door sets according to their respective bulkhead size layout mounts.

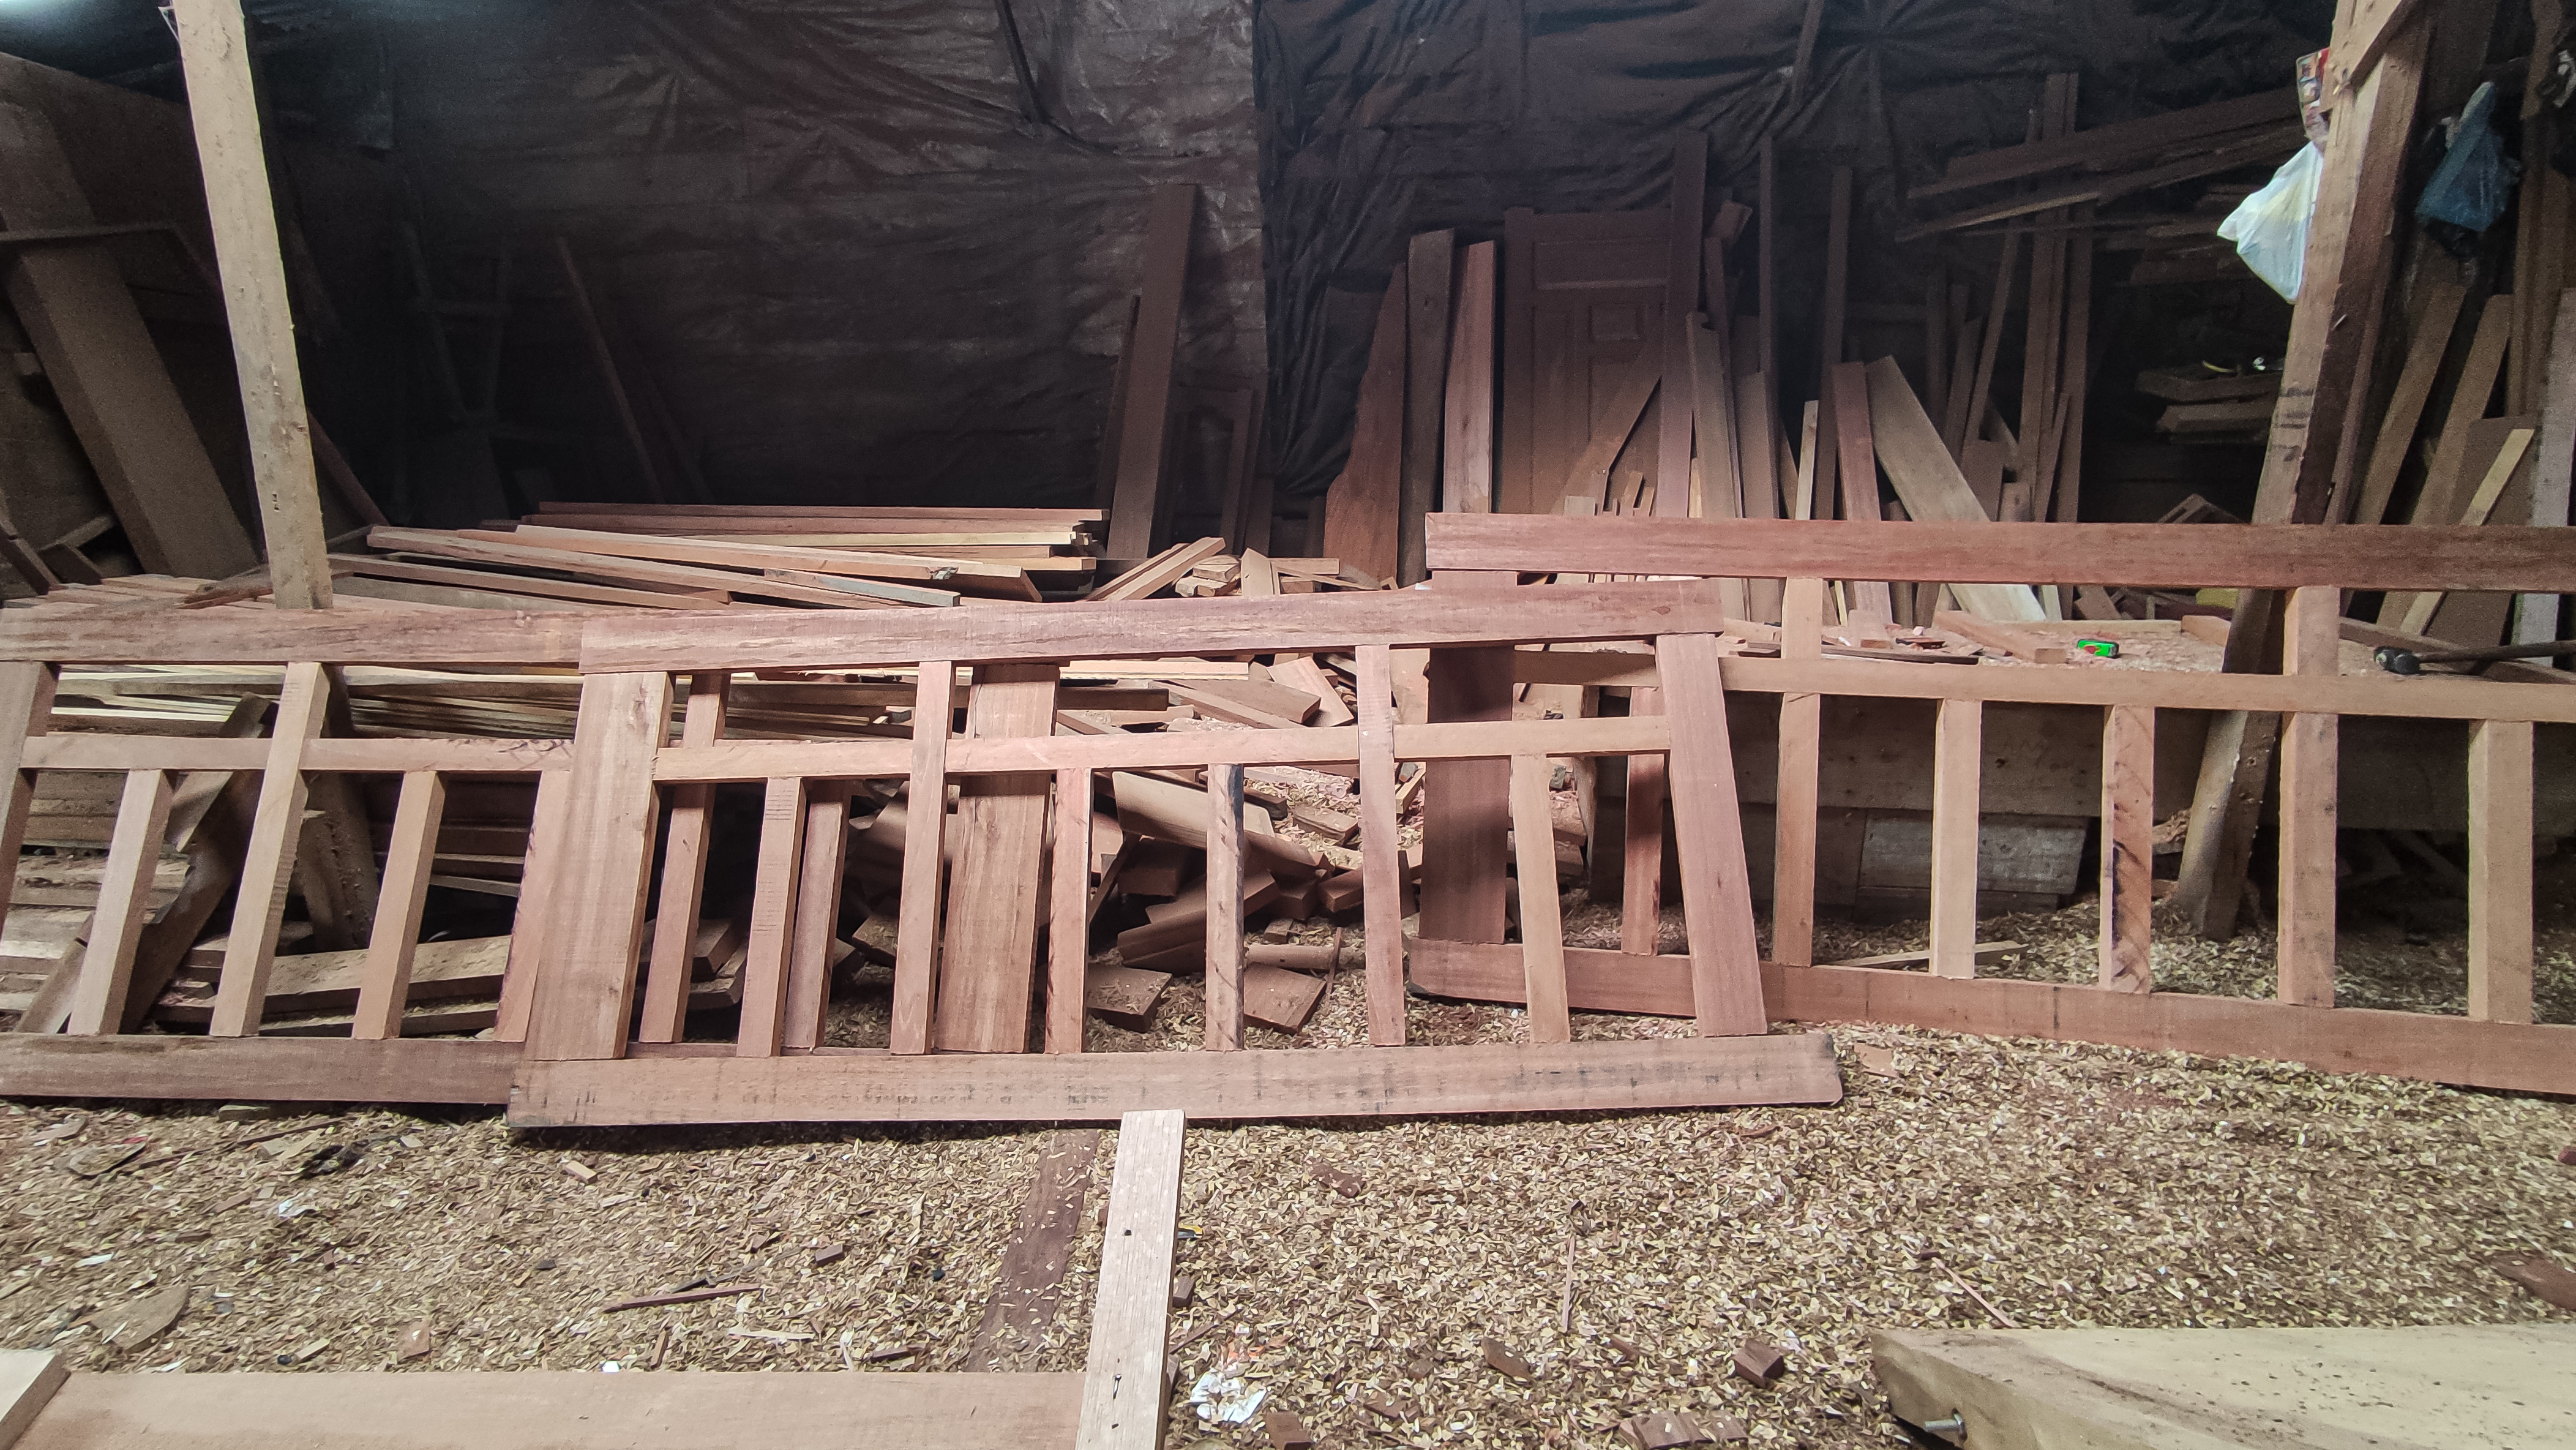
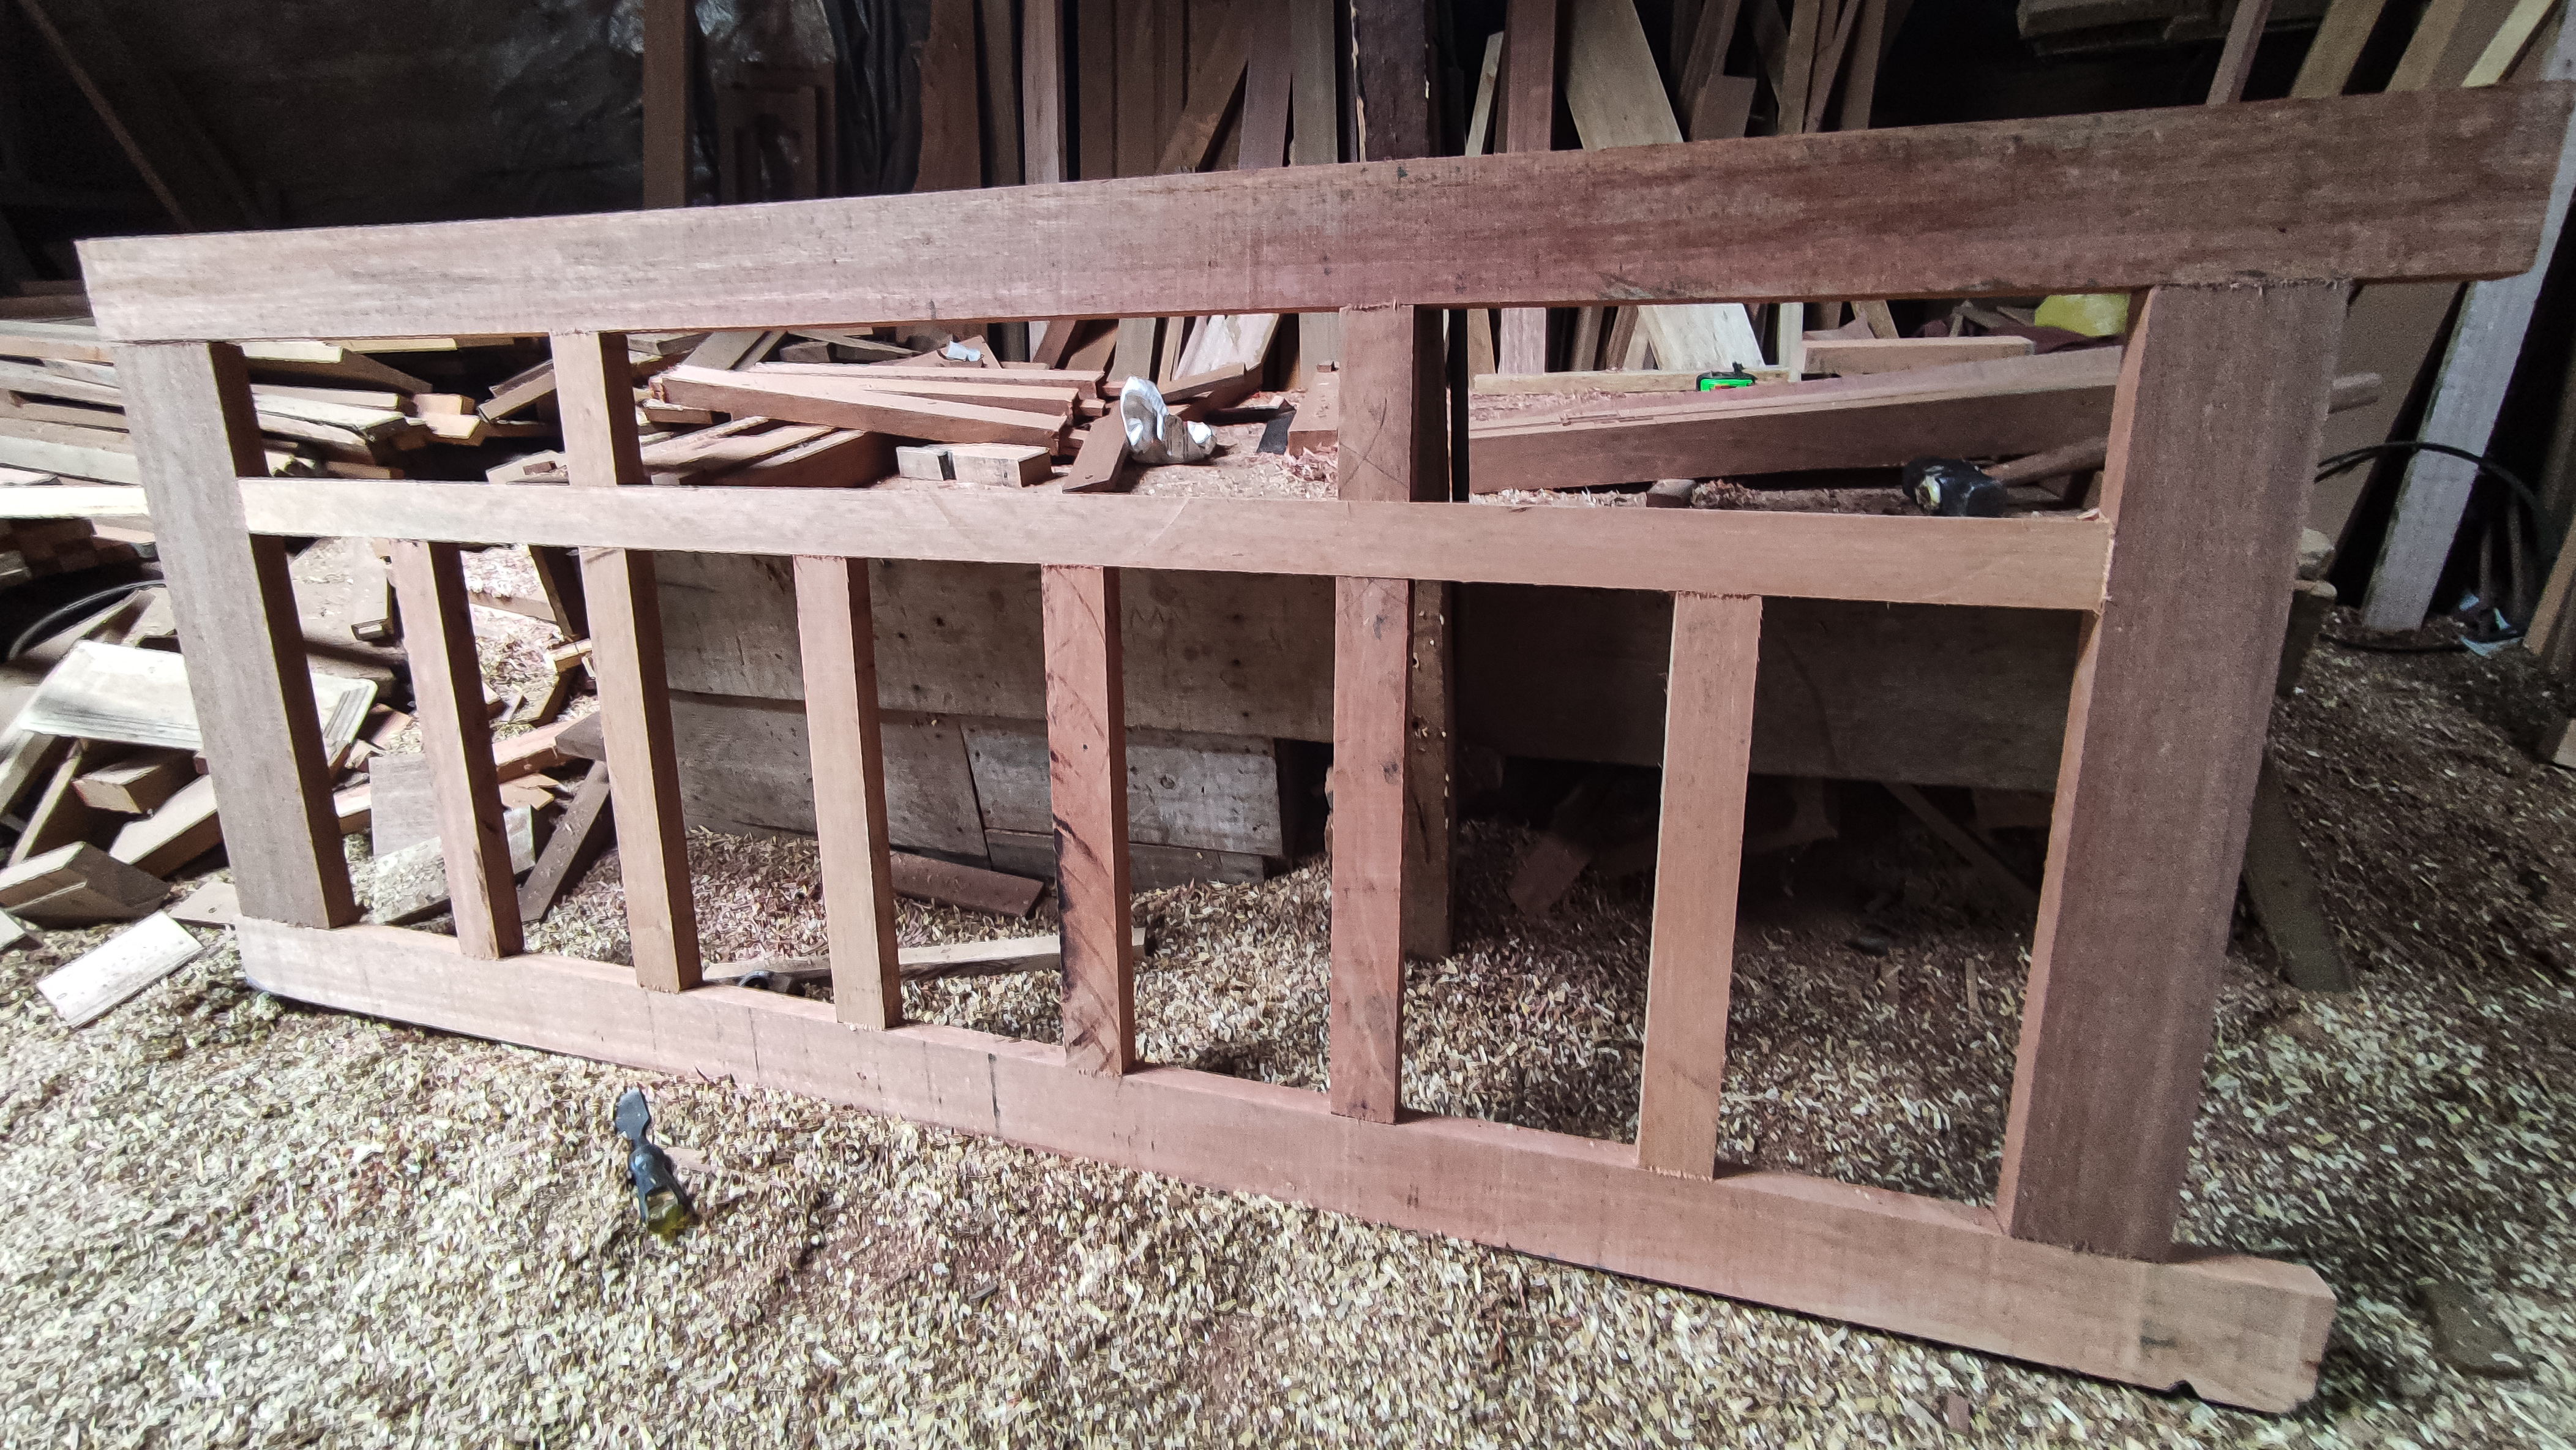
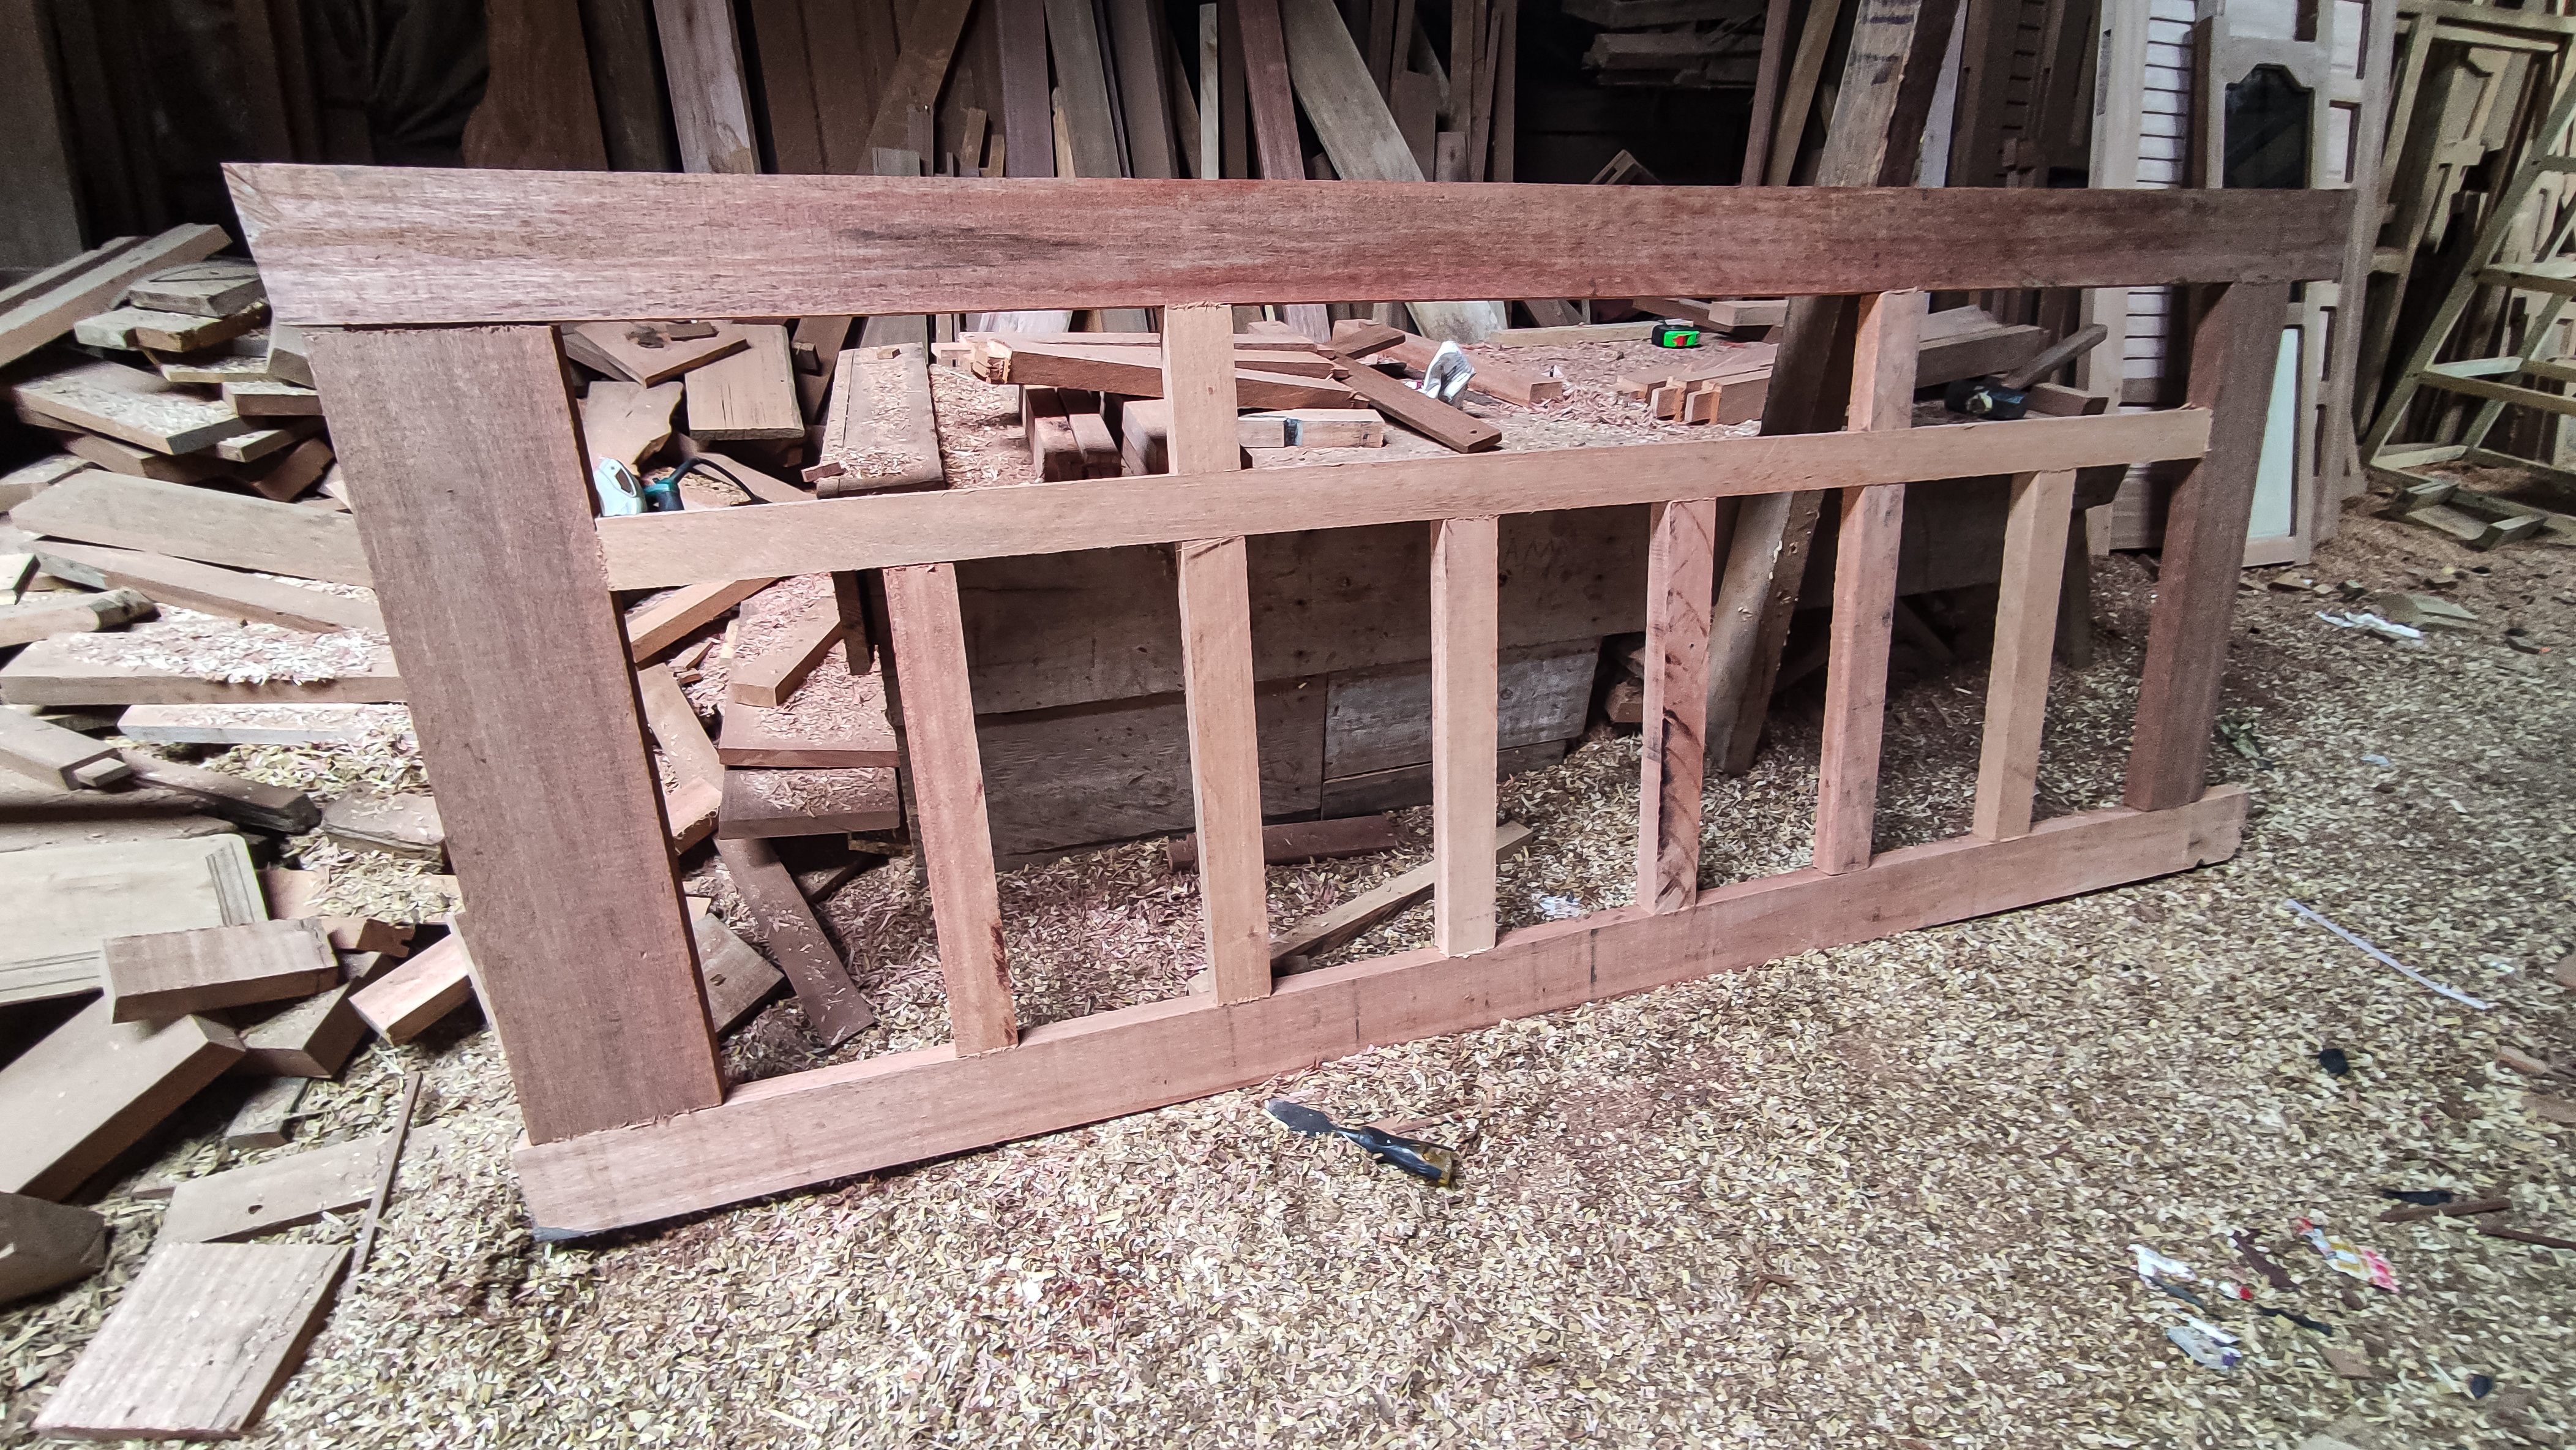
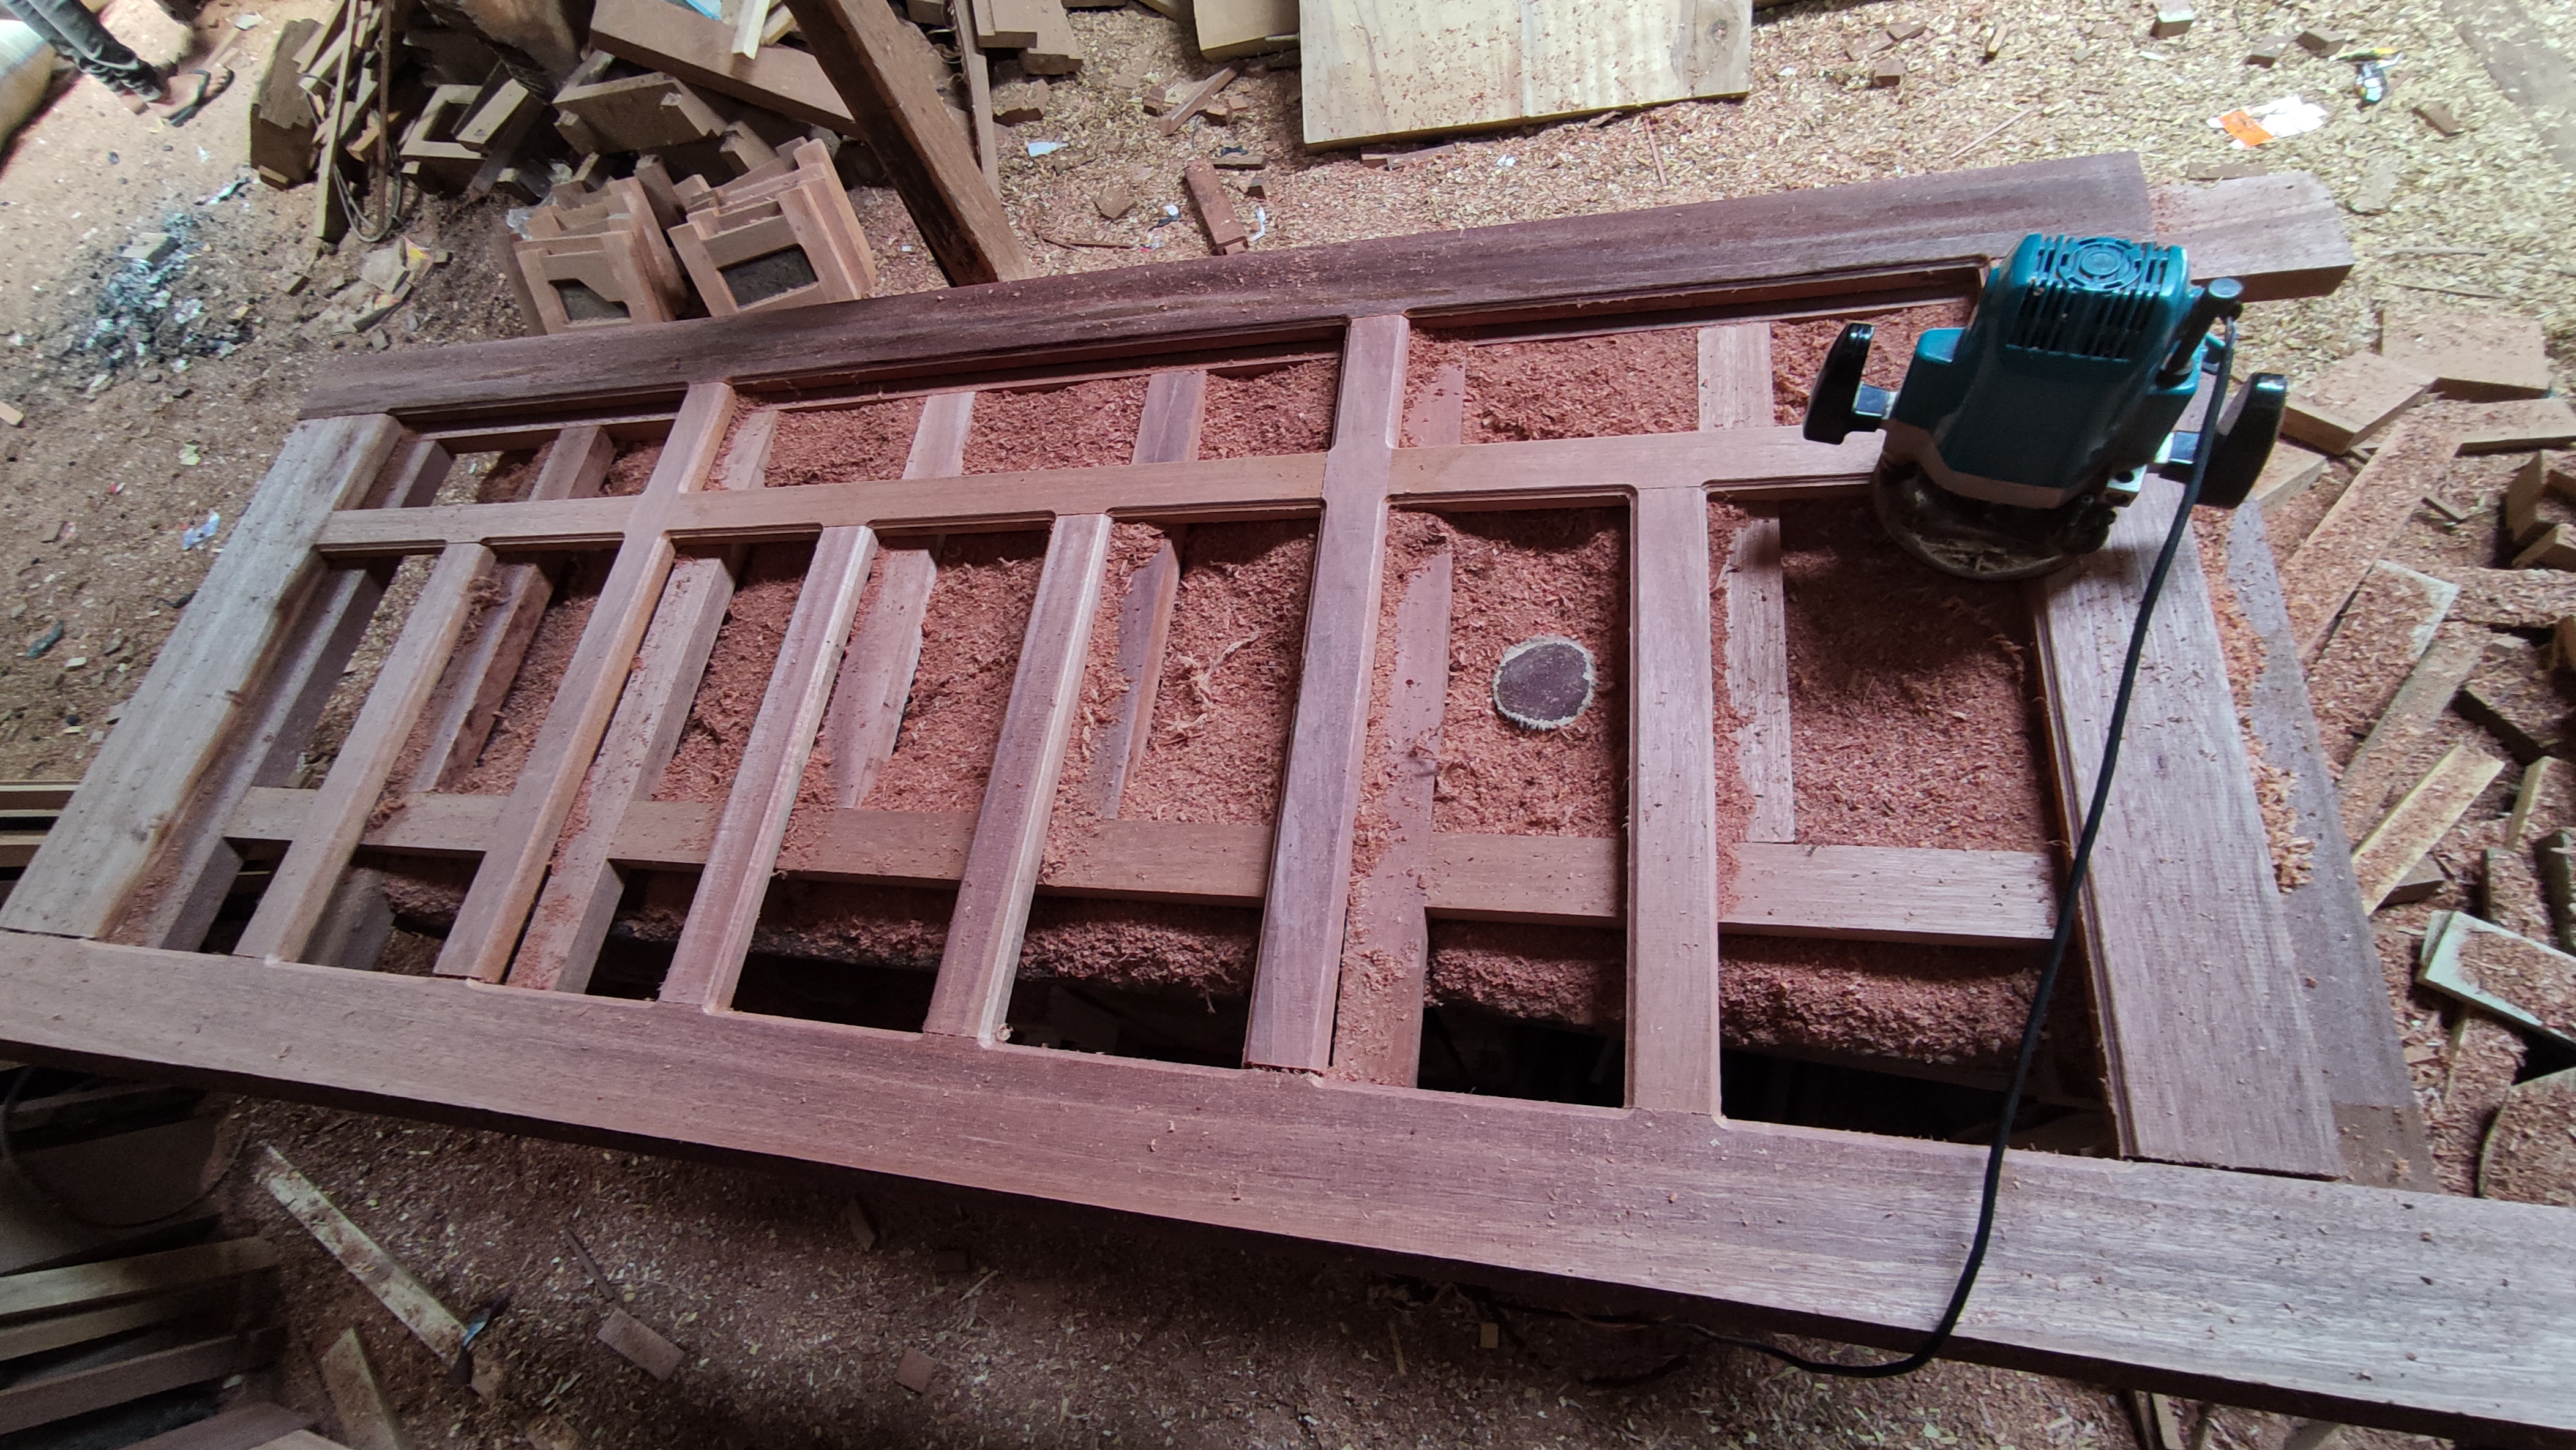
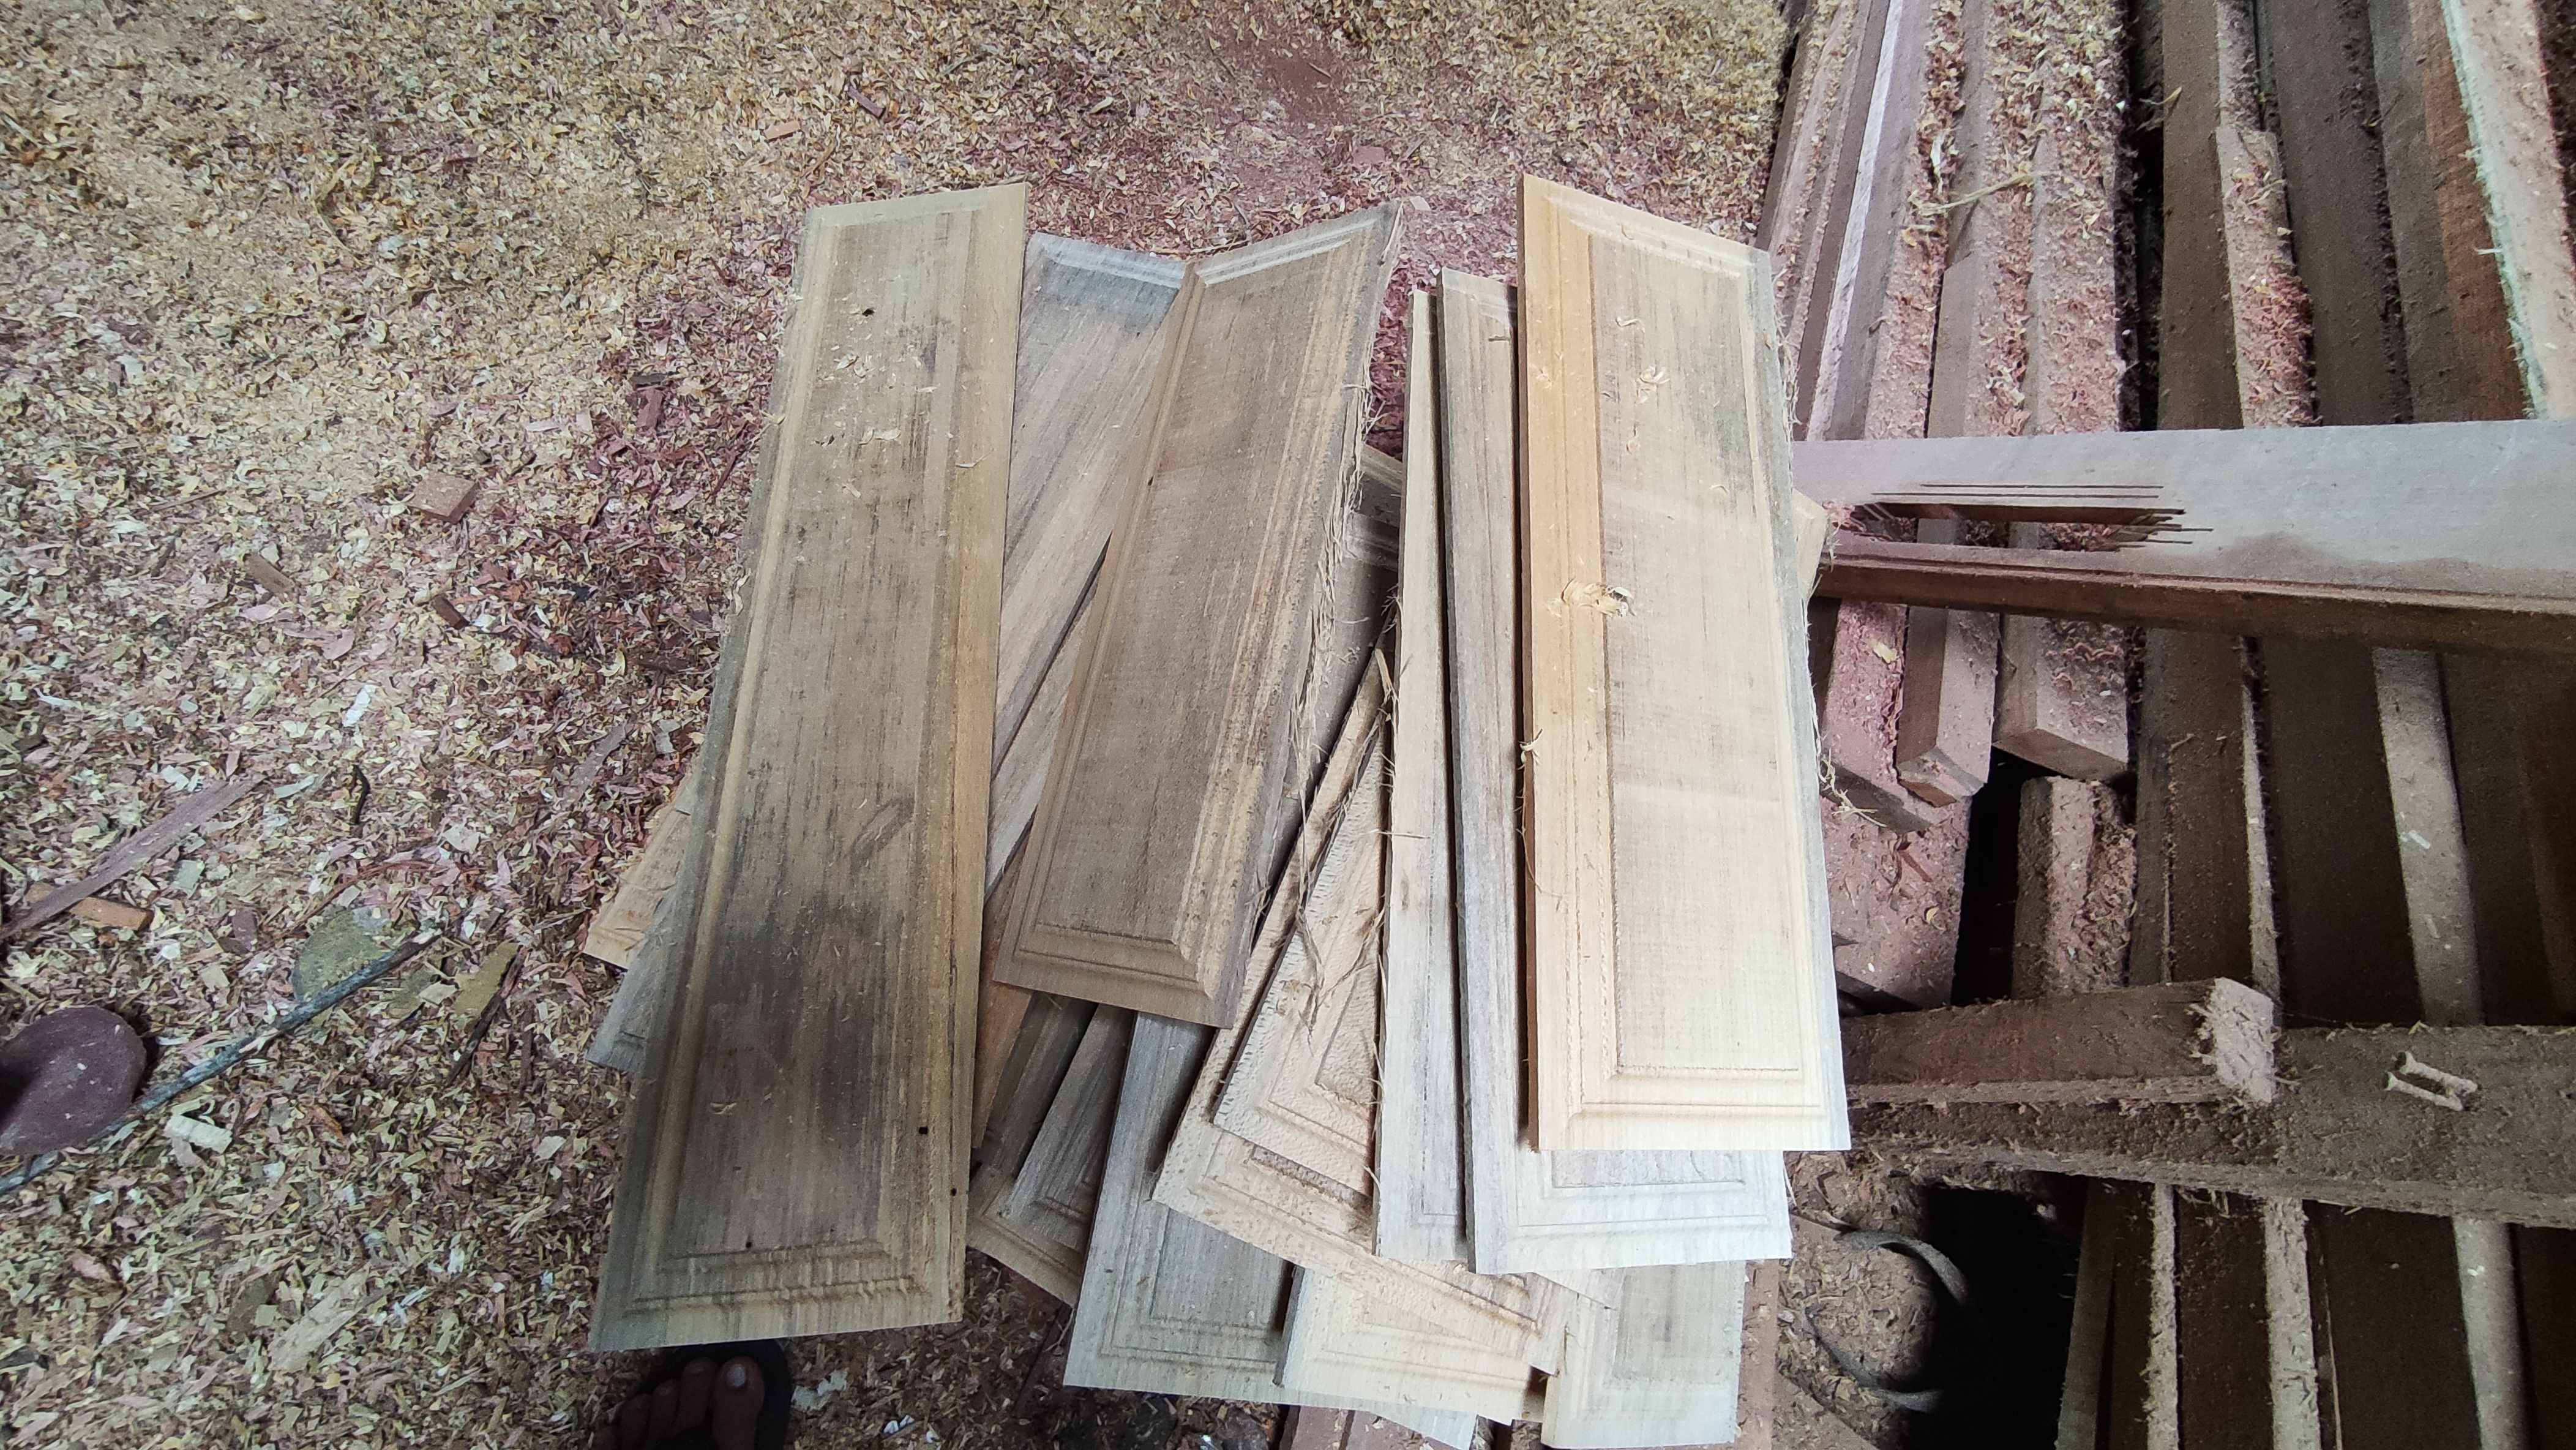
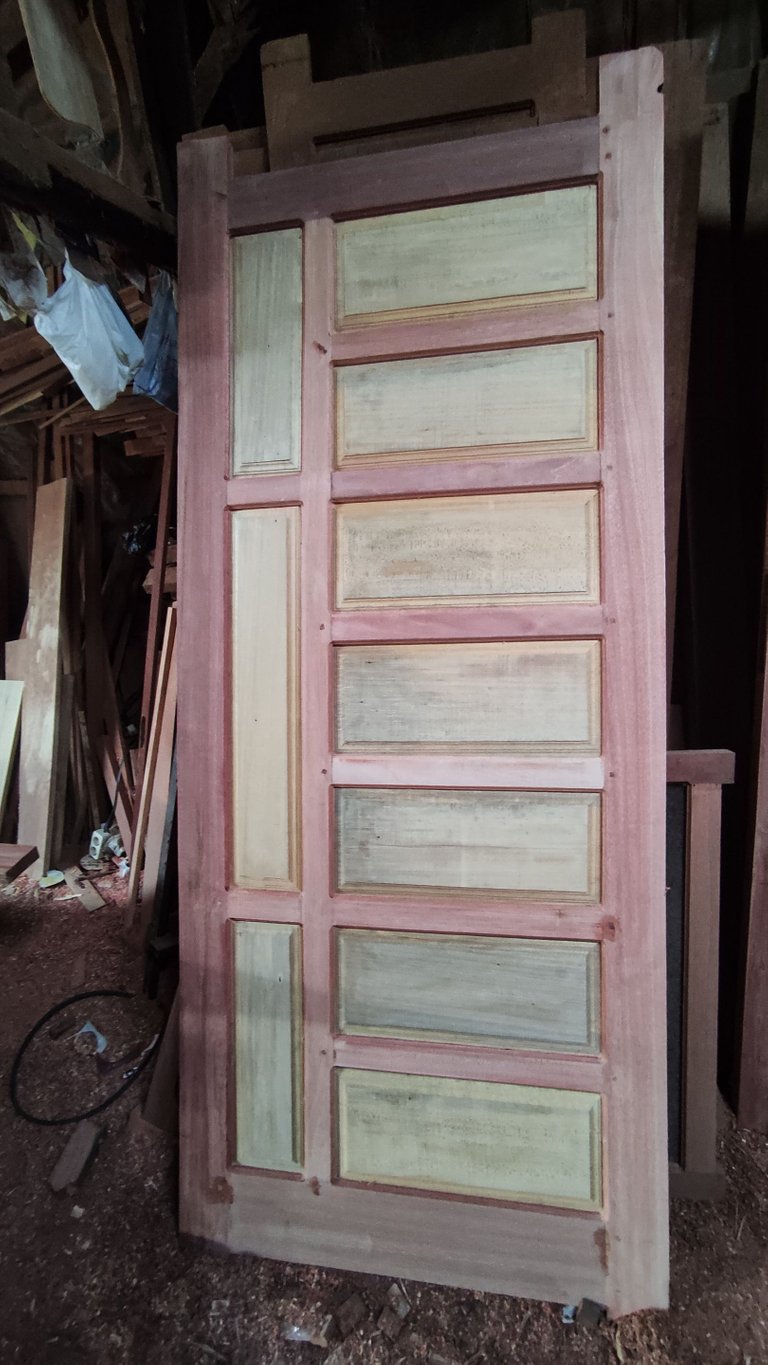
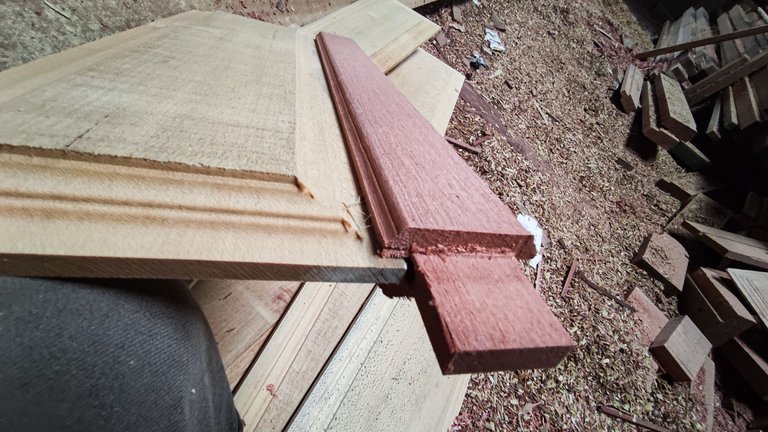
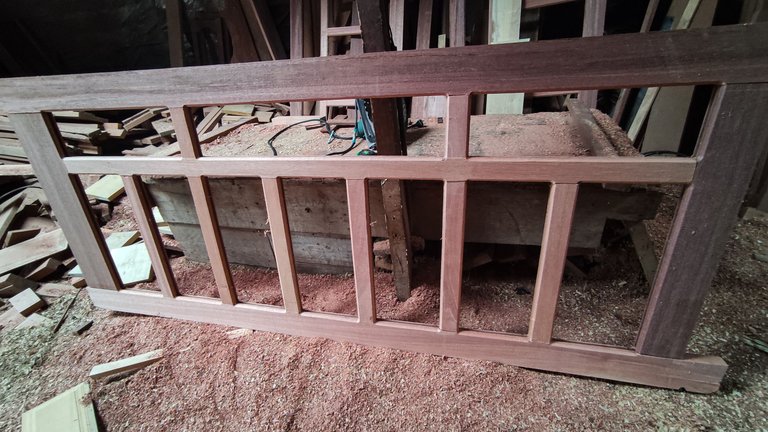
After I finished assembling all the basic assembly of the door, the beauty of the door design began to look beautiful and then I continued the process of trimming or tidying all the front and back of the door using a drawstring machine and after the process is finished I work on it, the door will look like this and the surface of the doors looks neater.
and for the next stage, namely giving router flowers to the inner partitions of the door and making the door leaf holder using a router machine, after the process of giving flowers and giving the door leaf holder the door will look like this and this is process of making the basic circuit for the 3 doors I have completed.
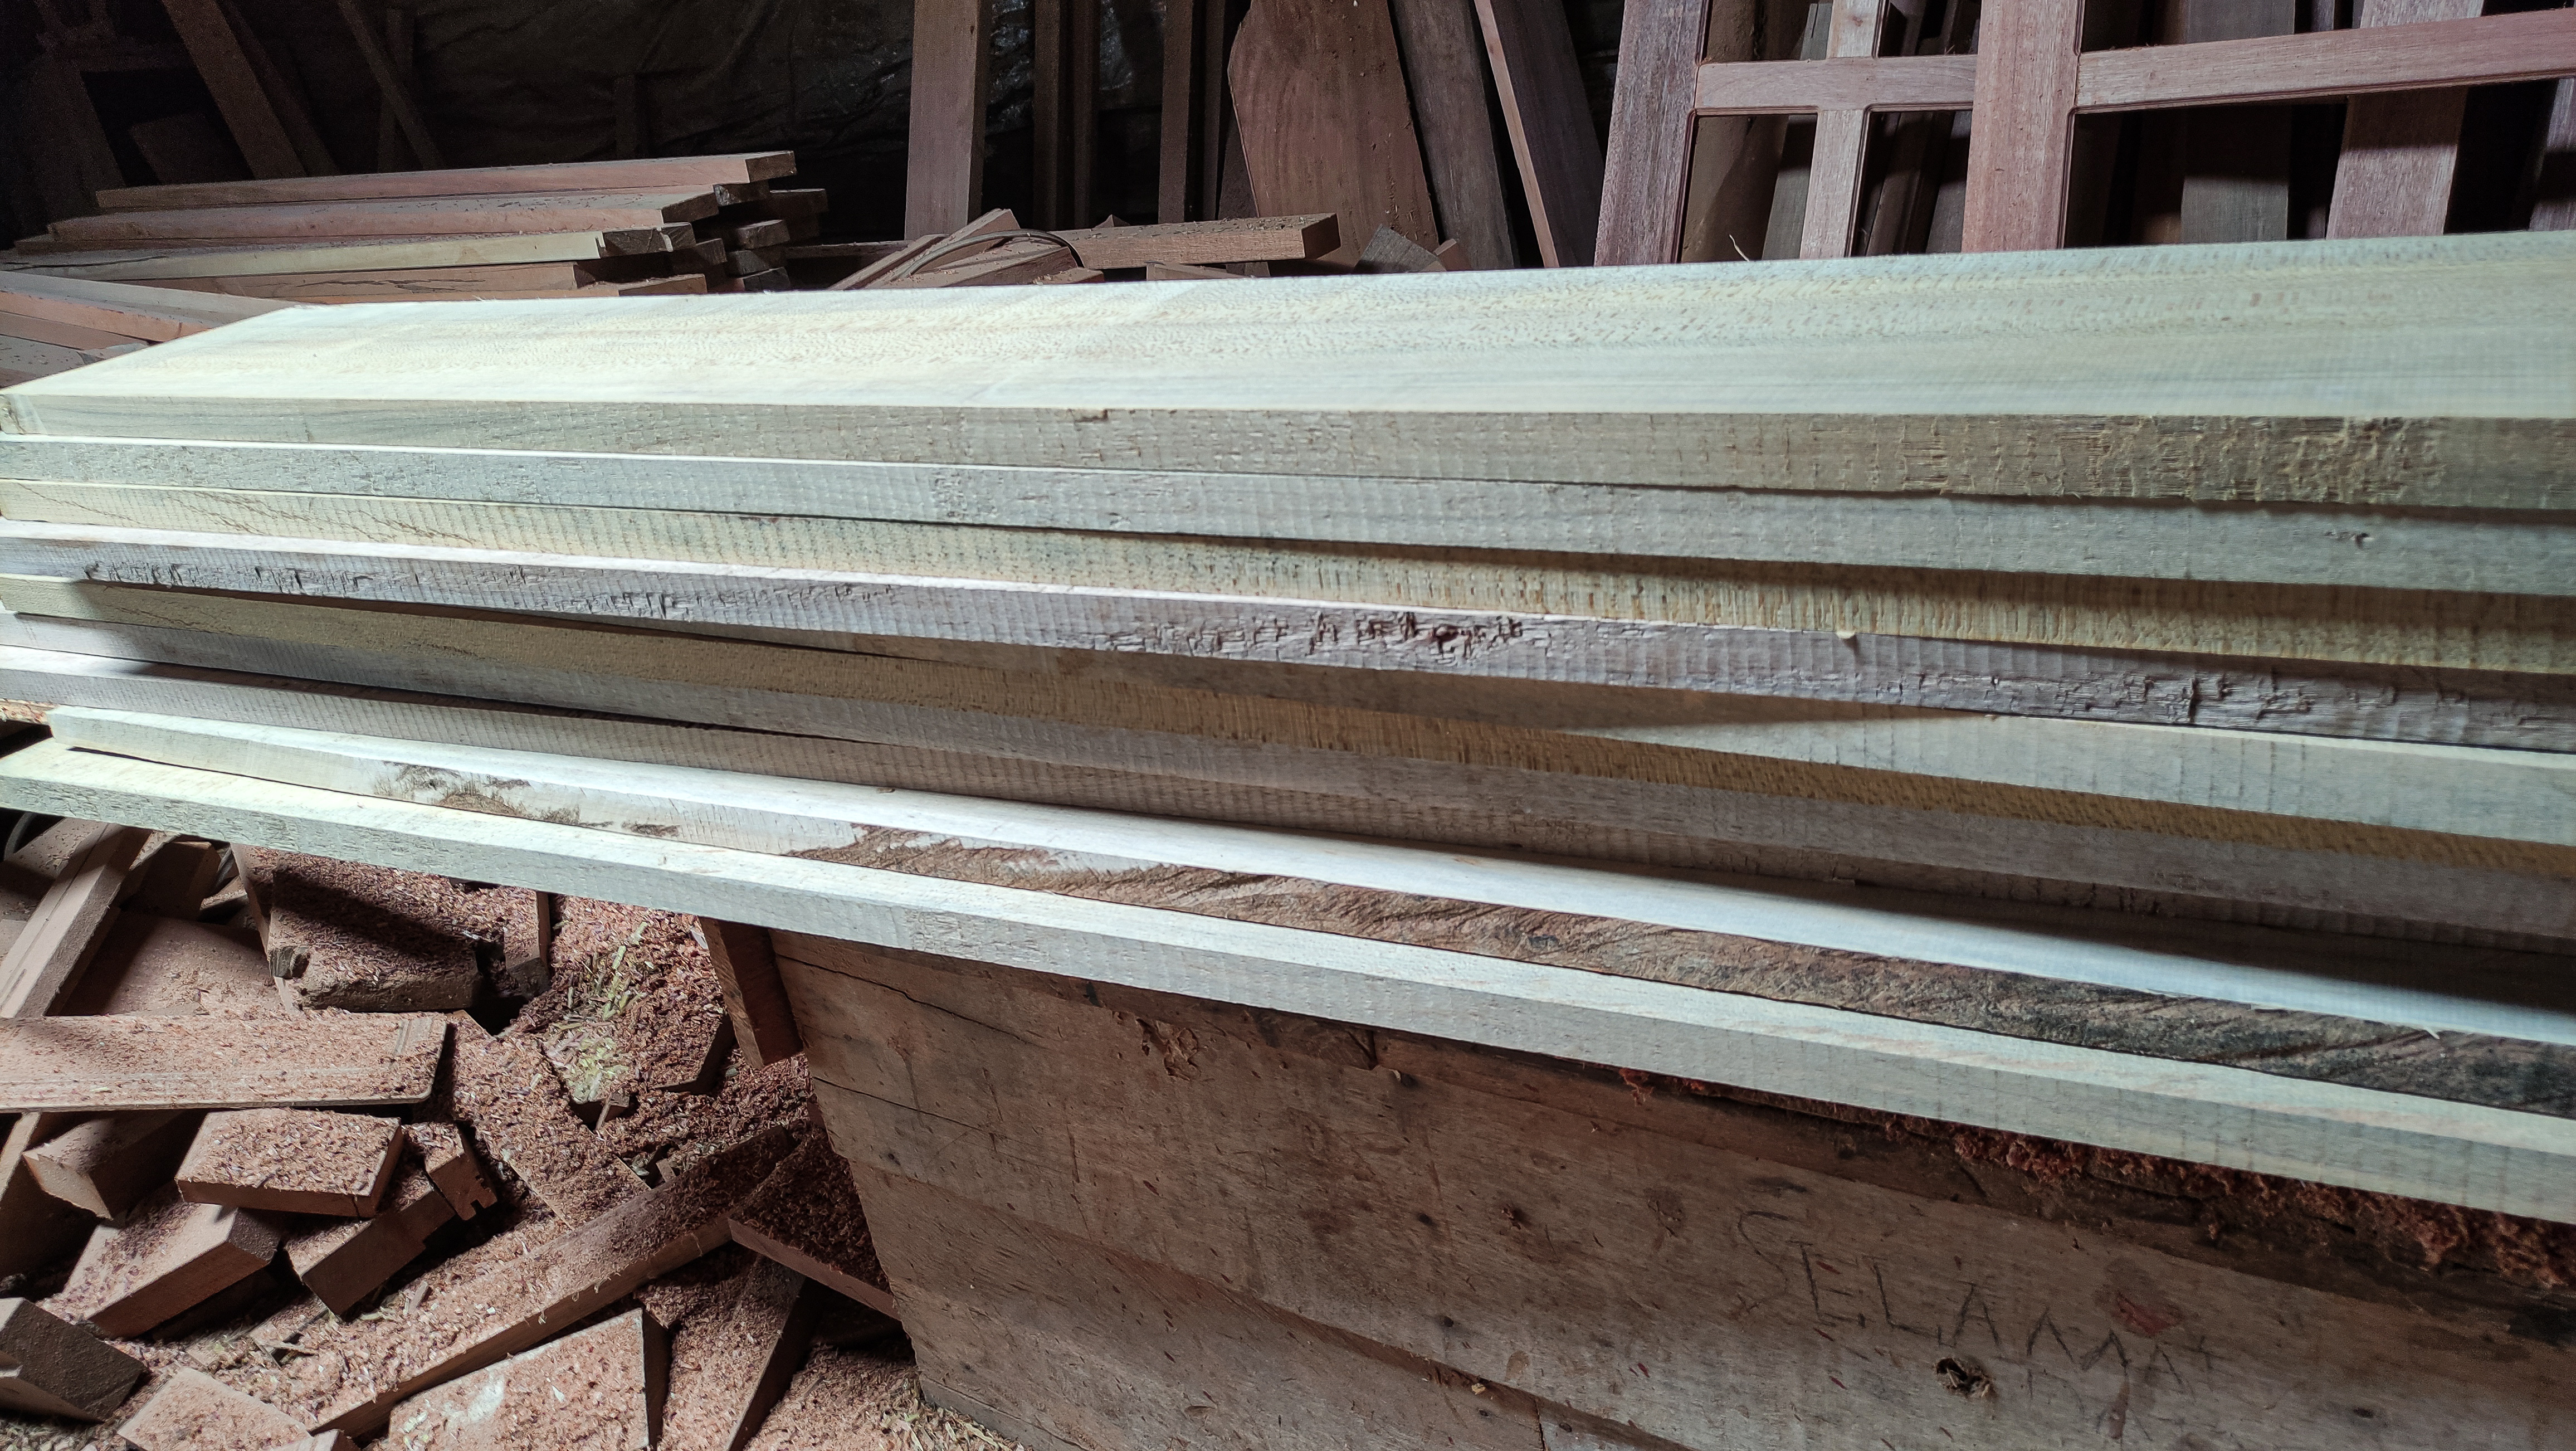
And now the stage of making the door leaf and here I also use pine with a characteristic white color with soft green fibers wood which I have trimmed with a leaf thickness of 2 cm.
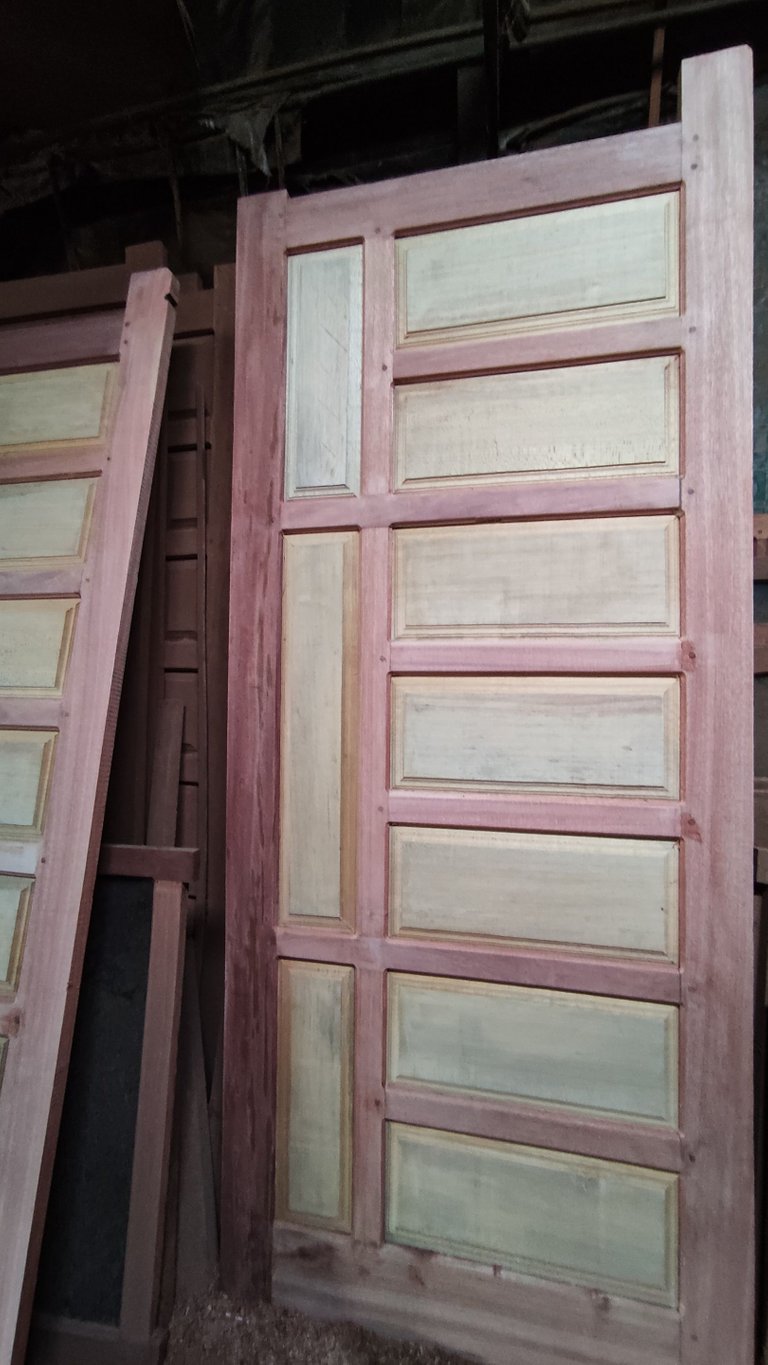
For the door leaf, in the basic series of doors that I have adjusted to the design drawings from customer orders, the arrangement of the leaf doors is divided into two parts.
The left plot consists of a size of 20.5 x 48cm (deep) + 1cm around it as a retaining nail for the door leaf which is embedded in the bulkhead assembly and total leaves that I have to cut with a size of 50cm x 22.5 cm = 18 pieces.
*The door leaf on the right has a small and elongated width and the size of the top and bottom is 15cm x 51cm(deep) + 1cm around the perimeter and the size is 17cm x 53 cm, the total wood I have to cut from the 3 doors with that size is 6 pieces ,and *
for the left center door leaf, it consists of a size of 15cm x 61.5 (inside) + 1 cm around and the size of the door leaf that I have to cut for the 3 doors is 17cm x 63.5cm as many as 3 pieces.
And after I cut all the boards for the door leaf then I continued the panel process / giving flowers on the door leaf sheet.
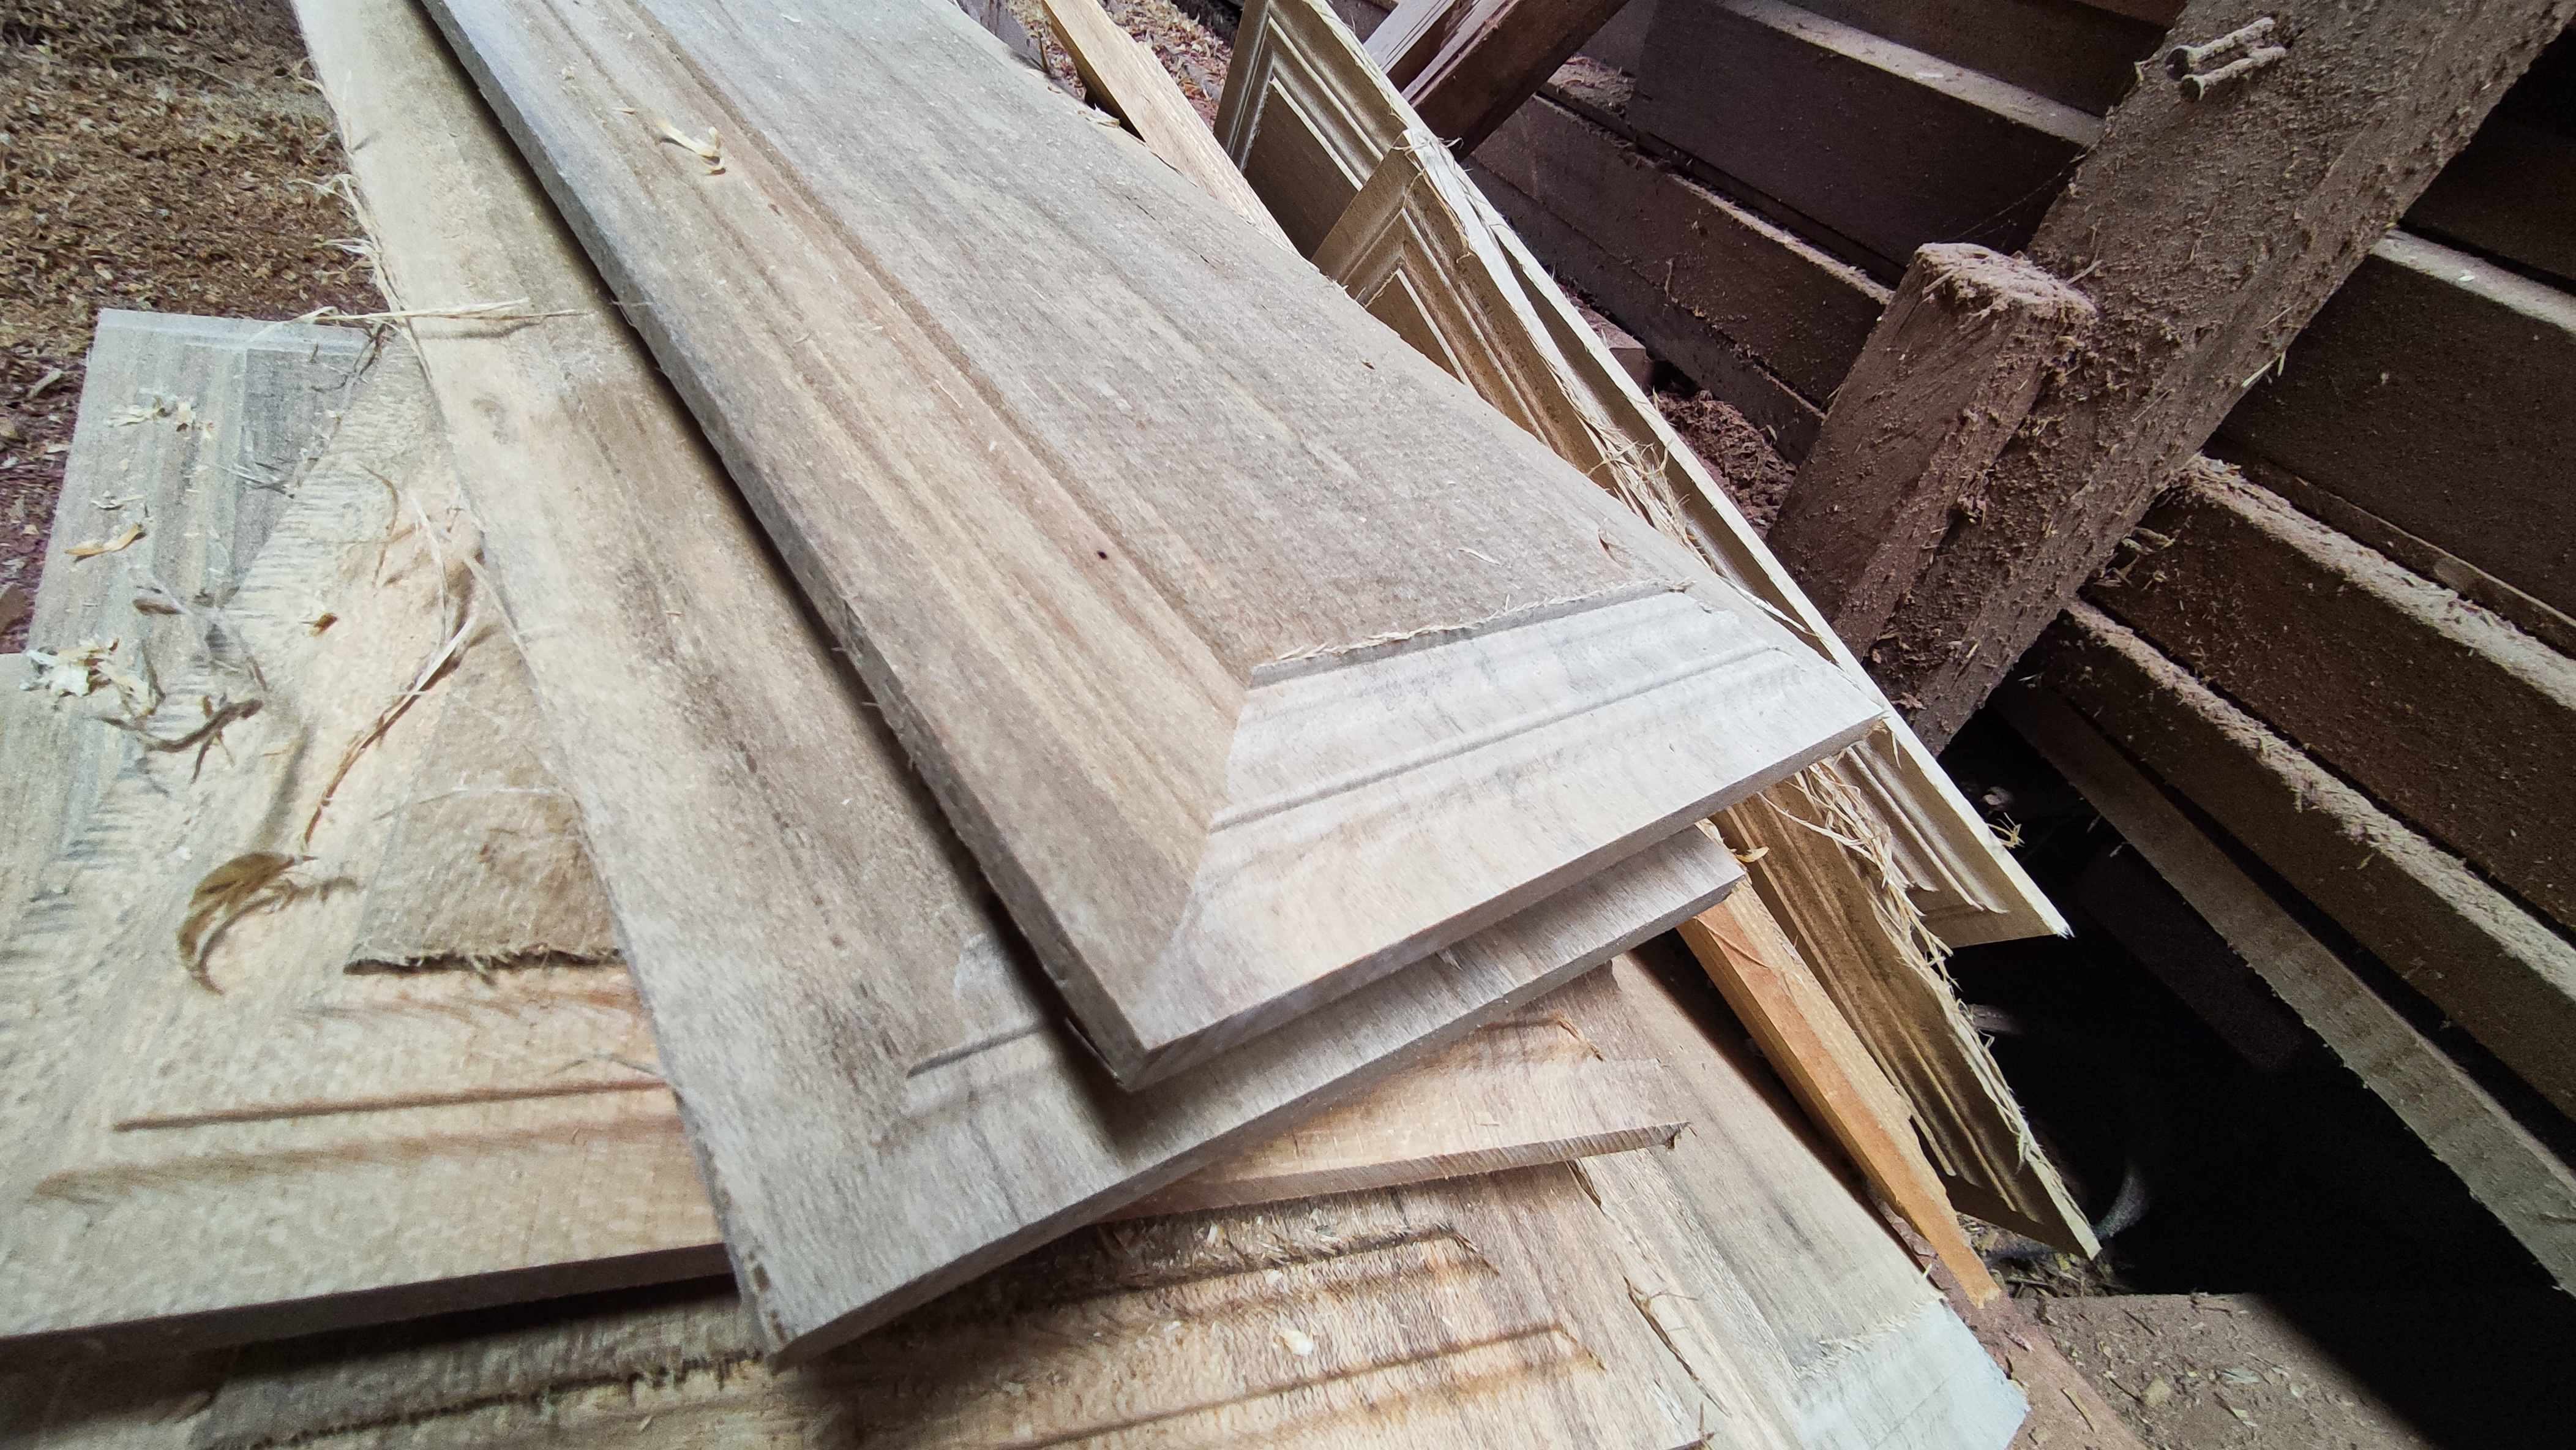
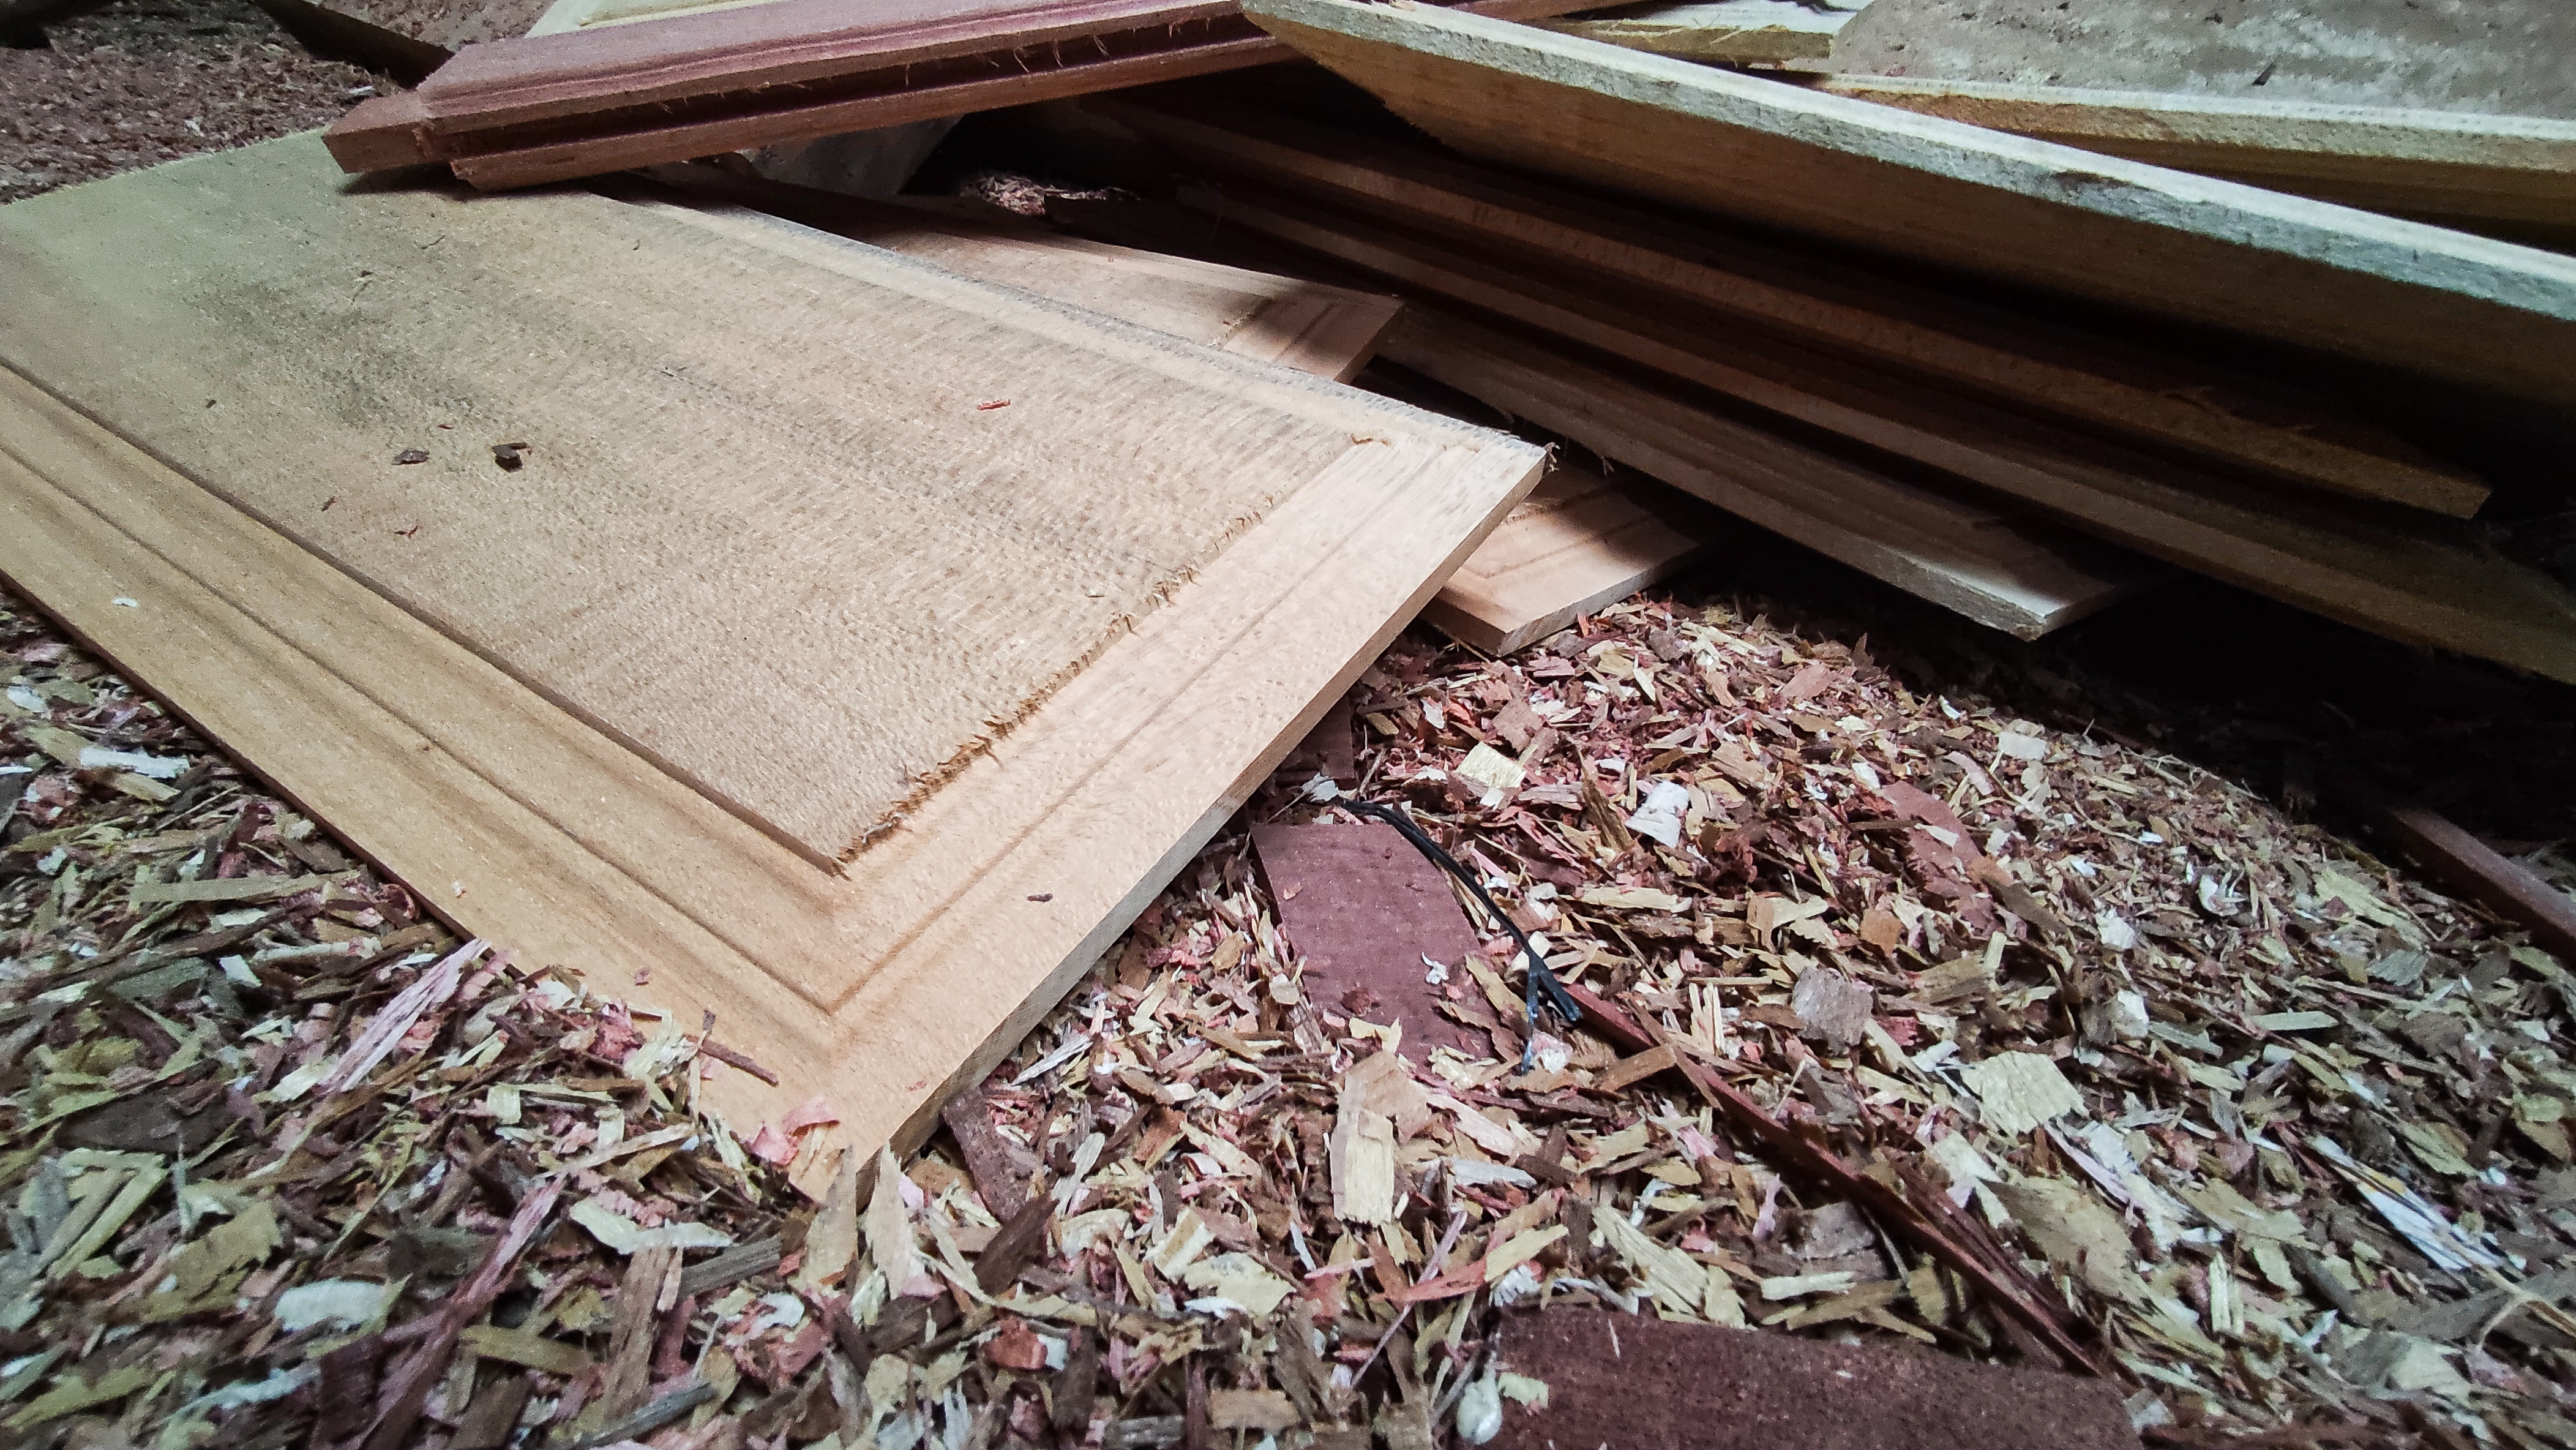
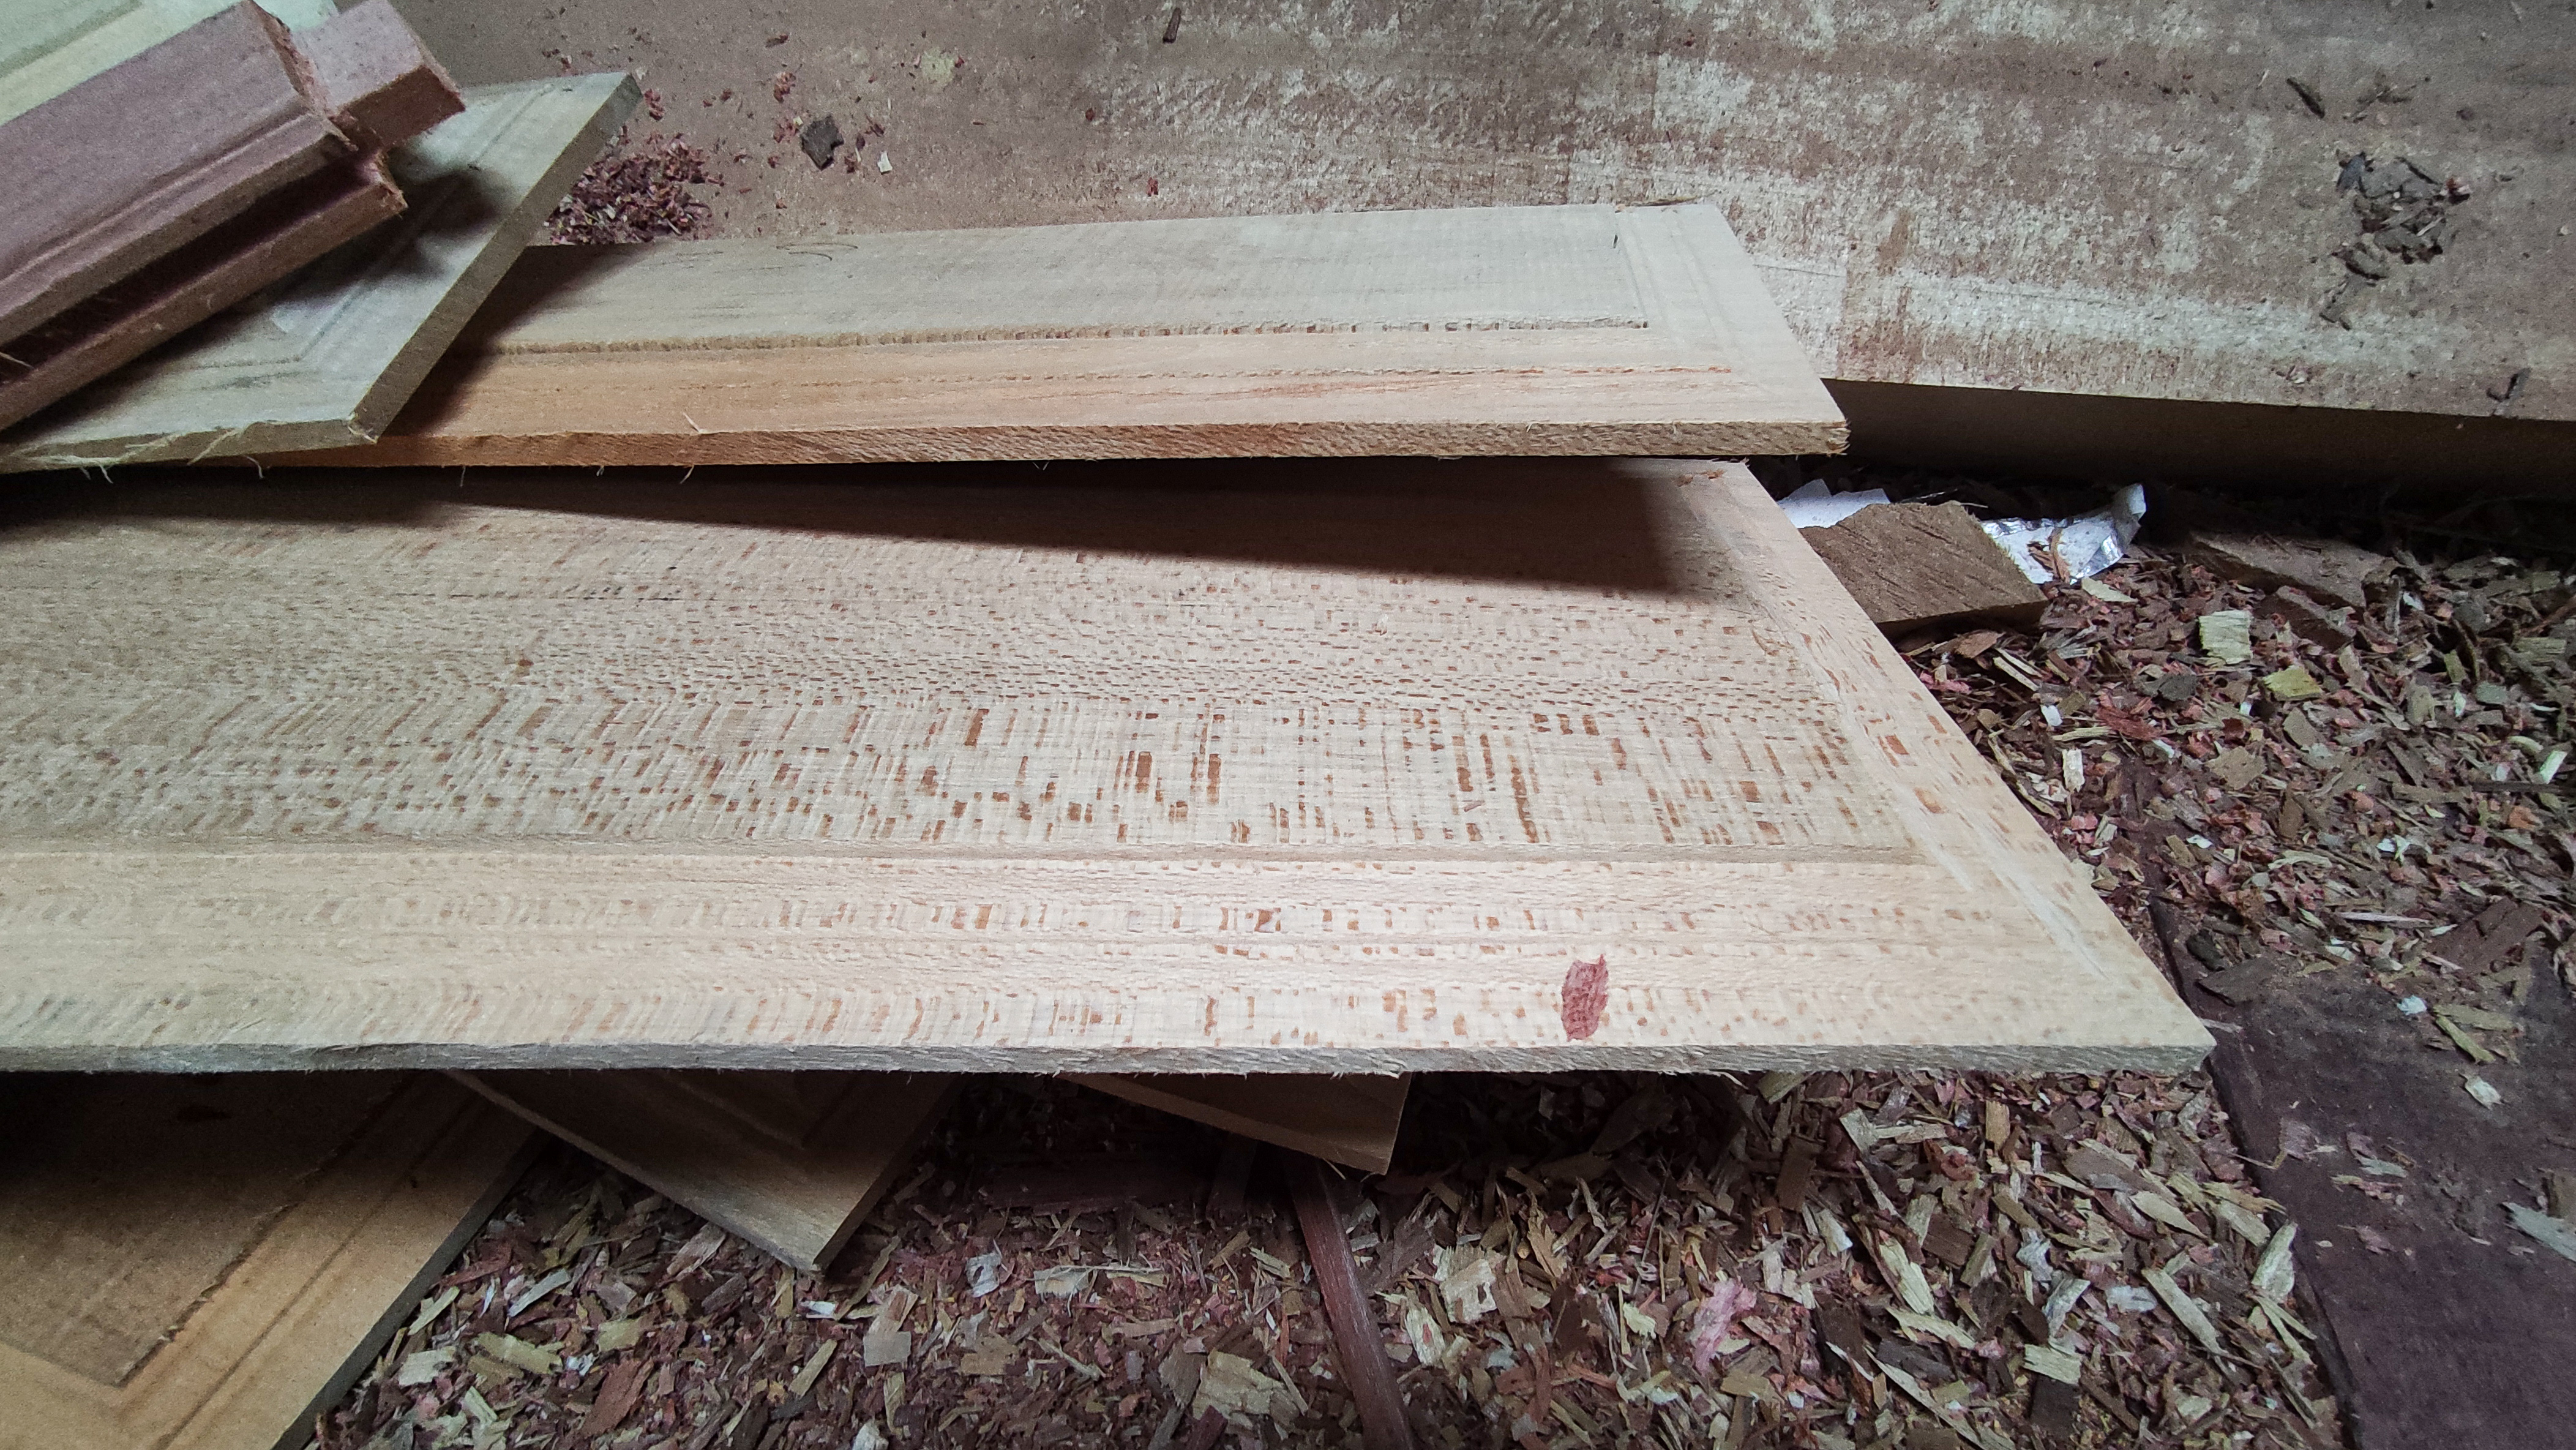
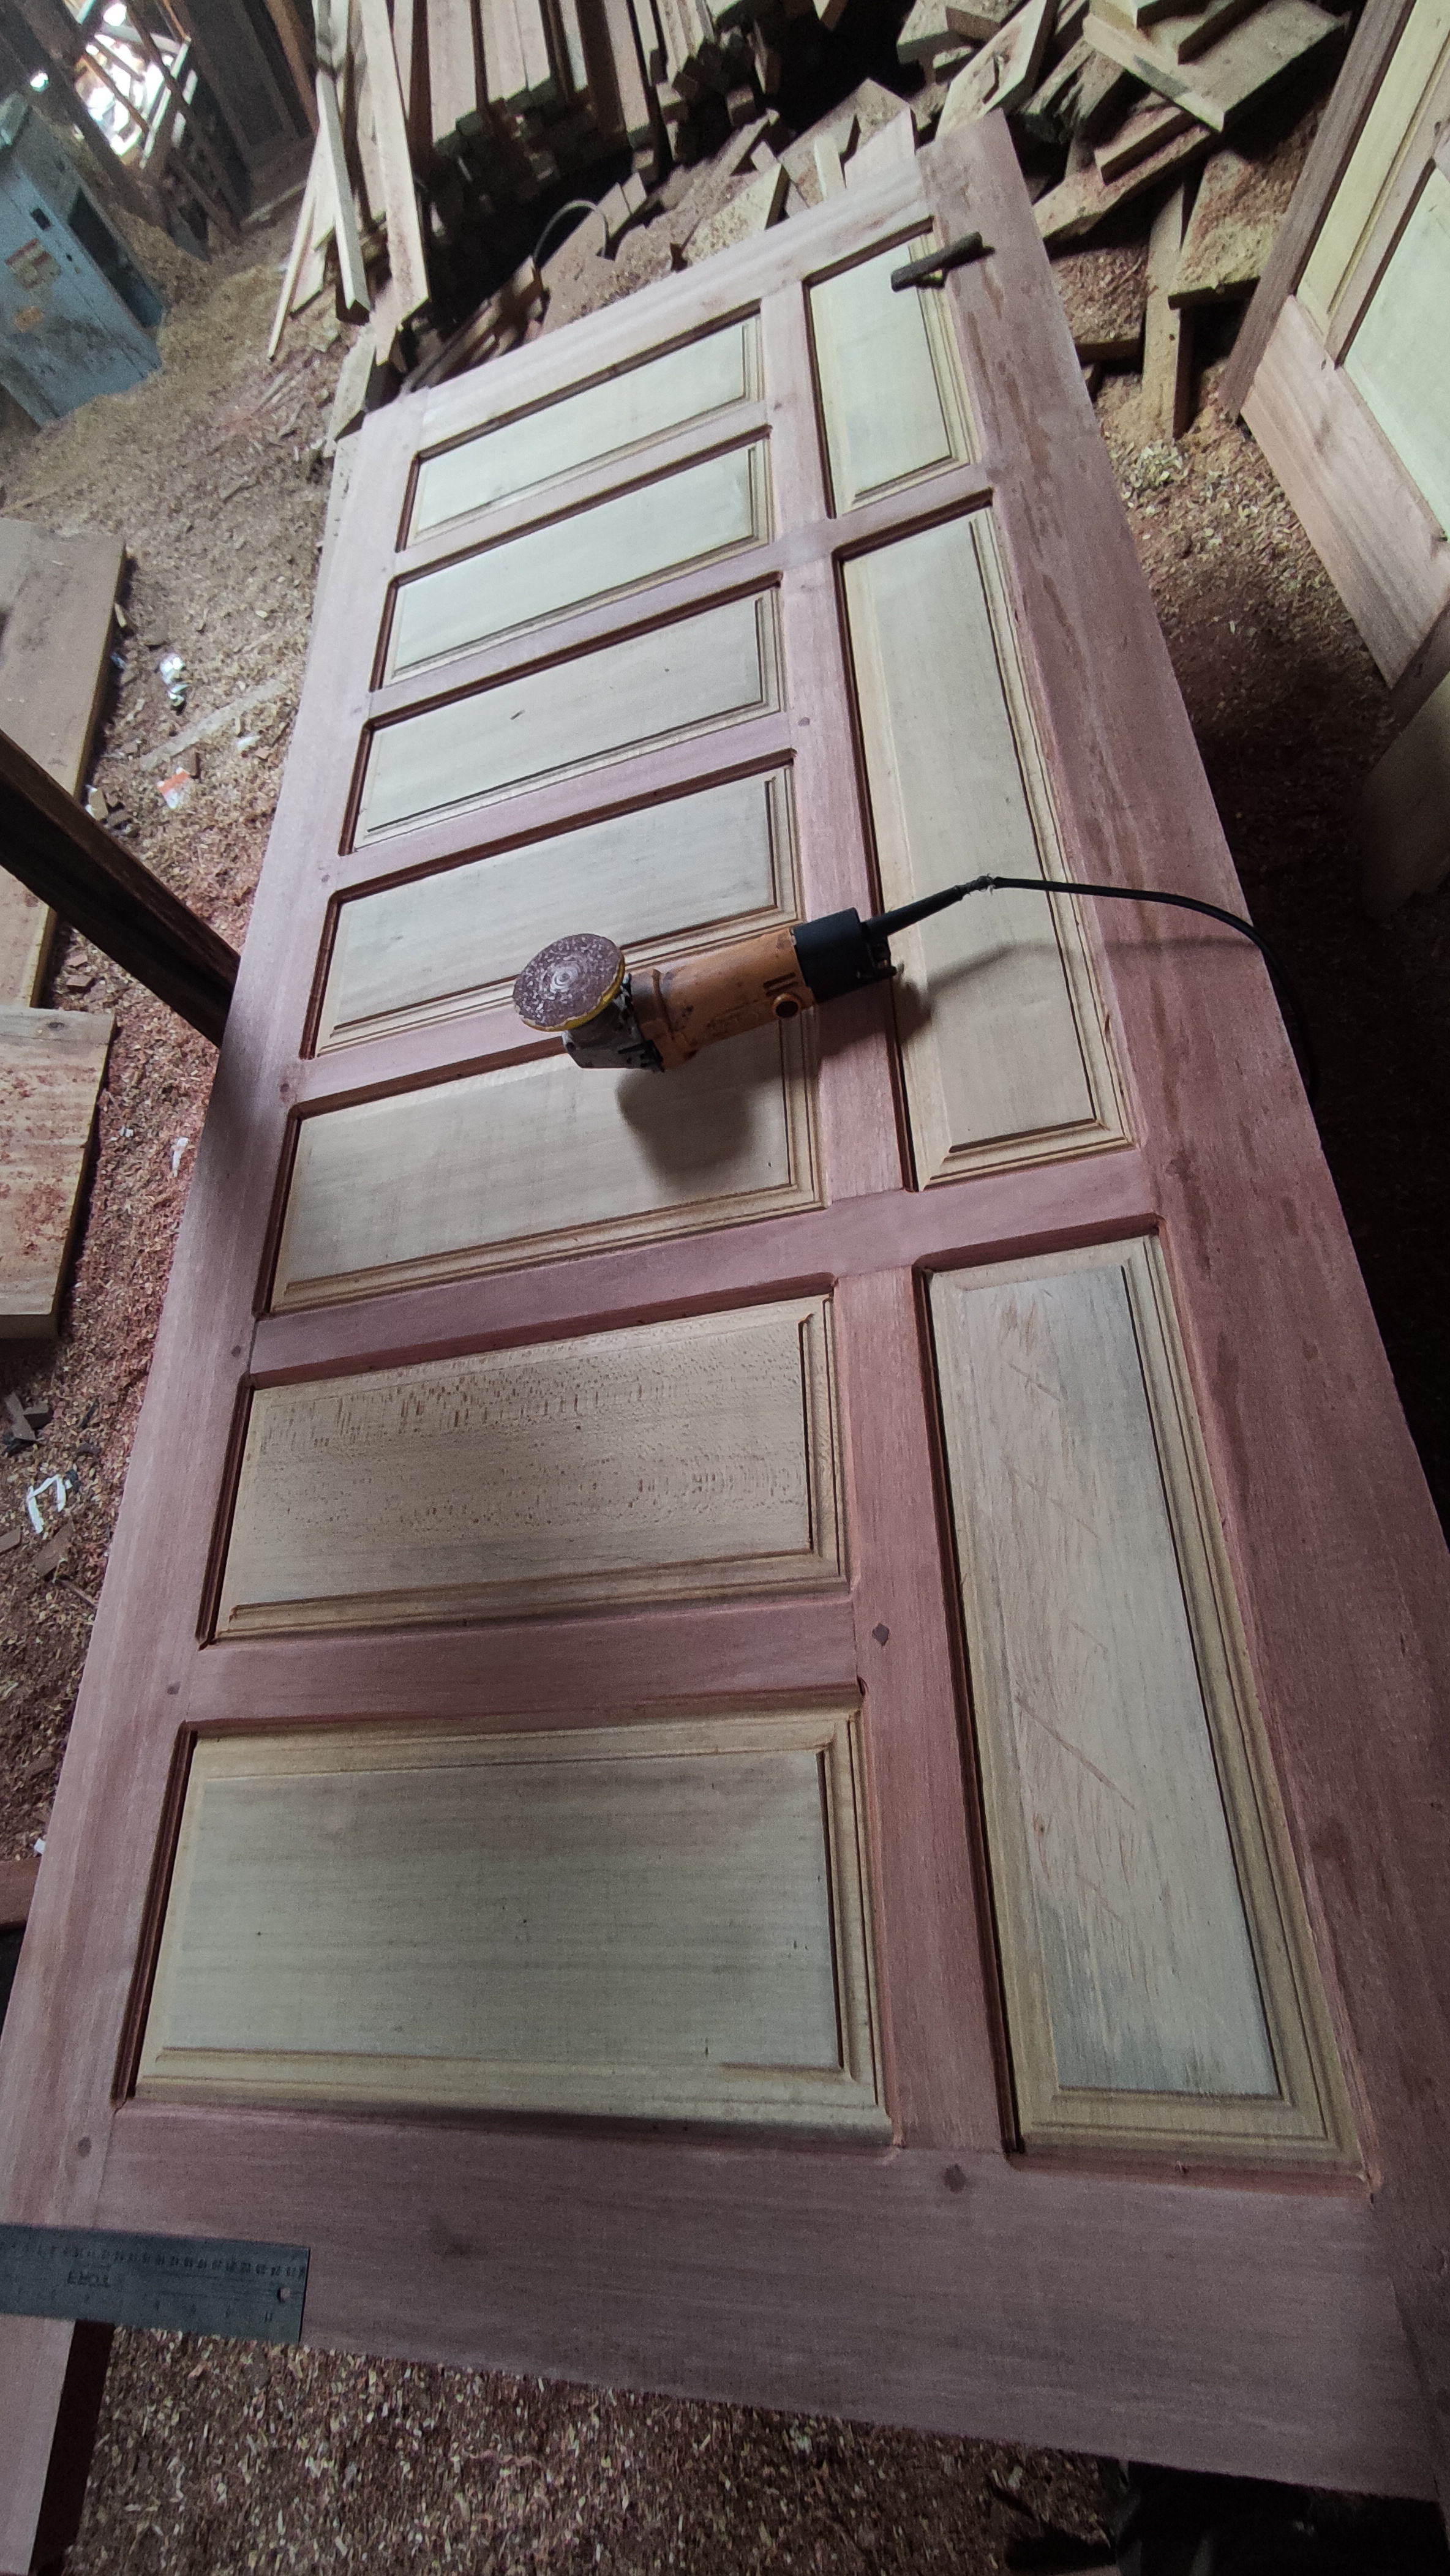
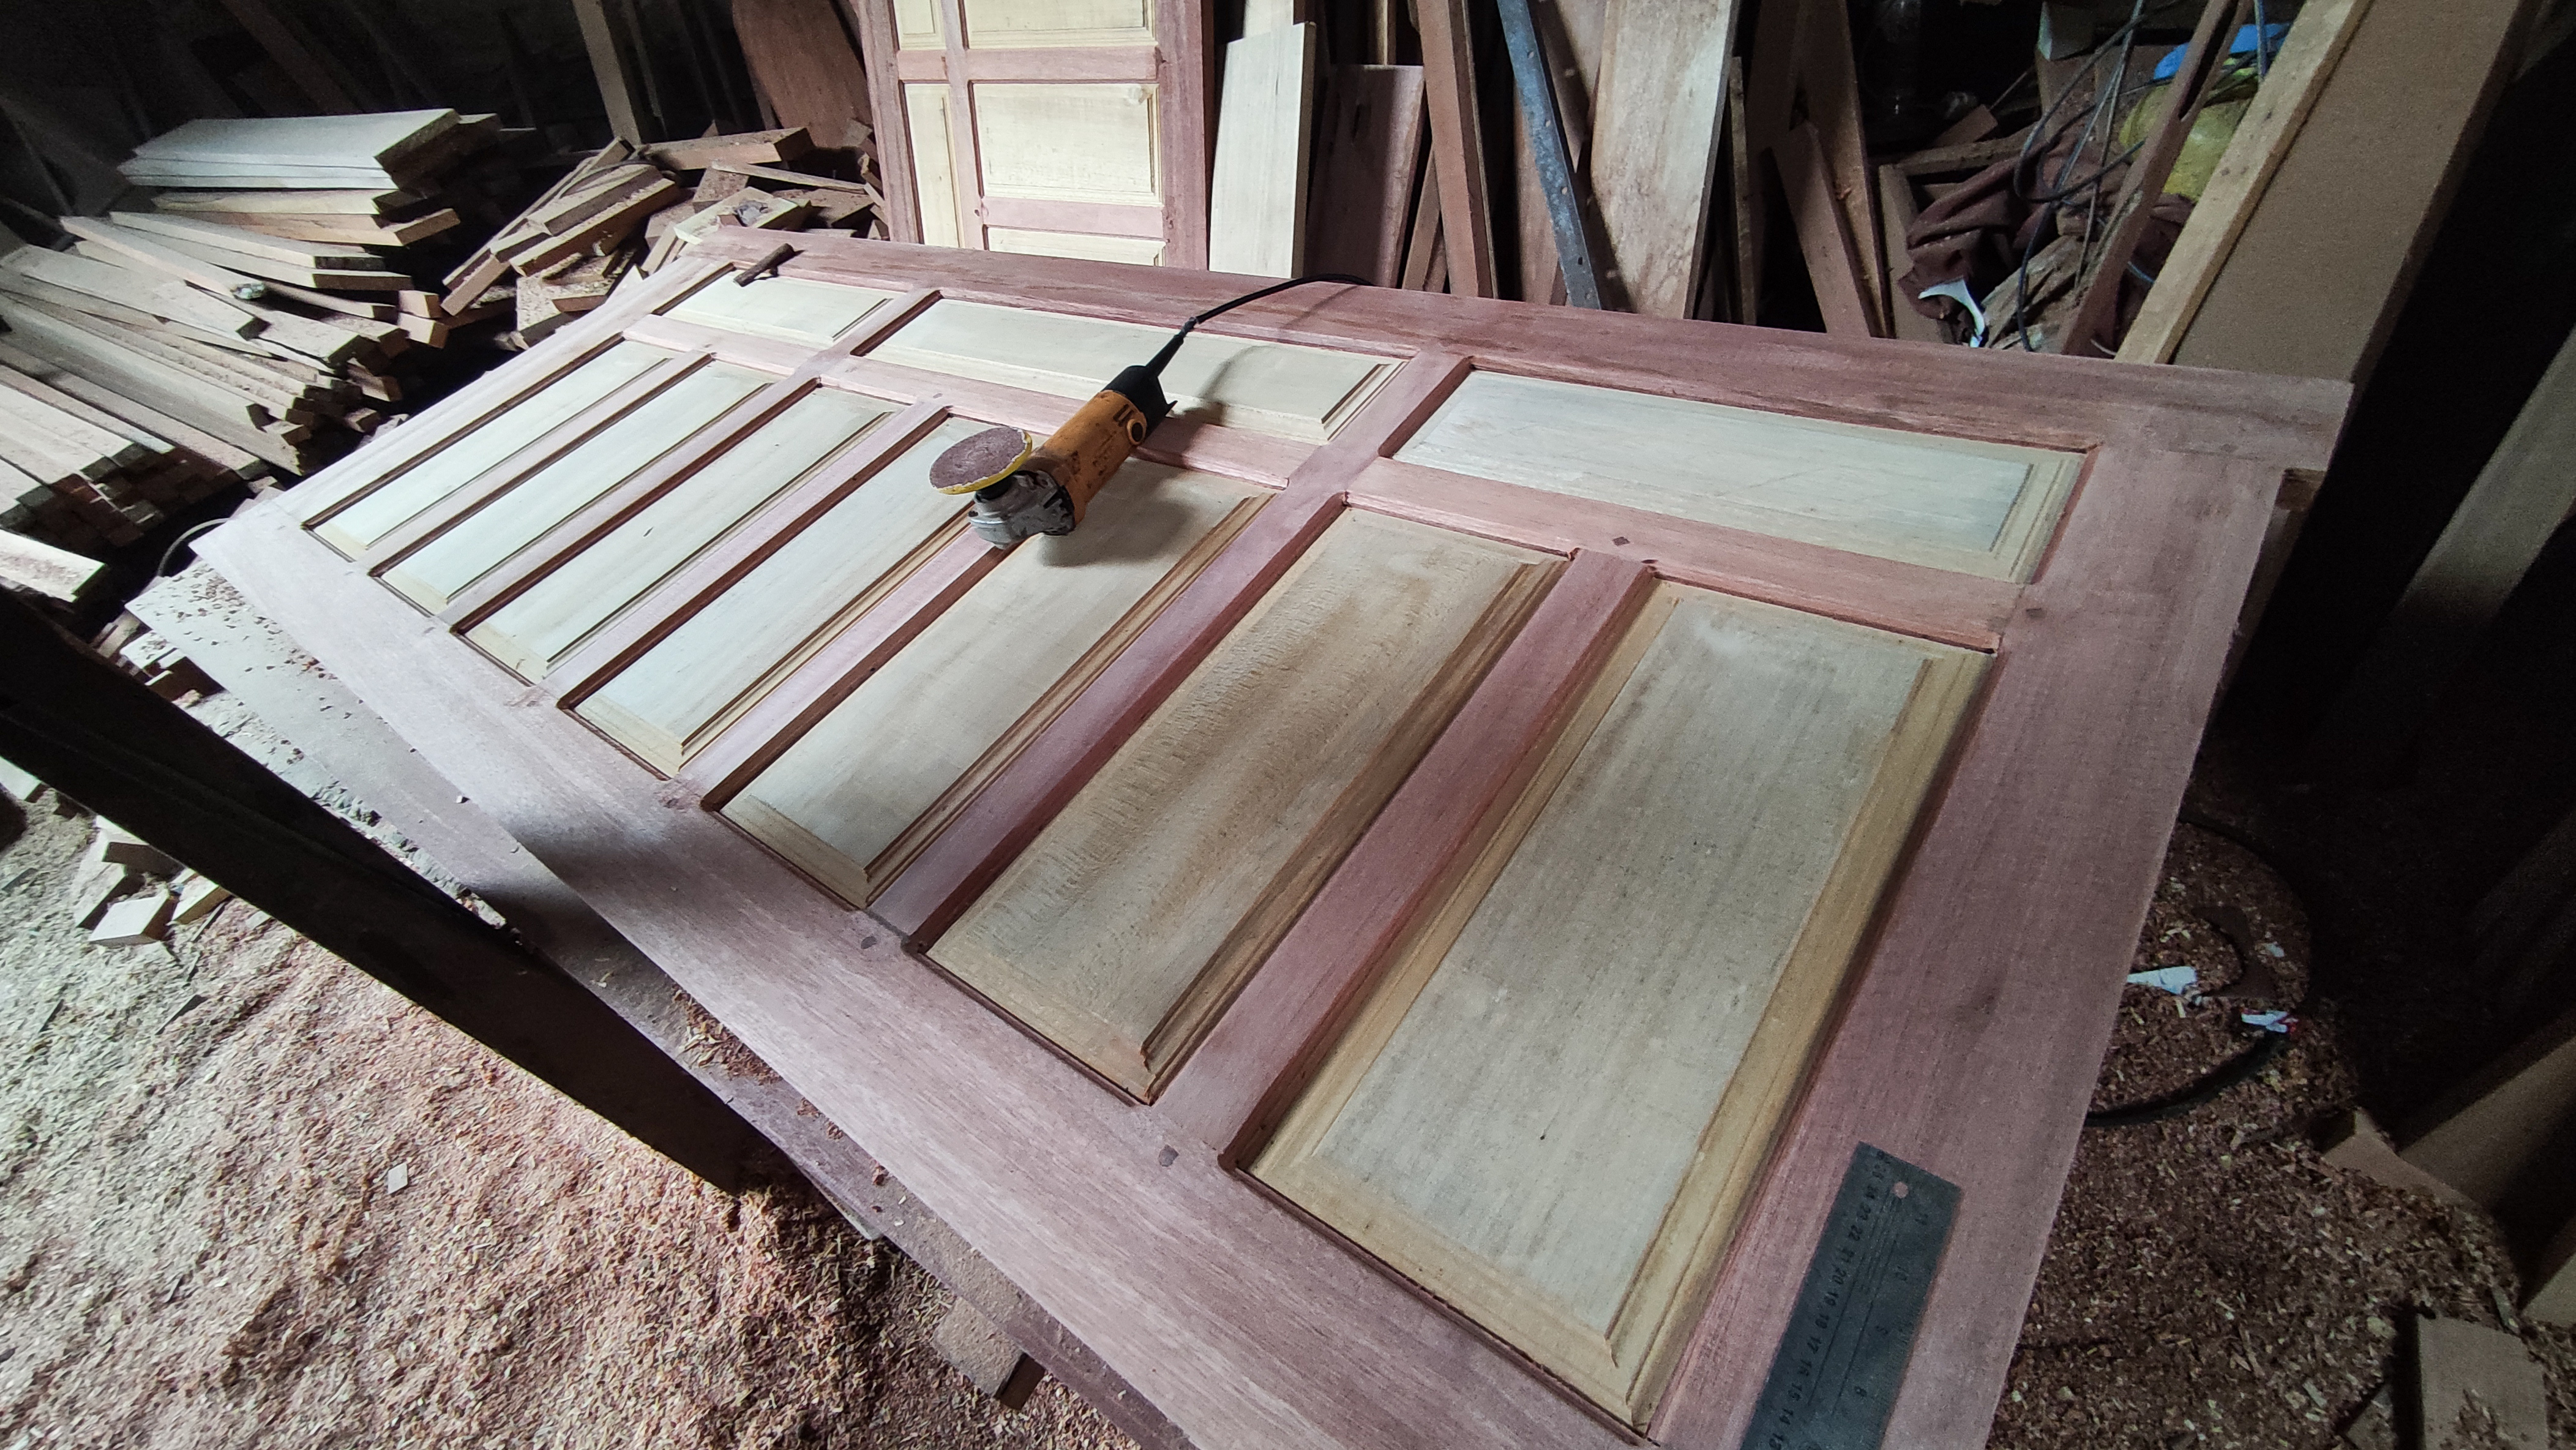
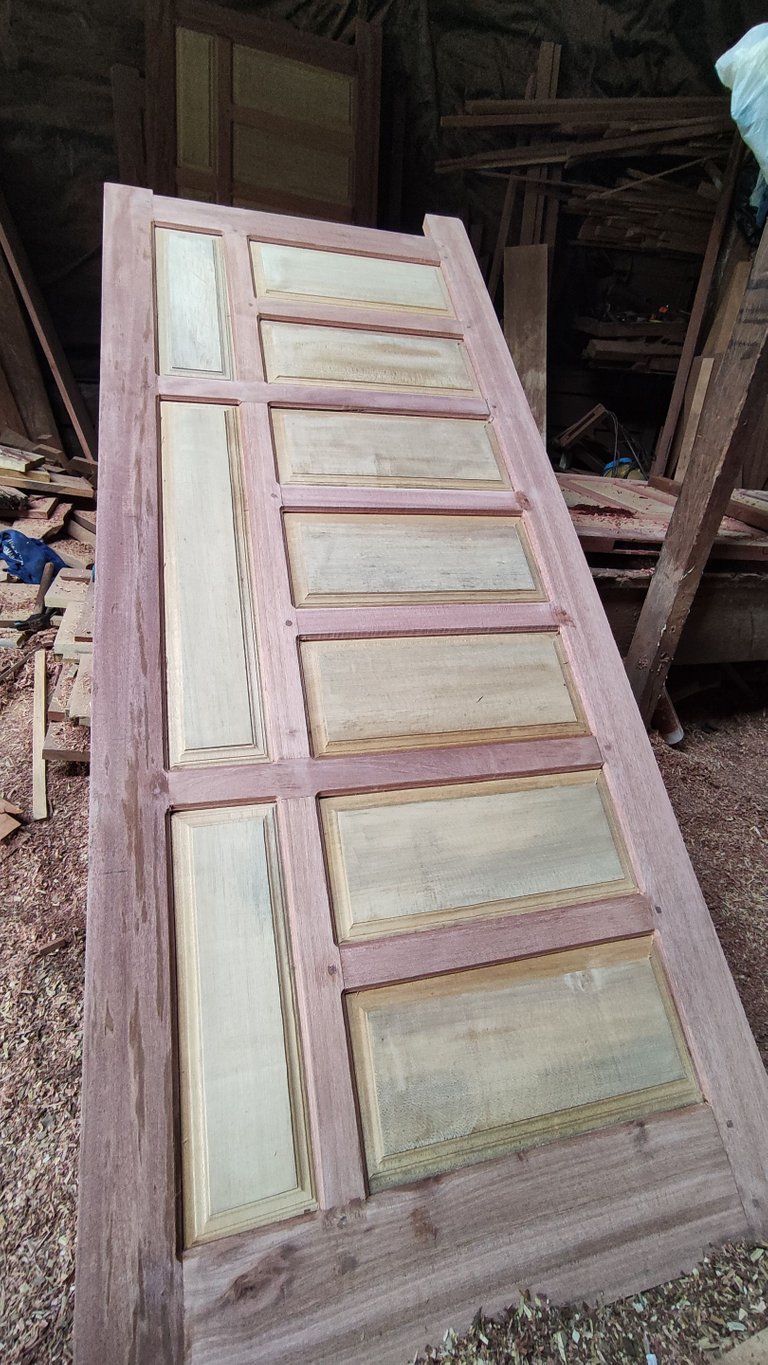
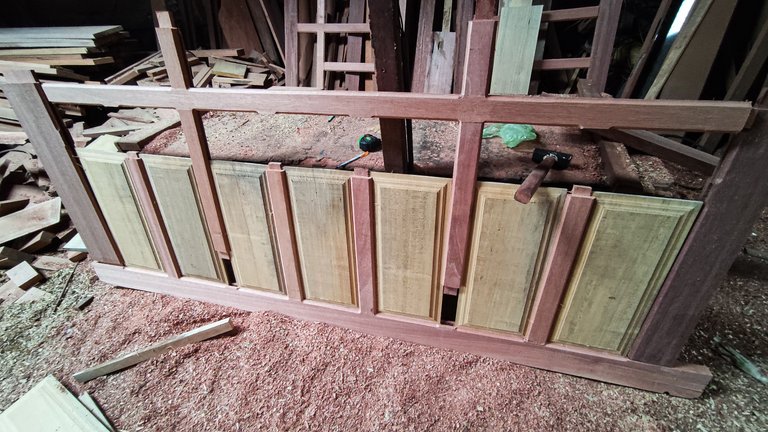
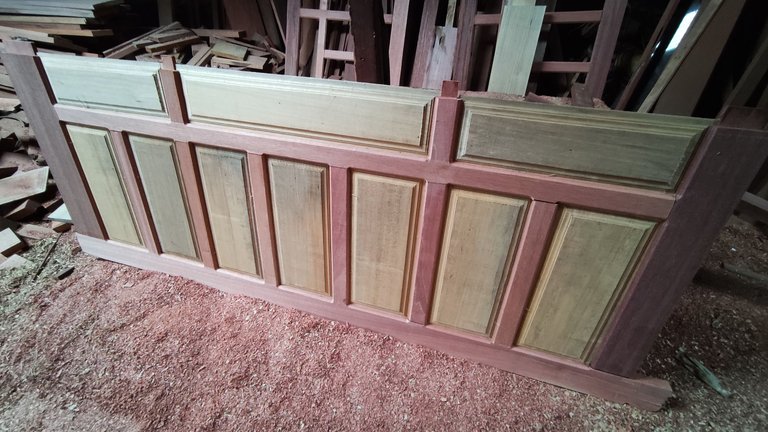
After I finished the panel, the surface of the edges around the board looks to form a beautiful simple flower and now, we enter the stage of installing the leaves on the door series and in installing the leaves, I have to disassemble all the bulkhead sets and insert the leaf boards one by one into the series bulkhead.


And after I finished assembling all the doors the result would be seen to have a two-color texture, namely a brown frame and a white pine door leaf and then I continued the pressing process to lock all the dowel joints on the main series of door bone bulkheads and to lock the bulkhead post nipples after I drilled them first then I continued with wooden dowels.
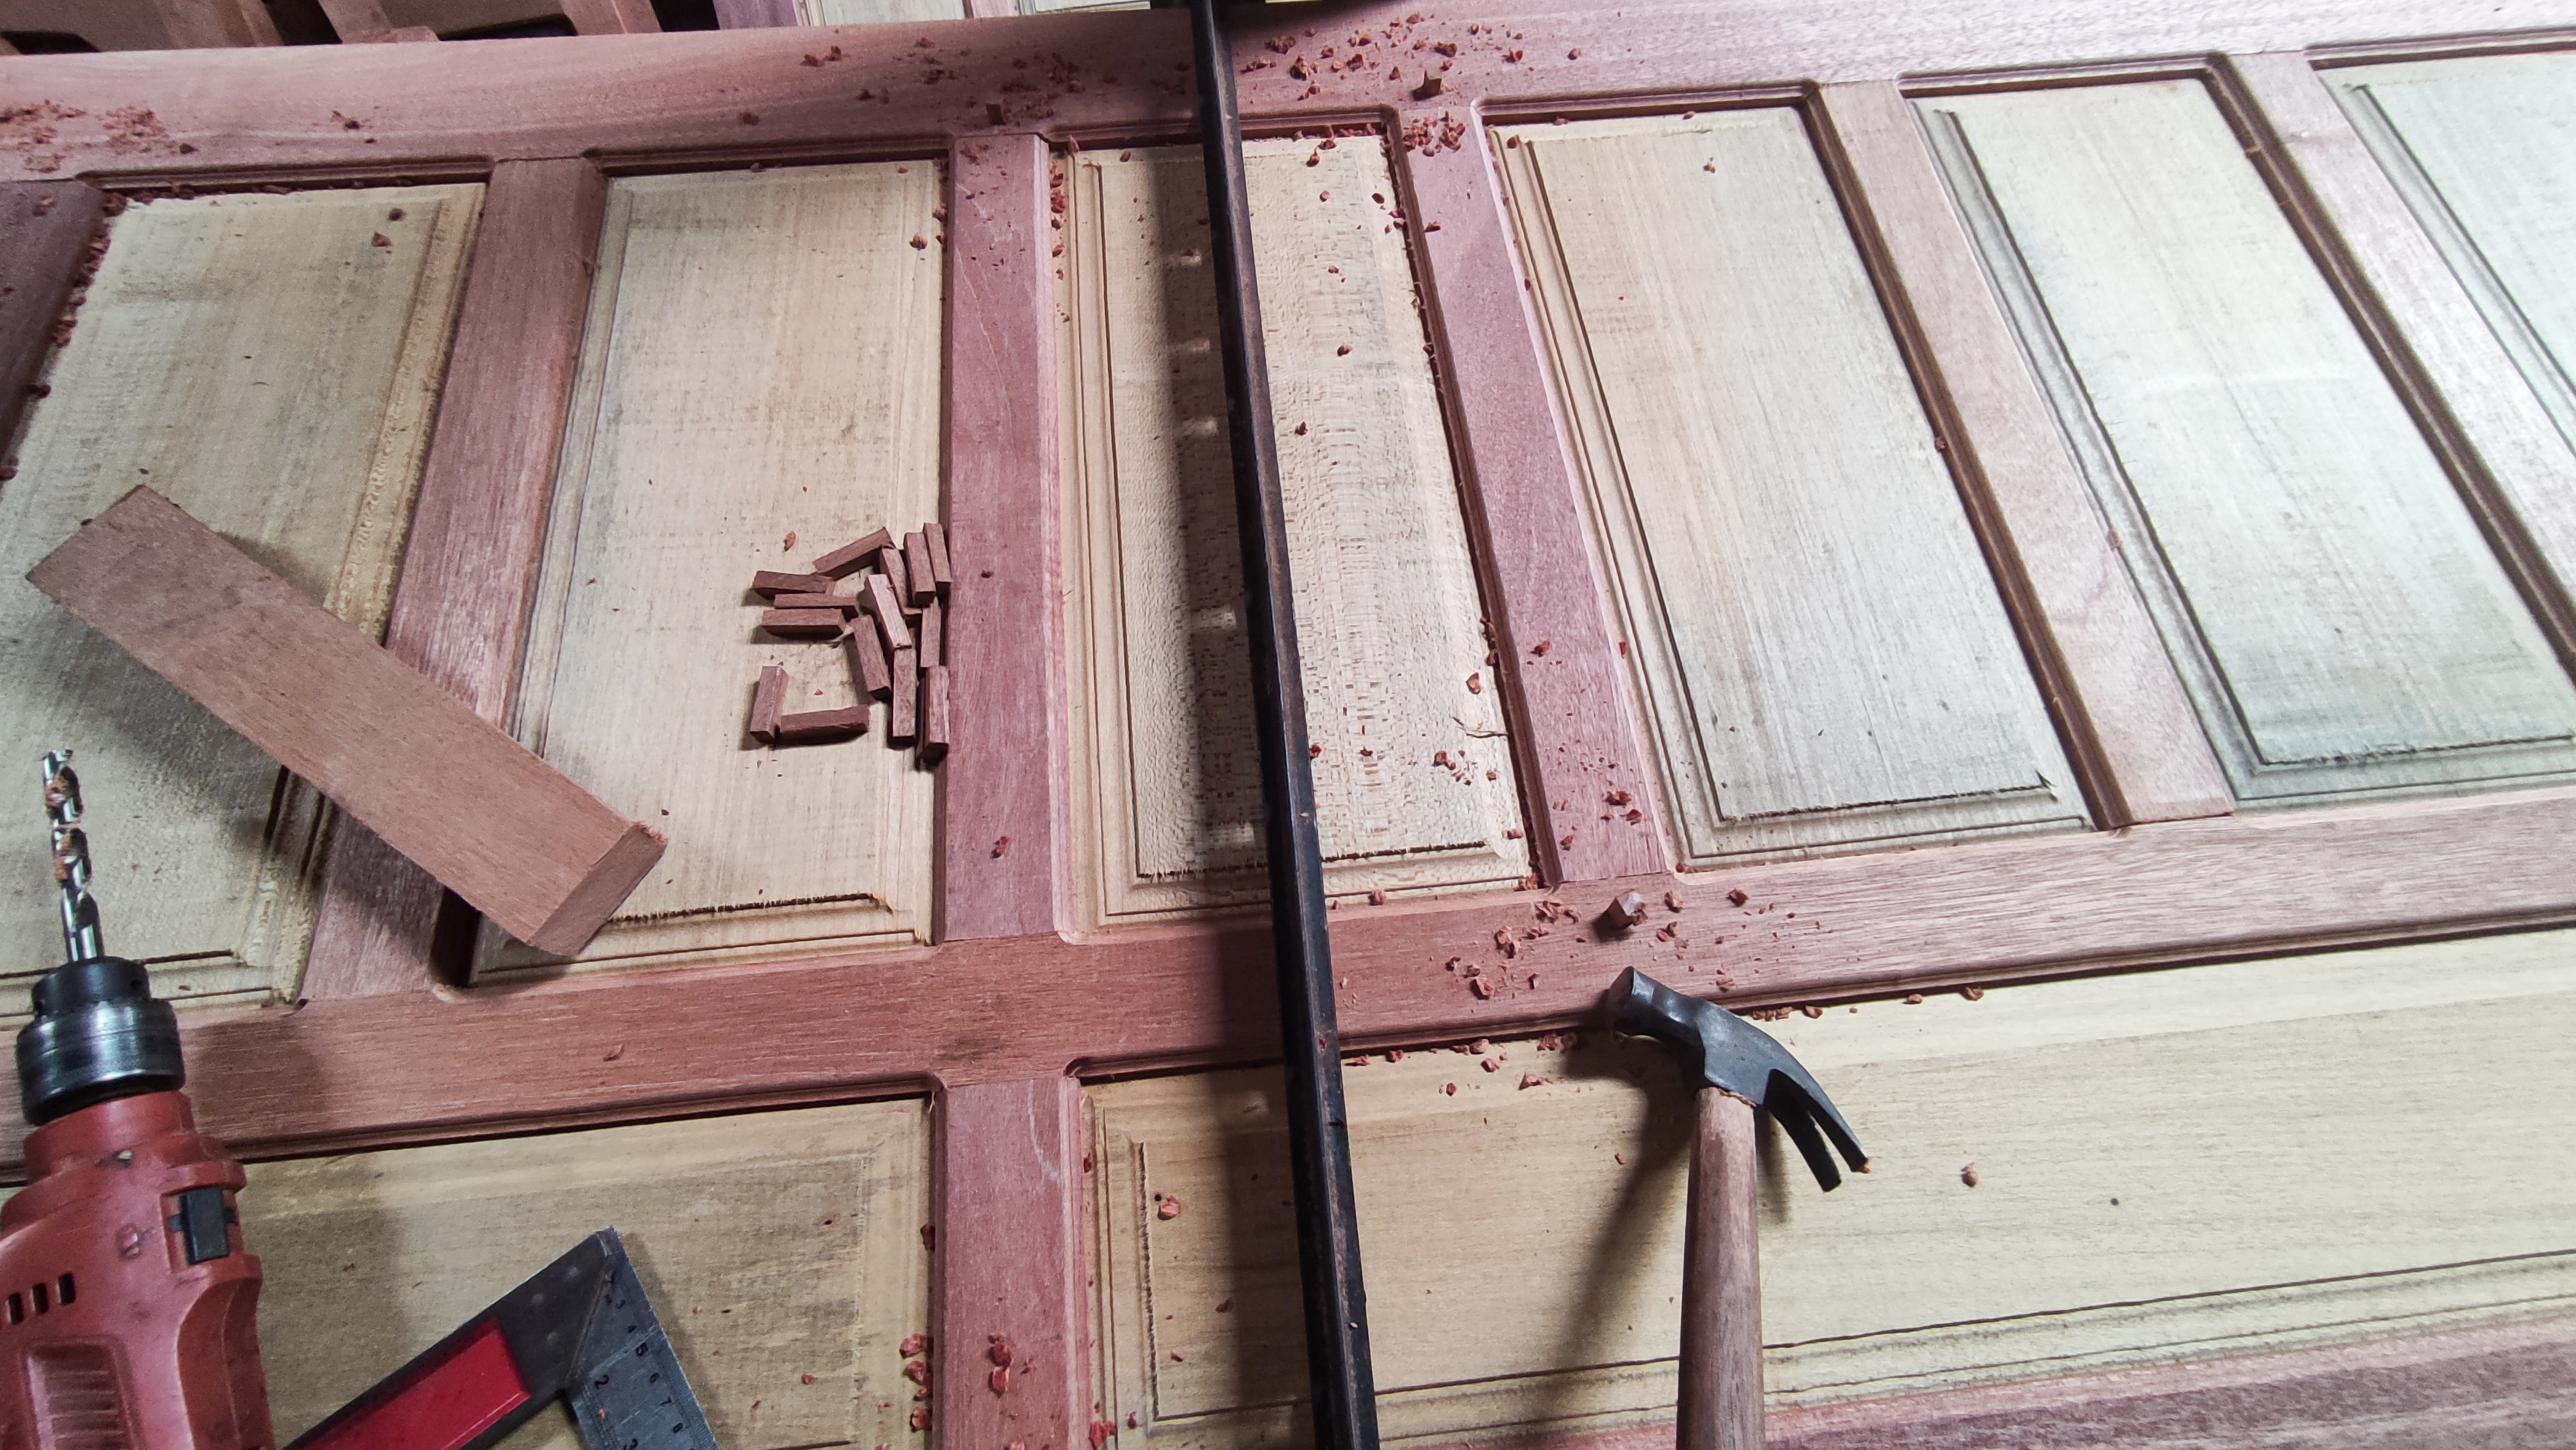

After the process of locking the pegs is complete, then I continue the process of dumping the bulkhead connection points using glue and a mixture of brown sawdust,so that there are no small gaps in the wood connection gaps that can be seen and at the finishing stage the door will look really neat.

And after the wood putty process was finished, then I waited for the glue to dry for an hour and after that I continued the process of sanding the entire door surface using sandpaper in several stages of slow repetition.
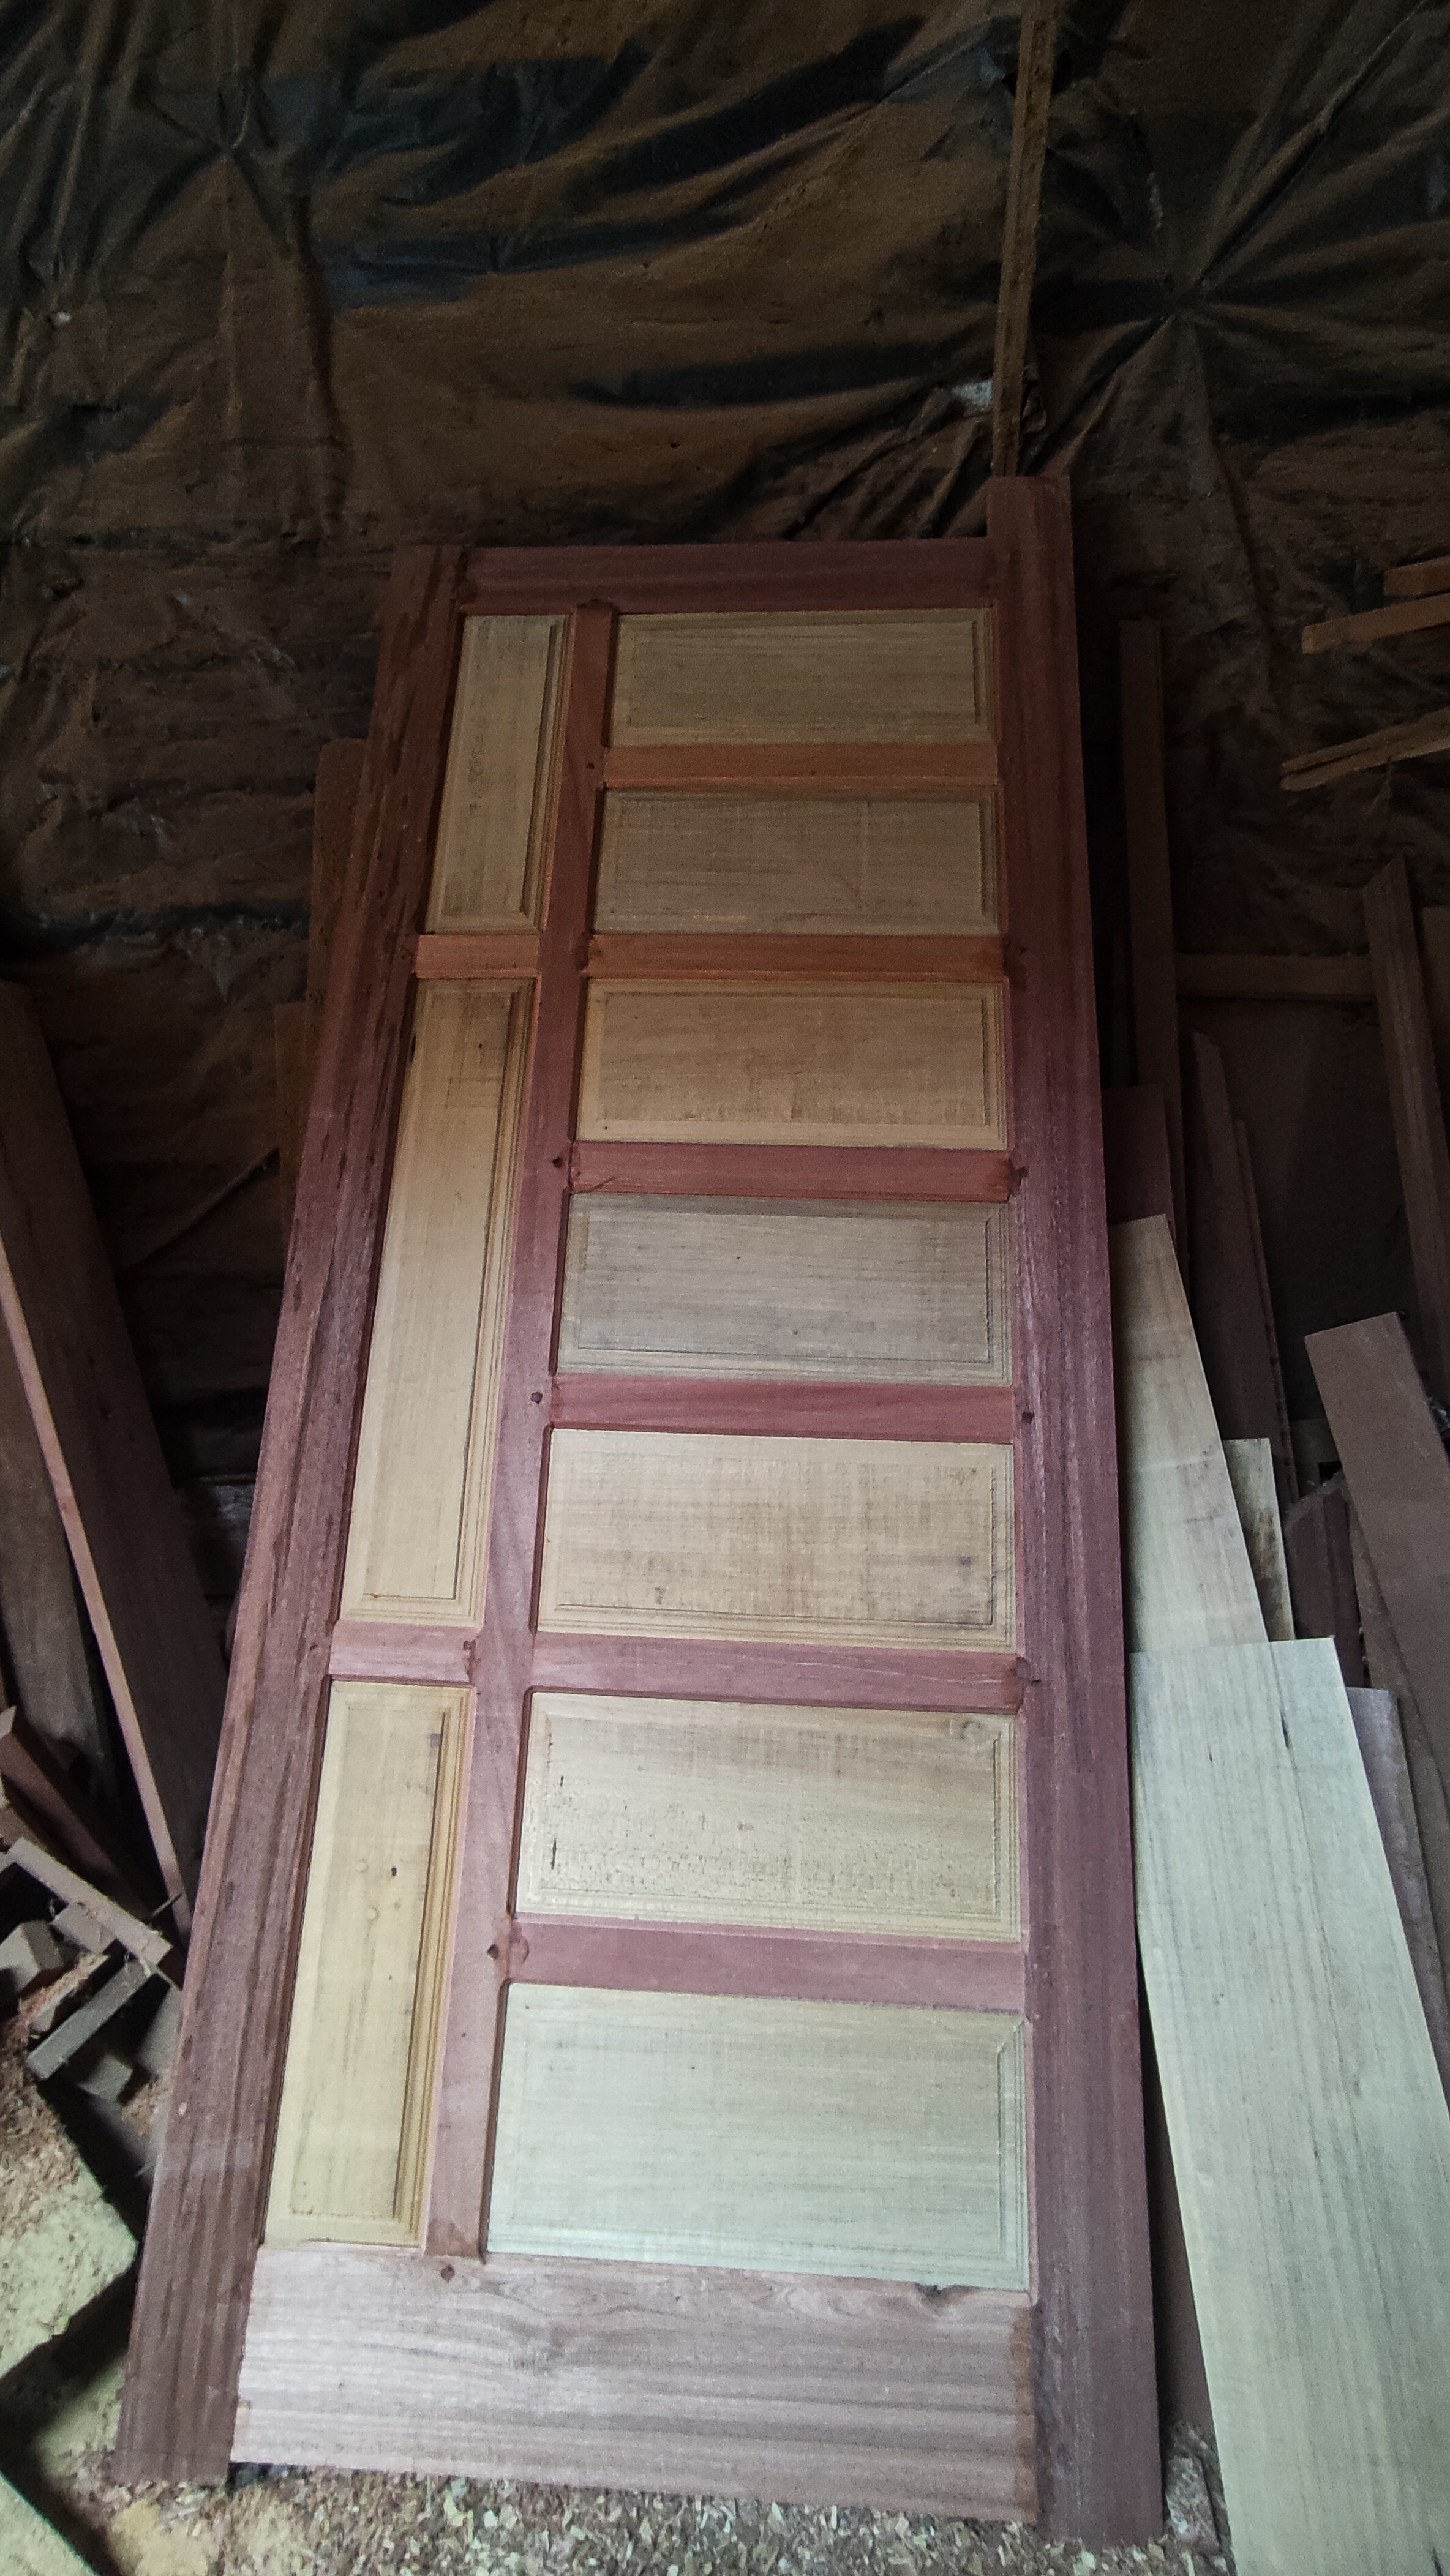
And now the architecture + design for the manufacture of 3 door units of a local resident's house with a size of 90cm x210cm I have finished working on and this is how the finishing of 3 door units for an ordered house looks with the same design and the same wood.

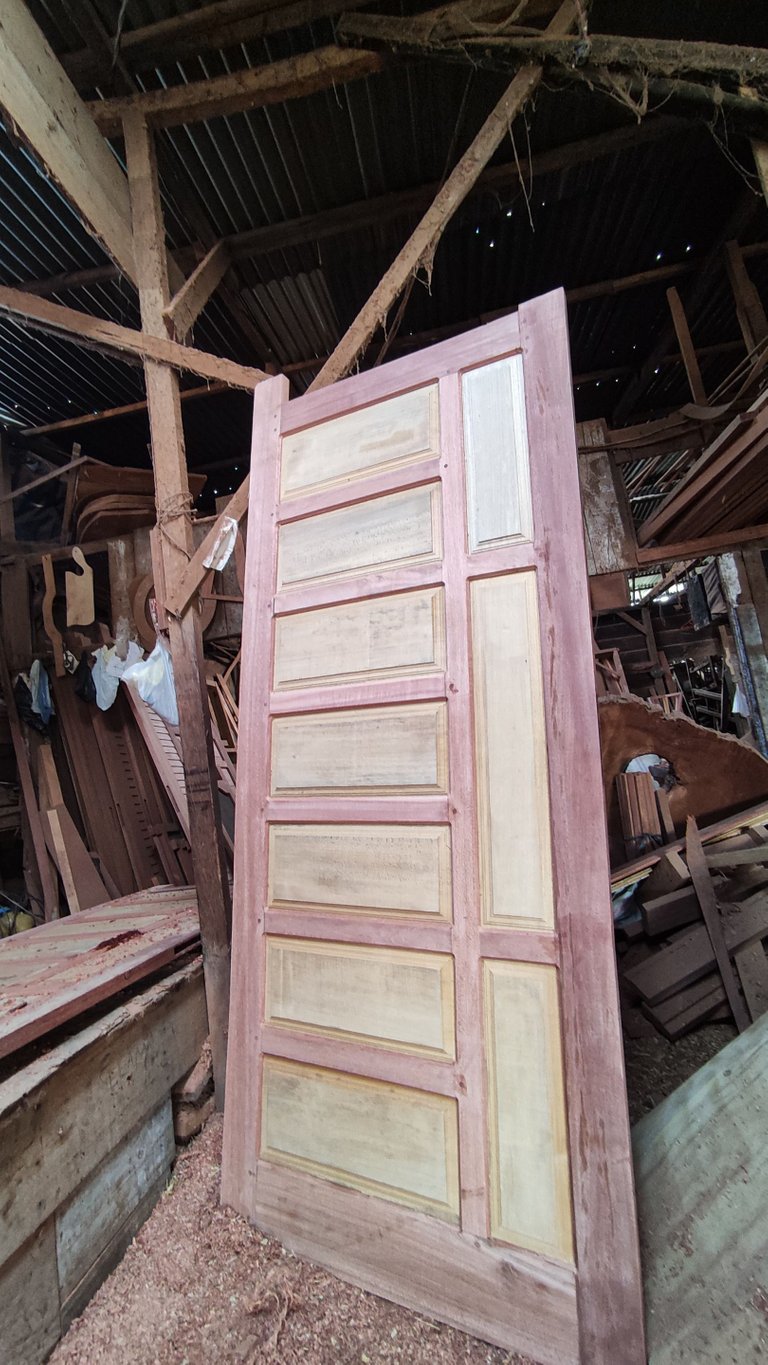
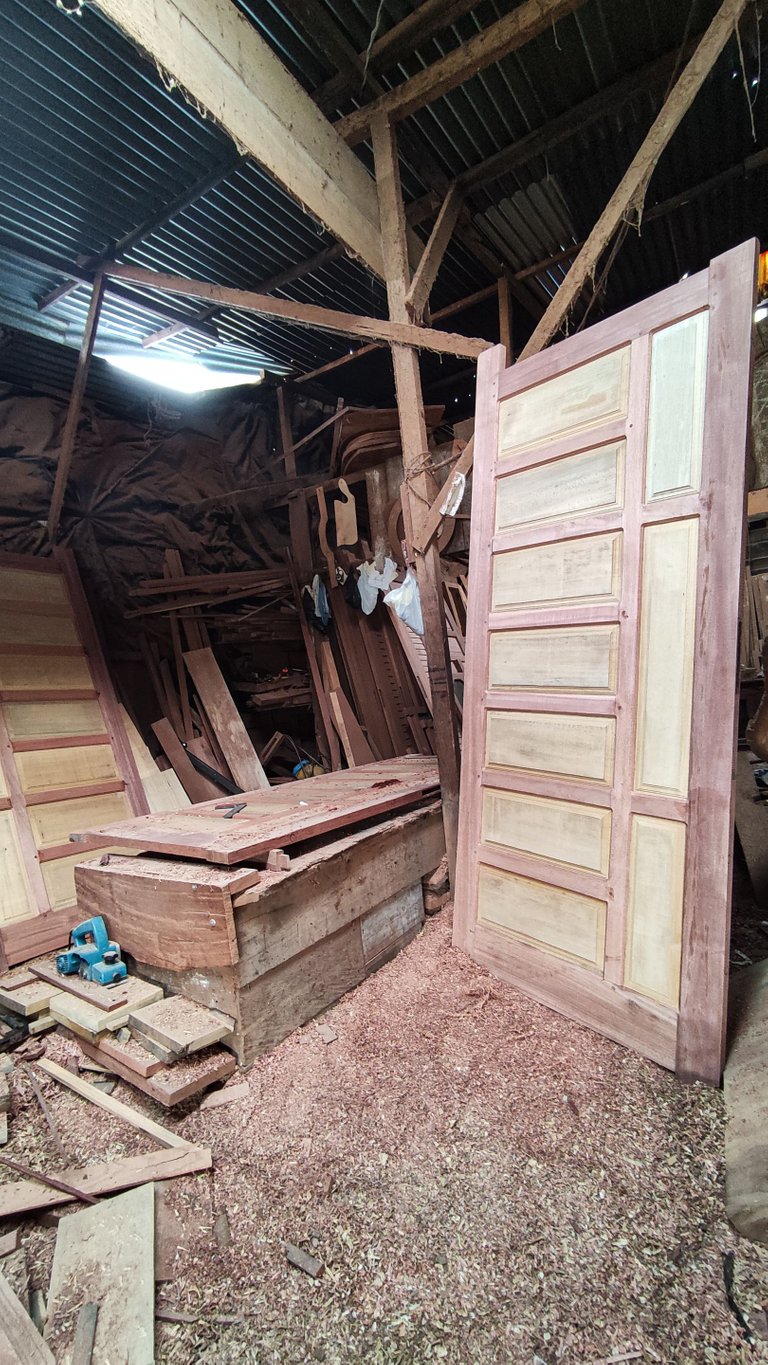
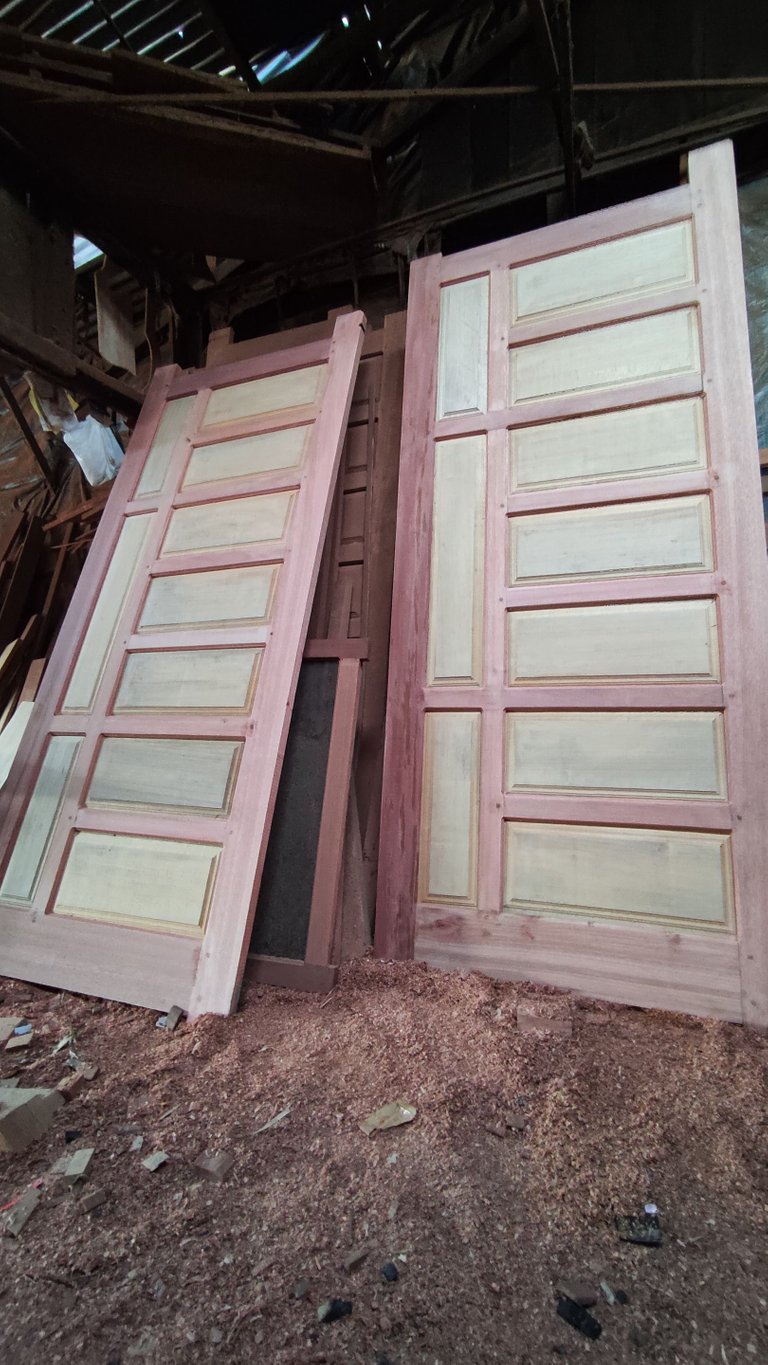
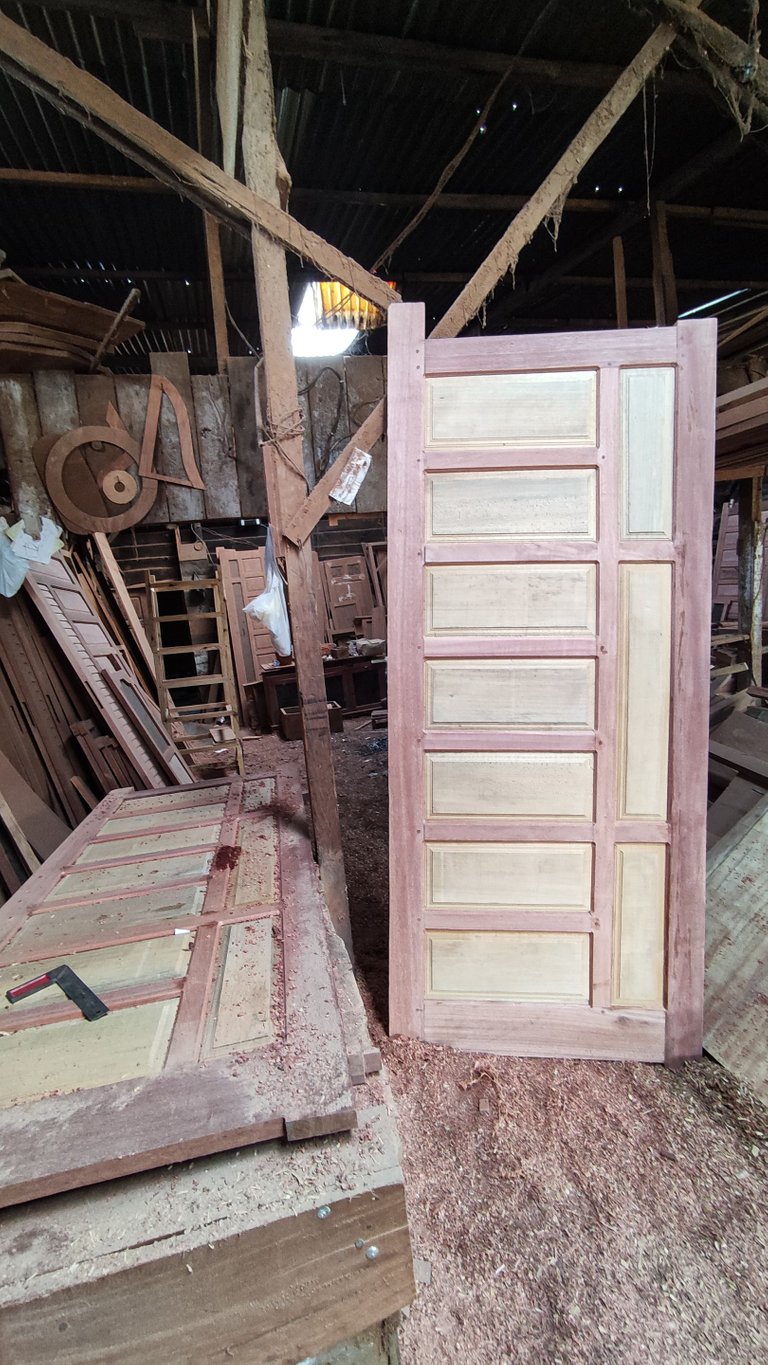


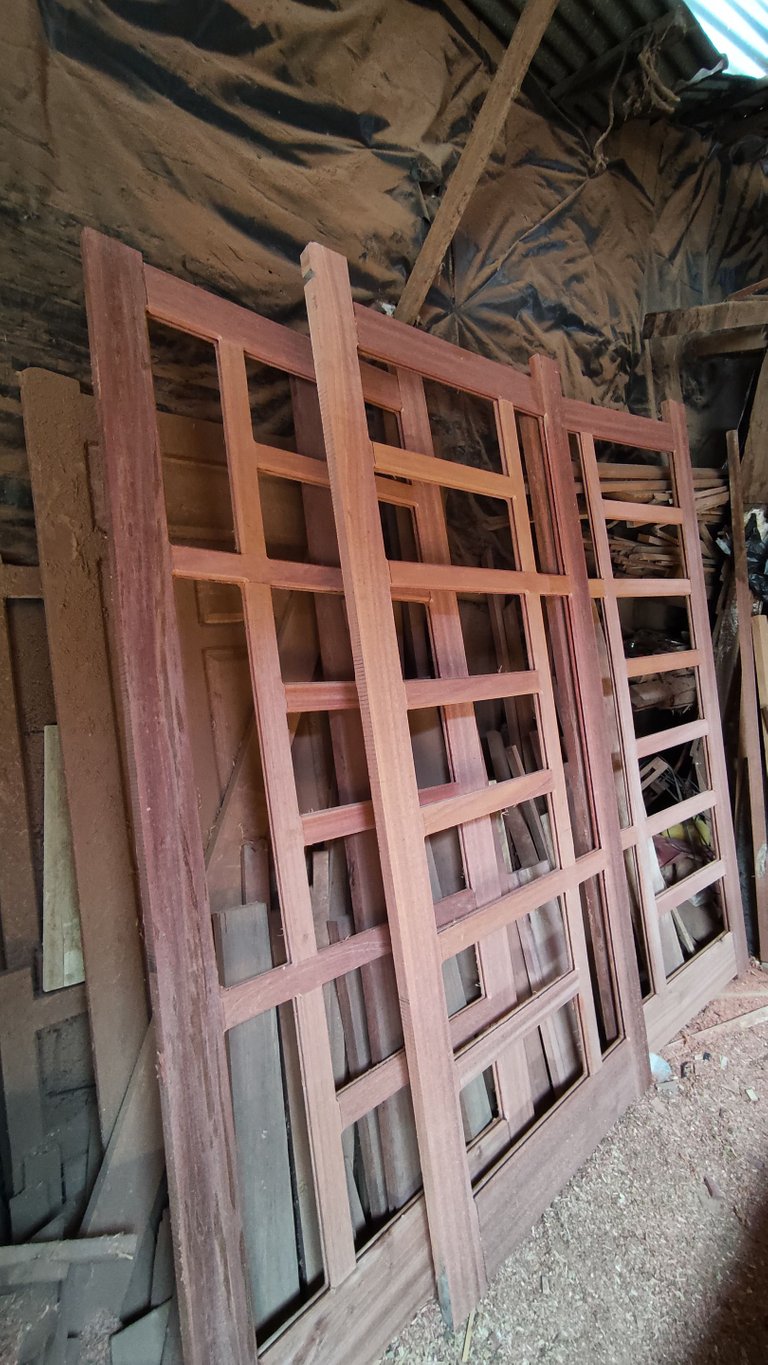
And for wood that is more at the top end of the main door frame the door chain will be cut at the time of door installation evenly with the door width main bulkhead.
All of these pictures I take when i was working on that doors and all images were taken using a smartphone camera, if you want to enjoy my previous architectural design works, please visit the post link below.

All of these pictures when i was working on that window and jalousie project ,all images were taken using a smartphone camera, if you want to enjoy my previous architectural design works, please visit the post link below.
1.Architectural design- simple cafe bar table
2.Architectural design - Wooden tray with natural wood color combination/utilization of wood waste
3.Architectural design - Flower vases / utilization of wood waste.
4.Architectural design-Simple architectural design of my baby crib basket.
5.Architectural design-Table simple the combination of natural wood colors and classic table tops
6.Architectural design- Shophouse frame jalousie
7.simple-minimalist-mini-wall-shelf-architectural-design-to-decorate-your-home-room
8.architectural-design-of-the-ventilation-jalousie - part 1
9.architectural-design-of-windows-house -part 1
10.interior-design-architecture-simple-makeup-mirror-frame.
11.architectural-design-simple-minimalist-wooden-window -part 2
12.architectural-design-window-designs-that-are-in-great-demand-by-local-residents
13.architectural-design-of-a-mini-table-and-a-simple-photo-frame
14.architecturaldesign-of-glass-windows-and-jalousies - house
![]()
The rewards earned on this comment will go directly to the person sharing the post on Twitter as long as they are registered with @poshtoken. Sign up at https://hiveposh.com.
I have often wondered why wooden doors are so expensive.
Now I understand that it is a very laborious job. From start to finish it requires a lot of dedication and attention so that the result is ideal.
The door looks very well crafted and beautiful. Best regards.
thank you and it's true as you said and this is my daily work:)
the door looks really good and beautifull, you are so talent.
thank you and you also have an extraordinary talent for this :)
@tipu curate
Upvoted 👌 (Mana: 33/43) Liquid rewards.
thanks @claudio83 :)
Thank you for sharing this amazing post on HIVE!
Your content got selected by our fellow curator @priyanarc & you just received a little thank you via an upvote from our non-profit curation initiative!
You will be featured in one of our recurring curation compilations and on our pinterest boards! Both are aiming to offer you a stage to widen your audience within and outside of the DIY scene of hive.
Join the official DIYHub community on HIVE and show us more of your amazing work and feel free to connect with us and other DIYers via our discord server: https://discord.gg/mY5uCfQ !
If you want to support our goal to motivate other DIY/art/music/homesteading/... creators just delegate to us and earn 100% of your curation rewards!
Stay creative & hive on!
thanks @priayanarc and the whole team @diyhub who work :)
What surprised me was if you made all the boxes by hand, the tenon if you made them with a machine, but you made the boxes by hand, how did you make them stay straight. Cheers
Love the finished product. Nice job again my friend. Good evening!
thank you friends for the warm words and good night also hope you are always healthy there.
You're welcome, my friend. Have a nice day ahead.
the work of your hands is very neat, when I saw the door it immediately implied in my mind that the door was very complicated in the process.
thanks @neoseven this job is indeed a little complicated and thanks to the help of the machine if the process is a little easier ;)
Congratulations @deltasteem! We're delighted to specially curate your awesome publication and award it RUNNER-UP in Architecture Brew #65. More power!
Thank you for subscribing to Architecture+Design, an OCD incubated community on the Hive blockchain.
thanks @aplusd and will continue to be in this beloved community with the best publications we have ;)
All the best always dear @deltasteem. Cheers! 😀
Great design and built.
Congrats on being a runner up @deltasteem