![]()
In the last few days I have just finished an architectural project for house door design and as usual this is one of the local community door projects and this time I completed a fairly simple house door design.
And in my area in general, some local people are more interested in making house door designs with simple designs besides that local people always pay attention to price and quality derived from the type of wood you want to use.
For now and in recent years the local community has claimed meranti wood as a good type of wood that is included in group II with a characteristic faded brown color and white-striped fibers.
And today I am sharing the process of completing two architectural design projects for the manufacture of two door units with a fairly simple design and this is one door design that is relatively easy for in work
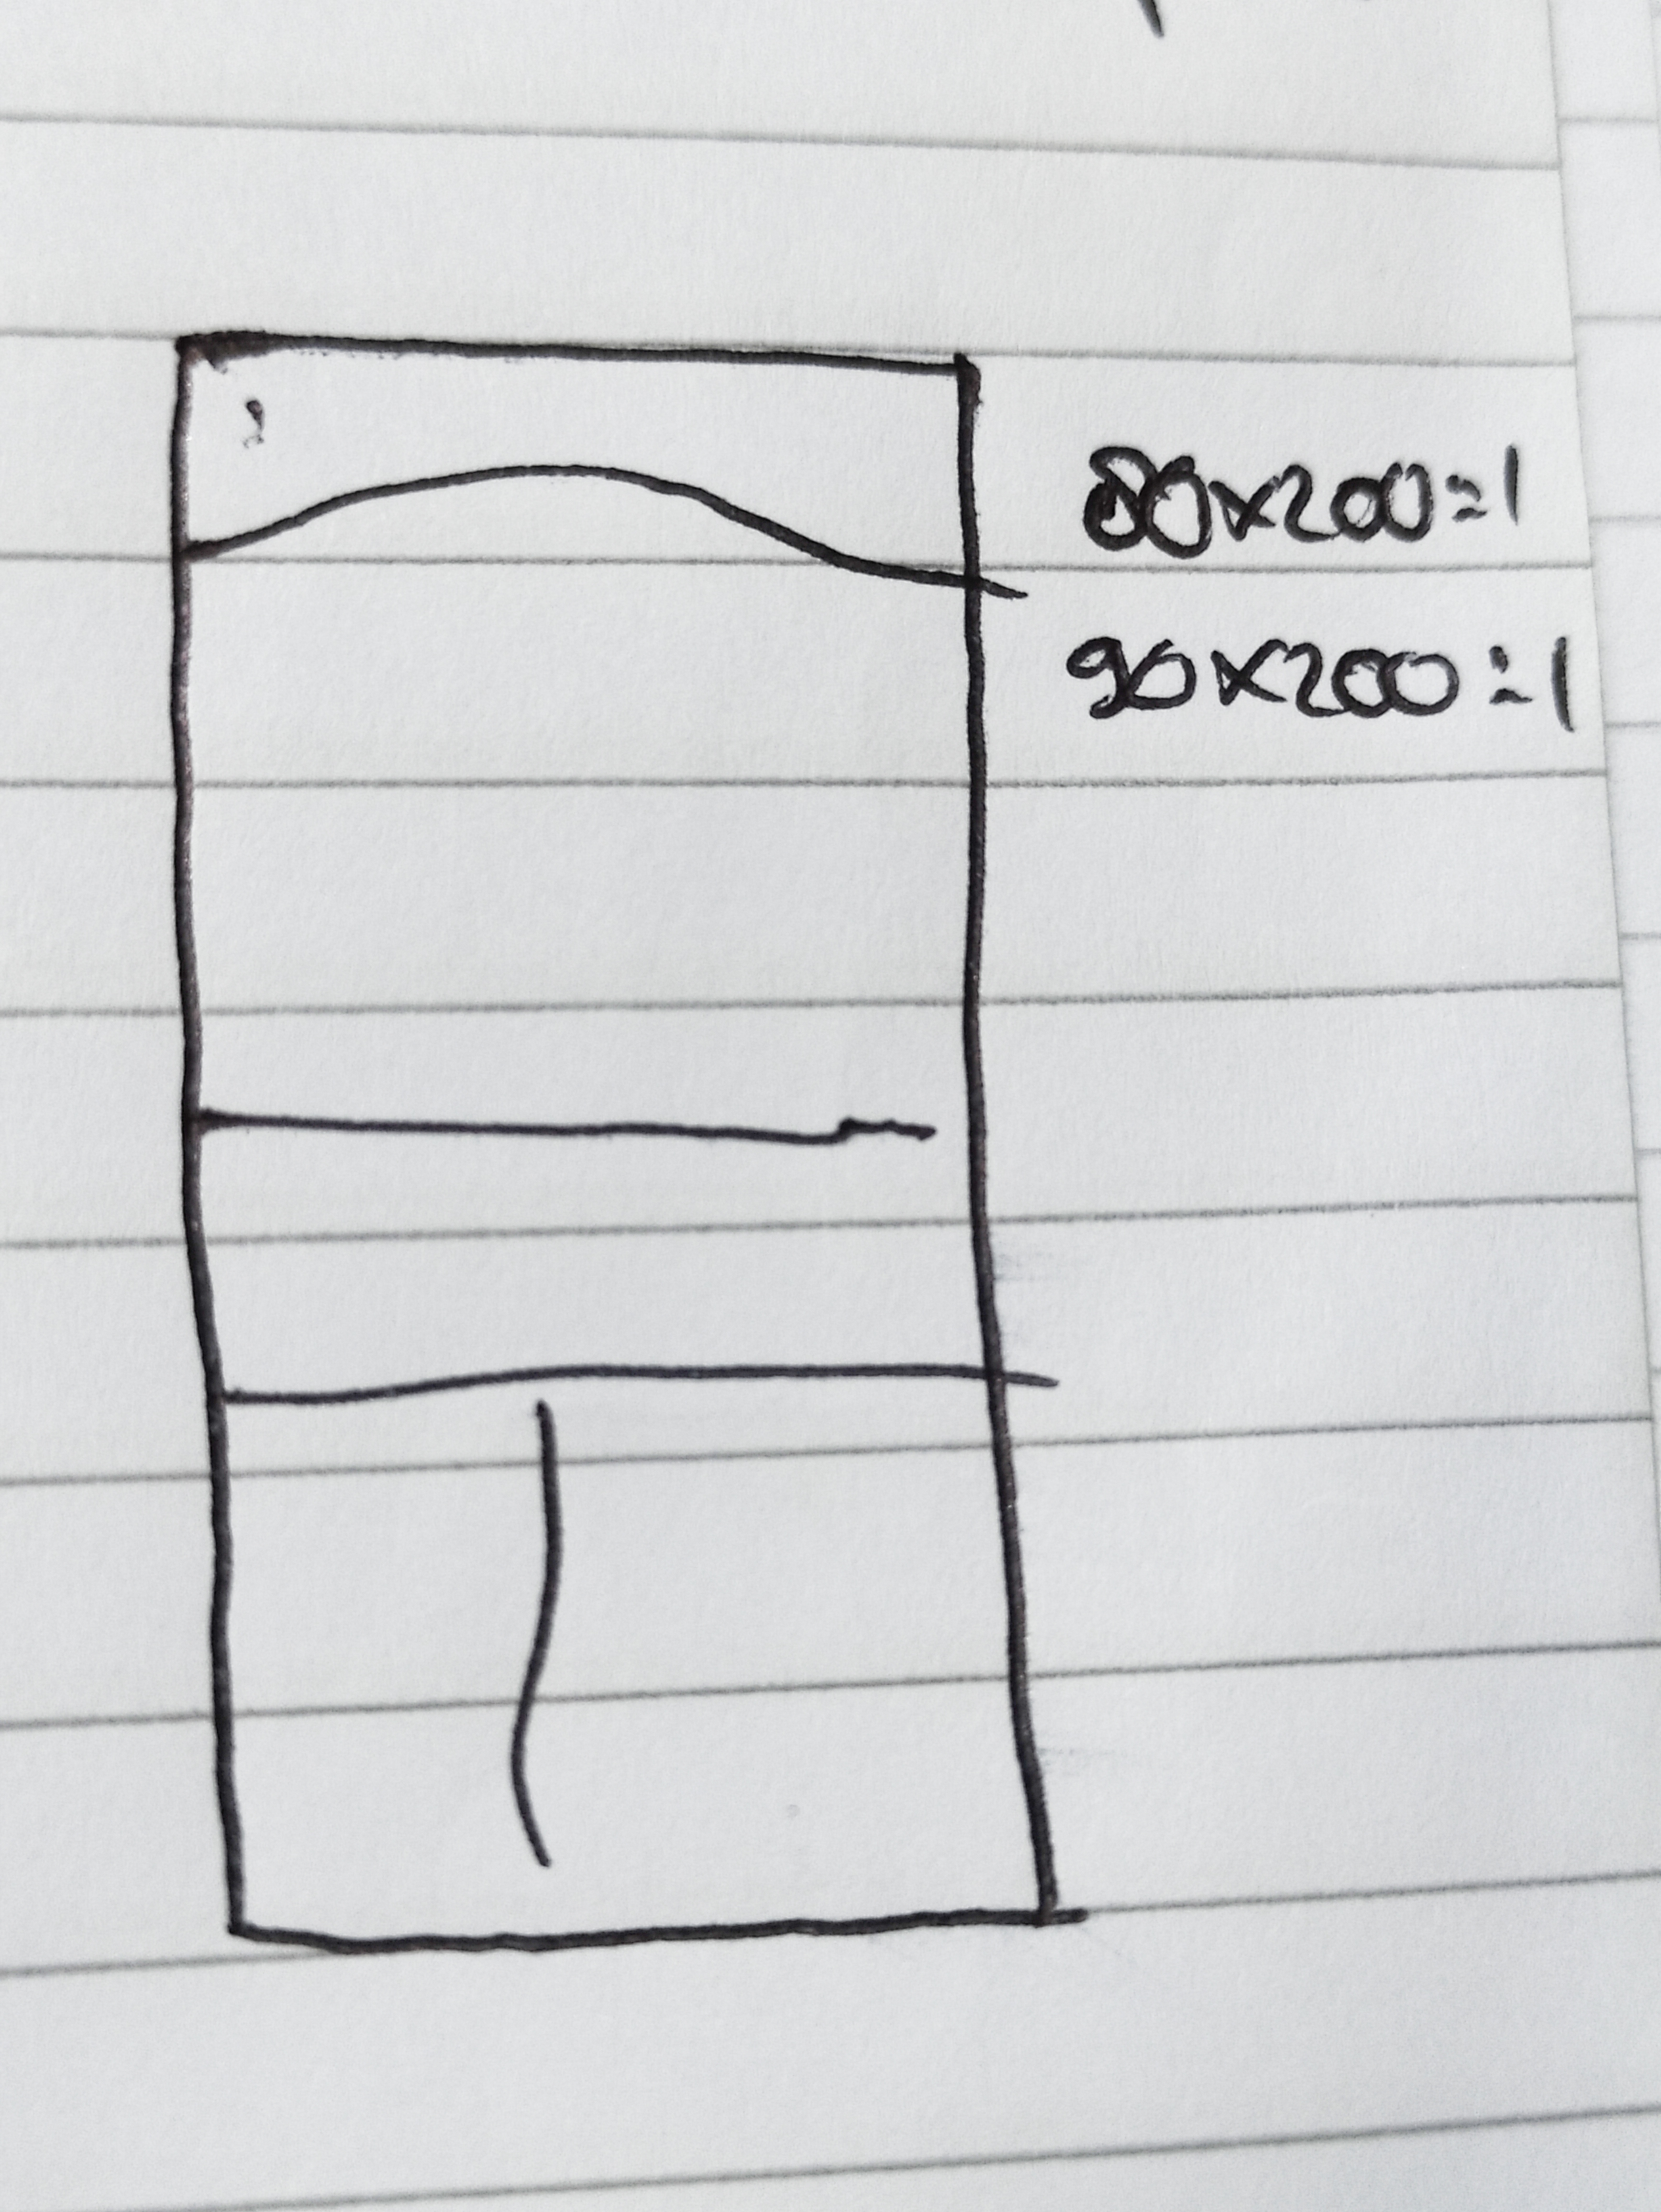
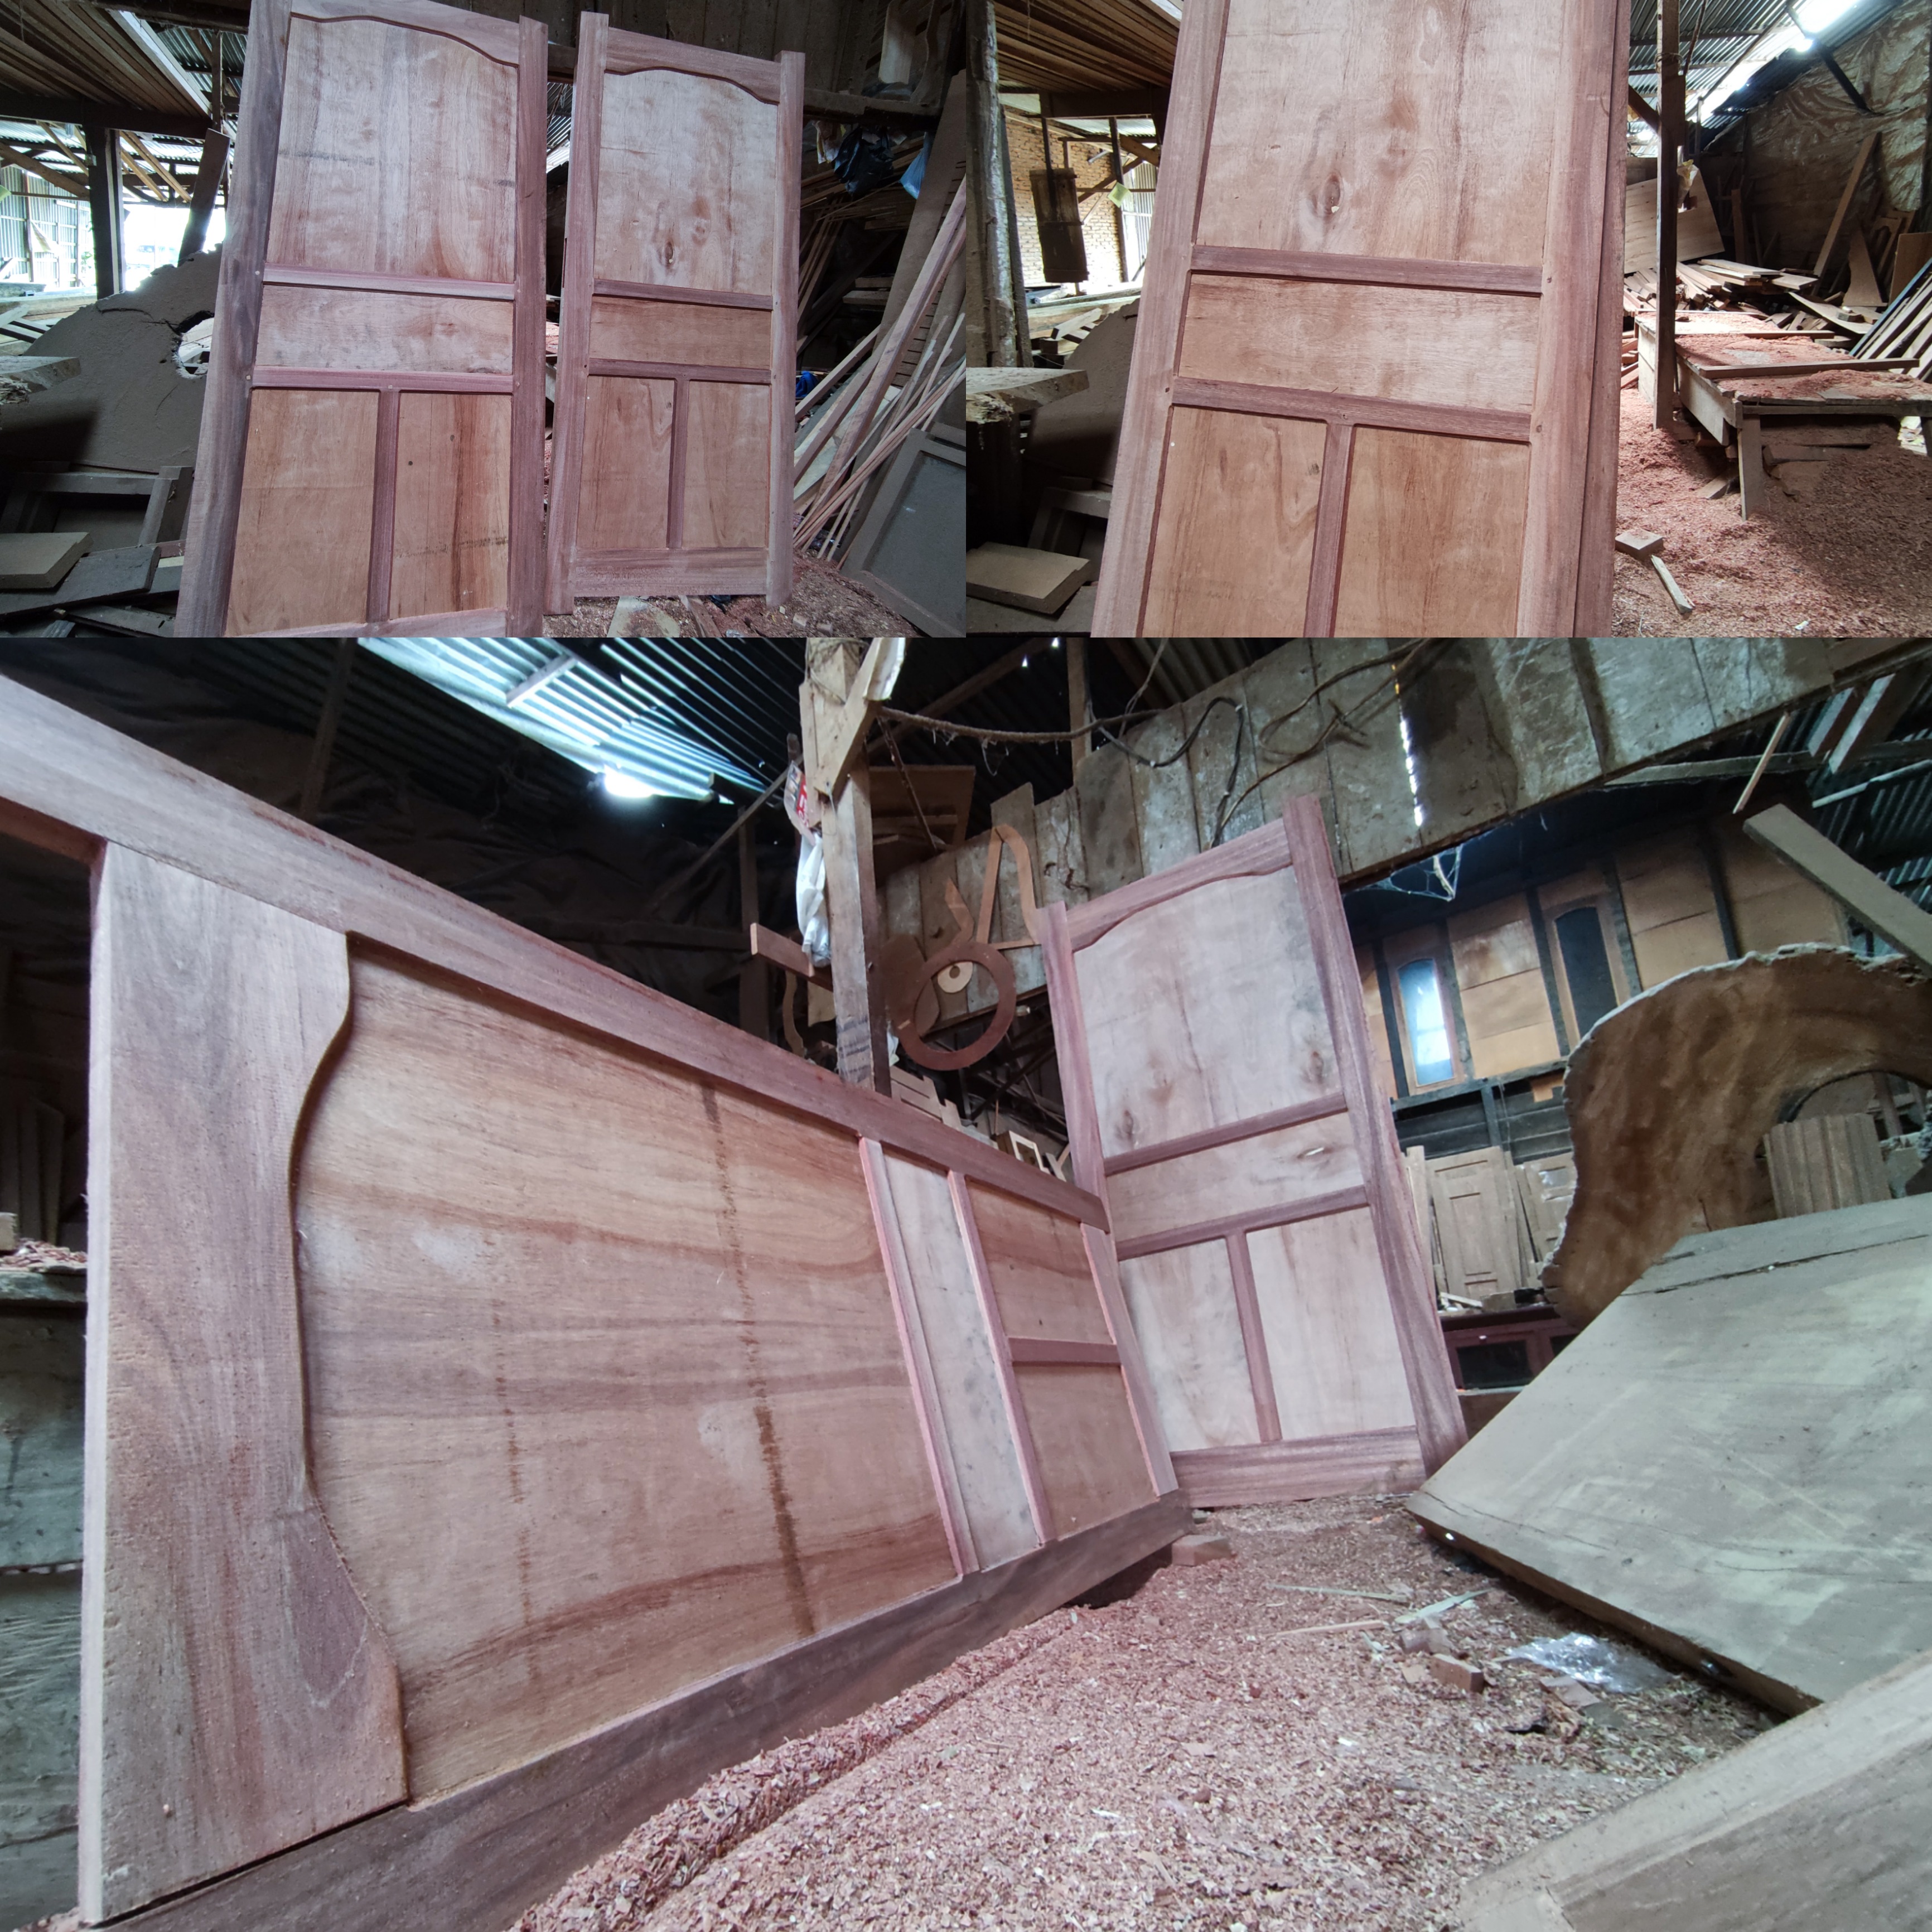
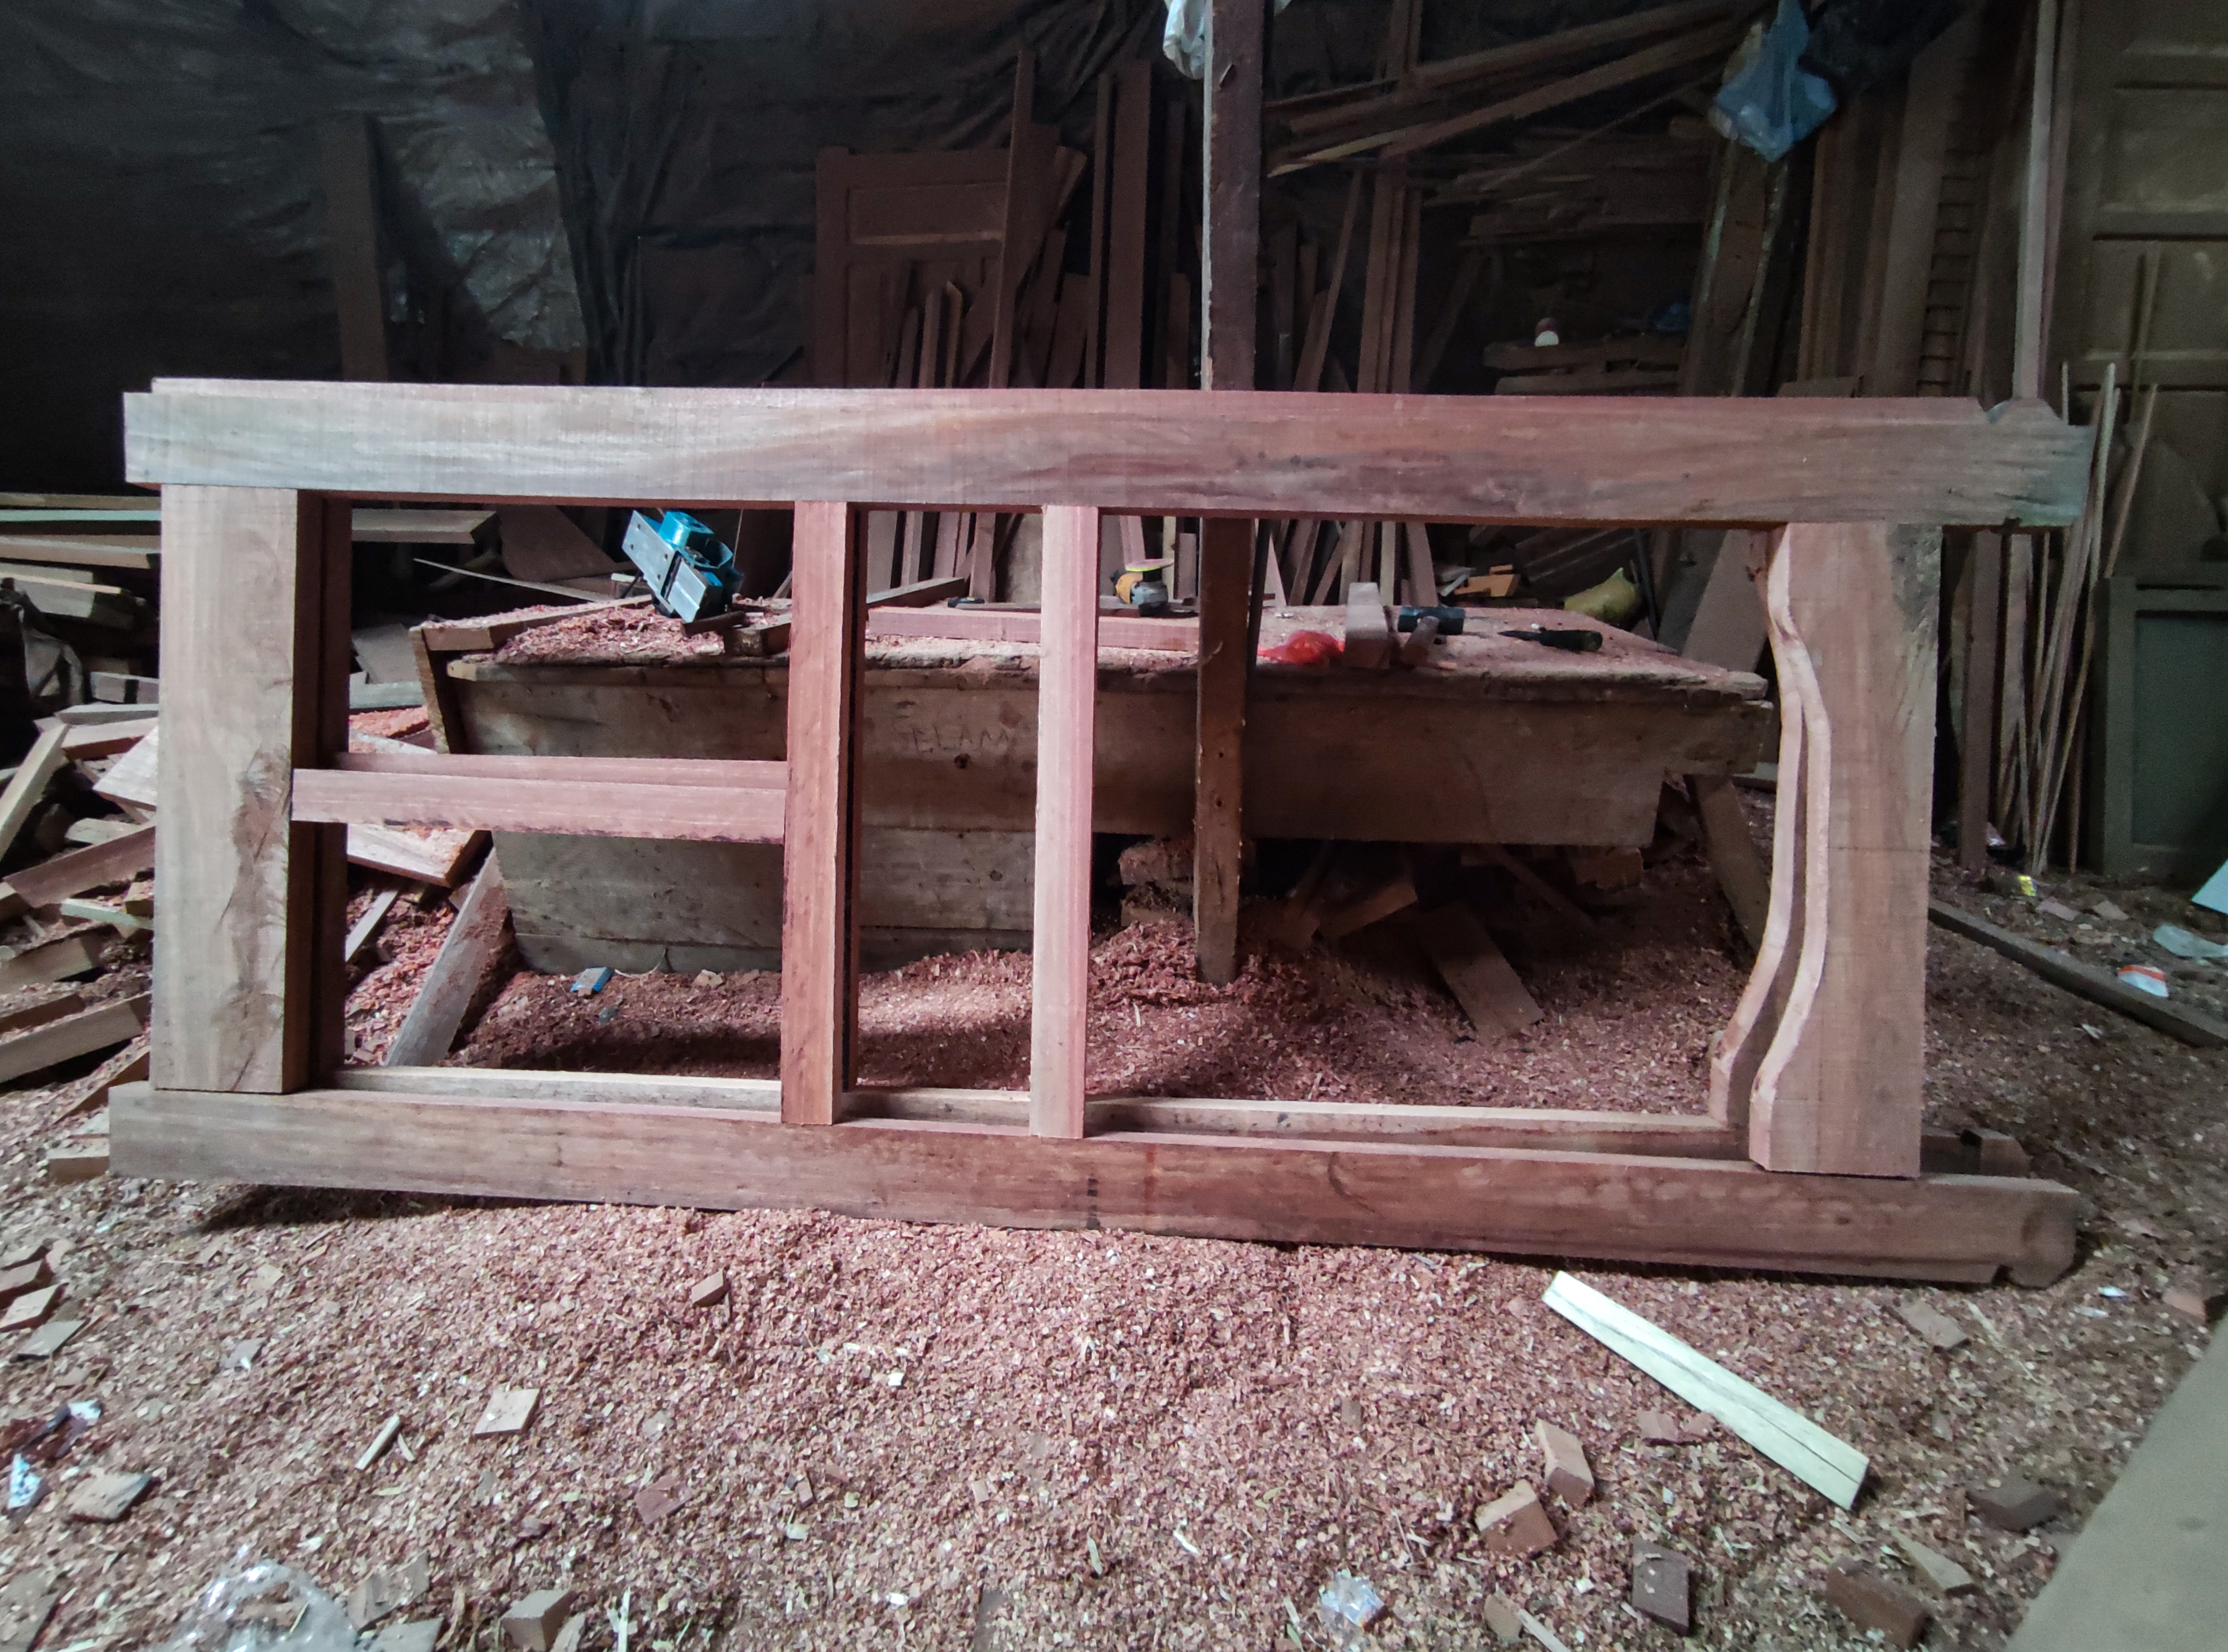
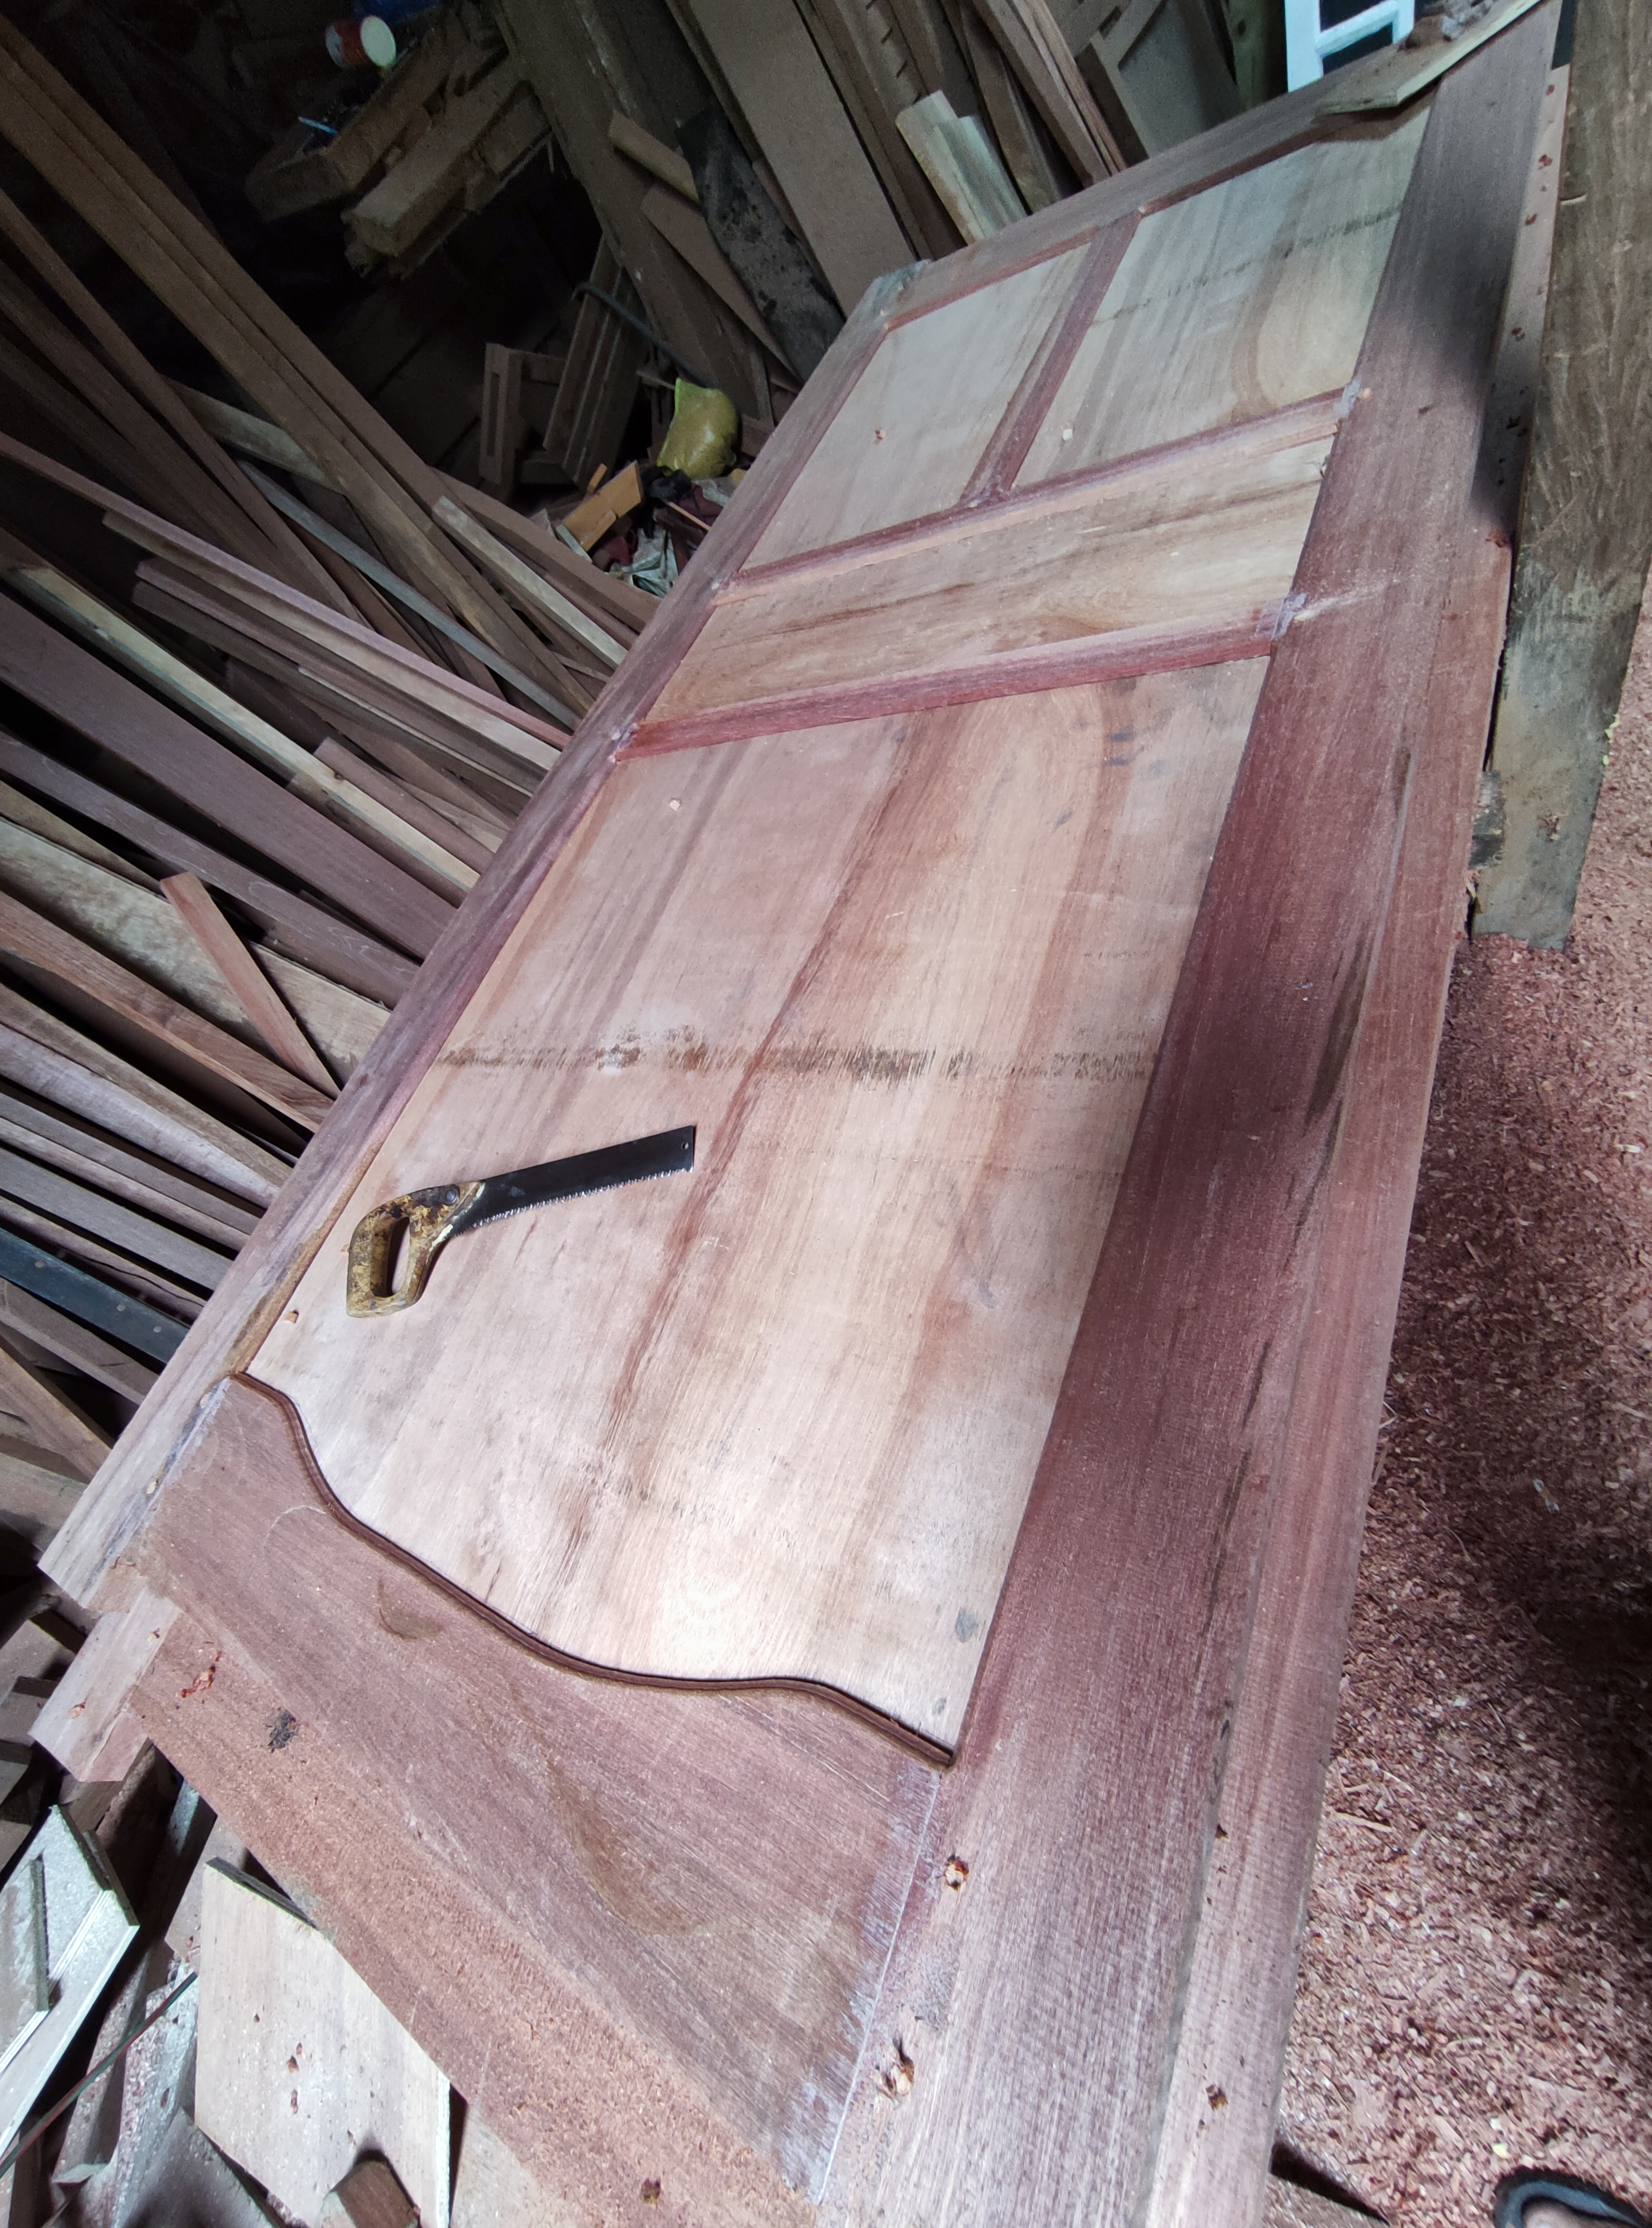
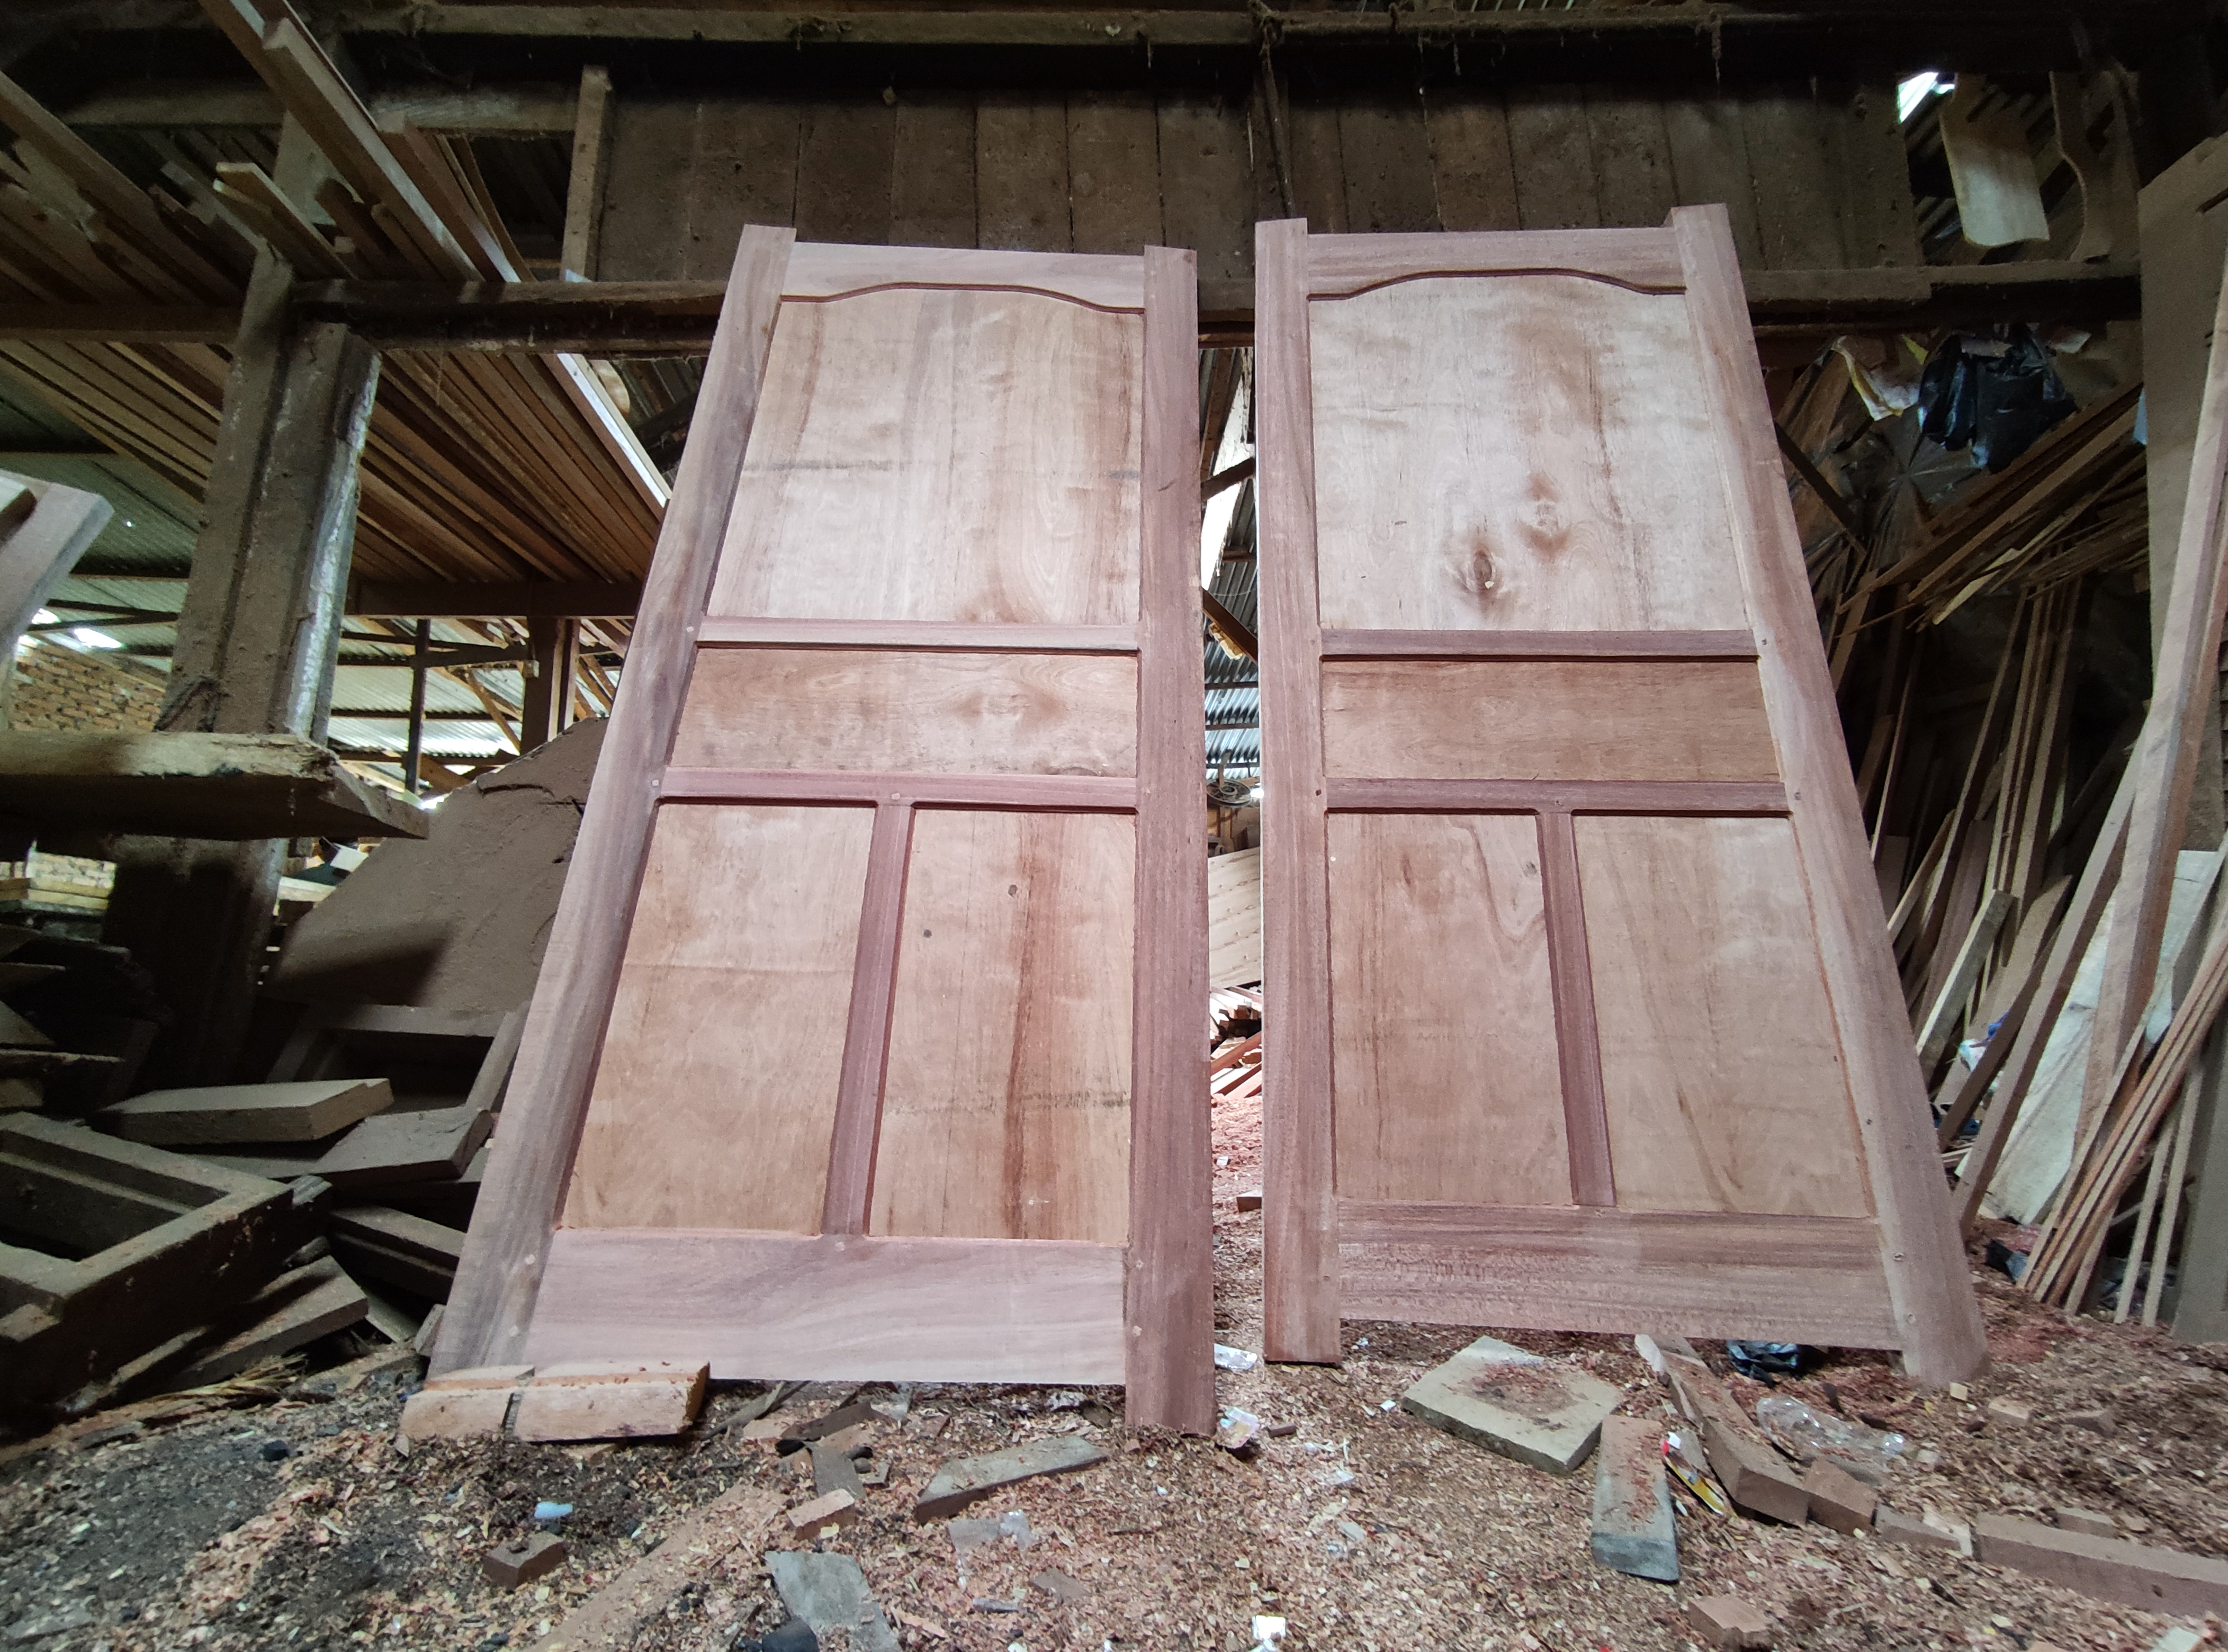
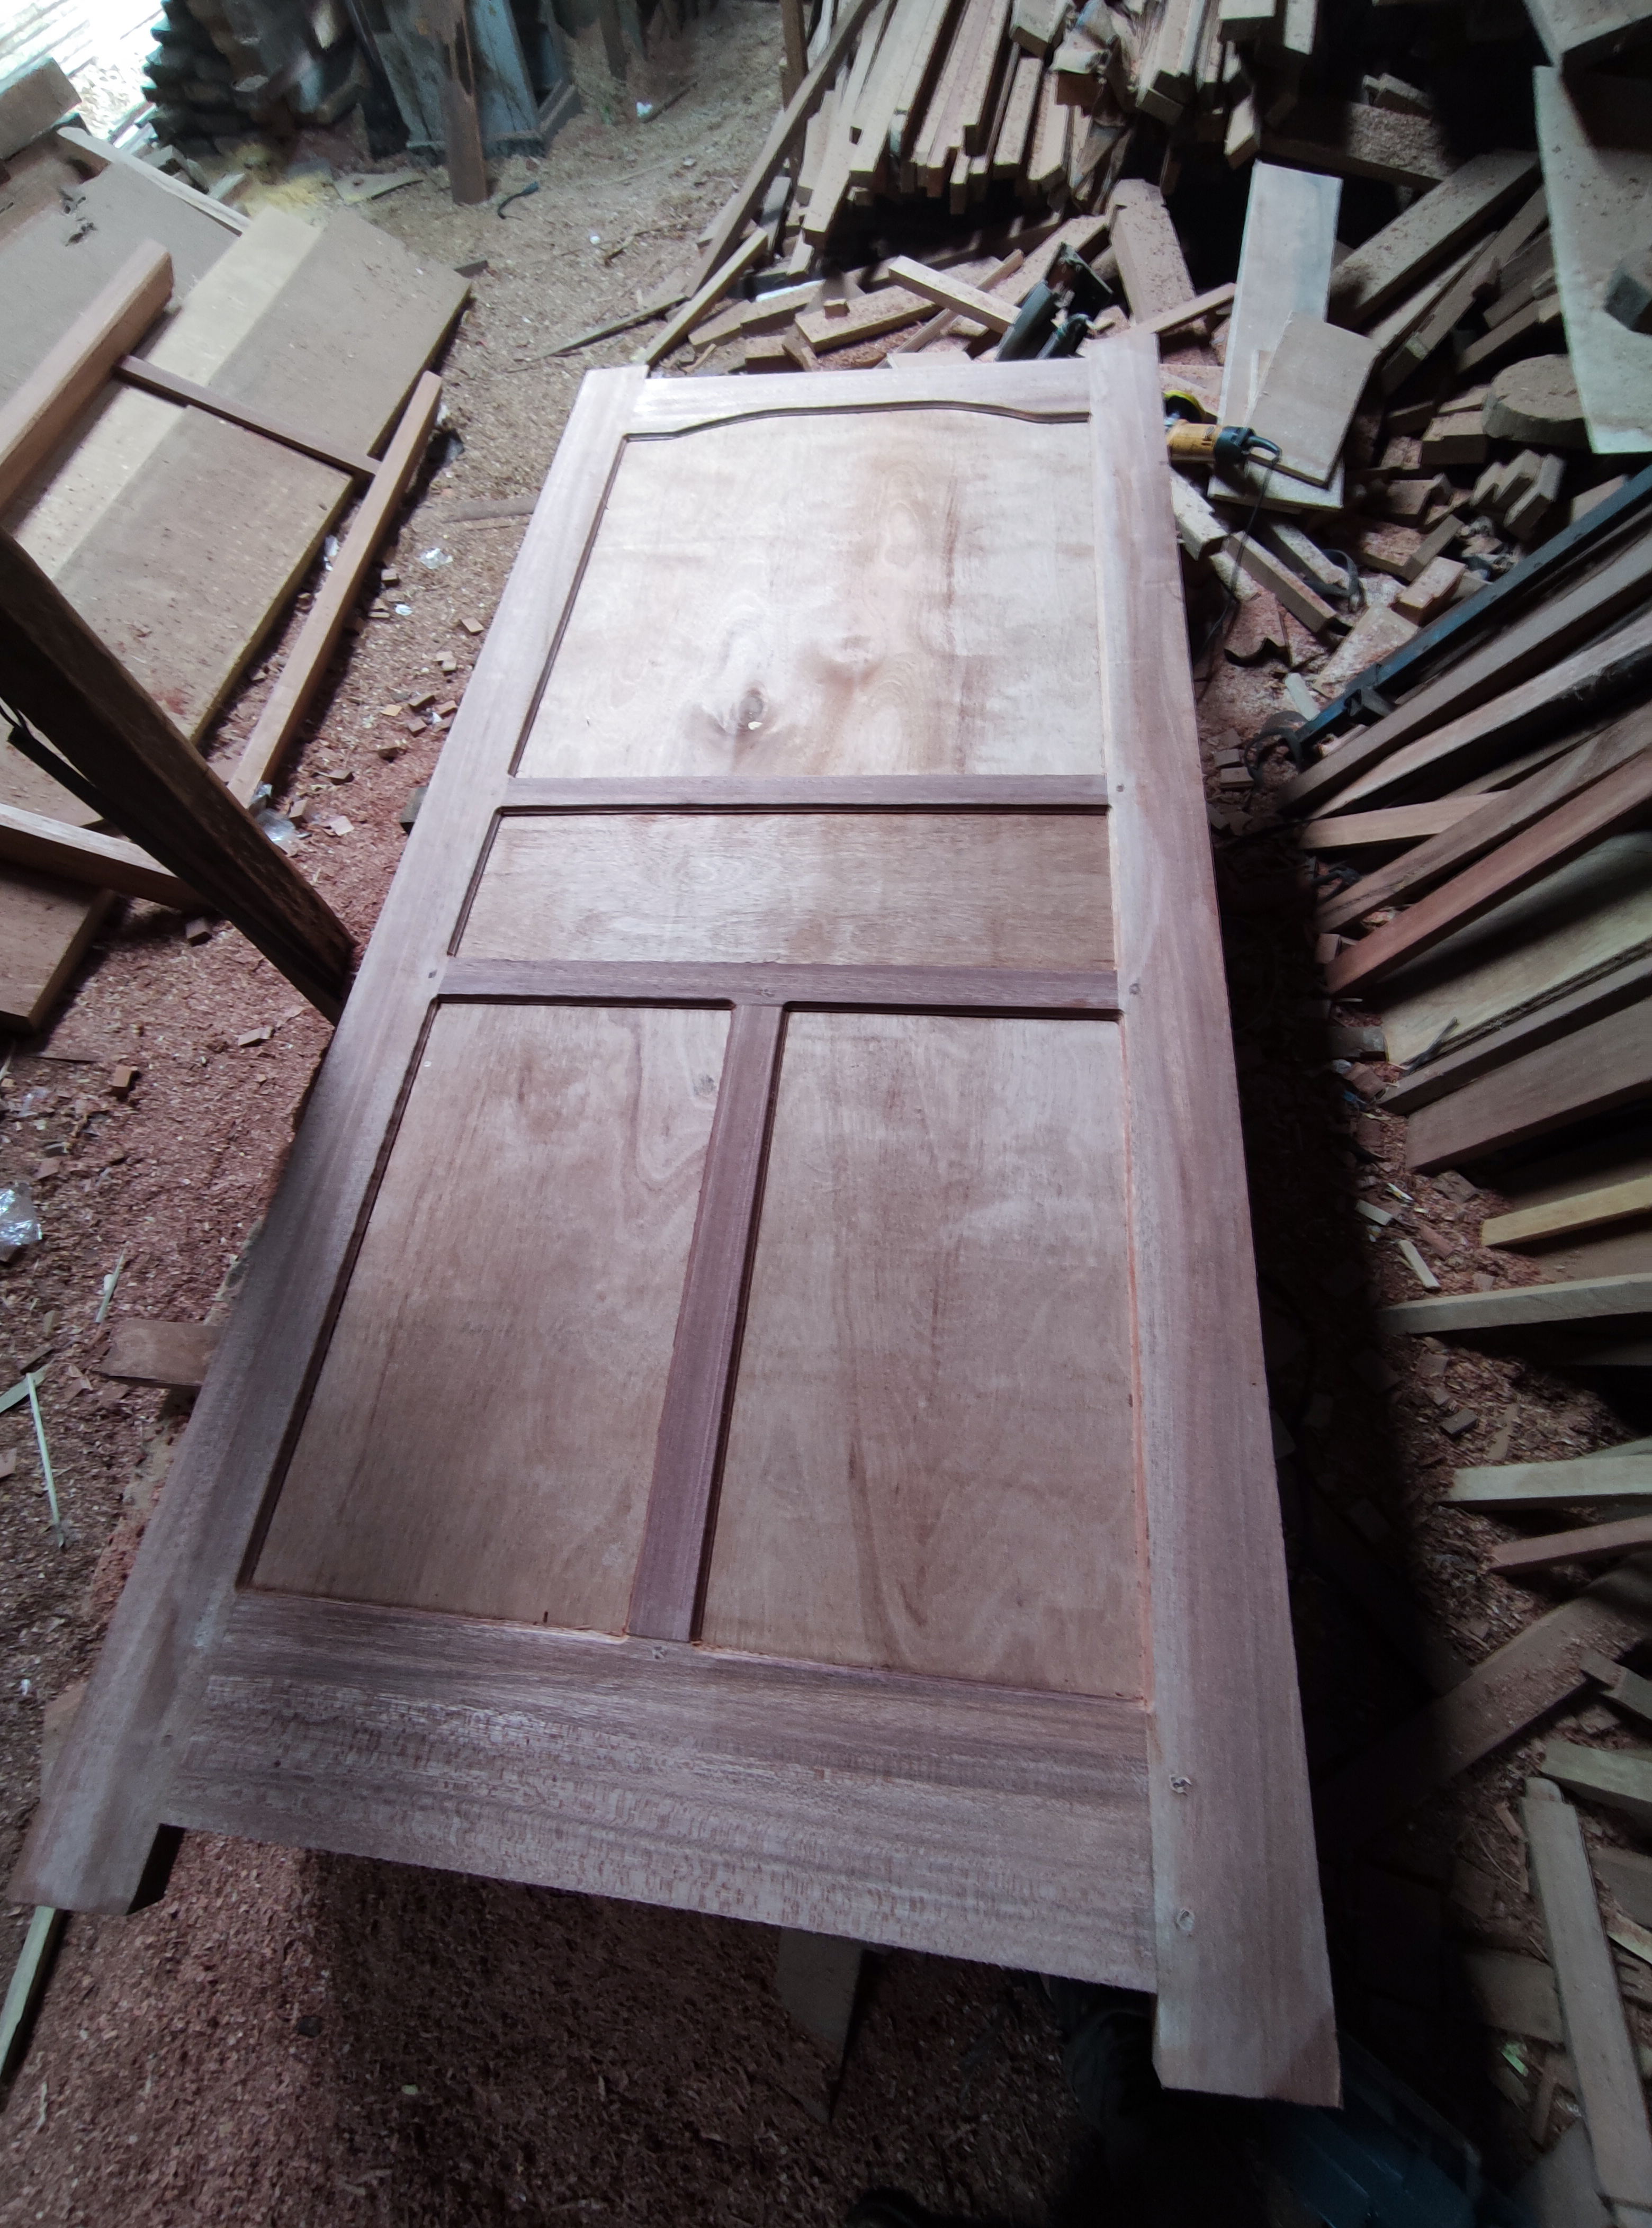
In the picture, the design of this door looks to have a concave shape on the upper bulkhead surface of the door and the door has 3 pattern bones in the middle and my customer asked me to give the door leaf a 12mm multiplex board so that the price of the door is not so expensive.
And the door consists of 2 units of different sizes with the same design with a size of 1 unit width 80cm X height 200cm and 1 unit width 90cm X 200cm.
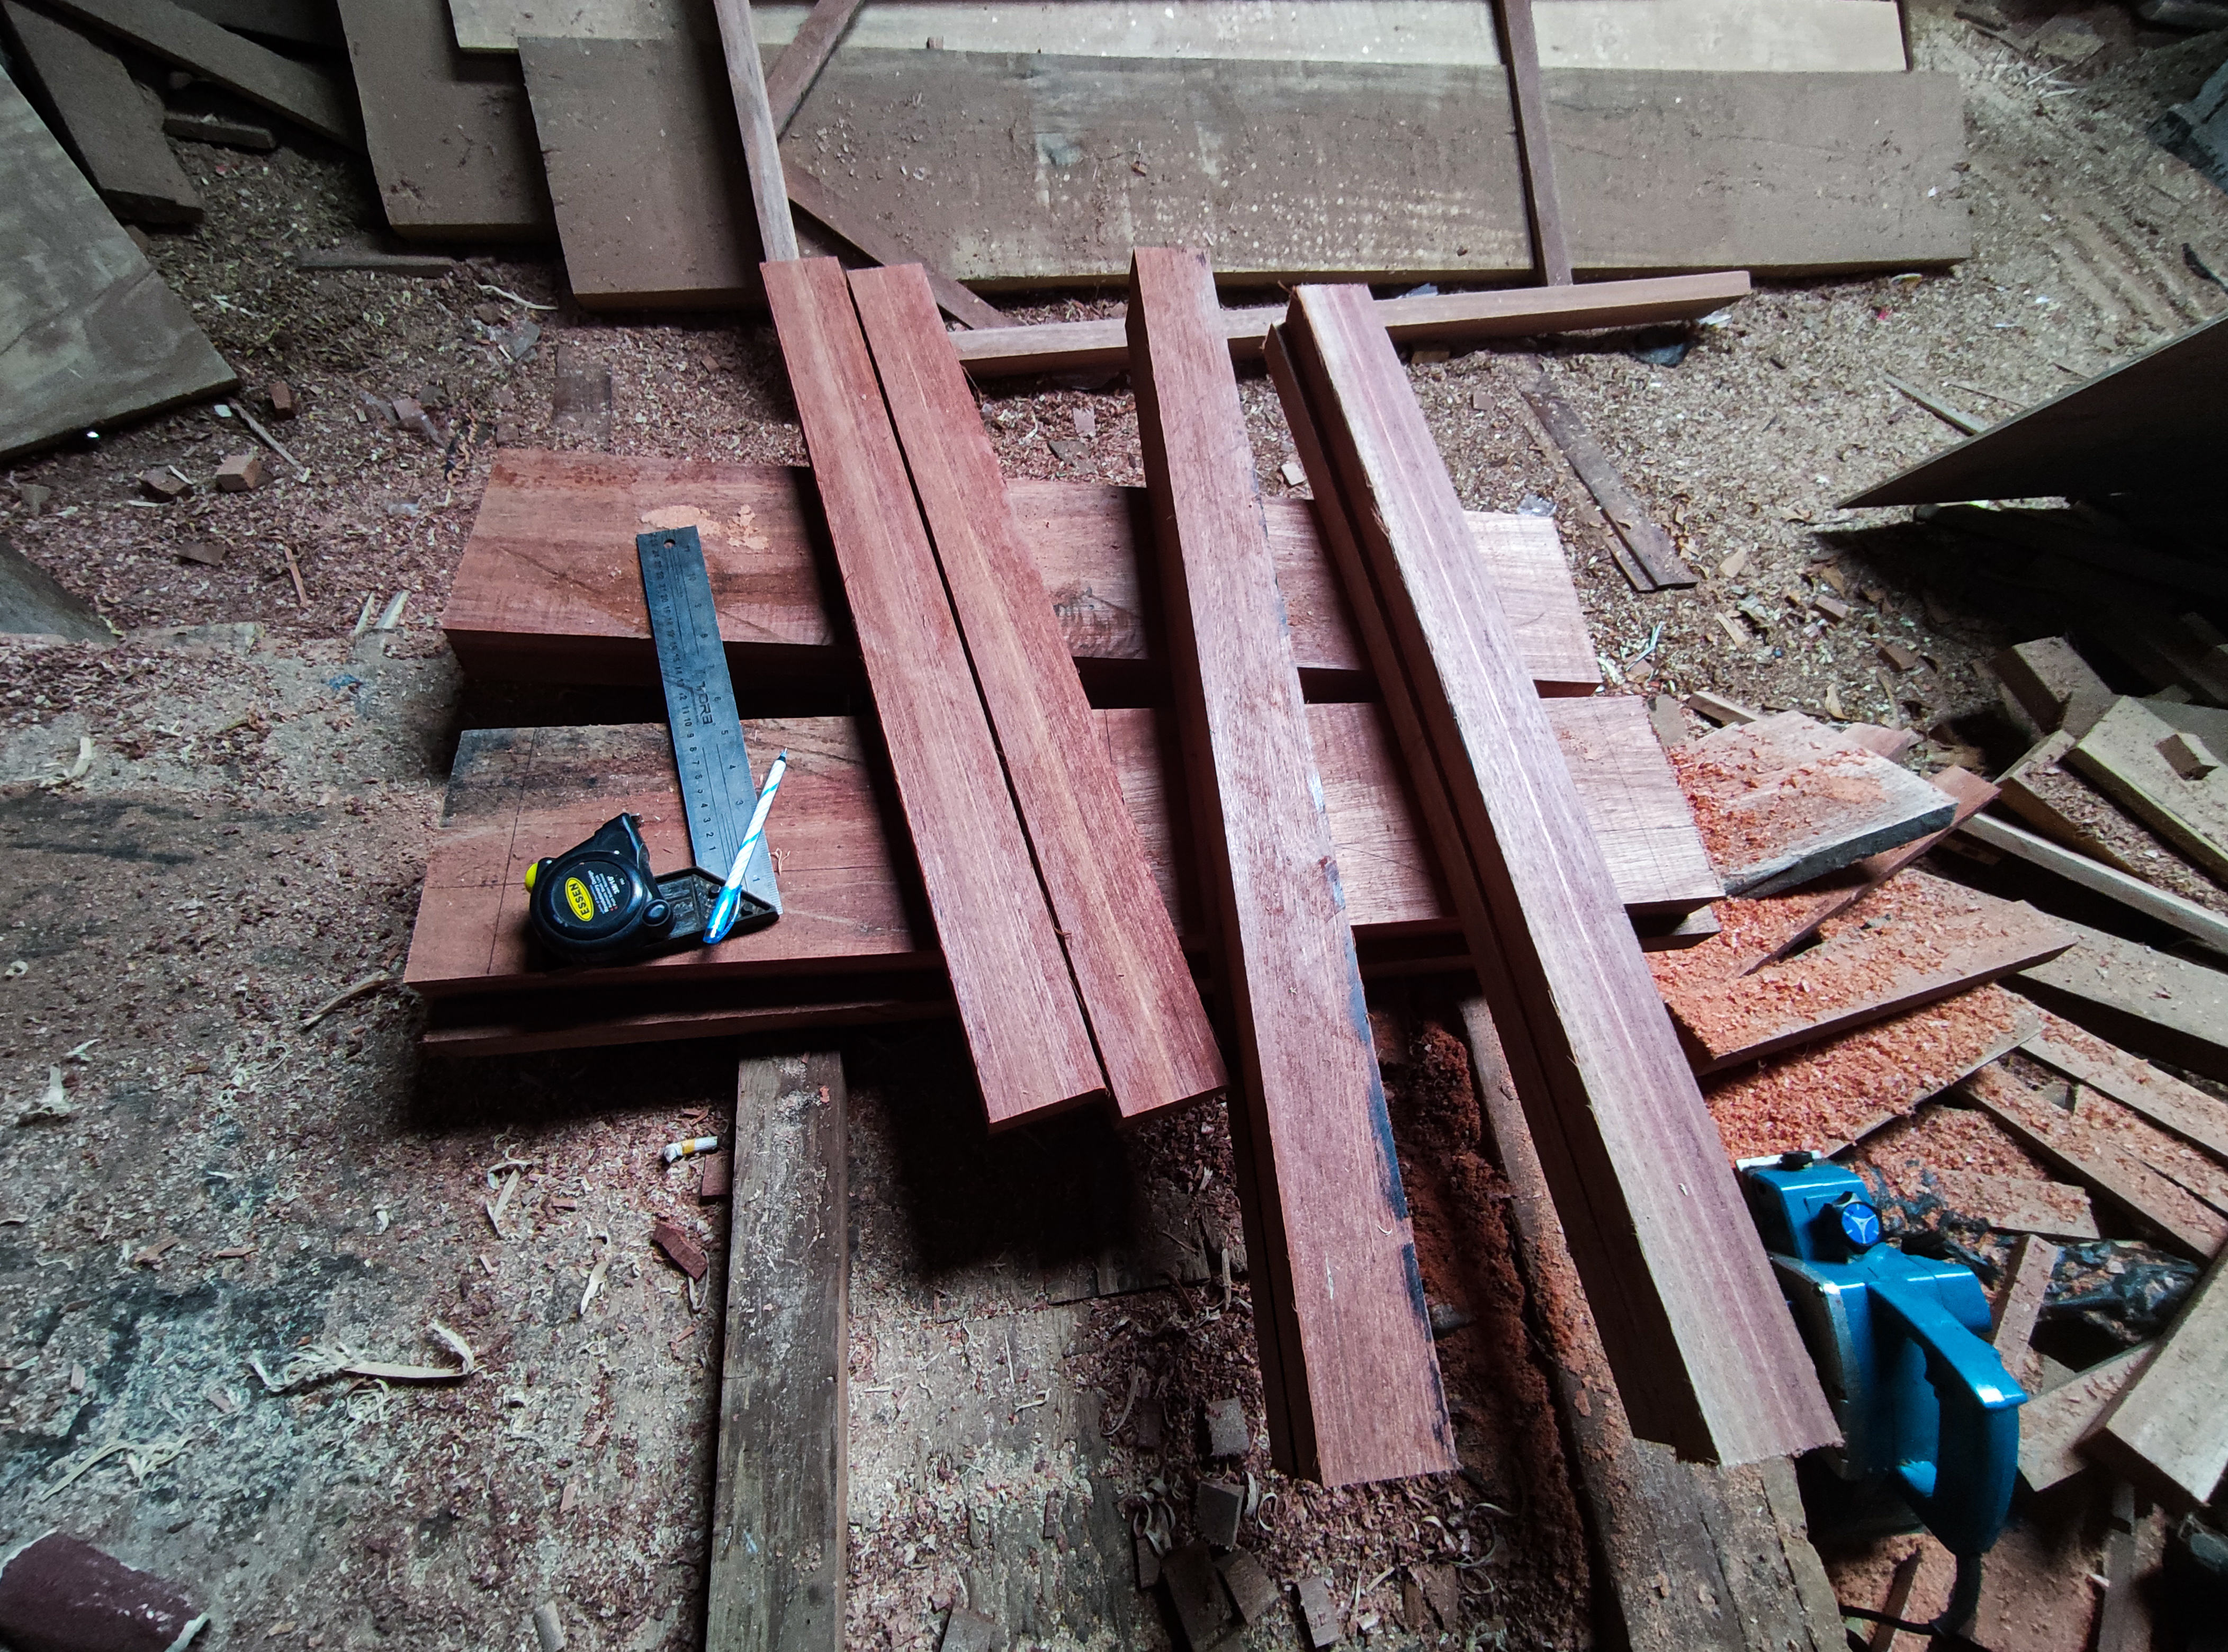
To complete a door project, the machine tools I need are the kind of machine tools that I often use every day, ie.,,
•Meranti wood that has been trimmed ....for the main frame, the left and right of the post and the upper bulkhead, the width of the door which is the main series measuring wide 10.5cm X 3.5 cm thick and the bottom door width of 16cm and the middle door series bulkhead in the form of window material with a size of 3.5 cm x 6 cm is the main binding material for the window series.
•Wood cutting machine to cut all wood materials for door materials.
•Shaving machine to flatten the entire surface of the series connection and make leaf comb carvings.*
•Hand drill(to make holes in the wood when installing the pegs) and sit drill(to make holes in the bulkhead of the top and bottom of the dors).
•Meter and hammer
•Router machine(for making flowers on the inside corners of doors and making leaf holder holes of doors).
•Meter (measuring instrument)and elbow.
•Smoothing machine .
•Panel machine (to make nipple pegs on frame sets) and for door leaf flower panels and.
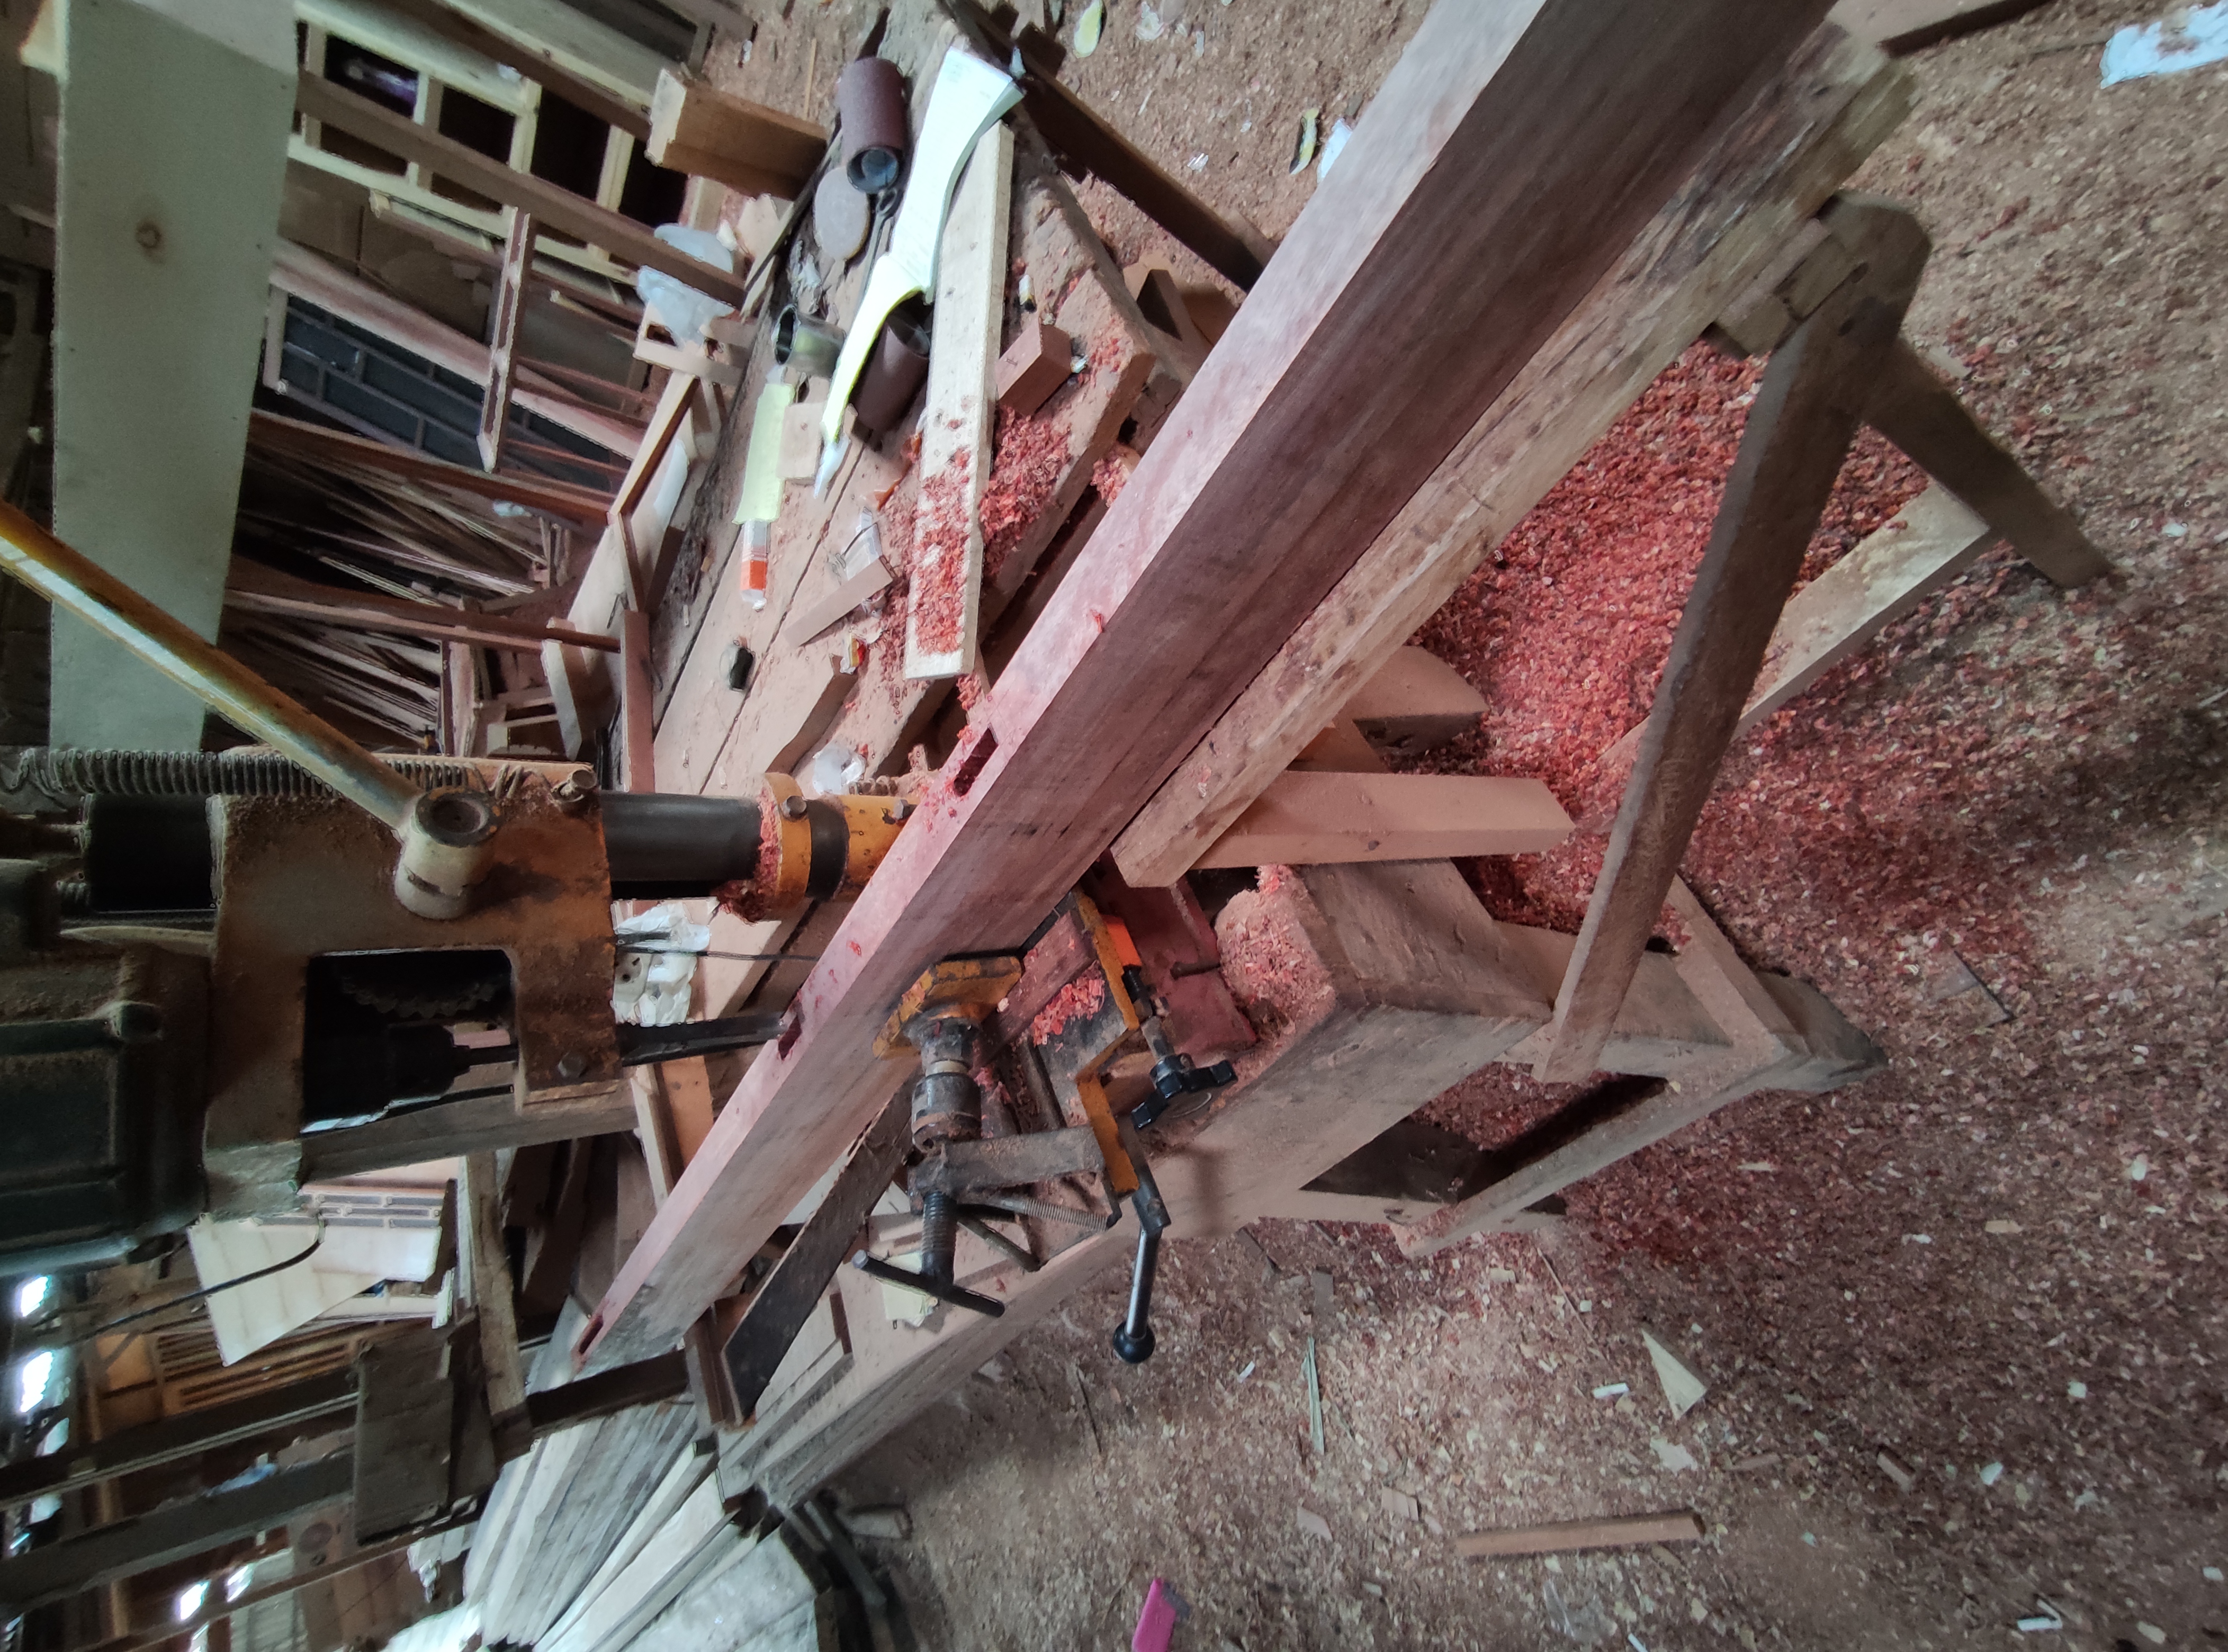
•Manual iron press to the door series during the process of installing the pegs.
And after all the materials are available, now we go into the main process, namely the preparation of a series of left-right doorposts for the two doors.
Because the size of the door is the same, so I can make the main pillar of the door at once, with a door height of 200cm.
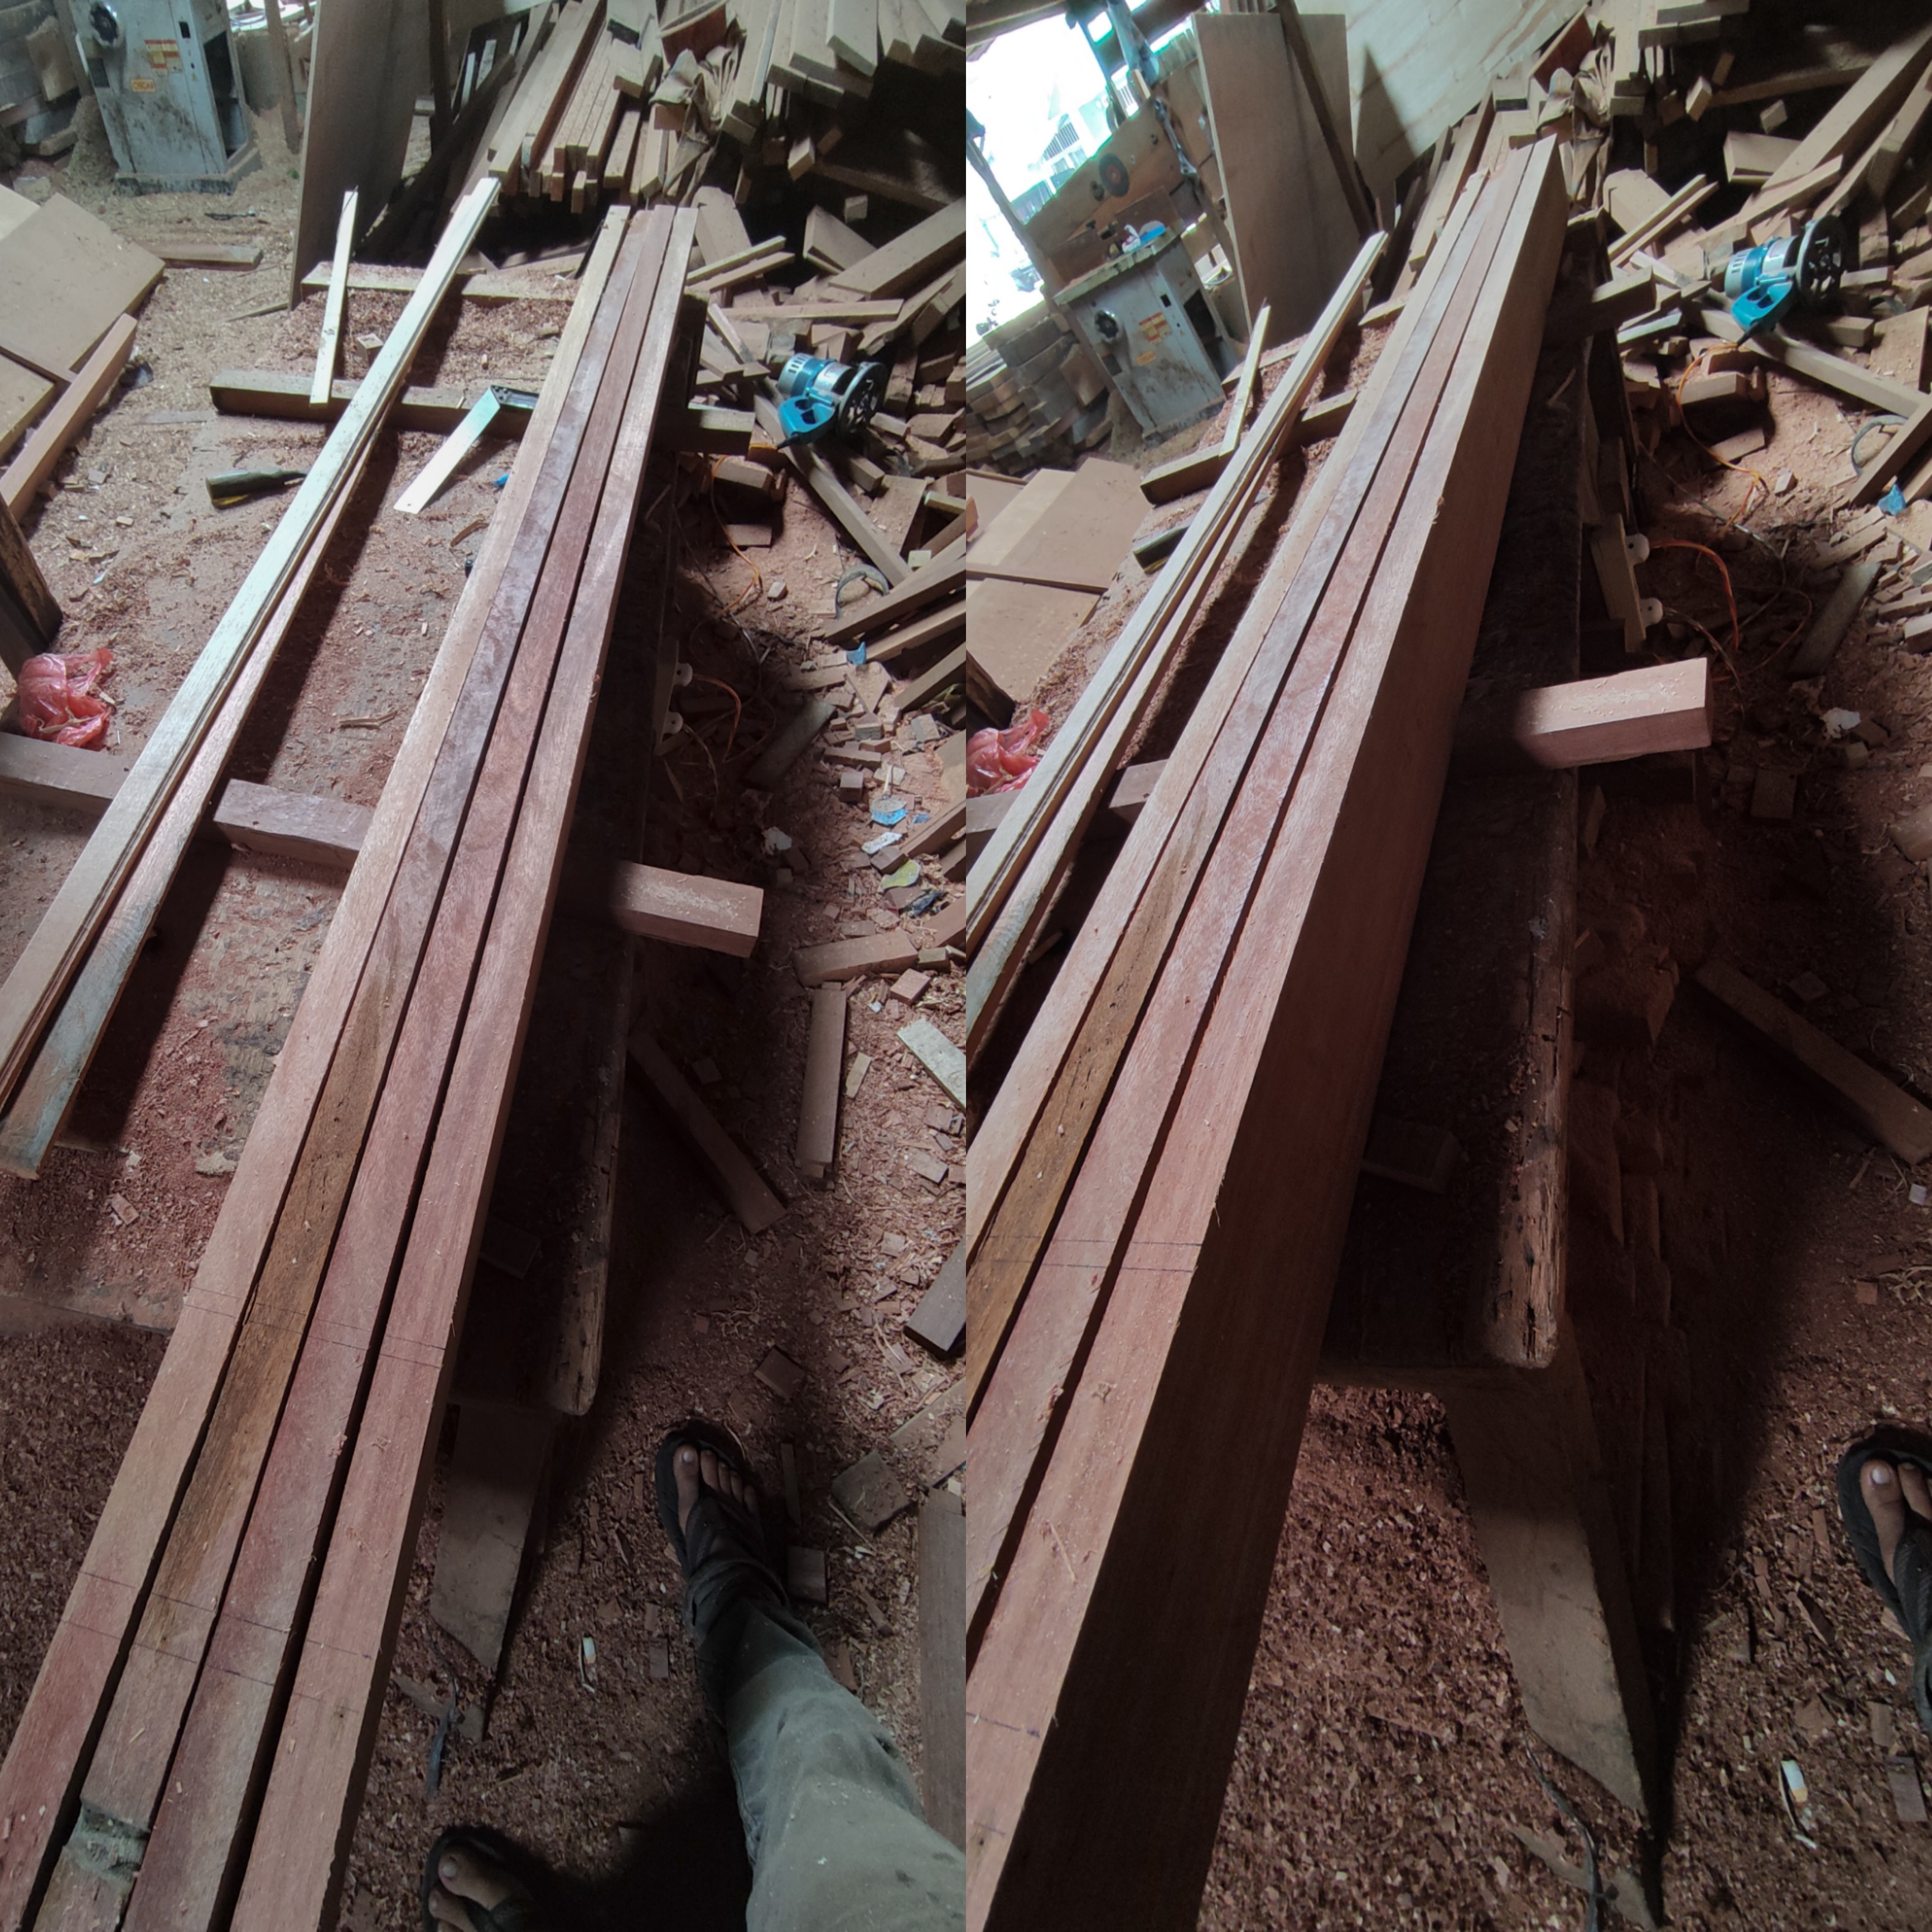
The wood material for the series of left and right poles of the door is made of meranti wood and the series is complete, I give the line for the peg holder the drilling point for the door width bulkhead connection.
And for the width of the upper and lower bulkheads, the width of the joint bulkhead is 16cm and this is a measure of the width of the base drilling and for the middle door bulkhead, I gave the size of the bulkhead 6cm and the size of the drilling width is also 6cm with a depth of 4cm which is the length of the door peg nipple.
After the preparation process for the main pile series was completed, then I continued the drilling process on the two pile sets using a drilling machine.
After drilling the peg holder, I now continue the process of cutting the door width divider from the two doors and the total bulkhead wood that I have to cut from the two doors is as follows.
The bulkhead for the door width is 90cm X height is 200cm.
• 2 units the wooden unit is 16cm wide x 3,5cm and 77cm long for the top and bottom door dividers consisting of 4cm left-right pegs and this bulkhead for 90cm x 200cm door sizes.
• 2 units the wooden unit is 6cm wide x3,5cm and 77cm long for the top and bottom door dividers consisting of 4cm left-right pegs and this bulkhead for 90cm x 200cm door sizes.
• 1 units the wooden unit is 6cm wide x 3,5cm and 65 cm long for the top and bottom door dividers consisting of 4cm left-right pegs and this bulkhead for 90cm x 200cm door sizes which I used for the middle bulkhead at the bottom of the door.
The bulkhead for the door width is 80cm X height is 200cm.
• 2 units the wooden unit is 16cm wide x3, 5cm and 67cm long for the top and bottom door dividers consisting of 4cm left-right pegs and this bulkhead for 80cm x 200cm door sizes.
• 2 units the wooden unit is 16cm wide x 3,5cm and 67cm long for the top and bottom door dividers consisting of 4cm left-right pegs and this bulkhead for 80cm x 200cm door sizes.
• 1 units the wooden unit is 6cm wide x 3,5cm and 65 cm long for the top and bottom door dividers consisting of 4cm left-right pegs and this bulkhead for 80cm x 200cm door sizes which I used for the middle bulkhead at the bottom of the door.
For the basic door bulkhead, we deliberately gave a size of 16cm which of course has the same size as the main bulkhead at the bottom of the door because the bulkhead at the top of the door is bent and the size of the wood is 16cm x 3.5cm, the wood is suitable for making hollow shapes.
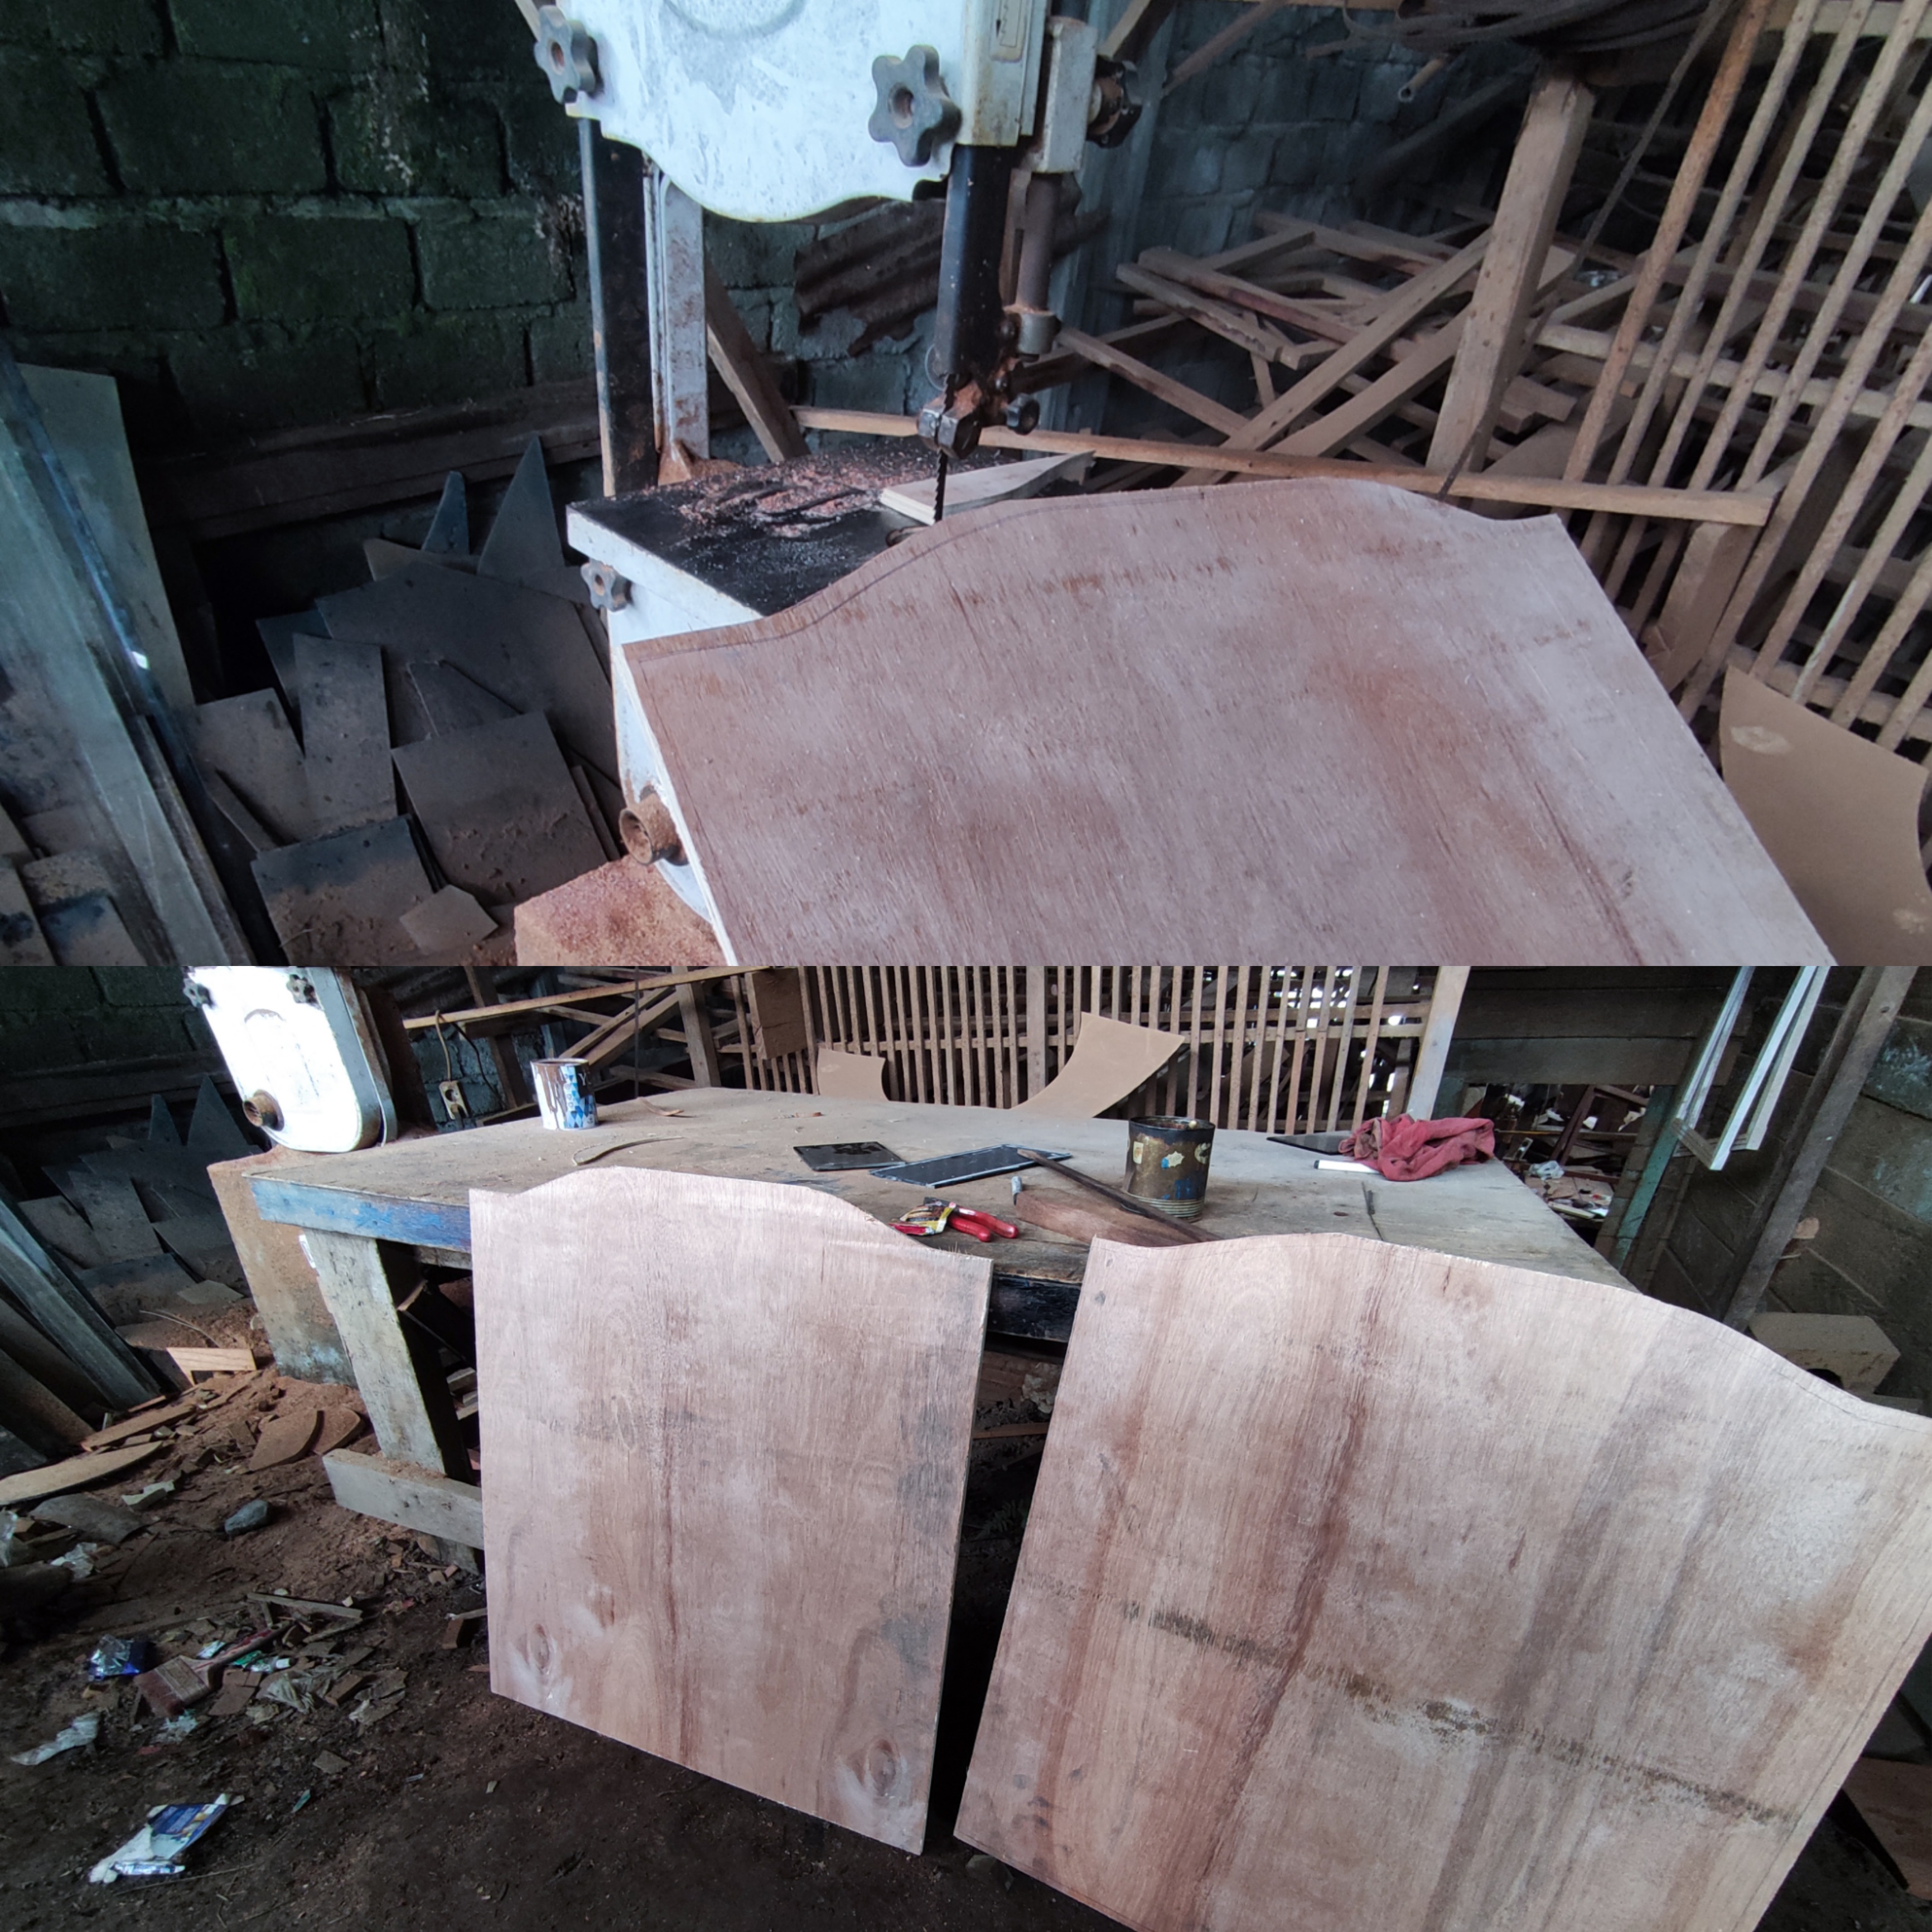
And to make a hollow shape on the bulkhead at the top of the door, first I drew a hollow shape using a pencil and after the drawing process was complete, then I continued the process of cutting the hollow using a jitsaw machine.
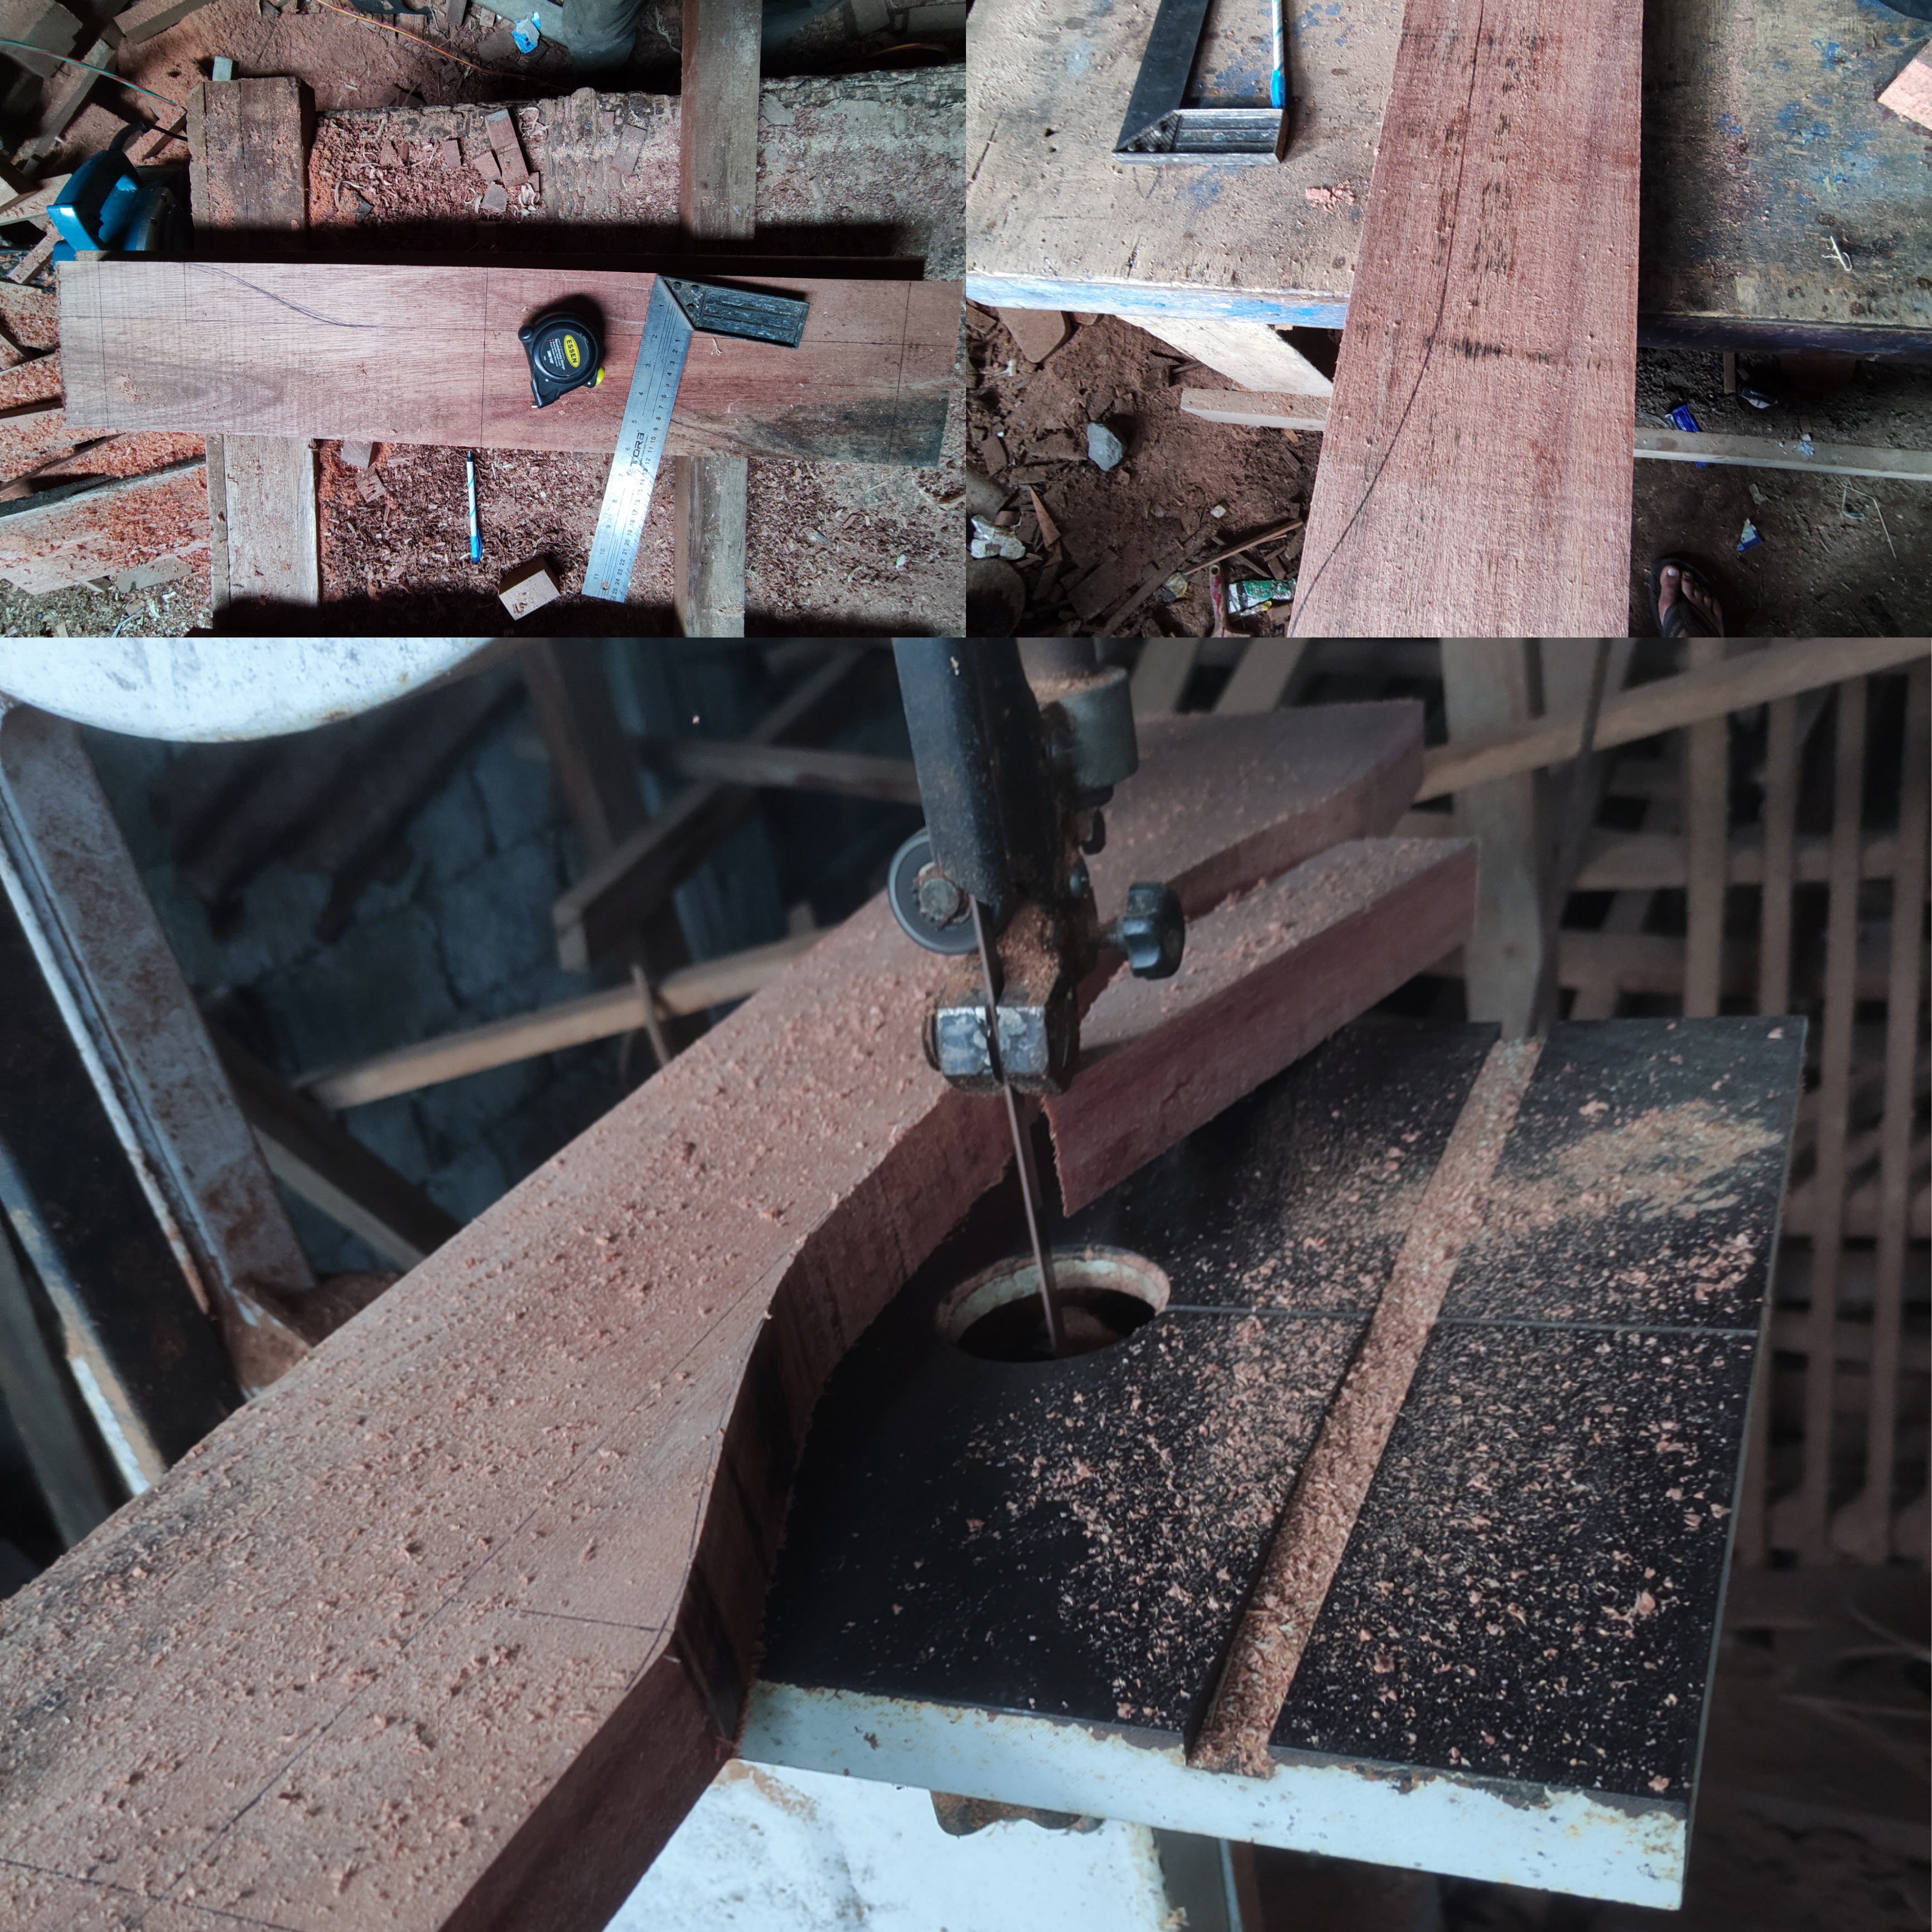
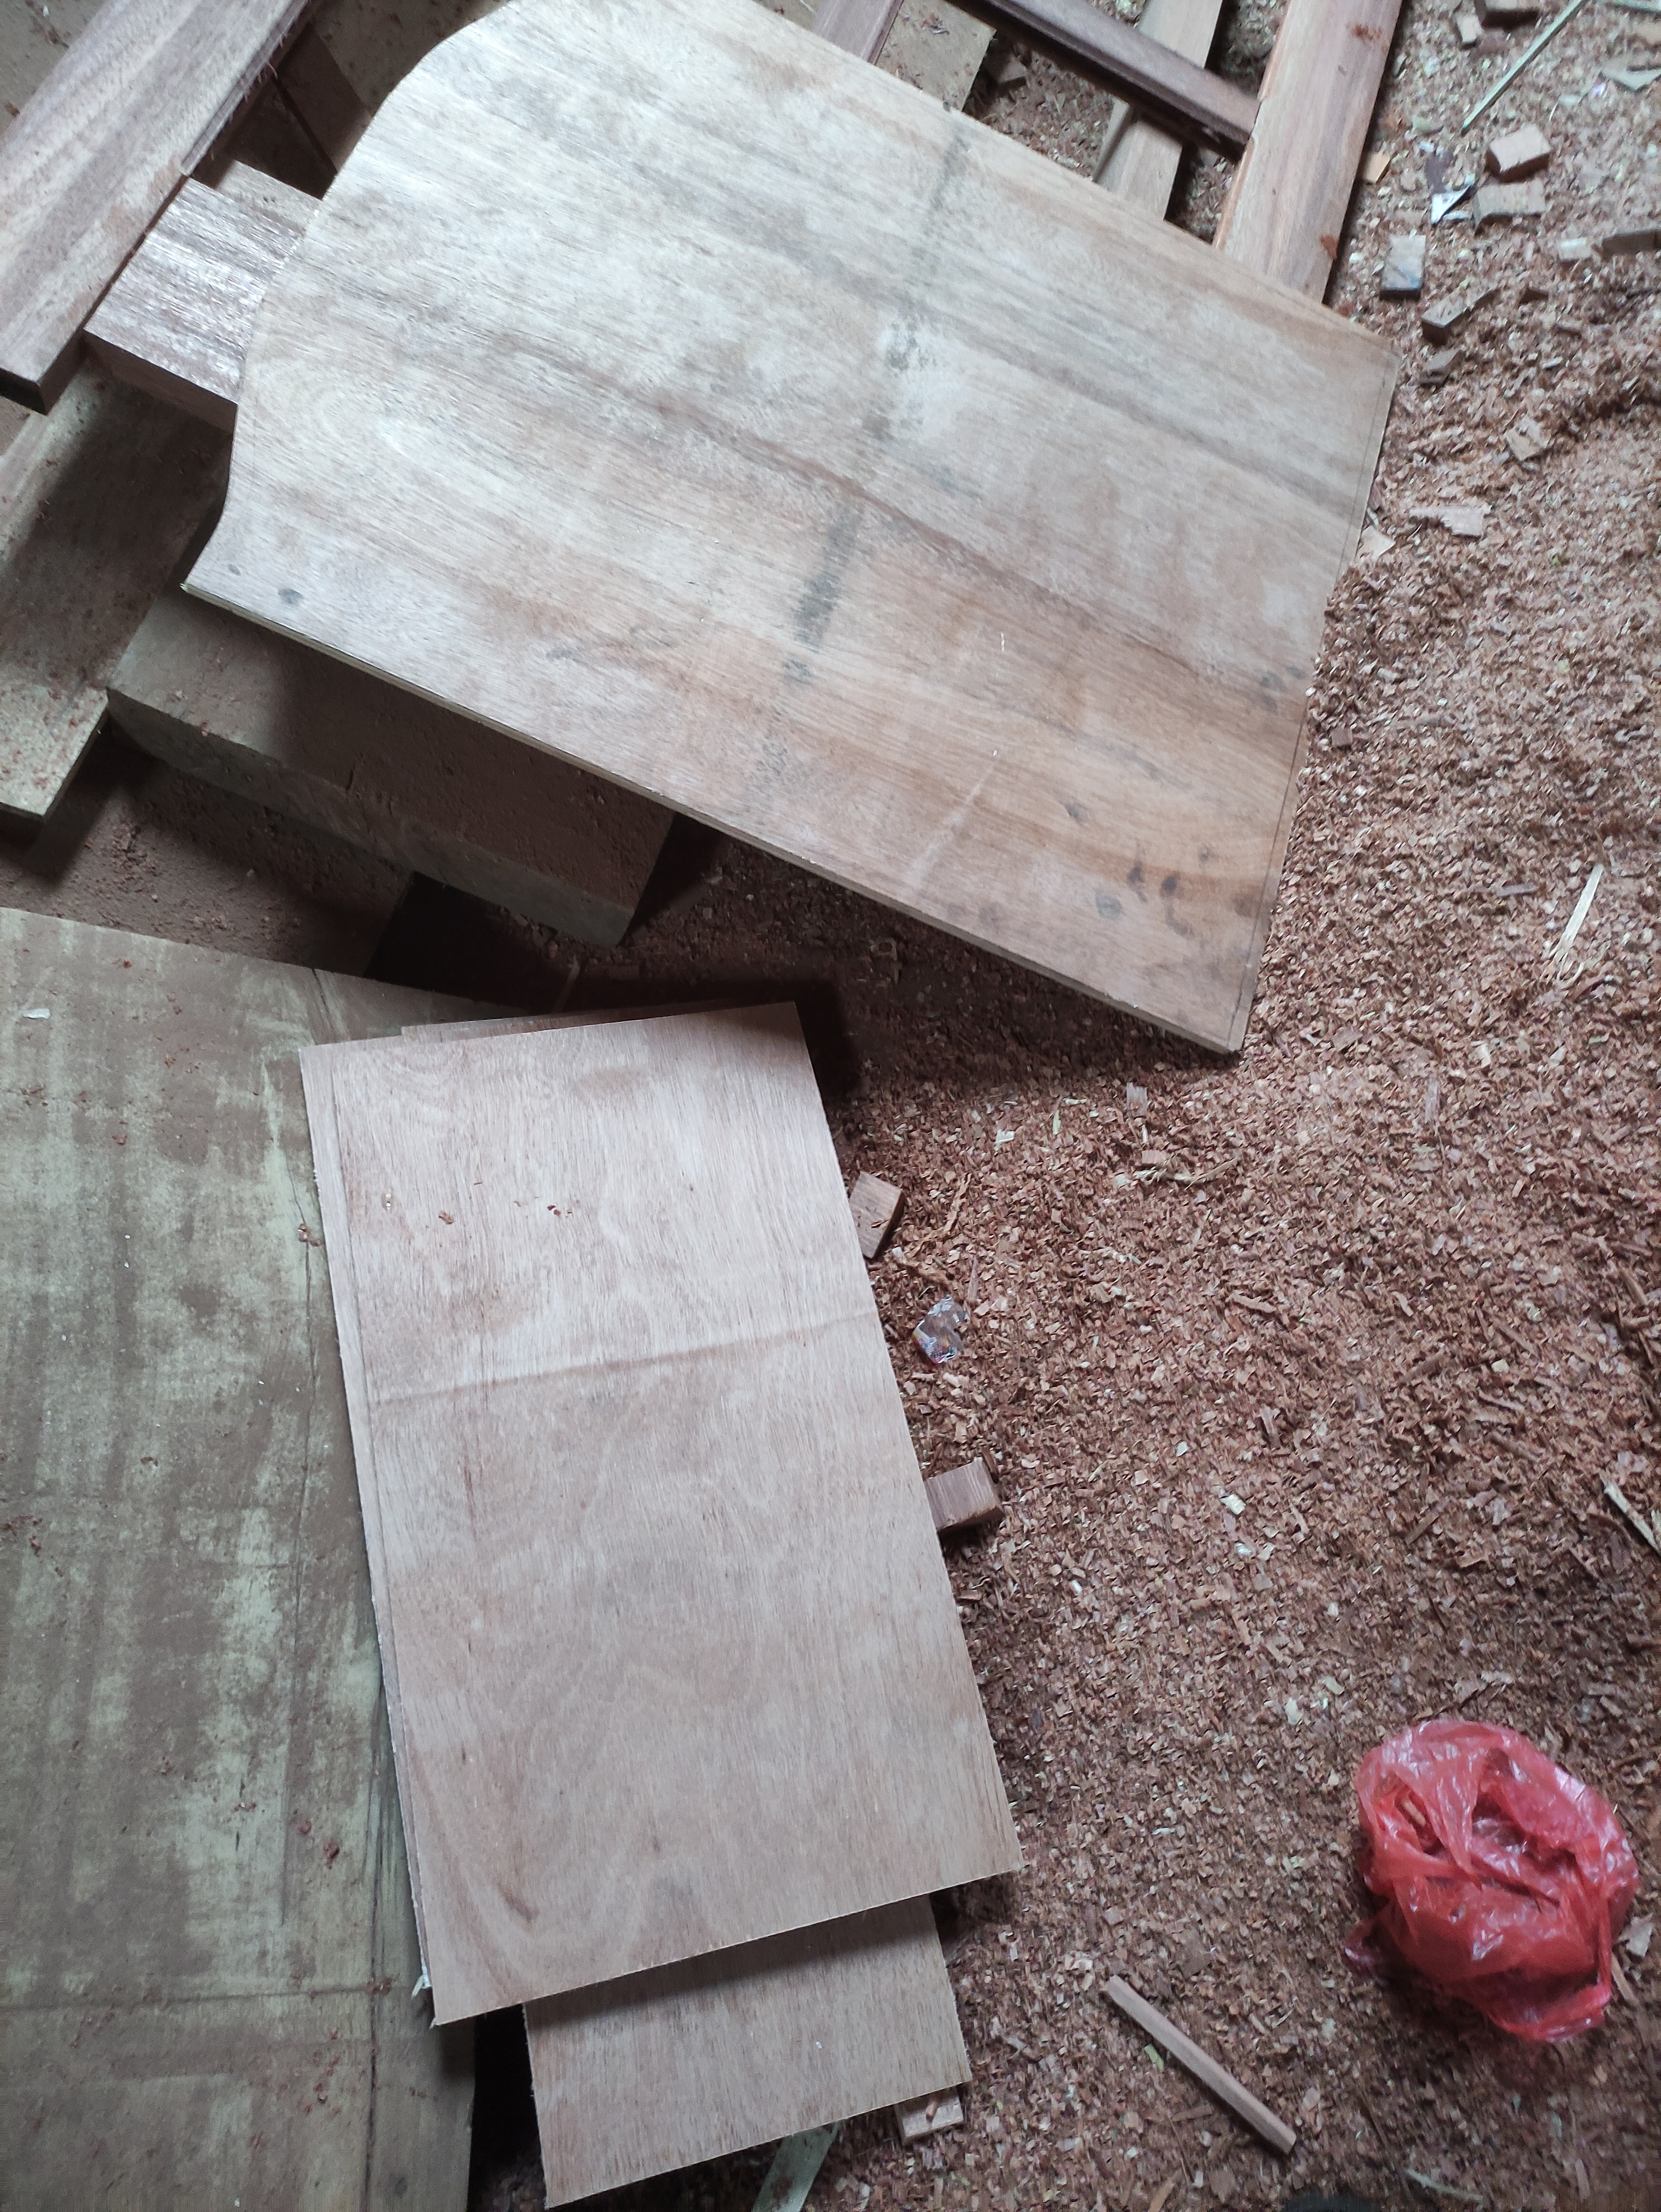
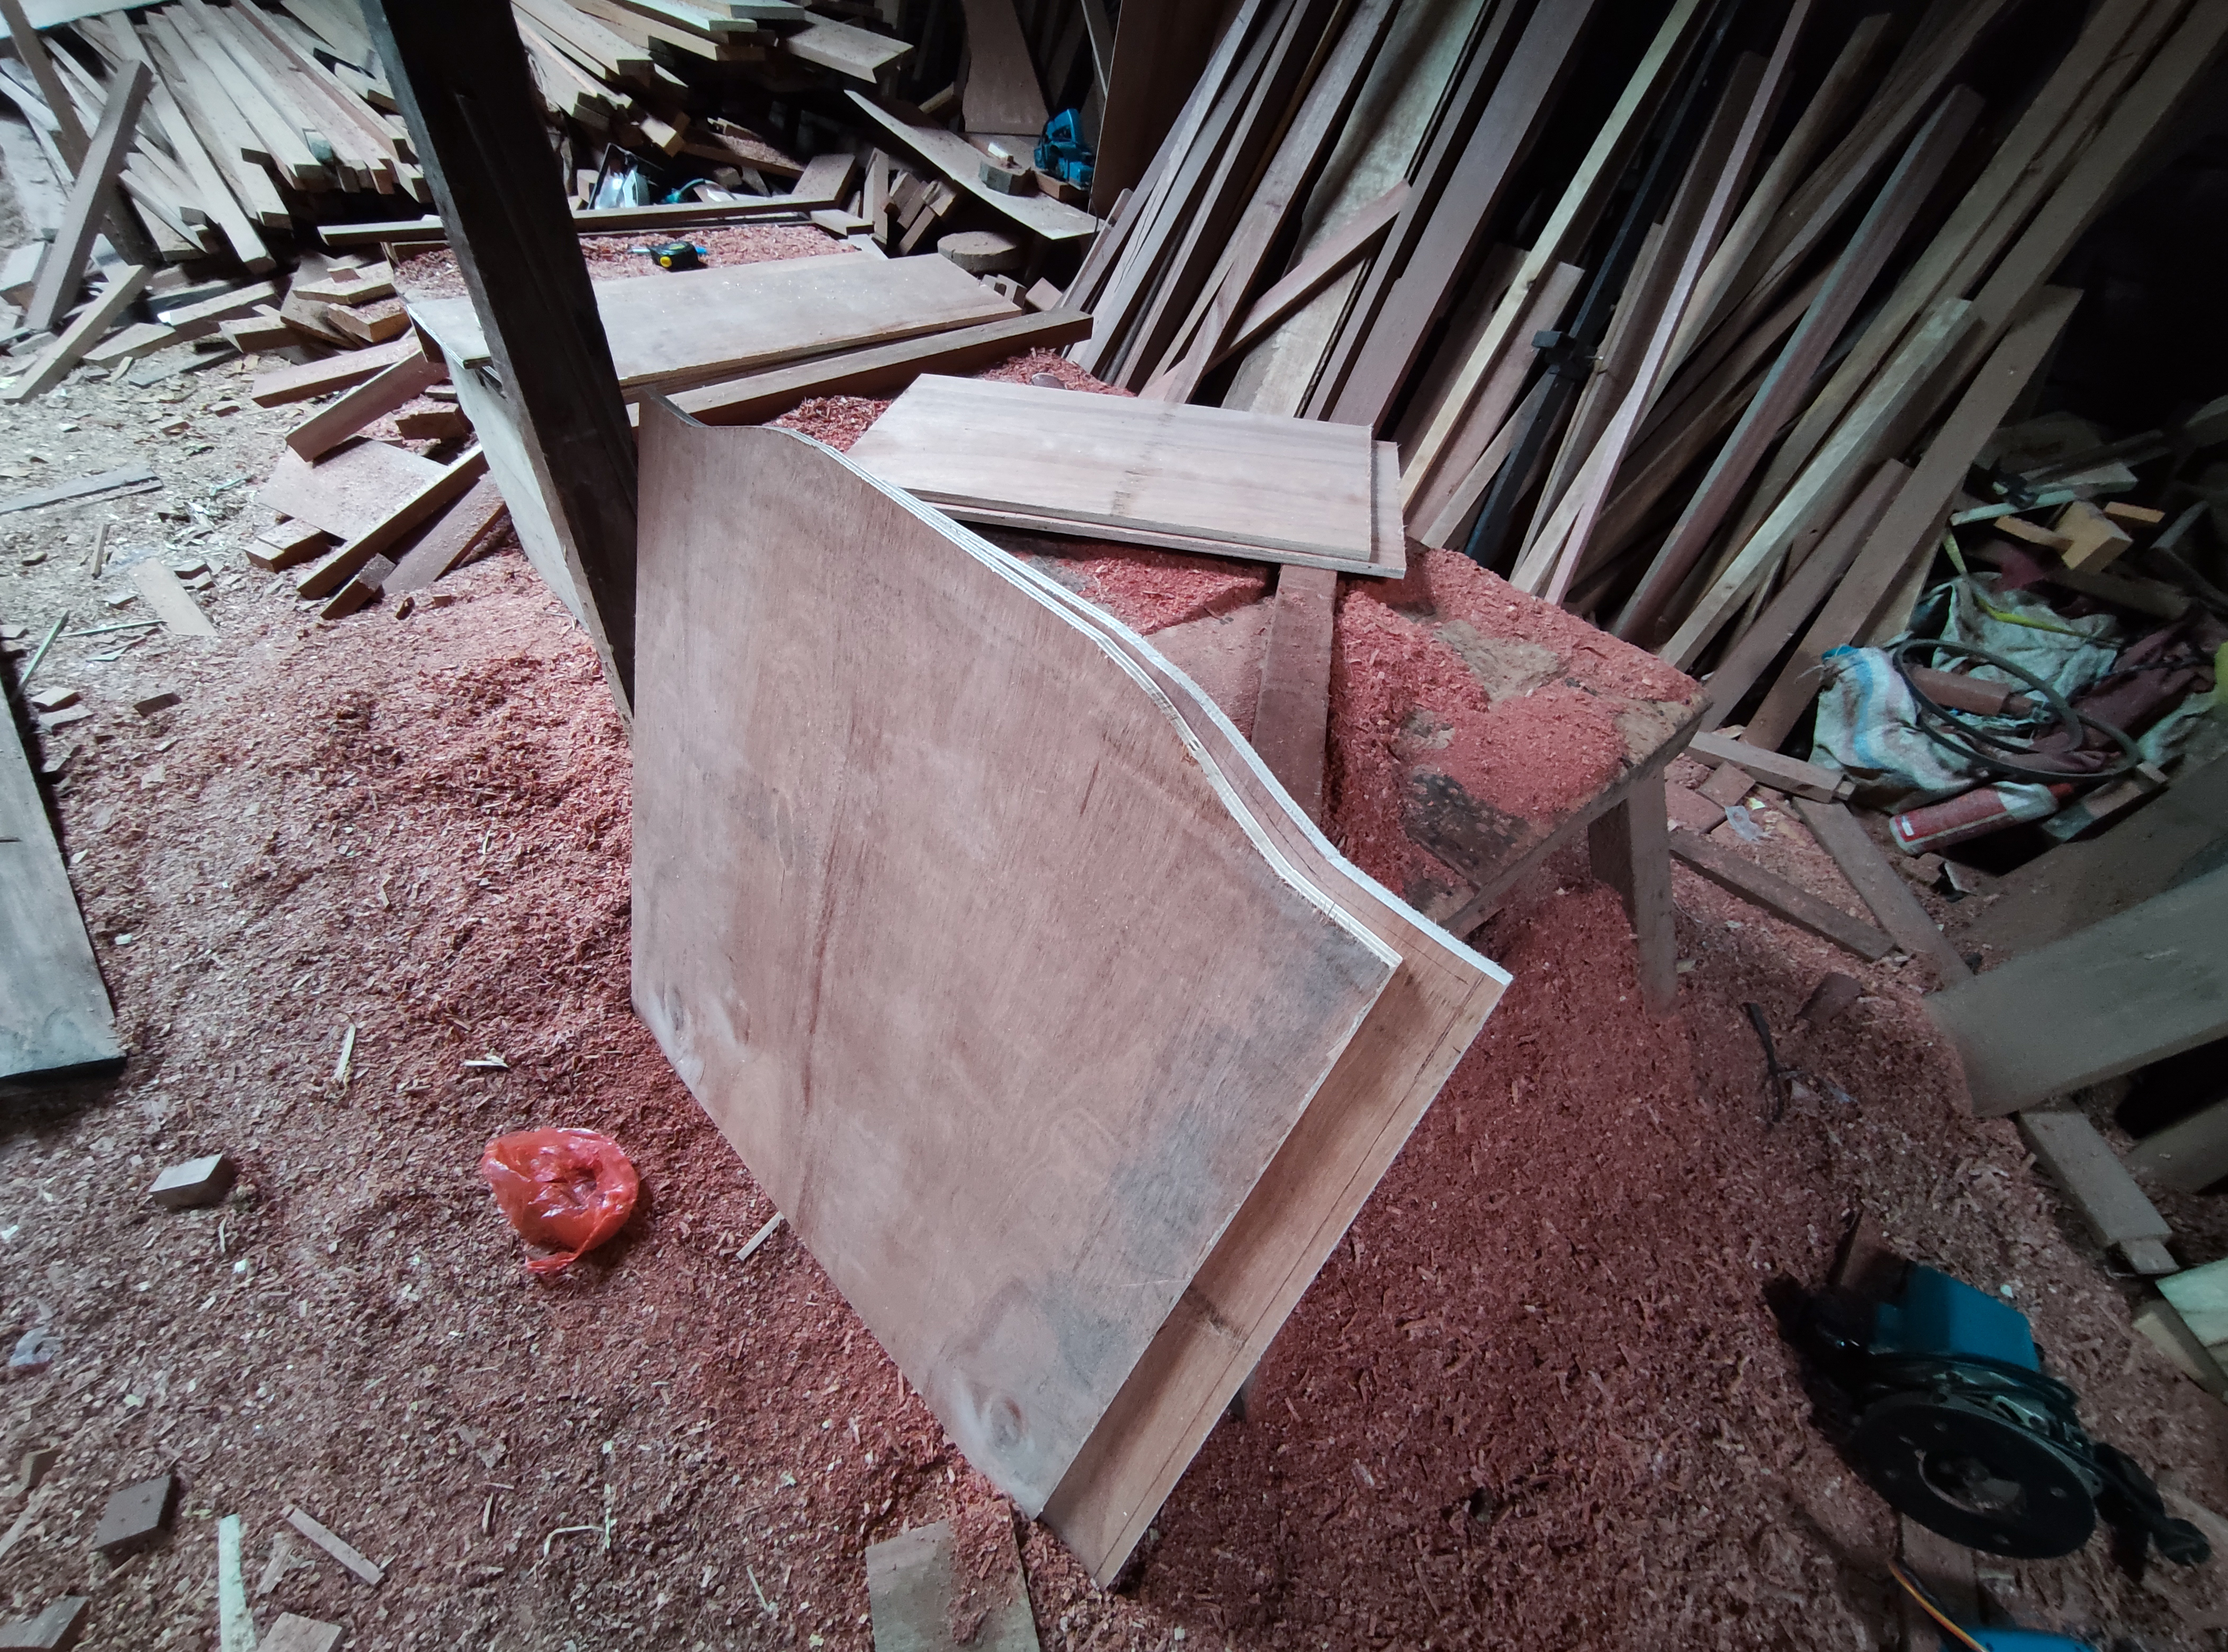
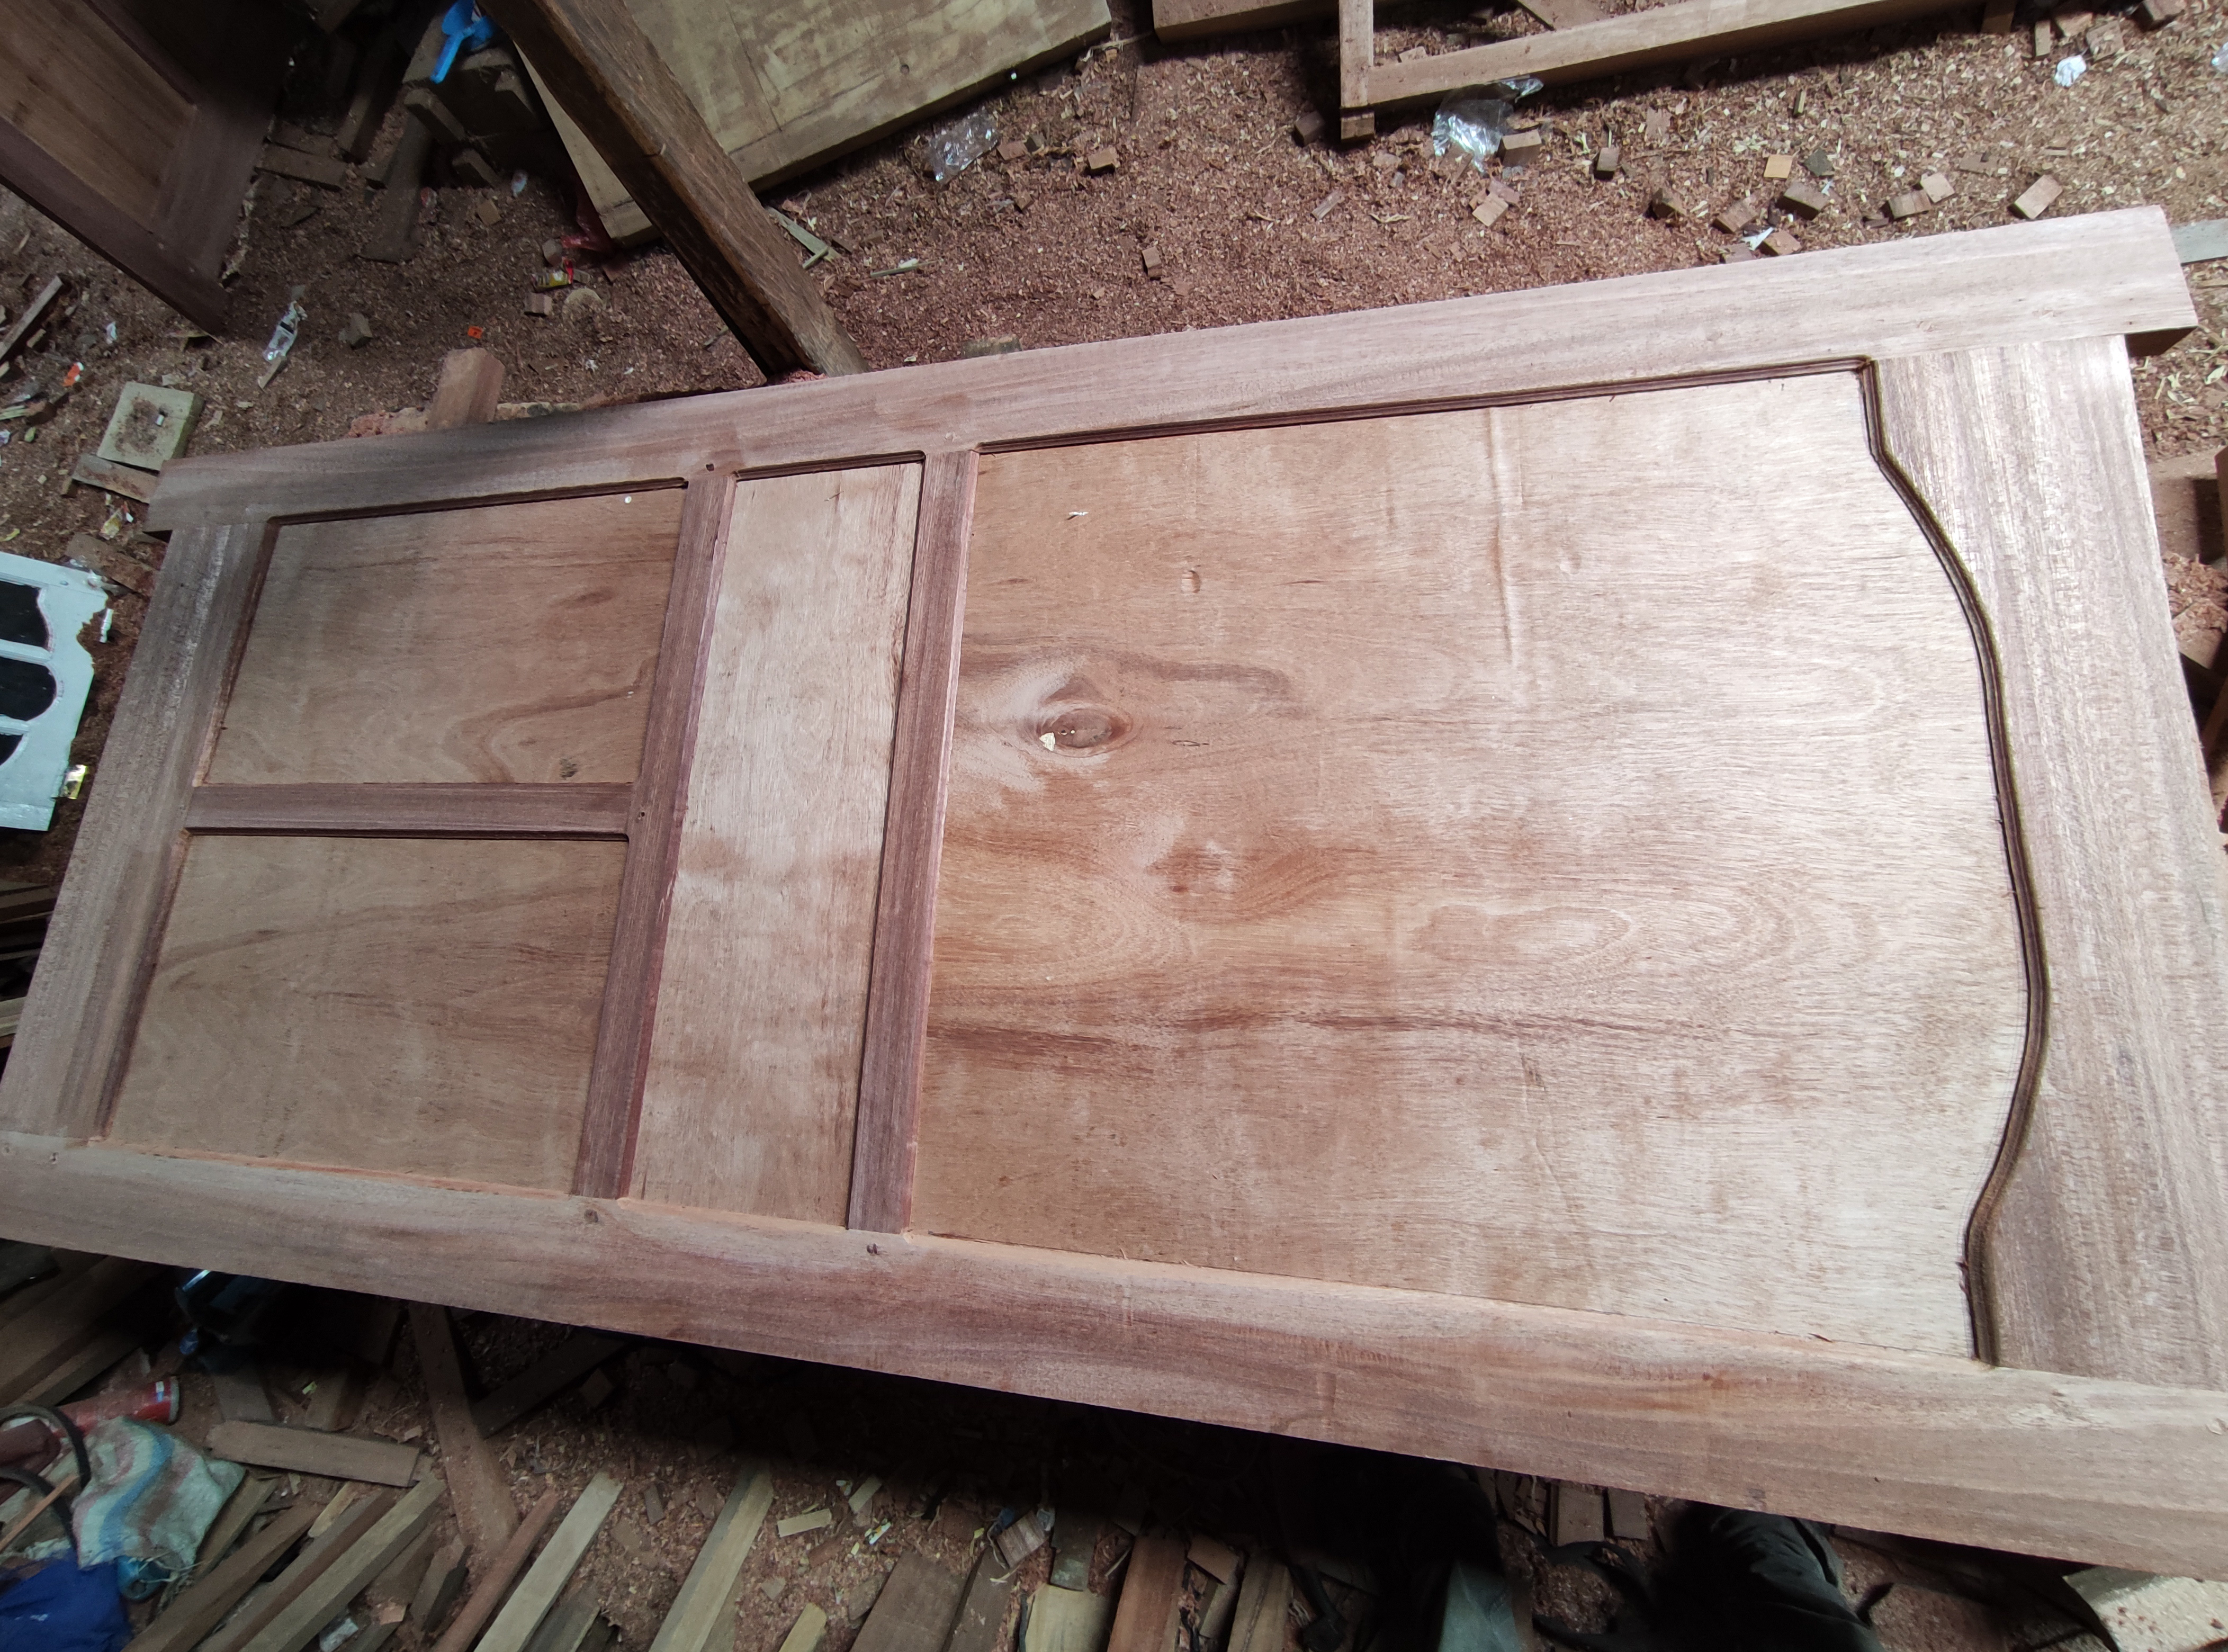
And this is the result of the top bulkhead frame bulkhead for the two doors ,,what I've done to create a curved shape on the inner side.
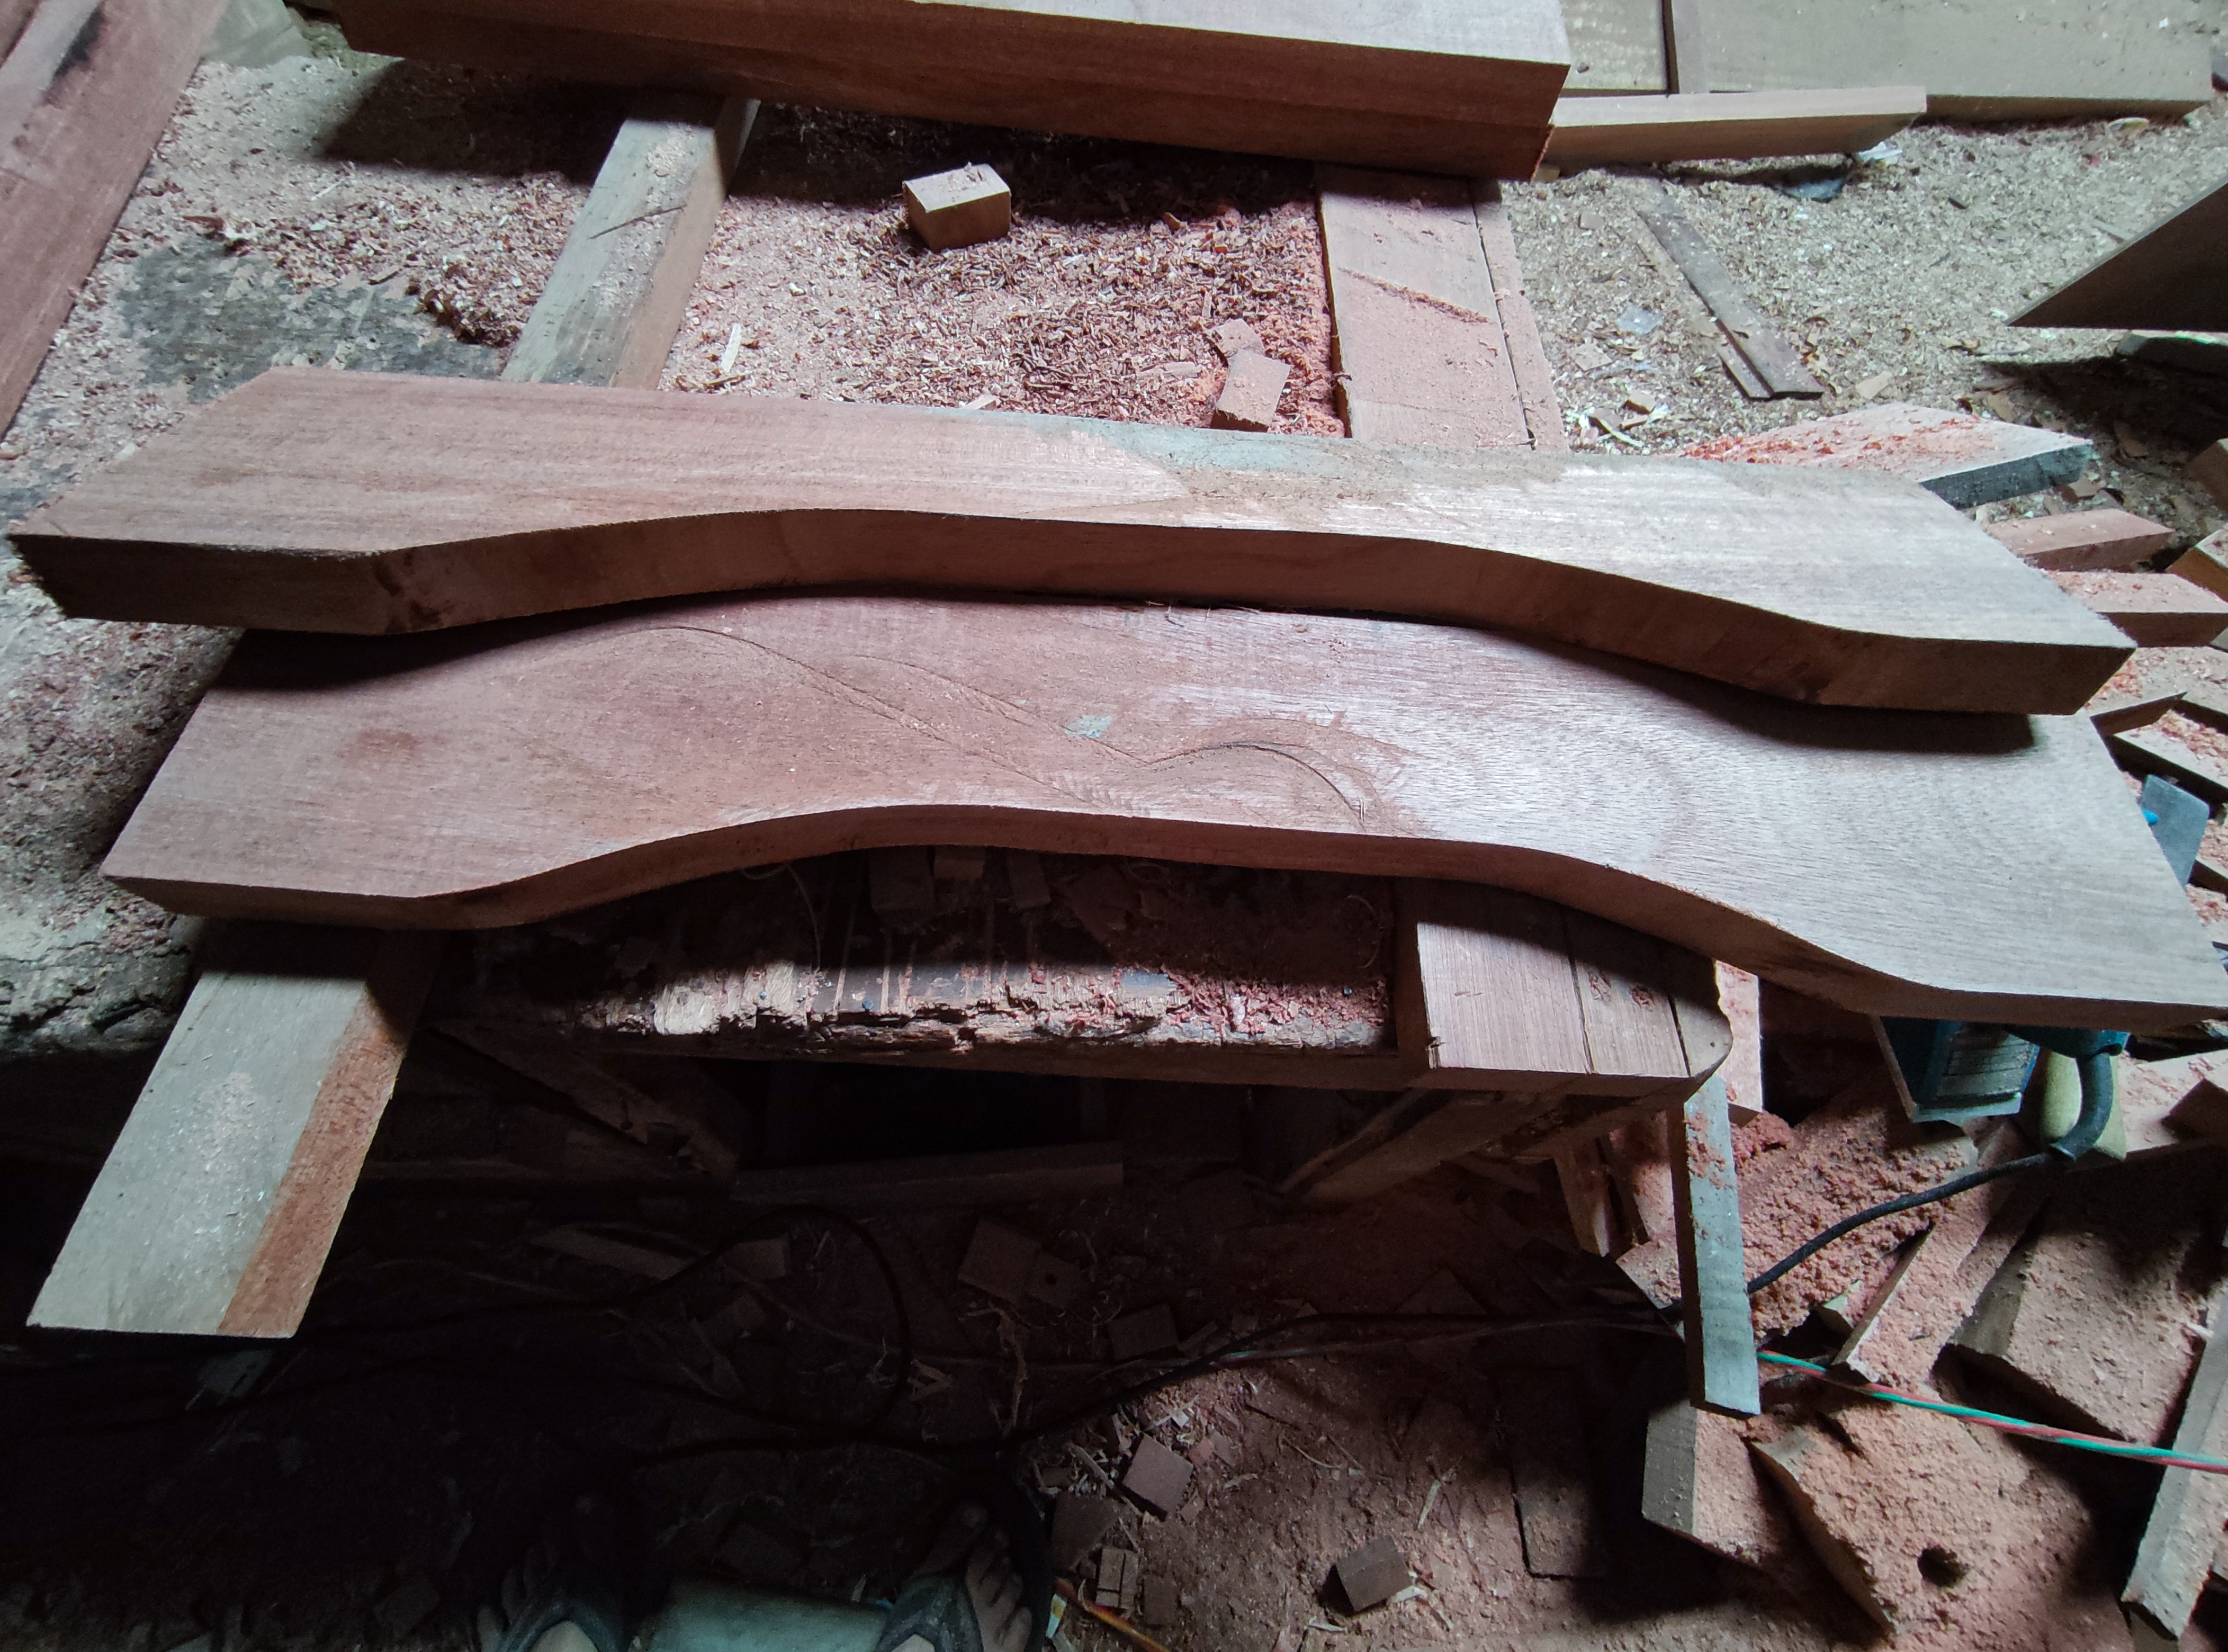
Then, after the process of making the the block is finished , now I continue the process of making the nipple of the door bulkhead using a panel machine.
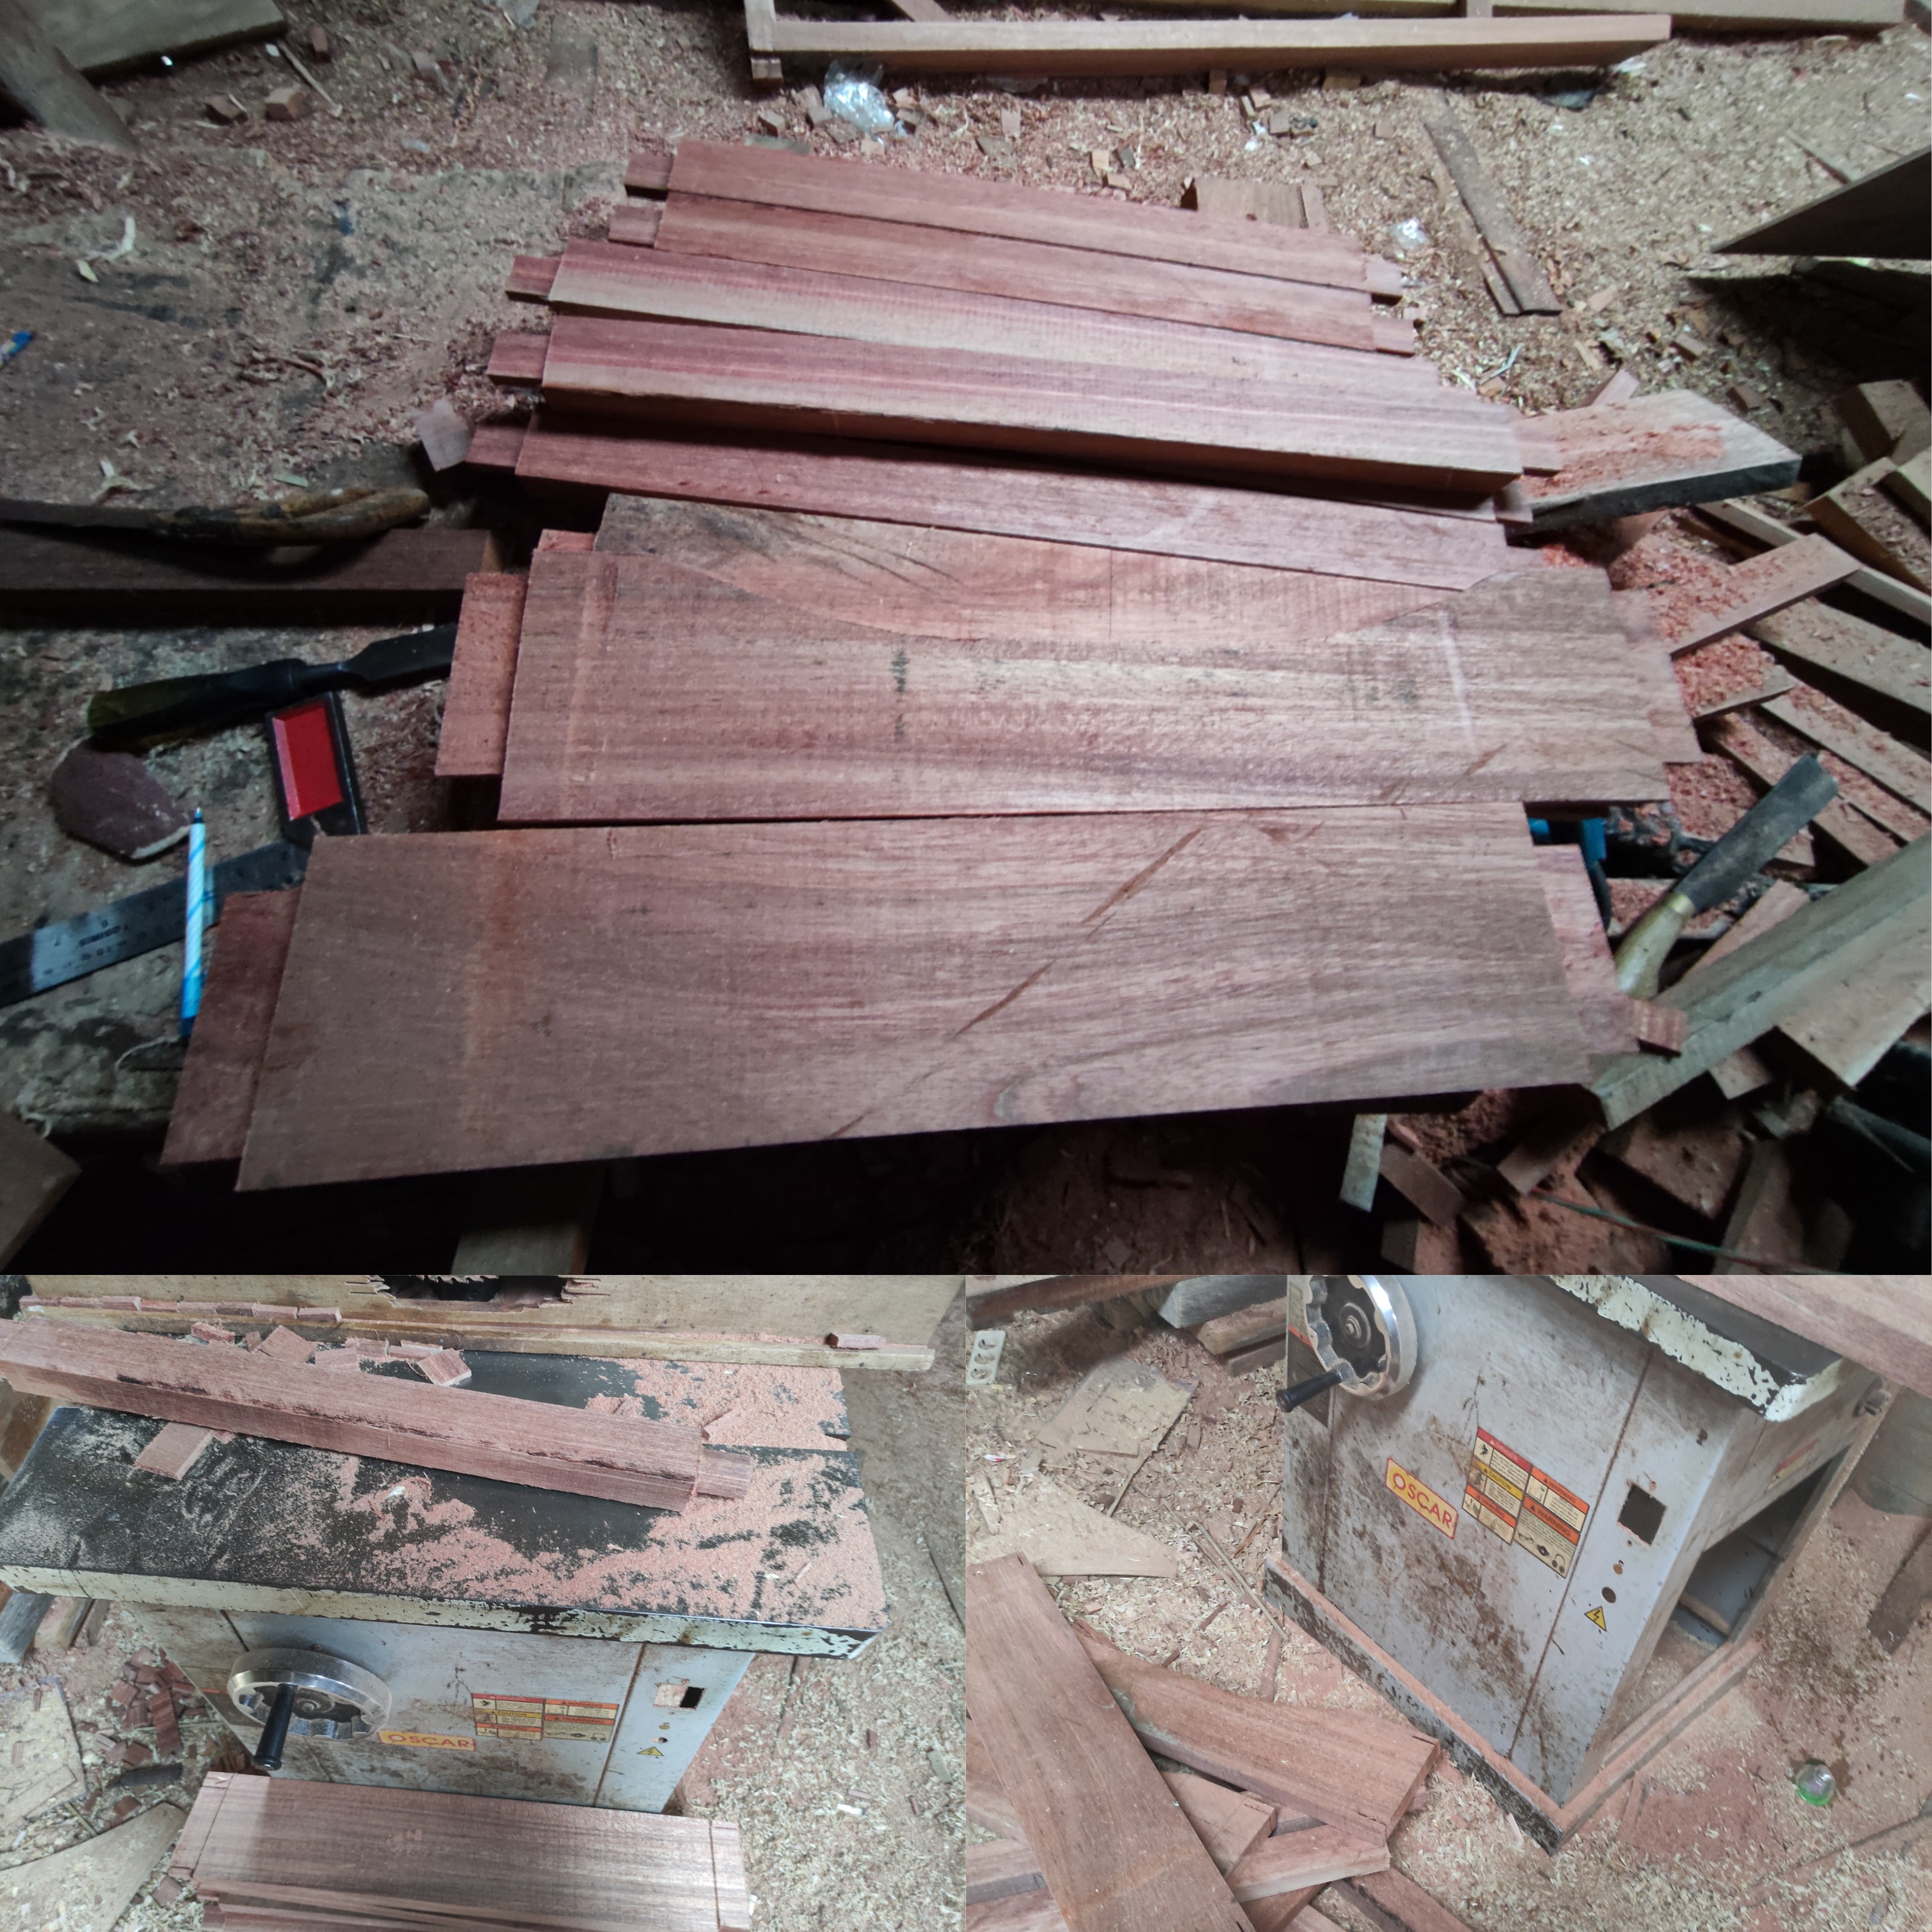
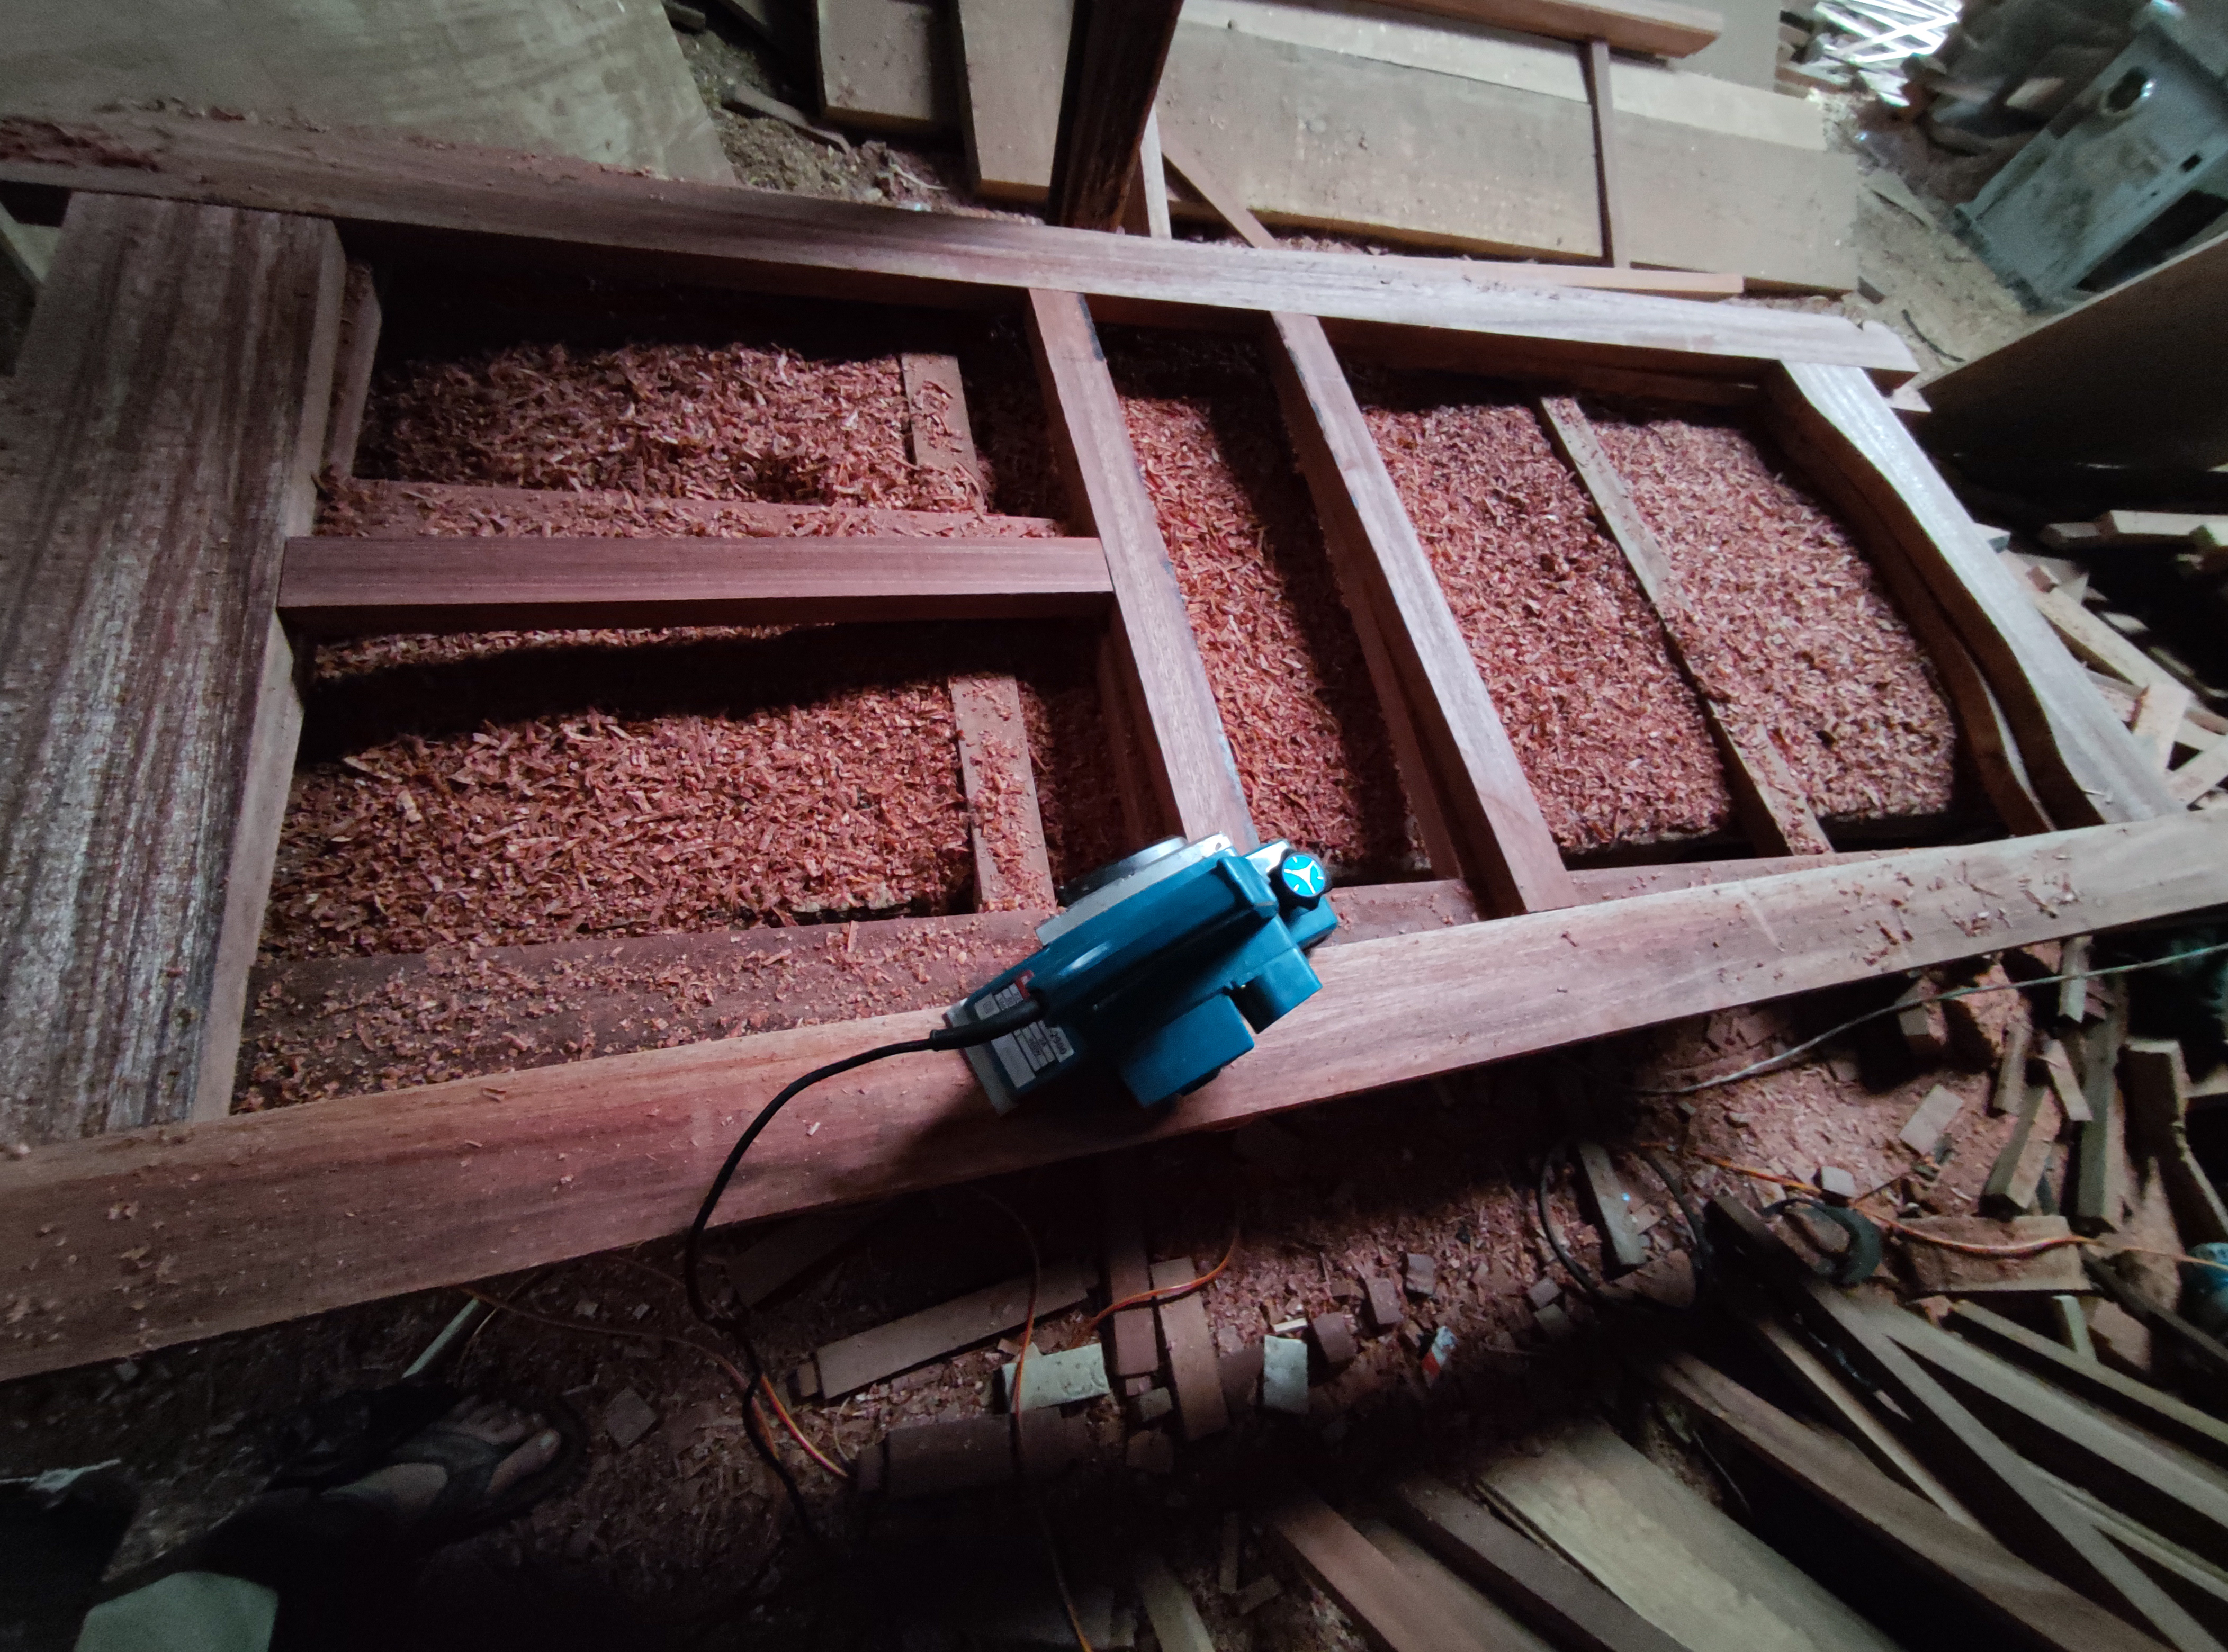
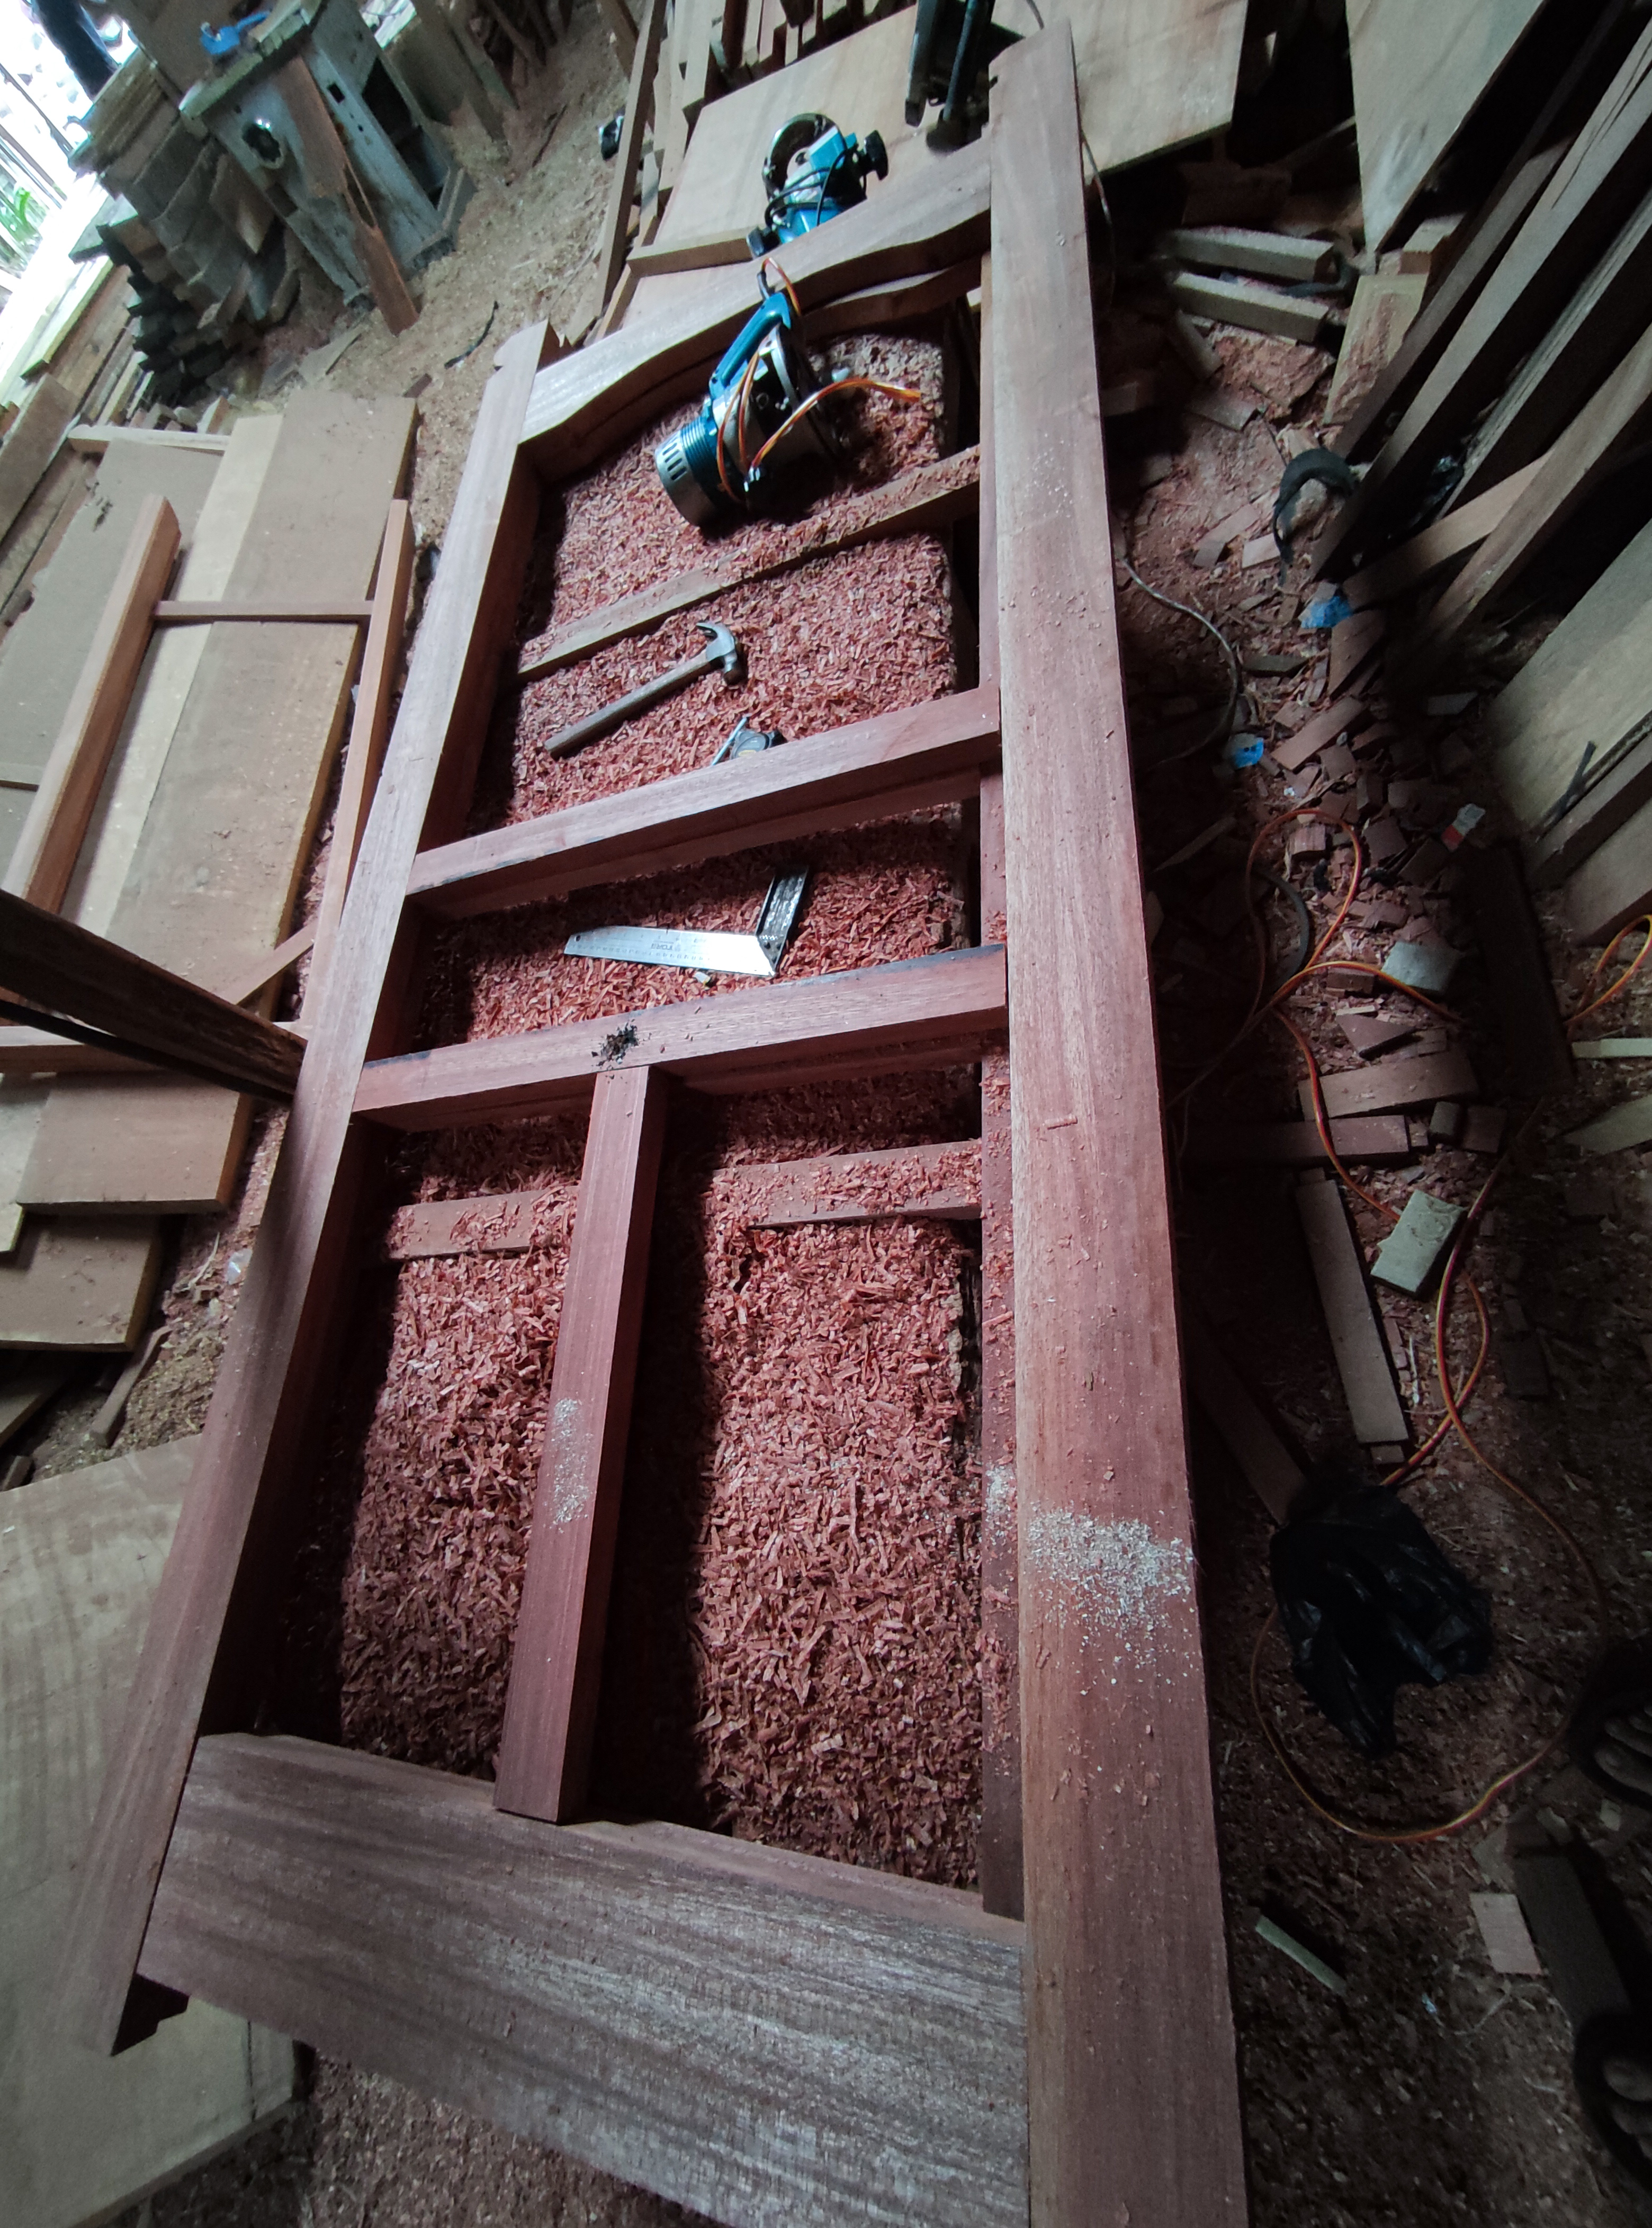
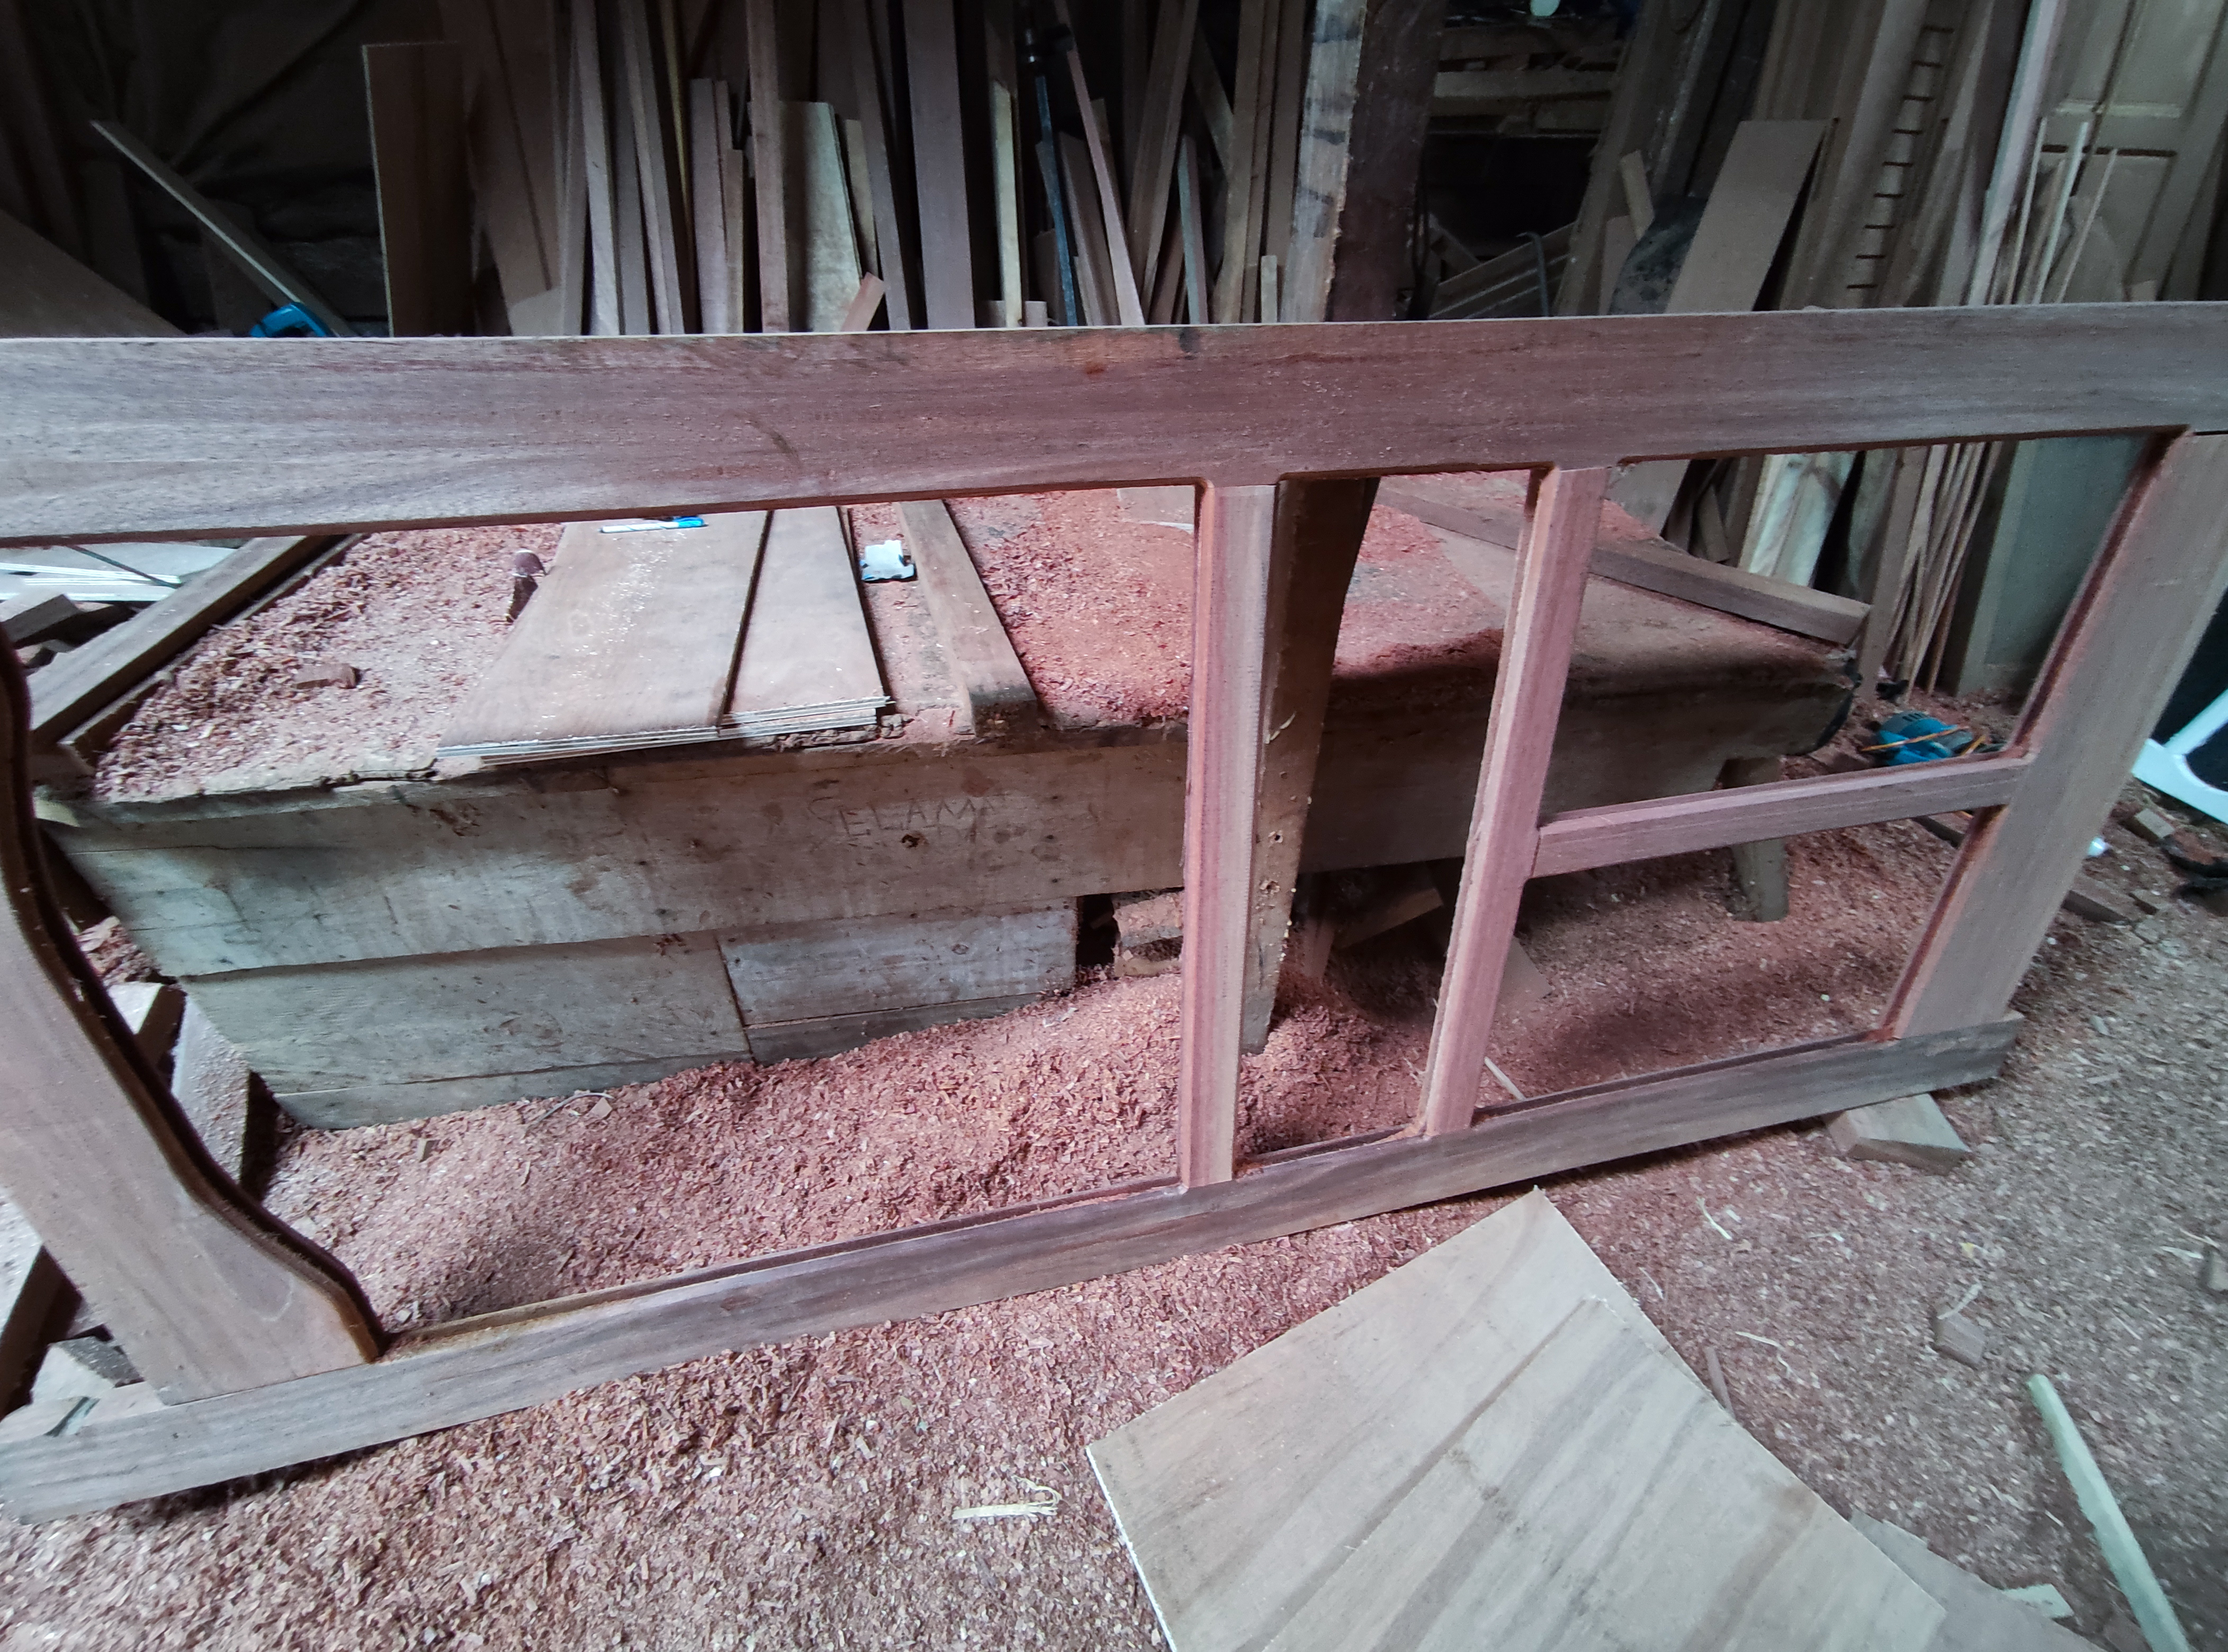
And after the process of making the nipple pegs is complete, now I continue the process of unifying all the bulkheads according to their respective seats.

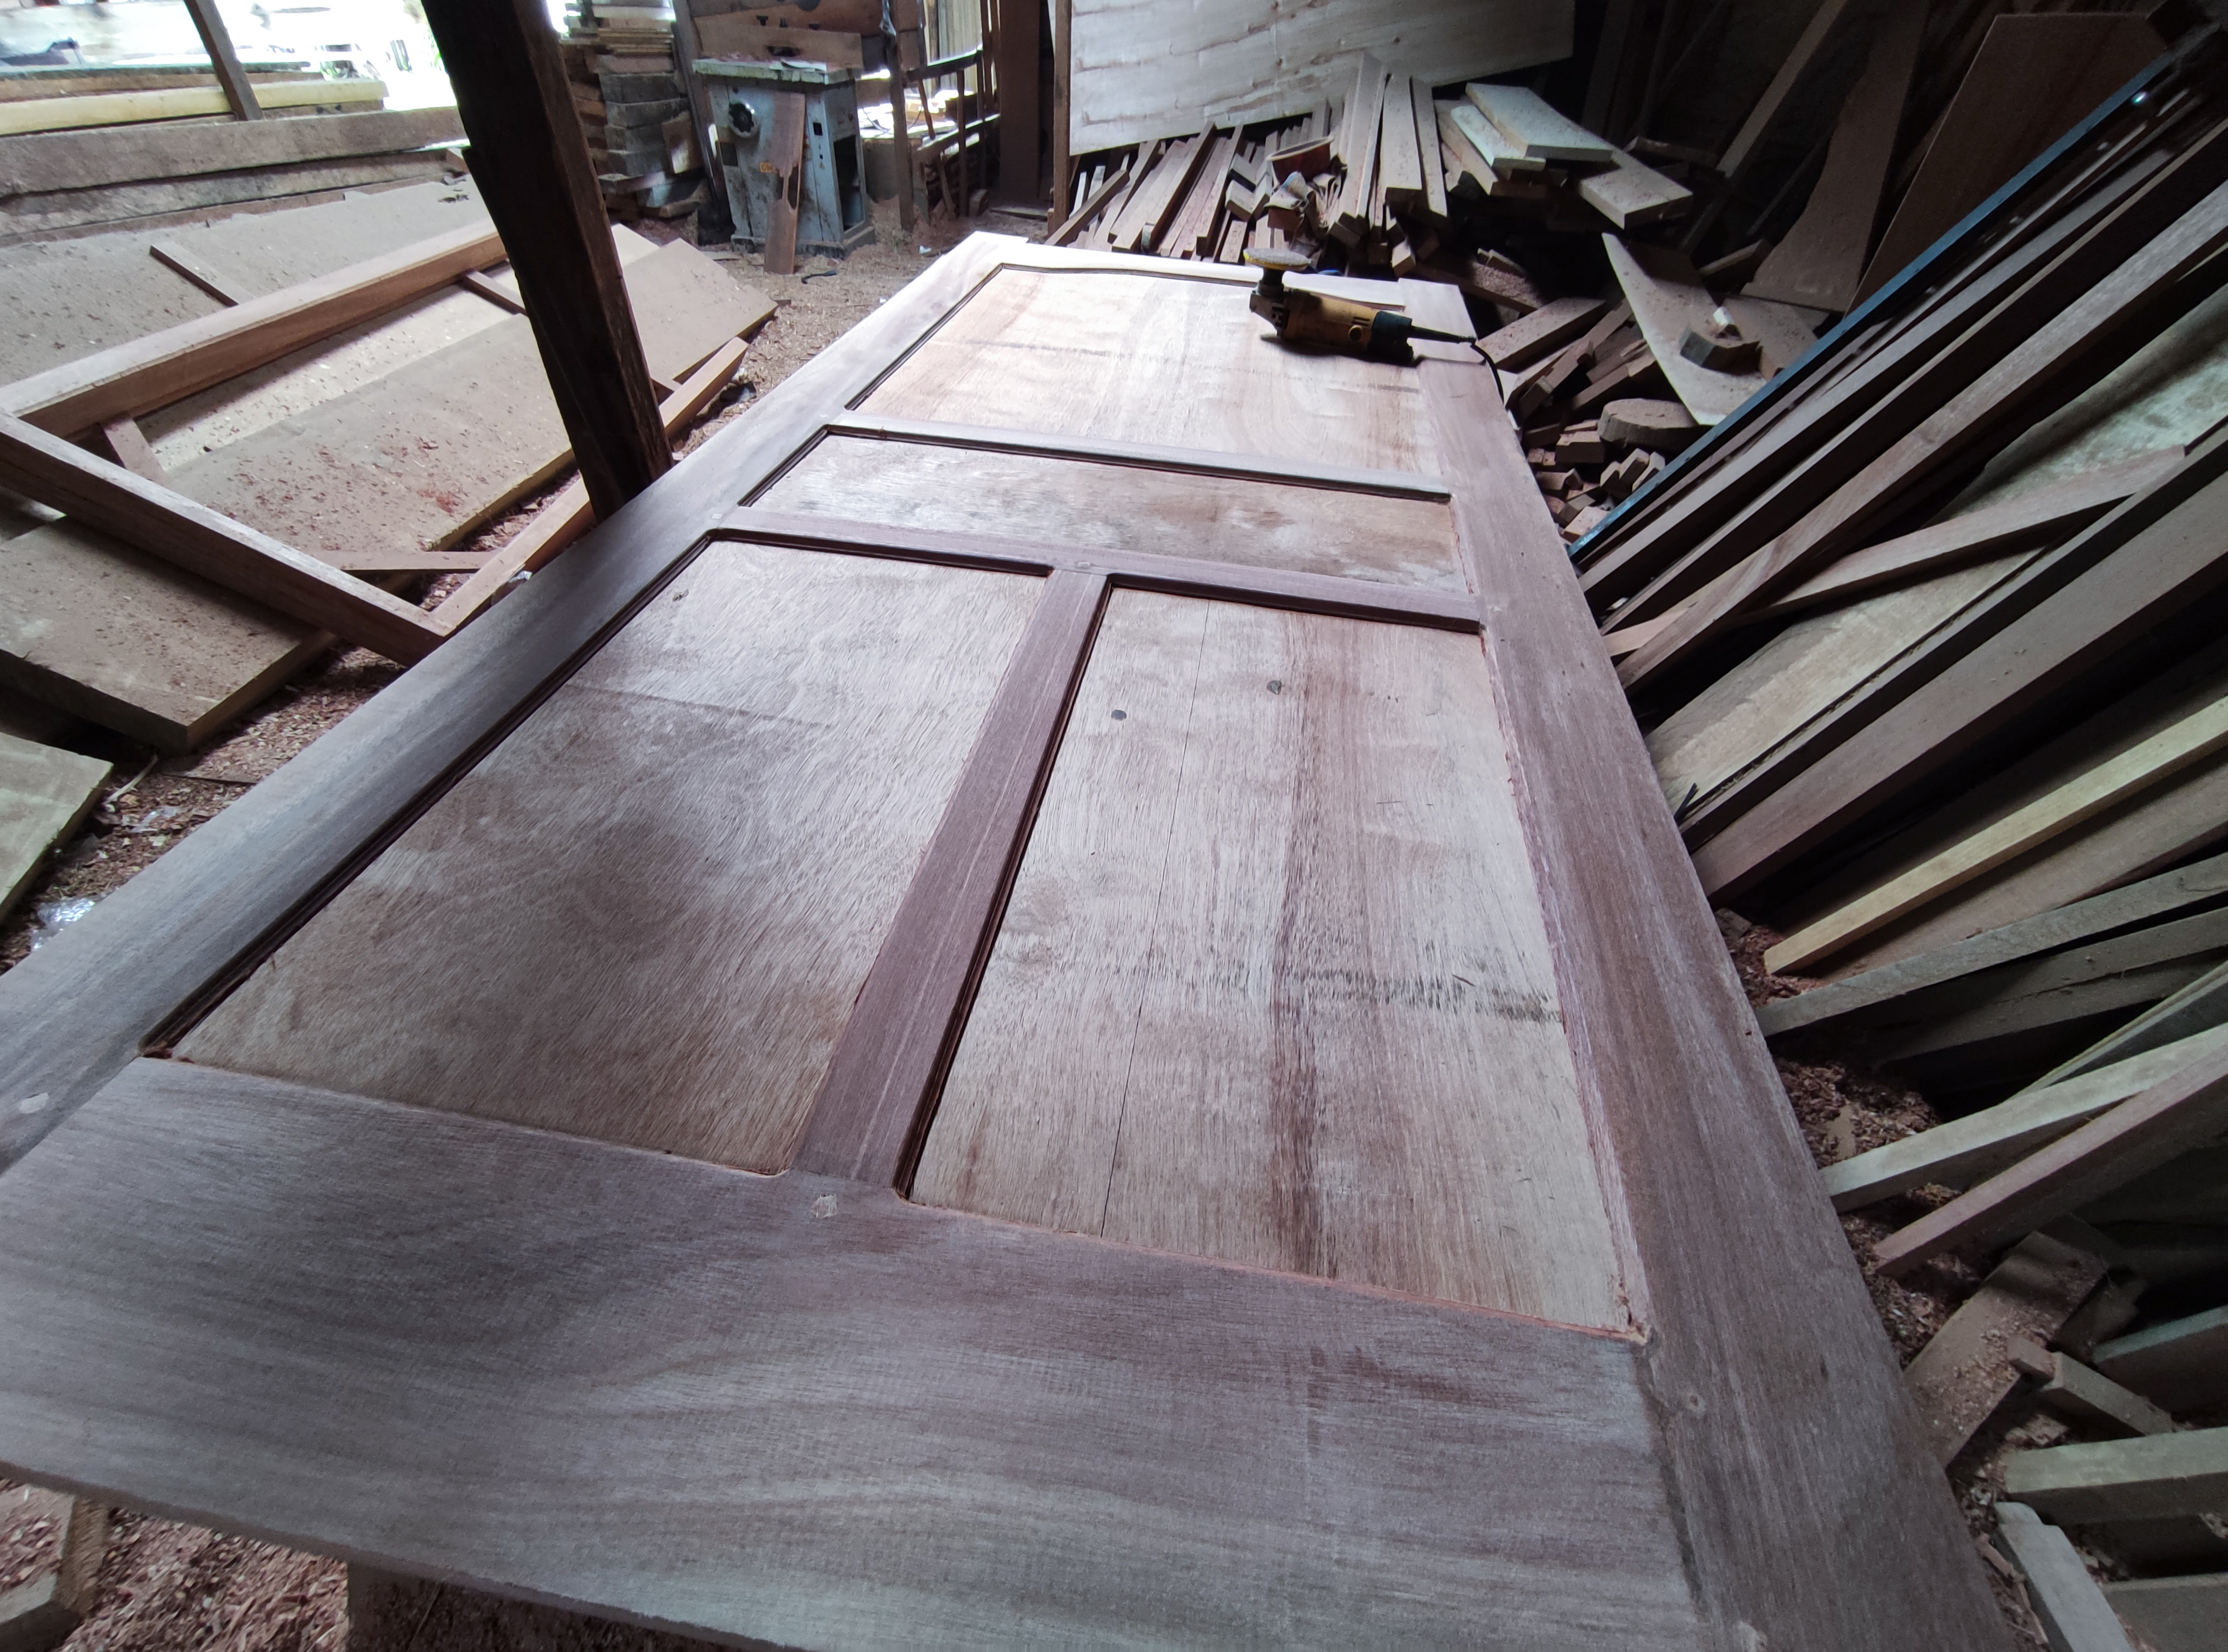
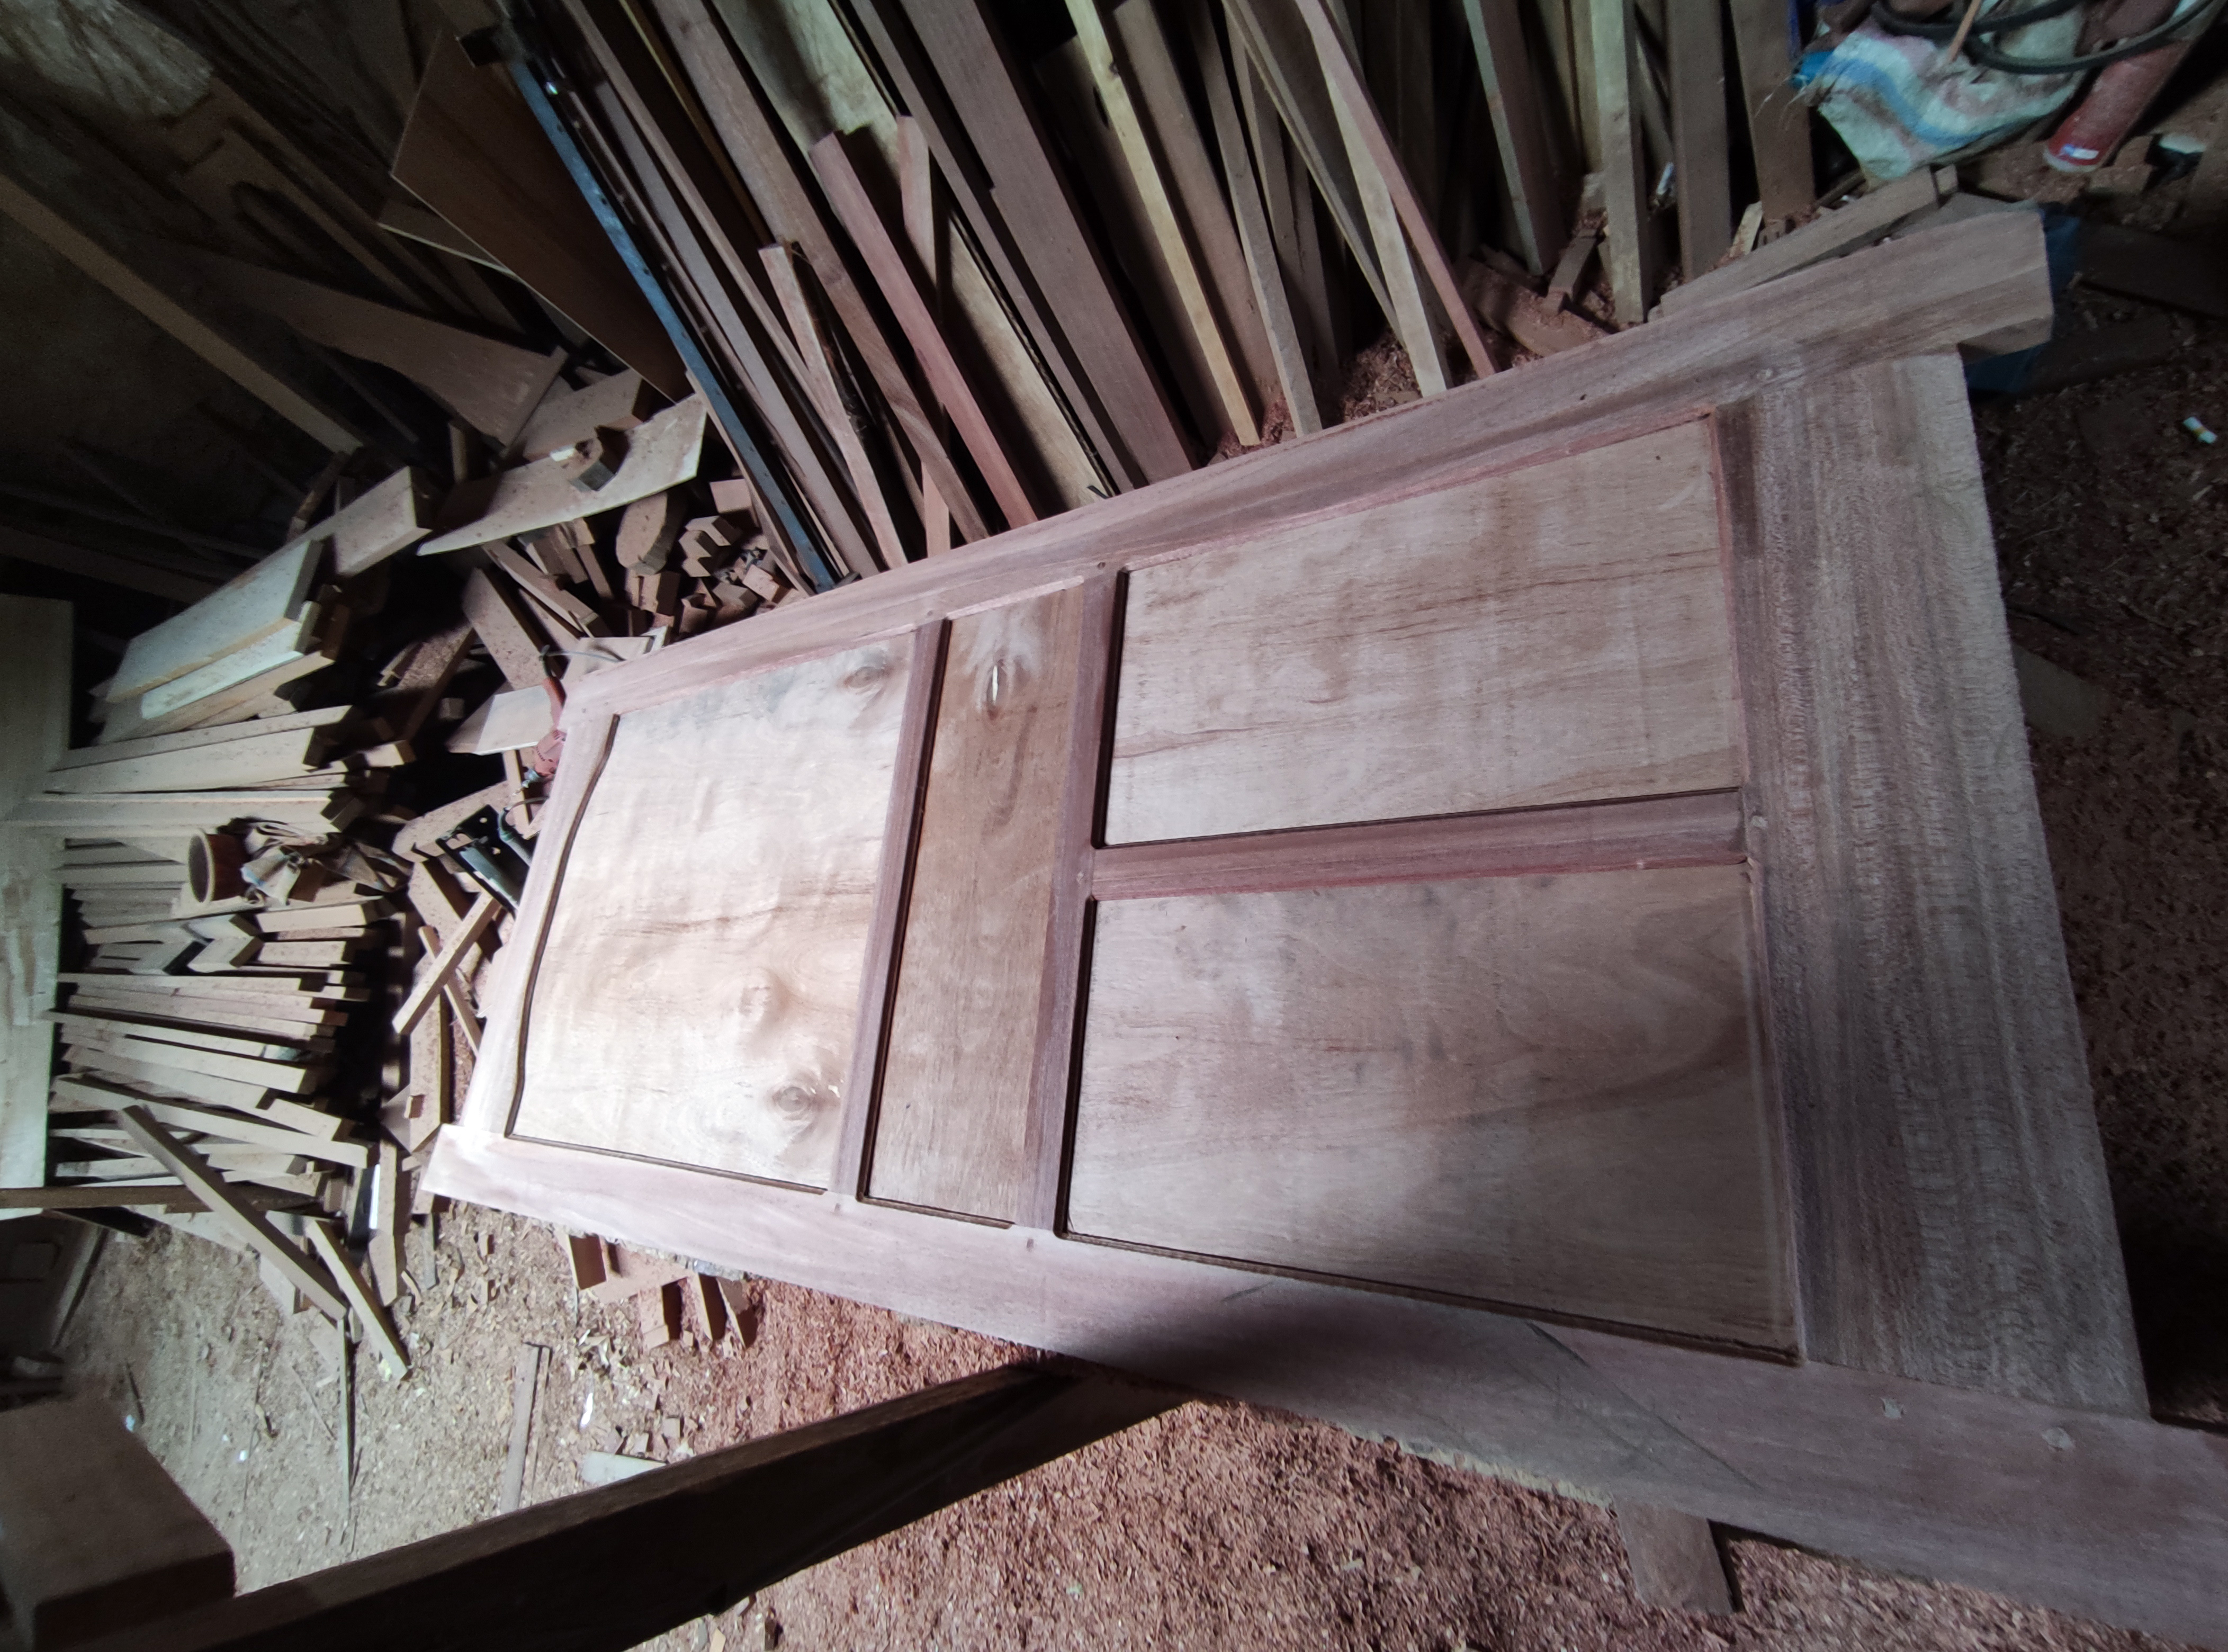
After the process of unifying the entire series of bulkheads is complete, the door design begins to appear with such a simple form.
and after the process of unifying the circuit is complete, now I proceed to the next stage, which is the process of smoothing all the connections to the front and back surfaces of the door using a shaving machine.
For the next work process after the surface fireplace process is complete, now I continue the process of giving flowers on the front and back surfaces of the door and also I continue the process of giving the door leaf holder, both processes I do using a machine router.
And now I have finished the process of making the circuit for that two door units and for the next stage, namely the process of preparing the leaves for the two doors.
For the door leaf sheet, my customer asked me to provide a 12mm multiplex leaf sheet.
Before I did the multiplex cutting process, I first had to share the size of the plywood so that no material was wasted and after I finished the assembly process, I continued using an electric cutting machine.
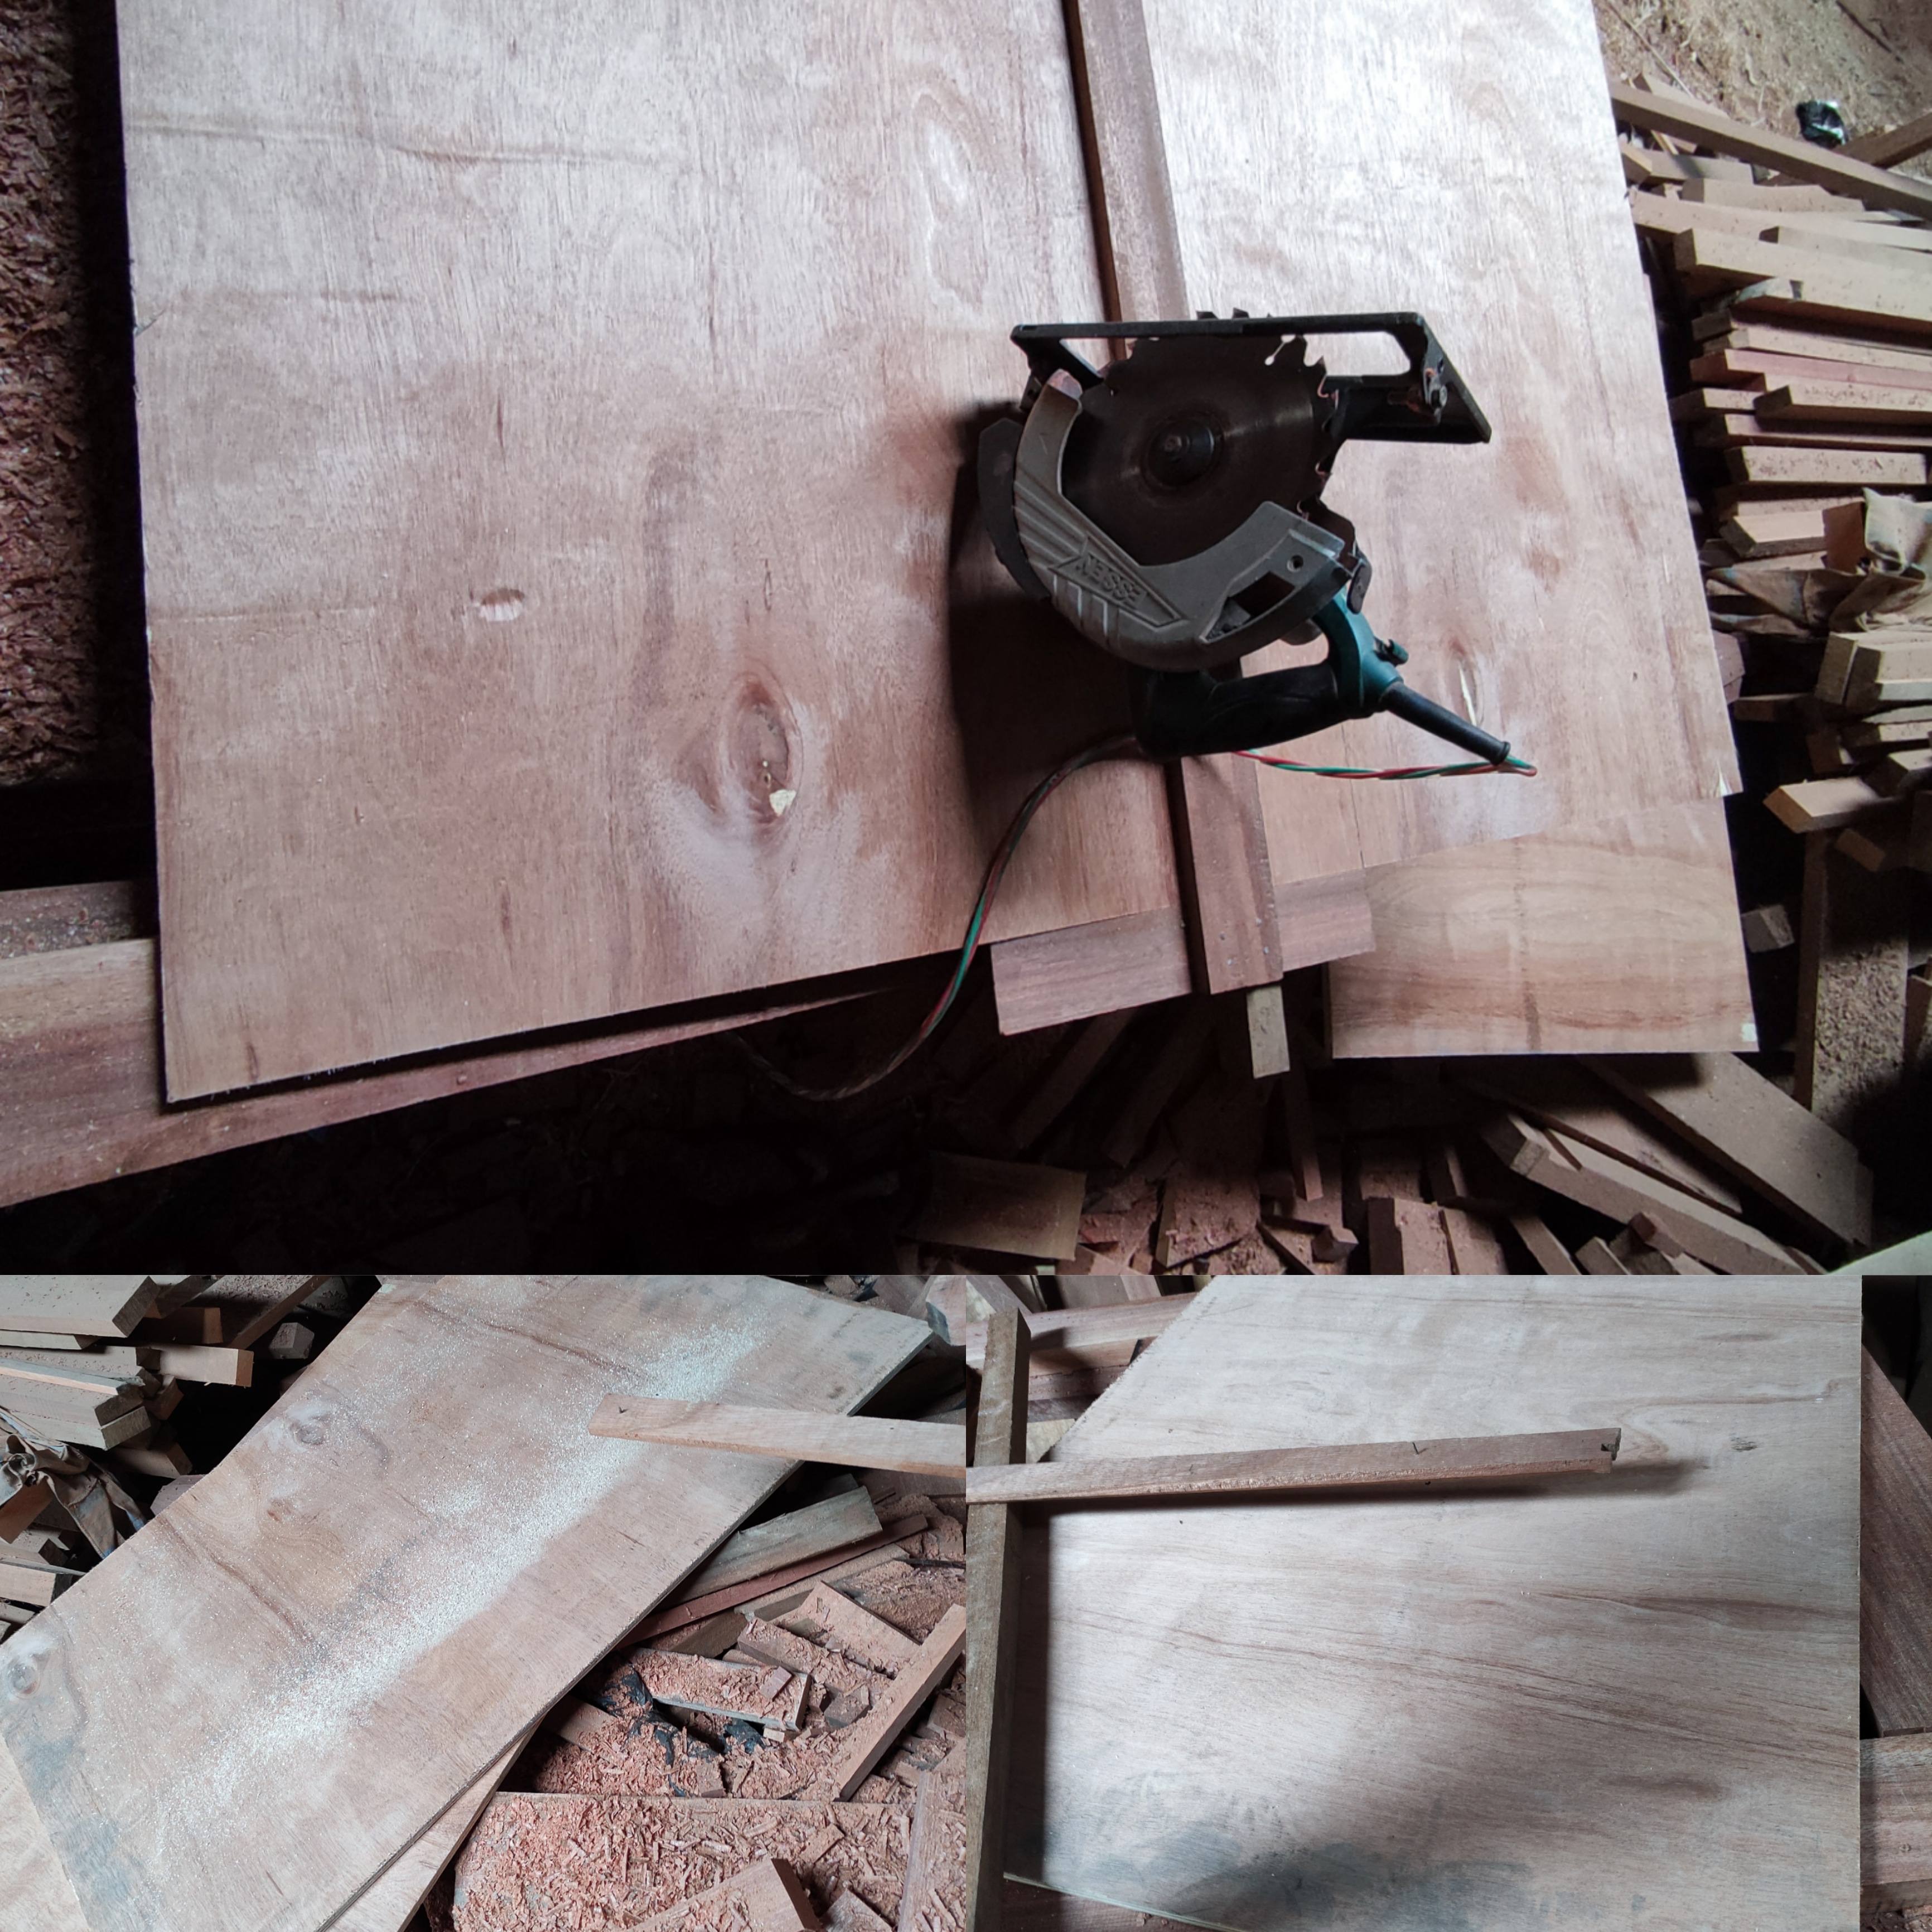
and after the leaf cutting stage is complete, now I continue the process of preparing the indentation on the main sheet of the door leaf by tracing the grooves of the door chain.
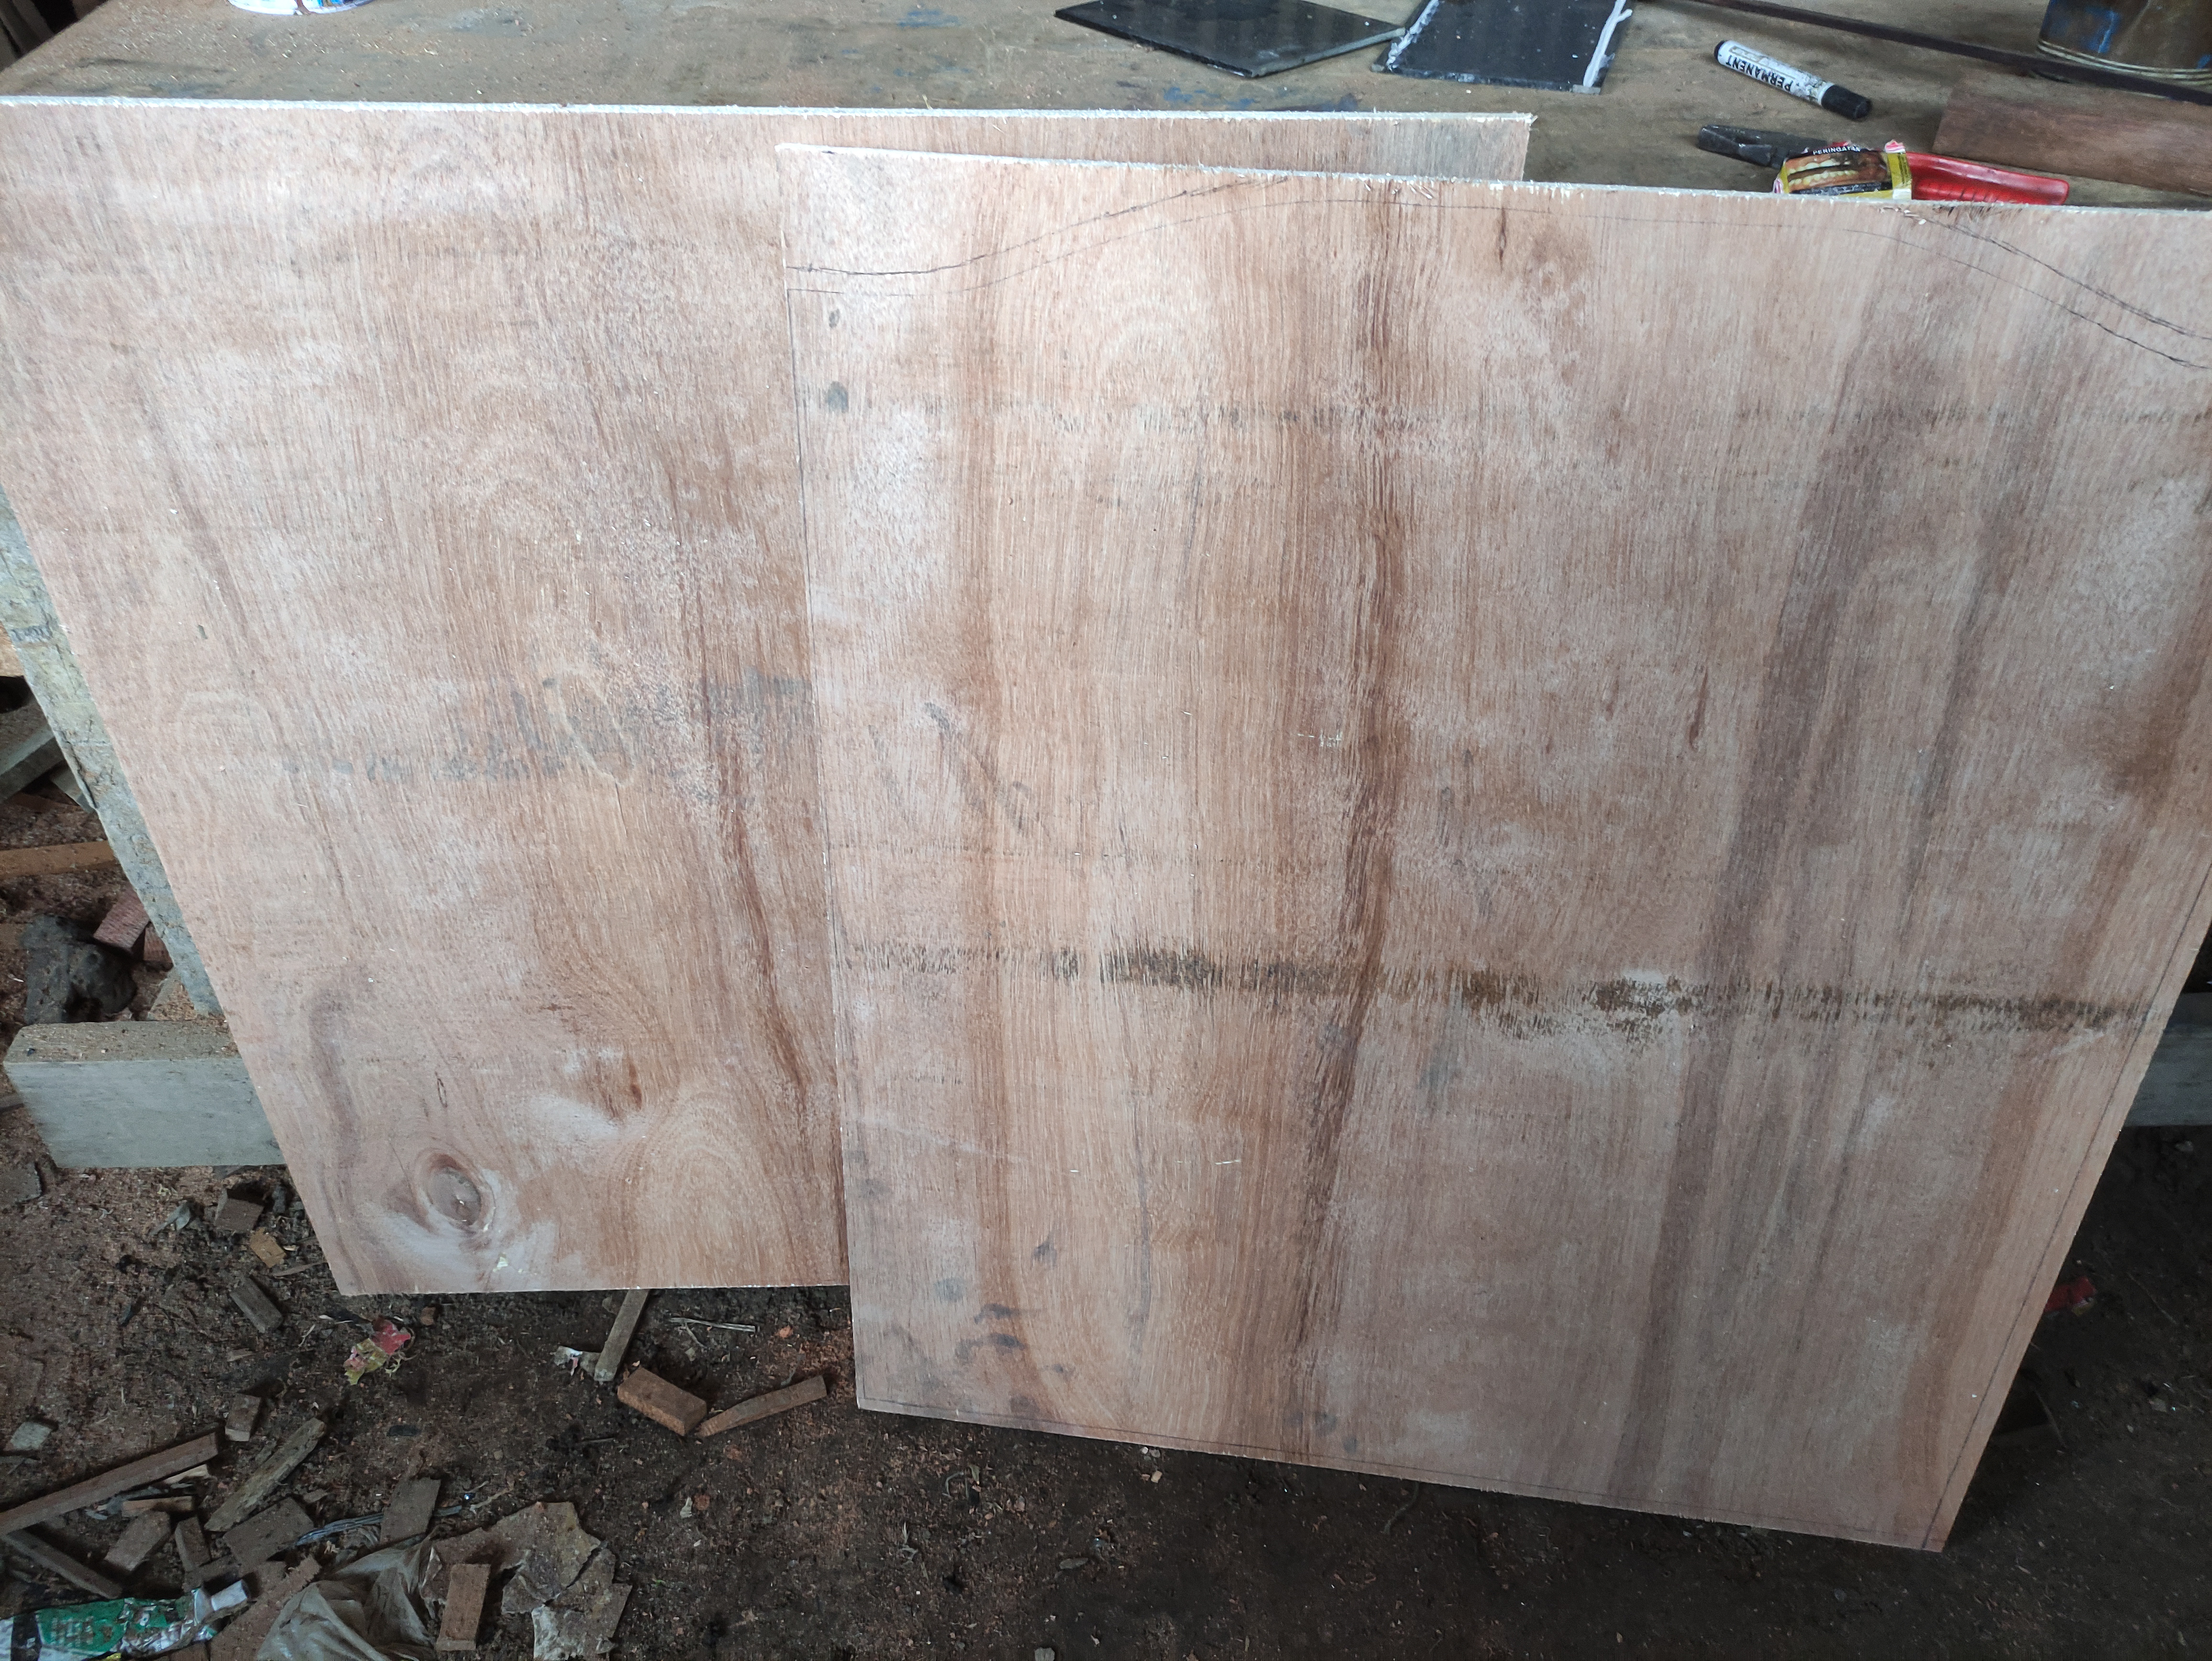
After the process of outlining the door leaf following the indentation of the series is complete, then the process of cutting the indentation using a sitting machine jitsaw.
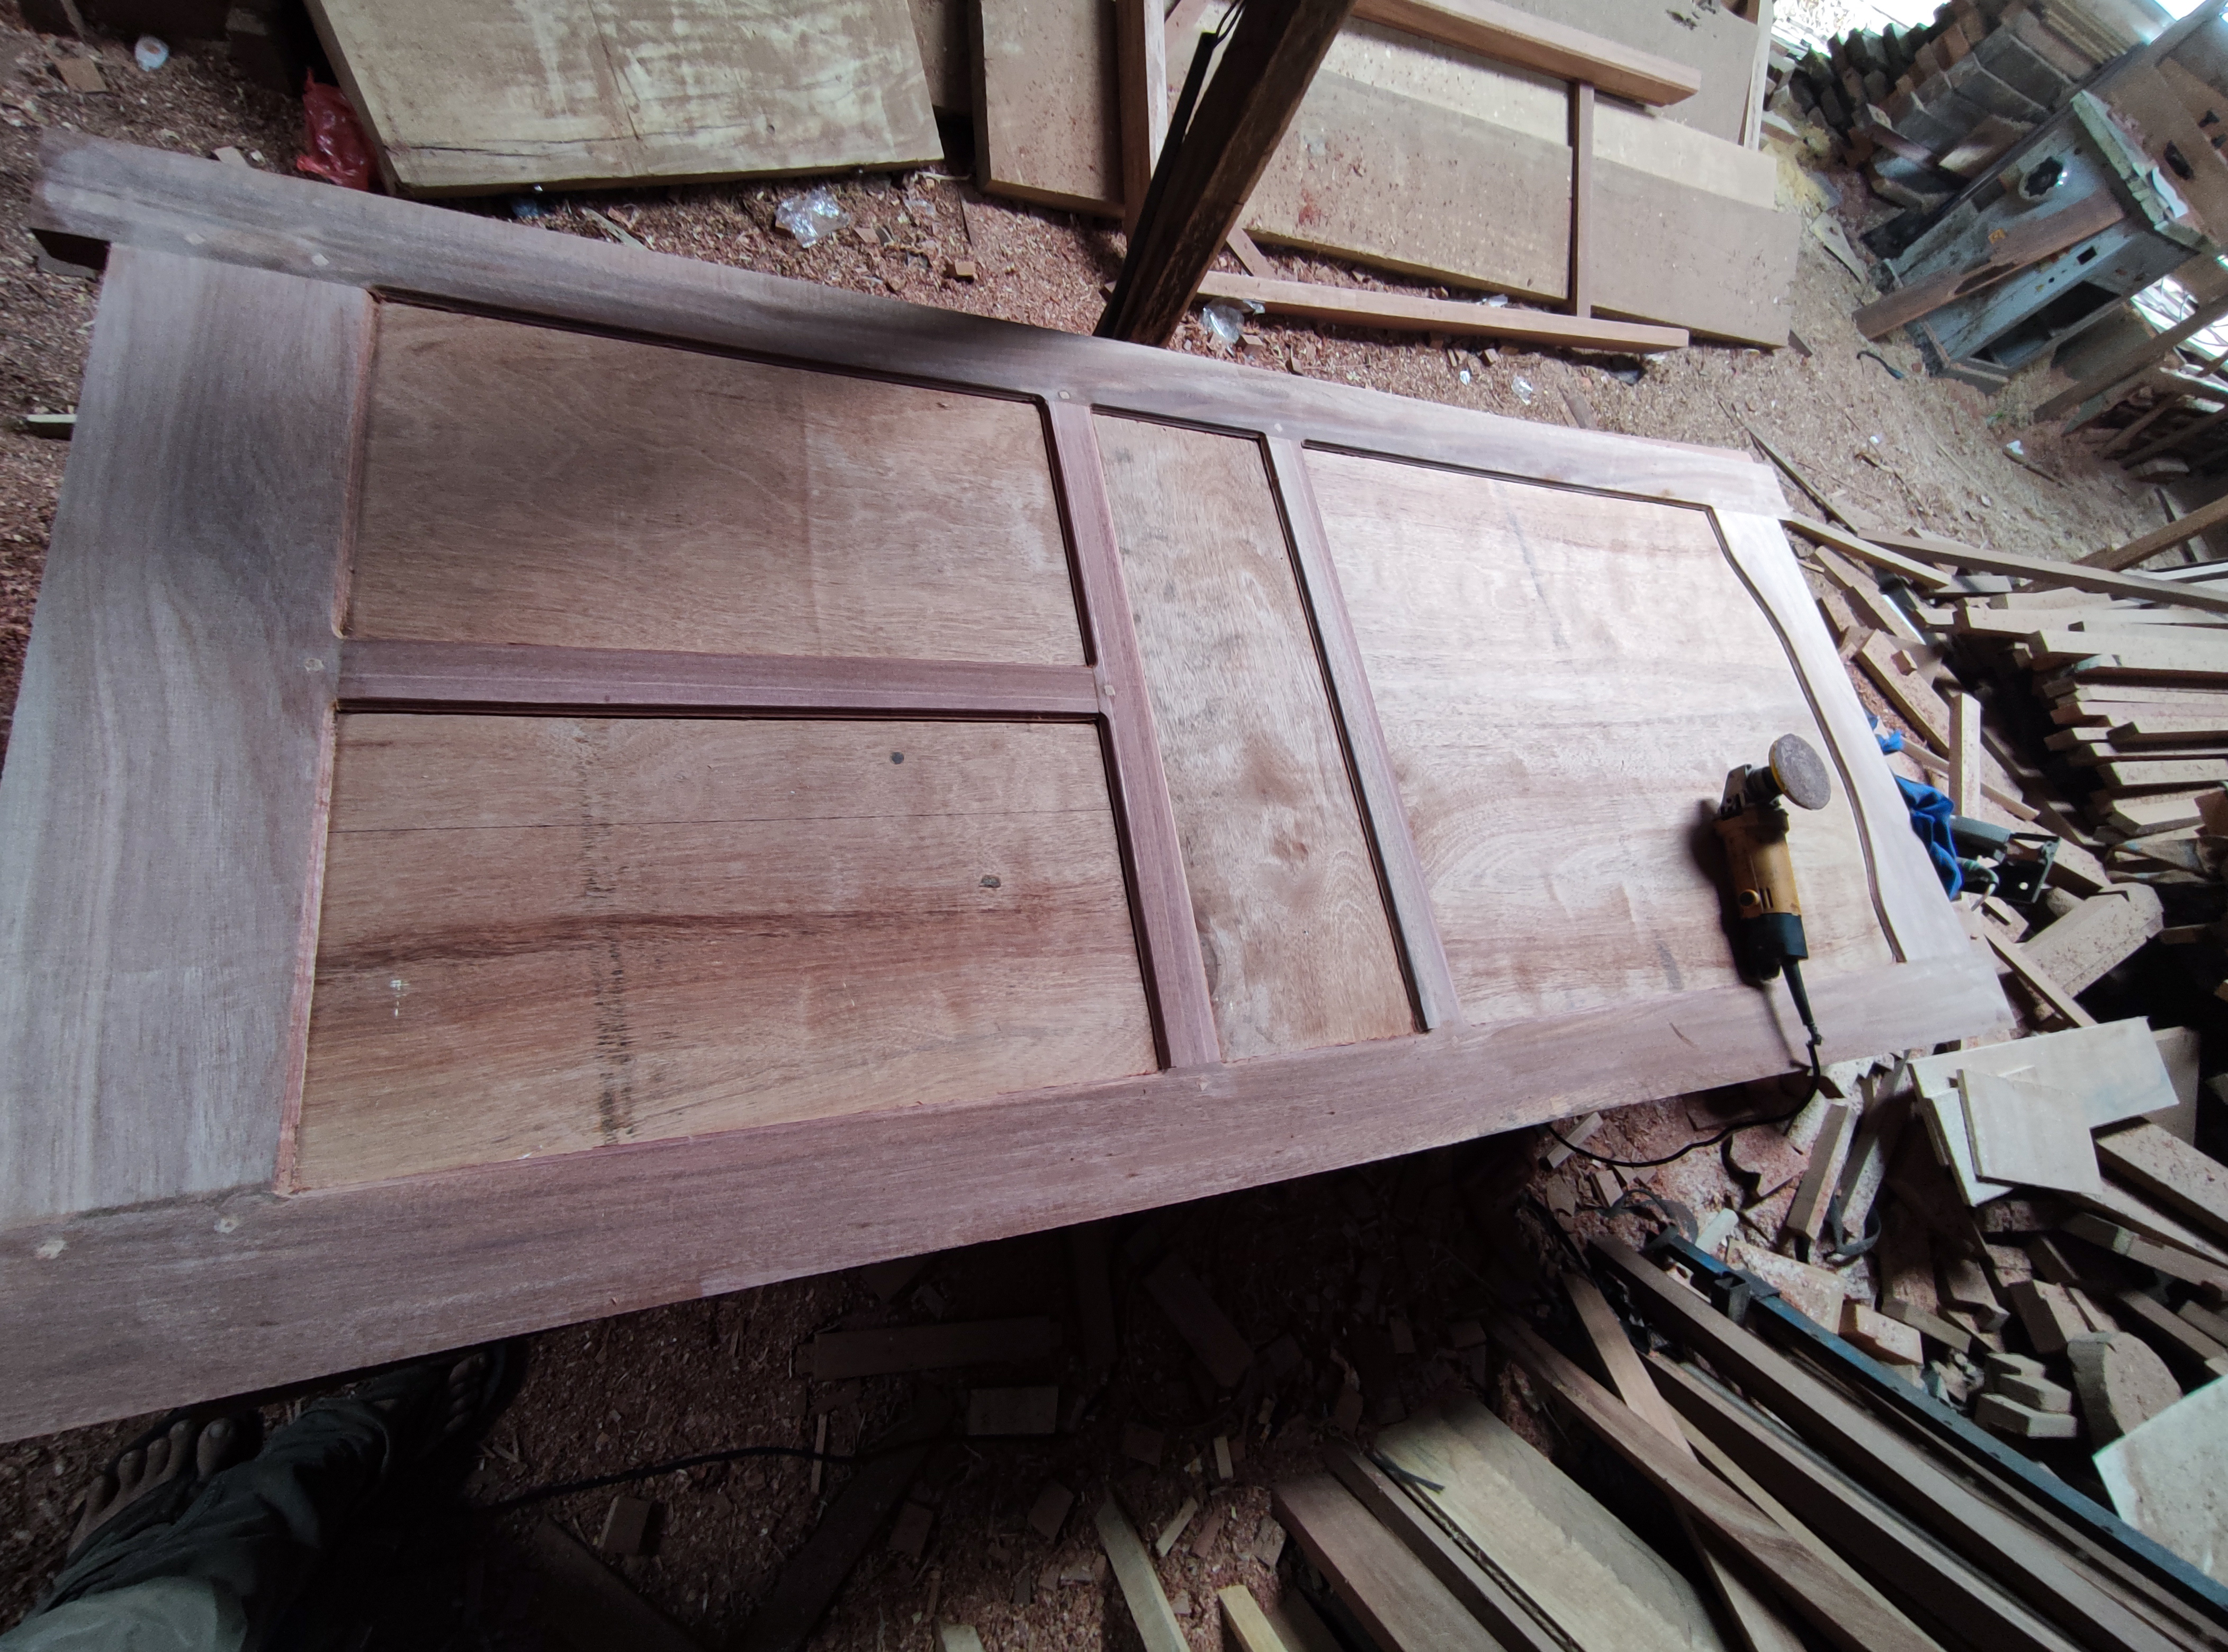
And then after the leaf preparation process is complete, I continue the process of installing the door leaves on the door chain.
In the process of installing the leaves, of course we have to disassemble the entire series of doors and continue to reinstall them simultaneously with the leaves and the process takes place as shown in the pictures below.


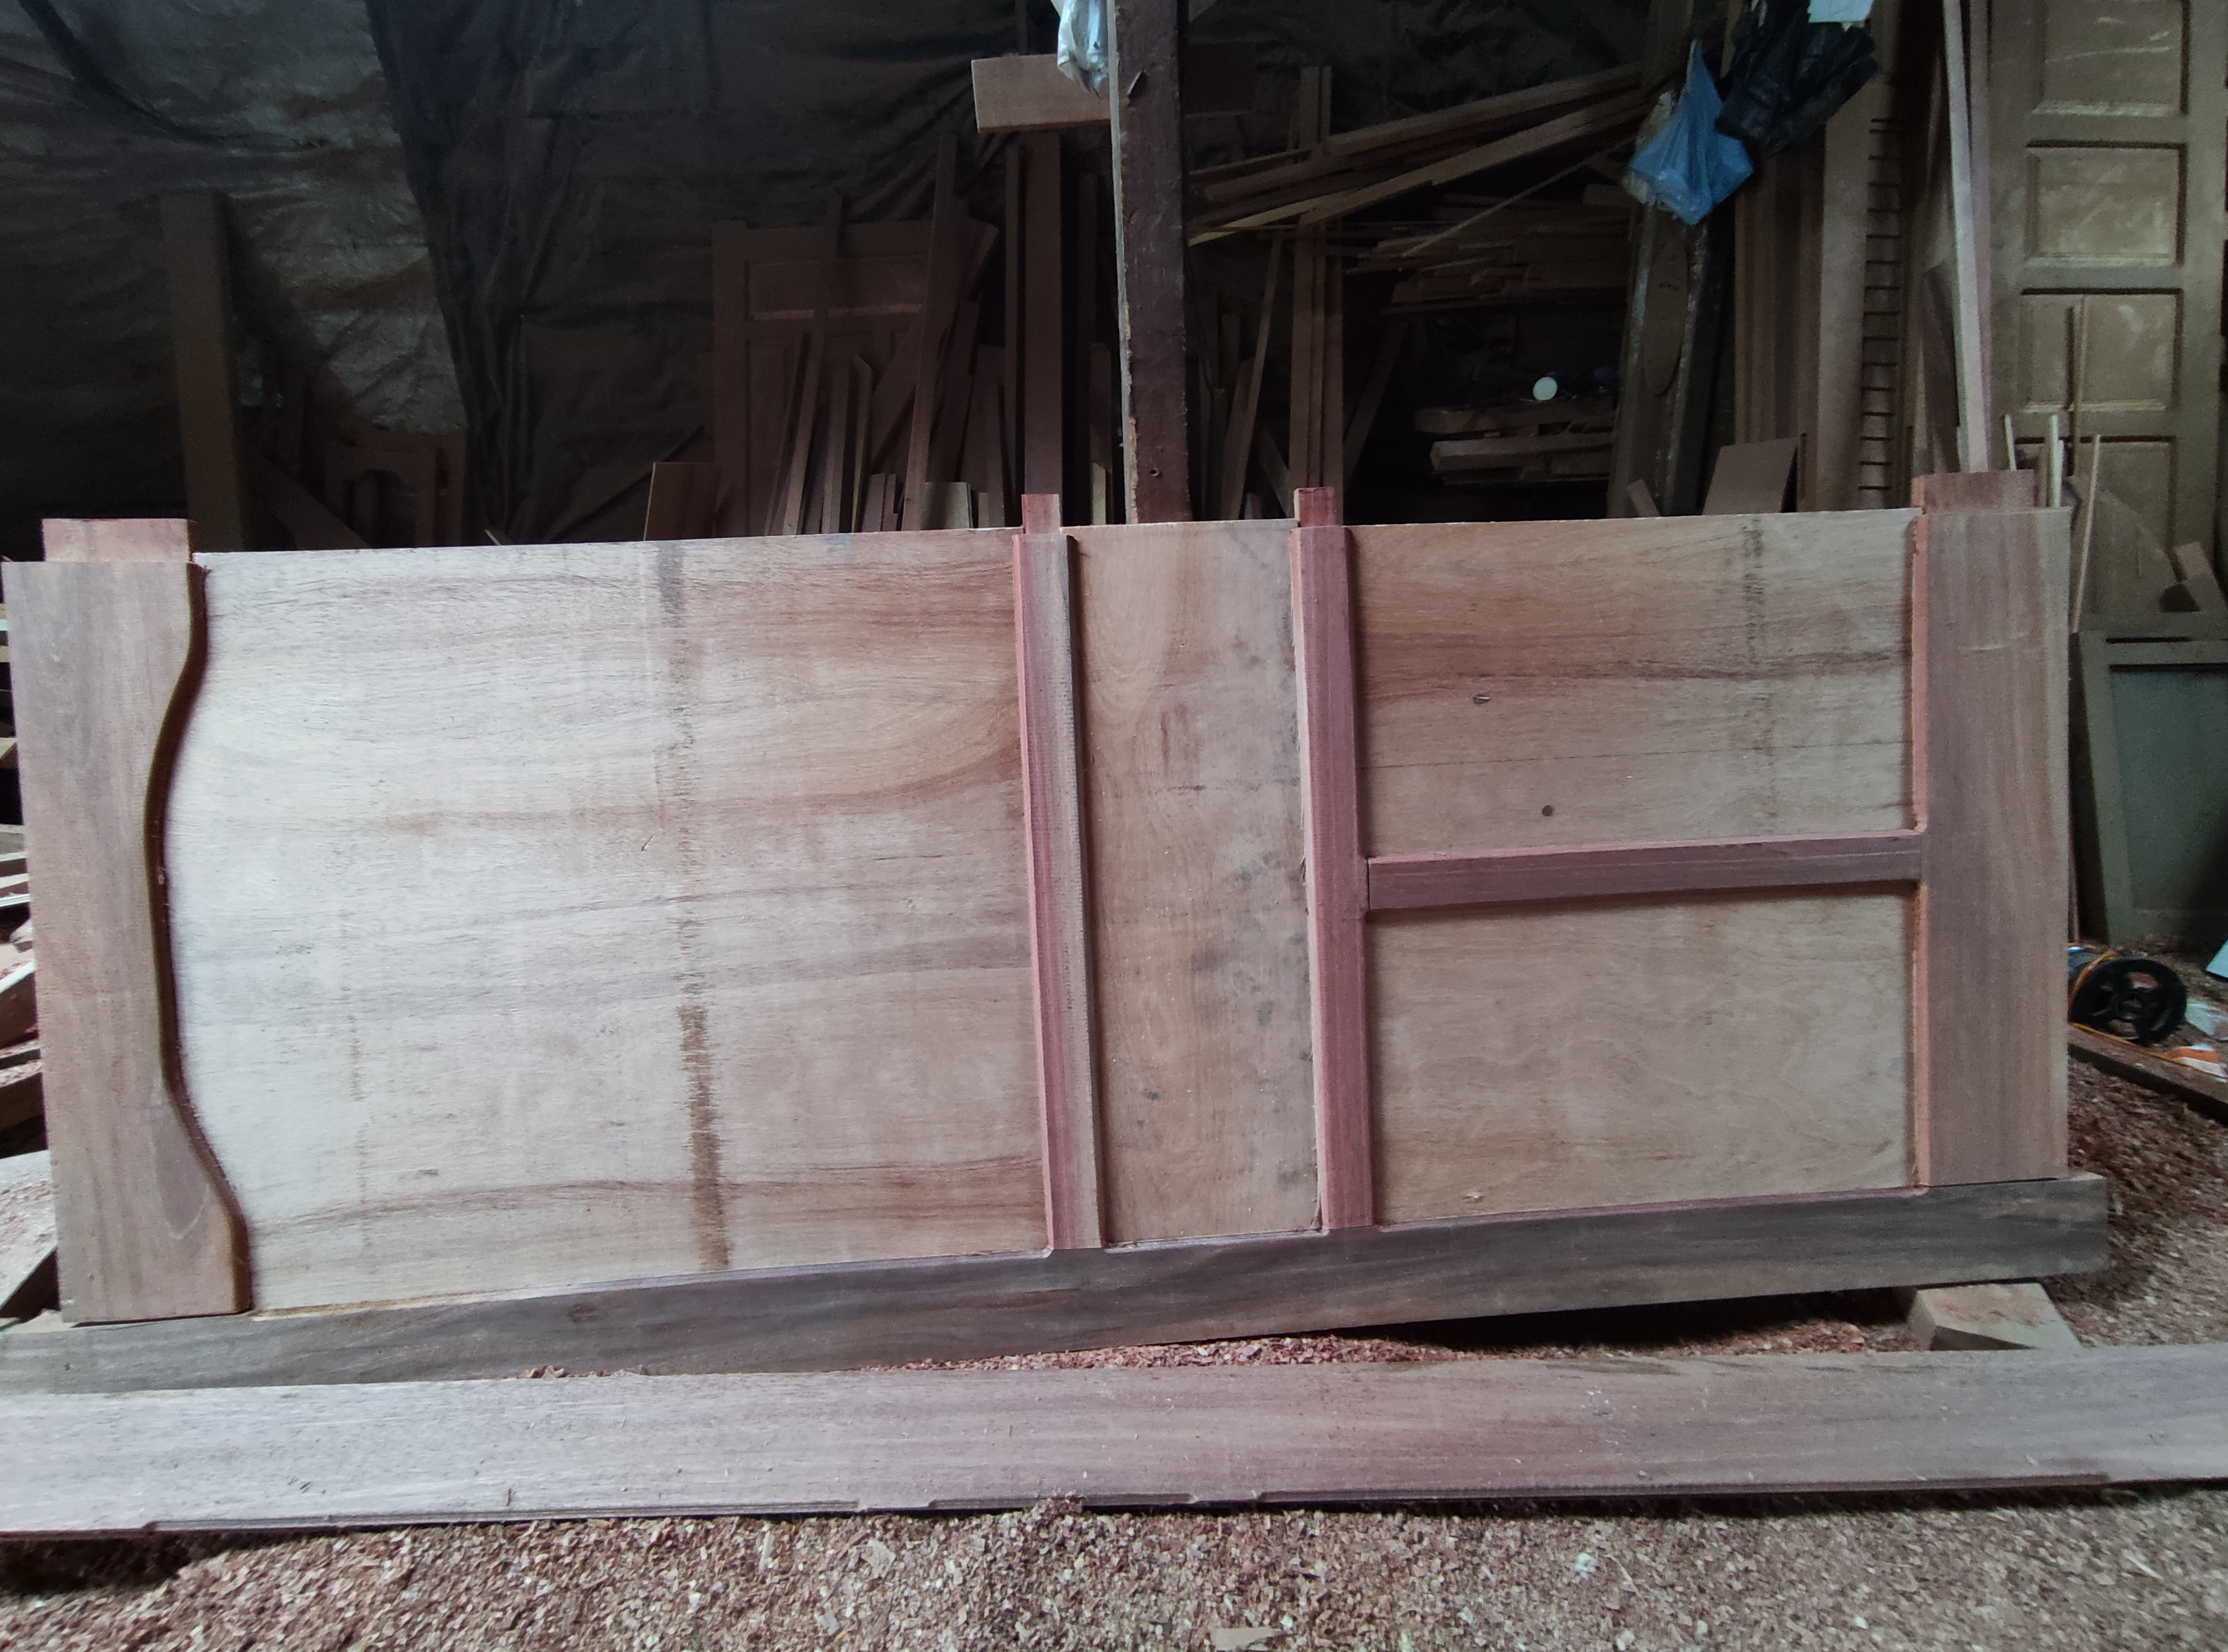
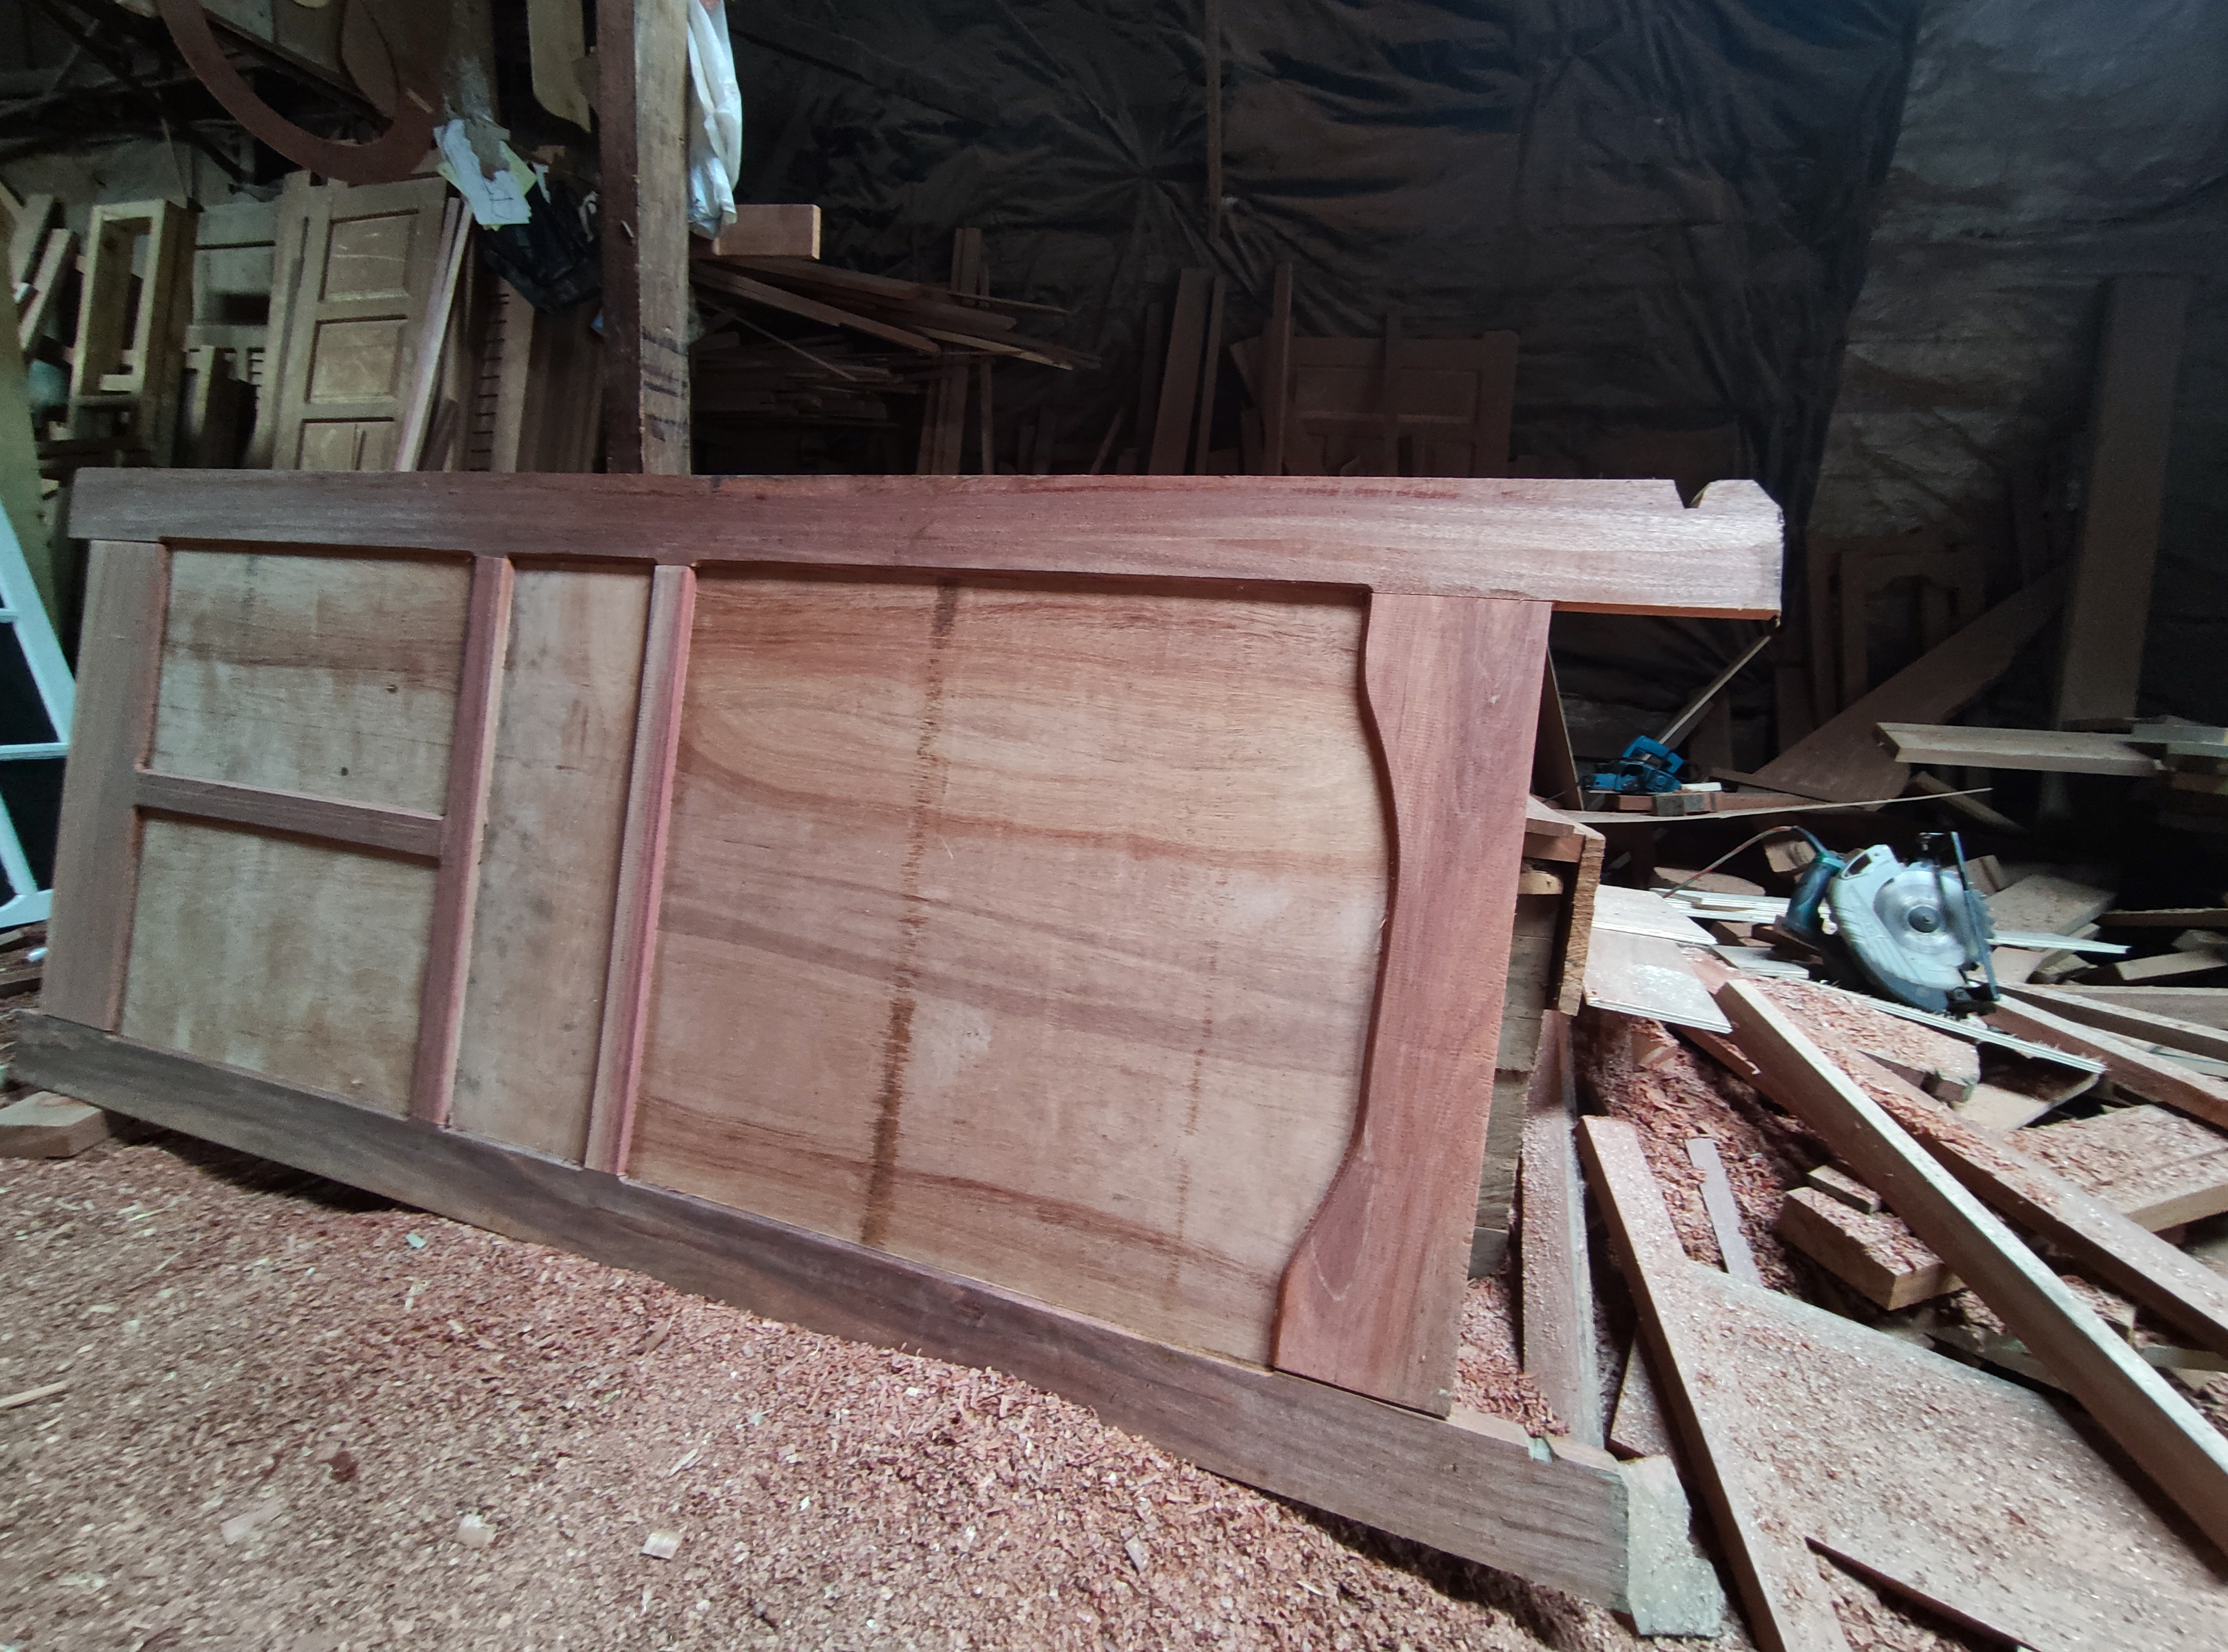
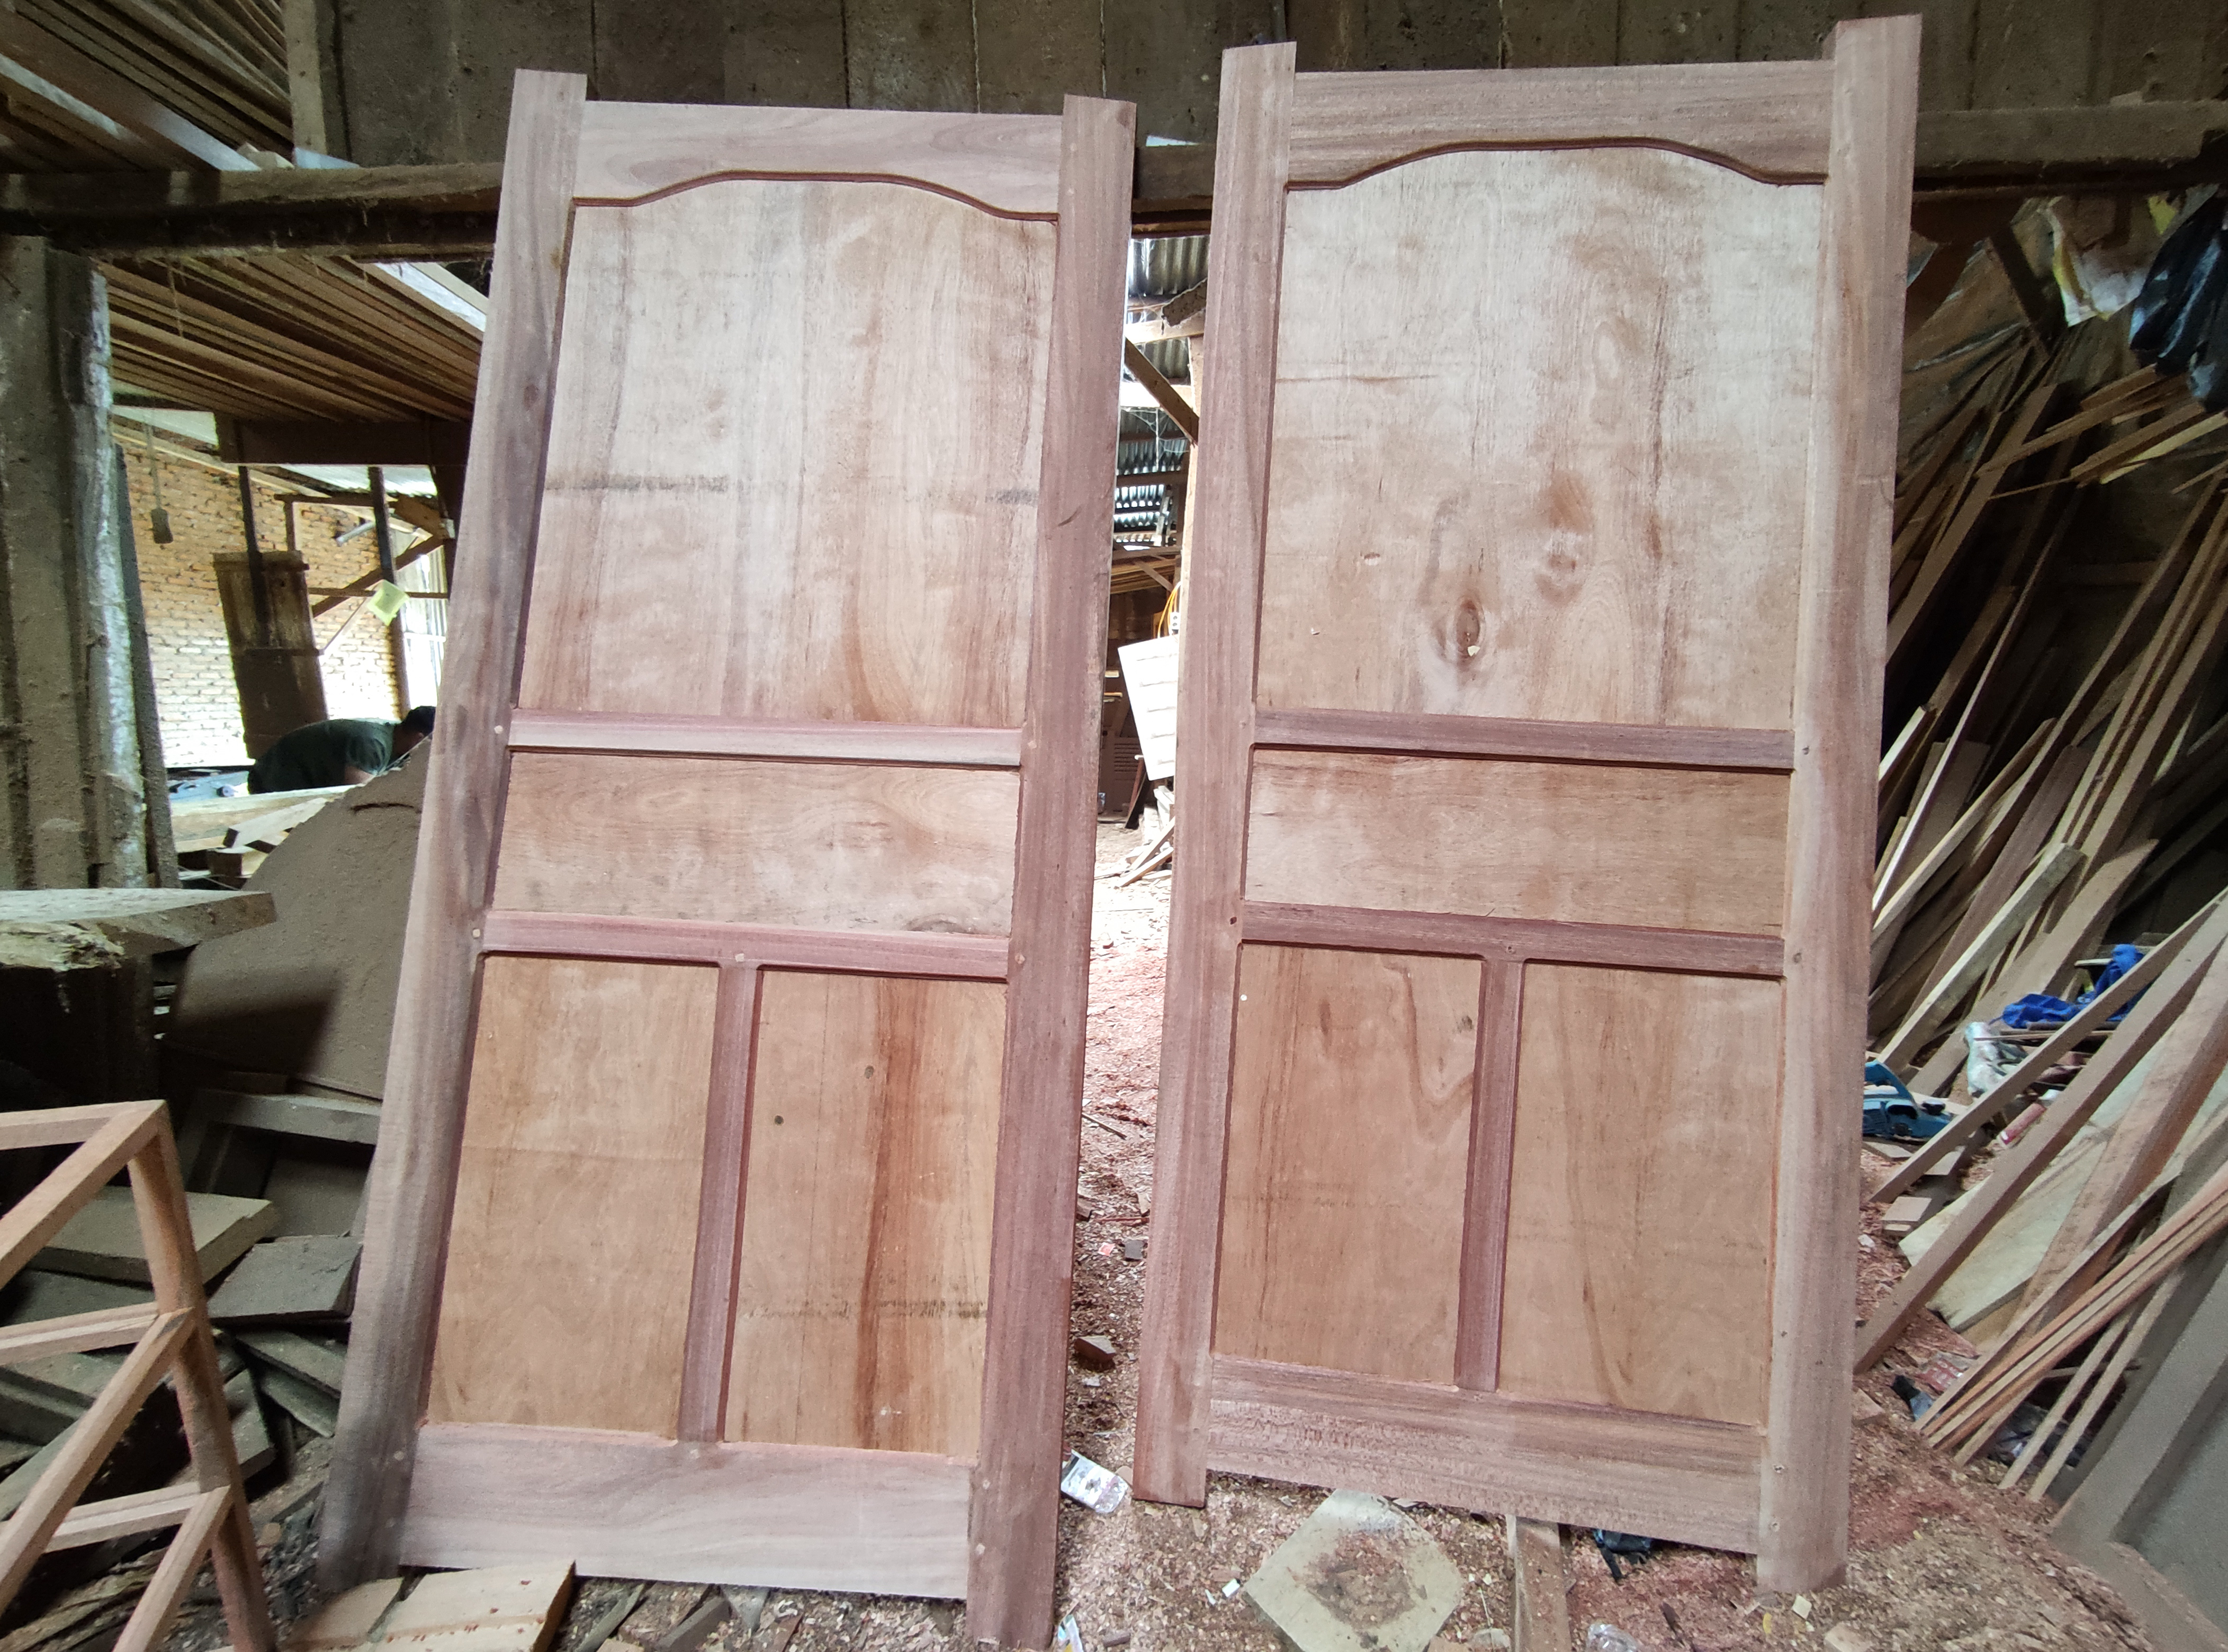
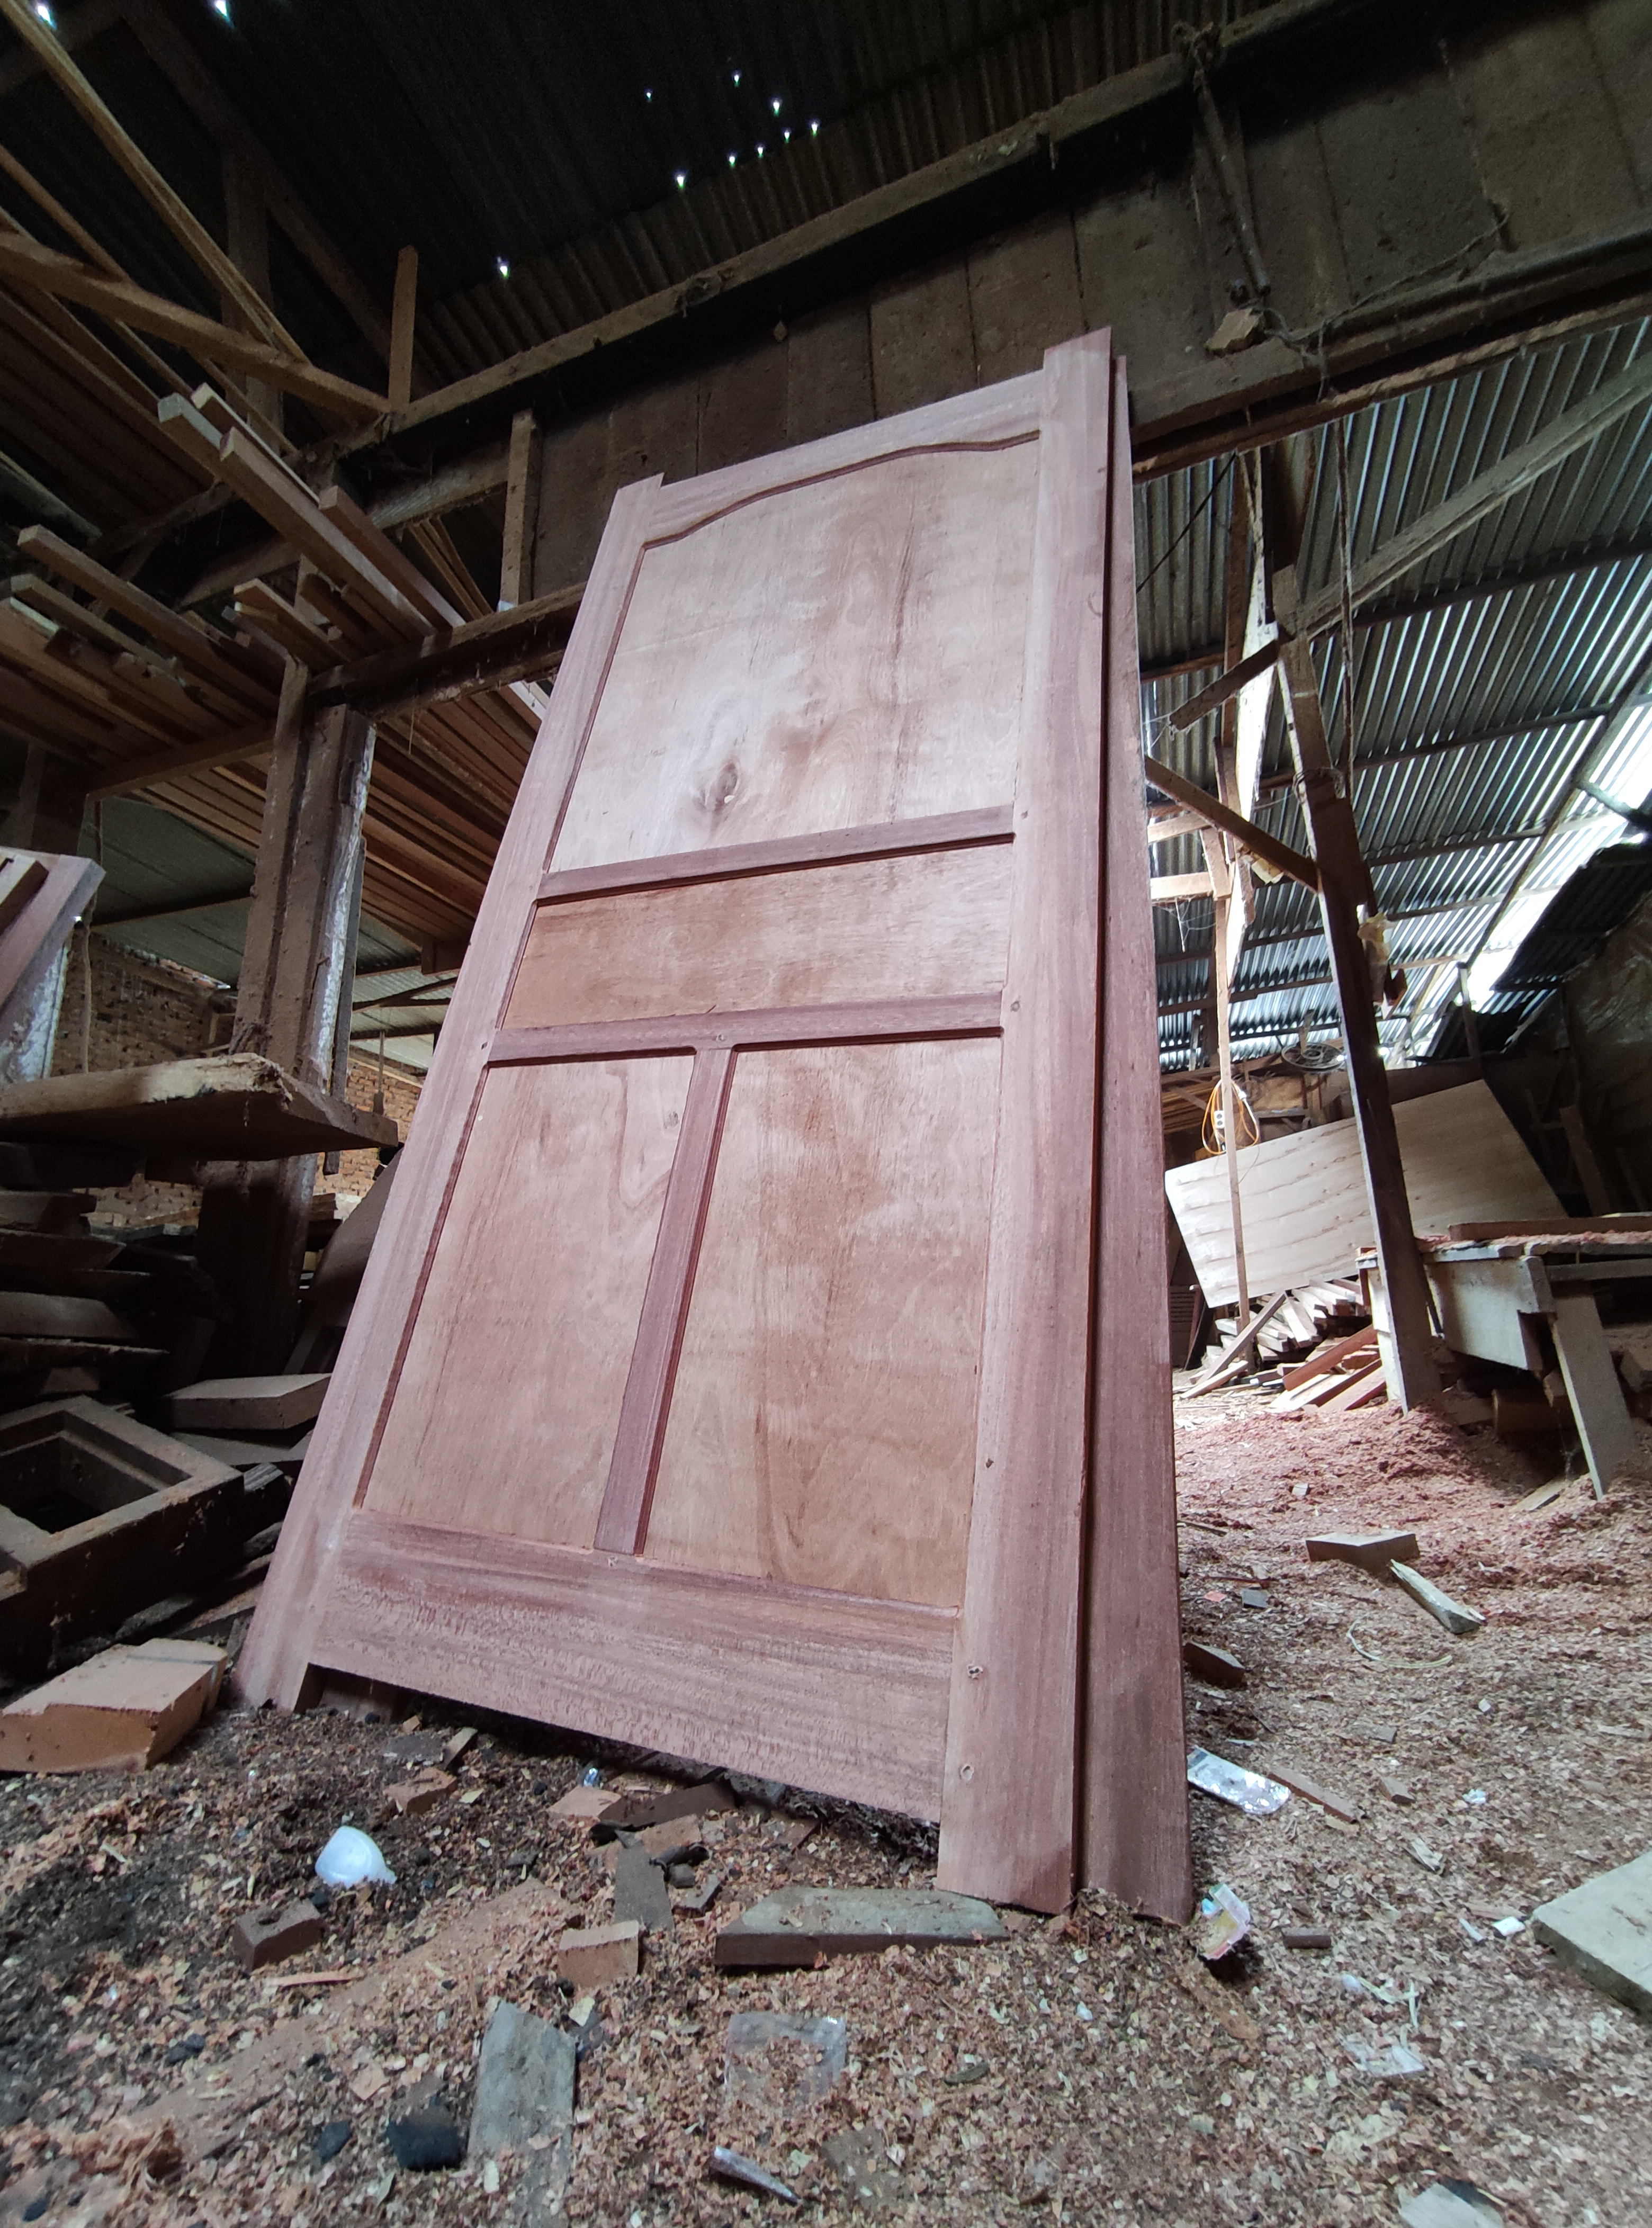
And after the process of installing the leaves for the two doors is complete, this is what the door looks like which is made from a series of meranti wood and 12mm multiplex leaf sheets.


Then, after the installation stage of the door leaf sheet is complete, then the process of locking the door bulkhead connection pegs.
For the process of locking the door pegs, here we use wooden pegs with a size of 1cm x 1 cm which are followed by pressing and drilling the peg holder.
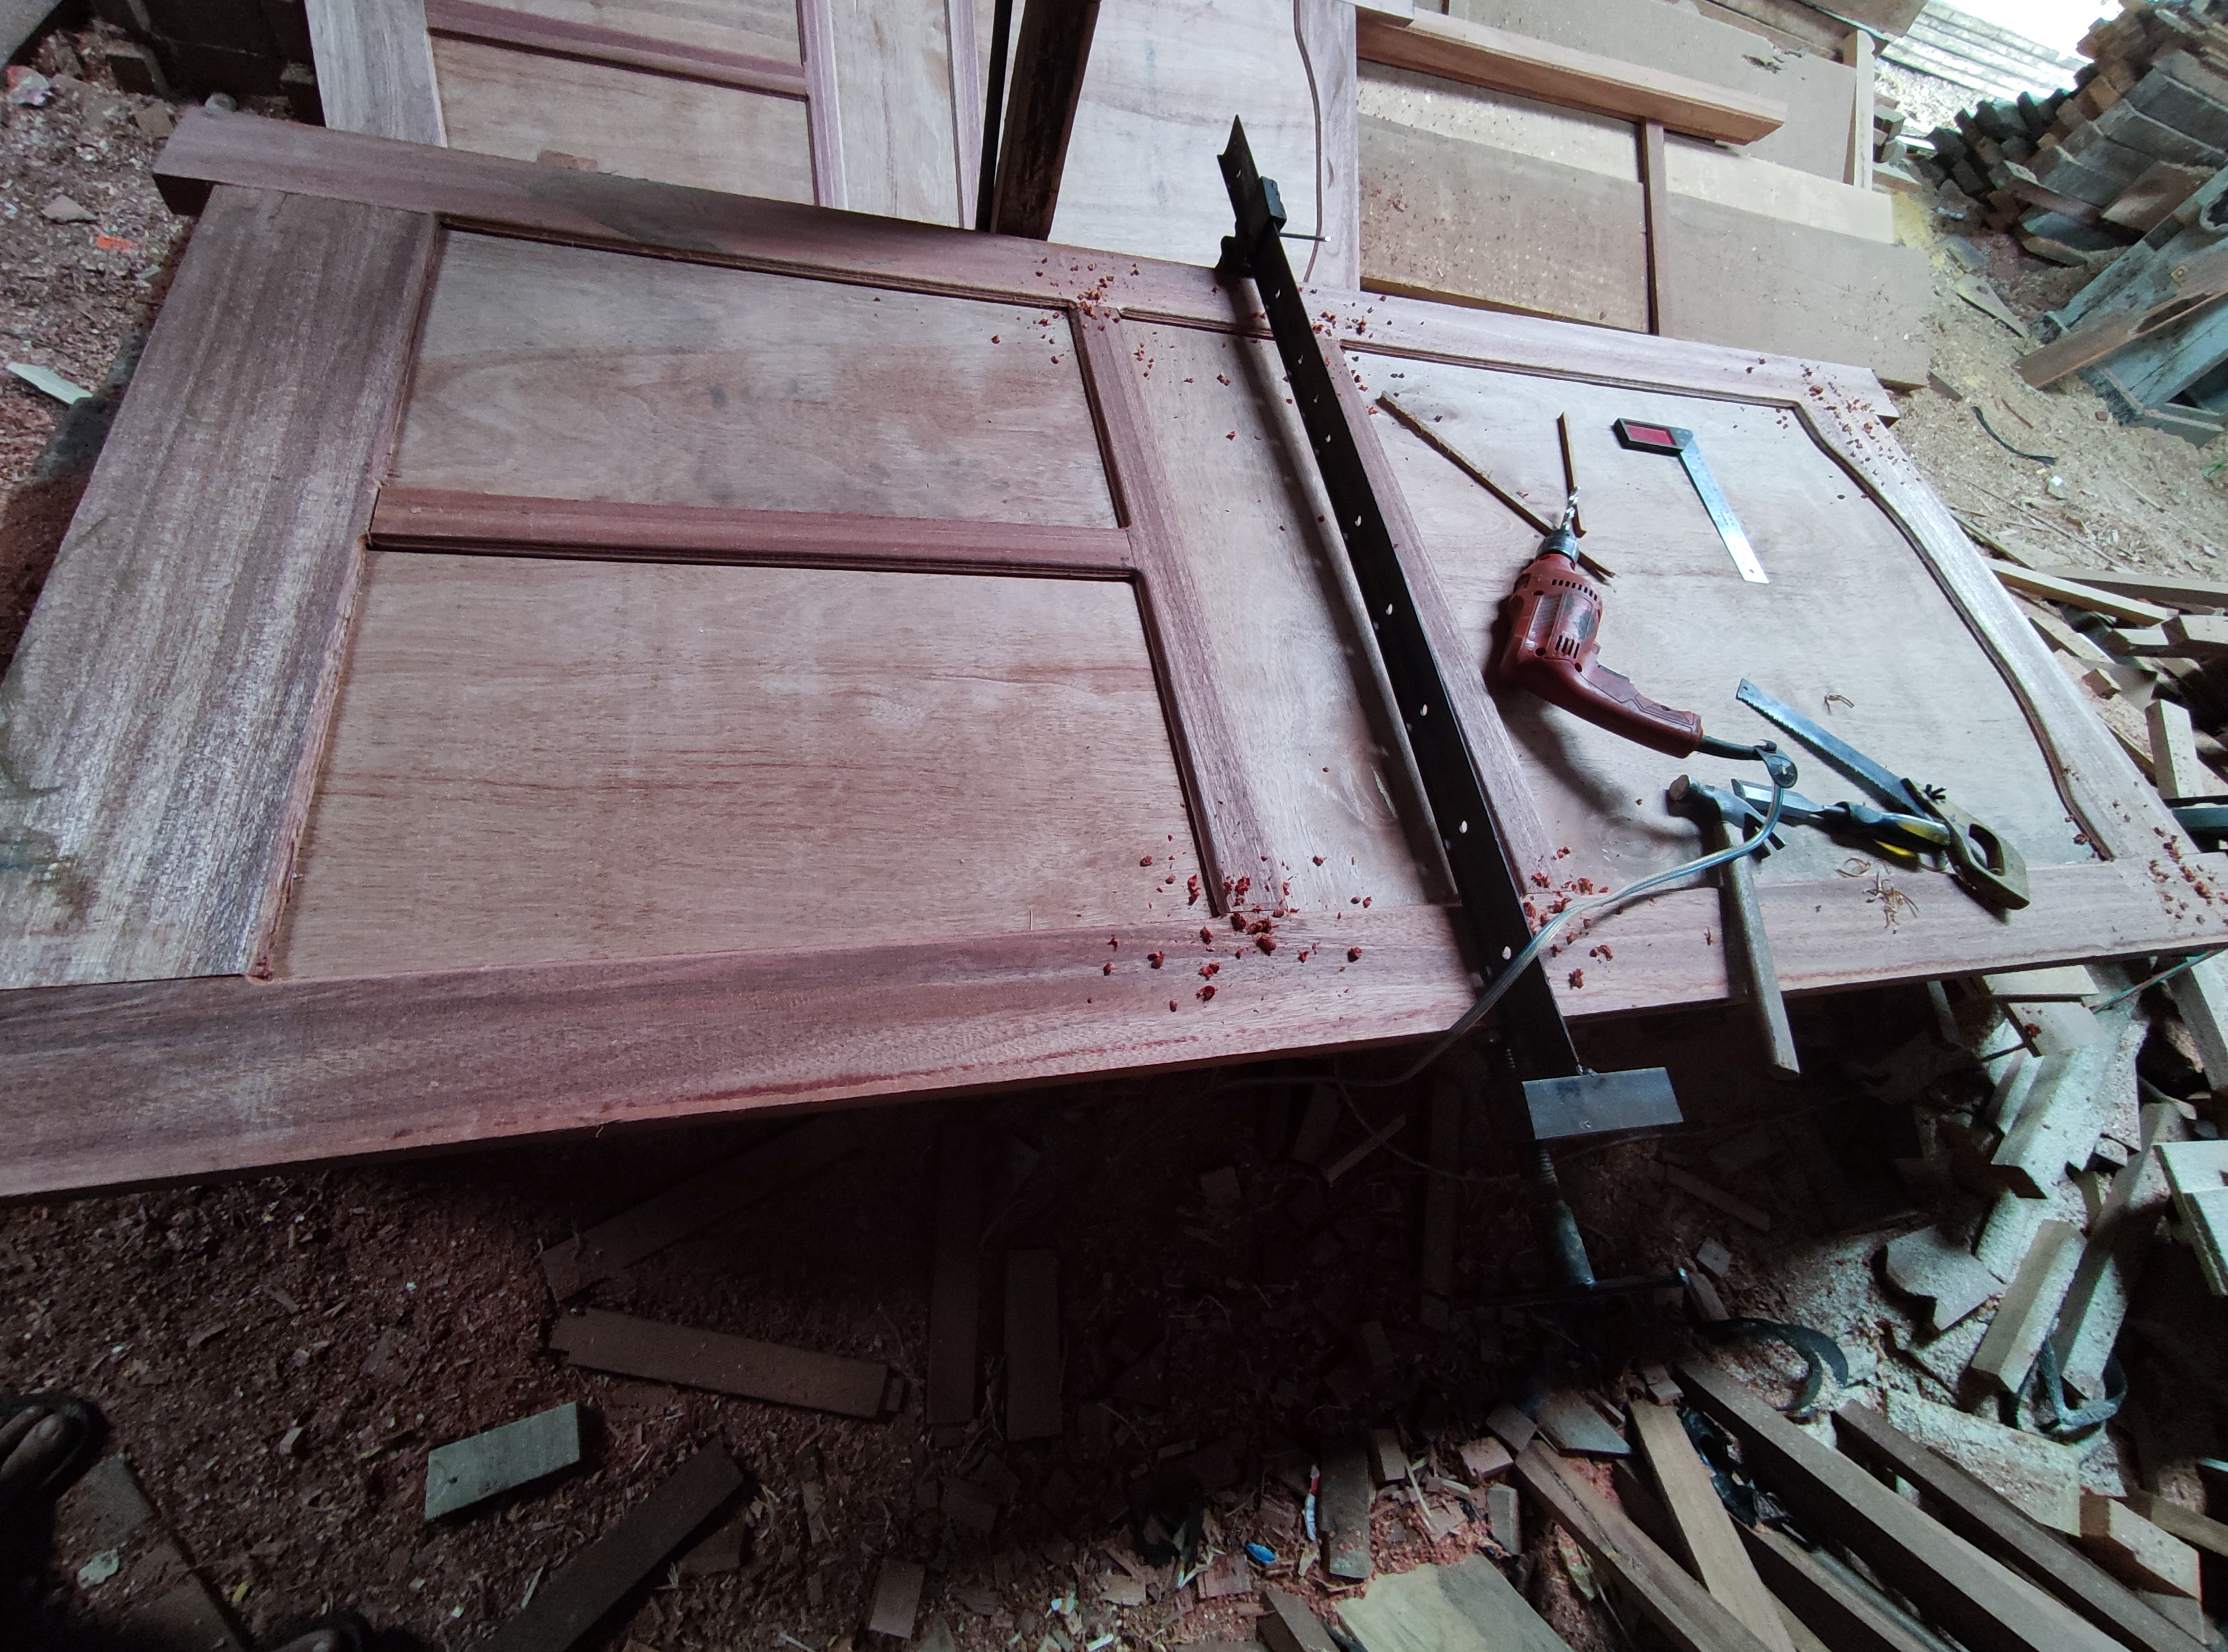
After the process was complete, I continued to tidy up the nipples of the pegs and continued to apply a little glue to all the door bulkhead connections.
After that, I have to wait for two hours for the glue that I applied to the door joint seal to work properly and after the glue is completely dry, I now continue the sanding process.
I also did the sanding process repeatedly in stages until the surface of the front and back of the door was completely smooth.
And after the sanding process for the front and the door was completed on the two doors with sizes 80cm x 200cm and 90 cm x 200cm, this is the result of the architectural design of the door with a simple design that looks so beautiful.

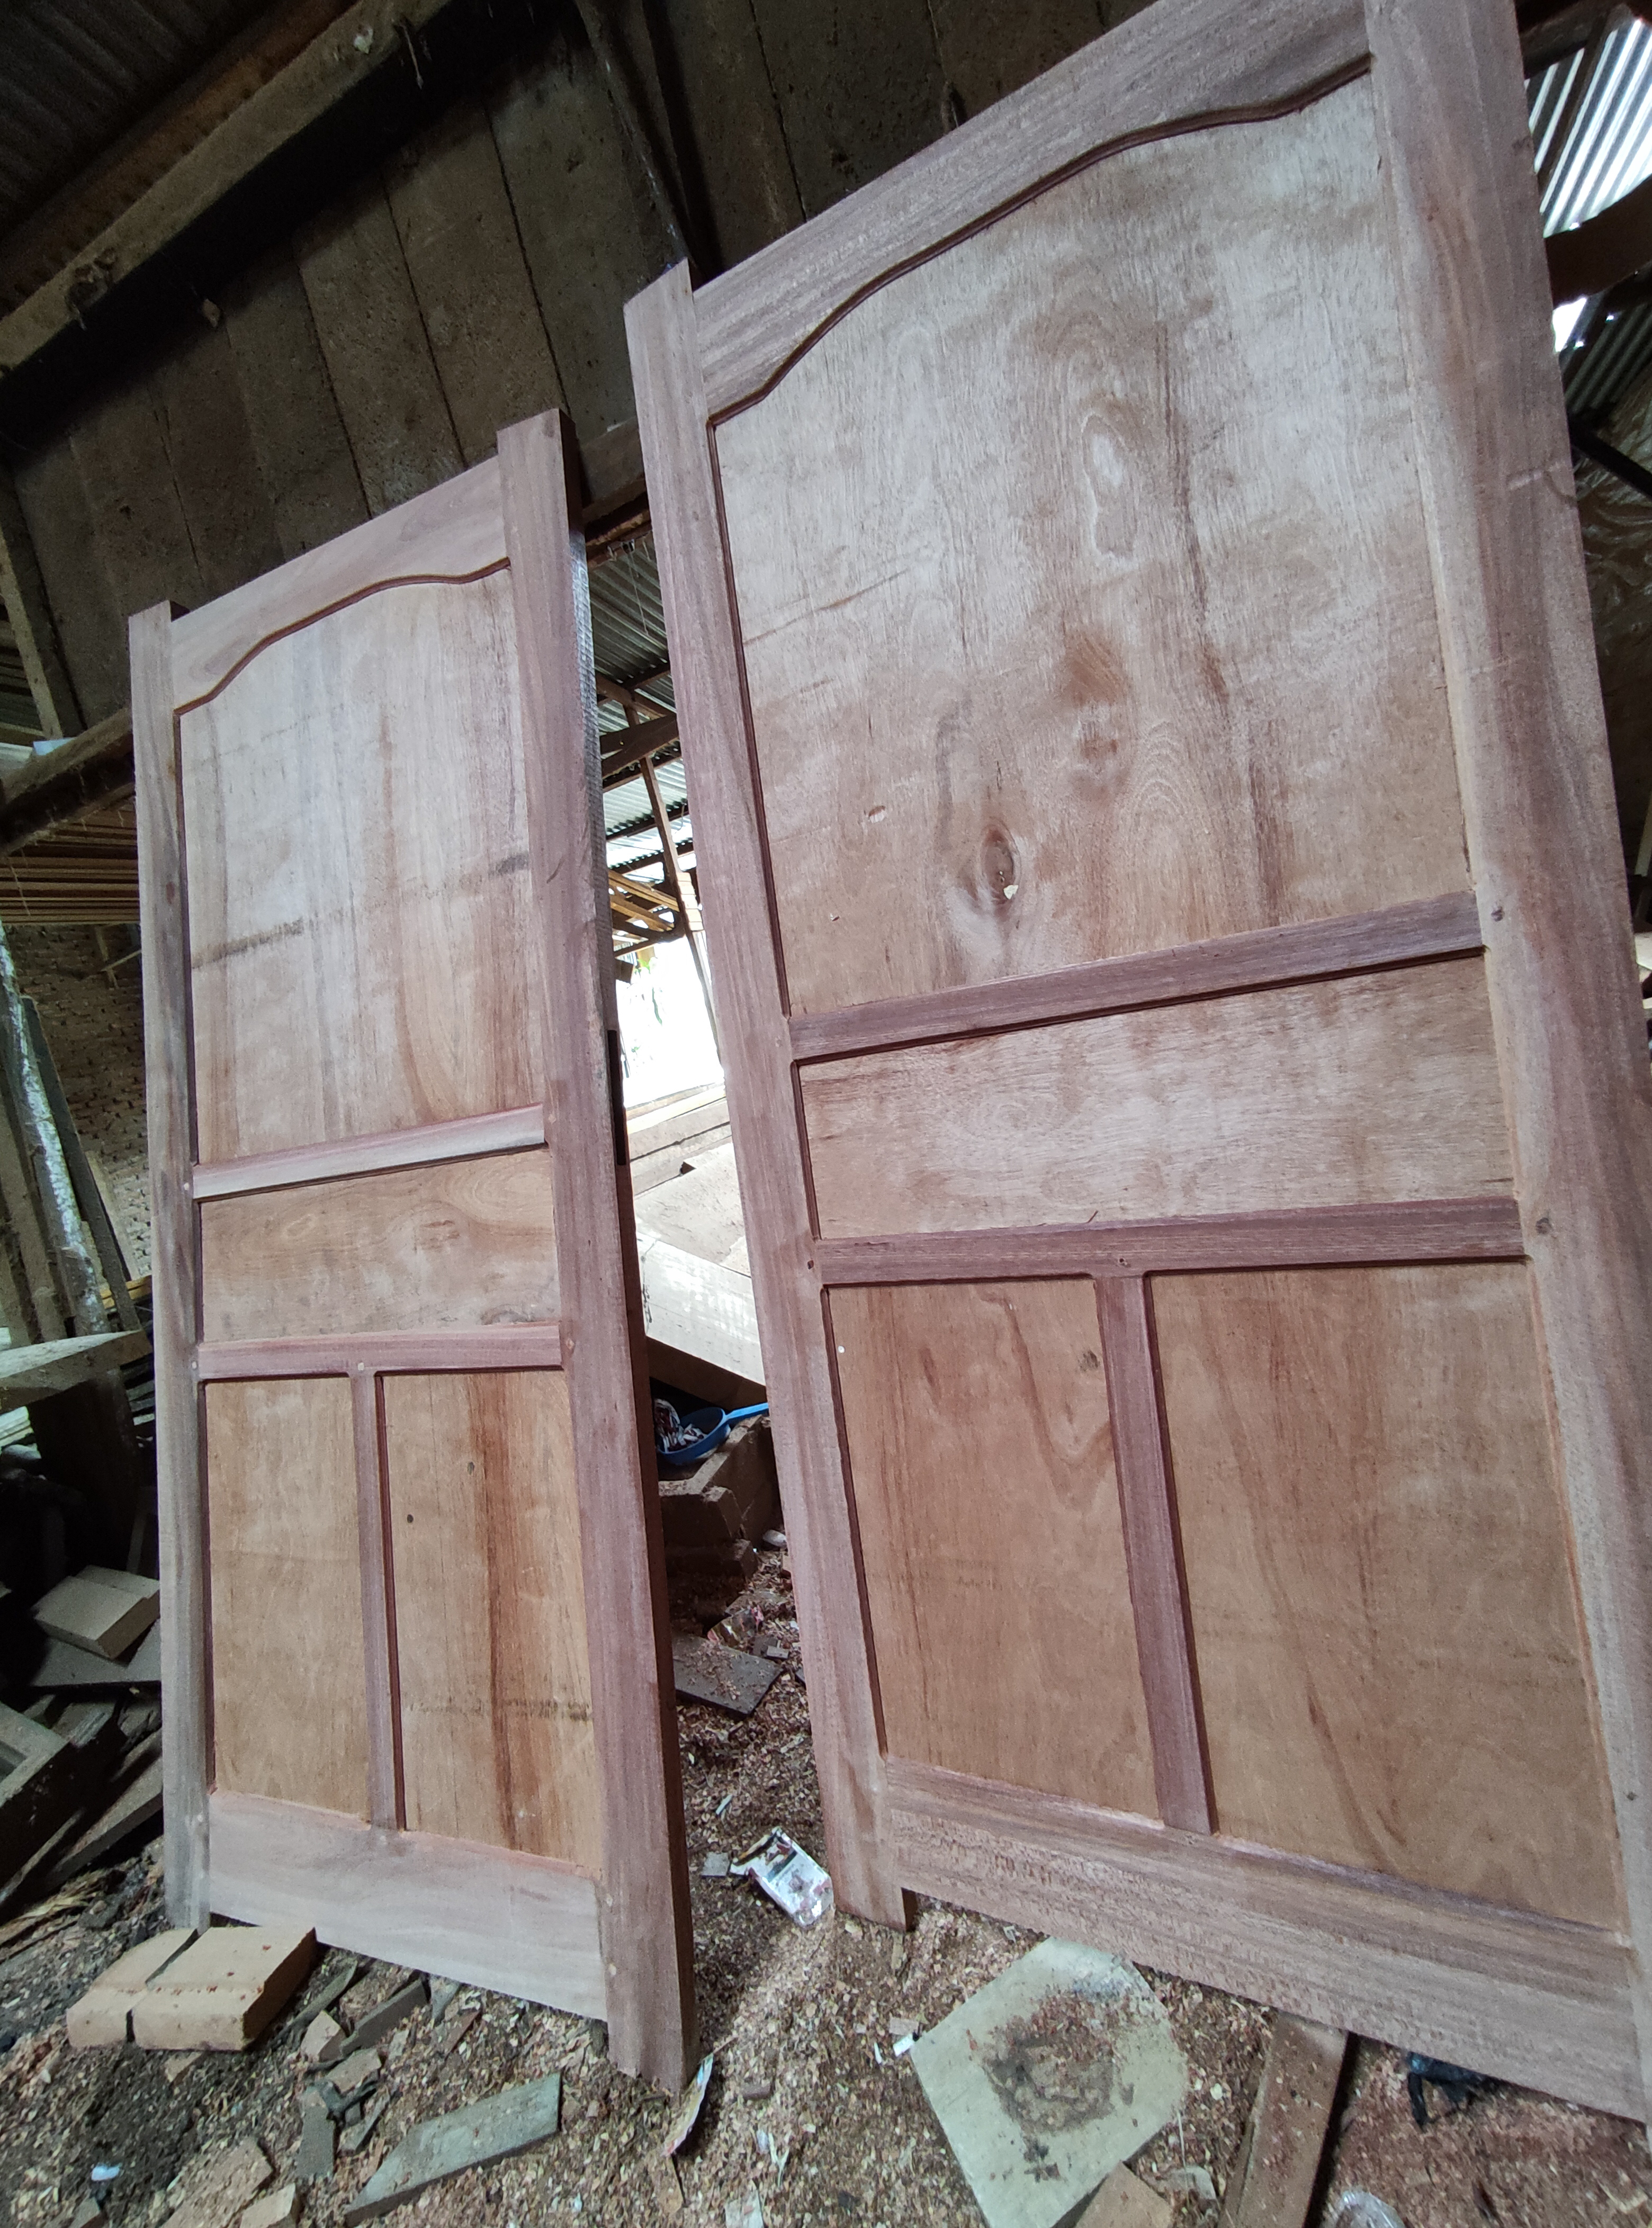


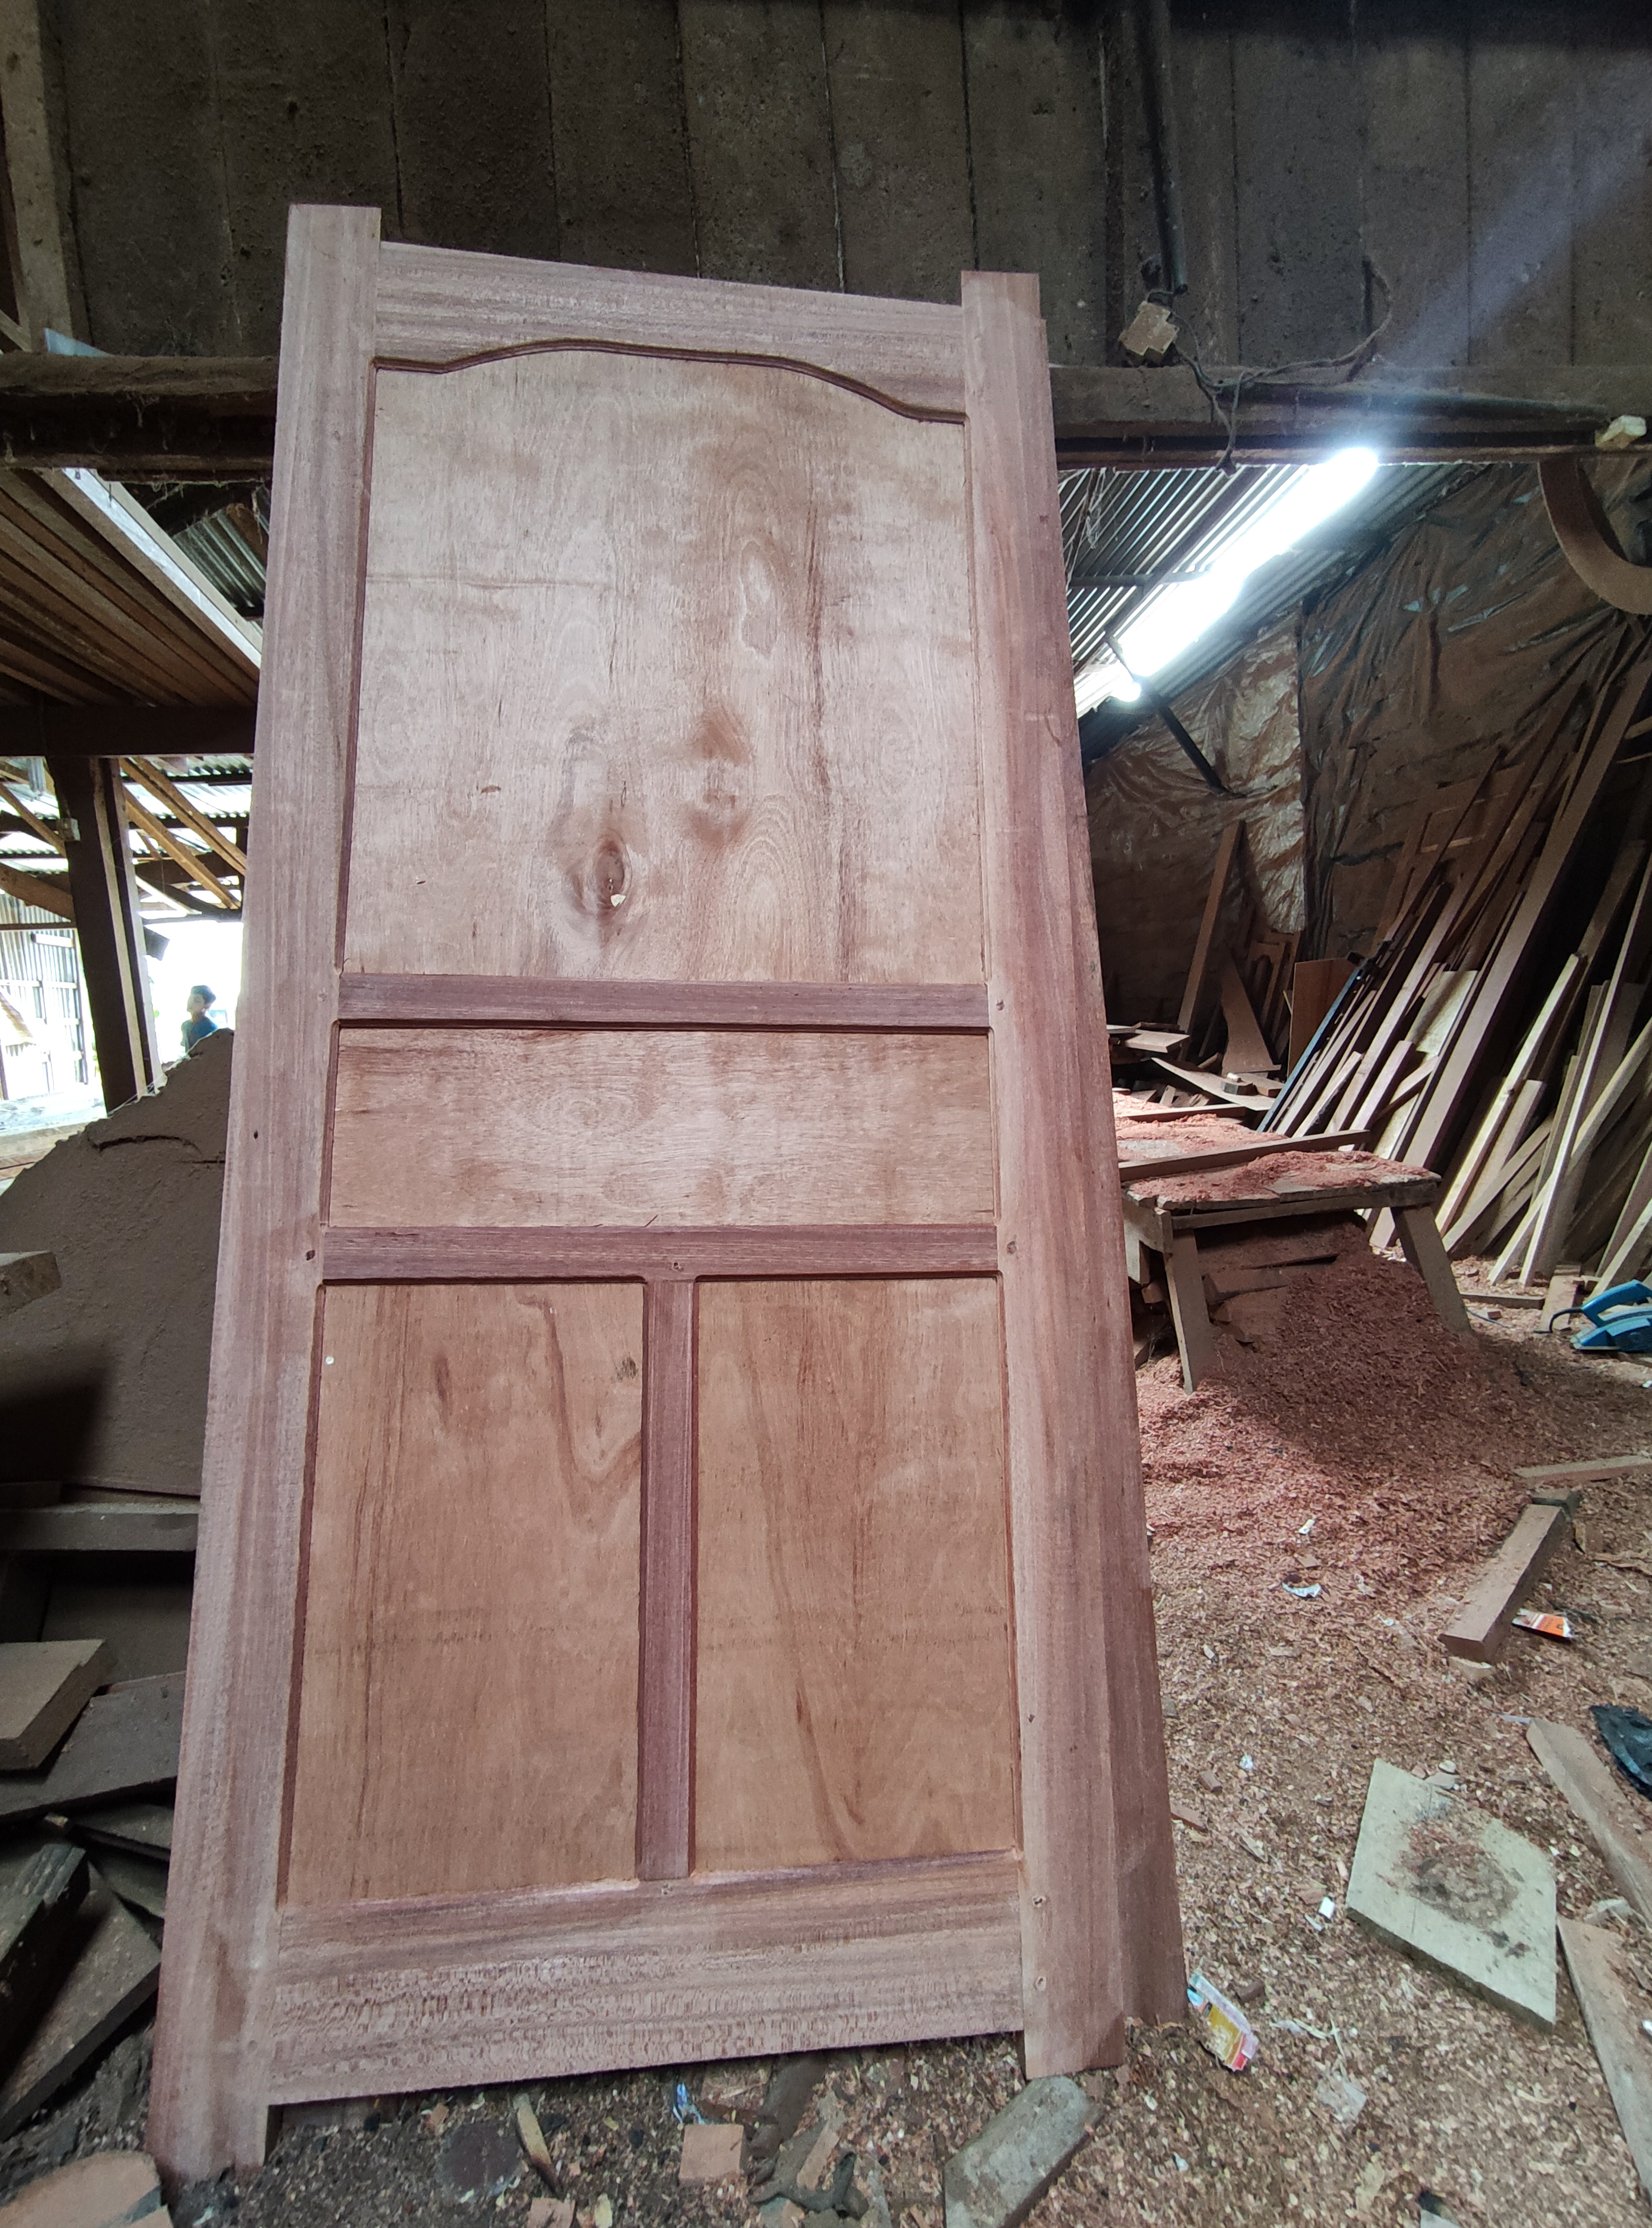


This is the architectural result of the door design that I just finished in the last few days and this is one of the house door designs that has been around for a long time and this design is certainly still very popular with local people today.
![]()

All of these pictures when i was working on that window and jalousie project ,all images were taken using a smartphone camera, if you want to enjoy my previous architectural design works, please visit the post link below.
1.Architectural design- simple cafe bar table
2.Architectural design - Wooden tray with natural wood color combination/utilization of wood waste
3.Architectural design - Flower vases / utilization of wood waste.
4.Architectural design-Simple architectural design of my baby crib basket.
5.Architectural design-Table simple the combination of natural wood colors and classic table tops
6.Architectural design- Shophouse frame jalousie
7.simple-minimalist-mini-wall-shelf-architectural-design-to-decorate-your-home-room
8.architectural-design-of-the-ventilation-jalousie - part 1
9.architectural-design-of-windows-house -part 1
10.interior-design-architecture-simple-makeup-mirror-frame.
11.architectural-design-simple-minimalist-wooden-window -part 2
12.architectural-design-window-designs-that-are-in-great-demand-by-local-residents
13.architectural-design-of-a-mini-table-and-a-simple-photo-frame
14.architecturaldesign-of-glass-windows-and-jalousies - house
15.Architecture + door design of local people's houses.
16.Furniture design architecture || Making multiplex doors for motorcycle workshops.
17.Architecture+furniture design || Simple comb design house door.
18.Architecture + furniture design || A pair of doors home belonging to local residents.
20.Architecture + Design || Double-faced house door part ll.
21.Architecture + design || Making window for villagers' houses.
22.Architecture+furniture design || Two-faced house door part III
![]()
The rewards earned on this comment will go directly to the people( @deltasteem ) sharing the post on Twitter as long as they are registered with @poshtoken. Sign up at https://hiveposh.com.
It is impressive all the work that wood can carry, I consider that the door has beautiful simple details
thanks @ginethchira2301 and greetings architecture furniture, greetings from Indonesia :)
@tipu curate
Upvoted 👌 (Mana: 28/38) Liquid rewards.
thanks @claudio83 I hope you are always healthy there :)
Thank you for sharing this amazing post on HIVE!
Your content got selected by our fellow curator @hafizullah & you just received a little thank you via an upvote from our non-profit curation initiative!
You will be featured in one of our recurring curation compilations and on our pinterest boards! Both are aiming to offer you a stage to widen your audience within and outside of the DIY scene of hive.
Join the official DIYHub community on HIVE and show us more of your amazing work and feel free to connect with us and other DIYers via our discord server: https://discord.gg/mY5uCfQ !
If you want to support our goal to motivate other DIY/art/music/homesteading/... creators just delegate to us and earn 100% of your curation rewards!
Stay creative & hive on!
Another labor-intensive but amazing project dear @deltasteem. Those multiplex doors are simply gorgeous! It's certainly not easy to document each phase of this creation process from initial conception to final production. Hey, I forgot to ask you this question before, but may I know how many years have you already been involved with this architectural furniture woodworking experience? 😊
hello @storiesoferne The first time I worked in the furniture material processing section was in 2012 and in the lag time of my material processing work I helped my colleagues who make furniture, then in 2015 I began to learn to make furniture while working until now I have become a furniture employee at That CV :)
Oh wow! You have certainly accumulated lots of furniture work experience - around 10 years already. Hence, I congratulate you dear @deltasteem for pursuing your chosen passion until today. All the best! 😊
Thank you very much :) for your warm welcome in terms of furniture and I really enjoy this work with enthusiasm, I will continue to share various kinds of architectural furniture projects.
Hi @deltasteem, your post has been upvoted by @bdcommunity courtesy of @rem-steem!
Support us by voting as a Hive Witness and/or by delegating HIVE POWER.
JOIN US ON
thanks @bdcommunity I hope the team that works there are always healthy :)
Congratulations @deltasteem! We're delighted to specially curate your awesome publication and award it RUNNER-UP in Architecture Brew #78. More power!
Thank you for subscribing to Architecture+Design, an OCD incubated community on the Hive Blockchain.